


Quick Start Guide
Version G - October 2022
www.logtag-recorders.com
.

Quick Start Guide Contents
What's Included 3
Battery Installation 4
Running the Connection Wizard 5
Connecting to your WiFi Network 8
LogTag Online Remote Conguration 10
Downloading LogTag Analyzer 14
Conguration in LogTag Analyzer 15
Installing the Wall Mount 16
Starting your UTRED30-WiFi 17

What's Included
Please check you have each of the items shown below
before continuing with setting up your UTRED30-WiFi.
UTRED30-WiFi USB Cable
AC Adapter
(US and EU
adapter only)
Wall mount
(Not Included)
2x AAA Battery
(Not Included)
ST100 External
Probe
(Not Included)
Page 3
Battery Installation
A permanent power supply should be connected to
the USB socket at the bottom of the device.
Two AAA batteries are required as the back up
source to ensure your device continues to log in the
event of a power outage or accidental removal of
power.
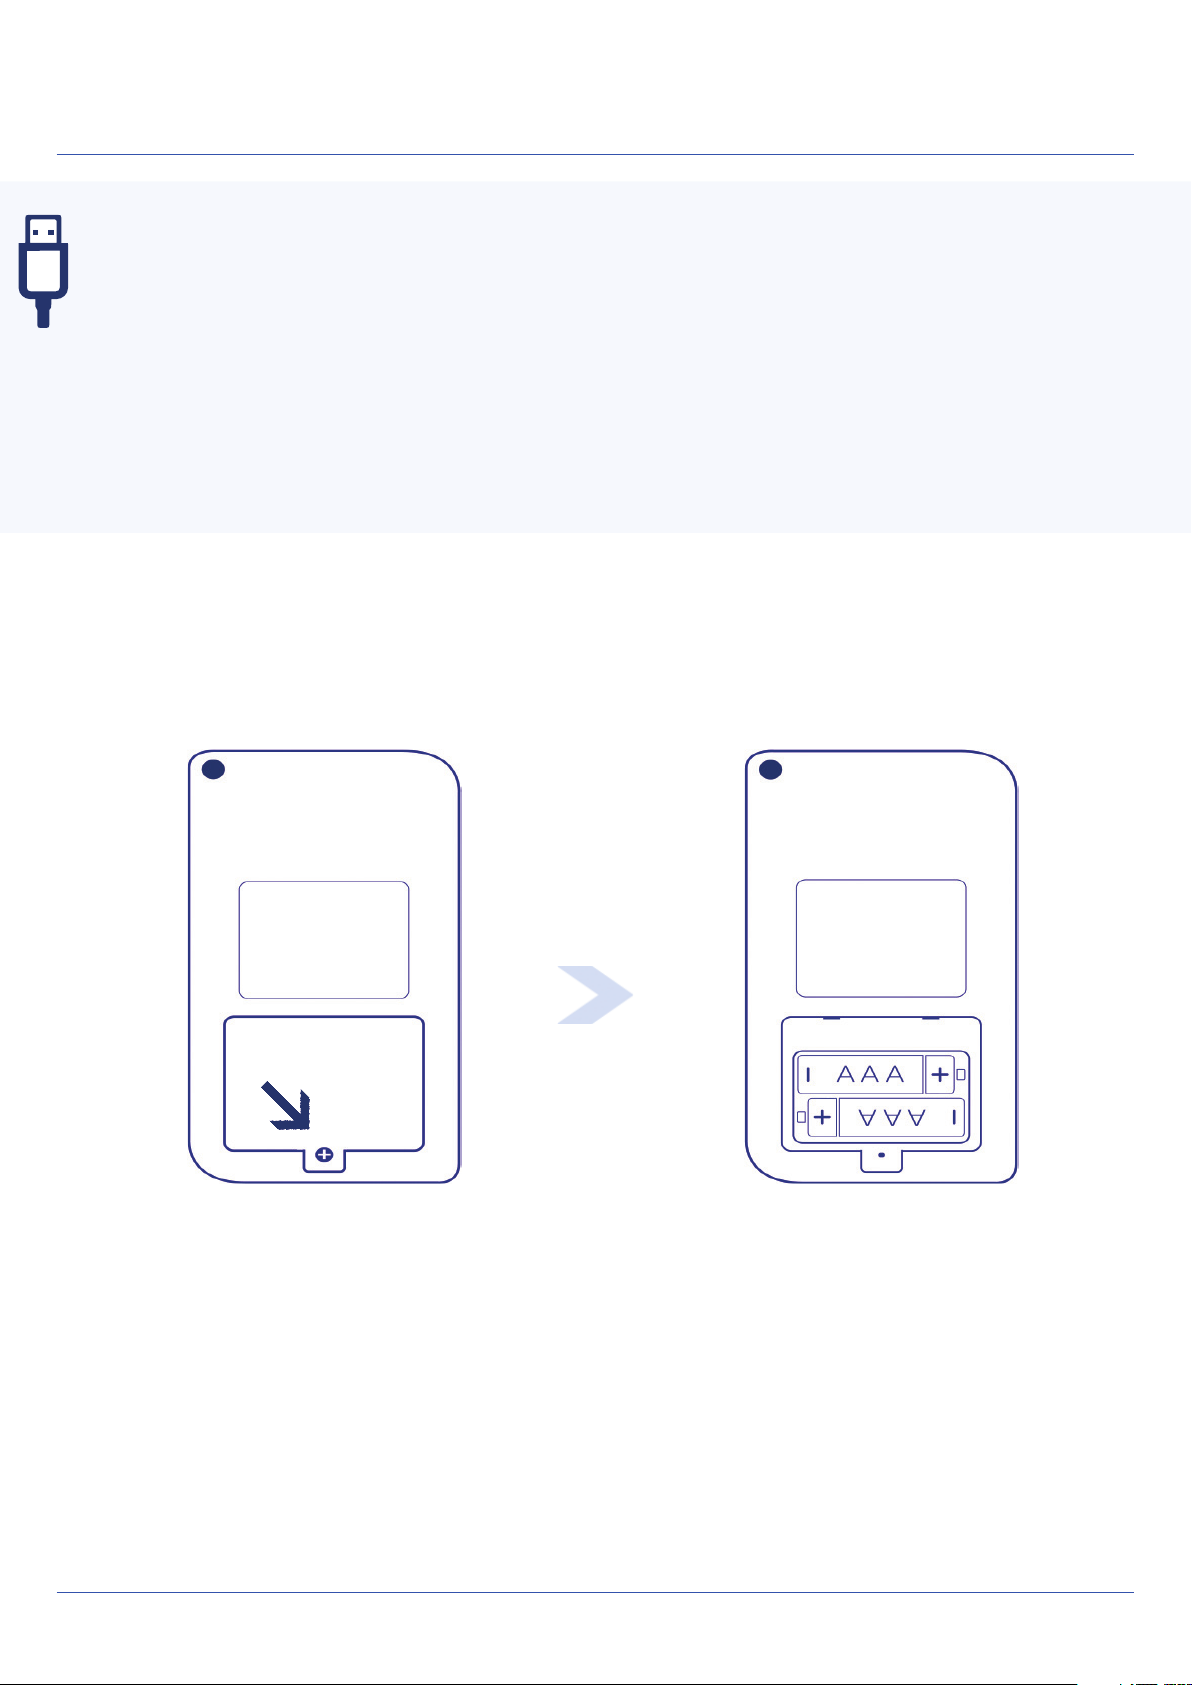
1. Remove the back cover of the UTRED30-WiFi case
using the Phillips (cross-shaped) screwdriver.
2. Install the two AAA batteries taking note of the
direction to install each battery.
3. Replace the battery cover to secure the batteries
in place.
Page 4
Running the Connection Wizard
Alternatively, to connect your logger using Bluetooth
connection capablities on the LogTag Mobile
application refer too the Bluetooth® Connection Guide.
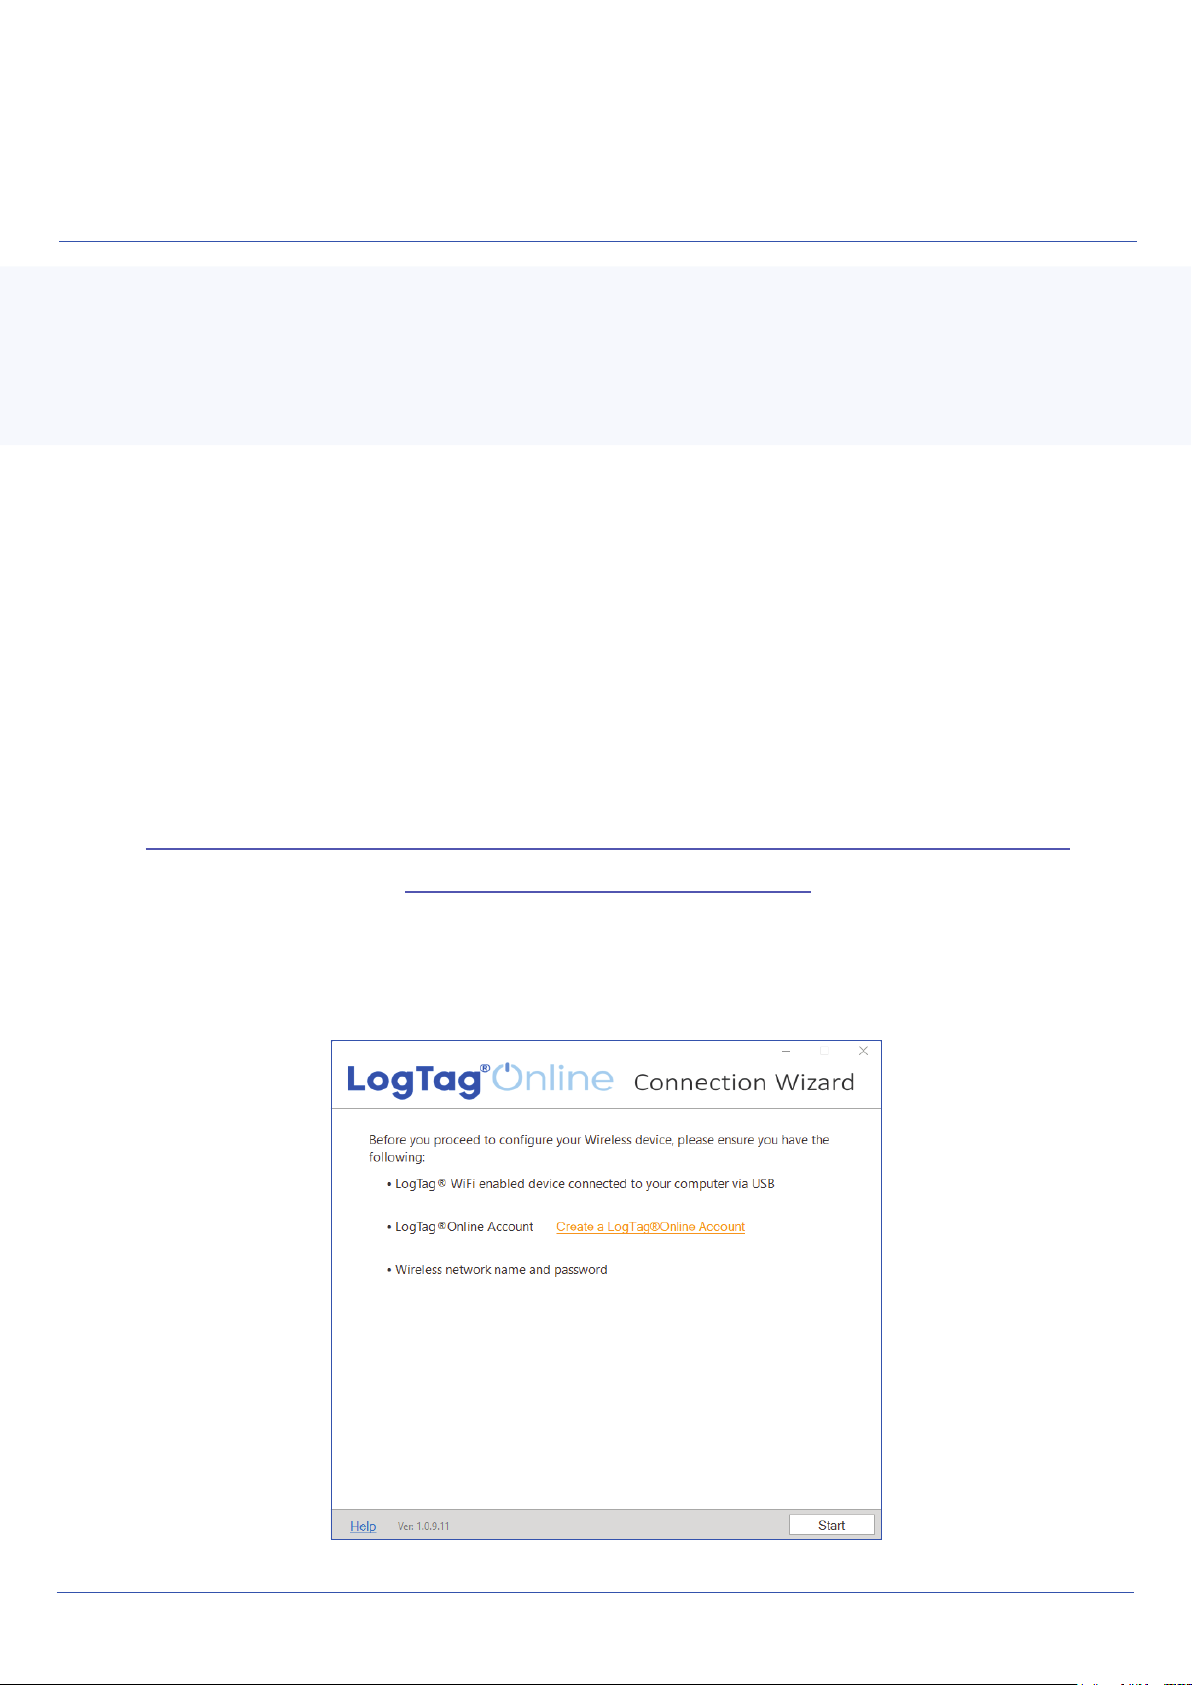
Note: Please ensure there is internet connection on
your computer prior to starting this process.
Download the latest Connection Wizard from the
®
LogTag website.
https://logtagrecorders.com/download/software/
connectionwizard.exe
1. Select Start and follow the instructions.
The Bluetooth® word mark and logos are registered trademarks owned by Bluetooth SIG, Inc. and any use of such marks by LogTag
North America Inc. is under license. Other trademarks and trade names are those of their respective owners.
Page 5
Running the Connection
Wizard (continued)
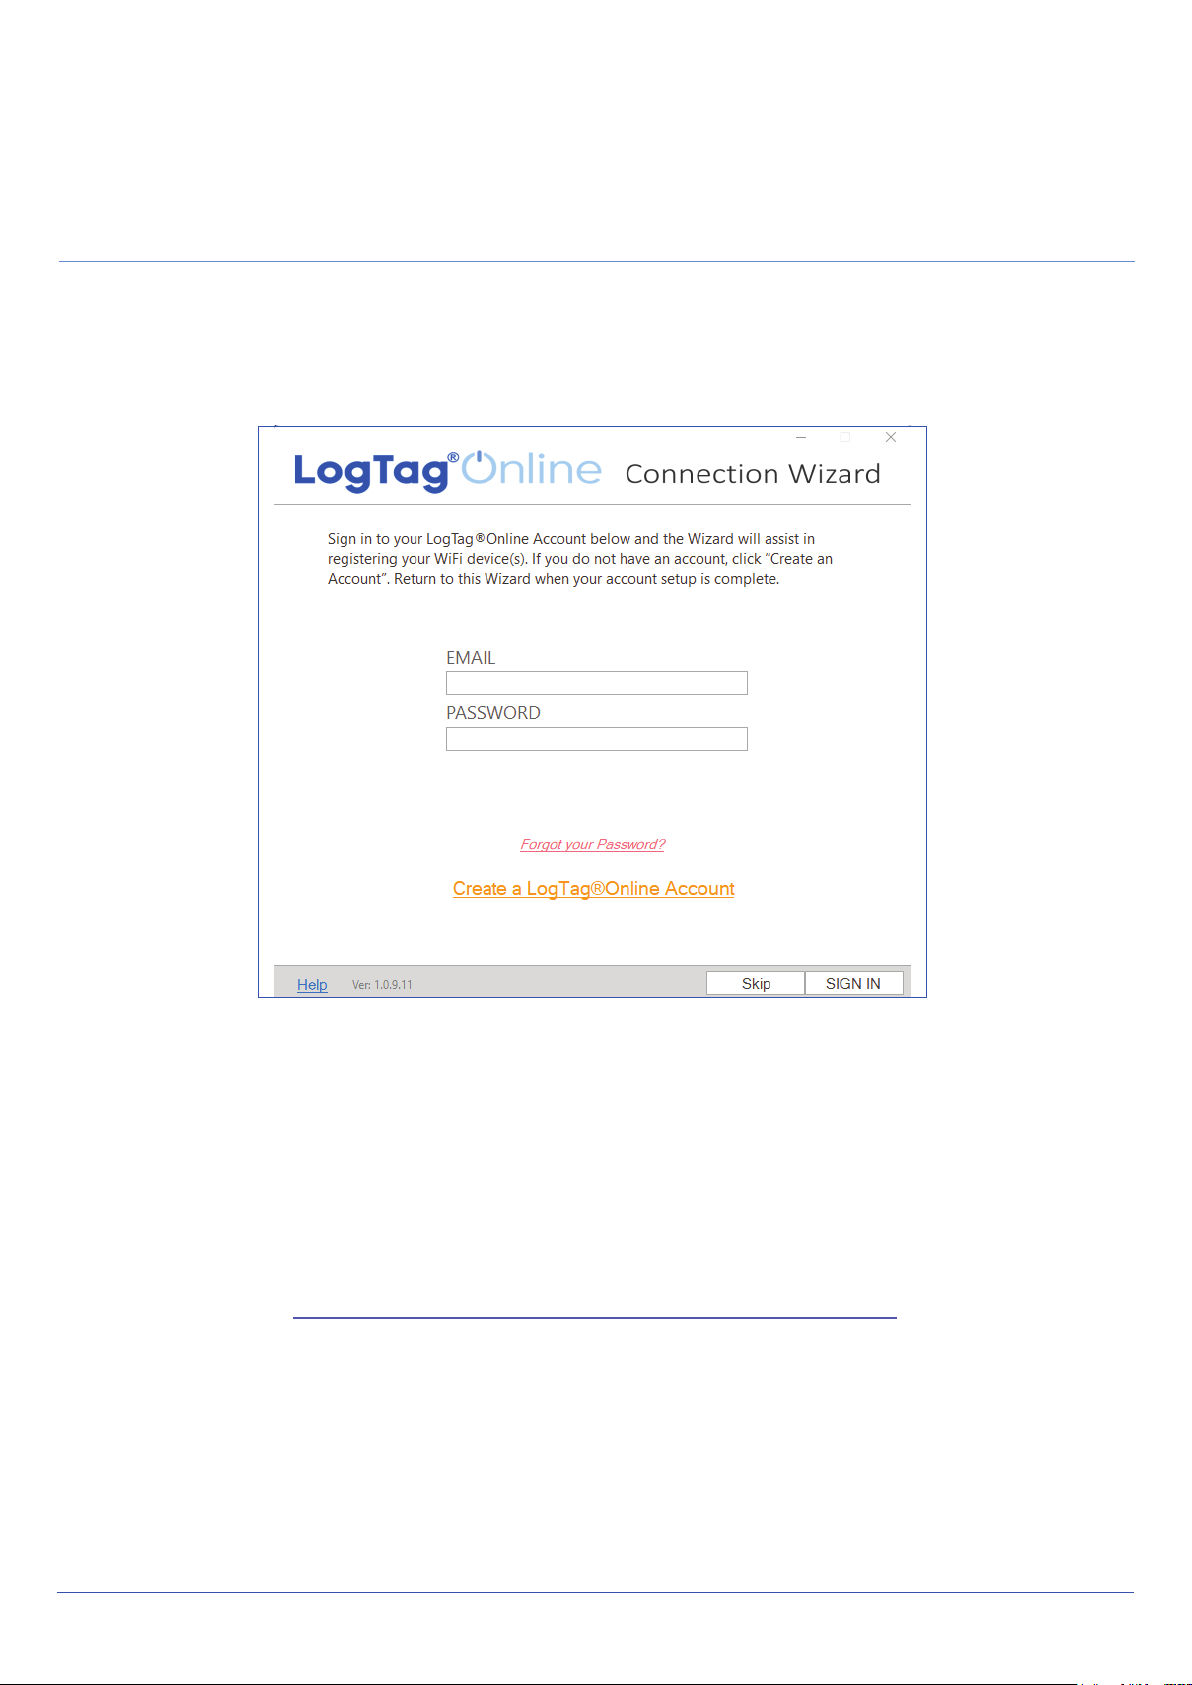
2. Sign in with your LogTag Online account and select
SIGN IN.
Select the Create a LogTag Online Account if you do
not have an account. You can also click or copy the
following link and follow the on-screen instructions;
https://logtagonline.com/signup
Note: If you selected Skip, you will need to manually
register the device on LogTag Online or repeat the
LogTag Online Connection Wizard.
Page 6
Running the Connection
Wizard (continued)
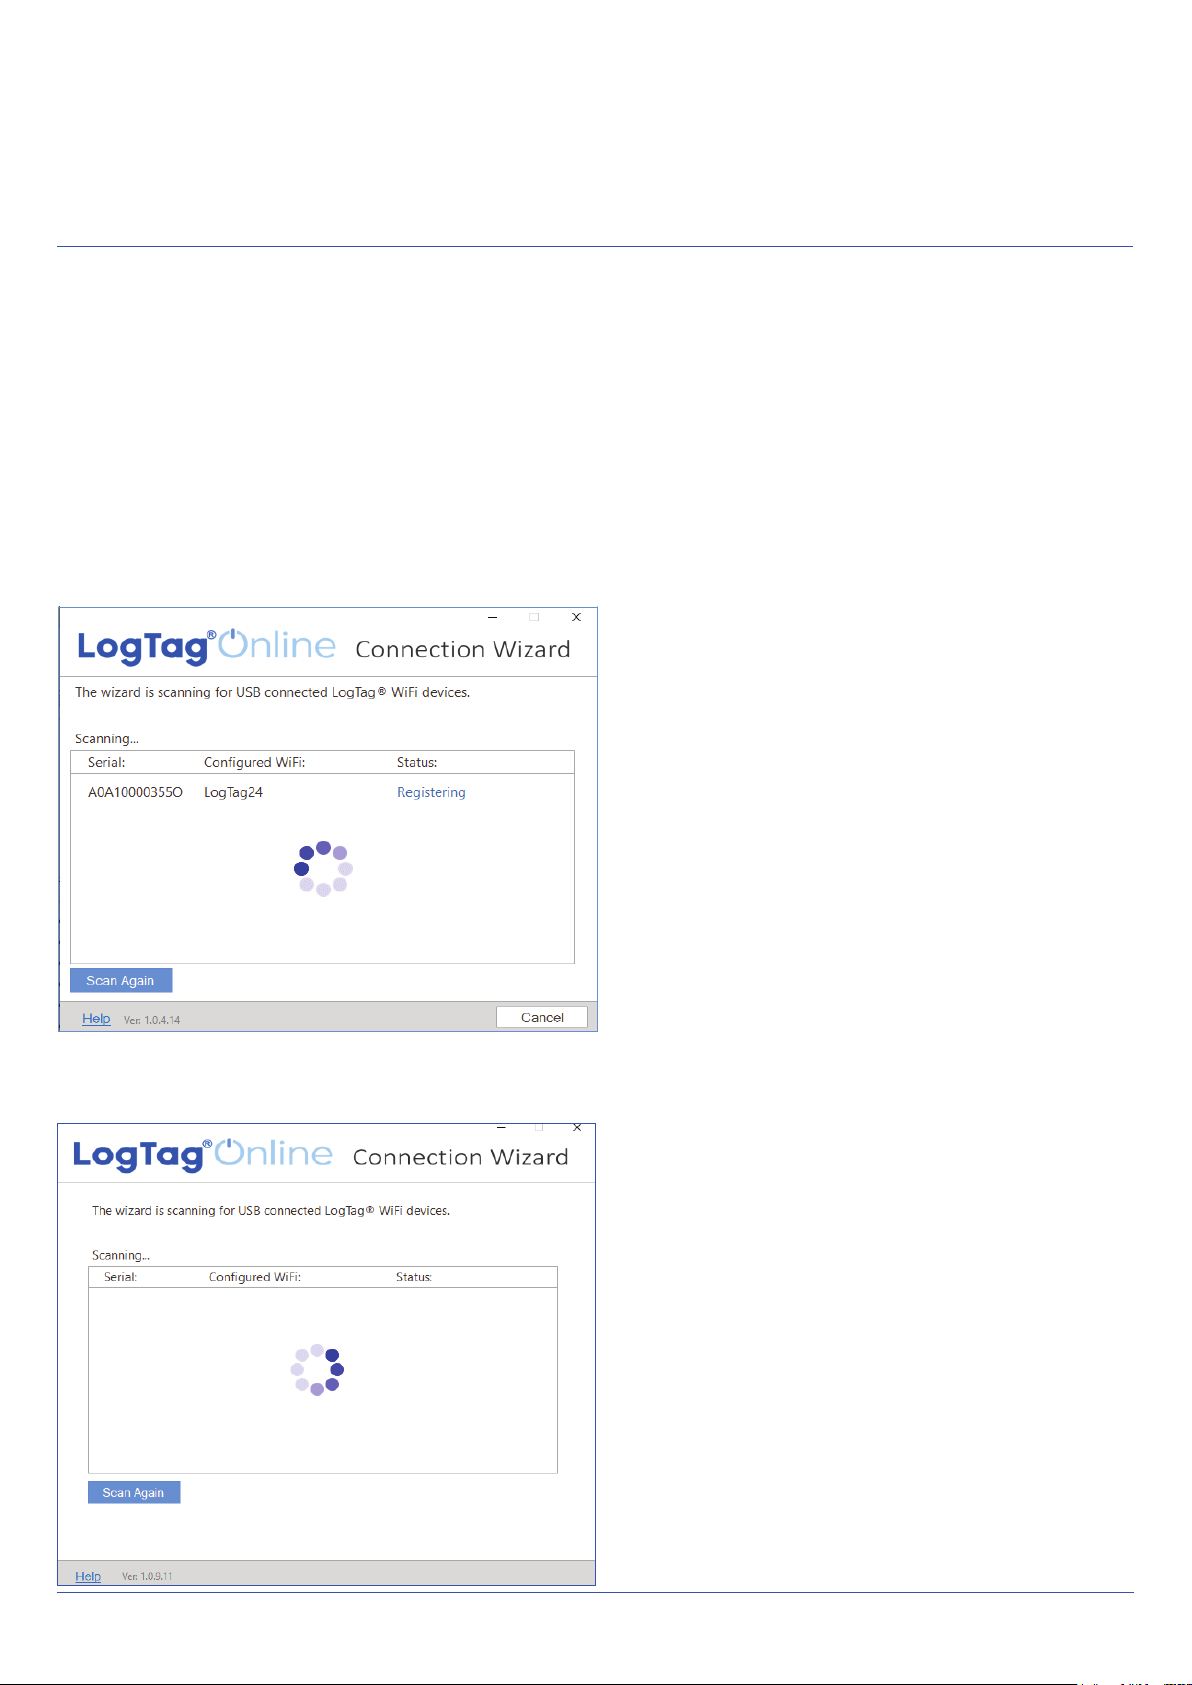
3. The Connection Wizard will scan for connected
LogTag devices. Your device will be automatically
registered to your LogTag Online account as soon as
your device has been identified.
Select Scan Again if your
device was not found.
Double-check your
devices are plugged-in
to your computer using
the USB cable provided
before scanning again.
Page 7

Connecting to your WiFi Network
4. Connect your device to the network by selecting
your Wi-Fi network name (or SSID) and providing the
network password, then select Next.
Passwords are case-sensitive. Select the eye icon to
view the password you entered.
Note: Incorrectly entered password is a common
reason why your device failed to connect to your
network. Some Wi-Fi Networks won’t appear in this list
for security purposes. If your network is one of those,
you can manually type the name of your network
(SSID) in the Network Name field.
Page 8

5. Your device will connect to your local network using
the provided Wi-Fi credentials (network name or SSID
and password). It will also check its’ connection to
LogTag Online. This typically takes 10 seconds. Select
Close once the connection was successful.
Select Again to repeat the steps to connect to your
network.
6. Select the LogTag Online Sign In page link to login
to LogTag Online.
Page 9

Remote Conguration
through LogTag Online
LogTag Online is a secure online application that
stores the data recorded from your logger against
your account. Once your device is connected to your
network, it can be configured remotely through
LogTag Online. Profile and timezone can be
configured for the logger.
Ensure your device is plugged-in to your computer
using the USB cable provided. If the profile is
shown as pending configuration, you can speed up
the connection between your logger and LogTag
Online by pressing and holding both the CHANNEL
FUNCTION and REVIEW/MARK buttons on the logger
simultaneously for approximately 6 seconds.
Page 10
Remote Conguration
through LogTag Online (continued)
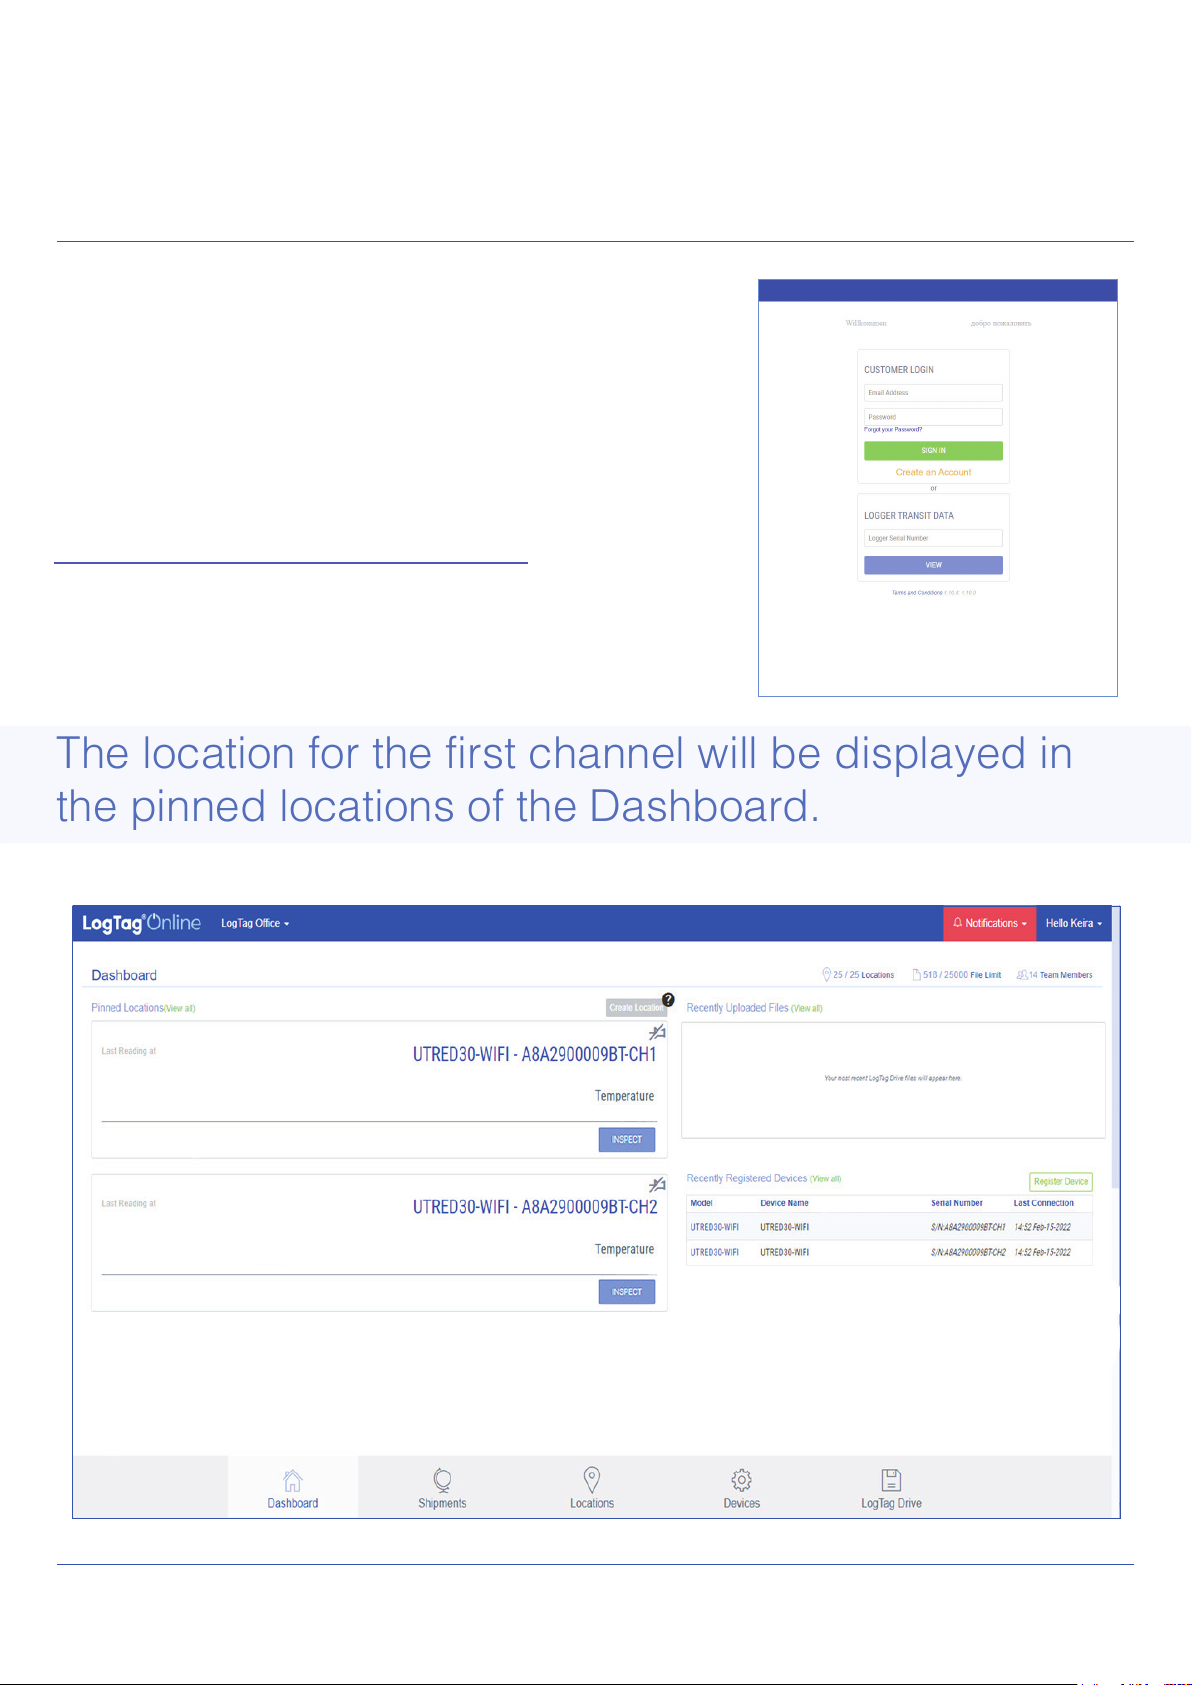
Signing in to your LogTag Online
Account
1. Login to LogTag Online;
https://logtagonline.com
The location for the first channel will be displayed in
the pinned locations of the Dashboard.
Page 11

Remote Conguration
through LogTag Online (continued)
Manually register your device if you cannot see the
location. The second location will need to be created
manually. Each channel can be assigned to its
location. Please refer to the Activation Codes section
in the LogTag Online User Guide for more information.
The probe inserted into the loggers CH2 port
will automatically register as CH1 in the location
description when only one probe is inserted into the
logger.
Note: When registering your UTRED30-WiFi Dual Channel
Logger to your LogTag Online account, a location is autocreated for the first channel when your team has a location
slot available from your current activation code;
• As soon as your device has been identified
through the Connection Wizard,
• Manual registration by selecting Register Device
in the registered devices table on the Dashboard
or in the Devices screen.
2. Navigate to Location screen and select to edit
the location created for the first channel of your
registered device.
Page 12

Remote Conguration
through LogTag Online (continued)
3. In the settings tab of the Location Details screen,
select the profile to apply to your logger from the
Logger Configuration Profile drop-down that best
suits your needs.
4. Select the time zone for the location from the
Logger Timezone drop-down.
5. Select Save to apply the configuration.
6. Navigate to the Devices tab and select on your
devices name. The configuration profile will be shown
along with its current status.
Page 13

Downloading LogTag Analyzer
The minimum recommended version is LogTag Analyzer 3.2.0
1. Download LogTag Analyzer from the LogTag
website:
https://logtagrecorders.com/software/LTA3/
2. Double-click the downloaded file to open the
LogTag Analyzer Setup Wizard and follow the
on-screen prompts to install.
3. Select Finish to exit the setup wizard.
4. Open the LogTag Analyzer application.
Note: If you already have LogTag Analyzer installed,
please see whether you need to update to the latest
version by clicking ‘Check Internet for updates’ from
the ‘Help’ menu.
Warning: Please ensure no other LogTag software is
currently running on your computer before running the
Analyzer software.
Page 14

Conguration through
LogTag Analyzer
Connect your UTRED30-WiFi
to your computer via the USB
cable provided. The USB
socket on the device is located
on the bottom, protected by a
rubber seal.
1. Select Configure from the LogTag menu or select
the Wizard icon.
2. Adjust your logger configuration settings as
required.
For more information on configuration settings, please
refer to Configuring the UTRED30-WiFi in the Product
User Guide or press F1 for help.
3. Select Configure to upload the configuration
settings to the logger.
4. Select Close to complete and exit the configuration
page.
Page 15
Installing the Wall Mount
Setup of your UTRED30-WiFi is complete.
Attach the Wall Mount Bracket on the side of your
refrigerator or freezer, preferably at eye-level with the
adhesive strip provided with the Wall Mount.
Before sticking on the Wall Mount, make sure the
probe cable and the USB cable from the
UTRED30-WiFi can both reach the device comfortably
without obstruction or at risk of being accidentally
disconnected if knocked.
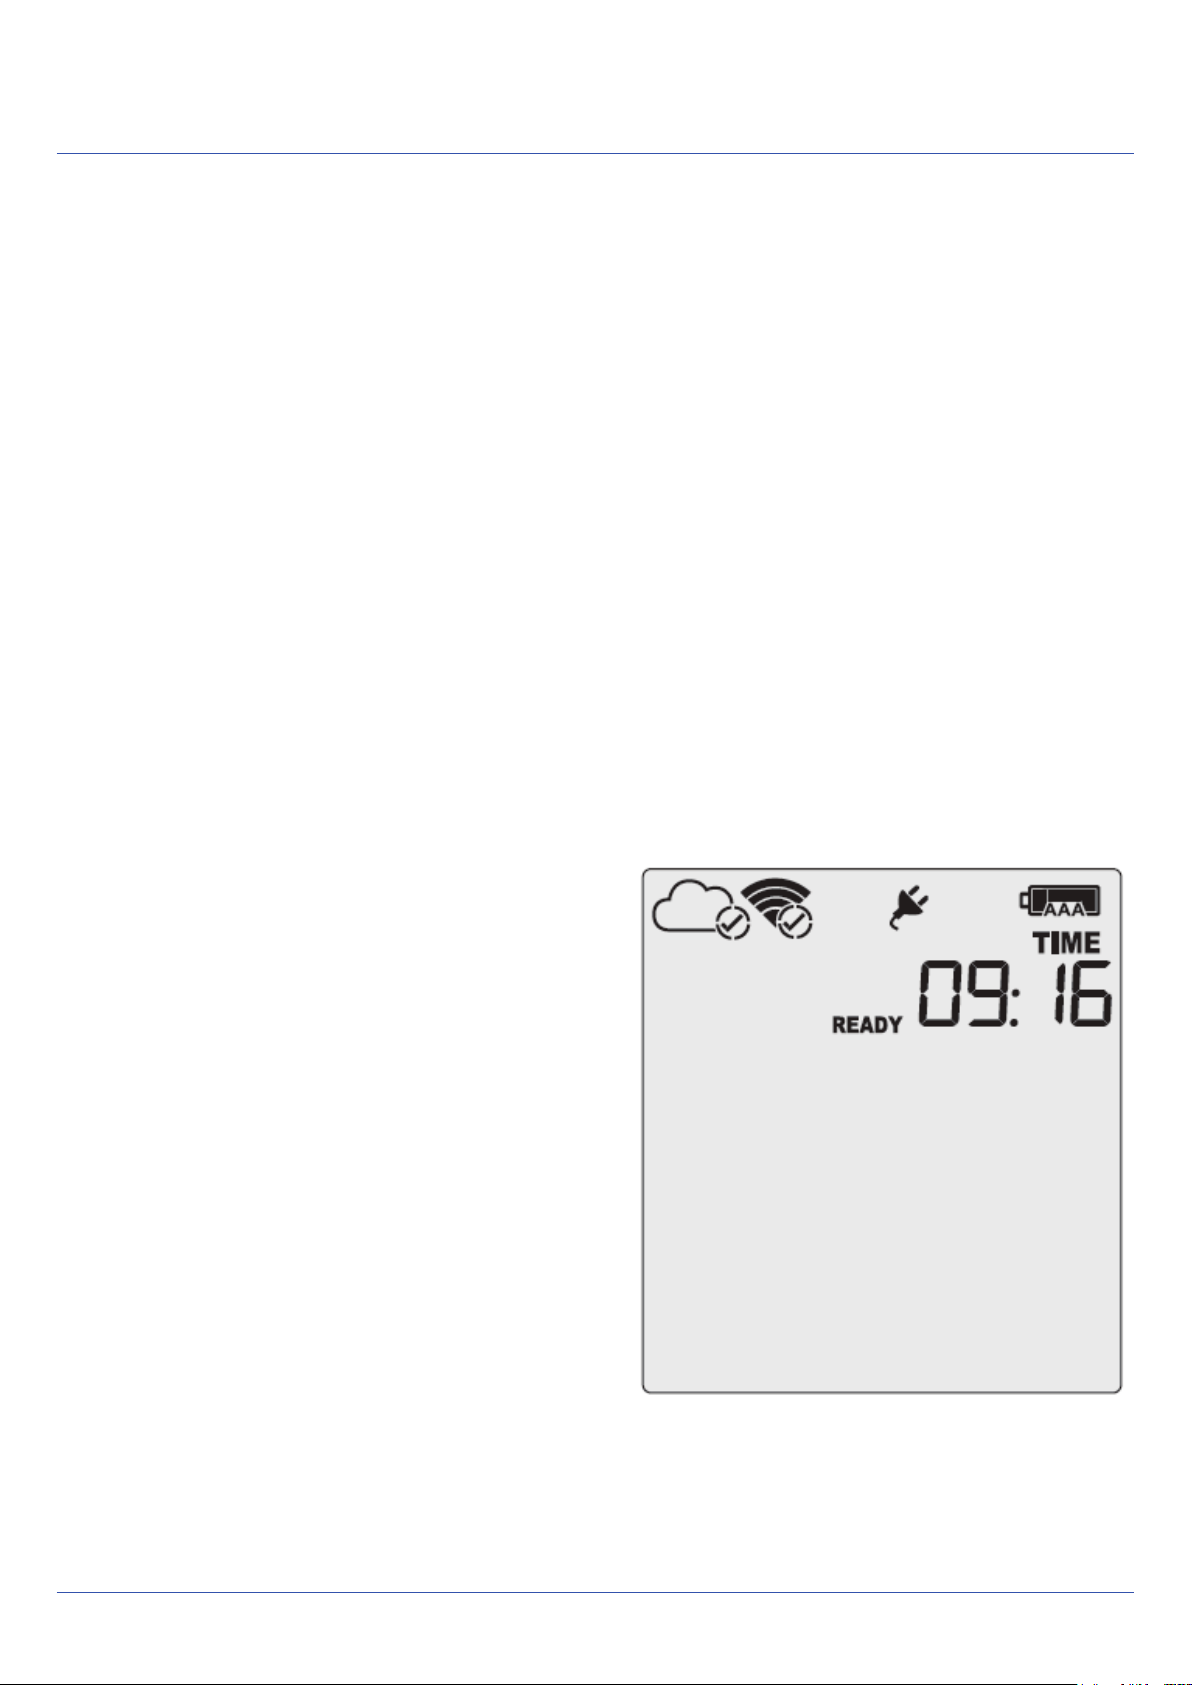
Insert the UTRED30-WiFi
into the Wall Mount, connect
the USB and sensor cables.
The display should show
the word “READY” as seen
in the image (right).
Note: Both the cloud and
WiFi symbols are showing
in the top left with a tick in
each to confirm successful
setup of the device.
Page 16

Starting your UTRED30-WiFi
Press and hold the
START/Clear/Stop button.
STARTING will appear
along with READY.
Release the button once
READY disappears.
The UTRED30-WiFi now
records temperature
data.
The Logger will not start
if:
• You release the
button before READY
disappears.
• You keep holding the
button for more than 2
seconds after READY
disappears.
• The backup battery is
critically low and the
Logger is not connected
to power.
Page 17

Viewing Second Temperature
Channel
Press the CHANNEL
FUNCTION button to
change the channel on
screen.
In this example, the
display switched from
CH1 to CH2.
The device will toggle
between the two channels
if both external probes are
configured.
Note: The probe cover can be inserted in an unused
channel port.
Page 18
 Loading...