


LogMeIn Free & Pro
User Guide August 2008

Contents
System Requirements [3]
Creating a LogMeIn Account [4]
Downloading and Installing
the LogMeIn Software [8]
Remote Controlling a Computer [12]
Remote Control Notication Window [17]
The Remote Control Ribbon [18]
LogMeIn Pro Features [24]
Preferences [35]
Appendix 1 Firewalls [36]
Appendix 2 Changing Proxy Settings [38]
Preferences Supplement [40]
© 2003-2008 LogMeIn, Inc. All rights reserved. LogMeIn Free & Pro User Guide Guide
2

LogMeIn Free and Pro are simple-to-use products that allow you to quickly and easily gain remote
access to another computer in a remote location.
Orange font titles will be used to highlight LogMeIn Pro-only features (except for in the Preferences
Supplement). LogMeIn Free users will need to subscribe to LogMeIn Pro to take advantage of the
signicant benets the extra features oer.
System Requirements
Local PC (Client)
Windows Vista, XP or Server 2003 (all including 64-bit): Windows ME, NT4, 2000, XP, or any •
operating system that supports Java or ActiveX within a web browser. Ensure that the latest
version of Java is installed.
Reliable connection to the Internet via cable modem, ISDN, or DSL.•
Internet Explorer 5.5 or later, with support for 128-bit or 256-bit encryption. Mozilla-based •
browsers that are compatible include Firefox 1.0.6 or later, Netscape 7.2 or later, and Mozilla 1.7
or later.
Note: if you are using Firefox then you will be given the option of installing a LogMeIn plug-in - it
is not required that you install the plug-in, but we recommend it.
You can also use a web-enabled device running Pocket PC 2002, Microsoft Windows Mobile •
2003 for Pocket PC, Microsoft Windows Mobile 2003 Second Edition for Pocket PC, or Microsoft
Windows Mobile 2005 for Pocket PC.
Target PC (Host)
Windows Vista, XP & Server 2003 (all including 64-bit); Windows ME & 2000 •
Permanent connection to the Internet via cable modem, ISDN, or DSL.•
Web browser that supports 128-bit or 256-bit encryption.•
LogMeIn software is installed.•
The Target PC is turned on.•
The Target PC is connected to the Internet with a live connection.•
The LogMeIn service is running. This can be determined by hovering your cursor over the •
LogMeIn System Tray icon:
© 2003-2008 LogMeIn, Inc. All rights reserved. LogMeIn Free & Pro User Guide Guide
3

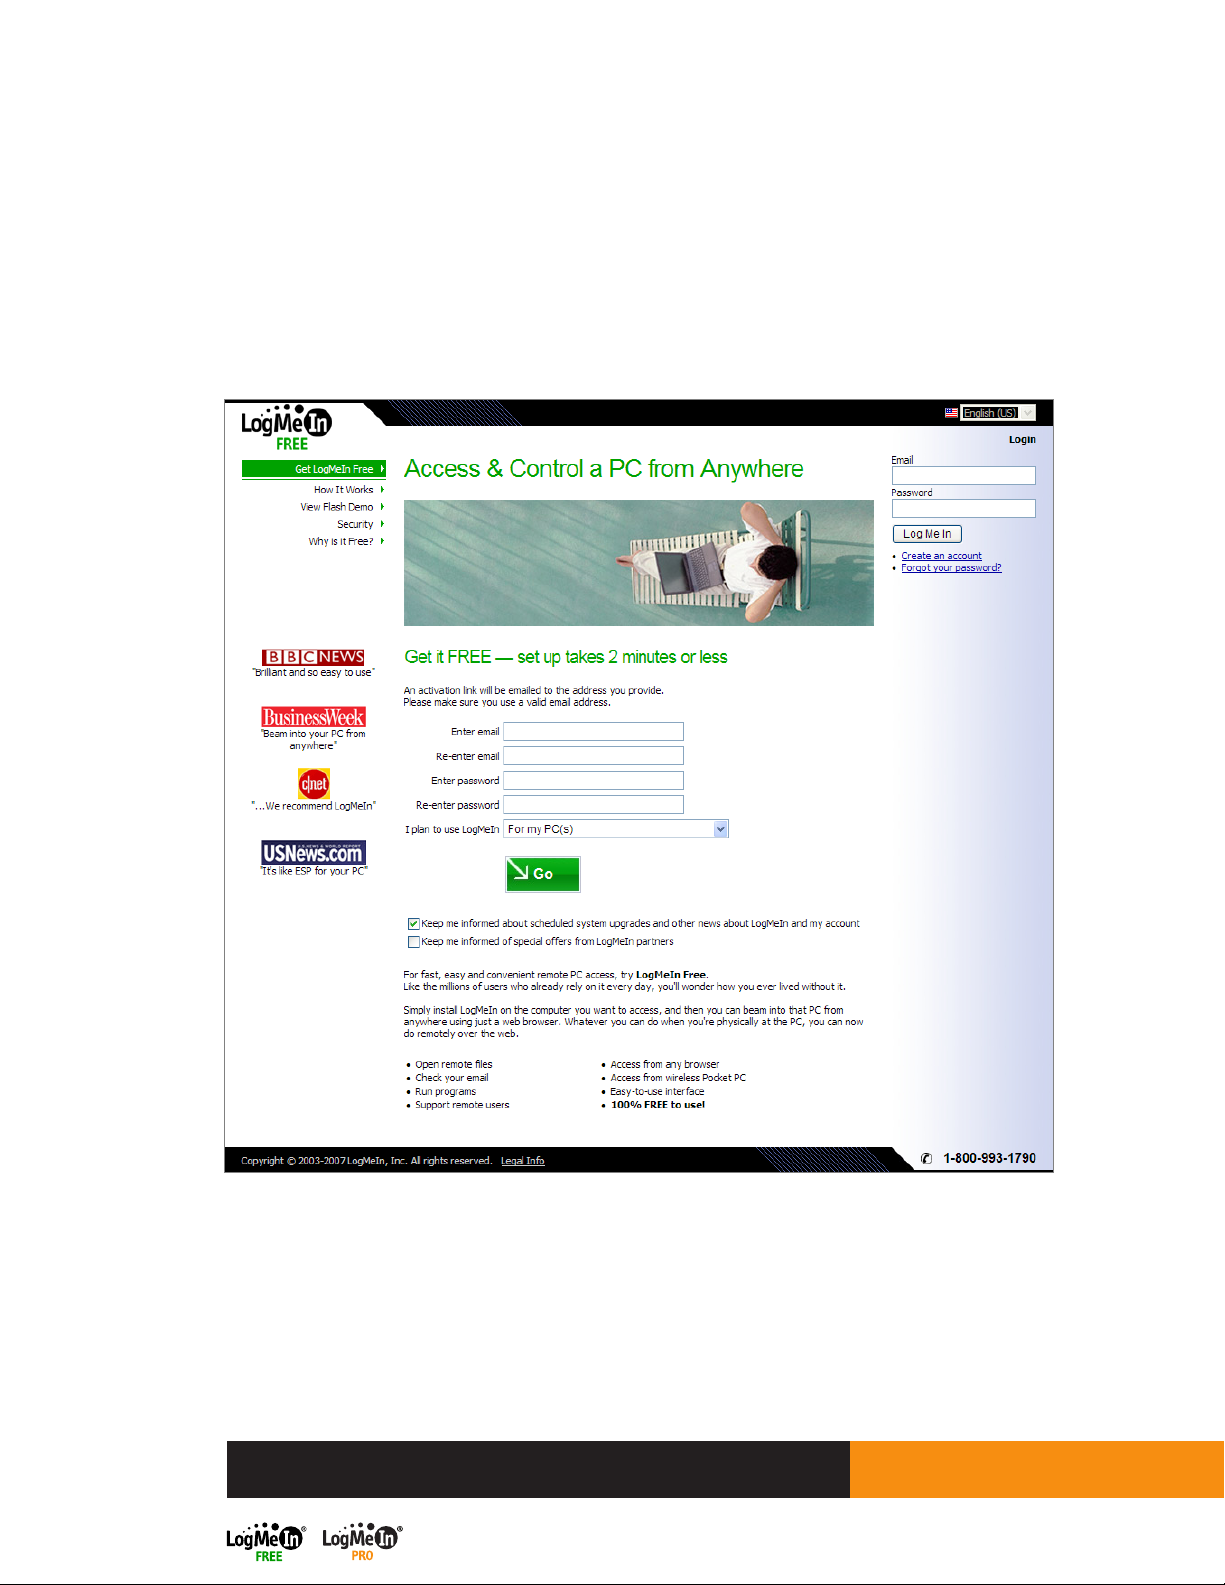
Creating a LogMeIn Account
The process to create a LogMeIn account and to download LogMeIn Free and Pro is very straightforward,
but should be done in a strict order. You should follow this guide in a linear fashion to ensure that you
are able to start remote controlling computers as soon as possible.
When you rst register with LogMeIn you automatically receive a free trial of LogMeIn Pro. This is
done by going to the LogMeIn Pro page and selecting the Get Free Trial option.
The LogMeIn Pro trial will
introduce you to the large
number of extra features that we
have added to the Free version
of the product. The features you
will be able to trial are:
Remote Printing: access les remotely,
select Print and you can print o
documents on your local default
printer
Remote Sound: From hearing incoming
email alert sounds to streaming high
quality music, this is possible with
LogMeIn Pro.
This will allow you the following:
30 days trial of LogMeIn Pro
Or
2 hours of remote control using the trial version
Whichever is the sooner.
Mini Meeting: Invite a friend or
colleague to access or view your
machine for collaboration purposes.
File Manager: A powerful tool to
manage les and to transfer les
between computers.
Drag and Drop: Drag and drop
les from the Local PC to the Target
computer.
Sharing: If you want a share a le
that’s too large to be sent as an email
attachment, send a link to anyone, even
non-LogMeIn account holders and
they can download the le from your
machine.
Direct Connect: Click on icons on
your My Computers page for one-click
remote control or File Manager access.
© 2003-2008 LogMeIn, Inc. All rights reserved. LogMeIn Free & Pro User Guide Guide
4
Once your trial expires, you will be given the option of subscribing to the LogMeIn Pro version, or
your subscription will revert to a LogMeIn Free subscription automatically with no action required
from you. You will, of course, lose all the above features if you choose not to continue with your
LogMeIn Pro subscription.
The next step is to create a LogMeIn account. Complete the registration elds and make your
notication selections, then click Go.
Note: We strongly recommend that you make a note of the details you give here and keep them
secure, as you may be required to input them at a later stage when remote controlling the computer
from another PC.
© 2003-2008 LogMeIn, Inc. All rights reserved. LogMeIn Free & Pro User Guide Guide
5

You will then receive two emails from LogMeIn:
One email welcomes you to LogMeIn and links to useful resources on our website to get you
started.
The other details the rst step you need to take. This is to conrm the email address you gave when
you completed the registration page (above).
This is a security precaution to ensure that your email address is validated and to ensure you only
receive the emails you requested. This is fully inline with LogMeIn’s strict privacy and security policy.
You should either click on the link in the email, or copy the link and paste it into your Internet Explorer
or Firefox browser.
© 2003-2008 LogMeIn, Inc. All rights reserved. LogMeIn Free & Pro User Guide Guide
6

This will conrm your email address and you will then be taken to your My Computers page.
© 2003-2008 LogMeIn, Inc. All rights reserved. LogMeIn Free & Pro User Guide Guide
7

Downloading and Installing
the LogMeIn Software
Which Computers Need the LogMeIn software?
Before downloading and installing LogMeIn Free or Pro onto a computer, you should rst decide
which computer(s) you actually need to remote control.
You need to install LogMeIn onto any computer that you wish to remote control. You DO NOT need
to install LogMeIn onto the machine that you will use to remote control another machine. (Although
you are able to do so, if you wish to access that machine at a later stage.)
We will now return to the My Computers page, above. This is the view you will have when you are
taken to your My Computers page for the rst time. There are two things to examine in the above
screenshot.
There are a number of options here that are not available to LogMeIn Free users.
There are two My Computers views:
The Advanced View, shown here•
The Simple View•
& Let’s look at these points, because they are closely related. Click on Simple View and the list
of options to the left of the screen is greatly reduced. Compare the screenshot below with the one
above:
© 2003-2008 LogMeIn, Inc. All rights reserved. LogMeIn Free & Pro User Guide Guide
8

The Simple View is all you will need to exploit the functionality of LogMeIn Free, but the other options
are available in LogMeIn Pro and you may need these.
The My Computers words are grayed out because you have added no computers to your LogMeIn
account. This is done by downloading the LogMeIn software onto them. The logical rst step is to
download the software onto the computer you are working at. However, read the paragraph at the
top of this section to decide onto which computer(s) you actually need to download LogMeIn Free
or Pro.
Downloading LogMeIn Free and Pro
There are some points to be aware of when downloading LogMeIn onto your computers:
You must log into your LogMeIn account to add computers to your account.1.
You can only download LogMeIn Free and Pro onto a computer at which you are sitting.2.
You must install LogMeIn onto every computer you wish to access remotely.3.
This is the view you will get when you download the software for the rst time using your LogMeIn
account. To download the LogMeIn software onto your computer, click on Add Computer:
First time users with Internet Explorer browsers will follow this procedure:
(Mozilla Firefox users will follow a very similar procedure, but will have their own instructions.)
Click on Download Now … … then on Run …
© 2003-2008 LogMeIn, Inc. All rights reserved. LogMeIn Free & Pro User Guide Guide
9

… then on Run … .. then on Next …
… then on I Agree …
… then select the Typical radio
button and Next …
… Give the computer a description, … then click Next …
then click Next…
© 2003-2008 LogMeIn, Inc. All rights reserved. LogMeIn Free & Pro User Guide Guide
10

… the Install status window appears … …once installation is complete, click on Finish …
… click on Installation was successful (if it was!) …
© 2003-2008 LogMeIn, Inc. All rights reserved. LogMeIn Free & Pro User Guide Guide
11

… and you will be taken to your My Computers page, where the computer you just added now
appears. You can now use LogMeIn to remote control this computer from another PC.
Remote Controlling a Computer
Scenario
You have a computer at work called XP DESKTOP. You create your LogMeIn account on this computer
and download LogMeIn onto it using the process described above. Following this, when you access
your My Computers page from XP DESKTOP, it appears there. However, there is not much point in
being able to remotely access the machine at which you are sitting!
You also have a home computer. You wish to access your work XP DESKTOP computer remotely from
home. When you are at your home computer, log into your LogMeIn account at www.logmein.com and
you will see your My Computers page. It will show your XP DESKTOP computer, onto which you earlier
downloaded LogMeIn. (See the System Requirements for the pre-requisites for remote controlling a
Target computer).
In LogMeIn Free or Pro, click on the machine name, highlighted, and you will be connected to the
computer. Once the connection is established, you can then select the Remote Control option from
the menu (or toolkit) to the left of the screen.
LogMeIn Pro Only
If you have LogMeIn Pro, you will see two Direct Connect icons to the right of the computer name: .
Hover over the icons and you will see a description of the functionality: . Click on the left
icon to connect directly to remote control the selected machine.
© 2003-2008 LogMeIn, Inc. All rights reserved. LogMeIn Free & Pro User Guide Guide
12

Depending on how you set up your account, you may be required to input a Computer Access Code
If so, input the code, then select Login:
Otherwise you will be presented with a login box where you should input your Windows login
credentials.
You are also told the status of the target PC’s keyboard and mouse. In the above example they are
both active, i.e. someone is using the computer at that time. This may inuence your decision to
initiate a remote control session.
Note: The Computer Access Code is for users who do not normally have to enter any Windows
credentials when logging on to the Target PC. As an additional security measure, LogMeIn have
added the Computer Access code to ensure that only authorized users gain access to the computers
in an account. The code was created here:
© 2003-2008 LogMeIn, Inc. All rights reserved. LogMeIn Free & Pro User Guide Guide
13

Once connected to the Target PC via LogMeIn Pro, you will see this screen:
Once connected to the Target PC via LogMeIn Free, you will see this screen:
Note that the number of options available in the Pro version is signicantly larger than in Free.
© 2003-2008 LogMeIn, Inc. All rights reserved. LogMeIn Free & Pro User Guide Guide
14

You will probably start by
downloading a trial version of
LogMeIn Pro and you will see
this screen. There is a Trial Status
window to the right of the Free
connection screen. This is to
inform you of the status of your
free-of-charge Pro trial. The trial is
for 30 days or two hours of remote
control, whichever expires sooner.
Once the trial expires, you will not
have access to any of the premium
Pro features detailed in the Trial
Status box.
As you take advantage of Pro’s great extra features, a green tick will appear in the box to show you
have used a particular feature. The features are hyperlinked to short movies that demonstrate each
feature.
You are only one step away from remote controlling the Target computer.
There is a toolbar to the left of the screen …:
LogMeIn Pro LogMeIn Free
… and a list of options on the main screen:
LogMeIn Pro LogMeIn Free
© 2003-2008 LogMeIn, Inc. All rights reserved. LogMeIn Free & Pro User Guide Guide
15

Select the Remote Control options and decide if you want to open the remote control session in a
new browser window using the check box on the main screen.
You will see a progress box appear to inform you of the status of the connection:
The connection will be established in a few seconds.
You will then be connected to the Target computer:
You are now able to remote control the target PC just as if you were sitting at the machine itself. You
can work on documents, listen to music (LogMeIn Pro only), adjust settings, open les, reboot, and
generally use the machine how you like.
There are several powerful remote control features accessed via the remote control ribbon, which is
described below.
© 2003-2008 LogMeIn, Inc. All rights reserved. LogMeIn Free & Pro User Guide Guide
16

Remote Control Notication Window
This window ALWAYS appears. This cannot be changed, nor can the window wording be altered.
As soon as your remote control session starts, a notication window appears on the screen of the
Target PC. This is a security feature to advise the user that the machine is being remote controlled
and by which IP address.
Depending on the status of the Target machine, there are two versions of the notication window:
This one, where the Target PC is not active, so the Close option does not appear…
…and this version, where the target PC is active.
The notication window can be closed by a user on the target PC and also on the local PC, but it will
appear!
© 2003-2008 LogMeIn, Inc. All rights reserved. LogMeIn Free & Pro User Guide Guide
17

The Remote Control Ribbon
Once you are in a remote control session, there are several features that you can adjust to streamline
the experience. You make these adjustments using the remote control ribbon.
Note: You may not see all of the following features in your ribbon. You will only be able to see
the options that your LogMeIn subscription entitles you to or that your computer settings allow.
LogMeIn Pro trial users: You will be able to access all the features for the duration of your trial
period (30 days or two hours of remote control – whichever expires sooner). After the trial expires the
Pro-only features will disappear from the ribbon.
QuickLinks
This feature allows you to add icons to the QuickLinks bar. These icons will allow you
one-click access to all the features available in both the basic and advanced ribbons. Click the down
arrow next to the QuickLinks bar to see a list of available features that can be added. Items already
appearing in the QuickLinks area are listed with a checkmark.*
A typical, customized QuickLinks bar could look like this:
Sound – LogMeIn Pro only
If Sound is enabled, you can mute the sound (and vice-versa) by clicking on the
loudspeaker icon, and adjust the volume by dragging your mouse across the volume bars until you
obtain the optimum setting. Click on the loudspeaker icon to mute the sound, , and click again to
listen again.
Takes you to a series of Quick Clips; short movies outlining the LogMeIn Pro features available.
Activate/deactivate full-screen mode
This enables you to view the remote desktop in full-screen mode.
© 2003-2008 LogMeIn, Inc. All rights reserved. LogMeIn Free & Pro User Guide Guide
18

Once full-screen mode is activated, you will see these two icons. By selecting the Pin icon:
, you can pin the toolbar to the top of the screen and the icon changes to: . If you do not select
this icon, , the toolbar will “disappear” and will reappear if you hover the mouse over the docked
bar at the top of your screen: , or you may view the black
ribbon toolbar by moving your mouse pointer to any point at the very top of the screen.. Selecting
deactivates the full-screen mode.
Disconnect
Disconnects you from the remote control session and takes you back to the LogMeIn main menu.
To avoid accidental disconnection, a conrmation dialog box will appear.
*There are also two other options only accessible from the QuickLinks bar If your computer setting
allow them:
The Monitors option (Only visible to users with multiple monitors on the Target PC). Selected 1.
via Customize QuickLinks toolbar > Screen Settings > Monitors. When the feature is selected,
this icon: , will appear in the QuickLinks bar. If you click on it, the remote control view will
switch between screens on dual-monitor set ups, and toggle through screens on multi-monitor
set ups.
The Terminal Server option (Only visible to users with Terminal Server activated). Selected from 2.
the Customize QuickLinks toolbar. If the remote computer is a terminal server, which means
multiple terminals are connected to it using Windows remote desktop, then the terminal server
option lets you select whether you want to remote control the remote computer or one of the
terminals. Click on this QuickLink icon: , to switch between sessions.
Test it by enabling remote desktop on computer A, then connect with computer B to A using
remote desktop. Then use LogMeIn to remote control computer A from a third computer. You will
be able to select whether you want to remote control computer A or B.
© 2003-2008 LogMeIn, Inc. All rights reserved. LogMeIn Free & Pro User Guide Guide
19

Options
The advanced options ribbon is activated by clicking on Options. Please note that options only
appear if you have access to them via you level of subscription. The features that are only available to
Pro users are highlighted in orange font.
Some options duplicate what is on the basic ribbon. Other options available are:
Screen Settings
Color Quality
Adjust the color quality of the displayed remote screen to optimize the amount of information
transferred during remote control. Adjusting this setting changes the look of the screen during remote
control, but will not be seen by the target PC user. We recommend that
this is set to Automatically adjust color settings.
View
The Advanced option is to allow your remote control screen to switch to
grayscale if focus shifts to another part of your screen. To restore color,
move your cursor back onto the remote control screen.
Adjust the zoom setting for the viewable screen.
Use “Scale to t” to ensure the screen ts the screen of your local PC.
If using a set percentage, the remote screen may be larger than the local screen. If
so, scroll-bars appear to allow you to navigate the remote screen.
If your remote control screen appears fuzzy or unclear, inputting 100% into the
Custom Zoom eld will rectify this, but scroll-bars may appear. To view the Target
PC screen as if you were there, we recommend that you select Scale to Fit and
switch to full-screen.
© 2003-2008 LogMeIn, Inc. All rights reserved. LogMeIn Free & Pro User Guide Guide
20

Resolution Settings
Change the Target computer’s screen resolution during remote control to
better suit it to the local PC’s screen. The Match Resolution option sets the
target PC screen resolution to the same as the local PC ensuring a perfect t in
full-screen mode.
On nishing a remote control session, the Target computer’s screen resolution
returns to its default.
If your remote control screen appears fuzzy or unclear, your screen is probably
in a zoomed view to t on your local PC screen. View the Target PC screen as if
you were there by matching the resolution & switching to full-screen.
Full Screen
This performs the same function as the full-screen button on the standard ribbon.
Ctrl-Alt-Del
Click this button to perform the same action as the Ctrl-Alt-Delete button combination on the Target
computer.
Sound – LogMeIn Pro only
This activates a control box where you can enable sound to be transmitted from the Target PC to the
local PC. You can also control the volume by dragging your mouse over the volume bars. There are
also three quality options that you can select. The higher the quality of the
sound that you will be transferring from the Target PC, the higher the setting
you should make here. If you merely wish to hear incoming email message
warnings, for example, select the lower of the settings, whereas listening to
Mp3 tracks will need the higher quality setting.
Selecting Advanced allows you to select the sound playback device on the
local PC from the drop-down menu:
© 2003-2008 LogMeIn, Inc. All rights reserved. LogMeIn Free & Pro User Guide Guide
21

Tools
Whiteboard
The Whiteboard feature is invaluable for showing remote users how to detect specic parts of their
desktops. It leaves a red track on the screen of the Target PC. Deactivate the feature to delete the onscreen lines. You will also need to deactivate it to regain control of the Target machine.
Chat
Selecting Chat allows you to open a chat dialog with the user of the Target PC. Input text on your local
PC’s screen in the line that appears under the ribbon – above. Select Send, or the Enter key, and a chat
box opens on the Target PC’s desktop where the remote user can respond.
Laser Pointer
As with the Whiteboard feature, the Laser Pointer assists you in talking remote users through a
complex issue on their machine. A clear red dot can be moved around the screen to highlight features.
Deactivate the feature to regain remote control.
Magnify
This activates a box on the local PC that can be dragged and dropped around the Target PC’s desktop
viewed on the local PC to magnify a small area of the remote screen. Useful for when you are running
screen resolutions of less than 100% and you wish to view a specic area of the screen without
readjusting your screen resolution.
Connection Options
Connect Drives – LogMeIn Pro only
This option allows you to map the drives of the local computer so that they are accessible by the
Target computer.
Blank Screen
With this option checked, you blank the Target computer’s screen. This may be useful if, for example,
you are inputting condential information.
Connect Printer – LogMeIn Pro only
You can print out les on your local printer using les on the Target PC. Selecting Print on the Target
machine sends that print job to your printer.
© 2003-2008 LogMeIn, Inc. All rights reserved. LogMeIn Free & Pro User Guide Guide
22

Sync Clipboard
This synchronizes the two machines’ clipboards. Anything copied (Ctrl–C) on one machine is
automatically available to be pasted (Ctrl-V) on the other.
Lock keyboard
This locks the keyboard of the Target machine so that it cannot be operated by anyone sitting at the
Target machine. This may be useful if you need to run a presentation and do not wish to be disturbed,
for example.
Network
This allows you to select the network connection type. Selecting Slow allows you to optimize your
connection on lower speed connections. Selecting Fast lets you exploit high bandwidth connections.
The recommended Auto option allows LogMeIn to set this connection automatically according to the
kind of connection it detects.
© 2003-2008 LogMeIn, Inc. All rights reserved. LogMeIn Free & Pro User Guide Guide
23

LogMeIn Pro Features
As mentioned earlier, LogMeIn Pro oers many advantages over LogMeIn Free. If you have a trial
version of LogMeIn Pro, all these features will be available to you for 30 days or two hours of remote
control, whichever expires sooner.
Connect Drives
This activates the disk mapping feature in a separate window. Users at a Local PC will be able to make
drives on the machine they are using available to the Target PC.
Users gain these key benets:
The ability to link the Local PC’s drives to the Target PC•
You can use standard applications, e.g. Windows Explorer, to manage les between the •
computers
Manage les between the connected computers within a Remote Control session•
Files on the Local PC can then be opened and run on the Target PC•
- For example, an .msi installer located on the Local PC can be run on the Target PC
Once you select the Connect Drives option by either selecting it using the
Options menu in the remote control ribbon: , or via a QuickLink you have
created: an advisory box will pop up to say the drives have been
temporarily connected:
You can choose whether or not to see this message in
future.
Next, go to the Target PC’s Windows My Computer screen.
This will show all the drives available:
The highlighted Network Drive is the Local PC. To view the drives on that PC, double-click it.
© 2003-2008 LogMeIn, Inc. All rights reserved. LogMeIn Free & Pro User Guide Guide
24

This will display the Local PC’s drives. To view folders, select a drive and just follow normal Windows
practice to reach the desired le. The selected le will open on the Target PC.
Note: The drive details above are worth explaining:
F:\• is the drive letter on the Local PC
data (D)• and winxp (C) are drives on the Target PC accessible by the Local PC (with
Preferences set to show the drive description rst)
Disconnecting
To disconnect the drives, uncheck the Connect Drives option in the remote control ribbon’s
Options menu, click on the Connect Drives QuickLink, or exit the remote control session.
Remote Sound
Although a very powerful feature, Remote Sound is very simple to use. The feature is accessed via
the remote control ribbon: , and will appear as a gray loudspeaker when the option is
enabled. You enable the feature via the ribbon’s Options menu. Click and drag your mouse over the
volume bars to adjust the volume setting. You can also choose one of three sound quality settings by
dragging the slider to the required setting.
Note: the higher the sound quality you select, the greater the bandwidth
needed to transmit the sound.
The Advanced option allows you to select the sound playback device on the
Local computer:
© 2003-2008 LogMeIn, Inc. All rights reserved. LogMeIn Free & Pro User Guide Guide
25

File Manager
Access the File Manager feature by using the Direct Connect link on your My Computers page:
; via the File Manager option to the left of the screen once you are connected to a
computer: ; or from the main screen once you are connected:
The feature allows you to easily transfer les between your Target and Local PCs. You can also
synchronize entire folders on both computers, with just one mouse click. There’s no need to
worry about security - all data transferred between your Target and Local PCs are compressed and
encrypted.
To transfer or synchronize les, follow these steps:
Once you’ve connected remotely to your Target PC, click • File Manager on the navigation bar to
the left of your browser window.
Note: To perform this function in a new window, right-click on File Manager and select Open
Link in New Window.
A dialog box will indicate the progress of your le manager connection to the Target PC.•
If the dialog box does not close automatically, click • Close.
The File Manager mode displays your Target and Local PCs’ les in a split screen. The Target PC’s les
are displayed in the right frame, the Local PC’s in the left. Use the Tab key to switch between the two
frames.
To transfer les from, for example, the Local PC to the Target PC, click once to select a le or folder in
the right-side frame. The selected le will be your Source Folder.
You can select multiple Source Folders by using the Shift + Click function.
On the toolbar at the top of the File Manager window, click Transfer, then Copy. The contents of the
Source Folder will be copied to the Destination Folder of the same name on the Local PC.
For more options, refer to the key below when using the File Manager toolbar:
The File Manager toolbar in Active X lists items on the toolbar according to the following four
categories: Navigate, Edit, Transfer and Select. These actions are available via the drop-down menu
shown, the toolbar buttons indicated below, or the keyboard shortcut listed.
© 2003-2008 LogMeIn, Inc. All rights reserved. LogMeIn Free & Pro User Guide Guide
26

Navigation options
The Navigation and Sort options are accessed via a drop-down menu:
Refresh: Press the F5 key to refresh the list.
Up: You can go up to the parent directory by pressing Backspace.
Go to folder…: Selecting this option enables you to input a specic directory into the editable
eld at the top of the panel representing either the local or Target host. You can also activate this
eld by clicking in it, or with the Ctrl+G shortcut.
Sort: The drop down menu also oers options to sort directory contents by name (Ct r l+1 ), type,
(Ctrl +2), size (Ctrl+3) and date (Ctrl+3) and the option to Show all folders for all users. You can also
opt to show hidden and/or system les.
Edit options
Create Folder: You can create a new folder with the Create folder button or by pressing
Ctrl+N.
Rename: You can rename a le or folder with the Rename button or by pressing F2.
Delete: You can delete a folder or le with the delete button, or by pressing Delete on your
keyboard.
© 2003-2008 LogMeIn, Inc. All rights reserved. LogMeIn Free & Pro User Guide Guide
27

File Manager Options
Copy: You can copy a le or folder with the copy button or by pressing Ctrl+C.
Move: You can move a le or folder with the Move button or by pressing Ctrl+X.
Synchronize current folders: By clicking on the Synchronize current folder button (or by
pressing Ctrl+S) you can update the current folders to the local and Target PC so that their contents
are the same. Files and folders that exist only on one side are copied normally. If both folders
contain one or more les that are dierent on the local and Target PCs, the newer version will be
dierentially copied. This is very useful if you need to keep two folders in sync.
Replicate Current folder: When you click this button (or by pressing Ctrl+R) les and folders
that do not exist in the destination folder are copied normally. Files that already exist in the
destination folder will be transferred from the source folder. If a destination folder contains a le
or a folder that does not exist in the source, IT WILL BE DELETED. This is very useful if you update
the source folder and want to push those changes to the destination.
From the drop down menu you can also select Connection Details in order to display encryption
and authentication details about your current connection.
Selection options
Select Files: You can select les with the Select les button or by pressing + on the number
pad.
Deselect Files: You can also deselect les via the toolbar or with - on the number pad.
From the drop-down menu you can also select all the les (Ctrl+A), select none (Ctrl+Num), or
invert the selection (Num*).
Active X or Java
If you are using a Windows computer with Internet Explorer, the default File Manager interface in
LogMeIn is served by an Active X control (When clicking on File Manager in the menu). Otherwise,
Java will be the default.
The interface is slightly dierent, with the actions grouped in drop down menus above the icons,
but it is essentially the same, and there is no dierence in the options available.
© 2003-2008 LogMeIn, Inc. All rights reserved. LogMeIn Free & Pro User Guide Guide
28

Mini Meeting
The Mini Meeting feature is designed to enable you to invite another LogMeIn user to access your
computer. Access the feature by right-clicking on the LogMeIn system tray icon:
You can then decide to issue a new invitation or
view any pending invitations you may have. For
this exercise, we will issue a new invitation and click
Next.
You should choose how the recipient receives the
invitation; via an email automatically generated by
LogMeIn, or to send them the invitation yourself,
e.g. via an instant messaging system.
An invitation name appears by default, but you can
input any name you wish into the eld. You can also
specify for how long the invitation is open; between
one and 99 hours, then select Next:
© 2003-2008 LogMeIn, Inc. All rights reserved. LogMeIn Free & Pro User Guide Guide
29

Input the address to which you will send the
invitation and any message you wish the recipient
to read, then select Next:
The email is generated and sent automatically and
you receive conrmation of this. Click Finish to end
the process:
Alternatively, if you selected to send the link yourself,
you will receive the dialog box here. Choose whether
to copy the link to your clipboard to be sent to the
recipient, e.g. via an instant messaging system; or
click Email to open your default email client with the
link contained in the new message.
At the start of the process, you are able to view any
invitations you may already have issued. You are
able to edit these:
© 2003-2008 LogMeIn, Inc. All rights reserved. LogMeIn Free & Pro User Guide Guide
30

What the Recipient needs to do
The recipient of the invitation will receive an email detailing
the invitation and who has sent it. They need to click on Accept
Invitation.
Once the invitation is accepted, they are notied of this and can then
log into their own LogMeIn account, after clicking on Next:
When logged into their LogMeIn account, they can then select the
prole which relates to the invitation, and then select any of the
computers they wish to access.
Sharing
Access the Sharing feature via the Sharing option to the left of the screen once you are connected to
a computer: ; or from the main screen once you are connected: .
Simply create a secure link to the le you want to share and email it to designated
recipient(s) who can click the link and download the le directly from your computer.
You can specify the number of times the le can be downloaded or a timeframe for when the link
should expire. At any time, you can check the status of the downloads or delete the link to the le on
your machine.
© 2003-2008 LogMeIn, Inc. All rights reserved. LogMeIn Free & Pro User Guide Guide
31

You can easily share les in two ways.
Option 1: Right-click on a le, select “Send To”, then choose “LogMeIn Sharing”.
The le will then appear pre-selected. You can assign
a dierent description to it, if desired. Make any
availability settings and click OK.
You will be given a URL, which you can pass on via
email or instant message to anyone who needs the
le – ensuring that you do not send the URL to more
people than the maximum number of downloads
you have specied.
Option 2: Right-click on the LogMeIn system tray icon and then choose Sharing.
© 2003-2008 LogMeIn, Inc. All rights reserved. LogMeIn Free & Pro User Guide Guide
32

A dialog box will appear with a list of any les you
may have previously shared. To share another le,
select Add:
The following dialog box will appear. Choose the
le you wish to share, then make any other settings
relating to the availability of the le and click Next.
You will be given a URL, which you can pass on
via instant message to anyone who needs the le
– ensuring that you do not send the URL to more
people than the maximum number of downloads
you have specied. By clicking Email you launch
your default email client with the link already
contained in a new message.
© 2003-2008 LogMeIn, Inc. All rights reserved. LogMeIn Free & Pro User Guide Guide
33

Regenerating a Sharing Link
By selecting a le in the Your Shared Files dialog box and then clicking Details, you are able to
regenerate a Sharing link. You can specify a new expiry date and a new gure for the maximum
number of downloads. The link can then be copied to your clipboard or saved by clicking Apply
Changes.
Drag and Drop
You are able to drag les from your local computer and drag them onto the desktop or a folder of the
Target PC.
In the scenario above, the My Documents folder of the Target PC is open and the folder; Fonts, is
open on the local PC. The user is dragging a font to drop into the remote My Documents folder. It’s as
simple as that to drag and drop les from the local PC to the Target PC.
© 2003-2008 LogMeIn, Inc. All rights reserved. LogMeIn Free & Pro User Guide Guide
34

Remote Printing
It is possible to have les, e.g. a Word document, open on the Target PC and to be able to print them
on your local default printer.
Check the Connect Printer option on the Remote Control ribbon’s Options menu and you will connect
the Target PC to your default local printer.
A notication window will appear on the Target PC informing you that the connection has been
established:
If you have more than one printer and wish to use another printer, uncheck the Connect Printer box,
and make the desired local printer your default printer and reconnect.
Preferences
Both LogMeIn Free and Pro have a sophisticated degree of control that can be exercised over accounts.
These options are accessed via the Preferences menu once connected to a computer. Preference
options are covered in the Preferences Supplement, below.
© 2003-2008 LogMeIn, Inc. All rights reserved. LogMeIn Free & Pro User Guide Guide
35

Appendix 1 Firewalls
LogMeIn Free/Pro is compatible with all known rewalls and broadband routers. It is simple to use and
requires no conguration. When you install LogMeIn Free/Pro, some personal rewalls will display a
message asking for your permission for the LOGMEIN.EXE program le to communicate over the
Internet. This is a secure part of LogMeIn and must be allowed to function in order for the service to work.
Please nd below instructions on how LogMeIn works with the ZoneAlarm, Norton Internet Security,
and Windows XP and Service Pack 2 rewalls:
ZoneAlarm rewall
LogMeIn is compatible with the ZoneAlarm personal rewall. However, ZoneAlarm does require
some conguration. After installing LogMeIn, ZoneAlarm will ask whether to allow logmein.exe to
access the Internet. Click YES, and tick the “Remember this answer next time I use this program”.
If you use ZoneAlarm in Expert mode, you must continue with the steps below for logmein.
exe.
Click • Program Control and then Program Wizard.
Choose • Advanced and click Next.
Click • Add.
Browse to LogMeIn’s installation folder (usually found at C:\Program Files\LogMeIn), and double-•
click LogMeIn (or LogMeIn.exe if the full lenames are shown).
Make sure both the Access and the Server boxes are ticked.•
Click • Finish.
Exit the ZoneAlarm control center.•
Norton Internet Security (NIS) rewall
Open NIS from the systray bar and double click on the • Firewall.
Go to the Programs tab, click • Add, and browse for the logmein.exe le.
Double click the le, and then select • Permit from the pull-down menu. The category screen
should reect the current rewall settings in use on the machine.
Click on the • Networking tab and add 127.0.0.1 to the trusted sites.
Some recent versions of Norton Internet Security may prevent LogMeIn from working if no user is
logged in to Windows on the Remote PC. To prevent this, follow these steps:
On the Remote PC, open NIS from the systray bar and click on • Open Norton Internet Security.
Click Personal Firewall, followed by Congure, Advanced, then General.
Search for • “Block access to secure sites” in the list and click on it once.
Select • Modify, followed by Permit, then OK.
© 2003-2008 LogMeIn, Inc. All rights reserved. LogMeIn Free & Pro User Guide Guide
36

Windows XP and Service Pack 2 rewalls
Click Start on your Remote PC’s systray bar and select • Control Panel.
Double click • Network Connections.
Right click on the • Local Area Connection icon and select Properties.
Select the • Advanced tab, then Settings.
Click on the • Exceptions tab, then Add Program.
Browse to nd the • logmein.exe le in the Add a Program dialog box (it is usually located in c:\
program les\logmein\logmein.exe). Then click on Open.
Click • OK in the open dialog boxes until they are all closed.
Check the box for LogMeIn in the Windows Firewall dialog box.•
© 2003-2008 LogMeIn, Inc. All rights reserved. LogMeIn Free & Pro User Guide Guide
37

Appendix 2 Changing Proxy Settings
LogMeIn will automatically detect and use the current proxy settings. If you receive a connection error
when attempting to begin a remote control session, you may need to recongure the connection
settings on your Internet browser so that Internet access is granted to LogMeIn Free/Pro.
To congure your Internet Explorer proxy settings on the Local PC to work with LogMeIn Free/Pro,
follow these steps:
Select 1. Tools from the Internet Explorer menu bar, then Connections, then LAN Settings.
In the dialog box below, click to deselect the check box for 2. Automatically detect settings, and
under the Proxy server section, key in the proxy server’s numeric IP address if it is not indicated
by default (If you do not know this number, ask your system administrator).
Next, click 3. OK to save your settings.
To congure your proxy settings on the Remote PC to work with LogMeIn IT Reach, you have the
following three options:
You are prompted during a custom installation of LogMeIn to congure your proxy server 1.
settings (If you choose a typical installation, LogMeIn automatically attempts to detect your
proxy settings).
© 2003-2008 LogMeIn, Inc. All rights reserved. LogMeIn Free & Pro User Guide Guide
38

If while sitting at the Remote PC you receive the following error message: 2.
Correct this error, by simply clicking the Open LogMeIn button in the error message or rightclick the LogMeIn systray icon and select Open LogMeIn.
You will be prompted by the following message to enter your registered email address and
password:
3. With LogMeIn open in your web browser, choose Preferences on the left side of your browser
window, then select Network Settings:
Note: If you use NTLM authentication to access your proxy server, you will still have to enter
your username and password. Currently LogMeIn only supports BASIC and NTLM proxy
authentication methods.
© 2003-2008 LogMeIn, Inc. All rights reserved. LogMeIn Free & Pro User Guide Guide
39

LogMeIn Free & Pro
Preferences Supplement

Table of Contents
About this Guide............................................................................................................................................. 2
Key Terms .........................................................................................................................................................................................2
The Preferences menu.................................................................................................................................... 3
Remote Control Settings.............................................................................................................................................................4
General Settings ....................................................................................................................................................................... 4
Security........................................................................................................................................................................................5
Visible & Audible Notification..............................................................................................................................................5
Interactive User’s Permission............................................................................................................................................... 6
Remote Printing .......................................................................................................................................................................7
Connecting Drives ................................................................................................................................................................... 7
Remote Sound ..........................................................................................................................................................................8
Security Settings ............................................................................................................................................................................9
Access Control...........................................................................................................................................................................9
Windows Password ...............................................................................................................................................................10
IP Address Lockout................................................................................................................................................................10
IP Filtering.................................................................................................................................................................................10
LogMeIn Logs..........................................................................................................................................................................12
SSL Setup ..................................................................................................................................................................................12
Personal Password.................................................................................................................................................................13
Most Recent Accesses ..........................................................................................................................................................13
Network...........................................................................................................................................................................................14
General Settings .....................................................................................................................................................................14
Proxy Settings .........................................................................................................................................................................15
Log Settings...................................................................................................................................................................................16
General Settings .....................................................................................................................................................................16
ODBC Messages......................................................................................................................................................................16
Syslog Settings........................................................................................................................................................................16
Remote Control Session Recording.................................................................................................................................16
Reboot Options ............................................................................................................................................................................17
Advanced Options.......................................................................................................................................................................18
Remote Control ......................................................................................................................................................................18
Log Settings .............................................................................................................................................................................18
Network.....................................................................................................................................................................................18
Customized Login Message ...............................................................................................................................................19
General Settings .....................................................................................................................................................................19
©2003-2008 LogMeIn Inc. All rights reserved www.LogMeIn.com 1

About the Preferences Supplement
This guide serves as a supplement to the LogMeIn Free and Pro User Guide; it provides detailed information
regarding the settings and options found in the LogMeIn Preferences menu.
After reading this supplementary guide, you should be able to understand how to use this powerful set of
options to customize your LogMeIn experience.
Features and options that are not available to users of LogMeIn Free are marked as
Key Terms
The computer used to access a Host computer. Sometimes also called
the Local Computer, the Client can be any computer connected to the
Client
Host
Internet.
For example, if you are at home or in an Internet cafe and are remotely
connected to your office computer, the computer where you are
sitting is the Client.
The accessible device or computer. Sometimes also called the Remote
or Target computer, this is the specific device you want to access
remotely. LogMeIn software must be installed on the Host.
For example, you want to access your office computer from home or
while traveling. Your office computer is the Host.
Pro-only
.
©2003-2008 LogMeIn Inc. All rights reserved www.LogMeIn.com 2

The Preferences menu
The
Preferences
menu on the LogMeIn toolkit allows you to customize LogMeIn settings.
©2003-2008 LogMeIn Inc. All rights reserved www.LogMeIn.com 3

Remote Control Settings
On the toolkit, select
relating to the behavior of remote control sessions.
Preferences > Remote Control Settings
General Settings
Preferences > Remote Control Settings
Allow Mini Meeting
Use mirror display driver
Automatically disable wallpaper
Automatic clipboard transfer
maximum size
By checking this box, you enable the Mini Meeting feature.
Pro-only
LogMeIn Pro provides a mirror display driver on the Windows 2000
and XP platforms. This display driver provides a faster and less CPUintensive remote control session. Should you have any compatibility
problems, you can turn off the use of this driver by disabling this
option.
By default the wallpaper (desktop background) image on the Host
Device is disabled.
Cancel this selection if you need to see the Host Device’s desktop
background.
LogMeIn Pro features advanced remote clipboard capabilities. Its
usage is outlined earlier in this manual. Under preferences you can
specify the maximum number of kilobytes to be transferred between
machines. The default maximum is 1024kb, but bear in mind that
transferring significantly larger amounts may cause problems.
: This feature is not available to users of LogMeIn Free.
to view and modify a number of options
Idle time allowed
Auto panning
Default Remote Control
Ctrl + Alt + Del Hotkey
©2003-2008 LogMeIn Inc. All rights reserved www.LogMeIn.com 4
If the remote control computer is inactive for the amount of time
specified here, it will automatically be disconnected.
If the display area of the Host Device is too large to display on the
Client Computer, then only a part of the screen will be displayed and
you will use the scrollbars to view other parts of the Remote screen.
With this option enabled, the screen is automatically scrolled for you
when the mouse nears the edge of the current display area.
Allows the user to specify which technology is used when launching
an LogMeIn Pro Remote Control session (ActiveX, Java or HTML).
Allows you to select which keyboard shortcut to use to enact the Ctrl
+ Alt + Del Windows function on the Host machine. By default, it is
Ctrl + Alt + Insert.

Security
Preferences > Remote Control Settings
By disabling the Host keyboard and mouse you can prevent the
Disable Host keyboard and mouse
Blank the Host’s monitor
person sitting in front of the Host machine from using their mouse or
keyboard while a remote control session is in progress.
By checking this box, the Host machine’s screen is blanked. Anyone
sitting at the Host device will see a blank screen on the monitor while
the remote session is active.
Lock console when connection
broken
Lock console when connection
times out
Always lock console when remote
control disconnects
Local keyboard & mouse takes
precedence over remote
Allow one click login to desktop
With this option enabled LogMeIn Pro will lock the console to protect
your work in case the Client Computer loses its connection to the
server.
With this option enabled LogMeIn Pro will lock the console to protect
your work if your connection times out.
“Console” refers to the Host that you were controlling remotely before
disconnection. If the desktop is automatically locked, then anyone
physically at the host will not be able to do anything (good).
This is an important security feature. For example, if you are working
with your online bank account on the Host, but the connection is
dropped because of a problem at the Client, you do not want
someone near the Host to be able to access your bank account.
Select this option if you want all keyboard and mouse actions entered
on the Client device to be processed before actions entered on the
Host. That is, the actions of the person running the remote control
session will be processed before the actions of the person sitting at
the computer being controlled.
If the Host computer is locked when you initiate a remote control
session, LogMeIn will prompt you to unlock the computer with a
single click rather than prompting you to re-enter your Windows
credentials.
Visible & Audible Notification
Preferences > Remote Control Settings
Beep when the remote control
session starts or ends
Beep continuously during remote
control
Beep interval Allows you to define the time period between notification beeps.
©2003-2008 LogMeIn Inc. All rights reserved www.LogMeIn.com 5
If this is enabled the Client Computer will beep when a remote control
session is initiated or ended.
With this enabled the Client Computer will beep according to the
Beep interval
when a remote control session is active.

When this field is selected the Number Lock, Caps Lock and Scroll
Flash Keyboard Indicator Lights
Lock keyboard lights will flash in sequence to indicate that a remote
control session is active.
Interactive User’s Permission
Preferences > Remote Control Settings
Ask for permission from interactive
user
By default, LogMeIn will prompt the user of the Host Computer to
grant permission to the person making a remote connection.
Cancel the selection if you want to be able to access a Host Computer
without requiring permission from a user.
Cancelling the selection will also disable the Chat function.
Default answer for confirmation
message
Time allowed for the interactive
user to give permission
Text to display to the user
Full Control (and Remote Control)
access rights bypass interactive
user’s permission
Do not require authorization if
user is not present
If set to
user does not respond within the time set in the
the interactive user to give permission
If set to No, the connection will not be made.
Enter the amount of time that the Host Computer user has to respond
to the notification message.
If this time expires, the setting in the
confirmation message field
This is the text that will be presented to the user in the remote control
confirmation dialog box. The string
name of the user attempting a remote control operation.
With this option enabled, users with full Remote Control access rights
(Read, Write, Delete, or “R+W+D”) will be able to access the Host
Computer without first asking the user’s permission. If this is enabled
it overrides the setting in the
user
Select this box is you want be able to initiate a Remote Control
session without user permission.
, then the remote connection will be established even if a
Yes
Time allowed for
field.
Default answer for
will be applied.
%USER%
will be substituted by the
Ask for permission from interactive
field.
©2003-2008 LogMeIn Inc. All rights reserved www.LogMeIn.com 6

Remote Printing
Preferences > Remote Control Settings
Pro-only
Select
Client Computer. This feature requires no driver installation.
You can only print from the printer assigned to be the default printer on the Host Computer. If a printer you
want to use is not the default printer, you must change it to become the default.
: This feature is not available to users of LogMeIn Free.
Enable remote printing
to be able to print from the Host Computer to the default printer on the
Illustration: Remote Printing
Connecting Drives
Preferences > Remote Control Settings
Pro-only
These options control the accessibility of the disk drives on the Client Computer to the Host Computer,
allowing you to open Client Computer files on the Host Device.
Scenario
loaded on the Host Computer. You do have the software on the Client Computer. Using Windows Explorer
on the Remote Device, locate and run the executable file for the Spyware cleaning program directly from its
location on the Client Computer.
Note:
Device.
: This feature is not available to users of LogMeIn Free.
: You want to run a Spyware cleaner on the Host Computer, but you do not have the software
Some programs may require additional configuration or a license key before they will run on the Accessible
Enable connecting drives
Preferred drive letter…
Allow connecting local hard drives
to the remote computer
Select this box to enable this feature according to rules set in the
following fields.
This is the letter that will be used on the Host Device to signify the
Client Computer drives.
Example: “Drives on ‘AccessDeviceName’ on ‘Network Name’ (F:)”
Select this box to make disk drives on the Client Computer available
to the Host Device.
©2003-2008 LogMeIn Inc. All rights reserved www.LogMeIn.com 7

Allow connecting removable
drives to the remote computer
Select this box to make removable drives (such as a pen drive)
connected to the Client Computer available to the Host Device.
Allow connecting network drives
to the remote computer
Set directory format of connected
drives
Write-protect connected drives
Select this box to make network drives connected to the Client
Computer available to the Host Device.
Example:
Description first: winxp32 (C)
Drive letter first: (C) winxp32
Select this box to make all files on the Host Device read-only when
accessed using Remote Control.
Remote Sound
Preferences > Remote Control Settings
Pro only
Enable remote sound
Mute sound on Remote Computer
Sound capture device
: This feature is not available to users of LogMeIn Free.
With this box selected, the Client Computer will play sounds from
the Host Computer.
With this box selected, the Client Computer will play sounds from
the Host Computer, but sounds at the Host Computer will be
muted.
This field lists the sound devices (sound cards) available at the Host
Computer. Select the device to be used for capturing sounds.
Input line
Encode quality
This field lists the input lines available at the Host Computer. Select
the line to be used for capturing sounds.
Select the quality level of the sound to be recorded from the Host
Computer. High quality is recommended for high-speed
connections only.
©2003-2008 LogMeIn Inc. All rights reserved www.LogMeIn.com 8

Security Settings
Access Control
On the toolkit, select
Pro.
Preferences > Security Settings > Access Control
Users
Preferences > Security Settings > Access Control
The upper portion of this dialog box lists users with access to LogMeIn Pro.
Click
Click
to create a new user or group.
Add
next to any entry to remove that user or group from the access list.
Delete
Settings
Preferences > Security Settings > Access Control
This is enabled by default. It adds Full Control permission to all
Allow full control to administrators
NT LAN Manager Authentication
administrators of the computer. If you turn it off, only users explicitly
granted permission to use LogMeIn Pro will have access.
LogMeIn Pro supports Windows Challenge/Response type
authentication. You must use Internet Explorer to take advantage of
this feature. You need not worry about exposing your password to
eavesdroppers if you are using HTTPS to secure all communications
between your browser and LogMeIn Pro.
to define who can access LogMeIn
Save user name in a cookie
Do Not List Domains on Logon
Screen
Display “Enable/Disable LogMeIn”
option on the system tray menu
©2003-2008 LogMeIn Inc. All rights reserved www.LogMeIn.com 9
You can configure LogMeIn Pro to remember your user name in a
cookie.
When logging on to a Host Computer, users will be prompted to enter
a username and password for a computer on a given domain. By
default, LogMeIn provides a list of active domains in the
field.
When the
list of active domains will not be displayed, thus forcing the user to
type the exact name of the chosen domain in the
provides an extra layer of security by forcing would-be hackers to
know exact domain names.
Anyone managing a computer that is running LogMeIn software can
use this feature to prevent end-users from disabling LogMeIn.
Do Not List Domains on Logon Screen
Log on to
box is selected, the
Log on to
field. This

Windows Password
On the toolkit, select
Password on the Host Computer. The Windows Password page is displayed. Enter your
password
Note:
not allow you to change the password.
, and
The dialog box will not appear if your user account on the Host Computer is configured in a way that does
Preferences
Password confirmation
>
Security Settings > Windows Password
. Click
to save your changes.
Apply
to update the Windows
Old password, New
IP Address Lockout
On the toolkit, select
detect and temporarily lock out potential intruders. IP Address Lockout is useful if your server is exposed to
the Internet.
This security precaution allows you to configure these filters:
Denial of Service Filter
•
continuously requesting the same service.
Authentication Attack Filter
•
authorization.
The configuration for each is identical, although the default values differ due to the differences in the kind
of attack they are designed to prevent.
Failed login attempts and lockouts are logged in the LogMeIn log file, if you have logging enabled.
Note:
Preferences
Active Select this box to enable the feature.
>
Security Settings > IP Address Lockout
: A precaution against unwanted intruders who slow your Host machine by
: This locks out those who try to get past your logon screen without
to set up features that help
Number of invalid attempts before
locking out
Reset invalid attempt counter after
Lock out for
Specifies the number of login attempts before a lockout occurs.
After the amount of time specified in this box has elapsed, the invalid
attempt count of the offending IP address will be reset to zero.
All attempted connections from an offending IP address will be
rejected for the amount of time specified in this field.
An IP address will be locked out if the number of failed login attempts
from the same IP address reaches the value specified in the
of invalid attempts before locking out
specified in the
Reset invalid attempt…
field within the time period
field.
Number
IP Filtering
On the toolkit, select
allowed to access LogMeIn Pro on your system by creating profiles to allow or deny connections from
specific IP addresses. The IP filtering window is displayed.
To create a new filtering profile, enter a profile
•
A single IP address
Preferences > Security Settings > IP Filtering
and click
Name
to specify exactly which computers are
. You can enter the following:
Add
©2003-2008 LogMeIn Inc. All rights reserved www.LogMeIn.com 10

An IP address with a subnet mask, essentially granting or denying access for a whole network.
An IP address with wildcards and no subnet mask. Accepted wildcards are an asterisk (*) that
matches any number of characters, or a question mark (?), that matches a single character only.
Use the
To edit an existing filtering profile, select it from the list and click
•
The Up, Delete, and Down buttons let you manage already entered filters. Select one item in the list,
•
dropdown menu to
Type
allow
or
access to the selected IP address.
deny
.
Edit
and move it up or down with the appropriate buttons, or remove it altogether.
Whenever a new connection is established to LogMeIn Pro, the remote IP addresses are checked against the
filter or filters in the list, and access is granted or denied accordingly. The IP filters that you set up here apply
to every connection received by LogMeIn Pro, except for those aimed at the FTP or Port Forwarding Server.
To specify IP address restrictions specific to these modules you will need to use their specific IP filtering
options.
How IP Filtering Works
When an IP address is checked against a list, LogMeIn Pro goes from the first element of the list to the last,
comparing the IP address against the item. If the item is a single IP address, it only matches the remote IP if
they are equal. If the item is an IP address with a subnet mask, a logical AND operation is performed on the
subnet mask and the remote IP address, and the result is checked against the item’s network address to see
if the remote IP address is in fact on the network. If the item is a wildcard, the remote IP address is converted
to its dotted textual representation and the two strings are compared.
When a match is found, LogMeIn Pro checks if it should allow or deny the connection, based on the
allow/deny flag belonging to it. This result is then used to decide whether to let the connection proceed.
If no match is found, then the connection is allowed. If you would like all connections that are not listed to
DENY.*
be denied, enter
Examples
(ordering is crucial):
as the last item on the list.
Allow connections from IP address
215.43.21.12 and the network
192.168.0.0, and deny all other
connections:
Allow connections from IP address
215.43.21.12 and the network
192.168.0.0, but not from the
address 192.168.0.12, and deny
everything else
ALLOW:215.43.21.12
ALLOW:192.168.0.0 (255.255.0.0)
OR - ALLOW:192.168.*
DENY:*
ALLOW:215.43.21.12
DENY:192.168.0.12
ALLOW:192.168.0.0 (255.255.0.0)
OR
ALLOW;192.168.*
DENY.*
: Denying the connection from 192.168.0.12 comes before allowing
Note
connections to the 192.168.0.0 network. This is because if LogMeIn Pro
was to find the ALLOW item first, it would let IP address 192.168.0.12
through, since it matches the condition. To prevent this, we make sure
that the address 192.168.0.12 is checked before the network to which it
belongs.
©2003-2008 LogMeIn Inc. All rights reserved www.LogMeIn.com 11

Allow all connections, except
those coming from 192.168.0.12
Deny all connections from the
network 192.168.0.0 except for the
subnet 192.168.12.0, and allow all
other connections
DENY:192.168.0.12
ALLOW:192.168.12.0(255.255.255.0)
OR
ALLOW:192.168.12.*
DENY:192.168.0.0 (255.255.0.0)
OR
DENY:192.168.*
It is not possible for you to lock yourself out by accident when setting up IP address restrictions from afar, i.e.
DENY:*
you can not enter a
clause into an empty list.
LogMeIn Logs
On the toolkit, select
Preferences > Security Settings > LogMeIn Logs
The LogMeIn Logs page is displayed.
Click
Download all logs in one compressed file
to access all available logs in a single WinRAR ZIP archive.
You will be prompted to open or save the file.
The active log file is named LogMeIn.log. Older logs are stored with the naming convention
LMIYYYYMMDD.log. For example, the LogMeIn log file for June 1st 2007 would be called LMI20070601.log.
You can enable or disable logging to text files, but LogMeIn Pro will always log the following events to the
Windows Application Log:
Service Start/Stop
•
LogIn/Logout
•
Remote Control Start/Stop
•
Service start and stop events are always written to the LogMeIn log file whether or not logging is enabled or
disabled. You can modify the setting for these logs under
Preferences > Log Settings.
to view the LogMeIn Pro log files.
SSL Setup
Pro only
On the toolkit, select
The SSL Setup page is displayed.
If you set up SSL support for LogMeIn Pro all traffic between the Client Computer and the Host Device will
be encrypted using industry-strength 128-bit ciphers, protecting your passwords and data. LogMeIn Pro can
detect and use any SSL certificates already installed in Windows on your machine, as long as they have an
exportable private key.
You can choose to use an already installed certificate or create a self-signed certificate.
•
©2003-2008 LogMeIn Inc. All rights reserved www.LogMeIn.com 12
: This feature is not available to users of LogMeIn Free.
Preferences > Security Settings> SSL Setup
to view the LogMeIn SSL Setup options.
To select a previously installed certificate, choose one from the list of available certificates and click
Continue
. The chosen certificate will be activated.

To create your own self-signed certificate select
•
The Certificate Authority form is displayed. Complete the form. Some default values are provided from
the Host Device’s registry. When you have finished, click
Optional: Click
•
instructions in the Windows Certificate Import Wizard.
Install the CA certificate…
Create a self-signed certificate
Continue
to install the CA certificate to your browser. Follow the
. This will create the CA.
and click
Continue
Personal Password
On the toolkit, select
Password. The Personal Password feature is an added layer of security. After successfully logging onto the
Host Computer with your Windows username and password, you will be prompted to enter specific
characters from your Personal Password.
To create or change your password, type the password in the
enter it again in the
You will only be prompted for a few characters from your Personal Password, and never the whole string.
Note:
Personal Password authentication is only performed when you are accessing the Host Device using LogMeIn
and never when you are physically in front of your computer. Your Personal Password is securely stored on
the computer and cannot be retrieved by LogMeIn support staff.
Preferences > Security Settings > Personal Password
Enter your Personal Password
Confirm your Personal Password
field, and then click
to update the Personal
.
Apply
field, then
Most Recent Accesses
On the toolkit, select
recent remote control sessions. The list includes the following data: Local Name, User, Access Started, Access
Finished, and Idle Time.
Preferences > Security Settings > Most Recent Accesses
to view a list of your most
©2003-2008 LogMeIn Inc. All rights reserved www.LogMeIn.com 13

Network
On the toolkit, select
settings.
Preferences > Network Settings
General Settings
Preferences > Network Settings
Use this section to update your general network settings:
TCP/IP port to listen on
IP filter profile to use
Idle time allowed
Automatically check for latest
version on the Web
Automatically apply downloaded
updates when LogMeIn is idle
By default, LogMeIn listens on port 2002. However, if this port is
already used by a different application or service then you can set a
different port for LogMeIn to use.
Create profiles to allow or deny connections from specific IP
addresses.
This is the amount of time that can pass without any activity during a
session before the remote connection is dropped.
Select this option if you want LogMeIn to check for the latest version
of LogMeIn software upon log in to your account.
LogMeIn software must restart itself (but not the computer) after
applying an update. If this is done while LogMeIn is busy (for example,
when you have an active Remote Control session or if you have a file
transfer in progress) then the connection will be dropped during the
restart.
to update your network’s general, proxy, and SMTP
Pro-only
Stalled transfer timeout
File Transfer Compression
File Transfer Download Bandwidth
Limit
©2003-2008 LogMeIn Inc. All rights reserved www.LogMeIn.com 14
: The following options are not available to users of LogMeIn Free:
Any file being transferred that fails to complete within the defined
period of time will be ended. The time is expressed in days, hours,
minutes, and seconds.
Fast - Uses less CPU but also less compression. Use this when you do
not want to tie up the CPU.
Normal – A good balance between effective file compression and
balanced CPU utilization.
Best – When you want the CPU to compress the file data as much as
possible before transferring it.
No Compression – Do not compress at all.
You can set the maximum amount of bandwidth you want to use
while downloading files via LogMeIn File Transfer. This helps you
avoid network congestion and poor performance (web pages loading
slowly or failing to load).

You can set the maximum amount of bandwidth you want to use
File Transfer Upload Bandwidth
Limit
while uploading files via LogMeIn File Transfer. This helps you avoid
network congestion and poor performance (web pages loading slowly
or failing to load).
Proxy Settings
Preferences > Network Settings
Use this section to specify the proxy server LogMeIn will use when it accesses the Internet. You may also
retrieve your personal proxy settings (if you have them set).
Proxy server address & port If you do not want to use a proxy server, leave this field empty.
Get proxy settings Click to retrieve your proxy settings.
Proxy user name Complete this field if the proxy server requires authentication.
Proxy password Complete this field if the proxy server requires authentication.
©2003-2008 LogMeIn Inc. All rights reserved www.LogMeIn.com 15

Log Settings
On the toolkit, select
Preferences > Log Settings
to access log related settings.
General Settings
Preferences > Log Settings
Keep log files for this many days Set the number of days you want to keep log files
Directory for log files Define the folder where the files are to be saved.
ODBC Messages
Preferences > Log Settings
Click the checkbox here to send log events to an ODBC data source.
Syslog Settings
Preferences > Log Settings
Syslog is a standard for forwarding log messages in an IP network and is most commonly used for computer
system management and security auditing.
Use this section to send log events to a Syslog server. You can also set a Syslog hostname or IP address,
Transport protocol (UDP or TCP), UDP port number, TCP port number or Facility code to report.
Remote Control Session Recording
Preferences > Log Settings
Enable Session Recording Select this field to create a RCREC file during remote control sessions.
Automatically convert to .AVI
format
Location for Output Video Files Specify the folder where video files will be saved.
Maximum Total Size of Output
Video Files
©2003-2008 LogMeIn Inc. All rights reserved www.LogMeIn.com 16
If this field is selected, each new remote control session will
automatically be converted to .AVI format. AVI files can be played in
any media player with the appropriate codecs installed
If this field is not selected, you can convert recordings manually by
right-clicking on the LogMeIn system tray icon and selecting
Convert Remote Control Recordings
conversion wizard.
Enter a value (expressed in megabytes) if you want to limit the size of
your remote session recordings.
Set the value to zero to never delete any recorded sessions.
. Follow the instructions in the
Tools >

Reboot Options
On the toolkit, select
Host Device.
Restart LogMeIn
Normal Reboot
Emergency Reboot
Hard Reboot
Safe-mode Reboot
Preferences > Reboot Options
Restarts the LogMeIn Pro service. It does not reboot the remote
machine. This is useful if you change settings like the listening port
and have no physical access to the machine in order to restart the
service.
Closes all processes and reboots the Host machine in the traditional
way.
Does not allow applications and other processes to terminate
gracefully, so you might lose unsaved data. Windows will, however,
shut down properly and flush all outstanding file operations to disk.
This can be useful if there are hung processes that prevent NT from
shutting down normally.
Reboots as quickly as possible. This option will not allow Windows to
terminate normally, so you might lose unsaved data. Since rebooting
is immediate (just like pressing the reset button) you will not receive
any LogMeIn feedback if you select this option.
Restart the computer in safe-mode with networking enabled. Safe-
mode is a special way for Windows to load when there is a system-
critical problem that interferes with the normal operation of Windows.
LogMeIn must be enabled.
to view the following six options for rebooting the
Scheduled Reboot
This allows you to schedule a date and time to automatically reboot
the computer. This is useful if the reboot is not urgent and can take
place during off-peak hours.
©2003-2008 LogMeIn Inc. All rights reserved www.LogMeIn.com 17

Advanced Options
On the toolkit, select
Network, and Customized Login Message settings.
Preferences > Advanced Options
Remote Control
Preferences > Advanced Options
Disable HTML-based remote
control
Disconnect an existing remote
control session from the same user
Block the closing of the Remote
Control notification window
Force Bitmap printing
Select this option if you do not want to use the HTML-based version
of LogMeIn Remote Control when the LogMeIn ActiveX, Mozilla, or
Java plugin is unavailable.
If you lose your connection during a Remote Control session and
then want to be able to re-connect again before the old session
times out.
Select this field if you want the Remote Control notification window
to always be displayed.
Select
Force Bitmap printing
Remote Printing does not print properly (wrong layout,
meaningless characters and content).
When this option is selected, all material printed using Remote
Printing will be 'printed' locally to a bitmap which is then sent to
the remote printer. Bitmap printing is slow, but it is useful since it
always produces proper printing results.
to set your advanced Remote Control, Log Settings,
if material printed using LogMeIn
Log Settings
Preferences > Advanced Options
Enable debug-level logging
Click here to enable debug-level logging, which allows you to view
all events as part of your troubleshooting effort.
Network
Preferences > Advanced Options
Disable HTTP content compression
©2003-2008 LogMeIn Inc. All rights reserved www.LogMeIn.com 18
Select this option if your browser does not support HTTP
compression.

Customized Login Message
Preferences > Advanced Options
Pro-only
: This feature is not available to users of LogMeIn Free.
Display a customized logo on the
login screen
Customized Login Message
General Settings
Preferences > Advanced Options
Select Language
With this box selected, any image saved as “customlogo.jpg” in the
LogMeIn installation directory will be displayed on the LogMeIn
login screen.
The customized login message entered here will be displayed on
the LogMeIn IT login screen.
Choose the language used by LogMeIn. This setting has no impact
on operating system settings.
LogMeIn messages on the Remote Computer will be displayed in
this language.
©2003-2008 LogMeIn Inc. All rights reserved www.LogMeIn.com 19
 Loading...