

Page 1

Logitech
LXH-LKY-RK51
®
Installation
Premium Desktop Optical
Page 2

623251-0914.A
FCC Compliance and Advisory Statement.
the following two conditions: 1) this device may not cause harmful interference, and 2) this device must accept any interference received,
including interference that may cause undesired operation. This equipment has been tested and found to comply with the limits for a Class B
digital device, pursuant to Part 15 of the FCC Rules. These limits are designed to provide reasonable protection against harmful interference
in a residential installation. This equipment generates, uses, and can radiate radio frequency energy and, if not installed or used in accordance
with the instructions, may cause harmful interference to radio communications. However, there is no guarantee that interference will not occur
in a particular installation. If this equipment does cause harmful interference to radio or television reception, which can be determined by turning
the equipment off and on, the user is encouraged to try to correct the interference by one or more of the following measures: 1) reorient or
relocate the receiving antenna; 2) increase the separation between the equipment and the receiver; 3) connect the equipment to an outlet on
a circuit different from that to which the receiver is connected; 4) consult the dealer or an experienced radio/TV technician for help. Any changes
or modifications not expressly approved by the party responsible for compliance could void the user's authority to operate the equipment.
Where shielded interface cables have been provided with the product or specified additional components or accessories elsewhere defined
to be used with the installation of the product, they must be used in order to ensure compliance with FCC regulations.
Canadian DOC Statement.
in the interference-causing equipment standard entitled “Digital Apparatus,” ICES-003 of the Department of Communications.
This device complies with RSS-210 of Industry and Science Canada. Operation is subject to the following two conditions: 1) this device may not
cause interference, and 2) this device must accept any interference, including interference that may cause undesired operation of the device.
This digital device does not exceed the Class B limits for radio noise emissions from digital apparatus specified
This hardware device complies with Part 15 of the FCC Rules. Operation is subject to
ii
Page 3
Important Ergonomic Information
233
1
Long periods of repetitive motions using an improperly set-up workspace, incorrect body position,
and poor work habits may be associated with physical discomfort and injury to nerves, tendons,
and muscles. If you feel pain, numbness, weakness, swelling burning, cramping, or stiffness
in these areas, see a qualified health professional. For more information, please read the Comfort
Guidelines found in the help system located on the Logitech® software CD and on the Logitech web site
at
http://www.logitech.com/comfort
Connect the Palm Rest to the Keyboard
2
Line up the tabs on the palm rest with the slots on the keyboard,
which are located in front and underneath. Then snap both units
together.
.
English
1
Page 4

Connect the Keyboard
4
4
1.
Turn off your computer, and then remove the existing
keyboard and mouse.
2.
Plug the green PS/2 connector into the PS/2 mouse
port on the computer.
into the PS/2 keyboard port on your computer.
3.
Restart your computer.
Set Up and Activate the Mouse
5
1.
Open the battery compartment on the bottom of the mouse.
2.
Insert the batteries inside the battery compartment.
Refer to the battery diagram inside the compartment.
Replace the battery compartment door when finished.
3.
Make sure the keyboard’s PS/2 cable is plugged into the
computer’s PS/2 keyboard port.
4.
Establish communications: a) Press the red “Connect” button
on the bottom of the keyboard; b) Then press the red “Connect”
button on the bottom of the mouse.
5.
The mouse is active now. For more information about mouse
buttons, refer to the online help system located on your hard disk.
Plug the purple PS/2 connector
2
English
Page 5

Install the Software
7
8
9
6
1.
Insert the software CD into your CD-ROM drive, and then follow the on-screen instructions
to install the software.
2.
If the setup screen does not appear when you insert the CD, you will need to launch the setup
program manually. Click the “Start” button and choose “Run.” Type [drive]: setup and press Enter.
Note: replace [drive] with the letter of your CD-ROM where you inserted the software CD
(e.g., d: setup).
Using the Logitech Productivity Keys
7
The Hot-keys, located at the top of the keyboard, give you instant one-touch access to frequently
used programs and commands: Search, Files, E-mail, WWW, Mute, Volume -, and Volume +.
For more information about these keys, refer to the online help system located on your hard drive.
Keyboard Lights
8
The four lights (LEDs) located on the top right of the keyboard tell you whether the following functions
are on or off: Num Lock, Caps Lock, and Scroll Lock. If a light is on, the corresponding function is on.
If the light is off, the function is off. Note that the right LED is the cordless indicator.
Customizing the Hot-keys
9
The software on the CD (provided with the keyboard) allows you to customize the Logitech® Hot-keys
to meet your specific requirements. Insert the software CD into the CD-ROM drive, and then follow
the on-screen instructions to customize the Hot-keys. Installation of the included software is required
for all the features to operate properly.
English
3
Page 6

10
My keyboard does not work!
The Hot-keys or Feature keys do not work!
Troubleshooting
• Check the keyboard cable connection. Make sure that the keyboard cable has been plugged
into the computer’s keyboard PS/2 port and
• Check the help system on your hard drive for more information.
• Make sure to install the software located on the CD, and make sure the software is running.
• Be sure to un-install any previously installed keyboard customization software.
• Check the help system located on your hard drive.
• Make sure your Internet connection is working properly.
NOT
the mouse PS/2 port.
Refer to the Online Help System!
To help you get the most from the keyboard, a help system is located on the Logitech® software CD.
This help system gives you valuable information about your product, so we encourage you to take
the time to read it.
During the software installation, the help system was copied to your hard drive. After installation,
you can either view the contents of the help system on your computer screen or print it out.
You can find the help system shortcut from your computers “Start menu.”
This product comes with a limited two-year warranty. For more information, please read the Product
Warranty section found in the help system located on the Logitech software CD.
4
English
Page 7

Logitech
®
Addresses and Telephone Numbers
Country
EUROPEAN, MIDDLE EASTERN
& AFRICAN HEADQUARTERS
LOGITECH Europe S.A.
CORPORATE HEADQUARTERS
LOGITECH Inc.
ASIAN PACIFIC HEADQUARTERS
LOGITECH Far East Ltd.
AUSTRALIA
LOGITECH Australia Computer
Peripherals Pty Ltd.
CANADA
JAPAN
LOGICOOL Co. Ltd.
LATIN AMERICA AND CARIBBEAN
Address
Moulin-du-Choc
CH 1122 Romanel-sur-Morges
6505 Kaiser Drive
USA Fremont, CA 94555
#2 Creation Road IV
Science-Based – Industrial Park
ROC Hsinchu, Taiwan
Level 2, 633 Pittwater Road
AUS Dee Why NSW 2099, Australia
5025 Orbitor Dr., Bldg. 6, Suite 200
CDN Mississauga, ON L4W 4Y5
Ryoshin Ginza East Mirror Bldg.,
7F 3-15-10 Ginza
Chuo-ku, Tokyo, Japan 104-0061
+1 702 269 3457 +1 702 269 3457
Infoline
Product Information
+41 (0) 21 863 54 00 English
FAX +41 (0) 21 863 54 02
(800) 231-7717
(800) 231-7717
Hotline
Tec hni cal Help
+41 (0) 21 863 54 01 English
FAX +41 (0) 21 863 54 02
+1 702 269 3457
+886 (2) 27466601 x2206
+61 (02) 9804 6968
+61 (02) 9972 3561
+1 702 269 3457
+81 (3) 3543 2122
FAX +81 (3) 3543 2911
Page 8

www.logitech.com
© 2003 Logitech. All rights reserved. Logitech, the Logitech logo, and other Logitech marks are owned
by Logitech and may be registered. All other trademarks are the property of their respective owners.
Logitech assumes no responsibility for any errors that may appear in this manual. Information contained
herein is subject to change without notice.
623251-0914.A
Page 9

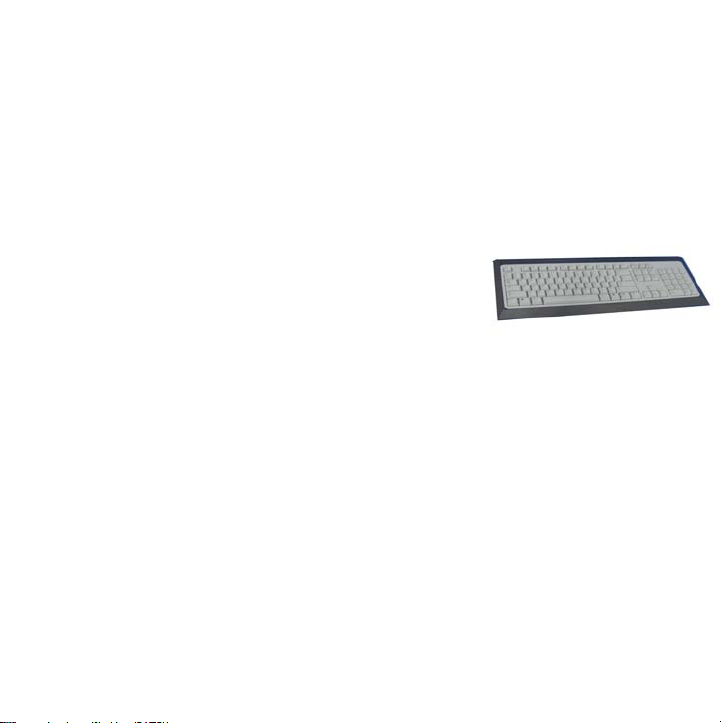
LXH-LKY-RK51 : Product Description
Purpose: This keyboard is a wireless keyboard, identical to current
keyboard, with the added convenience of being free of cable.
The system uses the 27 MHz ISM band. The transmitter
implement a low power mode for batteries saving.
System: This wireless keyboard works with the
C-BG17-DUAL or all compatible receiver.
Radio transmission: Mono directional, from keyboard to computer only.
Number of channels: 1
Carrier frequencies: 27.145 MHz
Modulation: FSK
Data Rate: 2400 bit/s.
Transmission range: 2m typical, free space.
Power Consumption: 25 mW typical when key pressed.
Effective radiated power: 400nW typical.
Antenna: Inductive loop of 60 cm2, integrated in the keyboard case.
LOGITECH CONFIDENTIAL
 Loading...