

Page 1
Page 2

Harmony 890 Advanced Universal Remote Reviewer’s Guide – Page 2
Logitech 890 Reviewer’s Guide
Table of Contents
1. A Note to Reviewers .....................................................................................................3
2. Product Overview..........................................................................................................4
3. Industry Overview .........................................................................................................5
3.1 The Problem: The Growing Complexity of Home Entertainment.............................5
3.2 The Opportunity .......................................................................................................5
3.3 The Logitech Family of Harmony Advanced Universal Remote Controls................6
3.4 Harmony Family Overview ......................................................................................8
4. Key Features in Detail: The Harmony 890 Remote ......................................................9
4.1 The Harmony 890 Remote: Features and Benefits...............................................11
4.2 Logitech Harmony 890 Remote Layout.................................................................12
4.3 Harmony 890 Remote Product Specifications and System Requirements ...........13
4.4 Reader Info Box.....................................................................................................14
5. Setting Up the Harmony 890 Remote.........................................................................15
6. Using the Harmony 890 Remote.................................................................................18
6.1 The One-Button Activity.........................................................................................18
6.2 Controlling Devices Behind Cabinet Doors or in Separate Rooms .......................18
6.3 Switching Between Activities.................................................................................18
6.4 Controlling Individual Devices ...............................................................................19
7. Optimizing and Customizing the Remote....................................................................19
7.1 Customizing the Color Display ..............................................................................19
7.2 Creating a Custom Button.....................................................................................20
7.3 Teaching the Harmony 890 Remote an Infrared Command..................................21
7.4 Adjusting the Speed Settings ................................................................................22
7.5 Custom Activities...................................................................................................22
8. Frequently Asked Questions.......................................................................................23
9. About Logitech Inc......................................................................................................25
Page 3

Harmony 890 Advanced Universal Remote Reviewer’s Guide – Page 3
1. A Note to Reviewers
This guide provides information to help you craft your independent review of the
Logitech Harmony 890 Advanced Universal Remote. The communications team at
Logitech hopes you’ll find our efforts helpful; we would appreciate your feedback.
Contact References:
Refer your readers to:
www.logitech.com/harmony
Customer Support:
1-866-291-1505
Harmony_Customer_Support@Logitech.com
Press Relations Contact (not for publication):
Nathan Papadopulos
Marketing Communications Manager
Logitech Harmony Remotes
Voice: 510.713.4207
Fax: 510.713.4780
Nathan_Papadopulos@logitech.com
Product Images:
Images are available online by visiting http://www.logitech.com/pressroom
Page 4
Harmony 890 Advanced Universal Remote Reviewer’s Guide – Page 4
2. Product Overview
The Harmony 890 Advanced Universal Remote is
Logitech’s first retail remote to use radio frequency
(RF) wireless technology, allowing people to control
home-entertainment components hidden behind
closed cabinets, or even those that are in other rooms
of a house. The Harmony 890 remote offers the same
ease of use and one-touch, activity-based control that
has helped Harmony quickly become the most
popular brand of advanced universal remotes in the
U.S. marketplace – but by using a combination of
infrared (IR) and RF wireless technologies, this
remote offers a new level of flexibility and control in
the home.
Typically, the device-specific remote controls that ship with consumer electronics
products work solely with infrared wireless signals – light waves that are easily blocked
by furniture or walls. Using an IR remote, people must point the remote directly at the IR
sensor on the components they want to control. If the component is behind a cabinet
door, or if furniture or any other obstacle blocks the beam, the remote can't communicate
with the device, and thus can’t control it.
The Harmony 890 remote communicates with Logitech’s RF Wireless Extender, included
in the retail package, by using RF signals. Unlike light waves, these radio waves can
travel through solid objects – such as cabinets, doors, furniture, and walls. Located
within range of the home-entertainment components that users want to control, the RF
Wireless Extender receives the RF signals and then, based on this information, blasts
out the necessary IR commands to control the components.
It may sound complicated – after all, the technology is sophisticated. But using the
Harmony 890 remote is easy. People don’t need to worry about aiming the Harmony 890
remote at their entertainment systems, or opening up the cabinet doors to expose their
components to receive infrared signals. And as with all Harmony remotes, pressing one
button on the Harmony 890 remote puts the entire entertainment system in the right
state to watch TV or movies, or listen to music – making it simple for any family member
to enjoy the modern home-entertainment experience without frustration or guesswork.
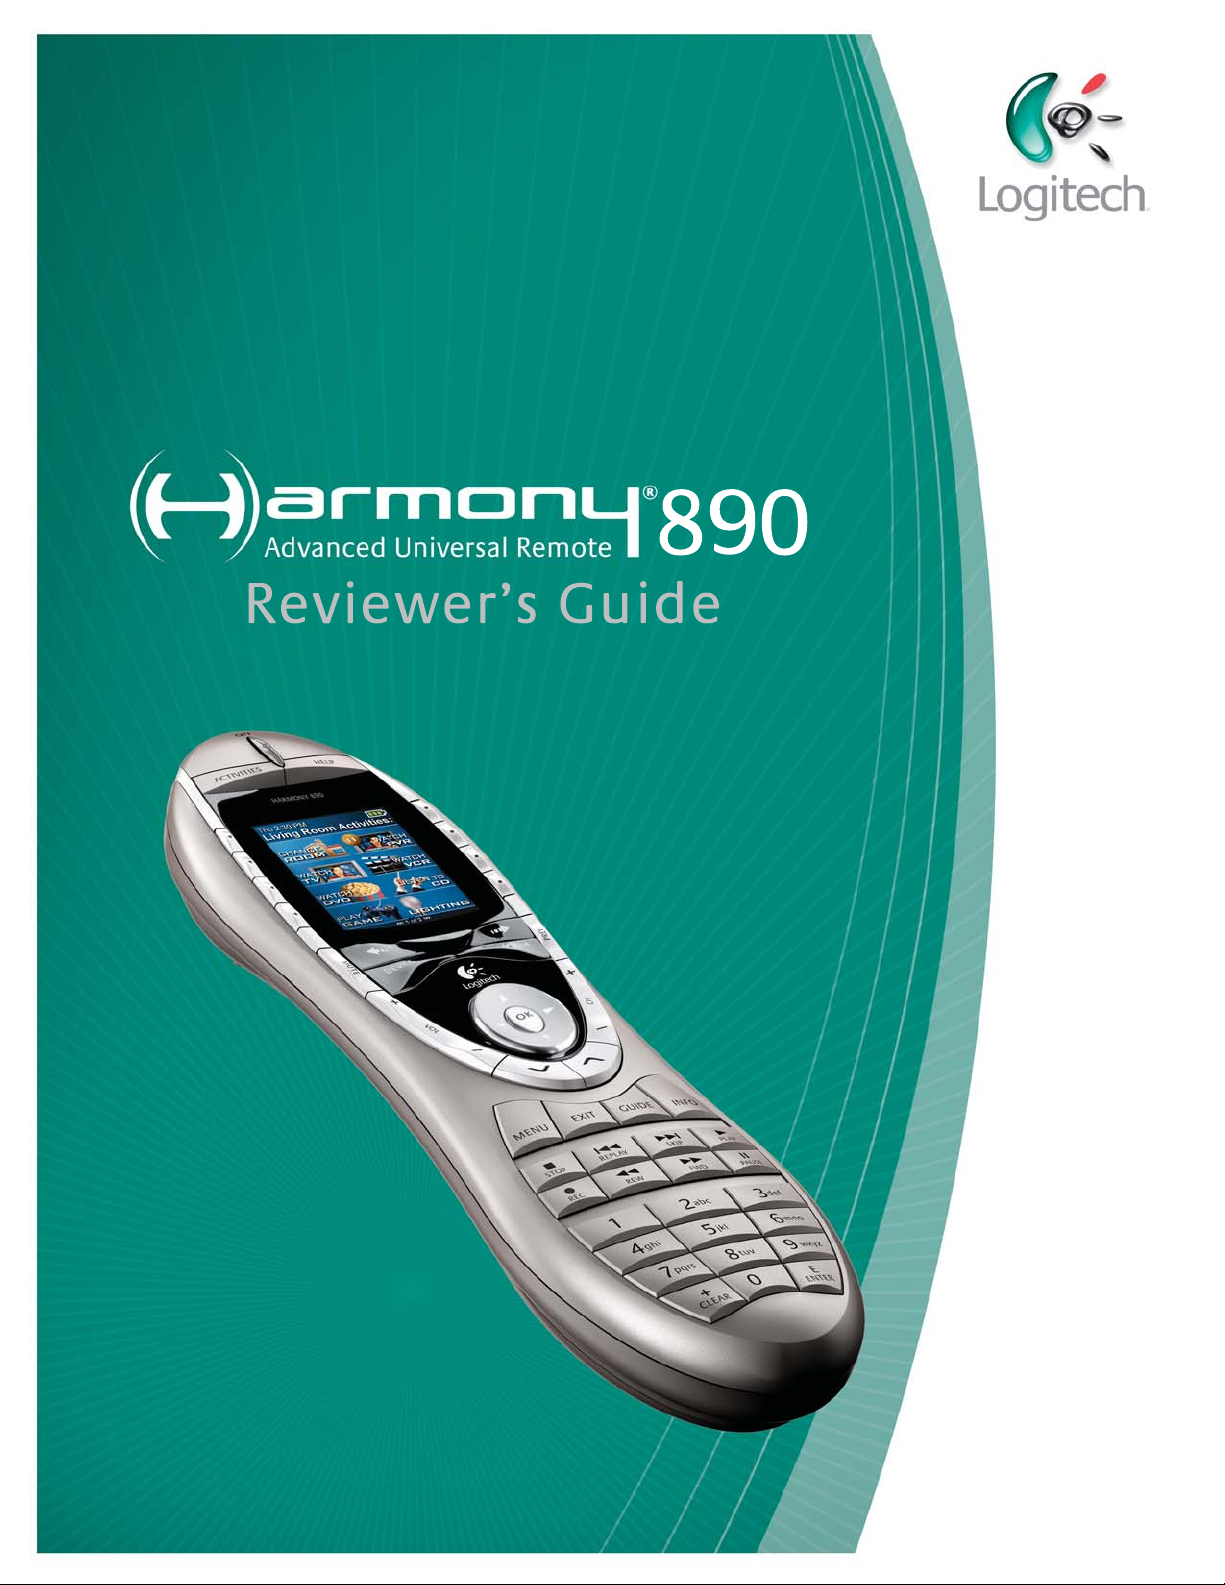
The Logitech Harmony
remote controls comprise
the No. 1 selling brand of
advanced programmable
remotes in the U.S.
Page 5

Harmony 890 Advanced Universal Remote Reviewer’s Guide – Page 5
3. Industry Overview
3.1 The Problem: The Growing Complexity of Home Entertainment
Until recently, most home-entertainment systems were confined to a single room of the
house – a living room or media room with only a few components. In nearly all cases,
these components were out in the open, so that conventional IR-based remote controls
could operate them.
But today’s home may feature entertainment consoles and systems concealed inside of
cabinets or other furniture. And today's consumers often enjoy music, video, games and
other home entertainment throughout home. Many high-end music systems include
speakers built into several rooms – a scenario in which walls prevent conventional IR
remote controls from controlling the equipment in another room.
This state of affairs has left many consumers frustrated – while they may spend
thousands of dollars for top-of-the-line home-entertainment technology, the experience
is tainted by their lack of complete and flexible control over their systems. They resort to
using several remote controls, often in several rooms, to operate their equipment.
Worse, the proliferation of multiple remotes throughout the house makes it all the more
difficult for family members to both learn and remember how to operate everything.
3.2 The Opportunity
Several companies have tried to solve the problem of home-entertainment complexity
with universal remotes. However, most third-party programmable remotes have been
inadequate for these reasons:
• They are difficult to set up. They require consumers to program complicated
infrared codes into the remote, so they must have deep technical knowledge or
hire an installer.
• They control components individually, even though most entertainment
activities involve more than one component. They require pressing an elaborate
sequence of buttons to simply watch television or a DVD, or listen to music.
• They do not work with all components. Many remotes only work on a limited
number of popular devices. On some remotes, information that the remote uses
to control components is stored internally, at the time it was manufactured, and
quickly becomes outdated, forcing people to teach these codes to the remote via
a confusing, laborious process.
• IR dependent remotes don't work through cabinets, where today's components
often reside, and they can't work through walls or floors to operate equipment in
other rooms of the house.
As a result, some consumers have turned to elaborate whole-house automation systems
that provide operation of all remote-controllable electronics throughout the home.
Unfortunately, these systems are typically custom installed and programmed by a
professional, extremely costly and still complex to operate.
Page 6

Harmony 890 Advanced Universal Remote Reviewer’s Guide – Page 6
3.3 The Logitech Family of Harmony Advanced Universal Remote Controls
The first Harmony advanced universal remote was brought to market in 2003, and
Logitech has since introduced a complete line of these remotes. Each solves many
problems with its easy setup and use, its one-touch activity-based control, and its
complete control of the most complex and unusual entertainment systems.
Simple One-Touch, Activity-Based Control
All Harmony remote controls feature buttons that, when pressed, send a sequence of
infrared commands to set up the entire entertainment system for an activity. For
example, to watch high-definition TV on a cable system with a digital video recorder
(DVR), the TV, high-definition receiver, cable receiver, and DVR box may all have to be
powered and set to the appropriate inputs – which could require pressing 10 or more
buttons on several remote controls. With the Harmony remote, one button – Watch
HDTV – launches all of the correct components with the correct input settings in the
correct sequence. After starting an activity, the remote knows how to control any of the
components used during that activity. If the volume for watching television is controlled
through a home-theater receiver rather than through the television, the Harmony remote
knows to send infrared commands to the receiver when the Up or Down volume buttons
are pressed.
By using activity-based control, Harmony remotes work the way people think. Nobody
sits down to switch on the TV, change the input, turn on the DVD player and A/V
receiver, switch the input and sound field setting and adjust the volume. They simply
want to sit down to watch a movie. With the Harmony remote, they need to press only
one button to do so.
Smart State Technology
Logitech’s patented Smart State Technology® powers every Harmony remote control.
This technology allows the remote to recognize all the current states and settings of the
entertainment components it has been programmed to control. For example, at any
given time, a Harmony remote knows whether the television’s power is on or off, and
which video input it is currently set to, based on the activities that were entered by the
user. This capability is the backbone for a Harmony remote’s ability to deliver complete,
simplified control of an entire entertainment system. For a complete description of how
Smart State Technology works, see Logitech’s Smart State Technology Innovation
Brief.
Easy Setup Wizard
The Logitech Harmony remote is configured through an intuitive online setup wizard.
People create a profile as they go through the setup, answering simple questions about
the equipment they own and how they prefer to use it. Once all the questions about the
system have been completed, data is downloaded from the online Logitech database to
the remote. When the update is complete, the Harmony remote is now a customized
controller that has been tailored precisely for the person and his or her equipment.
Because there are intricacies with everyone’s setup, Logitech maintains a toll-free tech
support line, available seven days a week, and a quick-response e-mail support system.
Page 7

Harmony 890 Advanced Universal Remote Reviewer’s Guide – Page 7
The Most Complete Online Database of Equipment Codes
One reason why the setup of Harmony remote controls is so easy is Logitech's
comprehensive online database, which contains information for more than 120,000
components (from more than 3,300 manufacturers) and the unique infrared signals that
control them. When people enter a component model number during setup, the
Harmony wizard matches it with infrared codes for that device, which are already stored
in the database. These codes are then downloaded into the remote as an update.
This industry-leading database is unique in that many thousands of Harmony remote
owners have contributed to providing the codes and device details. During a Harmony
remote owner’s setup, the database occasionally lacks information about a particular
electronics component or a unique feature. In these cases, the wizard walks the person
through a process that teaches the Harmony remote about the component as the person
presses a few buttons on the component’s original remote control. The Harmony remote
then captures these commands, and uploads them to the person’s online account,
where the commands are stored and can be accessed or updated at any time. This new
component information is then validated by the Harmony customer support team,
ensuring its accuracy, and is then published in the database for use by other Harmony
members. The next time a Harmony customer enters that component model number, the
new information will be available in the database. This approach ensures that the
database has the most current and accurate information, whether the components are
new or old, popular or obscure.
Page 8
Harmony 890 Advanced Universal Remote Reviewer’s Guide – Page 8
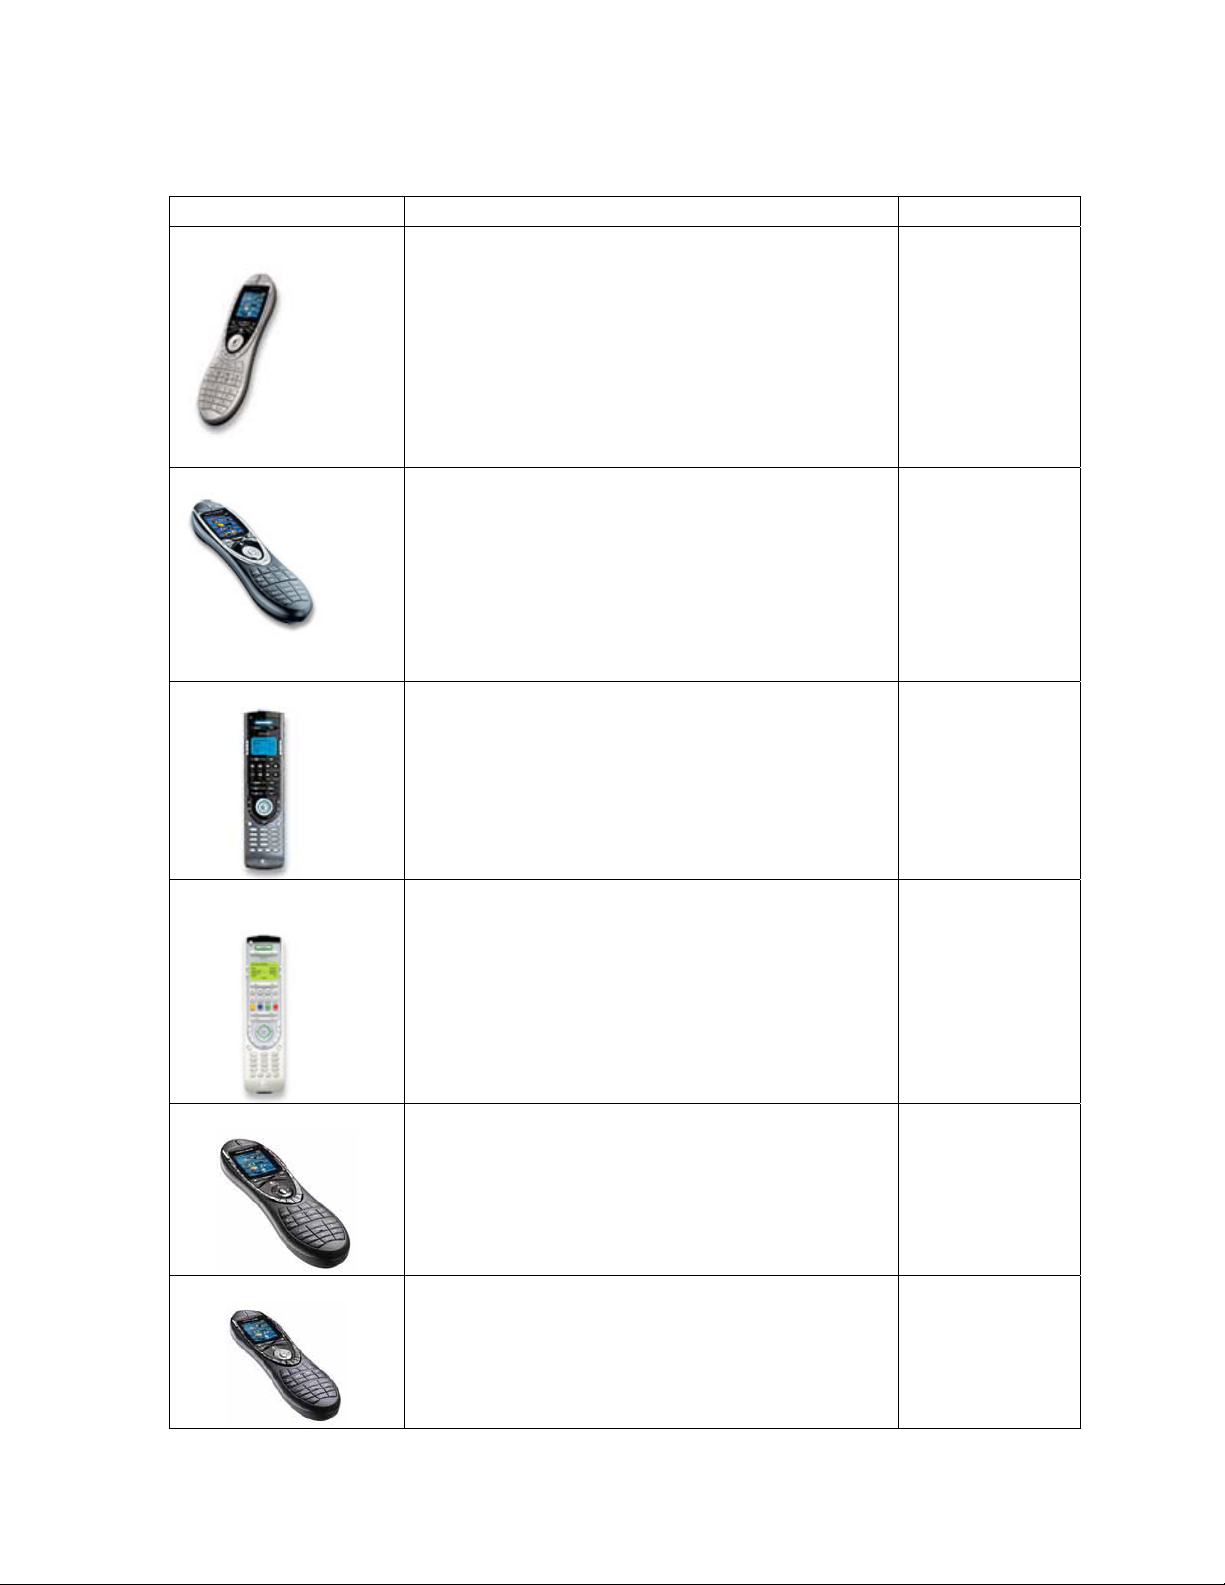
3.4 Harmony Family Overview
Model Features/Function MSRP (U.S.)
Harmony® 890
Delivering the complete set of advanced
Harmony features, the Harmony 890 remote
adds radio frequency (RF) control, providing
consumers the ability to control homeentertainment systems that are hidden behind
closed doors or in other rooms. Unlike remotes
that use only infrared technology, the Harmony
890 remote doesn’t require a direct line of site to
control entertainment systems.
$399.99
Harmony® 880
Harmony® 550
Harmony® Remote
for Xbox 360
The flagship of Logitech’s infrared remotes, the
Harmony 880 remote is rechargeable, features
a color LCD with eight programmable buttons,
and has a sleek design that complements
today’s living rooms. Optimized for complicated
HDTV and DVR systems, the Harmony 880
remote helps to tame sophisticated homeentertainment systems.
The Harmony 550 remote delivers one-touch
activity control, easy setup, simple for anyone to
use – in a budget-friendly design.
The Harmony Advanced Universal Remote for
Xbox 360 makes gaming easy, with Play Xbox
360 one-touch activity control and dedicated X,
Y, A and B buttons that can be used to navigate
the Xbox 360 interface.
$249.99
$149.99
$129.99
Harmony® 890 Pro
Harmony® 880 Pro
This modular product allows installers to create
custom multi-room solutions using wireless
extenders. Multiple remote controls and
enhanced support of lighting and homeautomation devices using Z-Wave wireless
technology.
Includes additional hard buttons to the Harmony
880 remote design that provides enhanced
control of advanced A/V features such as
aspect ratio and audio settings.
$449.99
$349.99
Page 9

Harmony 890 Advanced Universal Remote Reviewer’s Guide – Page 9
A
4. Key Features in Detail: The Harmony 890 Remote
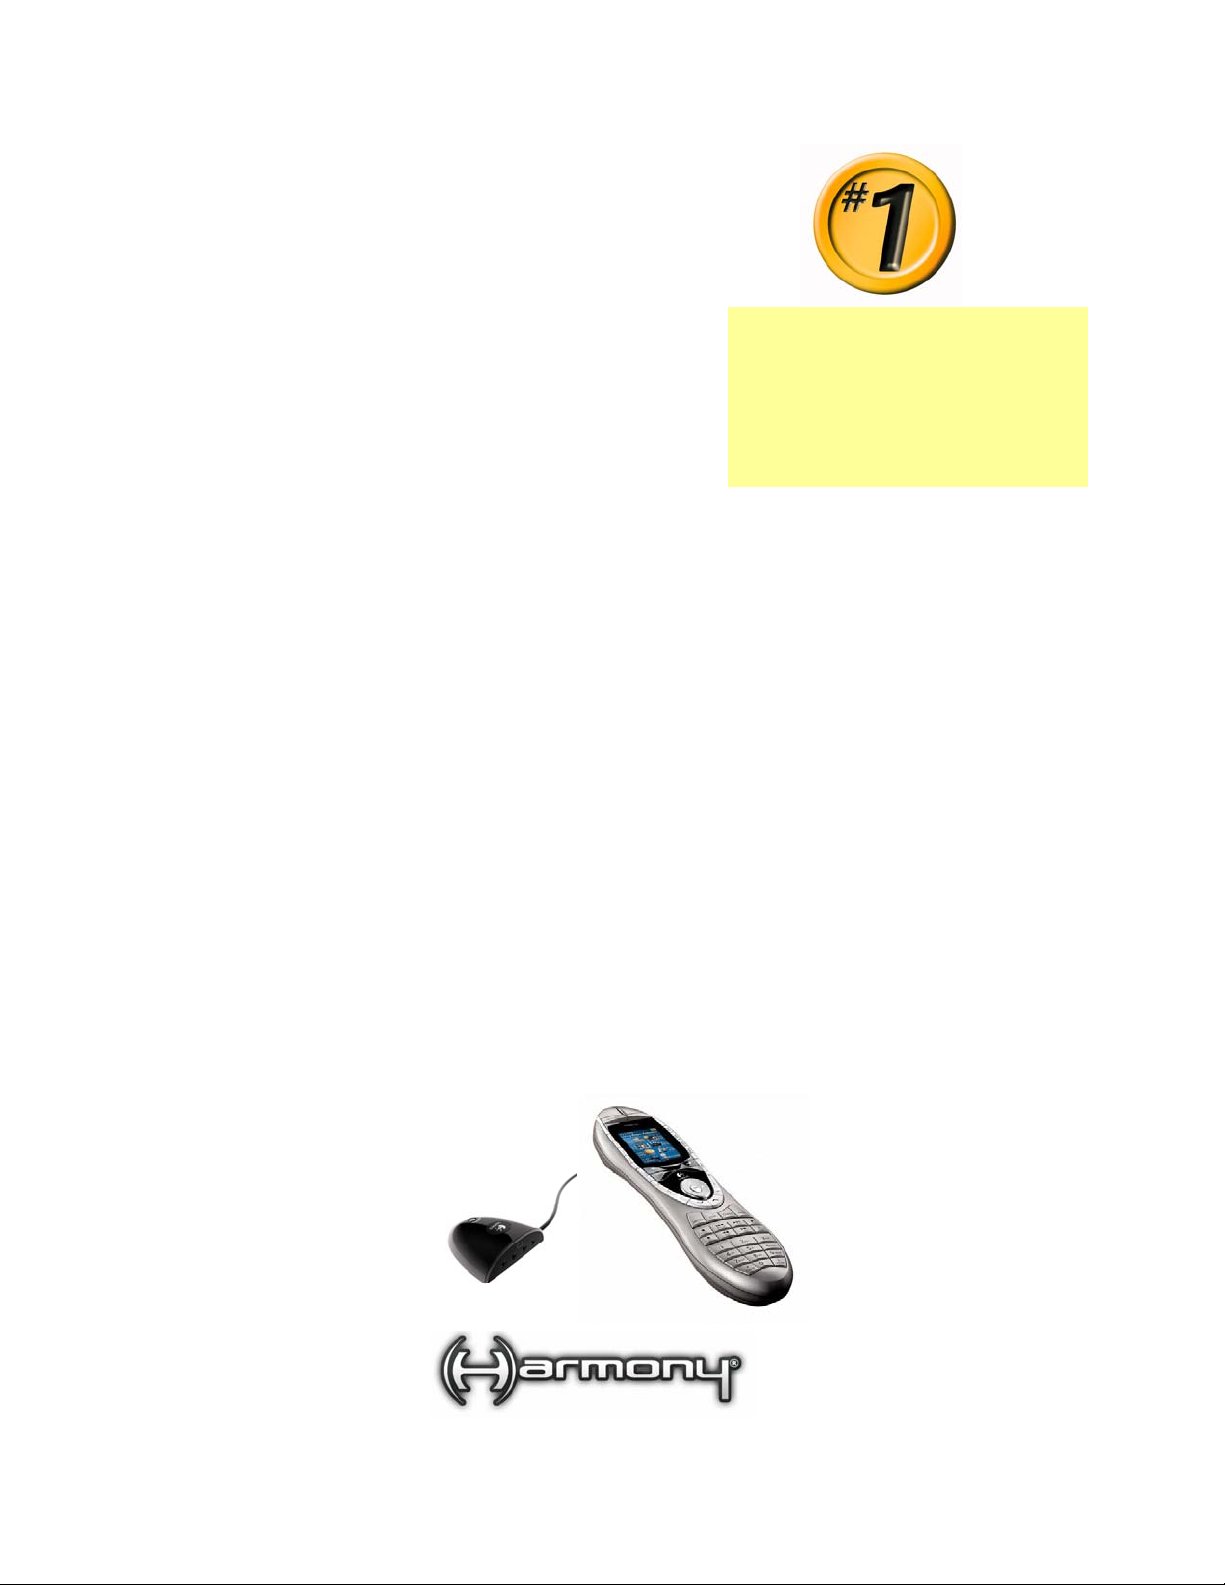
RF Wireless Operation with Z-Wave
The Harmony 890 remote transmits RF signals using the Z-Wave wireless standard.
Developed by Zensys, the Z-Wave standard allows electronic devices to communicate
with each other using low-power radio waves. The same technology is featured in some
advanced home-automation systems such as lighting, climate control, and security.
By using this RF technology, the Harmony 890 remote can transmit signals through
closed cabinets and cases that contain home-entertainment components. It also can be
used to control components in other rooms of the house, even through walls and floors.
In addition to the one RF Wireless Extender that comes in the retail package, Logitech
offers additional wireless extenders for those who want to use the Harmony 890 remote
to control components in multiple rooms.
The Harmony 890 remote can send RF signals as far as 100 feet,
more than enough range to cover most households. By being able t
control components in other rooms of the house, the Harmony 890
remote effectively becomes a multi-room home-entertainment
controller.
o
Customizable Color Display Screen
A vibrant, color display on the Harmony 890 provides information
that can be instrumental to the user as he/she controls the
entertainment center. The screen can be personalized in the
following ways:
• Up to eight custom activities or controls can be defined for each
screen; these functions are linked to the eight buttons
surrounding the display
• A background image can be uploaded from the PC
• Images for favorite channels can be uploaded from the PC
• Images can uploaded from the PC and run as slideshows
Rechargeable Design Means No More Changing Batteries
Unlike conventional remote controls that quickly run through AA and
AAA batteries, the Harmony 890 remote features a rechargeable
lithium-ion battery and a sleek docking station that keep the remote
fully charged for up to a full week of normal use. The horizontal
docking station allows the remote to be used while it is charging, and
also provides family members with a convenient and easy-toremember place to put the remote, so they'll always know where it is.
Backlighting Keeps the Show Going, Even in the Dark
The Harmony 890 remote has a built-in motion sensor and a lighting
sensor. The color display adjusts brightness based on a built-in
lighting sensor – staying bright during daylight and dimming when it
is darker. When the remote is motionless, the screen dims, and when
picked up, the screen automatically brightens. Users never have to
fumble in the dark to access a function while watching a movie.
The Harmony 890 remote’s
LCD displays the following
status information:
. Date and time
B. Indicator if the USB is
attached
C. Indicator when commands
are being sent to devices
D. Battery indicator (battery’s
power)
E. Current screen/activity label
F. The number of screens
available in a menu, and the
screen currently displayed
Page 10

Harmony 890 Advanced Universal Remote Reviewer’s Guide – Page 10
Simplified HDTV Control
Today’s sophisticated digital video formats, including SDTV, EDTV and HDTV, arrive at
the consumer's home in a variety of resolutions and screen shapes. Establishing the
correct settings to view these programs is often difficult, resulting in misshapen, distorted
images that don't deliver the full potential of these premium video sources. Optimized for
playback of these sophisticated programs, the Harmony 890 remote makes it simple to
establish the correct picture and sound settings as part of a one-touch activity button.
The remote also allows users to add optional settings for each activity. For example, it’s
easy to customize buttons for toggling between different picture and sound modes.
Stylish, Comfortable Design
Featuring a stunning industrial design, a color display and a low-profile recharging
station, the Harmony 890 remote matches even the most-sophisticated entertainment
room’s décor. Featuring a comfort-grip shape and a centered directional pad, the remote
fits easily in the hand and naturally guides people to the most frequently used controls.
The remote is fully backlighted so it’s easy to navigate in the dark. Even while watching
their entertainment with the lights out, people can find the buttons they want effortlessly,
by touch. Important buttons are easily identified by feel, thanks to their varied sizes,
shapes, and location.
Page 11

Harmony 890 Advanced Universal Remote Reviewer’s Guide – Page 11
4.1 The Harmony 890 Remote: Features and Benefits
FEATURES BENEFITS
RF Wireless
Operation
Controls components throughout the house, even through cabinets,
walls and floors. No line of site needed to operate equipment.
Remote provides 100 feet of range.
Color LCD Display
One-Touch Activity
Buttons
HDTV Optimization
DVR Control
Smart State
Technology
Recharging Station
Web-Based Wizard
for Easy Setup and
Customization
Vibrant color screen offers a customizable interface; images can be
uploaded for background, slideshow or favorite channels.
Send out sequence of commands to multiple components at one
time; with one touch, remote can send all commands needed to
Watch HDTV, Listen to CDs, Watch DVD, Listen to Radio, etc.
Automatically calls up correct aspect ratio and audio settings for
HDTV, with toggle capability for picture and sound options.
Complete functionality for DVRs. Logical button layout and extensive
customization capabilities unleash the full potential of any DVR.
This patented Logitech technology enables the remote to remember
the operating status of any component at any time. This allows onetouch switching between activities without having to turn on or adjust
components for different entertainment activities.
Rechargeable lithium-ion battery means no more running out of
batteries; attractive charging station provides a convenient location
where the whole family can find the remote.
People simply tell the wizard the brand and model of the
components they want to control. The wizard does all the
programming and downloads information to the remote via the
supplied USB cable.
Comprehensive
Internet Database of
Control Codes
Help Button
Learning Ability
Seven Days a Week
Tech Support
Online database contains codes and characteristics for more than
120,000 components from more than 3,300 manufacturers.
If any component doesn’t respond properly at any given time, the
simple Help button diagnoses the current state of the components
and walks the user through the simple steps to correct everything.
In addition to its huge database of command codes, the Harmony
890 remote can learn any infrared (IR) command from any device.
E-mail and toll-free phone support:
Monday through Friday 9 a.m. – 10 p.m. EST
Saturdays and Sundays, noon – 6 p.m. EST
Toll-Free Telephone: 1-866-291-1505
Harmony_Customer_Support@Logitech.com
Page 12

Harmony 890 Advanced Universal Remote Reviewer’s Guide – Page 12
4.2 Logitech Harmony 890 Remote Layout
1) USB CONNECTOR: Information downloaded from
Harmony database through this port.
2) OFF: Turns all devices off with one button press.
3) HELP: Asks simple questions so that the Harmony remote
can troubleshoot when a component is not in the correct state.
4) ACTIVITIES: Pressing the Activities button tells the LCD
screen to display the activities that have been programmed on
the remote.
5) COLOR DISPLAY: Shows activities, devices, features and
settings, as well as on-screen help and TV listings.
6) ON-SCREEN BUTTONS: The buttons on the left and right
side of the screen can select the corresponding commands
and activities listed on the screen.
7) DEVICE: Lists all devices in the entertainment system on
the remote's LCD screen, and allows you to select and fully
control any feature from any device.
8) MENU BUTTONS: For most cable or satellite TV services,
this opens the main menu from which to choose themes or
search for program information.
9) GUIDE: Provides television program listings on TV screen
for services with that feature.
10) MEDIA: In the Watch TV activity, press this button to view
a selection of favorite channels on the LCD screen.
11) LEFT/RIGHT Arrows: Navigates among Harmony LCD
screen pages when there are more than eight choices for a
given menu.
12) GLOW: Produces backlighted glow for instant illumination.
13) INFRARED LEARNING PORT: Includes infrared receiver so the remote can learn
commands from other remotes that are not in the Harmony database.
Page 13

Harmony 890 Advanced Universal Remote Reviewer’s Guide – Page 13
4.3 Harmony 890 Remote Product Specifications and System Requirements
Price
The Logitech Harmony 890 remote has a suggested retail price of $399.99 in the United
States and Canada, including the RF Wireless Extender. Additional wireless extenders
can be purchased separately for $149.95.
Product Specifications
• 2 MB flash memory
• USB communication
• Hardware: Color 64K LCD screen LCD 84 x 48 pixels, 53 buttons, Infrared sensor,
USB communication.
• Power: Rechargeable Lithium-ion batteries; included charging platform
• Dimensions: 8.1x 2.3 x 1.3 inches
• Weight: 5.8 oz
Warranty
Logitech offers the following warranty for new products purchased directly from Logitech,
or from a Logitech Harmony Authorized Dealer (with proof of purchase): A one-year
repair/exchange warranty for factory assembly defects only, not normal wear and tear
over time (including UV light), acts of nature (rain, animals as examples), buyer's
remorse, commercial or institutional use, or any user mishap or misuse.
System Requirements
The minimum recommended Windows® system configuration is:
• Microsoft Windows 98SE/Me/2000/XP operating system
• USB plug-and-play support
• 10 MB free hard drive space
• CD ROM drive
• Internet connection (dial-up, cable, DSL, LAN, etc.)
The minimum recommended Macintosh system configuration is:
• Mac with USB plug-and-play support
• Mac OS X 10.2 or later operating system
• 10 MB free hard drive space
• CD ROM drive
• Internet connection (dial-up, cable, DSL, LAN, etc.)
Page 14

Harmony 890 Advanced Universal Remote Reviewer’s Guide – Page 14
4.4 Reader Info Box
Many product reviews provide a product overview with pricing, options and vendor
contact information. If your review contains a reader information chart, you may find the
following table useful.
Reader Information
Logitech® Harmony® 890 Advanced Universal Remote
By using infrared (IR) and radio frequency (RF) wireless technology, the
Logitech Harmony 890 Advanced Universal Remote Control delivers one-touch
control of sophisticated home-entertainment systems, even for components
hidden behind closed cabinet doors or located in other rooms. The remote can
be customized to control any setup or suit any personal preferences. The
Harmony 890 remote does it all – upstairs or downstairs, even through walls,
floors and cabinets. With simple, one-touch activity controls, the Harmony 890
remote is easy for the entire family – and even the babysitter – to use. With an
intuitive, clean Web interface and USB connection, the Harmony remote is
extremely easy to set up. Its rechargeable design means no more changing
batteries.
Price: Harmony 890 remote (retail) - $399.99
In the box: The Harmony 890 Advanced Universal Remote Control; RF
Wireless Extender; recharging station; mini-USB cable; software CD; installation
guide; AC power adapter for charging station and RF Wireless Extender.
Compatibility: Windows XP, Me, 2000, 98SE; Mac OS 10.2 and above
Warranty: One-year limited hardware warranty
Vendor: Logitech Inc.
Web site:
www.logitech.com/harmony
Page 15

Harmony 890 Advanced Universal Remote Reviewer’s Guide – Page 15
5. Setting Up the Harmony 890 Remote
The Harmony 890 remote control setup is
a six-step process, estimated to take
approximately 45 minutes to 1½ hours,
depending on the complexity of the
system being controlled and the user's
familiarity with the system.
First, install the software and drivers from
the CD, and follow the onscreen
instructions. The software will then
connect you with the Harmony Web site.
You will first be prompted to set up a
user account. Your progress will be
shown on screen throughout the setup
process in the form of a grey and green
status bar.
Step 1: Creating a Harmony Account
At the end of software installation, you
will be taken automatically to the
Harmony Web site (if not, please visit
logitech.com/harmony and click on New
User Login). You will be asked to enter
your User ID and password, which you
will use to log in each time you want to
update your Harmony remote control
(fig. 1).
Step 2: Testing the Connection
At this point, the Web interface will ask
you to plug in the Harmony 890 remote
with the provided mini-USB cable. This
is simply to make certain the hardware
is functioning properly and is able to
upload and download information. When
you've arrived at Step 5 of the process –
updating the remote – you will plug the
USB cable into the rear of the RF
Wireless Extender
(fig. 2).
Fig. 1
Fig. 2
Step 3: Setting Up the Devices
During this step, the wizard helps
identify the various entertainment
components you want to control with the
Harmony 890 remote. First, you'll be
asked to select the kinds of components
you are using
(fig. 3), and then choose
brand names by using the pull-down
Fig. 3
Page 16

Harmony 890 Advanced Universal Remote Reviewer’s Guide – Page 16
menus
(fig. 4). After making your
selections, press Next.
The following screen asks for the
specific model numbers of the
components you have selected. The
model numbers provided are then
compared with the component
information already stored in the
Harmony database. At this point, the
Harmony database will move all of the
matching information into your online
Fig. 4
account, and make it ready to update
your remote.
In the unusual event that there is no
record of your particular component
model(s) in the database, the wizard
will launch the Device Tutor. The
Device Tutor will ask you to point the
original component remote toward the
back of the Harmony 890 remote,
where there is an infrared receiver in
the Learning Port. The Harmony
remote should remain connected to
your PC via the USB cord. You will be
instructed to press a few buttons on
your original device-specific remote.
This process allows the Harmony
remote control to learn the exact kinds
of codes needed to control the
component. These codes are then
uploaded into your account, where it is
Fig. 5
stored and then downloaded to the
Harmony remote at the end of the
process.
Step 4: Setting Up Activities
During this step, the setup wizard will ask questions about how your entertainment
devices are connected, and how they are used during each activity, such as Watch a
DVD, Listen to Music, or Watch TV.
As the setup wizard sets up each activity, it asks simple questions such as, “To watch a
DVD, what setting does your television need to be on?” Based on what the Harmony
database already knows about your television, it will provide a recommended choice of
inputs. If none of these first choices appear correct, simply click on the Adjust the
Inputs button within the Tip Center on the right side of your browser window to add
more options. When you've answered the questions and your activities are set up, you
are ready for the final step of the process: updating the RF Wireless Extender and then
the Harmony 890 remote.
Page 17

Harmony 890 Advanced Universal Remote Reviewer’s Guide – Page 17
Step 5: Updating the Harmony Remote and RF Wireless Extender
Once you have finished the first four
steps, your account has been prepared
with all of the information the remote needs to
control your entertainment system. At this point,
connect the RF Wireless Extender to the USB
cord, and click Update. Next, follow the
instructions to update the RF Wireless Extender
(fig. 5). Don’t plug in the AC power cord for the
RF Wireless Extender – you'll do that in just a
moment. Click Next to download your system
information into the RF Wireless Extender. The
progress bar of the Harmony wizard interface
will show you the status of the download as it
happens. When this process is complete you'll
be prompted to connect the USB cable to your
remote control
(fig. 6). Make the connection and
begin the update of the remote. After the
updates, all of the data to control the homeentertainment system is stored in flash memory
within the remote and the RF Wireless
Extender. This ensures that in the event
the remote’s battery is depleted, the
system configuration will not be lost.
Fig. 6
Step 6: Connecting the Remote to the RF Wireless Extender
After a successful update of the remote and the extender, a message on the remote's
display screen will prompt you to connect a Z-Wave module; in this case the module is
your RF Wireless Extender. Plug the RF Wireless Extender into a power outlet nearby
the components you want to control, and press the Connect button for at least one full
second. Your Harmony 890 remote will then recognize that the RF Wireless Extender is
part of the Z-Wave wireless network. Confirmation of this process is shown in the
remote's color display with a green check mark. Place the RF Wireless Extender near
the components you want to control, and you can then control the components from up
to 100 feet away.
After basic setup is complete, you may decide to customize the buttons or the color
display options of the Harmony remote. At any time, you can go back to your Harmony
member page and adjust the settings. The Web page can be reached by simply
connecting the remote over USB or clicking on the Harmony logo that should be located
in your system tray of a Windows OS PC or DOCK bar on a Mac OS X.
Page 18

Harmony 890 Advanced Universal Remote Reviewer’s Guide – Page 18
6. Using the Harmony 890 Remote
After the Harmony 890 remote has been programmed for the first time, turn the power
off all of the devices in your entertainment system. Now, you're ready to play – here are
some suggested activities and customizations that will help illustrate the power of the
Harmony 890 remote:
6.1 The One-Button Activity
For starters, try pressing one of the activity buttons on
the side of the color LCD screen. Pressing Watch DVD
sends a sequence of customized commands that
launch all of the devices and establish the correct state
of each those devices for this activity. On ordinary
remotes, you'd normally have to press multiple buttons
on different remotes to watch a DVD, such as:
• Turning on the DVD player
• Turning on the television
• Turning on the A/V receiver, if you use one
• Setting the television to the correct input to see the DVD player
• Setting the A/V receiver to the correct input to hear the DVD player
• Setting the correct picture aspect ratio for the TV so the picture isn't distorted
• Setting the correct sound field setting for the audio
As you can see, this simple activity would normally take at least seven steps, with as
many as three different remote controls. With the Harmony 890 remote, you simply
select one button and all of your equipment adjusts to operate in the selected activity as
you requested.
If at any time an activity doesn’t launch correctly, use the Help button above the LCD
screen, and it will ask a series of questions to help put your entertainment system into
the correct state.
6.2 Controlling Devices Behind Cabinet Doors or in Separate Rooms
If you have equipment behind closed doors, place the RF Wireless Extender in front of
the components to be controlled and ensure that the AC adapter is plugged in. Close the
cabinet doors, and simply select one of the on-screen activity buttons. The commands to
control the system will be sent over the Z-wave network to the RF Wireless Extender
and then converted into infrared signals that are transmitted to the individual
components. You should be able to control the components from another room, up to
100 feet away. If the RF Wireless Extender can’t be positioned to send IR signals to all
of the components, try using any of the eight IR blaster node cables that plug into the
base of the extender. These nodes can be positioned within a direct line of sight to the
IR receiver in each component. Each node has an adhesive backing so that it can be
applied directly to the IR receiver or to the back of cabinet doors.
6.3 Switching Between Activities
There's no need to power off all the devices that are in use to switch activities. For
example, if you're watching TV or listening to a CD, simply press any one of the activity
buttons to jump directly to that activity. The Harmony 890 remote will automatically
Page 19

Harmony 890 Advanced Universal Remote Reviewer’s Guide – Page 19
power on or off the necessary components and change input settings accordingly.
With the Harmony 890 remote, it takes just one button to launch – or change – an
activity. With conventional macro-based universal remote controls, the entertainment
system will need to be reset, with every component turned off, before it can launch a
new activity.
6.4 Controlling Individual Devices
The Harmony 890 remote can work in two different modes: through programmed
activities, as discussed above, or through individual device mode.
Here’s one example of where you may want to use the Device control. Let's say you
want to listen to music through your satellite TV or digital cable service, which runs
through both your audio system and your television. You may want the TV screen to be
on during this activity, to see what music you're listening to. But then again, maybe you
don't – you just want a nice relaxing time with music and don't need to have an obtrusive
TV picture.
Once you've called up the music you want, press the Device button, and the remote’s
screen will display the option to select any device in your system (if the device you are
looking for is not on the initial screen, press More). Once you select the TV, the remote
will be set up to control the television only – now you can simply turn it off or make any
other adjustments.
7. Optimizing and Customizing the Remote
One of the strengths of the Harmony remote is the adjustable level of programming.
Some people may choose to run only the basic setup and have all of their primary needs
fulfilled. But people may choose to run setup options and make adjustments that can
further customize how the Harmony remote is used to control the given system. For
example, some of the more advanced capabilities of the remote include:
7.1 Customizing the Color Display
The Harmony 890 remote’s color display can be customized in several different ways to
suit personal preferences.
Choosing a Background
To change the background image on the remote, log in to your Harmony account and go
to the home page. Click on My Remote Preferences, then choose Set a Background.
From there, you can browse your computer for the image you would like to set as your
background picture. Files in the .png, .bmp, .jpg, or .gif formats are accepted, up to 160
KB file size.
Choosing a Theme for Font/Icon Appearance
Choosing a different theme can change the appearance of the Harmony 890 remote’s
display menu. From the home page, click on My Remote Preferences, and then choose
Select a Theme. From there, you can choose from different font styles and whether or
not to include the icons in the display.
Page 20

Harmony 890 Advanced Universal Remote Reviewer’s Guide – Page 20
Creating a Slideshow
You can create a custom slideshow that runs on the LCD show while the remote is
charging. Launch this on the remote by pressing the System Options Activity, then
Start the Slide Show. To load images from the PC, click on My Remote Preferences
from the Harmony home page, and then choose Set Up a Slide Show. The next window
will allow you to browse and upload images from your PC.
Choosing Images for Favorite Channels
The Harmony 890 remote allows you to create a list of favorite channels, and then
choose icons to represent those favorites. From the Harmony home page, choose Set
Up Favorite Channels within the Watch TV, Watch PVR or Watch HDTV activities.
The next window allows you to designate your favorite channel numbers, and then add
icons for those channels. If you choose not to add an image for a channel, the channel
number will appear on your Favorite Channels screen. To access your favorites while
watching television, click the Media button just below the LCD screen on the Harmony
remote.
Fig. 7
7.2 Creating a Custom Button
It’s easy to add custom buttons on the Harmony 890 remote color display or change any
button’s function on the remote. Custom buttons can be created for a specific activity, or
for a specific device.
To try an example, log in to your Harmony account to enter the home page. Click on an
activity, such as Watch TV, and then select Change the Behavior of Buttons. In the
left column, you’ll see the names of the buttons
the functions of the buttons that are assigned to the cable box. And farther to the right,
(Fig. 7). A column to the right shows you
Page 21

Harmony 890 Advanced Universal Remote Reviewer’s Guide – Page 21
you may see another column (or more) of other components that are used during the
Watch TV activity, such as an A/V receiver. Simply change the function selection in any
of the drop-down windows to alter the task of the buttons associated to that function. If
you scroll down to the bottom of the page, you will see custom button labels that
correspond to the LCD button assignments
(Fig. 8) – there are eight of these soft buttons
visible at any given time. Change any one to the name and function of your choice.
7.3 Teaching the Harmony 890 Remote an Infrared Command
Occasionally, a function or feature button on a component's original remote control may
not appear as a default on the Harmony remote. In particular, new digital devices, such
as DVRs and audio servers often have functions that are unique to that product and its
remote control. If this situation is encountered, it is simple to teach the Harmony remote
the new commands.
As an example, try adding a button to enhance your control of the television. From your
Harmony home page, click More Options under the Television device. From there,
click Customize the Device, Sound, and Picture commands for this TV. At the top of
the next window, you will see a Learn Missing Commands button. Click it, and you will
see a grid of commands already represented in the database. If you scroll to the bottom
of the page, you will see a Learn a New Command window. There you can name the
function you are going to add. Click Learn New Command, then point your TV remote
at the base of the Harmony 890 remote and push the button you would like your
Harmony to learn. After completing the process, you can assign the command to any
button on the remote control, including those next to the color LCD.
Page 22

Harmony 890 Advanced Universal Remote Reviewer’s Guide – Page 22
7.4 Adjusting the Speed Settings
Different components respond to
infrared control signals at different
speeds. Some power on almost
immediately, while others take as long
as a few seconds to respond. The
Harmony remote compensates for
this, allowing people to adjust the
speed settings of the various
sequences the remote can send out.
In most cases, you only adjust the
speed settings on the Harmony 890
remote when there's a problem, such
as components not turning on or
switching inputs correctly when an activity button is pressed. To change speed settings,
click on More Options under any of your devices from the Harmony home page. Then
click on Adjust the Delays, which will bring you to a screen
(Fig. 9) where you can
change the following:
Power On Delay
How long the device takes to warm up and respond to any more signals that are invoked
after the component's power comes on.
Inter-key Delay
How many seconds the device needs to accept one signal and be ready for the next.
Input Delay
How long the device takes to respond to input signals. Sometimes TVs take a second or
two to switch between one input setting and another.
Inter-Device Delay
Some devices get confused when infrared signals sent to it are followed closely by
signals sent to other devices. Increasing this setting provides a buffer between those
signals.
Fig. 9
7.5 Custom Activities
Everyone likes to do things in their own special way. The Harmony remote’s ability to be
custom programmed gives people the opportunity to take control of anything that
accepts infrared commands. And with the addition of RF wireless capability, they can
control components in any room in the house, from anywhere in the house. Here is an
example of a custom activity that most people wouldn’t think about, but is possible using
the Harmony remote.
TV and Music At the Same Time
The playoffs are on, but you have company over and your spouse wants to turn on some
music. With the Harmony 890, it's no problem. You can set up a custom activity – call it
Background TV – in which you can have the television on (without audio) and music
playing at the same time.
Page 23

Harmony 890 Advanced Universal Remote Reviewer’s Guide – Page 23
From the home page, select Add an Activity, and then Add One Activity. From the
displayed list, choose the primary activity listed that is closest to what you want – for this
new activity, we’ll choose Watch TV.
At the next window, select Custom, which asks you a series of questions about which
devices you want to use for this activity. When you're done answering the questions,
return to your home page and rename the activity by clicking Customize, and then
Rename. You can also set up the buttons on the controller to give commands to the
various devices in this new activity. For example, you might want some optional controls
for the TV, such as picture-in-picture. You can define which buttons on the Harmony 890
refer to these and other functions, and you can also add additional custom soft buttons
on the remote’s screen. Once the new configuration is downloaded into the remote, you
can access the new activity like any other. Then it’s just one click of the custom
Background TV activity button to achieve video and music play back at the same time
and keep every member of the family happy.
8. Frequently Asked Questions
What types of devices can be controlled by the Harmony 890 remote?
The Harmony 890 remote can control most types of devices that come with an infrared
(IR) remote control. It is also capable of extending the capabilities of conventional
infrared control by being able to send IR codes via another wireless technology called
RF.
What's the difference between infrared and RF wireless technology?
Infrared signals are actually light pulses that are too low in frequency for human eyes to
see. Like any other beams of light, infrared signals are directional, and can be blocked
by obstacles. RF wireless technology works on the principle of radio waves. They are
not directional and not affected by obstacles, so people don't have to point RF remotes
at the components they want to control, and the signals can travel through walls, floors
and cabinets.
Does the Harmony 890 send RF or IR signals to control my gear?
It sends both. The infrared signals can control equipment in the same room, within the
remote’s line of sight, but the 890 can also send the IR codes via a wireless RF stream
to components hidden behind closed doors or in other rooms in the house. An RF
Wireless Extender receives the RF signals, and then translates them back into IR codes
that the equipment can understand. The RF technology being used at this time is based
on the Z-Wave standard.
On which frequency does Z-Wave operate on?
Z-Wave uses the 900 MHz frequency band. This band was chosen because it has a
range that's approximately 2.5 times greater than the 2.4 GHz frequencies used by
common household cordless phones. By working within the 900 MHz range, Z-Wave
networks not only offer longer-range operation, but aren't subject to interference from
cordless phones and Wi-Fi home networks.
What is the Logitech RF Wireless Extender?
The Logitech RF Wireless Extender is an example of what is sometimes referred to as a
“bridge receiver” – it takes an RF signal and converts it to IR commands. On its own,
each RF Wireless Extender will command up to eight devices through its own IR emitter
Page 24

Harmony 890 Advanced Universal Remote Reviewer’s Guide – Page 24
system. The RF Wireless Extender also comes with eight cabled IR blaster nodes that
plug into the base of the extender, and can be positioned more closely to components
with IR receivers that are not in a direct line of sight with the extender.
How do I use the IR nodes?
Simply plug the node into the RF Wireless Extender and aim the blaster's emitter toward
the IR receiving window of the gear you want to control. Each node has an adhesive
attached to it, so you should have no problems lining up the node with the component
you wish to control. The node provides a flexible extension of the IR signals.
How do I know that the information I receive from the Harmony database is
accurate?
There is a two-step verification process that takes place for information entered by
Harmony customers. First, Harmony engineers validate the commands before allowing
them to enter the public profile for a device. Second, Harmony customers may verify the
commands when they repeatedly enter the same information about new devices.
Can I set up my Harmony remote with operating systems besides Windows?
All Harmony remotes support both Windows (98 SE & Later) and Macintosh (OS X &
later) operating systems.
Page 25

Harmony 890 Advanced Universal Remote Reviewer’s Guide – Page 25
9. About Logitech Inc.
Logitech designs, manufactures and markets personal peripherals that enable people to
effectively work, play, and communicate in the digital world. The company's products
combine essential core technologies, continuing innovation, award-winning industrial
design and excellent price performance.
Logitech International is a Swiss public company traded on the SWX Swiss Exchange
under the symbol LOGN and on the Nasdaq National Market System under the symbol
LOGI. The company has manufacturing facilities in Asia and offices in major cities in
North America, Europe and Asia Pacific.
Logitech's origins lie in the OEM sector, which remains an important part of its business,
and represented 13 percent of the company's total sales in Fiscal 2005. To meet the
demands of its OEM customer base, which includes most of the world's largest PC
manufacturers, Logitech offers high-volume manufacturing with focused quality control,
worldwide distribution and logistics, and the ability to leverage its infrastructure under
changing demand conditions.
Logitech continues to broaden its product offering and its presence in the retail sector.
This is fueled by a trend among consumers to enhance their basic PC systems with
more fully featured personal peripherals that add functionality and cordless freedom to
their desktops. They are also purchasing supplementary devices designed for new
applications and specific purposes such as gaming, multimedia, or audio and visual
communication over the Internet. Further, Logitech’s retail business includes personal
peripherals for platforms beyond the PC, such as gaming consoles, portable music
players, mobile phones and home-entertainment systems.
Today, Logitech's retail business accounts for 87 percent of its revenue. To provide the
market with a broadening array of best-of-category products, Logitech's business model
calls for supplementing its internal engineering and manufacturing strength with
additional products and technologies through a combination of strategic acquisitions and
industry partnerships.
# # #
 Loading...