

Page 1
11
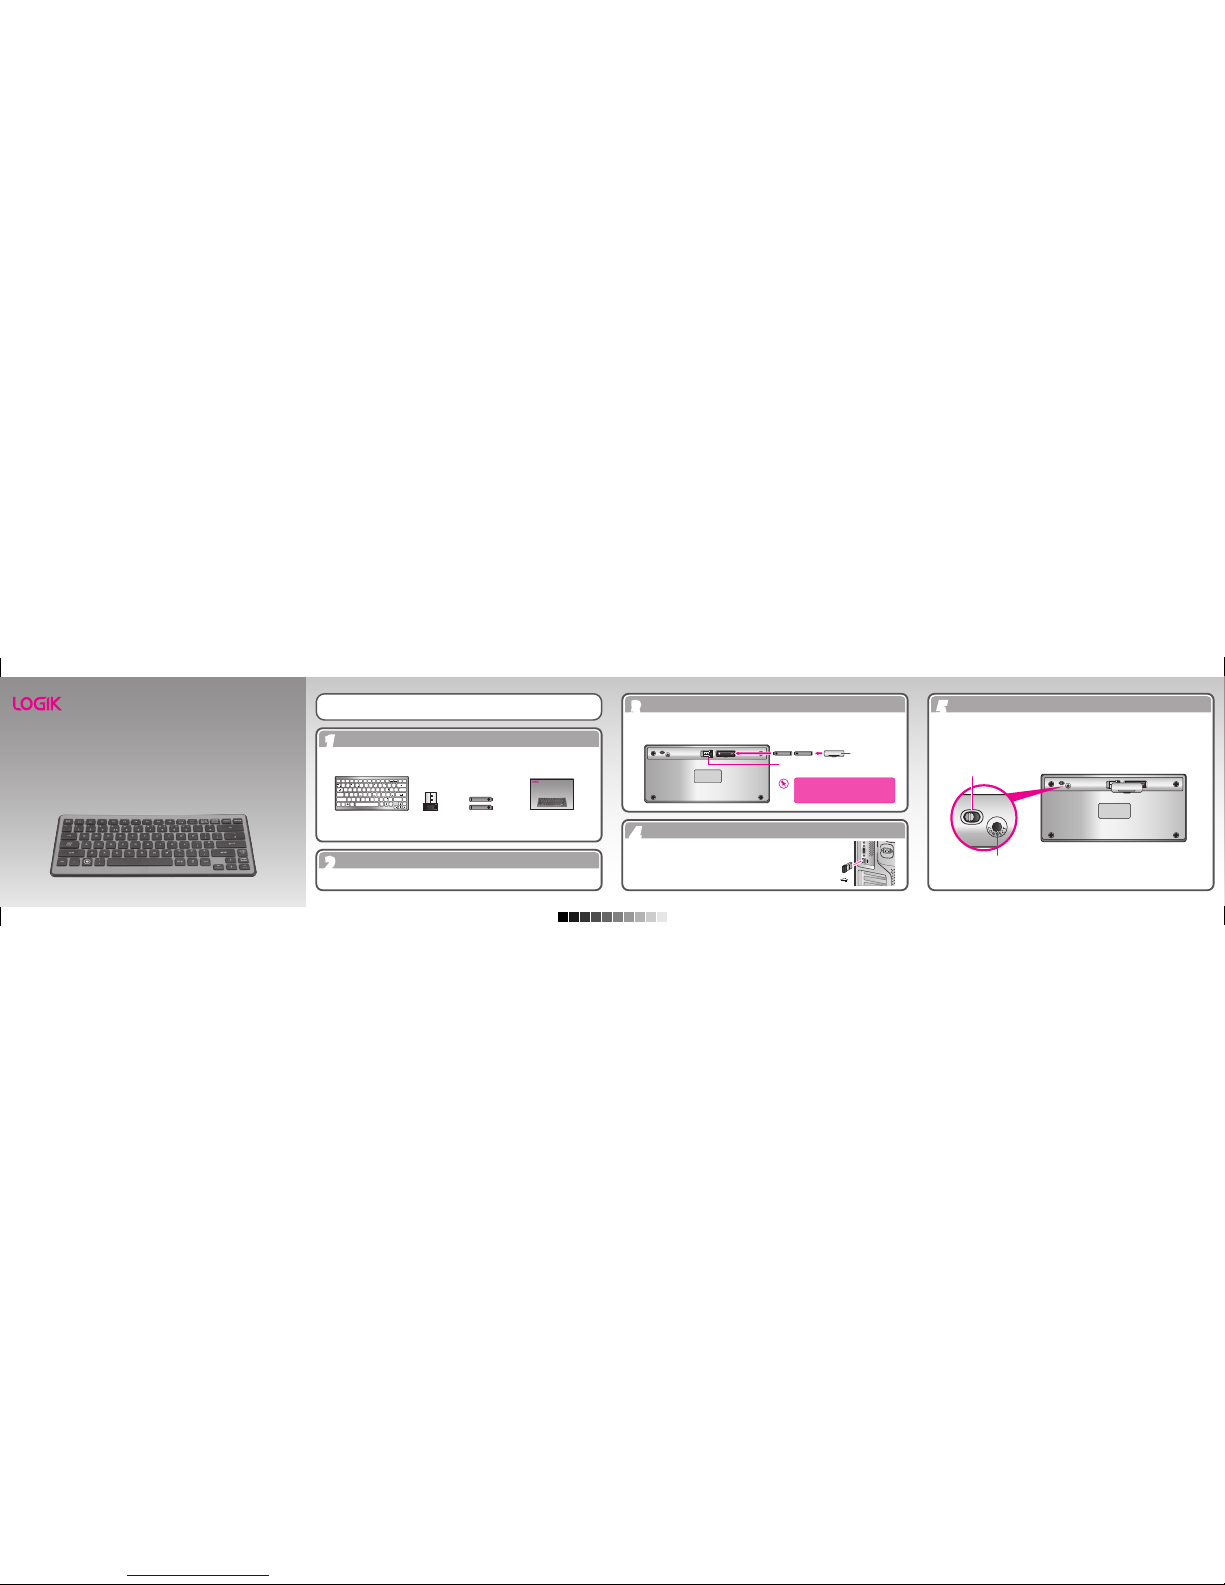
Unpacking
22
System Requirements
55
Activating the Keyboard
33
Install the Batteries
44
Connect the USB Nano Receiver
ON
OFF
ON
OFF
ON
OFF
Wireless Keyboard
Quick Start Guide
LK212R/ LK212B/
LK212V/ LK212O
LK212P
Thank you for purchasing your new Logik Wireless Keyboard.
Please familiarise yourself with this Quick Start Guide to enjoy all the exciting features oered.
Remove all packaging from the unit. Retain the packaging. If you dispose of it, please do so according to
the local regulations.
The following items are included:
Operating Systems: Microsoft® Windows® XP/ Vista™ & Windows®7
Hardware: 1 available USB port.
1. Slide the battery compartment to the right and lift to remove.
2. Insert two AAA batteries, making sure battery and keyboard polarities ( + / - ) match.
3. Snap the battery cover back into place.
Step l: Switch on your computer.
Step 2: Slide the power switch of the keyboard to the ON position.
Step 3: Insert the RF receiver into a free USB slot.
Step 4: The keyboard should connect automatically.
Quick Start Guide
P.N.: LK212R_B_V_O_P-001
AAA Size Batteries x 2
P.N.: AAABTY
Nano Receiver
P.N.: MRN
Keyboard
F9
F10
scroll
caps
lock
ctrl
Q W E R T Y U I O P
A
S D F G H
J K L
Z X C V B N M
0
insert
num
lock
delete
alt gr
F5 F6 F7 F8
esc
F11F1F12
F2
F3 F4
ctrl
#
home
end
page
up
page
down
?
/
<
,
>
.
fn
/
prt sc
sys rq
pause
break
shiftshift
|
\
}]{
[
0
1 2 3
4 5 6
;
@
+
=
_
-
1 2 3 4 5 6 7 8 9
C
! $ %^& 7 8 ( 9 )
: +
If items are missing or damaged, please contact Partmaster (UK only). Tel: 0844 800 3456 for assistance.
Battery Cover
Please ensure the batteries’ polarities
(+ / -) match the battery
compartment’s polarities.
If the keyboard does not respond, perform the following:
Step l: Remove the RF receiver.
Step 2: Turn over the keyboard without pressing any key. If the power switch is in the OFF position, slideit to
the ON position rst. Press the connect Button.
Step 3: Re-insert the RF receiver into the USB slot.
ON/OFF Switch
Connect Button
USB Receiver
USB
Wireless Keyboard
Quick Start Guide
LK212R/ LK212B/
LK212V/ LK212O
LK212P
Step 4: Then press any key. The keyboard should now be activated and ready for use.
LK212R_B_V_O_P IB_final120612.pdf 1 12/06/2012 10:15 AM
Page 2
66
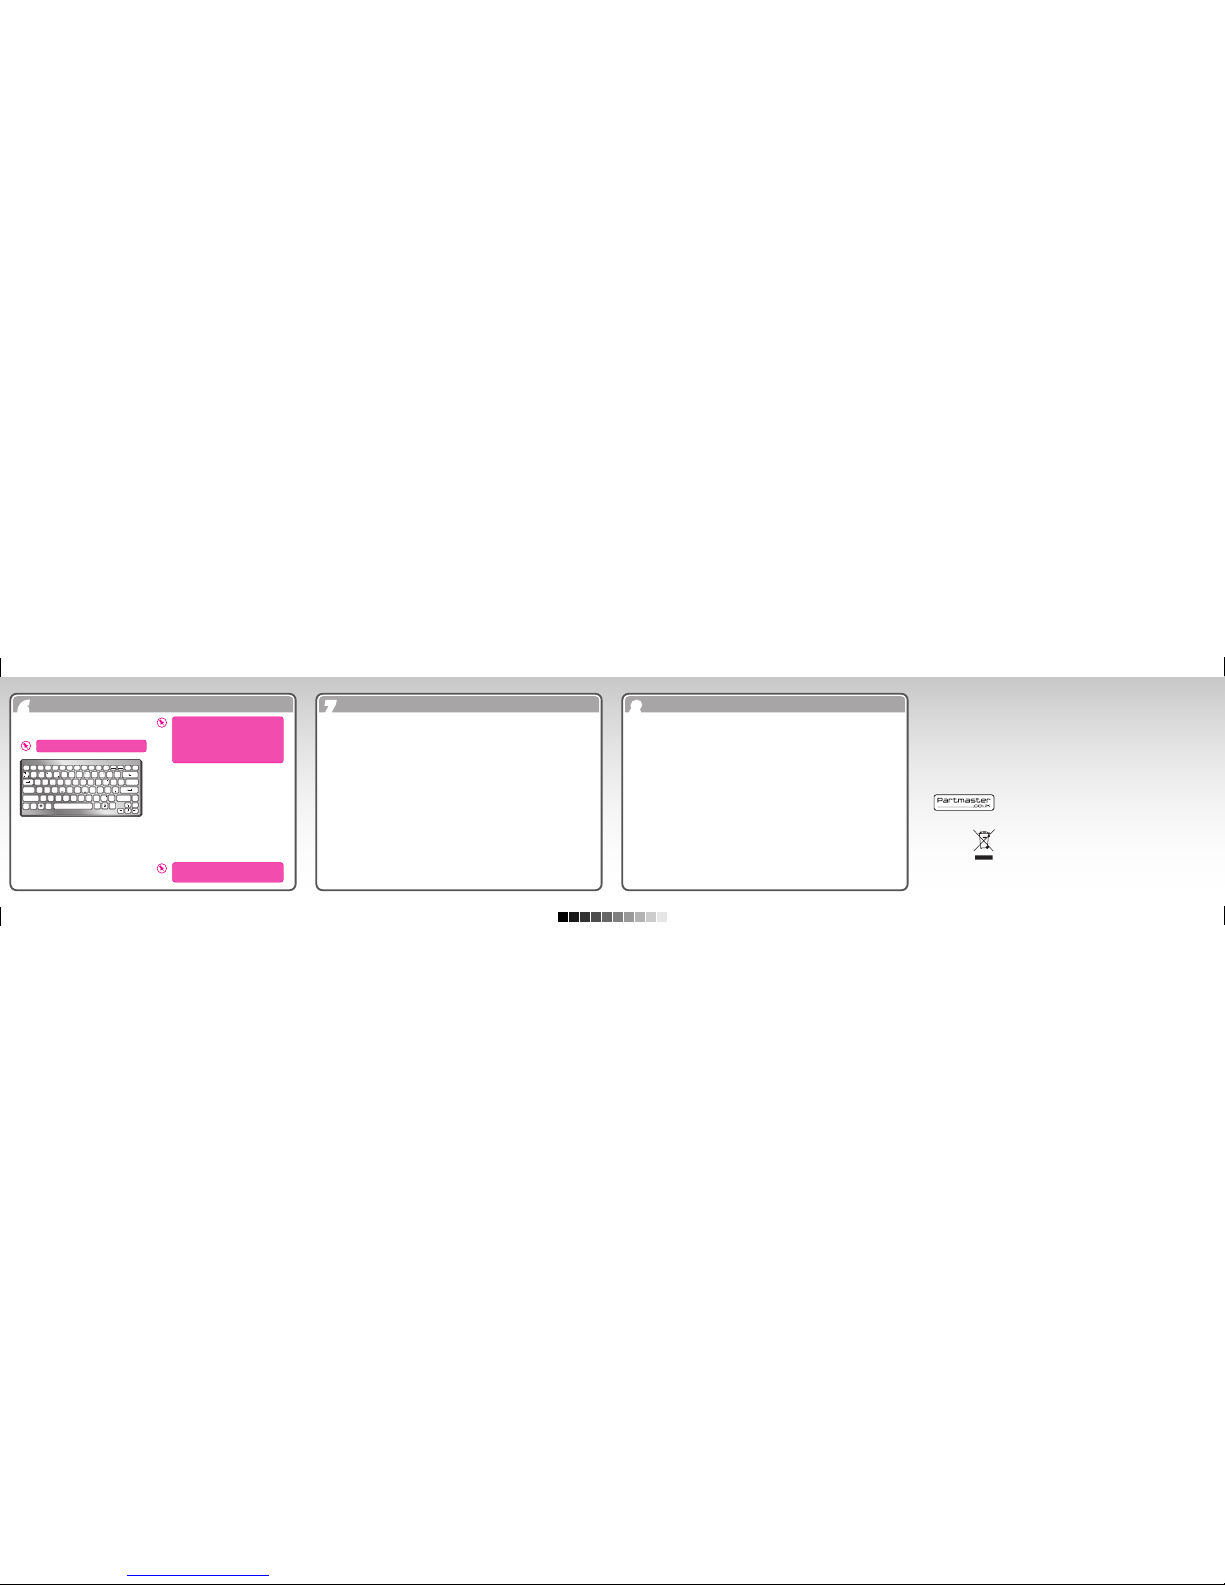
Function Keys
88
Safety Warning
77
Hints and Tips
F9
F10
scroll
caps
lock
ctrl
Q W E R T Y U I O P
A
S D F G H
J K L
Z X C V B N M
0
insert
num
lock
delete
alt gr
F5 F6 F7 F8
esc
F11F1F12
F2
F3 F4
ctrl
#
home
end
page
up
page
down
?
/
<
,
>
.
fn
/
prt sc
sys rq
pause
break
shiftshift
|
\
}]{
[
0
1 2 3
4 5 6
;
@
+
=
_
-
1 2 3 4 5 6 7 8 9
C
! $ %^& 7 8 ( 9 )
: +
The function keys are marked by pink text.
The function key (Fn) enables the use of the
pink function keys and the operation of the
embedded numeric keypad.
Pink Apha/ Numeric Keys: Hold down the Fn key
while pressing the appropriate key - F11, F12,
Scroll, Num Lock, Home, End.
Numeric Keypad: The numeric keypad works with
the Num Lock On.
Num Lock On: Press the Num Lock key or hold
down the Fn key while pressing the Num Lock key.
The pink characters of the keypad will be enabled.
The alpha characters will be disabled.
Bios Setting: The Wireless Keyboard’s space-saving
design requires the dual alpha/ numeric function of
certain keys. Since the numeric keypad feature is
controlled by the Num Lock key, an inconvenient
situation will occur when using a computer that
automatically enables the Num Lock key with each
boot up. Refer to the following solutions:
1. If your computer’s BIOS setup utility has Num Lock
option, set it to OFF/Disabled.
2. If your computer’s BIOS setup utility does not
have a Num Lock option, press the Fn+Num
Lock keys to turn o the numeric keypad after
each boot up.
To return to normal keyboard operation,
hold down the Fn key and press the Num
Lock key to turn o NumLock.
To use the 3rd level special character on a
key, press and hold the Alt Gr key while
selecting the appropriate key.
Please read your system’s user manual to
change your BIOS setting.
Keyboard not working:
1. Have the batteries been inserted incorrectly or are they spent?
Check the polarity (+/-) or exchange them for new ones as necessary.
2. Make sure the USB Receiver is plugged into a USB port and the computer is on.
3. Remove metallic objects between the keyboard and the USB Nano receiver.
4. If the Nano receiver is plugged into a USB hub, try plugging it directly into the computer’s USB port.
5. Move the keyboard closer to the receiver.
6. Turn o the keyboard and remove the USB receiver. Plug in the USB receiver and turn the keyboard back
on, press and hold the Connect button.
7. Restart the computer.
• Don’t disassemble the keyboard or remove any
parts.
• Don’t immerse the keyboard in water or any liquid.
• Don’t use the keyboard close to heat sources or
expose to high temperatures.
• Don’t use the keyboard where strong
electromagnetic waves are present. Strong
electromagnetic waves will cause damage to the
keyboard.
• Keep the keyboard away from direct sunlight,
moisture, dirt or abrasive chemical products
(cleaning products etc).
Wireless Devices:
• Before boarding any aircraft or packing a wireless
device in luggage that will be checked in, remove
the batteries from the wireless device.
• Wireless devices can transmit radio frequency (RF)
energy, whenever batteries are installed and the
wireless device is turned on.
Battery-Powered Devices:
• Improper use of batteries may result in battery
uid leakage, overheating, or explosion. Released
battery uid is corrosive and may be toxic. It can
cause skin and eye burns, and is harmful if
swallowed.
To reduce the risk of injury :
• Keep batteries out of the reach of children.
• Do not heat, open, puncture, mutilate, or dispose of
batteries in re.
• Do not mix new and old batteries or batteries of
dierent types.
• Do not allow metal objects to touch the battery
terminals on the device; they can become hot and
cause burns.
• Always remove old, weak, or wornout batteries
promptly and recycle or dispose of them in accordance
with Local and National Disposal Regulations.
• If a battery leaks, remove all batteries, taking care to
keep the leaked uid from touching your skin or
clothes. If uid from the battery comes into contact
with skin or clothes, ush skin with water immediately.
Before inserting new batteries, thoroughly clean the
battery compartment with a damp paper towel, or
follow the battery manufacturer’s recommendations for
cleanup.
Rechargeable batteries only:
• Caution Risk of explosion if battery is replaced by an
incorrect type. Use and replace only with the same type
and rating as the batteries provided.
• Charge only with the recharger provided with the
product.
Features and specications are subject to change without prior notice. Windows is a registered trademark of
Microsoft Corporation in the United States and other countries.
DSG International Sourcing declares that the wireless keyborad and mouse comply with the essential requirements
and other relevant provisions of Directive 1999/5/EC.
Notes for battery disposal
The batteries used with this product contain chemicals that are harmful to the environment. To preserve our
environment, dispose of used batteries according to your local laws or regulations. Do not dispose of batteries
with normal household waste.
For more information, please contact the local authority or your retailer where you purchased the product.
DSG Retail Ltd. • Maylands Avenue • Hemel Hempstead • Herts • HP2 7TG • England
(P.N.: LK212R_B_V_O_P-001)
Visit Partmaster.co.uk today for the easiest way to buy electrical spares and
accessories. With over 1 million spares and accessories available we can deliver direct
to your door the very next day. Visit www.partmaster.co.uk or call 0844 800 3456
(UK customers only). Calls charged at National Rate.
This symbol on the product or in the instructions means that your electrical and
electronic equipment should be disposed at the end of its life separately from your
household waste. There are separate collection systems for recycling in the EU.
For more information, please contact the local authority or your retailer where you
purchased the product.
LK212R_B_V_O_P IB_final120612.pdf 2 12/06/2012 10:15 AM
 Loading...