

Page 1
GB
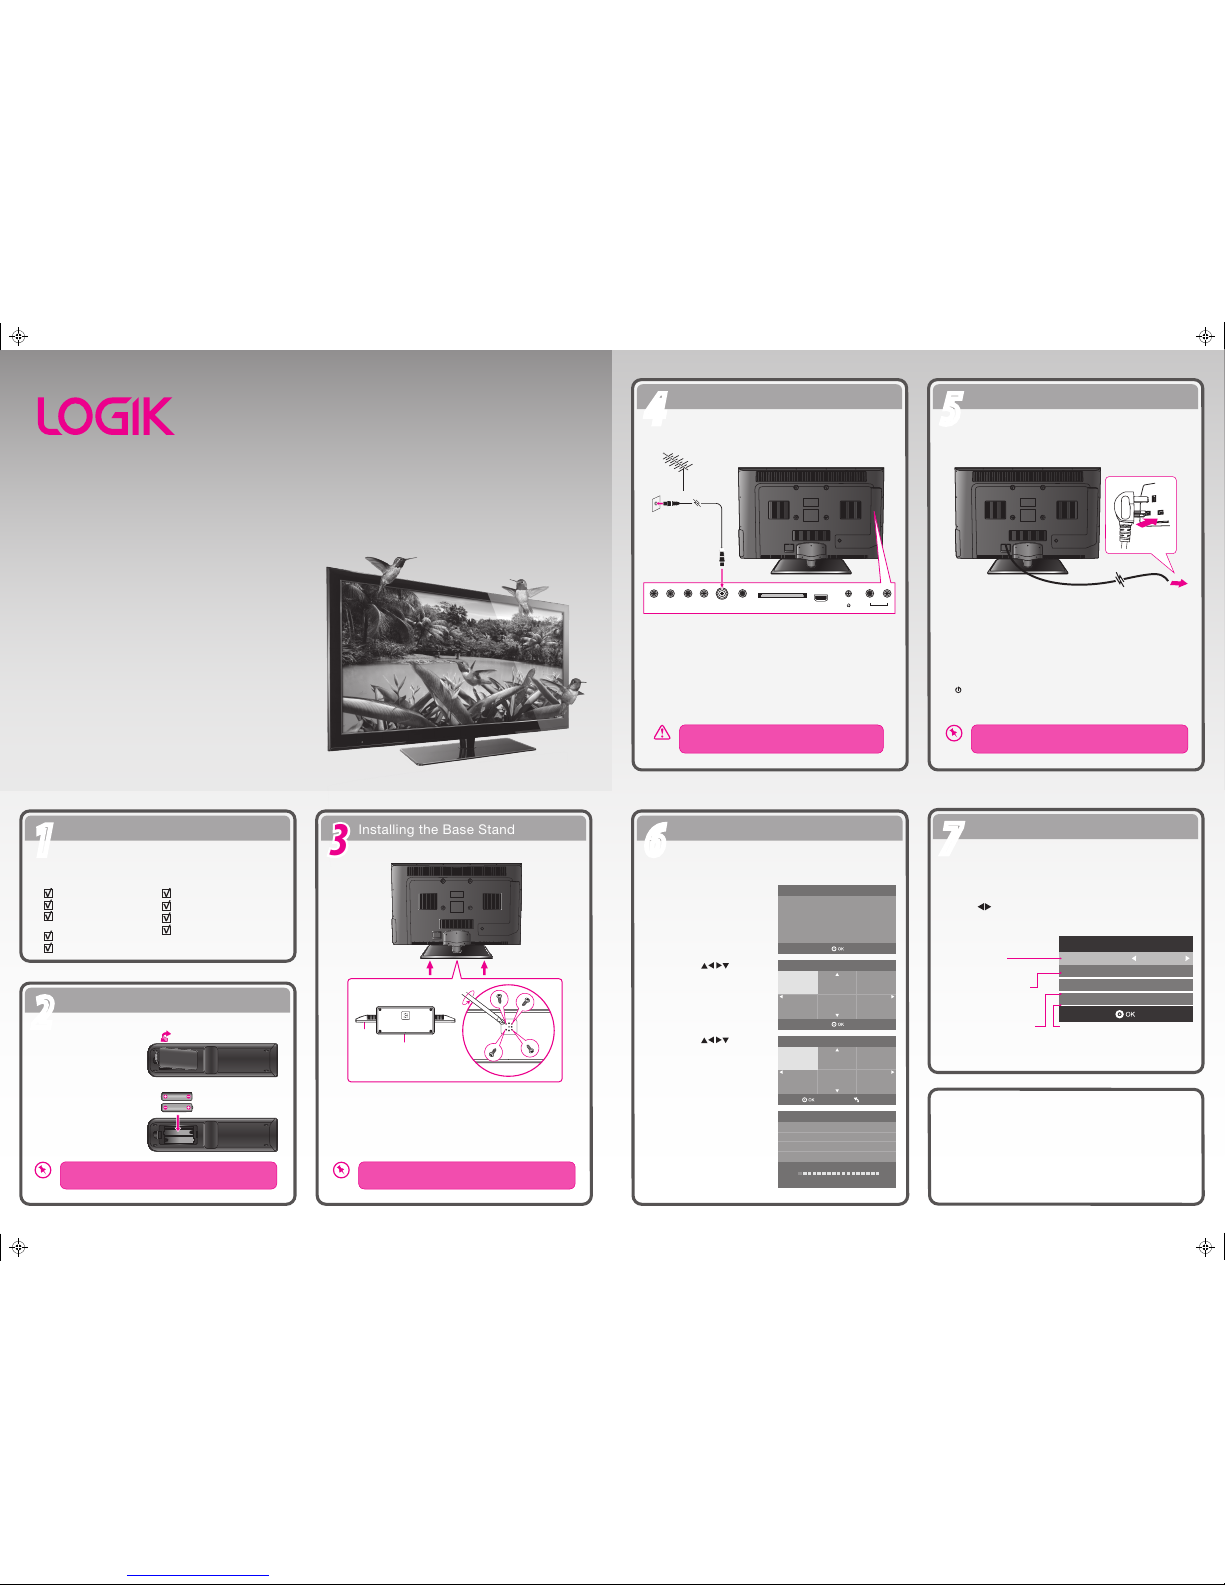
Unpacking
11
Operating Your Remote Control
22
Installing the Base Stand
33
Connecting to the Mains Socket
55
Connecting the Aerial
44
Turning the TV On for the First Time
66
Target Region Descriptor
77
Digital Switchover
Addendum
Instruction Manual
Quick Start Guide
Quick Start Guide
L423ED11
Thank you f or purchasin g your new Logik TV.
Your new TV incorporate s the lates t technolog y to enhanc e your
viewing experience . We would sug gest that y ou allow ab out 20
mins fo r initial s etup.
Please follow this guide for a successfu l rst time installatio n.
Remove all packaging from the TV. Retain the packaging. If you
dispose of it please do so according to any local regulations.
1. Lay the TV down on a at surface with the back side facing up.
Please make sure to place a soft cushioned material (such as a
pillow or thick piece of foam) beneath the screen.
2. To install the base stand rst make sure you position the front
of the base stand at the front of the TV. Align the 4 screw holes
and then use the 4 screws to x the base stand to the TV.
Install the batteries correctly by following the polarity
(+ and -) indications in the battery compartment.
The screw holes will only align if the front of the base
stand is at the front of the TV.
1. Press and lift the back
cover up to open the
battery compartment
of the remote control.
2. Insert two AAA size
batteries. Close the
battery compartment
cover.
42” 3D Ready LED TV
TV
Base Stand
Remote Control /
AAA Batteries x 2
Screw A x 4
3D Glasses x 5
Component Adapter Cable
1. Press the OK button to
start First Time Installation.
The rst time you turn the TV on, it will go straight into First Time
Installation.
2. Press the buttons
to select English as your
desired language to be
displayed on the menu.
Press the OK button to
conrm.
4. Channel tuning will
commence. This
operation may take up to
10 minutes. The display
will show the progress of
the tuning and the
number of channels
found.
Please press OK button to
begin auto tuning !
Please select an OSD Language
Deutsch
Español Français
Português Italiano
English
Country
France
Germany Portugal
Italy Spain
UK
Menu
Channel Tuning
TV : 0 Channel
DTV : 0 Channel
Radio : 0 Channel
Data : 0 Channel
1 %... 471.25 MHz (TV)
Please press MENU key to skip
3. Press the buttons
to select UK as the
country where you will
operate the TV. Press the
OK button to conrm.
Screw A x 4
(P.N.: 103020179)
TV Front
Base Stand Front
screw
Connect one end of the RF coaxial cable to the aerial socket on
the wall and the other end of the cable to the Aerial socket at the
rear right side of your TV.
1. Connect the mains cable to the mains socket after you have
completed all the connections. The TV will then enter standby
mode and the LED indicator on the front of the TV will
illuminate red.
2. In standby mode, press the STANDBY button on the TV or the
button on the remote control to turn the TV on. The LED
indicator will change from red to green.
Do not connect the TV to the mains supply until
you have completed all the connections.
The STANDBY button is located on the front right side
of the TV.
Well done, your new TV is now ready to use. You will
nd that there are many exciting features available. To get to
know all these features, please take some time to read the
instruction manual provided with your TV.
If after reading the instruction manual you have additional
questions related to the use of your TV please call our UK Call
Centre on 0844 561 1234. Our UK Customer Contact Centre is
open Monday-Saturday 8am-8pm or Sunday 8am-6pm.
(P.N.: 120010161-L423ED11)
RF coaxial cable
(not included)
OR
VIDEOMINI
YPbPr
HDMI3
Headp hone out
Rin Lin
L R
Audio out
Aeria l
Digit al
Audio out
COMMO N INT ERFACE
To the mains socket
During tuning your TV may have received signals from more than one
transmitter. If this has occurred the Target Region Descriptor screen
will be displayed. This will enable you to select the correct regional
transmission for the local news service that you require.
Press the buttons to adjust each option's setting and then press
the OK button to conrm.
Target Region Setting
Country Code GBR
Primary Region England
Secondary Region
Tertiary Region
London
This will be shown
as GBR for the UK.
This will show the regional
country (England, Wales,
Scotland, NI).
This will allow you to set the
region for your local news
service on BBC and ITV
(London, Beds and Cambs etc).
You may receive signals from more than
one transmitter within the Secondary
Region, (e.g Beds and Cambs may
have Luton or Sandy Heath).
L423ED11_QSG_111013_Zell.pdf 1 13/10/2011 3:04 PM
Page 2
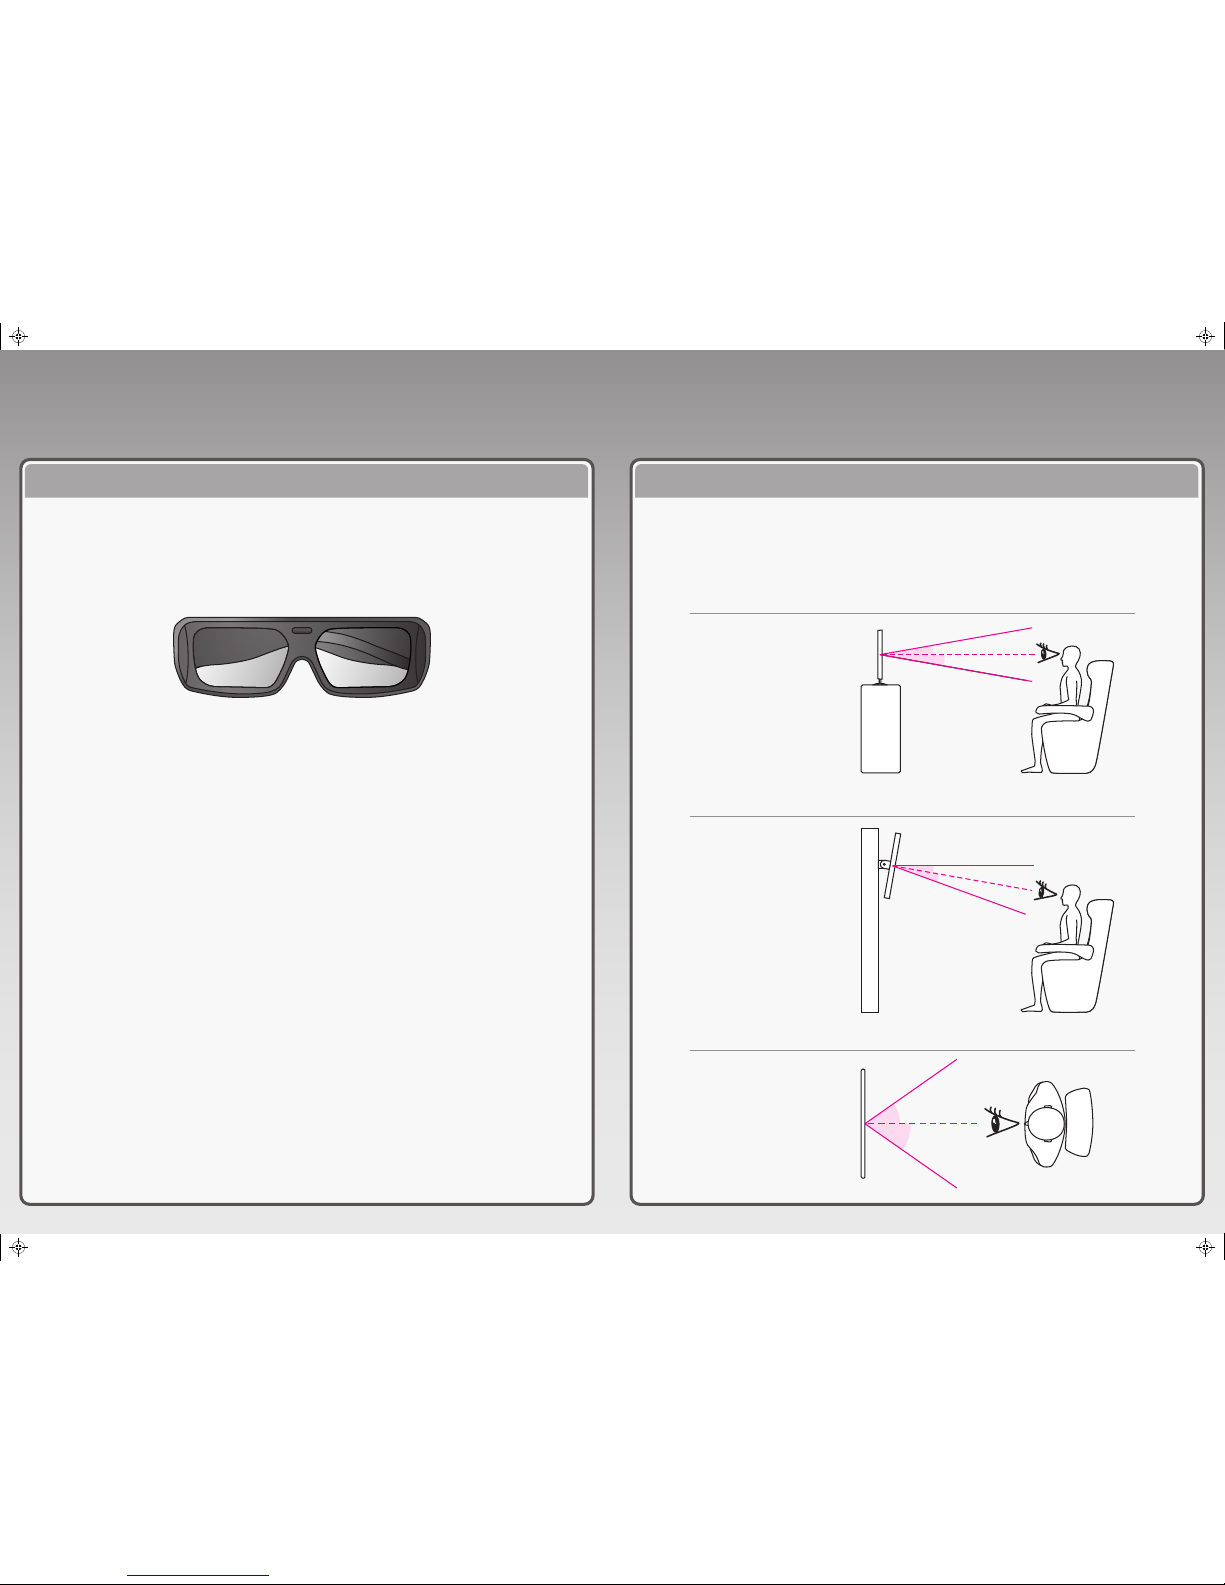
3D Technology Viewing Position
How to Enjoy Great 3D from your New Logik TV
This TV can display in 3D via 3D broadcasting or when the TV is connected to a compatible
device, such as a Blu-ray 3D Player. You need such a device to watch the TV in 3D. The 3D TV
displays two separate pictures formatted for each eye. The viewer needs to wear 3D glasses
in order to see these images in 3D format.
The viewing position is critical for Great 3D. The viewer’s eye level should be in line with the
centre of the screen. Side viewing angle is also important as any deviation beyond the limits
shown below could diminish the 3D effect. When a group is viewing, the best effect will be
within the area shown in the diagram.
To obtain the best viewing
experience from a wall mounted
3D TV, we recommend that only
a tilting bracket is used. This
will allow you to set the
optimum viewing angle.
• To watch the TV in 3D, you must put on your 3D glasses. Do not move around while wearing
the 3D Glasses as they may alter your sense of sight, balance and distance, leading to
possible physical injury or property damage.
• After watching 3D TV, remove the 3D glasses and be aware of possible disorientation due to
the change of balance and distance before moving around.
• After powering on the TV, a few seconds may be needed for your TV to calibrate.
• It may take a moment for you to see the 3D imaging if you look away from the TV and then
revert your eyes back to the 3D programme.
• If there is an obstacle between the TV and the 3D glasses, the 3D imaging may not display
properly.
• When watching 2D images, it is recommended to take off the 3D glasses. If you watch 2D
images with the 3D glasses on, you may see distorted images.
3D Gl asses
10°
150 - 200 cm
10°
150 - 200 cm
10°
10°
Stand Mounting
Wall Mounti ng
Top View
150 - 200 cm
35°
35°
L423ED11_QSG_111013_Zell.pdf 2 13/10/2011 3:04 PM
 Loading...