

Page 1
GB
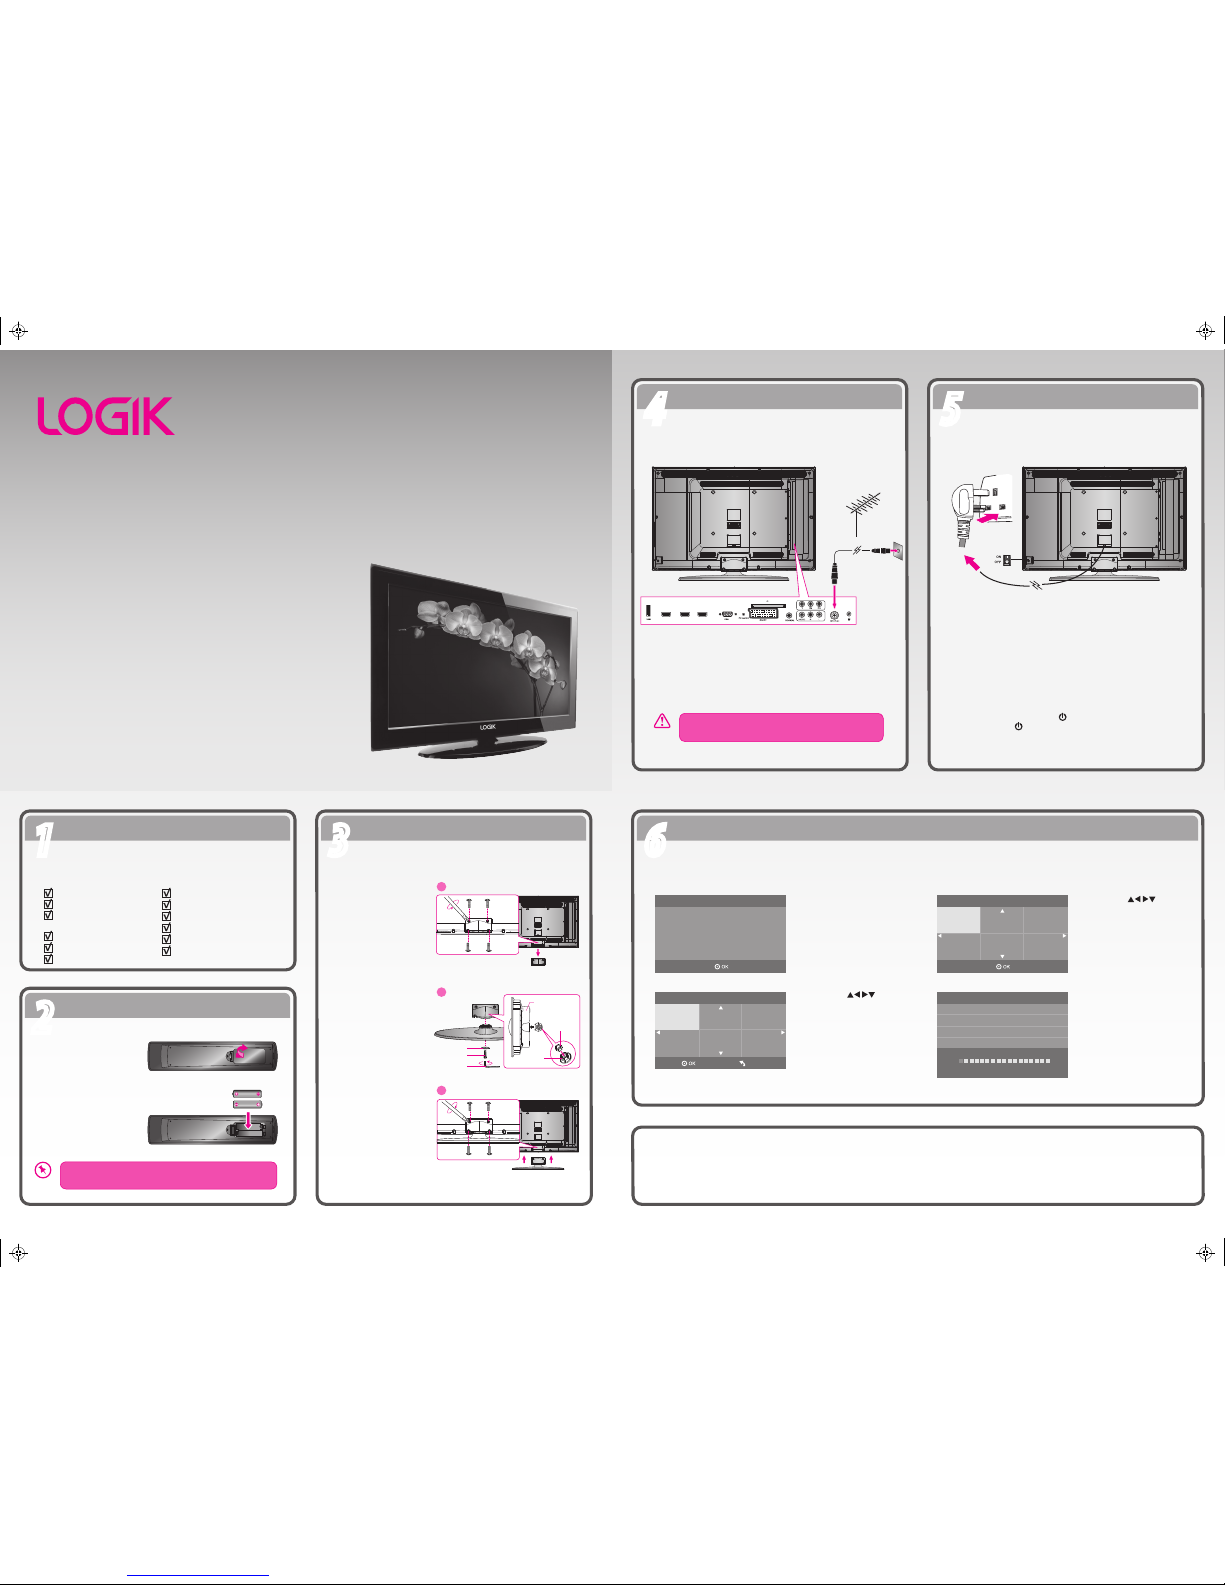
Unpacking
11
Operating Your Remote Control
22
Installing the Base Stand
33
Turning the TV On for the First Time
66
Connecting to the Mains Socket
55
Connecting the Aerial
44
Quick Start Guide
L32LCD11
Thank you f or purchasin g your new Logik TV.
Your new TV incorporate s the lates t technolog y to enhanc e your
viewing experience . We would sug gest that y ou allow ab out 20
mins fo r initial s etup.
Please follow this guide for a successfu l rst time installatio n.
Remove all packaging from the TV. Retain the packaging. If you
dispose of it please do so according to any local regulations.
1. Lay the TV down on a
at surface with the back
side facing up. Please
make sure to place a soft
cushioned material (such
as a pillow or thick piece
of foam) beneath the
screen.
2. To install the base stand,
rst remove the stand
support from the TV by
untightening the 4
screws at the rear of the
TV.
3. Put the nut into the nut
stand to hold the nut and
place the nut stand into
the stand support.
Assemble the washer in
the back of base stand
and make sure the four
columns of base stand
through the hole of the
washer. Put the screw
bolt through the washer
and attach the base
stand to the stand
support by using the
wrench.
4. Attach the base stand
with the 4 screws.
Connect one end of the RF coaxial cable to the aerial socket on
the wall and the other end of the cable to the RF IN (75Ω) socket
at the rear right side of your TV.
1. Connect the mains cable to the mains socket after you have
completed all the connections.
2. Switch on the POWER ON/OFF switch which is located at the
rear left lower side of the TV. At this stage, the TV switches to
standby mode. The red LED indicator will illuminate on the
front panel of the TV.
3. In standby mode, press the / I button at the front right side
of the TV or the button on the remote control to turn the TV
on. The red LED indicator will turn blue.
Install the batteries correctly by following the polarity
(+ and -) indications in the battery compartment.
1. Press and lift the back
cover up to open the
battery compartment
of the remote control.
2. Insert two AAA size
batteries. Close the
battery compartment
cover.
Do not connect the TV to the mains supply until you
have completed all the connections.
Well done, your new TV is now ready to use. You will nd that there are many exciting features available. To get to know all these
features, please take some time to read the instruction manual provided with your TV.
If after reading the instruction manual you have additional questions related to the use of your TV please call our UK Call Centre on 0844 561 1234.
Our UK Customer Contact Centre is open Monday-Saturday 8am-8pm or Sunday 8am-6pm.
To mains socket
(P.N.: I.08.226329102)
32” HD Ready 1080p Digital LCD TV
OR
RF coaxial cable
(not included)
LCD TV
Base Stand
Remote Control /
AAA Batteries x 2
AV Cable
Washer
Screw Bolt
Nut
1. Press the OK button to
start First Time Installation.
The rst time you turn the TV on, it will go straight into First Time Installation.
2. Press the
buttons
to select English as your
desired language to be
displayed on the menu.
Press the OK button to
conrm.
3. Press the buttons
to select UK as the
country where you will
operate the TV. Press the
OK button to conrm.
4. Channel tuning will
commence. This
operation may take up to
6 minutes. The display
will show the progress of
the tuning and the
number of channels
found.
Please ensure aerial is plugged in!!
Then press OK button to start
Please select an OSD Language
Deutsch
Español Français
Português Italiano
English
Country
France
Germany Portugal
Italy Spain
UK
Menu
Channel Tuning
TV : 0 Channel
DTV : 0 Channel
Radio : 0 Channel
Data : 0 Channel
1 %... 471.25 MHz (TV)
Please press MENU key to skip
Digital Switchover
Addendum
Instruction Manual
Quick Start Guide
Wrench
Nut Stand
2
Screw
Washer
TV Stand Support
Nut
Nut
Stand
Screw bolt
Wrench
3
4
HDMI1
HDMI3
HDMI2
Unscrew
Screw
L32LCD11_QSG_110517_Annie.pdf 1 11年5月17日 下午12:55
 Loading...