

Page 1
GB-4 GB-5
Digital Filter
Coffee Maker
Instr uctio n Manual
L12FC B10
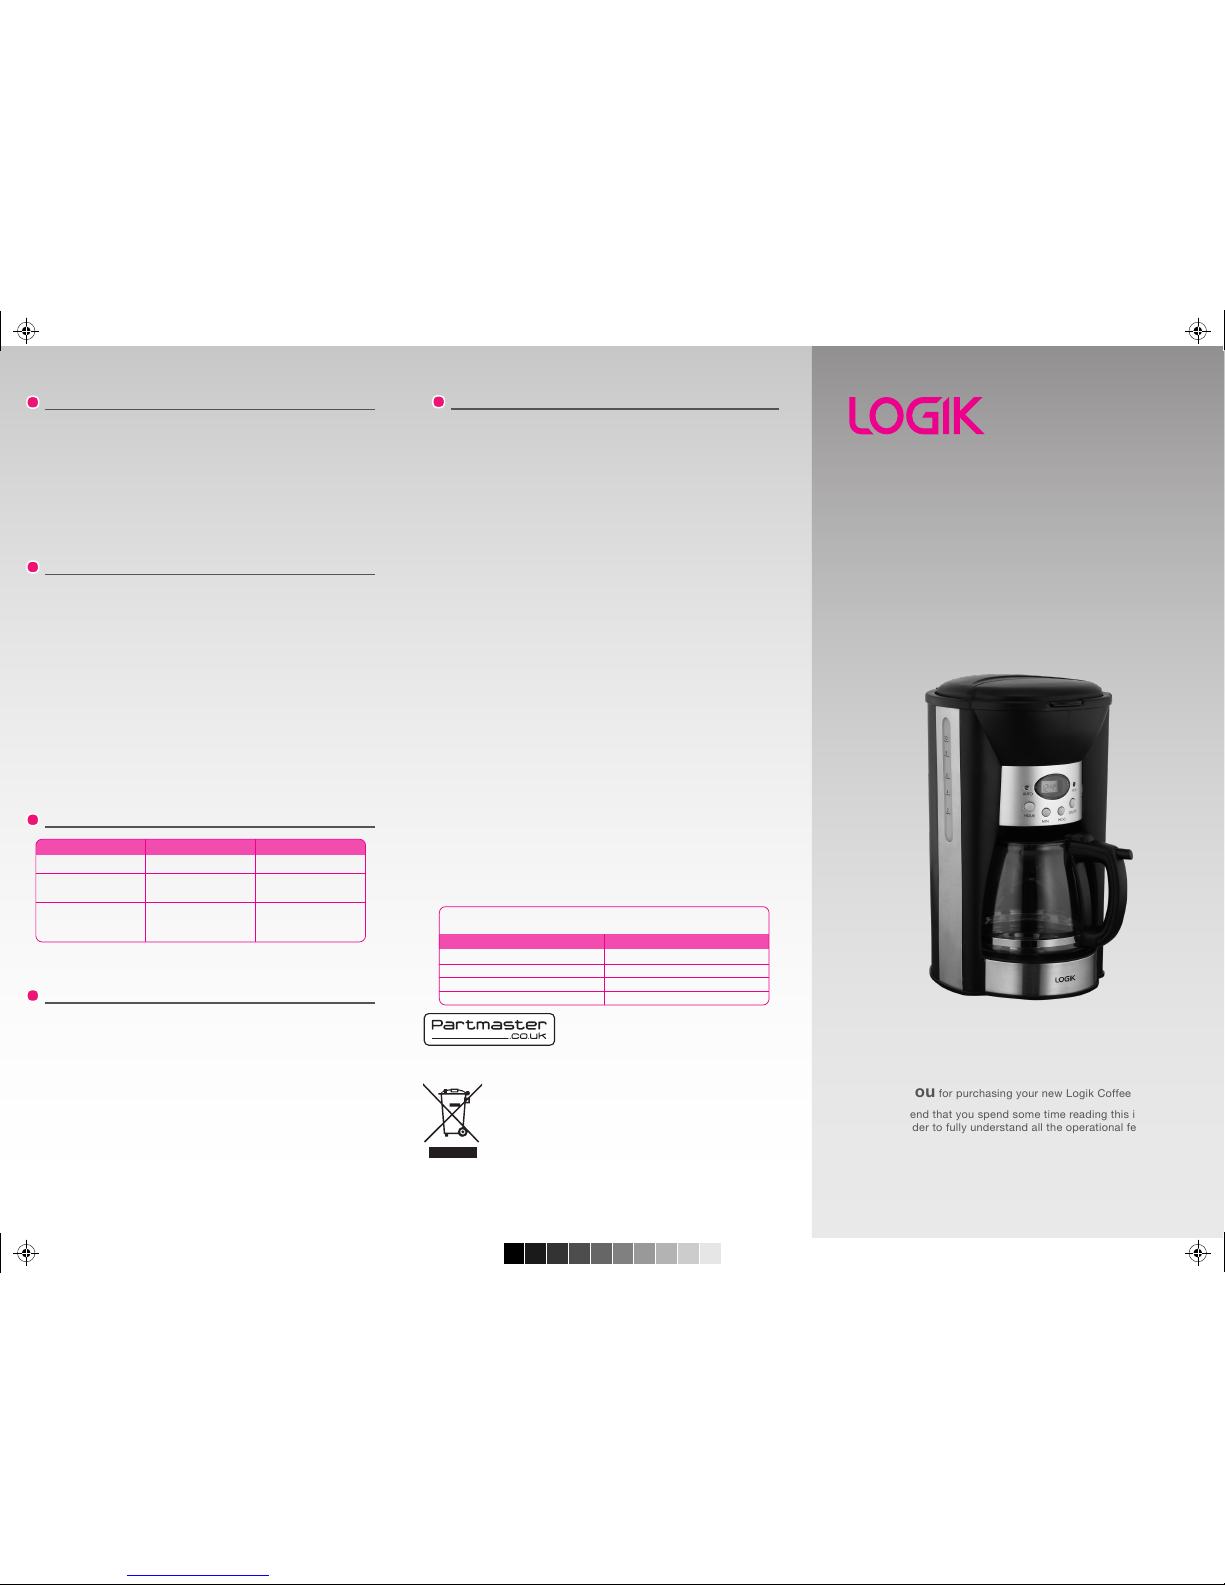
Thank you for purcha sing y our new Logik Coffee Maker.
We recom mend th at you spend some time re ading t his in struct ion
manua l in or der to fully unders tand a ll the operat ional feature s it
offers .
Read all the safet y inst ructio ns care fully b efore u se and keep this
instr uction manual for f uture re ference .
DSG Retail Ltd • Maylands Avenue • Hemel Hempstead
Herts • HP2 7TG • England
Visit Partmaster.co.uk today for the easiest way to buy
electrical spares and accessories. With over 1 million
spares and accessories available we can deliver direct
to your door the very next day. Visit www.partmaster.co.uk or call 0844 800 3456 (UK
customers only) Calls charged at National Rate.
This symbol on the product or in the instructions means that your
electrical and electronic equipment should be disposed at the end of
its life separately from your household waste. There are separate
collection systems for recycling in the EU. For more information, please
contact the local authority or your retailer where you purchased the
product.
(P.N. L12FCB10-002)
SAFETY FIRST!
When using electrical appliances, basic safety precautions should always be
followed to reduce the risk of re, electrical shock and/or personal injury.
• Read all the instructions carefully before using this appliance and keep them for
future reference.
• Retain the manual. If you pass the appliance on to a third party, make sure to
include this manual.
• Make sure that your outlet voltage corresponds to the voltage stated on the
rating label of the appliance.
• Unplug the appliance from the mains socket when not in use, or before cleaning
any part of the appliance.
• Do not operate any appliance with a damaged mains cable or mains plug, or in
an abnormal state. If the mains cable is damaged it must be replaced by the
manufacturer, its service agent, or similarly qualied persons in order to avoid a
hazard.
• Do not use an extension cable, it may result in re, electrical shock and/or
personal injuries.
• Do not let the mains cable hang over the edge of the table or counter, or touch
hot surfaces.
• To disconnect, remove the mains plug from the mains socket. Never pull the
mains cable to remove the mains plug from mains socket.
• Do not immerse the appliance, mains cable or mains plug in water or other
liquids.
• Be careful not to get scalded by the steam.
• Use handles or oven gloves. Accessible surfaces may get hot.
• Do not touch the appliance whilst in use as there are hot surfaces on this
appliance.
• Never use the appliance if the jug shows any signs of cracks. Only use the jug
supplied with this appliance. Handle the jug with caution as it is very fragile.
• Never leave an empty jug on the warming plate otherwise the jug is liable to
crack.
• Never switch your appliance on without water in it.
• Stand the appliance on a stable at surface before use.
• This appliance is intended for household use only. Do not use outdoors.
• This appliance is not intended for use by persons (including children) with
reduced physical, sensory or mental capabilities, or lack of experience and
knowledge, unless they have been given supervision or instruction concerning
the use of the appliance by a person responsible for their safety.
• Children should be supervised to ensure that they do not play with the
appliance.
SPECIFICATIONS
Mains supply: 230V ~50Hz
Power consumption: 1000W
We continually strive to improve our products. Specications may change without
prior notice.
CLEANING MINERAL DEPOSITS
To keep your coffee maker operating efficiently, you should regularly clean away
mineral deposits left by the water. The amount of mineral deposits will depend on
the water quality in your area and the frequency of use.
Fill the jug with one part white vinegar and three parts cold water. Pour the water
and vinegar mixture into the tank (do not place any coffee ground in the
appliance). Heat the water-vinegar solution as per steps 1-6 in “OPERATION”.
Repeat until no yellow liquid comes out, then pour out the mixture. Clean the
lter, funnel jug and jug lip with hot soapy water until no vinegar is left.
HINTS FOR GREAT-TASTING COFFEE
1. A clean coffee maker is essential for making great-tasting coffee. Regularly clean
the coffee maker as specied in “CLEANING AND MAINTENANCE”. Always use
fresh, cold water in the coffee maker.
2. Store unused ground coffee in a cool, dry place. After opening a package of
ground coffee, reseal it tightly and store it in a refrigerator to maintain its
freshness.
3. For optimum coffee taste, buy whole coffee beans and nely grind them just
before brewing.
4. Do not reuse ground coffee since this will greatly reduce the coffee’s avour.
Reheating ground coffee is not recommended as coffee is at its peak avour
immediately after brewing.
5. Clean the coffee maker when over-extraction causes oiliness. Small oil droplets
on the surface of brewed, black coffee are due to the extraction of oil from the
ground coffee.
6. Oiliness may occur more frequently if heavily roasted coffees are used.
HINTS AND TIPS
Replacement Part Part Number
NOTE: If you require a replacement for any of the items listed below, please
quote their corresponding part numbers:
Jug
Funnel
Filter
Spoon
L12FCB10, 35-44
L12FCB10, 55-59
L12FCB10, 60-61
L12FCB10, 45
Unit not working Fuse blown Check plug fuse
No coffee dripping
into the jug
Nozzle blocked on
funnel
Clean nozzle
Coffee on warnning
plate goes cold after
a short while
Coffee maker is not
plugged in
Connect coffee maker
to the mains socket
Problem Possible Causes Remedy
L12FCB10_IB_final110704_running change.pdf 1 04/07/2011 6:58 PM
Page 2
GB-1 GB-2 GB-3
1. Clean the lter, jug and jug lid after each use in hot, soapy water.
2. Wipe the appliance’s ex terior surface with a soft, damp cloth to remove stains. Do
not use strong detergents or aggressive cleaners.
3. Water droplets may build up in the area above the lter and drip onto the product
base during brewing. To control the dripping, wipe off the area with a clean, dry
cloth after use.
4. Use a damp cloth to gently wipe the warming plate. Never use abrasive cleaners to
clean it.
Tank
Cover
Gauge
Warming
Plate
Funnel
Filter
Spoon
Funnel
Support
Control
Panel
Water
Tank
Jug Lid
Open Lid
Button
Jug Handle
Jug
• Keep the lid of the jug closed when pouring. This will also keep the
coffee warm.
• The brewed coffee in the jug and the grounds in the lter are very
hot. Handle them with care to avoiding scalding.
Be sure to unplug this appliance before cleaning. To protect against
electrical shock, do not immerse the mains cable, mains plug or the
appliance in water or liquids. After each use, always make sure the
mains plug is rst removed from the mains socket.
The coffee maker will automatically shut off if left unattended for 2
hours.
You may cancel the automatic start function by pressing the ON/OFF
button. If you want to change the automatic start time, repeat the
above 1-3 steps again.
OPERATION (Cont.)
6. Press the ON/OFF button, the RUN indicator will illuminate red. The appliance
will begin operating.
Note: You can remove the jug, pour and serve at any time once the coffee is
made. The coffee maker will stop dripping automatically. The jug must be
replaced within 30 seconds.
7. Do not open the tank cover while the coffee maker is operating.
8. You can remove the jug to serve when brewing is nished (about one minute
after the coffee stops dripping into the jug.)
Note: The amount of coffee you get will be less than the water you have put in
the tank, as some water is absorbed by the ground coffee.
9. Always turn the coffee maker off and unplug the mains cable from the mains
socket when the coffee maker is not in use.
CLEANING AND MAINTENANCE
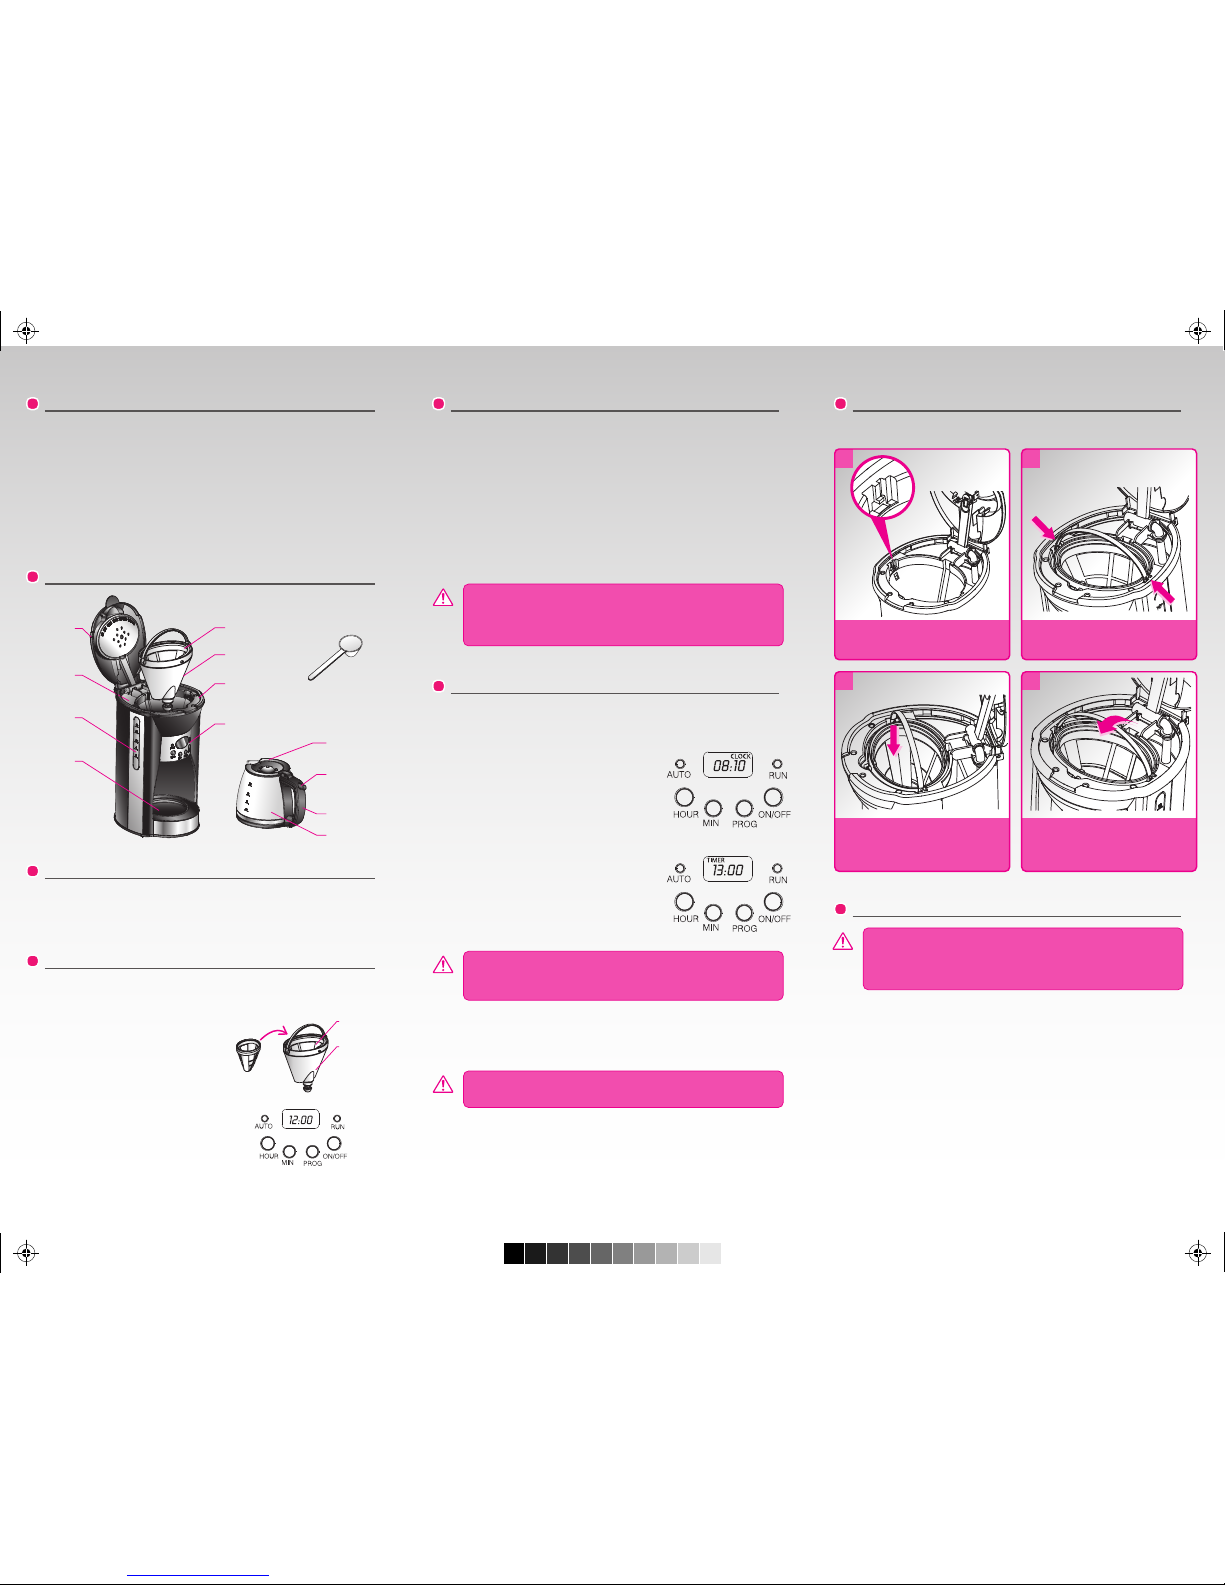
FUNNEL ASSEMBLY
• Water will overow if the funnel is not locked rmly and properly.
• The funnel should not move when locked properly.
AUTOMATIC START FUNCTION
If you do not want the coffee maker to start immediately, for example it is now
8:10 am, and you want the coffee maker to automatically start at 1:00 pm, rst
follow steps 1 to 5 in “OPERATION”, then set the automatic start function as
follows:
1. Press the PROG button, the LCD will display
CLOCK. Set the current time by pressing the
HOUR and MIN button.
Note: The time cycle is 24 hours. Select desired
time by pressing the HOUR and MIN buttons
continuously.
2. Press the PROG button again, the LCD will display
TIMER, then set the automatic start time by
pressing the HOUR and MIN buttons.
3. Press the ON/OFF button twice, the AUTO
indicator will illuminate green. The LCD will
display the current clock after about 10 seconds,
you may see the automatic start time by pressing
the PROG button.
UNPACKING
Remove all packaging from the unit. Retain the packaging. If you dispose of it
please do so according to any local regulations.
The following items are included:
• The coffee maker appliance
• Jug (Part number: L12FCB10, 35-44)
• Funnel (Part number: L12FCB10, 55-59)
• Filter (Part number: L12FCB10, 60-61)
• Spoon (Part number: L12FCB10, 45)
• Instruction Manual (Part number: L12FCB10-002)
If items are missing or damaged, please contact Partmaster (UK only).
Tel: 0844 800 3456 for assistance.
FIRST TIME USE
Fill the tank with clean water up to the maximum level 10. Follow the steps in
“OPERATION” (without adding ground coffee) once or twice, then pour out the
hot water. Clean the jug, lid and funnel thoroughly with warm water. You may now
use your coffee maker.
OPERATION
1. Open the tank cover of the coffee maker and ll with the correct amount of
water into the tank. The water level should not exceed the maximum level 10.
2. Add ground coffee into the lter. Usually a
cup of coffee needs a level spoonful of
ground coffee, but you may adjust
according to your taste.
3. Place the lter with the ground coffee in
the funnel. Place the lter into the funnel
support of the coffee maker, making sure
it is assembled correctly, see Funnel
Assembly for details.
4. Place the jug on the warming plate
horizontally.
5. Plug the mains cable into the mains
socket, the LCD will display 12:00.
PRODUCT OVERVIEW
Locate the tabs on the funnel and
lower the funnel into the coffee
maker with the handle upright.
2
Filter
Filter
Funnel
At 1:00 pm, the AUTO indicator will turn off, and the RUN indicator will
illuminate red. The appliance will then start automatically. After brewing, you
can replace the jug on the warming plate. Whilst the coffee maker is connected
to the mains, the coffee can be kept warm.
1
With the tank cover open, locate the
slot on both sides of the coffee maker.
Firmly press the funnel into the coffee
maker till the tabs lock under the
slots, while holding the handle
upright.
3
Lower the handle down.
4
L12FCB10_IB_final110704_running change.pdf 2 04/07/2011 6:58 PM
 Loading...