

Page 1

1
We, the undersigned,
Logicom
74, rue de la Belle Etoile
Z.I. Paris Nord II
B.P. 58338
95941 ROISSY CDG
FRANCE
hereby declare that the CALIS product complies with the essential requirements applicable, particularly the following requirements drawn from directive 1999/5/CE :
Article 3.1a - (protection of the health and safety of the user):
-EN60950 (2000) Article 3.1b - (protection requirements for electromagnetic compatibility):
-EN301489-01 V1.3.1, EN301489-06 V1.1.1 Article 3.2 - (effective use of the radio spectrum so as to avoid harmful interference):
-EN301406 V1.4.1
The product has an average power of less than 20 mW, so the SAR test is unnecessary for products with a power less than or equal to 20 mW.
We declare that the CALIS product complies with the requirements related to European standards for line interfaces
This device is intended to be sold in France.
This conformity is understood to apply as long as the product for which it granted is installed
and used according to the instructions provided in the user manual.
Any unauthorised modification to the production cancels this declaration of conformity.
Roissy, 17 August 2004
Bernard BESSIS
Chief Executive Officer
DECLARATION OF CONFORMITY
Page 2

3
CONTENTS
1 Description of the appliance page 0 3
2 Telephone functions page 09
3 Number identification function page 037
4 Advanced options page 045
5 Resetting the appliance page 051
6 Scope of the warranty page 052
7 Contacting the customer care service page 052
Featuring the most recent technologies, it is the essential tool for communicating
today.
Finally, CALIS is compact and simple to use, taking up little space on your desk.
Please read through this manual fully to get the best use out of the phone.
1-1 Characteristics page 4
1-2 Precautions for use page 6
1-3 Safety conditions page 7
1-4 Charging the batteries page 7
1-5 Battery charge level page 8
1-6 Installation instructions page 8
1-7 Indicator lights page 8
1 - DESCRIPTION OF THE APPLIANCE
Page 3

4 5
1-1 - Characteristics
The main technical characteristics are :
TELEPHONE FUNCTIONS :
• 300 m free field range.
• Autonomy : 100 hours on standby.
8 hours of communication.
• 2-line LCD screen (1 alphanumeric line + 1 line of icons).
• Backlit screen. Available only on the CALIS 200, 202, 203, and 204 models.
• Hands free mode. Available only on the CALIS 200, 202, 203, and 204 models.
• 2 handsets can be programmed on the same base.
• 1 handset can be programmed on 4 bases.
• Interphone call between two handsets.
• Transfer an external call to another handset.
• Redial of one the last 10 numbers called.
• Phone book of 25 alphanumeric entries (numbers + names).
Capacity of 25 figures per number
Capacity of 12 characters per name
• Predialling
• Possibility of switching the handset on/off
• Personal code (PIN) to prevent access to certain functions.
• Indicator light shows when the line is open.
• Personalisation of the handset (5 characters).
• Choice of 10 ring tones on the handset.
• Ring tone volume can be adjusted on the handset (5 levels + mute + crescendo).
• Listening volume can be adjusted on the handset (5 levels).
• Choice of 5 ring tones on the base.
• Ring tone volume can be adjusted on the base (5 levels + mute).
• Locking the keypad.
• Clock function.
• Programming of barred calls.
• Choice of language (French, English, Spanish, German and Italian).
• Key beeps.
• Visual and audible low battery alarm.
• Visual and audible out-of-range alarm.
• Call duration timer.
• Combined call.
• Dialling: Voice Frequency (VF) only.
• R key (adjustable period).
• PAUSE key (adjustable period).
• Privacy function.
FRANCE TÉLÉCOM CONTACT SERVICES :
All of the following characteristics are available only if you have subscribed to France
Télécom’s name or number identification service
(pleas contact your local agency on 1014,
free call) :
• Caller number or name identification.
• Call log (24 numbers + names).
• Time stamping of calls.
• Dialling from the log.
• Selective deletion of calls.
Page 4

6 7
1-2 Precautions for use:
• Read the instructions carefully.
• Only use the mains adaptor supplied.
• Do not set up the phone in a area exposed to dust, vibrations or shocks.
• Do not place the phone next to a magnetic source (television, speakers, etc.) as it
may cause interference.
• Never pour liquid onto the phone as a short circuit may occur.
• Do not place the base in a wet spot.
• Never dismantle the phone.
• Unplug the telephone connection before removing the plug from the power socket.
• Disconnect a damaged phone immediately and get it repaired at an approved cus-
tomer care service.
• After moving the base, begin by connecting the mains power.
• Do not place any object on the power cable and ensure that no-one can walk on it.
• Avoid connecting too many devices on the same wall socket.
• Never install the phone during a thunderstorm.
• Never touch bare telephone wires unless they have been disconnected.
• Unplug the device before cleaning it, do not use cleaning agents or sprays, use a
slightly damp cloth.
• Do not place the phone on an unstable object. If it falls, it will cause serious dama-
ge.
• Do not use your telephone inform emergency services of a gas leak if the source of
the leak is near the telephone.
• You must dispose of your batteries in accordance with waste disposal regulations.
• In the absence of mains power or during a power cut, the appliance will no longer
work. You will not be able to make or receive calls if an emergency arises. For this
reason, it is recommended that you use a standard telephone.
• Keep this manual in a safe place for future reference.
IMPORTANT :
1) Only use the type of batteries supplied.
2) Do not throw the batteries into a fire or a dustbin. Contact your seller to find out
about specific measures for recycling the batteries.
3) Do not open up the batteries, the electrolyte they contain is corrosive and may
burn hands, skin and eyes. It is toxic if swallowed.
1-3 Safety conditions :
• The appliance must not be connected to an IT power circuit.
• The phone is powered by an AC/DC mains adaptor compliant with standard EN
60950, and connected to a 230 VAC 50 Hz socket.
• As the adaptor serves as a circuit breaking device, the current base must be installed near the appliance and easy to access.
• The telephone line connection corresponds to the
TRT-3 safety level.
• The power supply input complies with the
TBTS level of safety.
• The electrical safety complies with the
NF EN 60950 verifications.
• The maximum temperature of use is 35°C.
• This appliance uses radio frequency bands whose use is harmonized throughout
the European Community.
• The marking of equipment proven to be compliant is located under the base.
1-4 Charging the battery
Before any use, the batteries must be charged (for the first time), for at least 20 hours
without connecting the telephone socket.
• Connect the mains adapter plug (16) to the jack (18) located on the base.
• Connect the mains adaptor
(16) to the mains socket (220 V ˜)
• Open the battery compartment
(20).
• Insert the 3 rechargeable batteries into the compartment
(20) while ensuring that
the polarities are correct.
• Place the handset on the base.
• An audible signal is emitted and the indicator light
(13)
CAUTION :
If you do not leave the handset to charge for 20 hours for the first time, it will not operate to the
best of its capacity.
The warranty will be invalid for malfunctions caused by incomplete charging before the first
use.
Page 5
8 9
2 - TELEPHONE FUNCTIONS
2-1 Diagrams and functions pages 10 and 11
2-2 Switching the handset on/off page 12
2-3 Using the menu page 12
2-4 Choosing a language page 13
2-5 Dialling a number page 14
2-6 Receiving a call page 15
2-7 Hands free mode page 16
2-8 Adjusting the listening and hands free volume page 17
2-9 Using the alphanumeric keypad page 18
2-10 Personalising the handset page 19
2-11 Recording a number and a name in the phone book page 20
2-12 Consulting the phone book page 21
2-13 Dialling a number from the phone book page 22
2-14 Modifying a phone book entry page 22
2-15 Removing a phone book entry page 23
2-16 Displaying the call duration page 24
2-17 Choosing a ring tone on the handset (external and internal call) page 24
2-18 Adjusting the ring tone volume on the handset page 25
2-19 Selecting a ring tone for the base page 26
2-20 Setting the phone base ring volume page 27
2-21 Interphone function page 28
2-22 Transferring an external call to a handset page 28
2-23 Setting the date and time page 29
2-24 Enabling/disabling key beeps page 29
2-25 Enabling/disabling the low battery alarm page 30
2-26 Enabling/disabling the handset out-of-range alarm page 31
2-27 Locking/unlocking the keypad page 32
2-28 Privacy function page 32
2-29 R key page 32
2-30 Pause function page 34
2-31 Resetting default settings page 35
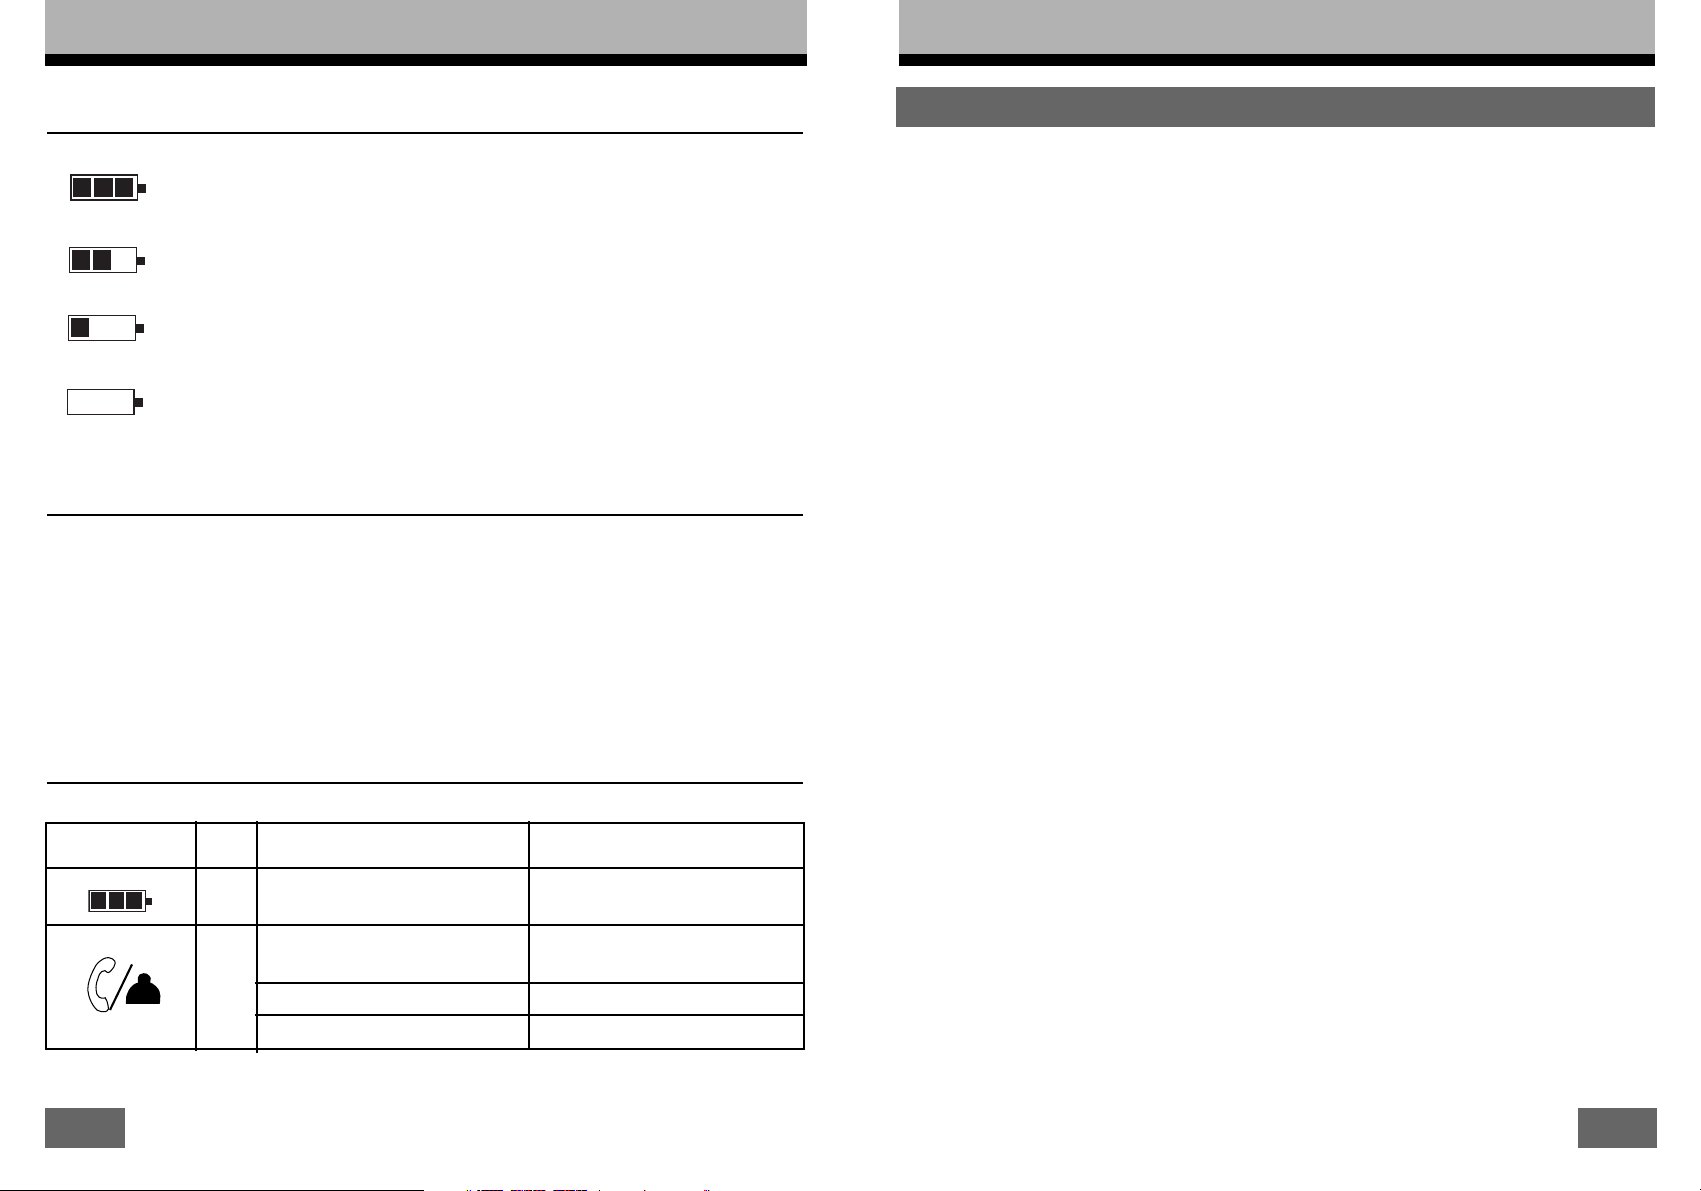
1-5 Battery charge level
The battery is full.
The battery is at 50% of its maximum charge.
The battery is low.
The battery is fully discharged, you must recharge it.
1-6 Installation instructions
Place the base on a stable, flat surface leaving at least 25 mm clear on each side for
ventilation.
• Connect the telephone cord
(17) to the modular jack (19) located behind the base
and the other end to the wall telephone jack.
1-7 Indicator light
Indicators No. Function Indications
Shows that the handset On and steady
is charging
Shows the presence of Flashing
unread call(s) in the log
Not calling Off continually
Calling On and steady
14
13
Page 6
10 11
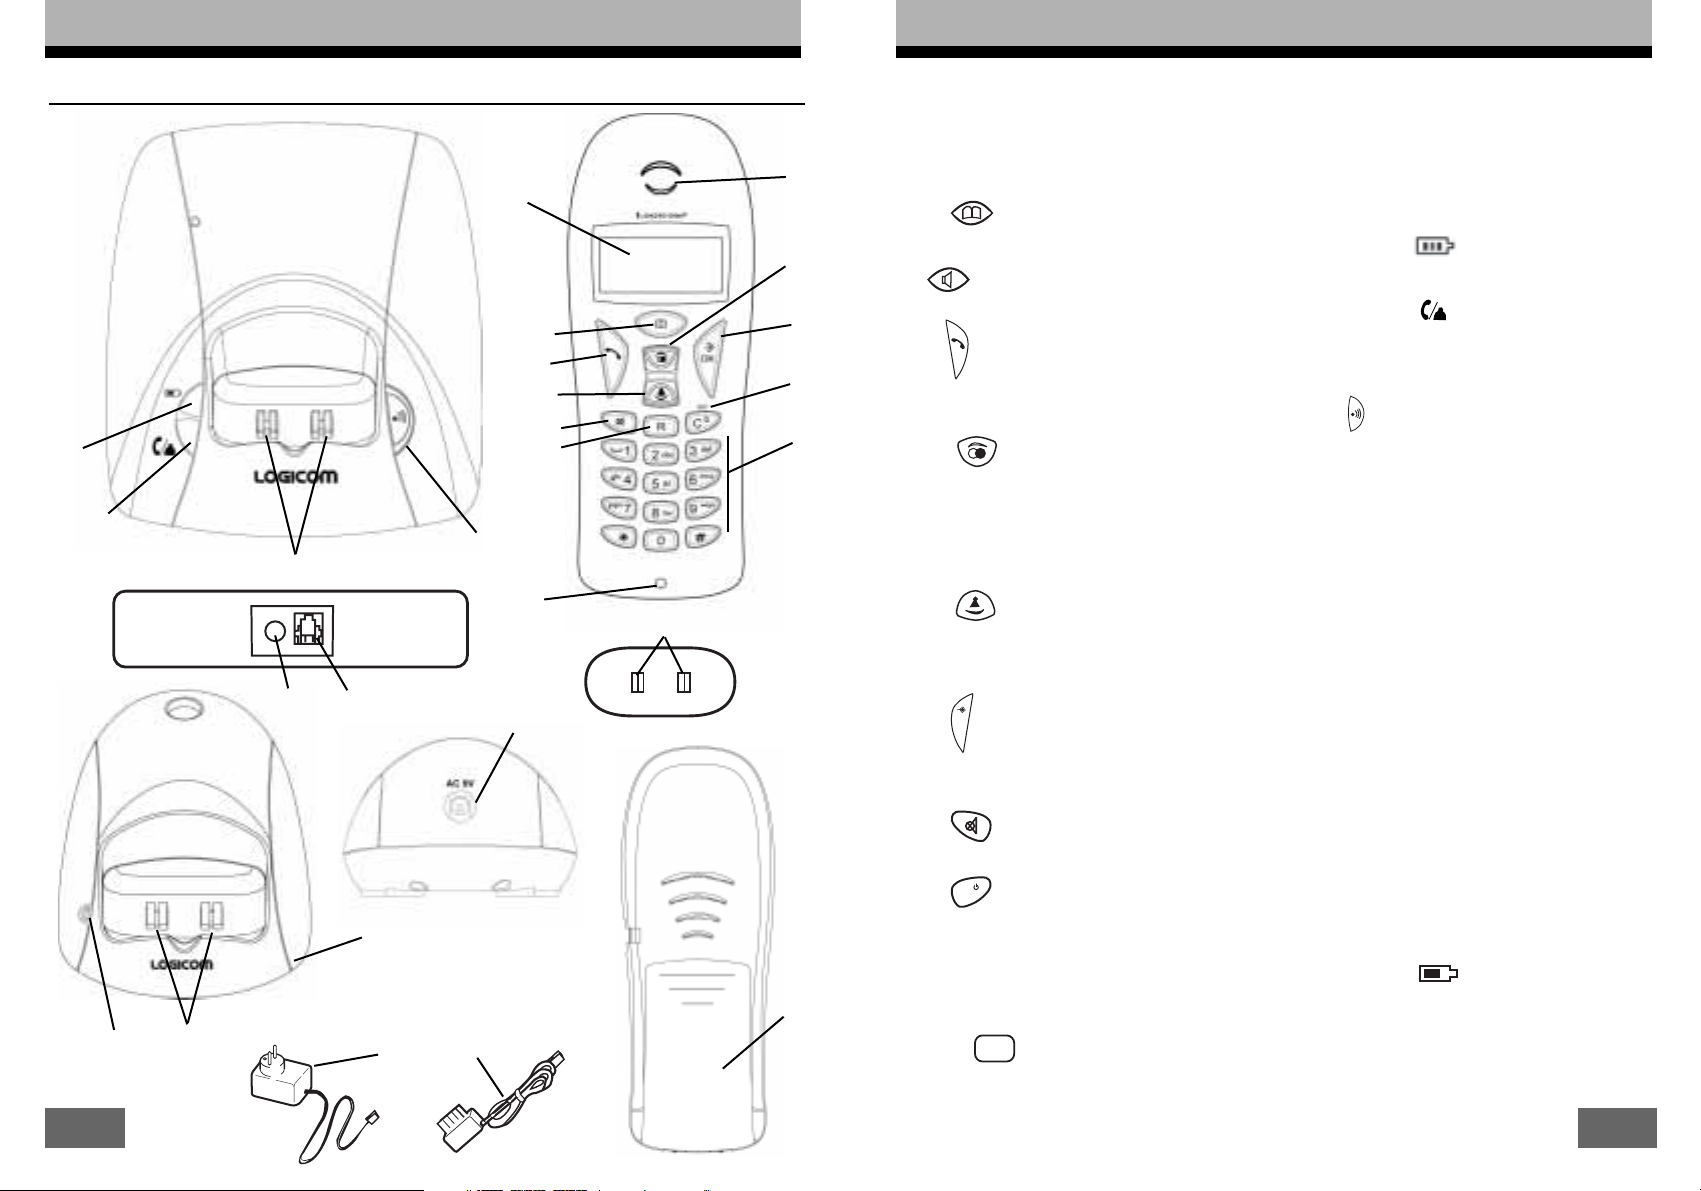
1- Handset receiver
Enables you to listen to your correspondent
2- Handset screen
Displays the telephone’s functions.
3- Key for the CALIS 100, 102, 103 and
104. Lets you consult the phone book.
Key for the CALIS 200, 202, 203, and 204.
Enables or disables the hands free mode.
4- key
Opens the line (answer).
Clears the line (hang up)
5- Key
Browses the menu.
Automatically repeats one of the last 10 numbers
dialled.
Inserts a pause
Increases the listening volume for calls.
6- Key
Browses the menu
Accesses the call log.
Reduces the listening volume for calls.
7- Key
Accesses the menu.
Validates the menu functions.
8- Key
Enables or disables the privacy function.
9- Key
/INT
Deletes a character.
Exits the menu.
Sets up an interphone call when you have 2
handsets registered on the same base.
Switches the handset on and off.
10- Key R
Provides access to various France Télécom contact
services.
11- Alphanumeric keypad.
Enables you to dial a number.
Enables a name to be entered
12- Handset microphone
Enables you to speak with your correspondent.
13- Indicator light
Shows the charge of the handset batteries.
14- Indicator light
Shows when a line is taken (on).
Indicates any unread call(s) in the call log
(flashing).
15- Key
Calls the handsets.
Enables a handset to be registered on the base.
16- Mains adaptor
Supplies the appliance with power
17- Telephone cord
Connects the appliance to the wall telephone jack.
18- Power supply plug
Enables the mains adaptor to be connected
19- Modular jack
Enables the telephone cord to be connected.
20- Battery compartment
Enables the handset batteries to be fitted.
21- Charging contacts on the base
Enables the handset batteries to be recharged.
22- Charging contacts of the charging support
Enables the handset batteries to be recharged.
23- Indicator light
Shows the charge of the handset batteries.
24- Power supply plug
Enables the mains adaptor to be connected.
O
K
13
14
15
21
12
21
11
9
7
5
1
2
3
4
6
8
10
23
22
16
17
24
Charging support for additional
handsets.
Only available on the CALIS 102, 103,
104, 202, 203, 204.
18
19
2-1 Diagrams and functions
20
C
R
Page 7
12 13
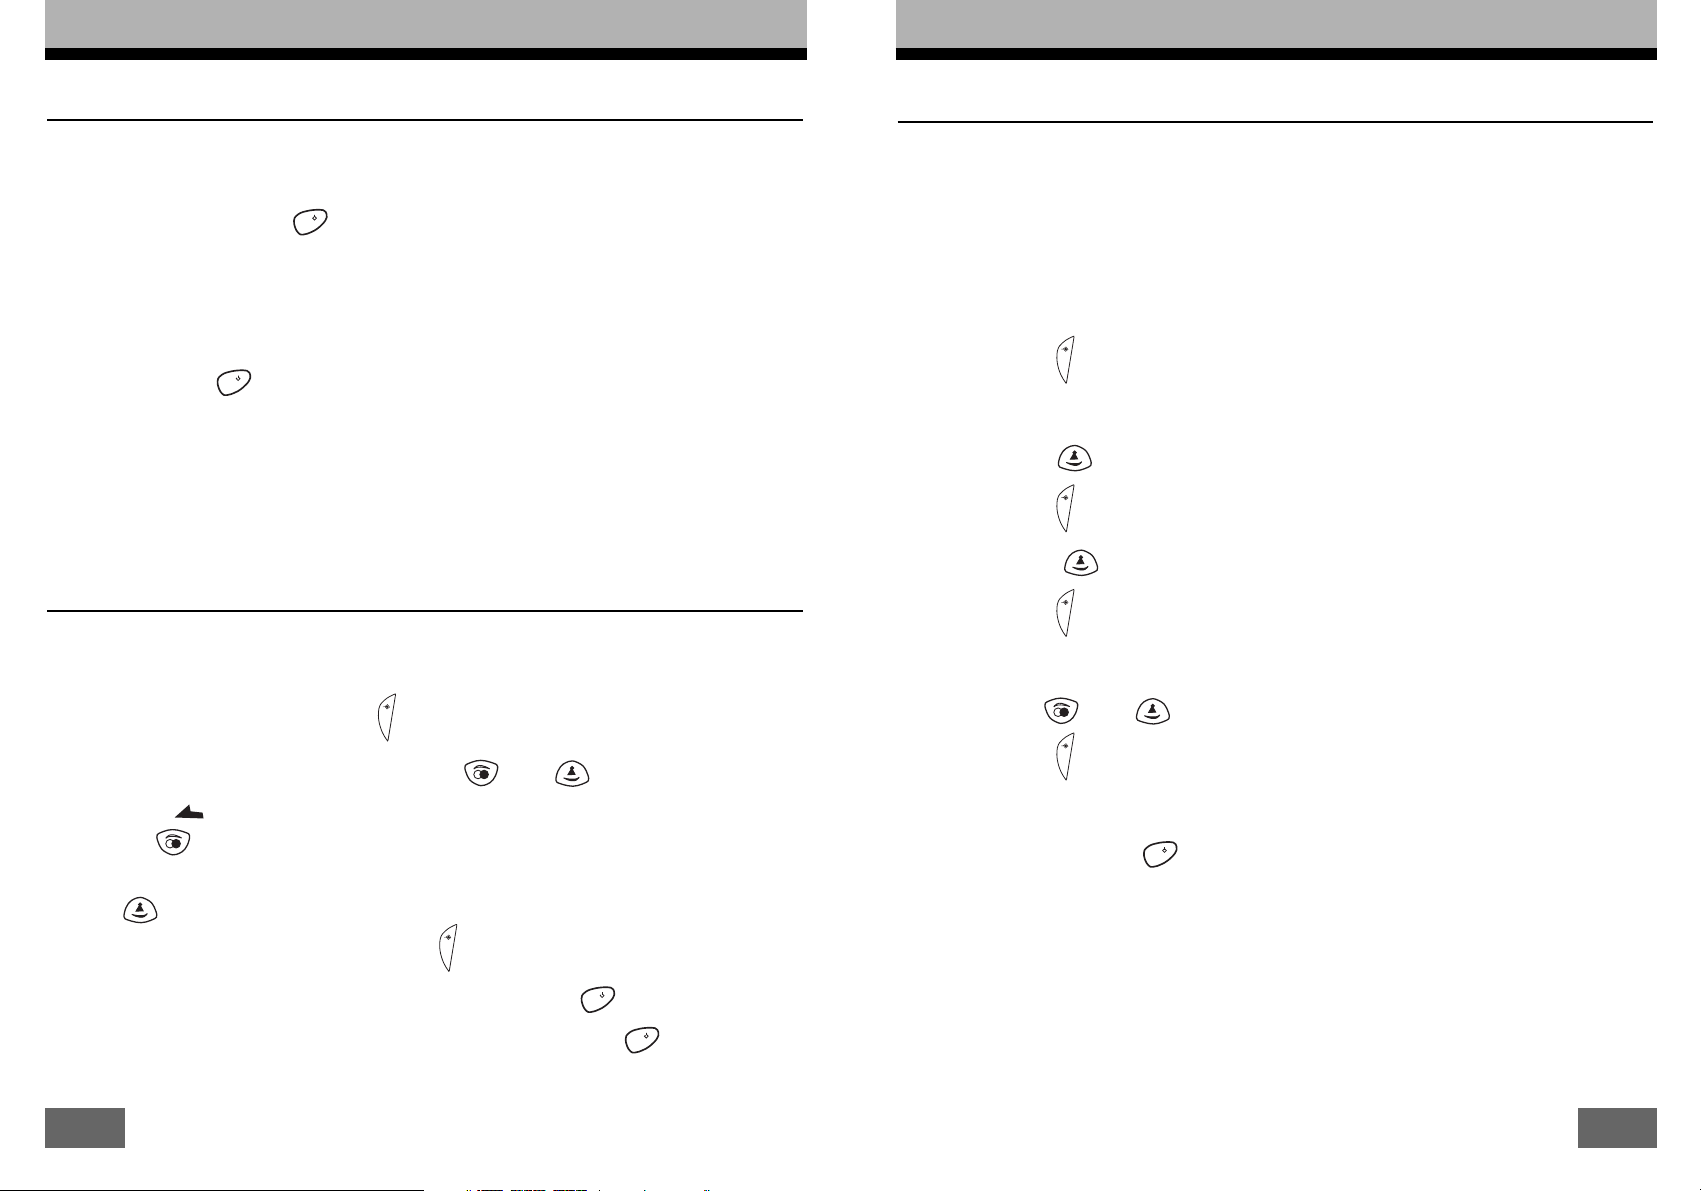
2-2 Switching the handset on/off
a) Switching the handset off
• The handset is on
• Press and hold key (
9) until the screen goes out.
• You will no longer be able to dial a number or receive calls.
b) Switching the handset on
• The handset is off
• Press key (
9)
• The handset switches on and establishes the link with the base
NOTE : When the instructions in this manual say that the handset is on standby, this means that
the handset is on but there are currently no calls. (no call tone).
2-3 Using the menu
A menu provides a more user-friendly access to a large number of functions on the tele-
phone. The menu has several sub-menus giving access to these functions.
1) To enter the menu, press key (
7)
2) To scroll the menu functions, press keys (
5) or (6)
• The icon on the handset screen tells you that a function can by accessed by the
key (5) .
• The icon on the handset screen tells you that a function can by accessed by the key
(6)
3) To select a menu function, press key (7)
4) To go back to the previous function, briefly press key (
9)
5) To exit the menu definitively, press and hold down the key (9) for 2 seconds.
OKO
K
2-4 Choosing a language
There are 5 languages programmed into the menu: French, English, German
(DEUTSCH), Italian (ITALIANO) and Spanish (ESPANOL).
The default language programmed is FRENCH.
To change the language, follow these steps :
• The handset is on standby (no call tone).
• Press key
(7)
• “PHONE BOOK” is displayed on the LCD screen.
• Press key (
6) to select “HANDSET”
• Press key
(7)
• Press key (6) until “LANGUAGE” is displayed on-screen.
• Press key
(7)
• The current language is displayed on the LCD screen
• Use key (
5) or (6) to select the language you want to use.
• Press key
(7) to confirm the language selected.
• “
LANGUAGE” is displayed on-screen.
• Press and hold key (
9) for 2 seconds to restore standby mode.
OKOKOKO
K
C
C
C
C
C
Page 8
15
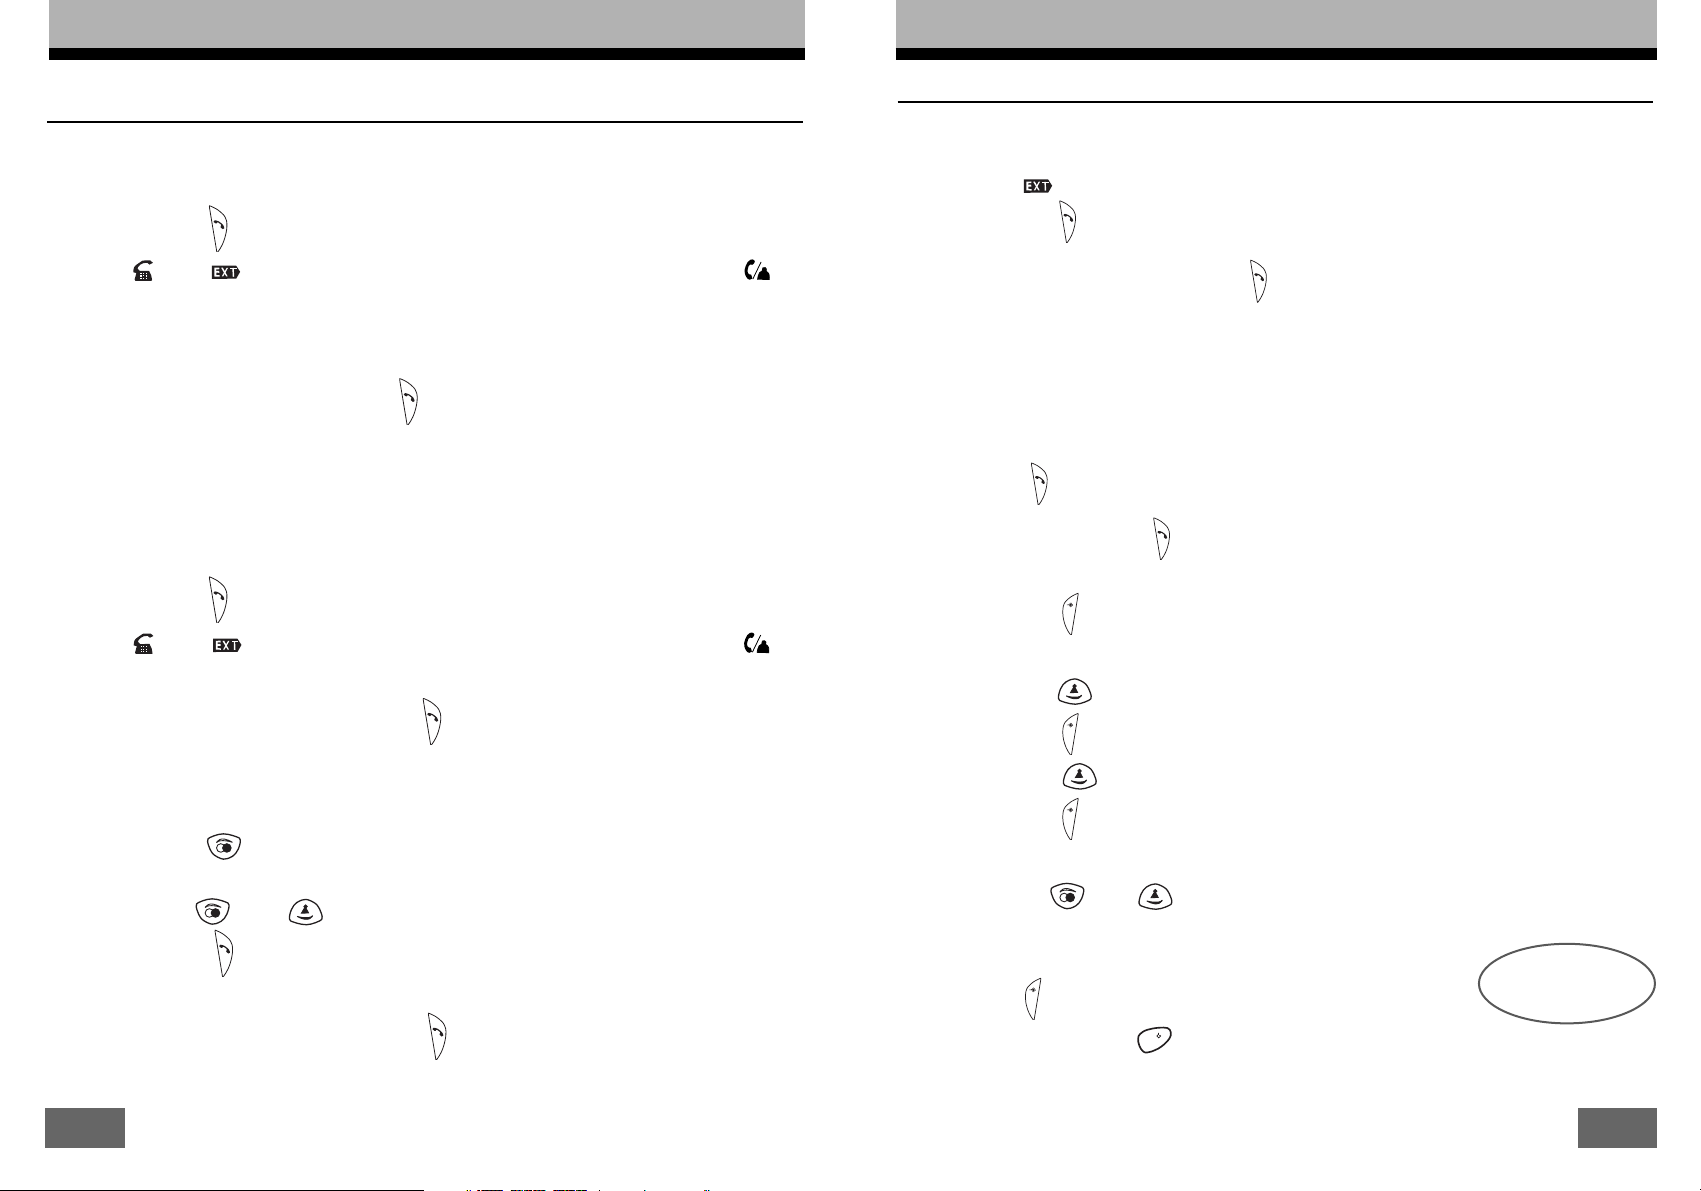
2-6 Receiving a call
a) The handset is not on its base.
• The handset rings (according to settings).
• The icon flashes on the LCD screen
• Press key
(4)
• Speak with your correspondent
• When the call is over, press key
(4) or place the handset on the base.
b) The handset is on the base.
When the handset is on the base, opening the line depends on the programming set
beforehand.
There are 2 programming modes to determine whether, after lifting the handset from its
base, you must either :
• Press key
(4) (AUTO PKUP mode ON)
Or • Do not press key
(4) (AUTO PKUP mode OFF)
You must use the following procedure to program one of these modes :
• Press key (7) .
• “
PHONE BOOK” is displayed on the LCD screen.
• Press key (
6) to select “HANDSET”
• Press key
(7) .
• Press key (
6) until “AUTO PKUP” is displayed on-screen.
• Press key
(7) .
• The current setting is displayed on-screen.
• Press key
(5) or (6)
to select the required mode of operation.
ON (the line will be opened for a call when the handset is picked up).
ARRET (la ligne ne sera pas prise au décroché lors d’un appel).
• Press
(7) to validate the setting.
• Press and hold key
(9) to return to standby mode.
N.B. : During this procedure, the previous mode is restored automatically after 60 seconds of
inactivity on the keys.
O
K
OKOKO
K
14
2-5 Dialling a number
a) Standard dialling procedure
• The handset is on standby (no call tone).
• Press key
(4)
• The and icons are displayed on-screen and the indicator light (14) on
the base switches on.
• You will hear the call tone
• Dial the number of your correspondent
• At the end of the call, press key
(4) or place the handset on the base.
b) Predialling
• The handset is on standby (no call tone).
• Dial the number of your correspondent
• The number is displayed on-screen
• Press key
(4)
• The and icons are displayed on-screen and the indicator light (14) on
the base switches on.
• The number is dialled automatically
• At the end of the call, press button (4) or place the handset on the base.
c) Redial function for the last 10 numbers dialled
• The handset is on standby (no call tone).
• Press key (5)
• The last number called is displayed on-screen
• Use key (5) or
(6)
to select one of the last 10 numbers dialled.
• Press key (4)
• The displayed number is dialled automatically
• At the end of the call, press button (4) or put the handset on the base.
manque
traduction
C
Page 9
1716
2-7 Hands free mode
Without picking up the handset, this function enables you to :
• Hear the call tone.
• Dial the number of your correspondent
• Hear your correspondent
• Speak with your correspondent.
a) To call :
• Press key
• The icons and are displayed on-screen.
- Wait for the call tone then dial the number of your correspondent.
• Speak when your correspondent picks up the phone.
b) To receive calls:
• The handset rings (according to settings).
• Press key
• The icons and are displayed on-screen.
• You can speak with your correspondent.
c) To switch from hands free mode to handset mode :
• During a call in hands free mode.
- Press the key to stop the hands free mode.
- Pick up the handset to speak.
• At the end of the call, press the key or replace the handset on its base.
N.B. : The hands free volume is set in the same way as the handset listening volume
(see next section).
CAUTION : Prolonged use of hands free mode during a call uses up the battery
power very quickly, thus greatly reducing the autonomy of the device.
2-8 Adjusting the listening and hands free volume
Setting the listening volume in the earphone is identical to setting the
hands free volume.
The volume can be set to 5 levels (1 minimum and 5 maximum).
The listening volume is set at level 4 by default.
You will have to set the listening volume for a call.
- You are taking a call.
• Press key (5) to increase the listening volume
• Press key (6) to reduce the listening volume
Page 10

1918
2-10 Personalising the handset
This function allows you to give your handset a name. The handset’s name must not be
more than 5 characters.
The default name of the handset is “DECT”
• The handset is on standby (no call tone).
• Press key
(7)
• “PHONE BOOK” is displayed on the LCD screen.
• Press key (
6) to select “
HANDSET
”
• Press key
(7)
• Press key (6) until “NAME” is displayed on-screen.
• Press key
(7)
• The name used is displayed.
• Press key
(9) a few times to remove the displayed name character by character.
• Enter the new name required (5 characters max.), using the keys of the alphanumeric pad
• Press key
(7) to validate the new name.
• Press and hold key
(9) for 2 seconds to restore standby mode.
N.B. : During this operation, the handset automatically returns to standby when no button has
been pressed for 60 seconds.
O
K
OKOKO
K
18
2-9 Using the alphanumeric keypad
Some functions such as the phone book or the handset name require the alphanumeric
keypad to be used. The keypad automatically goes into alphanumeric mode when you
enter one of these functions. To enter a letter, press the relevant key on the keypad as
many times as necessary.
For example:
- To enter an A, press once on 2
- To enter a B, press twice on 2
- To enter A followed by B, enter an A, wait until the cursor reaches the next character
then enter a B.
Press 1 to enter a space.
Press 1 twice to enter a dash.
The keypad characters are listed below :
Keys First Second Third Fourth Fifth
touch touch touch touch touch
1 space - 1
2ABC 2
3DEF 3
4GHI 4
5JKL 5
6MNO 6
7PQR S7
8TUV 8
9WXY Z 9
C
C
Page 11

2120
2-12 Consulting the phone book
1) Consulting the phone book via the menu
• The handset is on standby (no call tone).
• Press key
(7)
• “PHONE BOOK” is displayed on-screen.
• Press key
(7)
• “ADD” is displayed on-screen.
• Use key (6) until “LIST” is displayed on-screen.
• Press key
(7)
- The first phone book entry is displayed on-screen.
• Press key (5) or (6) to consult all the phone book entries
Or
• Enter the first letter of the name required.
• Press key
(9) to exit the phone book.
N.B. : During this operation, the handset automatically returns to standby when no button has
been pressed for 60 seconds.
2) Direct access to the phone book
Press key (3) on the CALIS 100, 102, 103, 104 to consult the phone book.
Press key
(8) on the CALIS 200, 202, 203, 204 to consult the phone book.
• Use the key
(5) or (6) to consult all the entries in the phone book.
Or
• Type in the first letter of the name required.
• Press key
(9) to exit the phone book.
OKOKO
K
20
2-11 Recording a number and a name in the phone book
You can record up to 25 entries (25 figures for the number and 12 characters for the
name) in the phone book.
The name and number must be entered.
Follow the steps below to record a number and a name in the phone book :
• The handset is on standby (no call tone).
• Press key
(7)
• “PHONE BOOK” is displayed on-screen.
• Press key
(7)
• “ADD” is displayed on-screen.
• Press key
(7)
-”NAME” is displayed on-screen.
• Enter the name of the correspondent you want to add to the memory by using the
alphanumeric keypad (see the section on
Using the alphanumeric keypad).
• Press key
(7)
• “NUMBER” is displayed on-screen.
• Enter the phone number corresponding to the name you have already recorded by
using the alphanumeric keypad.
• Press key
(7)
• “ADD” is displayed on-screen.
• Press key
(7)
to record a new phone book entry.
Or
• Press and hold key
(9) to return to standby.
N.B. : During this operation, the handset automatically returns to standby when no button has
been pressed for 60 seconds.
NOTE : “FULL” is displayed on-screen when all the entries of the phone book are used.
O
K
OKO
K
O
K
O
K
O
K
C
C
C
Page 12

2322
• Use key (9) to remove the displayed number character by character.
• Enter the new phone number corresponding to the name you have already recorded
by using the alphanumeric keypad.
• Press key
(7) to validate the setting.
• “
MODIFY” is displayed on-screen.
• Press key
(7) to modify a new phone book entry.
Or
• Press and hold key
(9)
for 2 seconds to restore standby mode.
N.B. : During this operation, the handset automatically returns to standby when no button has
been pressed for 60 seconds.
2-15 Removing a phone book entry
• The handset is on standby (no call tone).
• Press key
(7)
• “PHONE BOOK” is displayed on-screen.
• Press key
(7)
• “ADD” is displayed on-screen.
• Use key (
6) to select “REMOVE”
• Press key
(7)
- The first phone book entry is displayed on-screen.
• Use key (5) or (6) to select the entry that you want to remove.
• Press key
(7) twice until “CONFIRM” is displayed.
• Press key
(7)
• “REMOVE” is displayed on-screen.
• Press key
(7) to remove a new phone book entry.
Or
• Press and hold key
(9)
for 2 seconds to restore standby mode.
OKOKO
K
O
K
O
K
O
K
OKO
K
22
2-13 Dialling a number from the phone book
• Press key (3) to consult the phone book.
• Use key
(5) or (6) to select the correspondent that you want to call.
Or
• Type in the first letter of the name required.
• Press key
(4) to dial the number for the name displayed.
- The number is dialled automatically
2-14 Modifying a phone book entry
• The handset is on standby (no call tone).
• Press key
(7)
• “PHONE BOOK” is displayed on the LCD screen.
• Press key
(7)
• “ADD” is displayed on-screen.
• Press key (
6) to select “MODIFY”
• Press key
(7)
- The first phone book entry is displayed on-screen.
• Use key
(5) or (6) to select the phone book entry to modify.
• Press key
(7) when you have found the phone book entry to modify.
• Use key
(9) to remove the displayed name character by character.
• Enter the new name by using the alphanumeric keypad
(see the section Using the
alphanumeric keypad).
• Press key
(7)
“NUMBER” is displayed on-screen.
O
K
OKOKOKO
K
C
C
C
C
Page 13

2524
• The set ring tone sounds and is displayed (“MELODY: 3” for example).
• Press key (5) or (6) to select a ring tone.
• Press key
(7) to validate the setting.
• Press and hold key
(9)
for 2 seconds to restore standby mode.
N.B. : During this operation, the handset automatically returns to standby when no button has
been pressed for 60 seconds.
2-18 Adjusting the ring tone volume on the handset
The ring tone volume on the handset can be set to :
• MUTE (ring tone switched off)
• 5 levels (1 minimum to 5 maximum)
• CRESCENDO (the ringing gradually becomes louder)
The default ring tone volume is : 4.
To set the ring tone volume, follow the steps below :
• The handset is on standby (no call tone).
• Press key
(7)
• “PHONE BOOK” is displayed on-screen.
• Press key (
6) to select “HANDSET”
• Press key
(7)
• “BEEP” is displayed on-screen.
• Press key (
6) until “RING VOL” is displayed on-screen.
• Press key (7)
• Press key (5) or (6) to select either :
• “
MUTE”, “CRESCENDO” or “VOLUME X” (X represents the level between 1 and 5).
• Press key
(7) to validate the setting.
• Press and hold key
(9) for 2 seconds to restore standby mode.
N.B. : During this operation, the handset automatically returns to standby when no button has
been pressed for 60 seconds.
O
K
OKOKO
K
O
K
24
2-16 Displaying the call duration
The call duration is displayed after 15 seconds.
In minutes-seconds: “
00-15”.
At the end of each call, the call duration is displayed for 2 seconds.
2-17 Choosing a ring tone on the handset (external and
internal call)
The ring tone for an external call can be different from that of an interphone call.
Choosing a ring tone :
• The handset is on standby (no call tone).
• Press key
(7)
• “PHONE BOOK” is displayed on-screen.
• Press key (
6) to select “HANDSET” on the screen.
• Press key
(7)
• “BEEP” is displayed on-screen.
• Press key (
6) until the following is displayed :
• “
INT MEL” to select the ring tone for an internal call
OR
• “
EXT MEL” to select the ring tone for an external call
• Press key
(7)
OK
OK
OK
C
C
Page 14

2726
2-20 Setting the ring tone volume on the base
The volume of the ring tone may be set at five levels (1 is the minimum and 5 the maxi-
mum). The ring tone on the base may also be switched off (MUTE).
The default volume level is : 4.
To adjust the volume level on the base, follow these steps :
• The handset is on standby (no call tone).
• Press key
(7)
• “PHONE BOOK” is displayed on-screen.
• Use key (
6) until “SETTINGS” is displayed on-screen.
• Press key
(7)
• “BASE VOL” is displayed on-screen.
• Press key
(7)
• The volume level used is displayed :
•
“VOLUME X” (X represents the level between 1 and 5).
Or
• “MUTE” (the ring tone is switched off).
• Use key
(5) and (6)
to select the desired ring volume.
• Press key
(7) to validate the setting.
• Press and hold key
(9) for 2 seconds to restore standby mode.
O
K
O
K
OKO
K
26
2-19 Selecting a ring tone for the base
Five different ring tones are available for this system.
To select a ring tone, follow these steps :
• The handset is on standby (no call tone).
• Press key
(7)
• “PHONE BOOK” is displayed on-screen.
• Use key (
6) until “PAUSE” is displayed on-screen.
• Press key
(7)
• Press key (6) until “BASE MEL” is displayed on-screen.
• Press key
(7)
• The ring tone used by the base sounds and is displayed (“MELODY: 3” for example).
• Press key
(5) or (6) to select a ring tone.
• Press key
(7) to validate the setting.
• Press and hold key
(9) for 2 seconds to restore standby mode.
N.B. : During this operation, standby mode is automatically restored to the handset when no
key has been pressed for 60 seconds.
O
K
O
K
O
K
O
K
C
C
Page 15

2928
2-23 Setting the date and time.
CAUTION : If the user has subscribed to France Telecom’s name or number identification, the
date and time is automatically adjusted by the network at each incoming call.
• Press key (7) .
• “
PHONE BOOK” is displayed on-screen.
• Select “
HANDSET” using the (6) key.
• Press key
(7) .
• Select “
DATE / TIME” using the (6) key.
• Press key
(7) .
• The first number flashes.
• Using the alphanumeric keypad enter the day, the month, and the hours and minutes.
• Press key
(7) to validate the setting.
• Press and hold key
(9) for 2 seconds to restore standby mode.
N.B. : During this operation, the handset automatically returns to standby when no button has
been pressed for 60 seconds.
2-24 Enabling/disabling key beeps
The handset beeps each time the user presses a key when the key sound is activated.
• The handset is on standby (no call tone).
• Press key
(7) .
• “
PHONE BOOK” is displayed on the LCD screen.
• Press key (
6) to select “HANDSET”
• Press key (7)
• “BEEP” is displayed on the LCD screen.
• Press key
(7)
• “KEY” is displayed on the LCD screen.
OKOKO
K
OKO
K
O
K
O
K
28
2-21 Interphone Function
This function is only accessible when two handsets are saved on the same base.
The user can call the other handset using this function.
• The handset is on standby (no call tone).
• Press key
(9) .
• The user hears a call waiting tone.
• “
HANDSET:” and the , icons are displayed on-screen.
• Dial the number of the handset to call.
• “
HANDSET: 1” or “HANDSET: 2” is displayed on-screen.
• The handset (1 or 2) rings on being called.
• At the end of the call, press button
(4) .
2-22 Transferring an external caller to another handset
• The user is on an incoming call.
• Press key (9) .
• The user hears a call waiting tone.
• “
HANDSET:” and the , icons are displayed on-screen.
• Dial the number of the handset to which you want to transfer the external caller.
• “
HANDSET:” 1” or “HANDSET: 2” is displayed on-screen.
• The handset (1 or 2) rings.
• As soon as the internal contact picks the phone up, press button
(4) and then hang
up to transfer the external caller.
C
C
C
Page 16

3130
ON : light activated
OFF : light deactivated
• Press
(7) to validate the setting.
• Press and hold key
(9)
for 2 seconds to restore standby mode.
N.B. : During this operation, the handset automatically returns to standby when no button has
been pressed for 60 seconds.
2-26 Enabling/disabling the handset out-of-range alarm
When this function is activated, the handset beeps during calls to indicate that the hand-
set is too far away from its base.
To enable or disable this function, follow the steps below :
• The handset is on standby (no call tone).
• Press key
(7)
• “PHONE BOOK” is displayed on the LCD screen.
• Press key (6) to select “HANDSET”
• Press key
(7)
• “BEEP” is displayed on the LCD screen.
• Press key
(7)
• “KEY” is displayed on the LCD screen.
• Use key (
6) until “OUT-OF-RANGE” is displayed
• Press key
(7)
The current setting is displayed (ON or OFF) :
• Press key
(5) or (6) to enable or disable the signal for indicating the hand-
set is out of range.
ON : light activated
OFF : light deactivated
• Press key
(7) to validate the setting.
• Press and hold key
(9)
for 2 seconds to restore standby mode.
N.B. : During this operation, the handset automatically returns to standby when no button has
been pressed for 60 seconds.
OKOKOKOKO
K
O
K
30
• Press key (7)
The current setting is displayed (ON or OFF)
• Press key
(5) or (6) to enable or disable the key sounds.
ON : key sounds enabled
MUTE: key sounds disabled
• Press
(7) to validate the setting.
• Press and hold key
(9) for 2 seconds to restore standby mode.
N.B. : During this operation, the handset automatically returns to standby when no button has
been pressed for 60 seconds.
2-25 Enabling/disabling the low battery alarm
When this function is activated, the handset issues a sound signal to indicate that the
batteries are flat,
during a call.
To enable or disable this function, follow the steps below :
• The handset is on standby (no call tone).
• Press key
(7)
• “PHONE BOOK” is displayed on the LCD screen.
• Press key (
6) to select “HANDSET”
• Press key
(7)
• “BEEP” is displayed on the LCD screen.
• Press key
(7)
• “KEY” is displayed on the LCD screen.
• Use key (
6) until “LOW BATT” is displayed on-screen.
• Press key
(7)
The current setting is displayed (ON or OFF) :
• Press key
(5) or (6) to enable or disable the low battery alarm.
O
K
O
K
OKO
K
O
K
O
K
C
C
C
Page 17

3332
Modifying the R key’s waiting time :
Five waiting times are available :
- Position 1 corresponds to a waiting time of 80 ms.
- Position 2 corresponds to a waiting time of 100 ms.
- Position 3 corresponds to a waiting time of 180 ms.
- Position 4 corresponds to a waiting time of 300 ms.
- Position 5 corresponds to a waiting time of 600 ms.
CAUTION : We strongly recommend setting this waiting time to position 4 (default setting) as
certain services, such as call signal management for example, will not function if changed.
To modify the waiting time for the R key, follow the steps below :
• The handset is on standby (no call tone).
•
(7) .
• “
PHONE BOOK” is displayed on-screen.
• Use key (
6) to select “SETTINGS”.
• Press key
(7) .
• “
BASE VOL” is displayed on-screen.
• Press key (
6) until “R KEY” is displayed on-screen.
• Press key
(7) .
• The waiting time used for the R key is displayed (e.g. “
R KEY: 4” for position 4).
• Press key
(5) or (6) to select the desired waiting time (between 1 and 5).
• Press key
(7) to validate the setting.
• Press and hold key
(9)
for 2 seconds to restore standby mode.
N.B. : During this operation, the handset automatically returns to standby when no button has
been pressed for 60 seconds.
O
K
OKO
K
O
K
32
2-27 Locking/Unlocking the keypad
Locking the keypad avoids dialling a number accidentally.
a) To lock the keypad :
• The handset is on standby (no call tone).
• Press key
(7) then on the alphanumeric keypad’s* key.
• The icon is displayed on-screen, indicating that the keypad is locked.
b) To unlock the keypad :
• The handset is locked and the icon is displayed on-screen.
• Press key
(7) then on the alphanumeric keypad’s* key.
• The icon is cleared from the screen, indicating the keypad is unlocked.
2-28 Privacy Function
This function is used to speak to a third party during a call, without being overheard by
the caller.
• Press the key to activate this function.
• The icon is displayed on-screen.
• The user can speak to a third party, the caller cannot hear the conversation.
• Press the key again to deactivate this function.
• The user can speak to the caller again.
2-29 The R Key
The R key is used to access certain France Telecom contact services.
For further information, please contact your France Telecom agency (freefone 1014 or 3614
France Telecom on your minitel).
OKO
K
C
Page 18

3534
• Press key (5) or (6) to select the desired pause duration.
• Press
(7) to validate the setting.
• Press and hold key
(9) for 2 seconds to restore standby mode.
NB : During this operation, the handset automatically returns to standby when no button has been
pressed for 60 seconds.
2-31 Resetting default settings
The user must know the base’s PIN code for this function.
This function is used to restore all the default settings of the telephone.
The following default settings will be obtained :
Call Log : Clear
Entries redial : Clear
Phone Book : Clear
Time : 12:00
Date : 01-01
Listening volume : 4
Internal handset ring tone : 1
External handset ring tone : 3
Volume of handset ring tone : 4
Volume of base ring tone : 4
Base ring tone : 3
R Key : 4 (300 ms.)
Pause function : 4 (3 seconds.)
Language : French
Beep key : On
Low battery alarm : On
Handset out-of-range alarm : ON
Automatic response : On
Handset name : DECT
O
K
34
2-30 Pause Function
When the user dials a number he/she may insert a pause by holding down key (5)
/P
for 3 seconds (after dialling at least one figure) then finish dialling the number.
This automatically inserts a pause in the number dialled. The PAUSE function may be stored in the same manner as an ordinary number in the directory’s 25 memories.
NB : Key (5)
/P
will not run the PAUSE function if no figure has been dialled before
triggering it.
Modifying the duration of the pause :
CAUTION : The pause’s default setting is a duration of 3 seconds (position 4) as this is how it
works in France. However, modifying this time may prove essential for informed users.
Four pause times are available :
- Position 1 corresponds to 1 second.
- Position 2 corresponds to 1.5 seconds.
- Position 3 corresponds to 2 seconds.
- Position 4 corresponds to 3 seconds.
To modify the pause duration, follow the operation below :
• The handset is on standby (no call tone).
• Press key
(7)
• “PHONE BOOK” is displayed on-screen.
• Use key (
6) to select "SETTING"
• Press key (7) .
• “
BASE VOL” is displayed on-screen.
• Press key (
6) until “PAUSE” is displayed on-screen.
• Press key
(7) .
• The pause duration used is displayed (“
PAUSE: 4” for position 4, for example).
O
K
O
K
O
K
C
Page 19

3736
Access to the name or number identification service is subject to subscription with France
Telecom (freefone 1014 or 3614 France Telecom on your minitel) and to France Telecom’s
technical availabilities.
3-1 Call identification page 36
3-2 Caller number or name identification. page 36
3-3 Consultation of the call log page 38
3-4 Dialling from the log page 40
3-5 Transfer of a number from the log to the phone book page 40
3-6 Selective call clearing page 41
This appliance can identify the telephone numbers of callers and the date and time of their calls.
All this information is saved in the call log, which can hold up to 24 numbers.
3 CALLER NUMBER OR NAME IDENTIFICATION
36
To restore the default settings, follow the operations below :
• The handset is on standby (no call tone).
• Press key
(7)
• “PHONE BOOK” is displayed on-screen.
• Use key (
6) to select “SETTINGS”
• Press key
(7)
• “BASE VOL” is displayed on-screen.
• Press key (
6) until “RESET” is displayed on-screen.
• Press key
(7)
• “CODE” is displayed on-screen.
Enter your PIN code using the alphanumeric keypad (the default PIN code is 0000)
• Press key (7)
• The base and the handset emit a audible signal to indicate restoration of default
settings.
CAUTION : If the PIN code has been forgotten, the telephone must be reset (Please refer to
chapter 5 - Resetting the appliance).
O
K
OKOKO
K
Page 20

3938
a) Reception of a call with a name
b) Reception of a call with a number
c) Reception of a call where the caller has withheld his/her number
d) Reception of a call including a network-based error
e) Reception of a call from a France Télécom SMS reception server
CAUTION :
One cannot return a call to this caller from the call log.
CAUTION : It is not possible to call someone back from the call log.
CAUTION : This telephone cannot receive text messages but it indicates that a contact has
attempted to send one.
38
3-1 Call Identification
The telephone saves a list of the last 24 incoming calls. This list is the “call log”.
• On receiving a call, the incoming line’s number is compared to the numbers saved in
the directory. If the number is identified in the directory the telephone replaces the
incoming number with the name sourced in the directory.
• The appliance has a capacity of 12 characters per name and 25 figures per number.
• Each number and name saved in the call log is associated with the time and date of
its arrival.
• When a call is received, the number or the name is replaced by the display of the
call duration.
• When you have unread calls recorded in the call logs, the icon flashes on the
handset’s standby screen and the indicator on the base.
• “
EMPTY” is displayed if no calls are saved in the call log.
• When over 24 numbers are in the log memory, the most recent call replaces the
oldest one.
• The number or name of a caller is displayed if the user is already on a call, only
where the user subscribes to the France Telecom call signalling service.
3-2 Caller number or name identification
This service is used to :
• Read the telephone number of the incoming call on the handset’s screen.
•
Have access to a list of caller numbers with the date and time of their calls associated.
• The identification messages are transferred by the telephone exchange after a short
ring tone (250 ms.) and before a normal ring tone.
LOGICOM
0148636794
PRIVE
INDISPONIBLE
MINI MESSAGE
Page 21

4140
b) The caller has withheld his number
c) The caller’s number is unavailable
d) SMS Reception
Two calls, for example, have been received for which the number is withheld (it may
be the same caller who has called twice, or two different callers).
As the caller withholds the number, one cannot return the call.
An error has occurred on the network, number or name display is unavailable.
You cannot return the call.
You have received 1, for example, SMS on your fixed telephone line.
This telephone cannot receive SMS messages.
There is no point in calling the number associated with this message as it is simply the
France Telecom reception server’s number, which will simply respond by saying this
number is unregistered.
2
1
1
40
A contact tried to reach you 3 times from 0148636795.
Press key
(7) to display the time this caller tried to reach you at his/her last call.
O
K
a) Repeated call
3-3 Consulting the call log
• The telephone is on standby (no call tone)
• Press key
(6)
• The most recent call is displayed
• Use key
(5) and (6) to consult other calls
1
Caller’s
name
Caller’s name
Repeated call
(e.g. 3 times)
3
LOGICOM tried to reach you once.
• To display the number followed by the date and time associated with a name,
use key (7)
OK
SPECIFIC CASES :
LOGICOM :0
PRIVE :0
INDISPON :0
0148636795 :0
MINI MESSA :0
Page 22

4342
• The name in the log is displayed automatically
• Use the alphanumeric keypad to modify the name displayed (key
(9) deletes a
character).
• Press key (
7) to validate
• This caller’s name and number is added to the phone book
* Only for those subscribing to France Telecom name identification. Subscribers must
manually enter the name using the alphanumeric keypad.
CAUTION : If “DELETE” is displayed instead of “ADD”
This indicates that the caller is already saved in your phone book, so it is unnecessary to conti-
nue, press and hold the (9) key to return to standby mode.
3-6 Selective deletion of calls
• Consult the call log (chapter 3-2)
• Select the call for deletion using keys
(5) and (6)
• Press key (7) (several times if necessary) until a function from the menu is
displayed :
- If “
ADD” is displayed, press key (6)
• “DELETE” is displayed
• Press key (
7)
• This call is deleted and the next call in the log is displayed
• Press and hold key
(9) for 2 seconds to restore standby mode.
NOTE : When there are no more calls saved in the log, “EMPTY” is displayed for 2 seconds.
OKO
K
O
K
42
3-4 Dialling a number from the log
• Consult the call log (please refer to the previous chapter)
•
As soon as the number or name of your correspondent is displayed on-screen, press
• The number is dialled automatically
NOTE : The number of calls displayed as “PRIVATE” or “UNAVAILABLE” cannot be dialled in
this manner.
3-5 Transferring a number and a name from the log to the
phone book
• Consult the call log (chapter 3-3)
• Select the call for transfer using keys
(5) and (6)
• Press key
(7)
(several times if necessary) until “ADD” is displayed on-screen
• Press key (
7)
OK
OK
COMMENTS :
• Press the key to dial the number of the caller whose name of telephone number is displayed
on-screen.
• To exit the call log at any time, press and hold the (9) key until the standby screen is displayed.
• L’appareil revient automatiquement au repos après 1 minute d’inactivité des touches.
manque traduction
C
C
C
C
Page 23

4544
4-1 Programming the PIN code
(secret personal code) for the base page 44
4-2 Selecting an operational base
for a handset page 45
4-3 Registering a handset onto a base page 46
4-4 Cancellation of a handset on a base page 48
4 ADVANCED OPTIONS
44
Page 24

4746
4-2 Selecting an operational base for a handset
A handset may be registered on four bases.
However, it cannot operate simultaneously on four bases, so one must be chosen as its
operational base.
If the user selects AUTO mode, the handset will operate on the first identified base (the
PIN code is not requested for this mode).
The steps below must be followed to select an operational base :
• Press key (7)
• “PHONE BOOK” is displayed on-screen.
• Use key (
6) until “MENU SAVED” is displayed on-screen.
• Press key (
7)
• “REGISTER” is displayed on-screen.
• Press key (
6) to select "SEL BASE"
• Press key (7)
• Press key (5) or (6) to select a base
• “BASE : 1”, “BASE : 2”, “BASE : 3”, “BASE : 4” or “AUTO”
• Press key (7) to confirm the base selected.
•
“CODE” is displayed on-screen.
• Enter the PIN code for the selected base.
• “
SEARCH X” is displayed on-screen while searching for the base. X represents the
selected base’s number.
N.B. : During this operation, the handset automatically returns to standby when no button has
been pressed for 60 seconds.
O
K
O
K
OKO
K
46
4-1 Programming the PIN code (secret personal code) for the
base
Certain functions are only accessible to users who know the base’s PIN code (the base’s
default PIN code is “0000”)
.
To modify the base PIN code, follow the operation below :
• The handset is on standby (no call tone).
• Press key (
7)
• “PHONE BOOK” is displayed on-screen.
• Use key (
6) until “SETTINGS” is displayed on-screen.
• Press key (7) .
• “
BASE VOL” is displayed on-screen.
• Press key (
6) until “PIN CODE” is displayed on-screen.
• Press key (
7) .
•
" CODE " is displayed on-screen.
• Enter the old PIN code using the alphanumeric keypad
(the default PIN code is 0000)
• Press key (7) .
• “
NEW” is displayed on-screen.
• Enter the new PIN code using the alphanumeric keypad
• Press key (
7) .
• “
REPEAT” is displayed on-screen.
• Enter the new PIN code again using the alphanumeric keypad
• Press key (
7) to validate the new PIN CODE.
• Press and hold key
(9) for 2 seconds to restore standby mode.
N.B. : During this operation, the handset automatically returns to standby when no button has
been pressed for 60 seconds.
O
K
OKOKOKOKO
K
C
Page 25

4948
b) To register a new handset, follow these steps :
• “NOT REGD” flashes on-screen.
• Press and hold the key on the base until flashes (approximately 10 seconds).
• Press key
(7) .
• “
REGISTER” is displayed on-screen.
• Press key
(7) .
•
" BS 1 2 3 4 " is displayed on the LCD screen.
• Enter the number of the base onto which you want to save the handset using the
alphanumeric keypad.
•
"CODE" is displayed on-screen.
• Enter the new PIN code using the alphanumeric keypad
(the default PIN code is
0000)
• Press key (7) .
• “
SEARCH X” is displayed on-screen. (X is the number of the searched base).
• When the base is identified, press key
(7) to validate the registration.
O
K
OKOKO
K
48
4-3 Registering a handset onto a base
The user must know the PIN code for this function.
A maximum of 2 handsets may be registered with a base.
a) To register a handset with a base, follow the operation below :
The handset is already registered with a base
• Press and hold the key on the base until the indicator light flashes (approximately
10 seconds).
• Press key
(7)
• “PHONE BOOK” is displayed on-screen.
• Use key (6) until "MENU ENREGIS" is displayed on-screen.
• Press key
(7) .
• “
REGISTER” is displayed on-screen.
• Press key
(7) .
• “
BS 1 2 3 4” is displayed on the LCD screen.
• Enter the number of the base onto which you want to register the handset using the
alphanumeric keypad.
•
"CODE" is displayed on-screen.
• Enter the new PIN code using the alphanumeric keypad
(the default PIN code is
0000)
• Press key (7) .
• “SEARCH X” is displayed on-screen. (X is the number of the required base).
• When the base is identified, press key
(7) to validate the save.
OKO
K
O
K
OKO
K
Page 26

5150
This function is used to reset the original configuration of the telephone as used initially.
All the default settings and
the default “0000” PIN code are available in this manner
(please refer to chapter X.)
To reset the telephone, follow these steps :
• The handset is on standby (no call tone).
• Press and hold key
(9) until the handset’s screen switches off.
• Press key
(9) briefly to switch the screen on again and press the key on the
alphanumeric keypad immediately.
•
“RESET” is displayed on-screen.
• Press key (
7) .
• Wait a few seconds while the handset finds its operational base.
• Standby mode is restored to the handset, indicating that the telephone has been reset.
NOTE : Use this function if the PIN code has been forgotten.
O
K
5 RESETTING THE APPLIANCE
50
4-4 Cancelling a handset on a base
The user must know the PIN code for this function.
A handset may be deleted from a base. This function is used to cancel a faulty handset
for replacement with a new one.
CAUTION : A handset may only be cancelled using another handset registered on the same
base.
To cancel a handset on a base, follow these steps :
• Press key (7)
• “PHONE BOOK” is displayed on-screen.
• Use key (
6) juntil “REGD MENU” is displayed on-screen.
• Press key
(7) .
• “
REGISTER” is displayed on-screen.
• Use key (
6) until “DEL HANDSET” is displayed on-screen.
• Press key
(7) .
•
" CODE " is displayed on-screen.
Enter your PIN code using the alphanumeric keypad
(the default PIN code is 0000).
• “CONFIRM” is displayed on-screen.
• Press key
(7) to validate deletion of the handset.
O
K
O
K
OKO
K
C
C
Page 27

5352
This equipment complies with the R&TTE 1999/5/EC directive issued by the European
Parliament and the Commission concerning the pan-European connection of unique terminals
to public switched telephone networks (PSTN).
However, as there are differences between each country’s PSTN, compliancy does not constitute an absolute guarantee of optimal operations at each PSTN network termination point.
In the event of a problem, please contact your supplier first.
This device is intended to be sold in France.
52
The LOGICOM supplier warranty is valid for normal use of the device as defined in the
instructions for use.
Damage to this appliance caused by external factors is excluded from this warranty.
In particular, the warranty is not applicable if the appliance has been damaged as a
result of a fall, a shock, incorrect use or use with a connection which is not compliant
with the instructions or France Telecom requirements, or due to lightening, mains overvoltage, or insufficient protection from heat, humidity or frost.
The warranty applies to Metropolitan France only.
Whatever the circumstances, the legal warranty for latent defects will apply in conformity
with articles 1641 onwards of the Civil Code.
LOGICOM S.A.
ZI PARIS NORD 2
74, rue de la Belle Etoile
B.P. 58338
95941 ROISSY CDG
FRANCE
6 SCOPE OF THE WARRANTY
NOTE : Before returning the appliance to the vendor, it is imperative to contact us to ensure the
appliance is faulty.
• When calling this service, place the appliance close by and plug it in (except if it is
damaged).
• Two customer care numbers are available :
+33 (0)1 48 63 67 94 or
+33 (0)1 48 63 67 95.
• A telephone server will provide a solution to each of your problems.
7 CONTACTING THE CUSTOMER CARE SERVICE
?
Page 28

54
IN THE EVENT OFA PROBLEM AND FOR FURTHER INFORMATION
PLEASE CONTACT OUR CUSTOMER CARE SERVICE
Tel.: +33 (0)1 48 63 67 94
+33 (0)1 48 63 67 95
 Loading...