

Page 1
User’s
QuickStart Guide
Model 30911
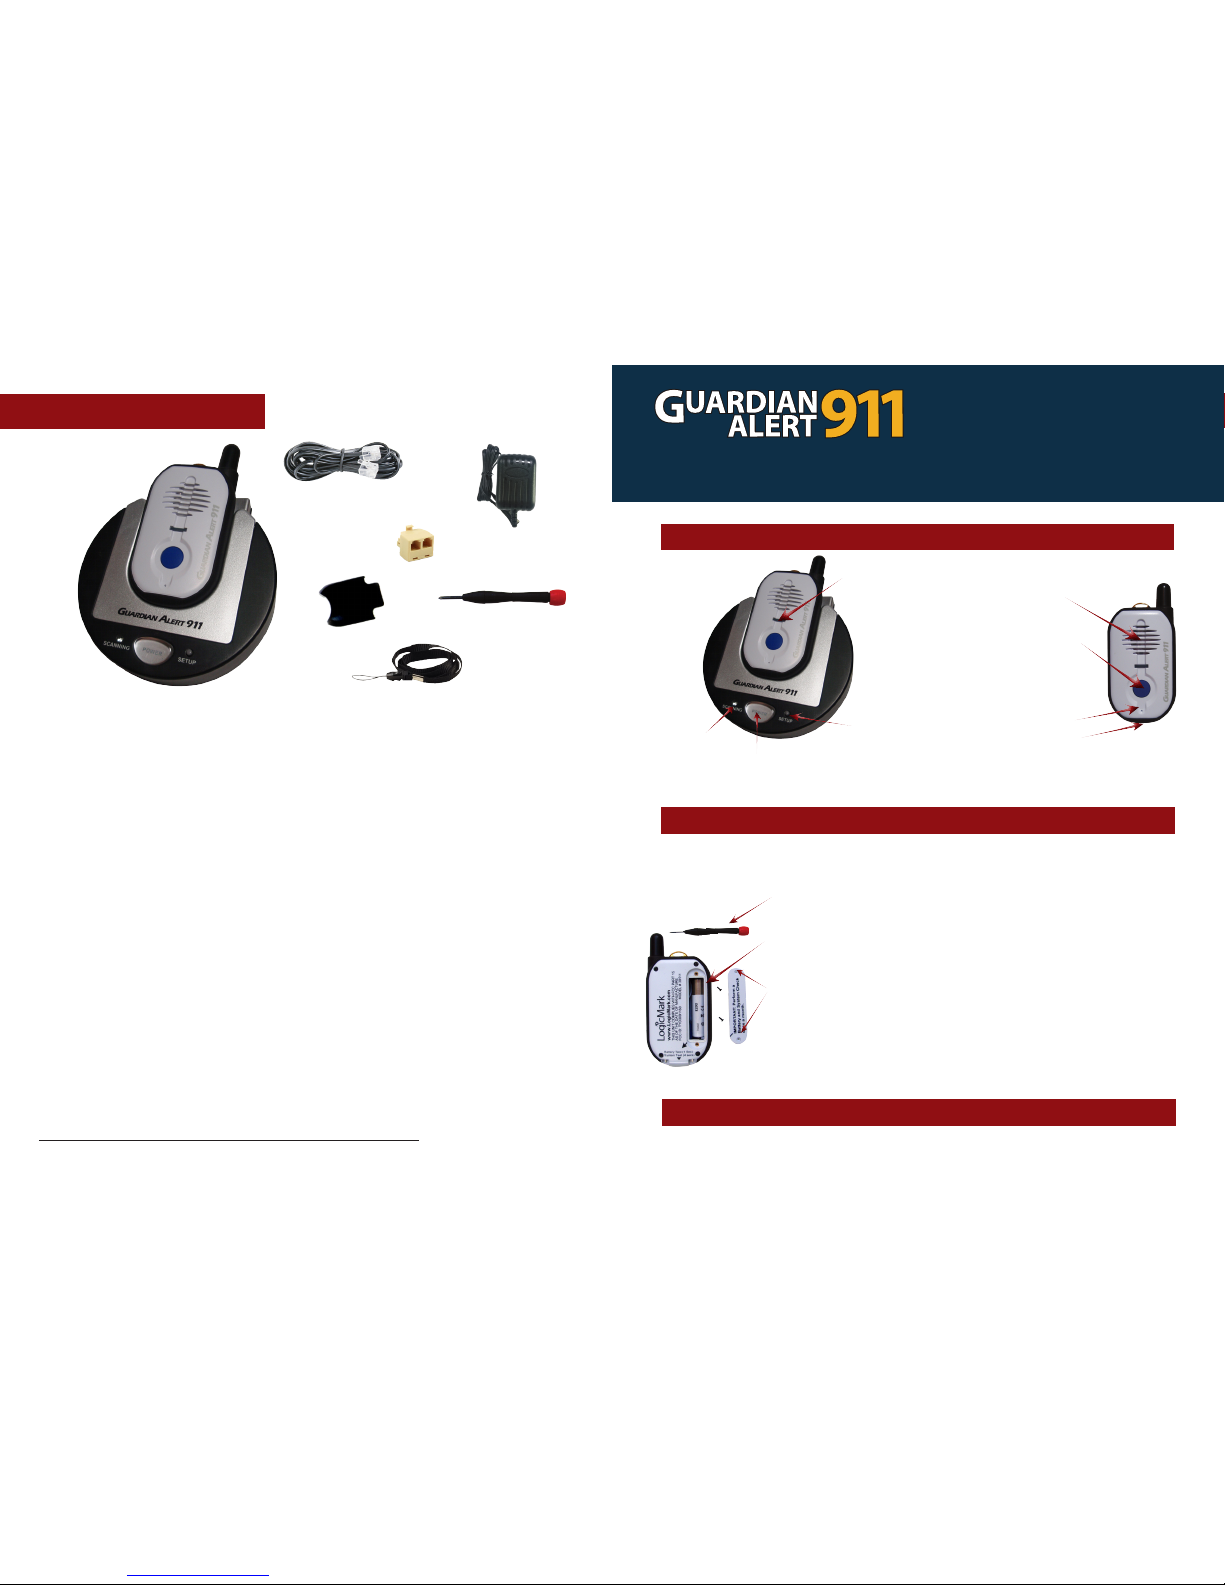
Unit Functions
Speaker
Emergency
Button
TEST Button
The pendant is water resistant but NOT waterproof. Splashing with water is
OK but do not submerge. Constant exposure to soaps and conditioners can
damage seals and reduce speaker volume. Towel dry when wet.
Manufacturer’s Disclaimers and Limited Warranty
The Manufacturer’s warranty period is one year from time of purchase.
COMMUNICATION AND RESPONSE LIMITATIONS: Purchaser acknowledges that signals pass through
communication networks wholly beyond the control of The Manufacturer and are not maintained by The
Manufacturer, and, therefore, The Manufacturer shall not be responsible for any equipment or
communication failure which prevents transmission signals from reaching your contact list including
emergency 911 operators or damages arising therefrom. Purchaser acknowledges that The
Manufacturer provides no response to the System’s equipment. The Manufacturer shall not be
responsible for ambulance, police or other emergency response.
TESTING AND SERVICE OF THIS EQUIPMENT: The equipment, once installed, are in the exclusive
possession and control of the Purchaser, and it is Purchaser’s sole responsibility to test the operation of
equipment and request warranty service if the equipment is under warranty.
PURCHASER’S EXCLUSIVE REMEDY: Purchaser’s exclusive remedy for The Manufacturer’s default
hereunder is to require The Manufacturer to repair or replace, at The Manufacturer’s option, any
equipment or part of the personal emergency alert system which is non-operational during The
Manufacturer’s warranty period.
LIMITATION OF LIABILITY: This equipment is not designed or guaranteed to prevent any loss or injury.
This Limited Warranty and Disclaimer of Liability
constitutes the terms of sale and use of the equipment, and if there should arise any liability on the part of
The Manufacturer as a result of any cause whatsoever, regardless of whether or not such loss, damage, or
personal injury was caused by or contributed to by The Manufacturer’s negligence to any degree or failure
to perform any obligation or strict products liability, such liability will be limited to an amount paid by the
Purchaser to The Manufacturer for the product, or to the sum of $350.00, whichever is greater.
For warranty information, contact Customer Service at LogicMark, LLC.
Power Light
Setup Button
Charging Light
(RED when charging,
GREEN when charged)
Base and Pendant
AC Adapter Power cordTelephone cord
Splitter
Belt clip
Lanyard
Contents
v 6.1 Model 30911
FCC ID TYD3091160
Part # 30929
Microphone
TM
Scanning
Light
Screwdriver
with DECT 6.0
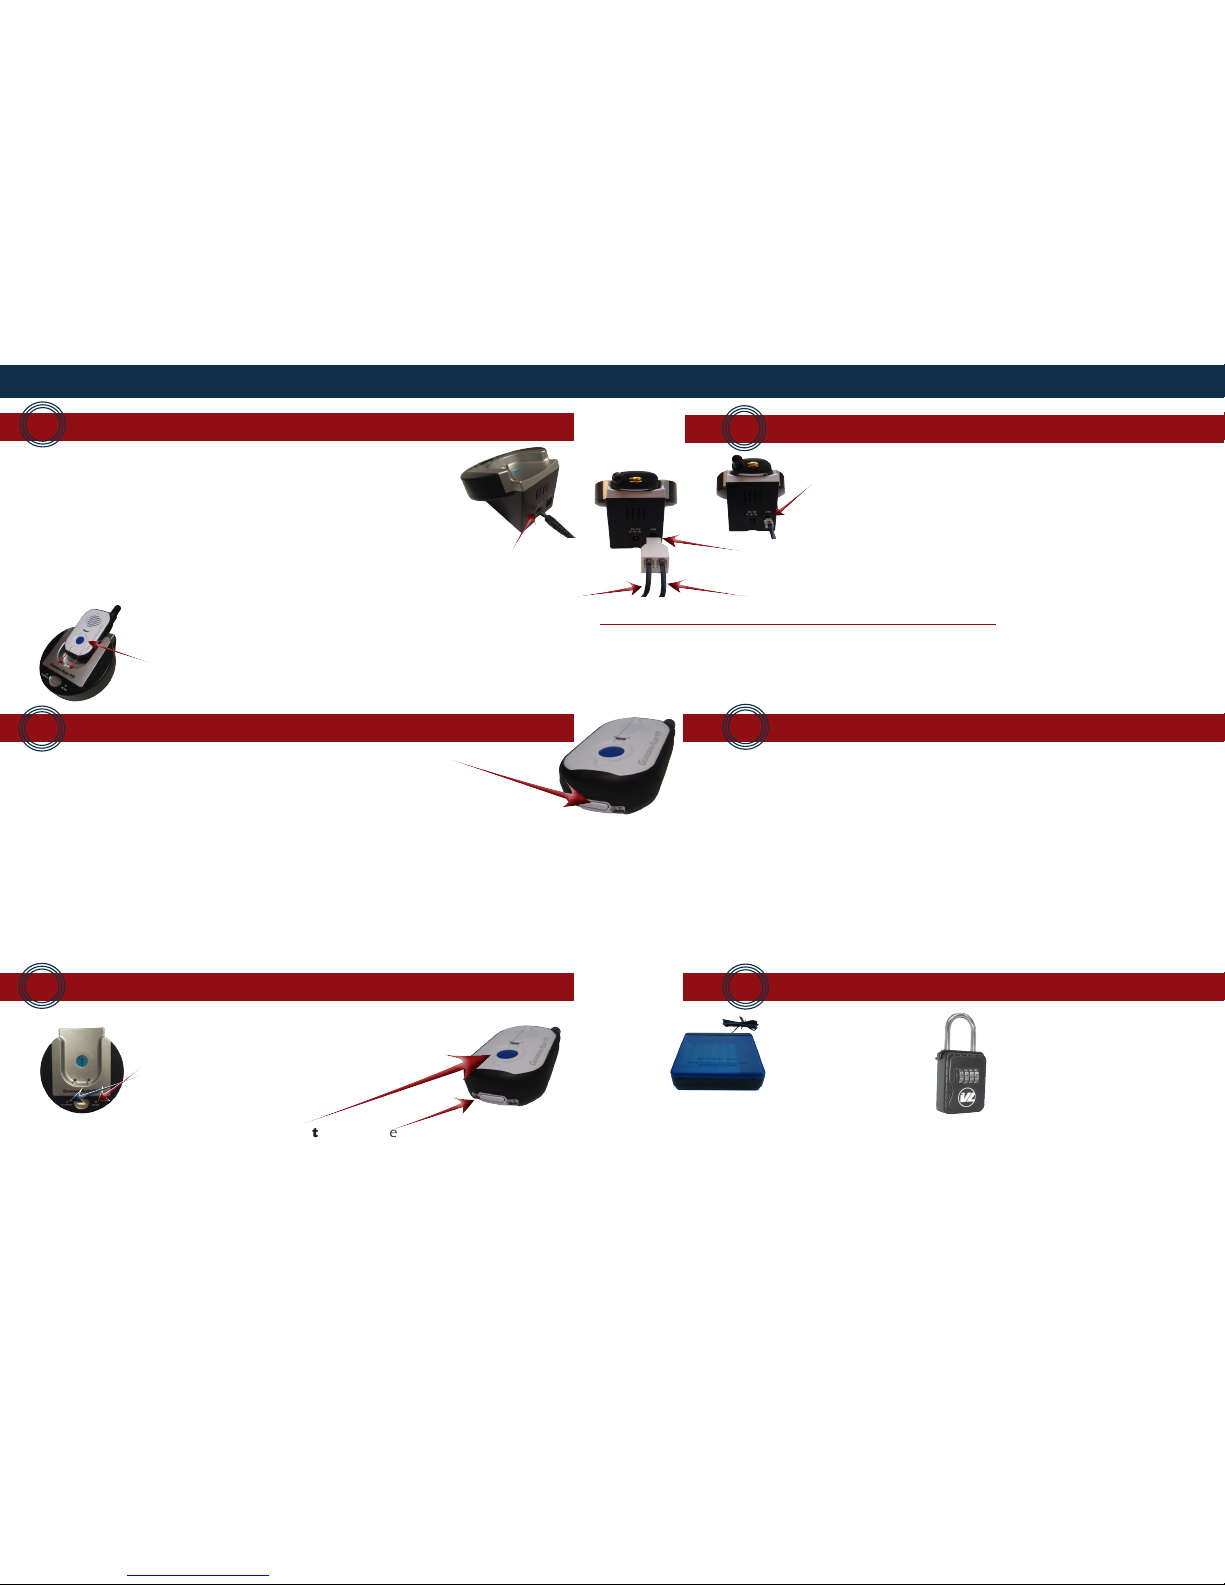
• The battery may already be installed. Press the white TEST
Button on the bottom of the pendant to check.
• If battery is not installed, use the enclosed screwdriver to
unscrew the two small screws and remove the battery cover.
• Insert the rechargeable Lithium Ion battery into the pendant
making sure the Negative or Silver side is facing up toward
the antenna.
• Replace the cover and use the screwdriver to tighten the
two screws.
NOTE: This is NOT a disposable AAA battery. It should provide
years of service, but if you need to replace it, please call
Customer Service at 1-800-519-2419.
Battery Installation and Maintenance
Personal Emergency Response System
Water Resistance
Page 2
Placing an Emergency Call
Accessories
Before First Use:
Fully charge pendant by putting it in the charging cradle prior to use.
It may take 3 to 4 hours to ensure a full charge. The Charging Light on
the pendant will be Red when charging and turn solid Green when
fully charged. We recommend that pendant be charged monthly.
Perform a System Test
Press the BLUE EMERGENCY button for 2 seconds:
A. The Guardian Alert calls 911 and user talks to the 911 operator using the
speakerphone in the pendant.
B. Call can be ended one of two ways:
i. After 3 minutes of silence, the Guardian Alert automatically ends the call.
ii. User pushes the white TEST button on the bottom of the pendant to end
the call and hang up.
C. The Guardian Alert pendant announces “Hanging Up” and returns to Standby.
Note: (If you place a call to 911 to test, it is important that you stay on the phone
and tell them you were testing your phone’s 911 feature.)
3
Plug cords into power and telephone service
4
If you are having problems, please call:
1-800-519-2419
Plug cords into the back of the base
1
Synchronize base and pendant
A. Plug AC Adapter (power cord) into back of base unit and into a
working power outlet.
B. The Yellow POWER light will illuminate.
NOTE: If you only have one telephone jack:
Plug the splitter in the back of the base as shown on image to the left
Battery Backup
Part #30912
Powers your base
unit in the event of
a power outage
A. Press and hold the
Setup button for 4 seconds. When the
Scanning light starts flashing, release
the Setup button.
B. Press and hold the Blue emergency button and the White test button until the
pendant LED starts flashing Red/Green. The flashing Scanning LED on base and flashing
LED on pendant will turn OFF when learned. (You have about 20 seconds to press and
hold the pendant buttons.) Perform system check to confirm success.
2
5
NOTE: Do not plug AC Adapter (power cord) into
an outlet that is controlled by an On/Off switch on
the wall to avoid accidentally turning off the base.)
6
A. Plug one end of the phone cord into the phone jack on the
back of the base unit.
B. Plug the other end into a working phone jack in the wall or
modem.
To wall jack or other working phone jack
To Telephone
If you replace a pendant, you will need to synchronize the new one to your base:
Lockbox
Part #30913
By placing a lockbox on a
door with a spare key inside,
emergency personnel can
enter the home without
damaging personal property.
Plug AC Adapter into base
and into power outlet.
A. Push the WHITE test button on bottom of pendant for 4 seconds.
B. Listen for voice prompt from the pendant:
i. “All Systems are OK” - “Battery is OK” is heard if the system is correctly installed.
ii. If any other voice prompt is heard, the unit will describe the problem.
a. “Cannot detect telephone line” - Plug telephone cord into a working phone jack
b. “Cannot detect dial tone” - An extension phone is off the hook.
c. “Recharge battery soon” - Place pendant in charging base for 3-4 hours.
d. “Base and pendant out of range” - There is no power to the base, or the base
and pendant are not communicating. If the power light on the base is on, follow
instructions below (#5) to synchronize.
C. We recommend that you perform this System Test weekly.
IMPORTANT NOTE regarding VoIP Telephone Service:
If you have wireless or VoIP telephone service through the Internet, (for example: MagicJack,
Ooma, Vonage, etc.) make sure that your 911 service is enabled and set up with your correct
address. If you take your modem to another location, call your phone provider to update 911
services to your new location, then place a test call to 911 to verify your address.
 Loading...