

Logic LFTC60W12, LFTC60A12, LFTC50W12, LFTC50A12 Installation Manual

Free-Standing Twin Cavity
Electric Cooker
Instruction / Installation Manual
LFTC60W12 / LFTC60A12
LFTC60W_A12_IB_120604_Annie.indd 1 12年6月4日 下午7:09
LFTC60W_A12_IB_120604_Annie.indd 2 12年6月4日 下午7:09

Contents
Unpacking ..................................................................................................................................... 4
Product Overview ......................................................................................................................... 5
Front View ...................................................................................................................................................................5
Top View .......................................................................................................................................................................5
Control Panel ..............................................................................................................................................................6
Before Using Your Cooker ............................................................................................................ 6
First Time Use of the Hob ............................................................................................................. 6
Choosing the Right Cookware ..................................................................................................... 6
Using Your Hob ............................................................................................................................. 7
First Time Use of the Oven ........................................................................................................... 8
Using the Oven ............................................................................................................................. 8
Replacing the Anti-tilting Oven Shelf ......................................................................................... 8
Using the Oven Control ................................................................................................................ 9
Baking Tips .................................................................................................................................... 9
Energy Saving ............................................................................................................................... 9
Using the Grill ............................................................................................................................. 10
General Advice ............................................................................................................................11
Cleaning the Outside of the Cooker .......................................................................................... 11
Cleaning the Ceramic Hob .........................................................................................................11
Cleaning the Oven Door Glass ................................................................................................... 12
Cleaning the Inside of Your Oven .............................................................................................. 12
Removing the Grill Doors ........................................................................................................... 12
Replacing the Oven Lamp .......................................................................................................... 13
Hints and Tips ............................................................................................................................. 14
Specications .............................................................................................................................. 15
Installation .................................................................................................................................. 16
Adjusting the Feet ...................................................................................................................... 17
Moving the Cooker ..................................................................................................................... 17
Stability Bracket .........................................................................................................................17
Electrical Connection ................................................................................................................. 18
Safety Warnings .......................................................................................................................... 19
LFTC60W_A12_IB_120604_Annie.indd 3 12年6月4日 下午7:09
4
Unpacking
Remove all packaging from the unit. Retain the packaging. If you dispose of it please do so according to local
regulations.
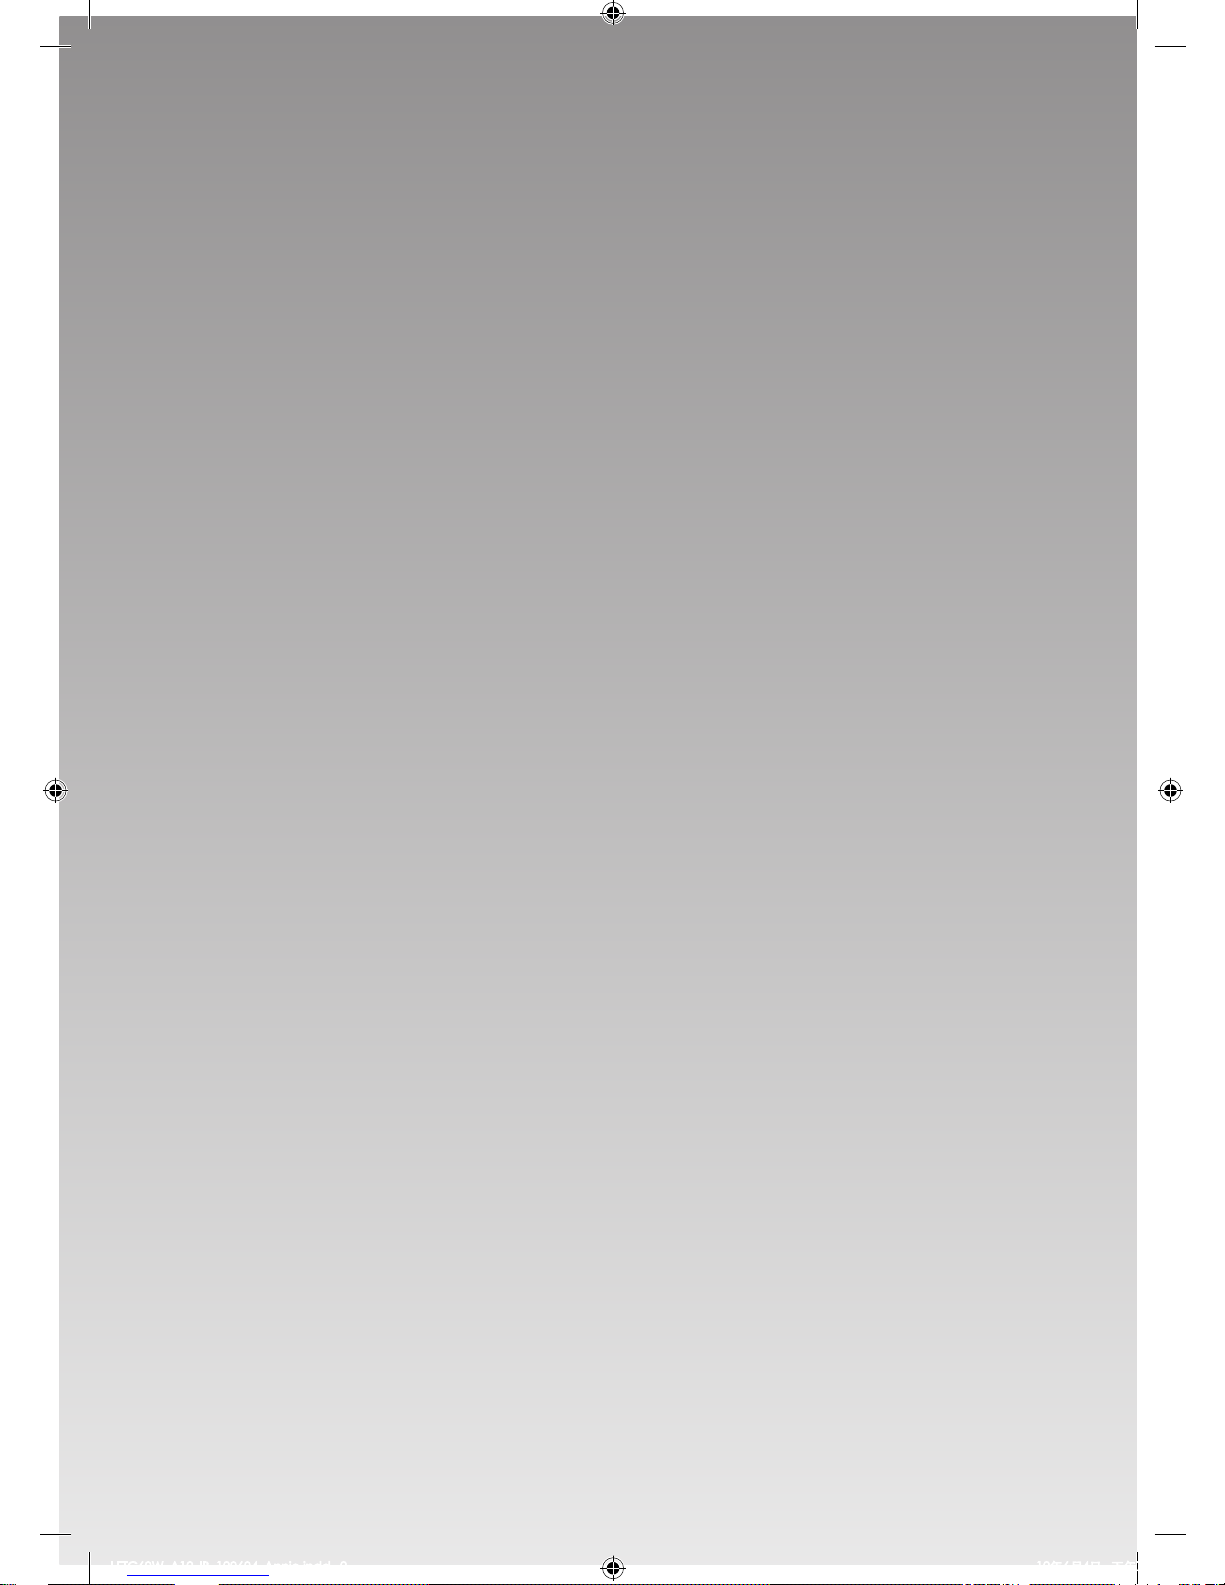
The following items are included:
Grill Pan Handle x 1
P.N.: 37004739
Grill Pan x 1
P.N.: 20643831
Grill Rack x 1
P.N.: 37006132
Oven Shelf x 2
P.N.: 37015286
The Main Unit
Instruction / Installation Manual
P.N.: 52068989
Thank you for purchasing your new Logik Free Standing Twin Cavity Electric Cooker.
You must read this manual in order to fully understand how to operate it correctly.
This cooker must be installed by a competent engineer. Please allow the installer to view the
installation section of this manual.
Read all the safety instructions carefully before use and keep this manual for future reference.
If items are missing, or damaged please contact Partmaster (UK only).
Tel: 0844 800 3456 for assistance.
* All images are for indication only; please refer to your individual unit for actual item.
LFTC60W_A12_IB_120604_Annie.indd 4 12年6月4日 下午7:09
5
Product Overview
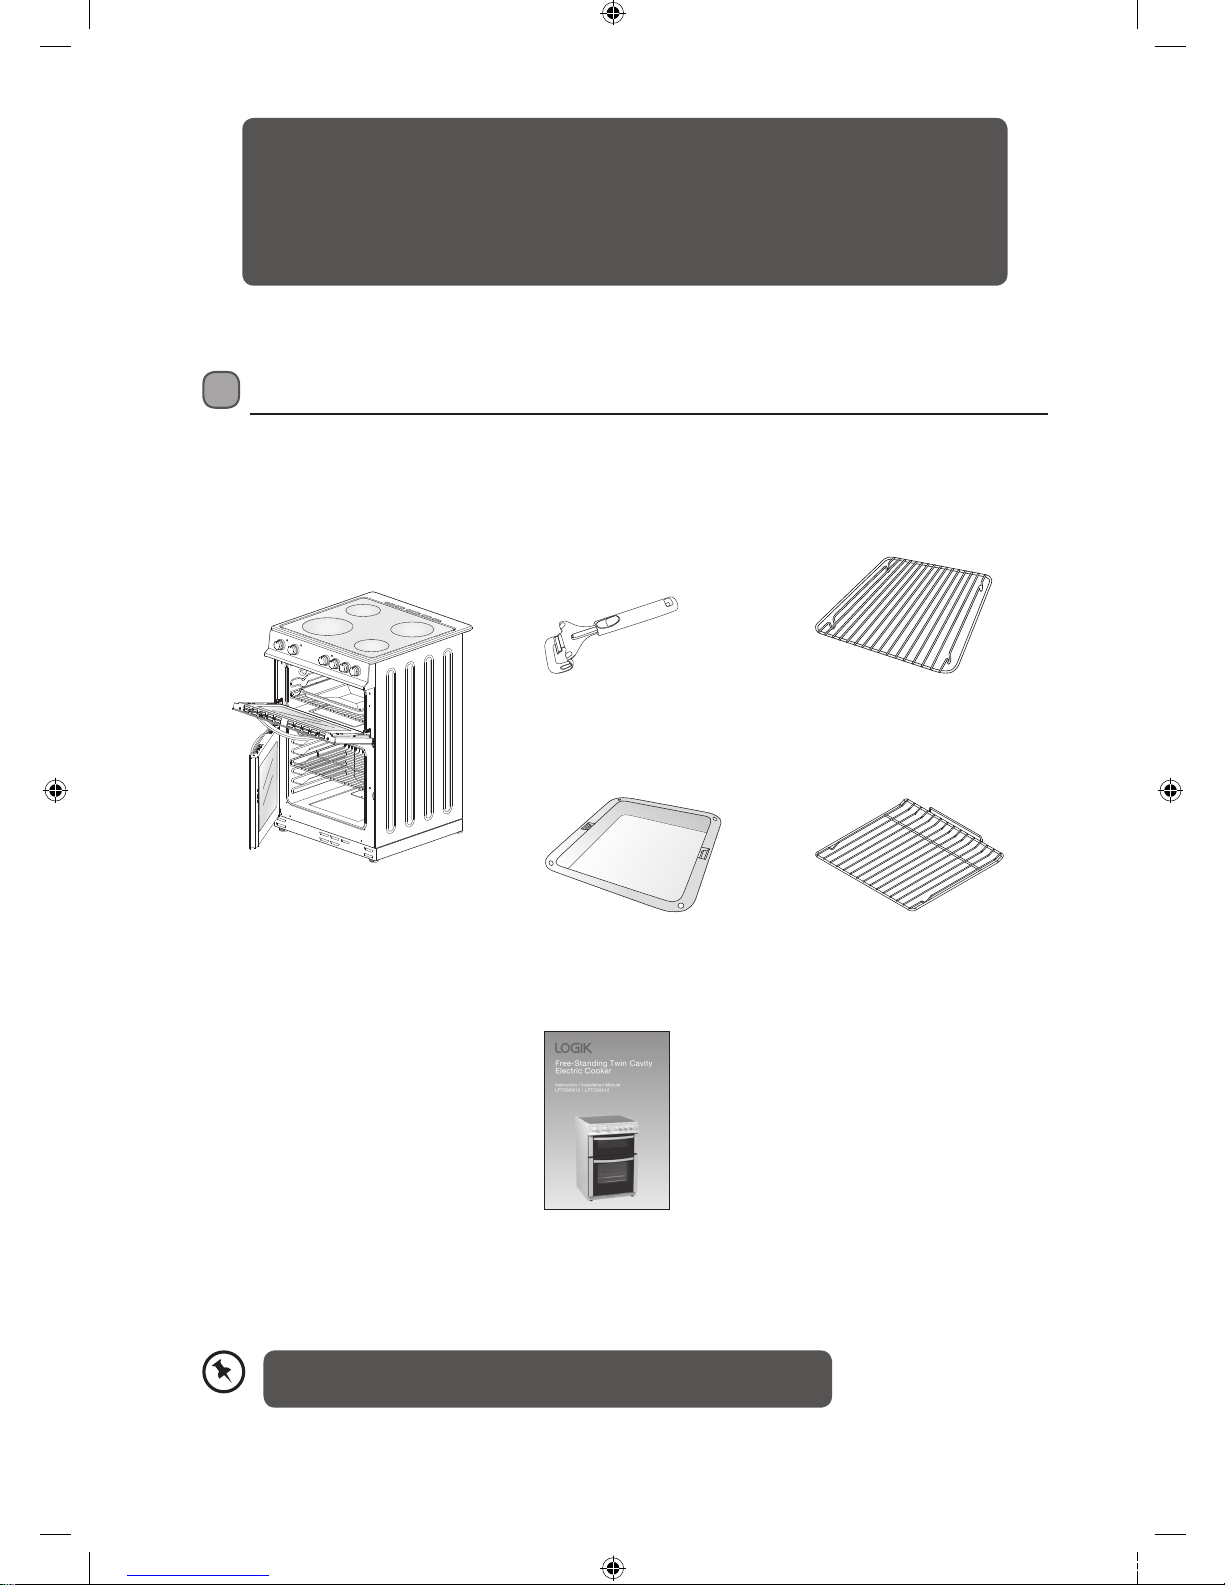
Front View
Top View
1
2
3
7
5
6
4
8
1
2
3
2
1
1. Large Ceramic Heater 1700W
2. Small Ceramic Heater 1200W
1. Hob
2. Control Panel
3. Grill Pan
4. Top Oven Door
3. Hot Hob Warming Light
5. Top Oven Door Handle
6. Oven Shelf
7. Main Oven Door
8. Adjustable Feet
* All images are for indication only; please refer to your individual unit for actual item.
LFTC60W_A12_IB_120604_Annie.indd 5 12年6月4日 下午7:09
6
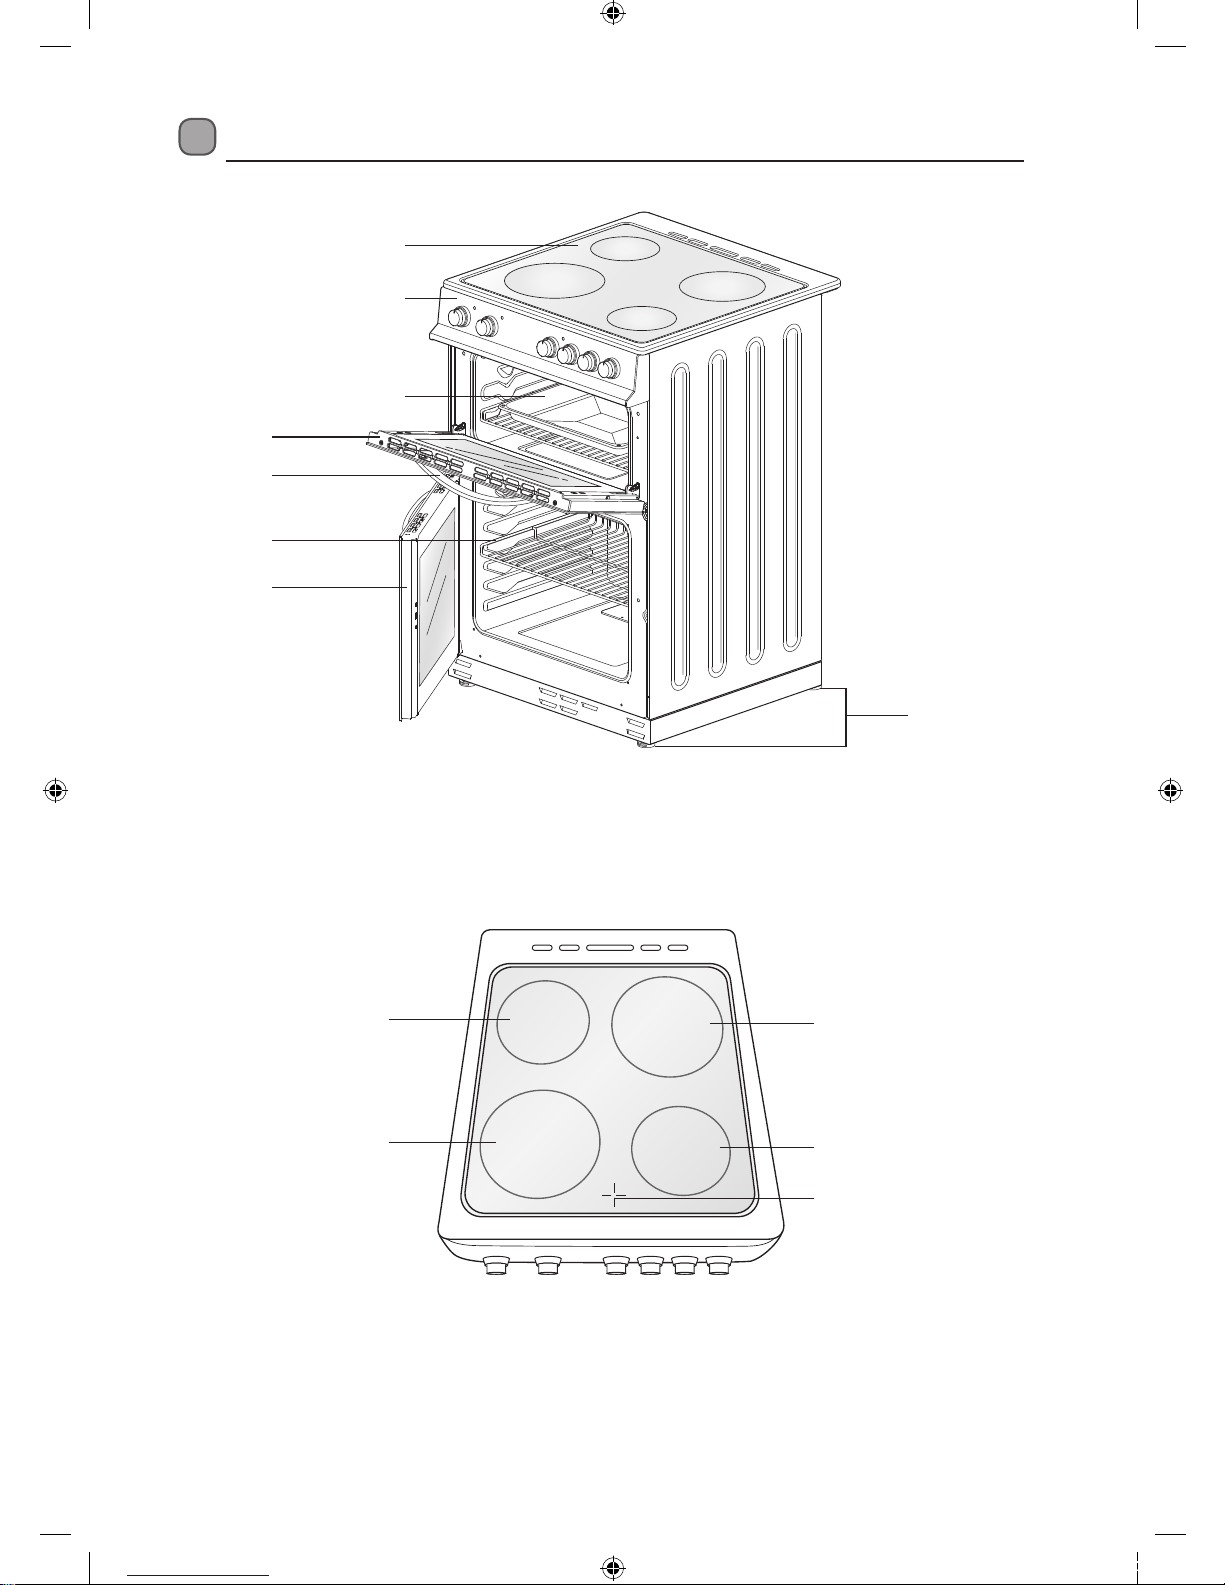
Control Panel
1. Grill Control
2. Oven Control
3. Ceramic Heater Controls
4. Grill Indicator Lamp
5. Oven Indicator Lamp
6. Hob Indicator Lamp
Before Using Your Cooker
Before using your new cooker, please:
• Make sure all the controls are turned off.
• Read this Instruction/Installation Manual, taking special note of the 'Safety Warnings' section.
• Turn the mains power on.
First Time Use of the Hob
Operate your vitro ceramic hobs at level 6 for 5 minutes. This will remove any manufacturing residues. There
may be a little smoke and odour upon initial start up for a few minutes. This is normal. It is due to the protective
substance on the heating elements which protects the cooker from the effects of corrosion during shipping from
the factory.
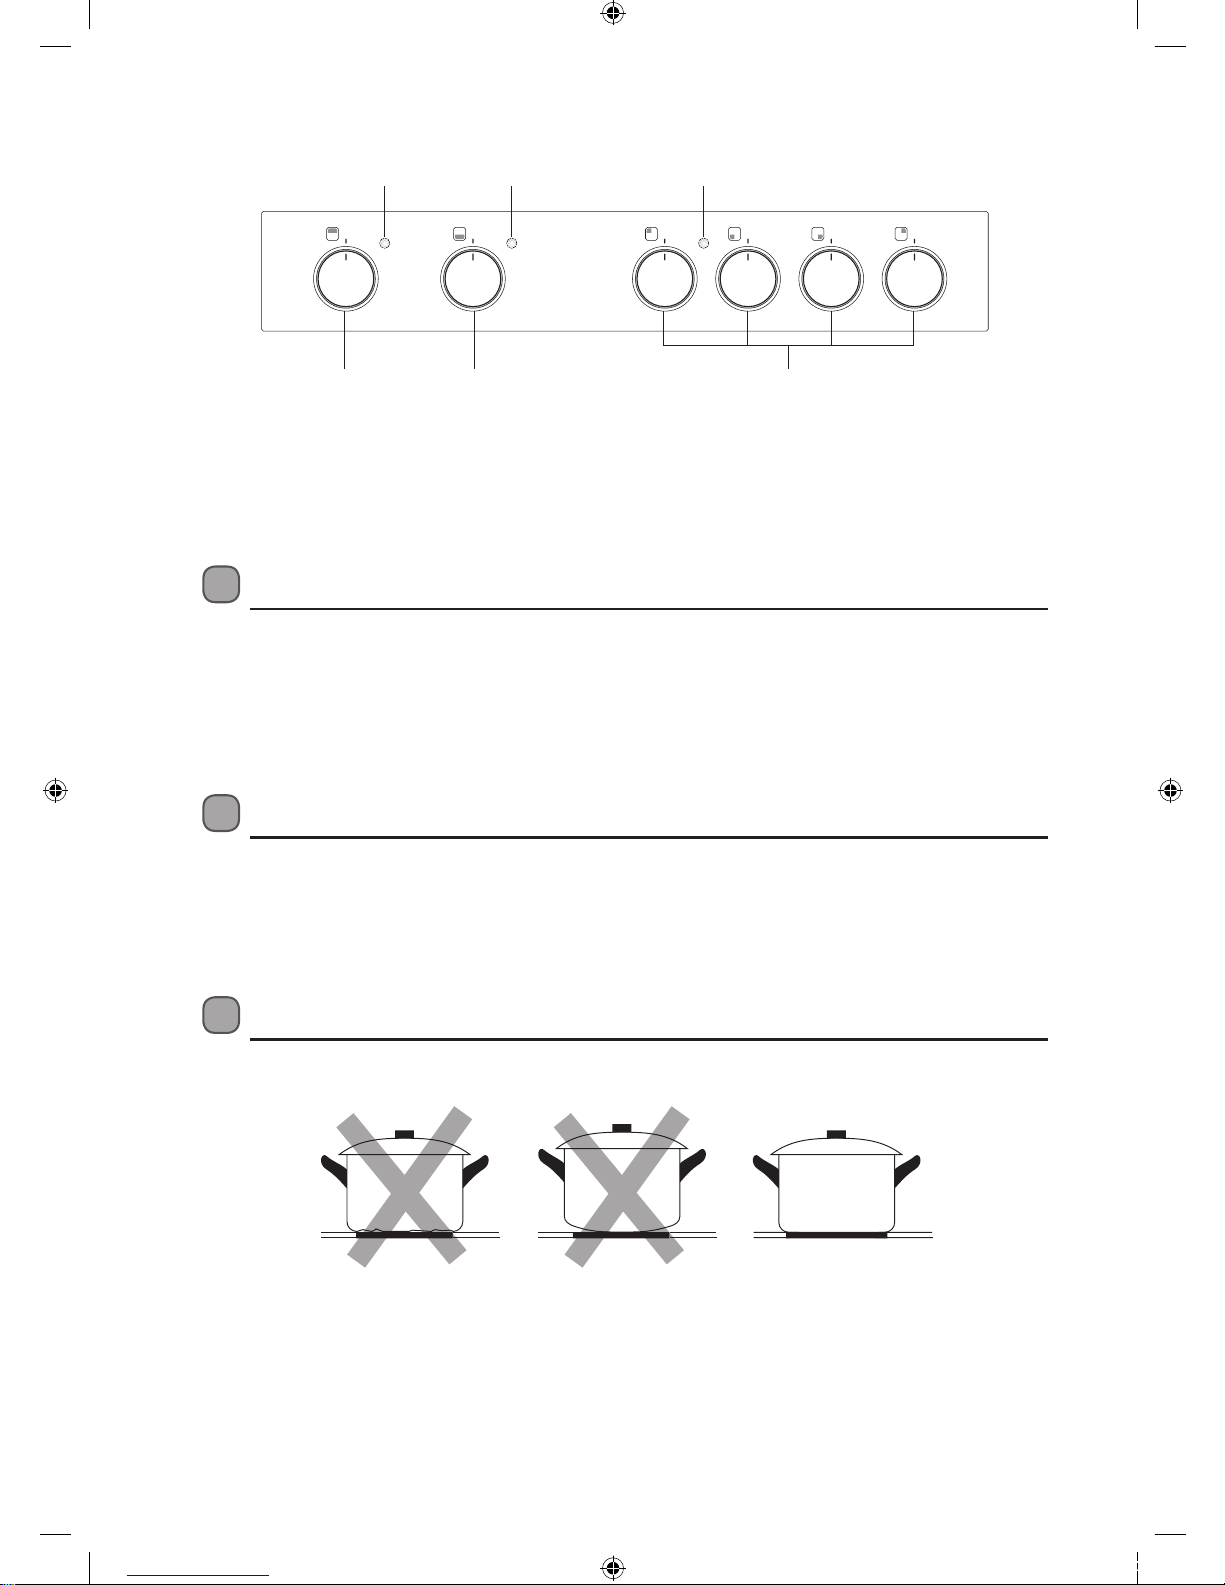
Choosing the Right Cookware
Do not use cookware with jagged edges or a curved base.
1
4 5 6
2 3
* All images are for indication only; please refer to your individual unit for actual item.
LFTC60W_A12_IB_120604_Annie.indd 6 12年6月4日 下午7:09

7
Using Your Hob
1. Rotate the control to the heat level you wish to use for the selected cooking zone.
LEVEL 0 LEVEL 1 LEVEL 2 LEVEL 3 LEVEL 4 LEVEL 5 LEVEL 6
OFF
Simmering
(Low)
Cooking at
medium temperature
Cooking, frying and boiling
(High)
2. When the hob indicator lamp illuminates above the controls, this means that one or more of the hobs are
switched on.
3. When you are finished cooking rotate the control back to the “0” position, the hob indicator lamp will turn
off. The cooking zones will remain hot for some time and the hot hob warning light will illuminate. Do not
touch the hobs until they have completely cooled down.
Make sure that the base of your pan is smooth, sits flat against the glass, and is the same size as the cooking
zone. Always centre your pan on the cooking zone.
Always lift pans off the ceramic hob – do not slide, or they may scratch the glass.
• The heated areas will be seen to switch on and off even when higher heat settings are used. This is
due to a safety device, which prevents the glass from overheating. Some switching on and off when
cooking at high temperatures is quite normal, causes no damage to the hob and little delay in
cooking times. Excessive switching may however be caused by the use of an unsuitable cookware
or a saucepan which is smaller than the heated area. If excessive switching occurs, discontinue the
use of the cookware.
• To improve performance, and reduce energy, always use pans with close fitting lids.
• If the ceramic hob glass surface is cracked, switch of the appliance to avoid the possibility of electric
shock. Contact an authorised repair agent.
* All images are for indication only; please refer to your individual unit for actual item.
LFTC60W_A12_IB_120604_Annie.indd 7 12年6月4日 下午7:09
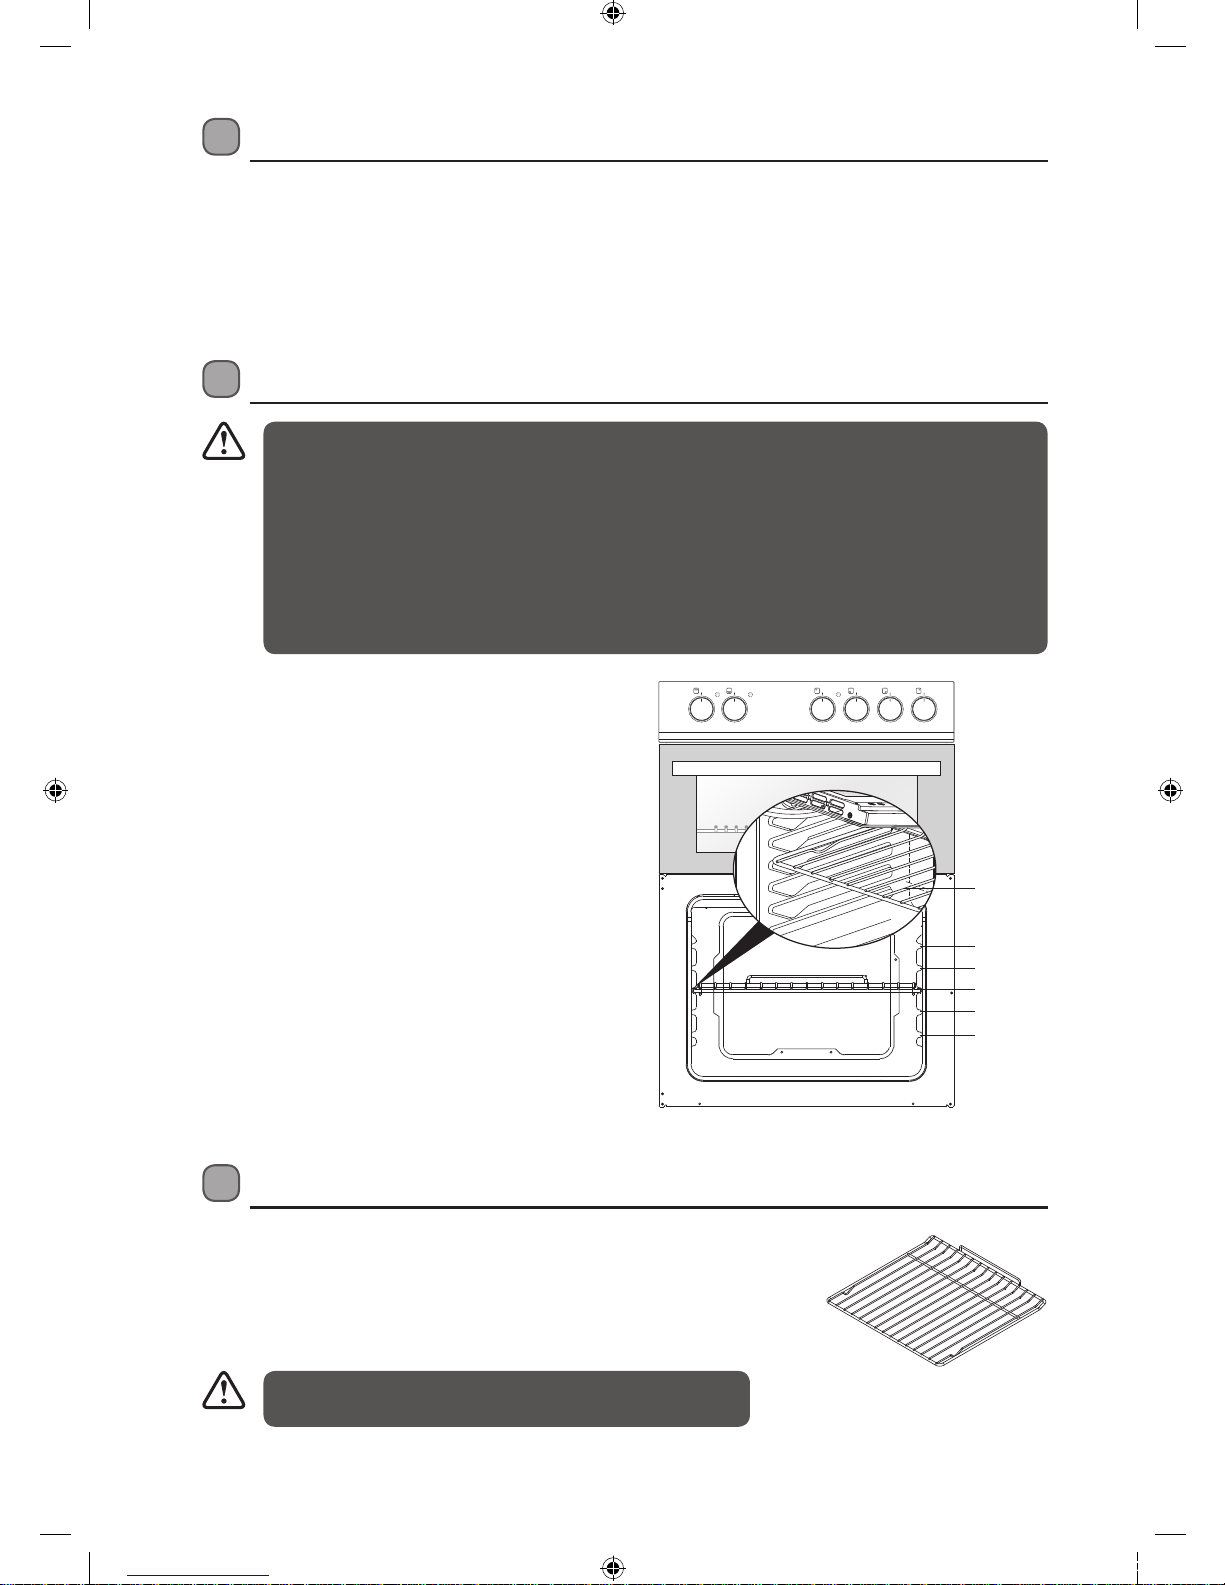
8
1. On the wall of the inner cavity there are 5 different
rack guide slots. You can place the rack at different
heights to achieve the best cooking performance
depending on the heat of the heating element and
the size of the food. It is recommended to preheat
the oven for 10 minutes.
2. Always monitor the food during operation to ensure
that you are not overcooking it.
3. For heavy food, use the oven tray rather than the
oven shelf.
4. During cooking, do not open the door unnecessarily
as you will lose heat and your cooking results may
change. Cooking times will be longer and energy
use will be higher.
5. Using cake tins when cooking cakes will give better
results.
Replacing the Anti-tilting Oven Shelf
• Insert the shelf at an angle with the vertical section to the rear to clear the
stops at either side of the guide slot. Once past this stop the shelf can be
placed level again.
• To remove, completely angle the shelf upward so the shelf stop is cleared
from the guide stop.
First Time Use of the Oven
Ensure that nothing has been left in the oven. Remove any insert cards or plastic bags. Before connecting the
power, use a damp cloth to carefully wipe the inner cavity wall and housing. Clean all the detachable parts in hot,
soapy water before using.
Heat the oven on maximum for 45 minutes. There may be a little smoke and odour upon initial start up (for about
15 mins). This is normal. It is due to the protective substance on the heating elements which protects the cooker
from the effects of corrosion during shipping from the factory.
Using the Oven
Accessible parts may become hot during use. Young children
should be kept away.
Oven Shelf
Guide 5
Guide 4
Guide 3
Guide 2
Guide 1
• Under no circumstances should the oven be lined with aluminium foil as overheating may occur.
• Do not place dishes or baking trays directly onto the base of the oven as it becomes very hot and
damage may occur.
• Bread may catch fire if the toasting time is too long. Close supervision is necessary during toasting.
• During use, this appliance becomes hot. Care should be taken to avoid touching hot surfaces, e.g.,
oven door, heating elements.
• Accessible parts may become hot when in use. Children should be kept away.
• Do not leave the handle in position when grilling. If the handle is left in position when grilling, it will
get very hot.
* All images are for indication only; please refer to your individual unit for actual item.
LFTC60W_A12_IB_120604_Annie.indd 8 12年6月4日 下午7:09
 Loading...