

Page 1

Logan Do-It-Yourself
Mat Cutting Kit - 525
Instruction Manual
Page 2
DO-IT-YOURSELF
Model 525
Mat Cutting KIT
Purchase Date
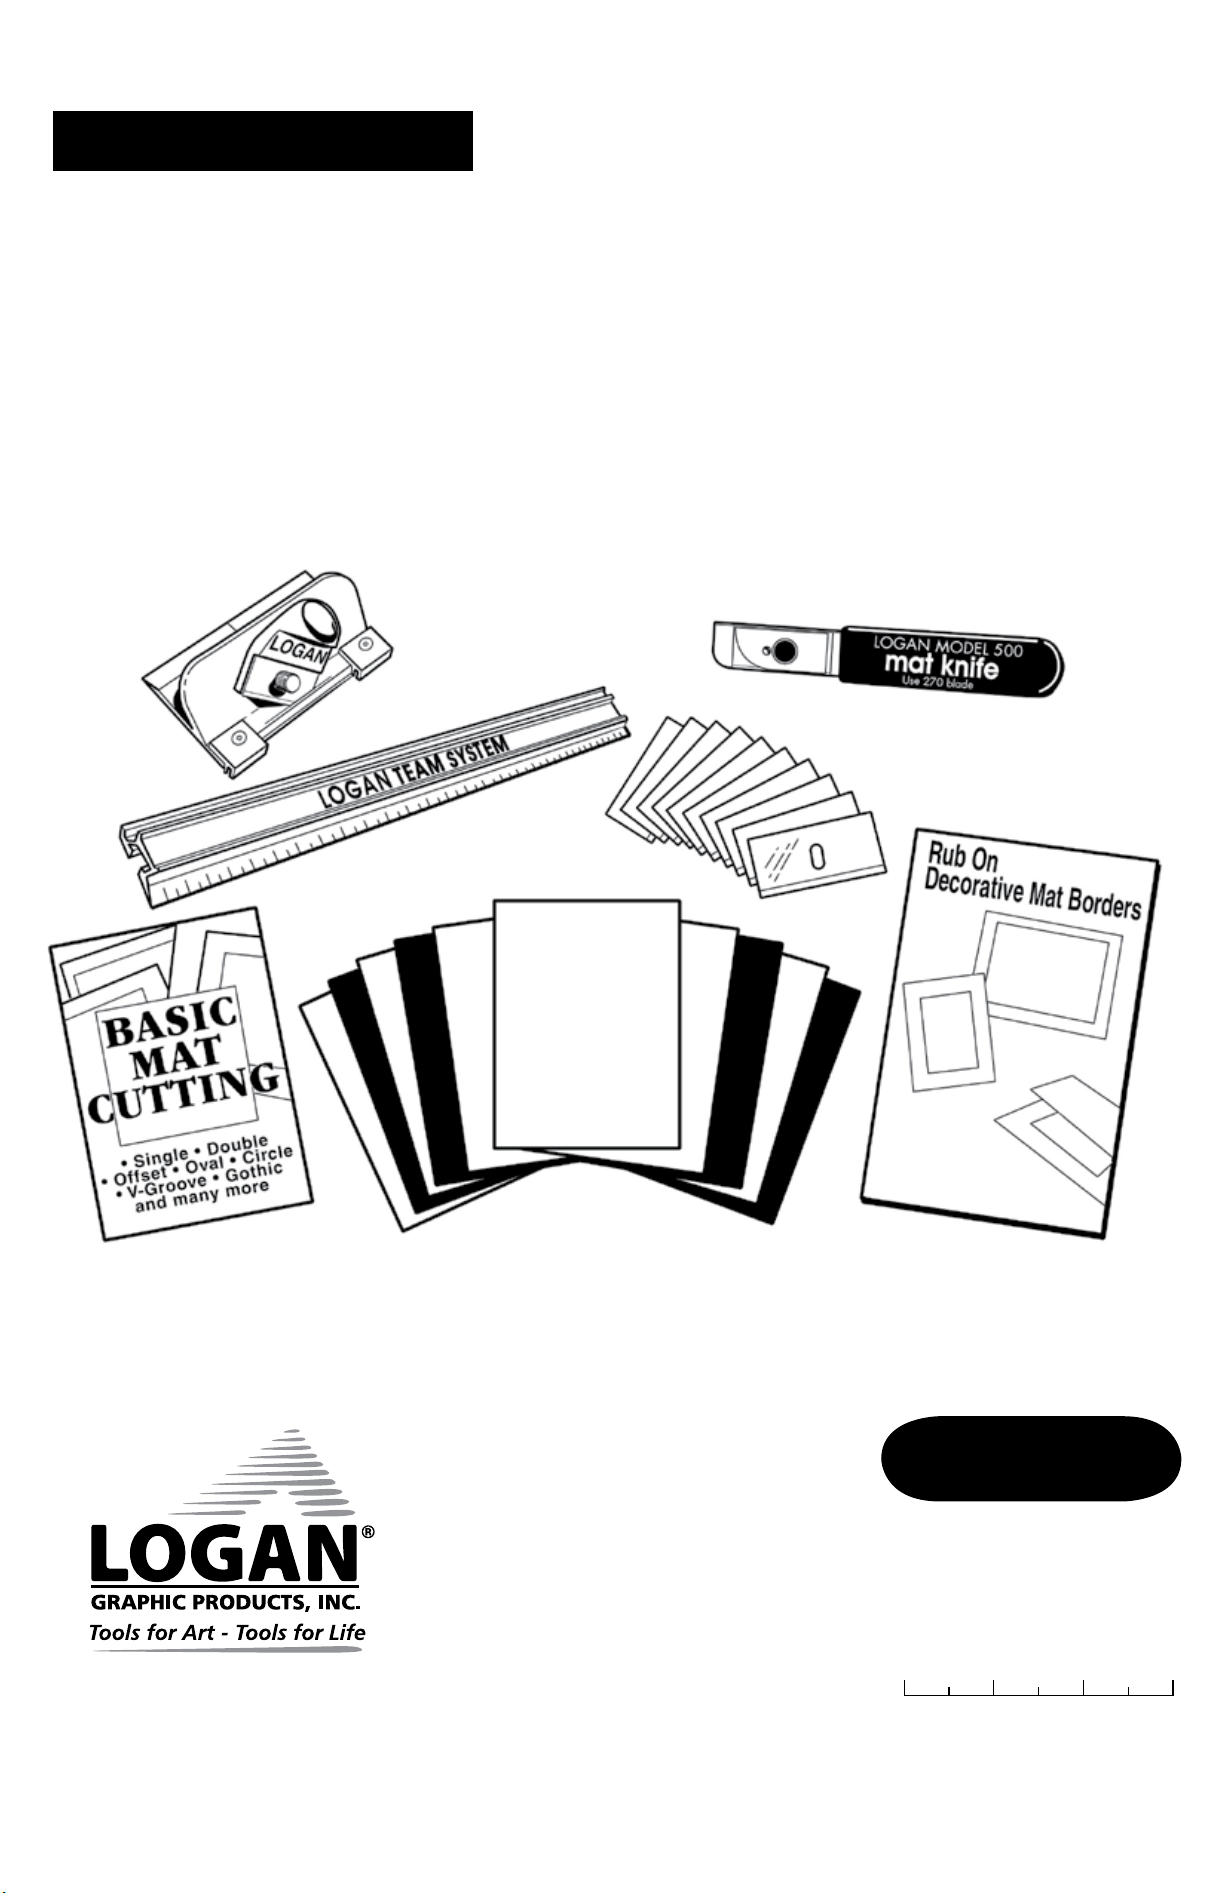
24” Guiderail, Bevel Cutter, Mat Knife, Blades, Matboards, Rub-on Transfers
and Basic Mat Cutting Book.
Instruction Manual
For best results use only
authentic Logan blades
Logan Graphic Products
Inc., 1100 Brown Street,
Wauconda, IL 60084
847-526-5515
www.logangraphic.com
Reference Part No. L421N
Rev. 1/10
Page 3
Preparation
Inserting Blades
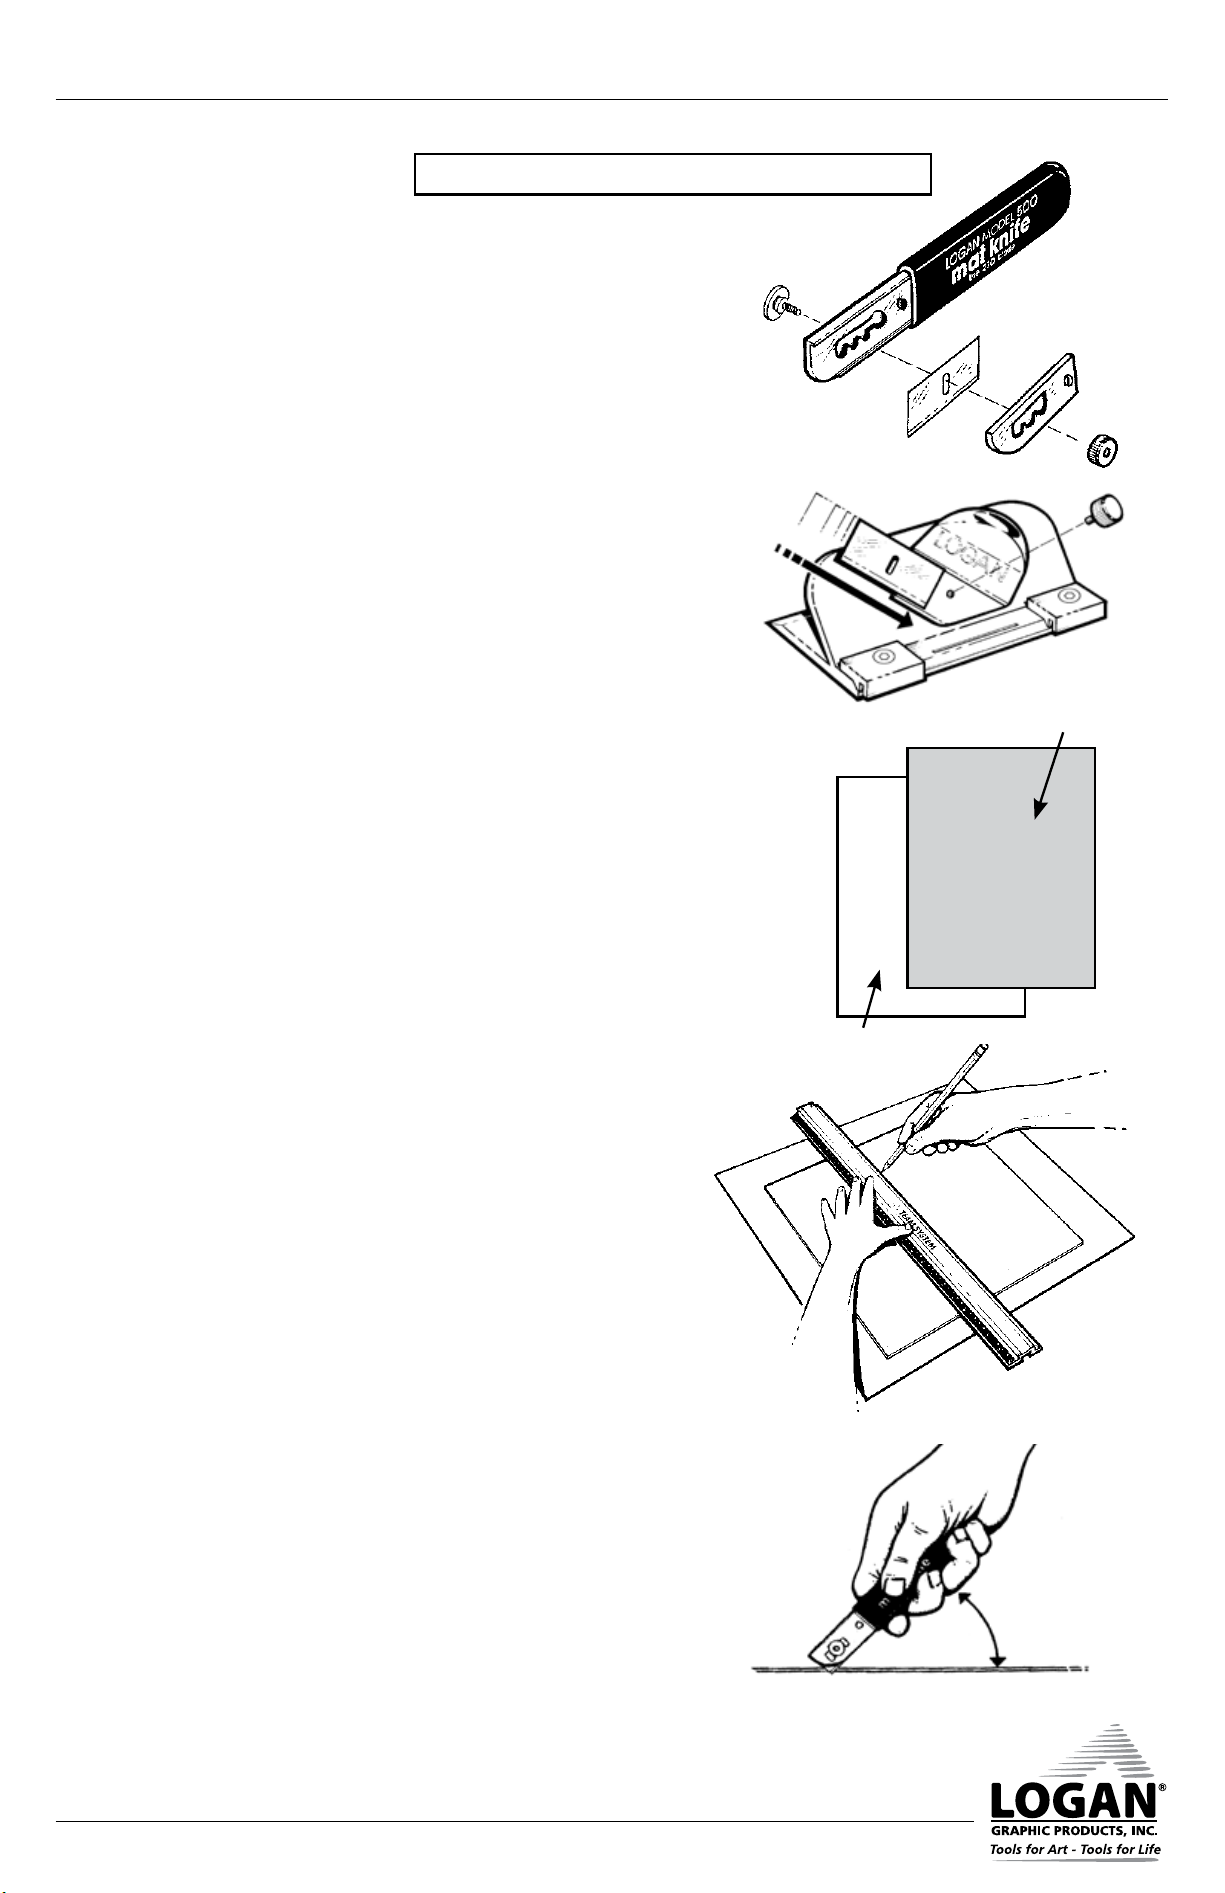
1. Mat Knife
Remove one blade from pack of 5. Remove nut and Cover
Plate. Align blade hole over thread. Be sure sharp edge
of blade is facing downward. Reassemble Cover Plate.
Adjust blade to double thick mat board/foam board (fully
extended), standard (middle setting) or safety setting (fully
retracted).
2. Bevel Cutter
Remove the Blade Holding Screw from the front of the
Bevel Cutter. Remove one blade from the package of 5.
Slide the blade down onto the FRONT of the chrome Blade
Holder, sharp edge down, until the bottom right hand corner
of the blade enters into the Blade Slot and the hole in the
blade lines up with the hole in the chrome Blade Holder.
Replace Blade Holding Screw in hole and re-tighten.
Operation
Mat Knife
Cutting a Board to Size
The Mat Knife is used for trimming matboard or foamboard
to size for the outside dimensions. The Mat Knife has three
settings: Double thick mat board/foam board (fully extended),
standard (middle setting) or safety setting (fully retracted).
1. Use a Slip Sheet
Before cutting, be sure to use a slip sheet of scrap mat-
board the same size or larger than the piece you are going
to cut underneath the matboard you will be cutting. For
now use one of the 10 pieces provided in the box. The slip
sheet provides a place for the blade tip to go so it won’t
cut into the surface you are cutting on and also helps stabilize the blade to get nice straight cuts.
2. Measuring
Draw pencil lines on back of matboard at desired size.
Place the channel side of the rail edge along the left side
of the pencil line. Fig 1
3. Precut
Hold the rail firmly in place with your left hand. With your
right hand hold the Mat Knife vertical so that the handle
is at a 45 degree angle putting the tip against the Straight
Edge. Fig 2.
If you are cutting across a sheet of matboard, simply start
the blade beyond the top edge of the board and pull the
Mat Knife completely through.
Fig. 1
Fig. 2
Slip Sheet
Matboard
Caution!! Mat Cutting Blades are Sharp
Do-it-yourself Mat Cutting Kit
1
Logan Graphic Products Inc., 1100 Brown Street, Wauconda, IL 60084 847-526-5515 www.logangraphic.com
Instruction Manual
Model 525
Page 4
4. Cutting
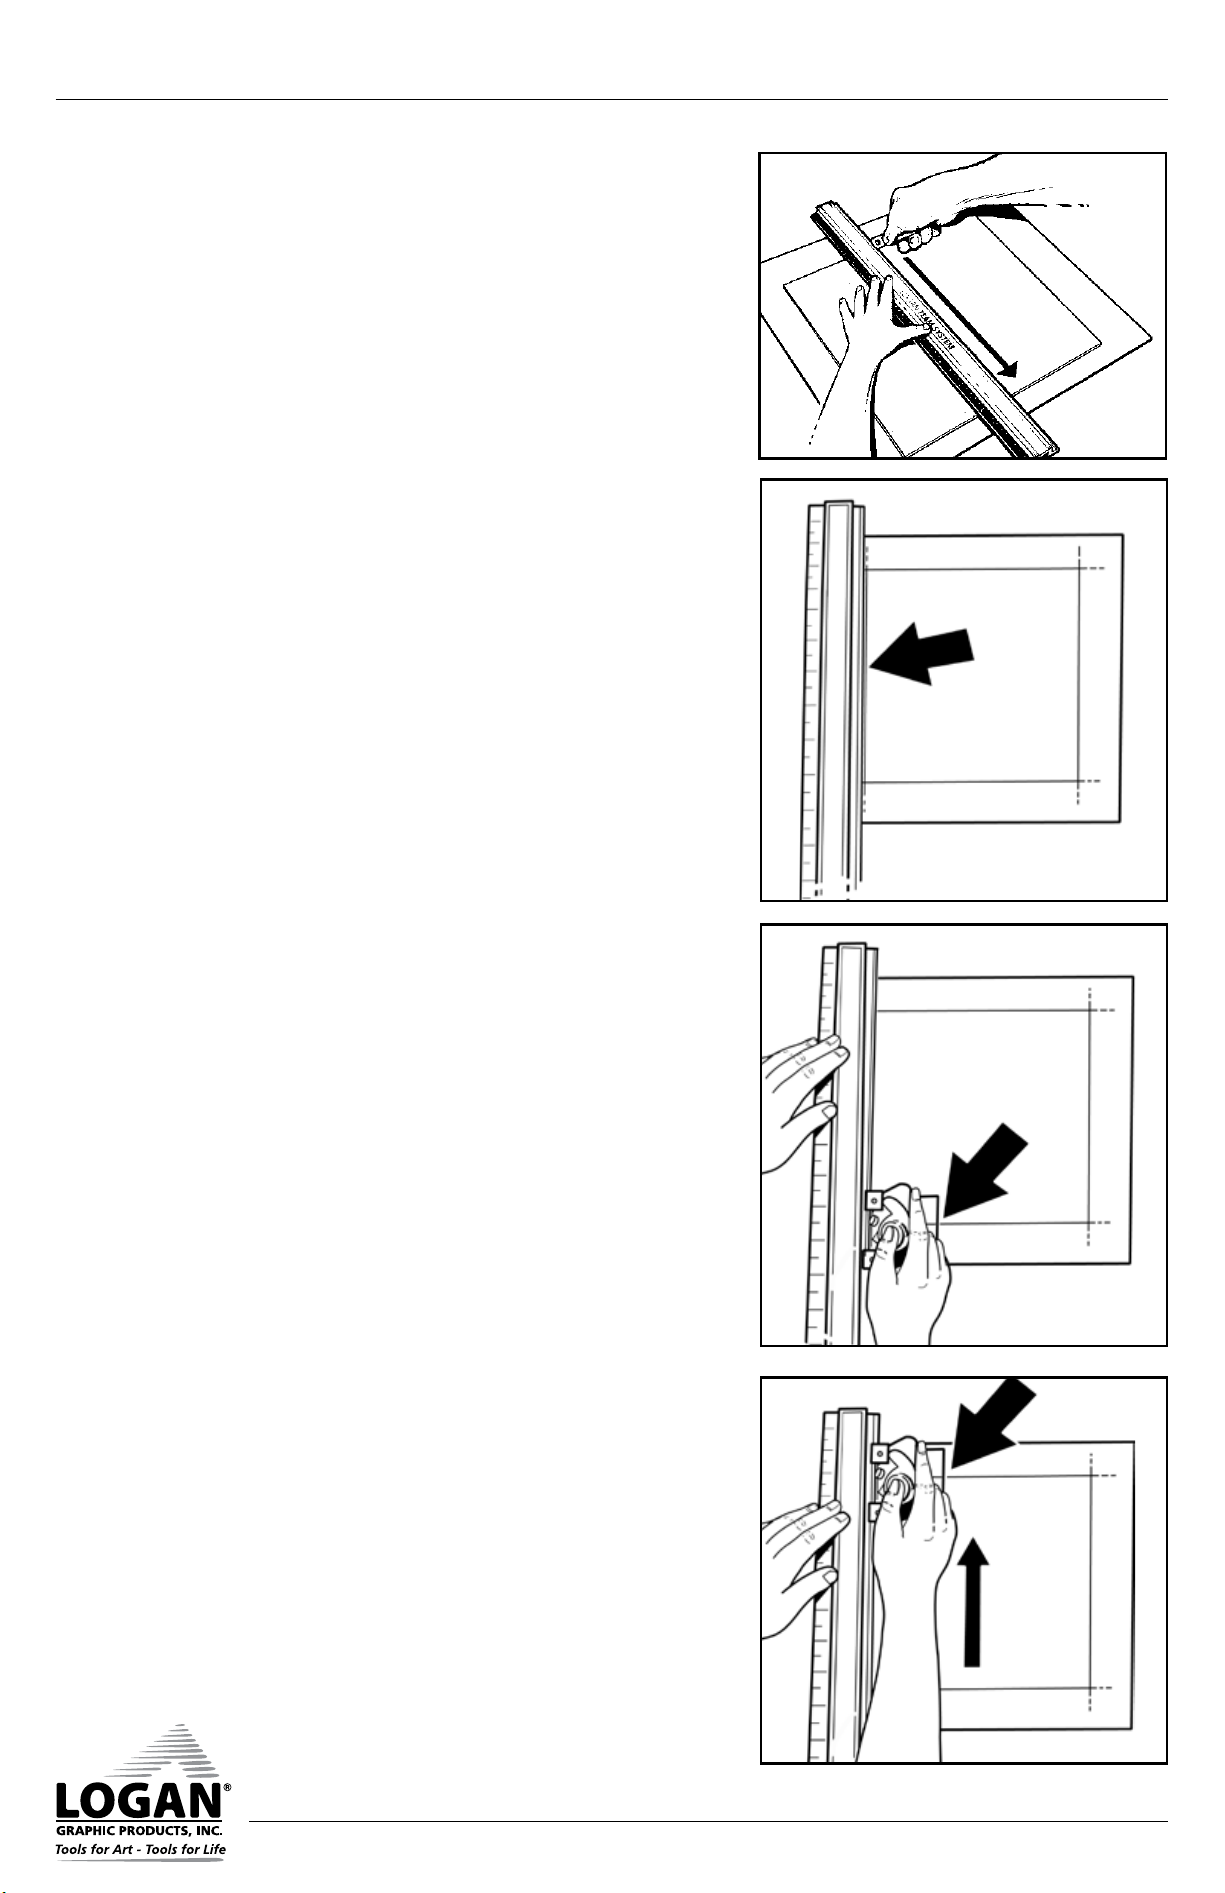
Draw the Mat Knife toward you along the Straight Edge
keeping constant pressure on the Straight Edge and downward pressure on the Mat Knife. Fig. 3.
WARNING! Be careful when knife reaches the end of
the mat so that it does not ”jump” toward you.
Bevel Cutter
Cutting a Single Mat
1. Using the scale side of Straight Edge, mark the back of the
mat for the exact border you want.
2. Place the mat face down on the Slip Sheet. Place the
Straight Edge EXACTLY on the left hand border so that the
outside edge of the channel is lined up along the pencil
line. Fig.4. Make sure that the bulk of the mat is to the
right hand side of the Straight Edge. Having the mat on the
left side of the Straight Edge will result in a reversed bevel
cut. Attach the 302 Bevel Cutter to the straight edge by
fitting the black nylon guides over the raised edge of the
channel. Position the Mat Cutter so that the silver indicator
line lines up with the bottom intersecting pencil line. Fig.5
3. Hold downward pressure on the Straight Edge with your
left hand. Place the thumb of your right hand on the thumb
divot on the retractable Blade Holder and plunge the blade
into the mat.
4. Keeping downward pressure on the Blade Holder, slide
the Bevel Cutter away from you until the silver line on it
intersects with the upper pencil line. Be sure to keep even
downward pressure. Fig. 6
5. Use your thumb to pull the Blade Holder back into the up
position so the blade is removed from the mat. Repeat
these steps for the remaining three sides. Congratulations!
You have just cut your first mat.
Apply Rub-on Transfers
Align the sheet of transfers across the top of the mat with
desired design in place. Use the grid on the sheet to aid in
alignment. Using any smooth blunt object (blunt tipped pencil,
spoon handle, coin, etc.) gently rub on the back of transfer
sheet to apply transfer on the surface of the matboard.
Fig. 3
Fig. 4
Fig. 5
Fig. 6
Do-it-yourself Mat Cutting Kit
2
Logan Graphic Products Inc., 1100 Brown Street, Wauconda, IL 60084 847-526-5515 www.logangraphic.com
Instruction Manual
Model 525
Page 5

Trouble Shooting
Bevel Cut has a Rough Edge
1. You may need to change your blade more often. Dull blades drag through the mat instead of cut.
2. Change your Slip Sheet. Cutting over the same area on the Slip Sheet repeatedly can cause rough cuts.
Not Cutting Through the Mat
1. Keep even downward pressure on the Chrome Blade Holder throughout the cut. Letting pressure off will
allow the blade to come out of the mat.
2. Check your blade depth. Insufficient blade depth can result in undercut mats.To adjust the blade depth
on the Bevel Cutter, turn the screw on the underside of the cutting head clockwise to decrease or counter-clockwise to increase the amount of the exposed blade.
Overcuts In Corners
1. Check your blade depth. Extra blade depth can cause the blade tip to cut past the marked lines producing
an overcut. Using the recessed screw on the bottom of the Bevel Cutter, adjust the blade tip to allow for
1/8” exposure. The blade should just score into the surface of the Slip Sheet.
To adjust the blade depth on the Bevel Cutter, turn the screw on the underside of the cutting head clock-
wise to decrease or counter-clockwise to increase the amount of the exposed blade.
Hooks or Curves in Cut
1. Check your blade depth. Extra blade depth can cause the blade tip to flare out producing a hook or curve.
Using the recessed screw on the bottom of the Bevel Cutter, adjust the blade tip to allow for 1/8” exposure. The blade should just score into the surface of the Slip Sheet.
To adjust the blade depth on the Bevel Cutter, turn the screw on the underside of the cutting head clock-
wise to decrease or counter-clockwise to increase the amount of the exposed blade.
2. Change the blade. A dull blade will flare out causing a hook or curve.
A NOTE ON BLADES: No two blades will have the same lifespan. Always start with a new blade before
each project to ensure best results.
Do-it-yourself Mat Cutting Kit
Instruction Manual
Model 525
3
Logan Graphic Products Inc., 1100 Brown Street, Wauconda, IL 60084 847-526-5515 www.logangraphic.com
Page 6
4
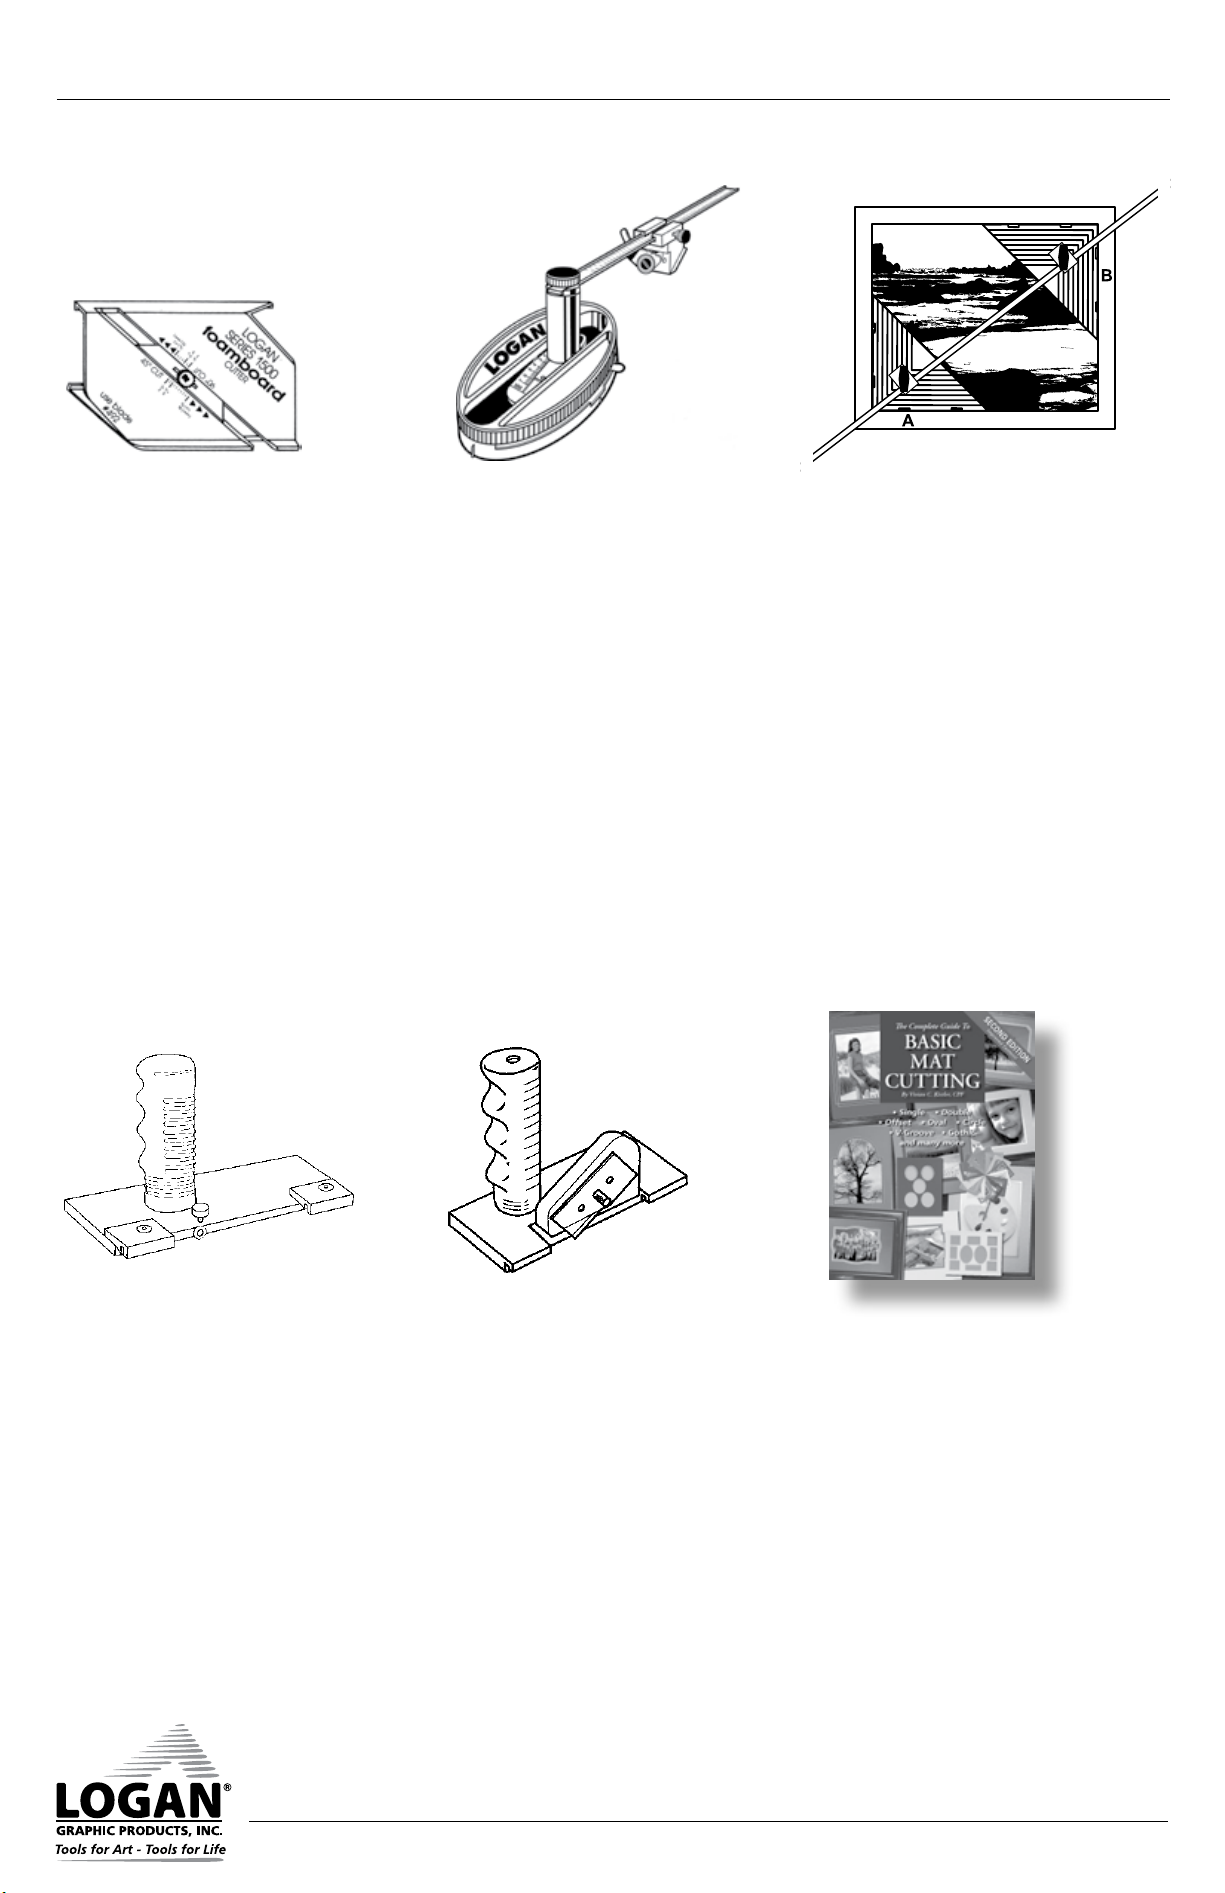
Foamboard Cutter
- Model 1500
Push style fixed blade cutter can be
used against any suitable straight
edge. Reversible, it cuts 90° or 45°
bevel with an adjustable blade to a
foamboard thickness of 1/8” (3mm),
3/16” (5mm) and 3/8” (10mm).
Includes three extra blades.
Replacement blades - Model 492
More great Logan products…
3-Step Oval & Circle Mat
Cutter - Model 201
Easy to use, fast and portable. Cuts
ovals or circles on the surface of the
matboard using a patented 3-step
mechanism for gradual increase of
blade depth.
Converts from oval to circle cutter
with the turn of a knob. Ovals from
3 1/4” x 4 3/4” to 20” x 23”. Circles
from 4 3/4” to 20”.
Replacement blades - Model 324
Glass Cutter - Model 704
Simple and easy to use, this handy
tool provides the ability to cut glass
for framing right on your Logan
Rail System. Uses a hardened steel
wheel and cuts glass up to 0.09”
thick.
Replacement Wheels
- Model 786
Straight Cutter - Model 701
Ideal for cutting mat board and
other materials to size. Features two
depth settings and adapts to Logan
board and rail systems.
Includes 5 blades.
Replacement Blades
- Model 270
Basic Mat Cutting Model 238
Description goes here.
Basic Mat Cutting
Model 238
Fit-N-Frame - Model 262
The Fit-N-Frame mat measuring
guide tool is great for those new
to mat cutting. Fit-N-Frame helps
to quickly calculate border sizes
without complicated math. It perfectly sizes border to frame and
centers artwork to mat board.
Do-it-yourself Mat Cutting Kit
Instruction Manual
Model 525
Logan Graphic Products Inc., 1100 Brown Street, Wauconda, IL 60084 847-526-5515 www.logangraphic.com
 Loading...