

Loewe 42 HD, 42 HD-DR+, TV Spheros 42 HD User Manual
.
■
Spheros 42 HD
■
Spheros 42 HD/DR+
Operating Instructions.
TV.
233–31936.021
31936_021_Spheros42HDR+_GB 18.10.2004, 10:17 Uhr1
1

Contents
Remote operation – TV functions 3
Connections Signal Box 4
Operation on the Signal Box 5
Setup 6-7
Installation possibilities 6
For your safety... 6-7
Tilting Spheros wall unit 7
Please note 7
Setup and cleaning 7
Initial installation 8
Batteries 8
Connection 8
Switching on 8
Daily handling 9-12
Menu functions in TV 9
Rotating the TV set 9
Remote control RC3 10
TV equipment 10
Use the drive buttons in TV- and STB position
for VCR, DVD or Digital Recorder 10
Switching on/off 10
Changing channels 11
General menu operation 12
Adjusting the sound 12
Adjusting the picture 12
Operation on the TV set 12
Radio mode 16
Teletext mode 17
LOEWE Dialog 18
Operation of additional equipment 19-27
Video mode 19
Logging in equipment 20
Connecting VCR equipment 20
Search for and store the VCR station 20
Video playback 21
Calling an AV program in the
AV selection list 21
IR-Link 21
DVD player 22
Digital output 22
Digital input/output 22
Connecting Loewe sound systems 23
Converting the remote control in order to
operate a Loewe DVD player or devices
from other manufacturers 24-25
Loewe sound systems Certos /
Concertos and Spheros 26-27
Viewing angle range of rotation 28
Displaying PC images 29
Connecting personal computers 29
What to do when ... 30-31
Available accessories 33
Secret code 33
Service addresses 34
Codelist 35-41
Modes of operation 13-17
TV mode 13
Picture in Picture (PIP) 14
EPG mode 15
Dear Customer,
Congratulations on your purchase of this high quality Loewe television. Loewe stands for innovative
design, excellent quality and exceptional functionality. To ensure that your product retains these
properties for as long as possible, please follow the operating and safety instructions contained in
this manual.
This instruction manual will help you to get started.
Your Loewe Team
2
31936_021_Spheros42HDR+_GB 18.10.2004, 10:17 Uhr2
Technical data 32
Manufactured under license from Dolby
Laboratories. ”Dolby” and the double-D symbol
are trademarks of Dolby Laboratories.
dts
Is a registered trademark of Digital Theater
Systems Inc.
Acoustimass® is a registered trademark of the
Bose Corporation.
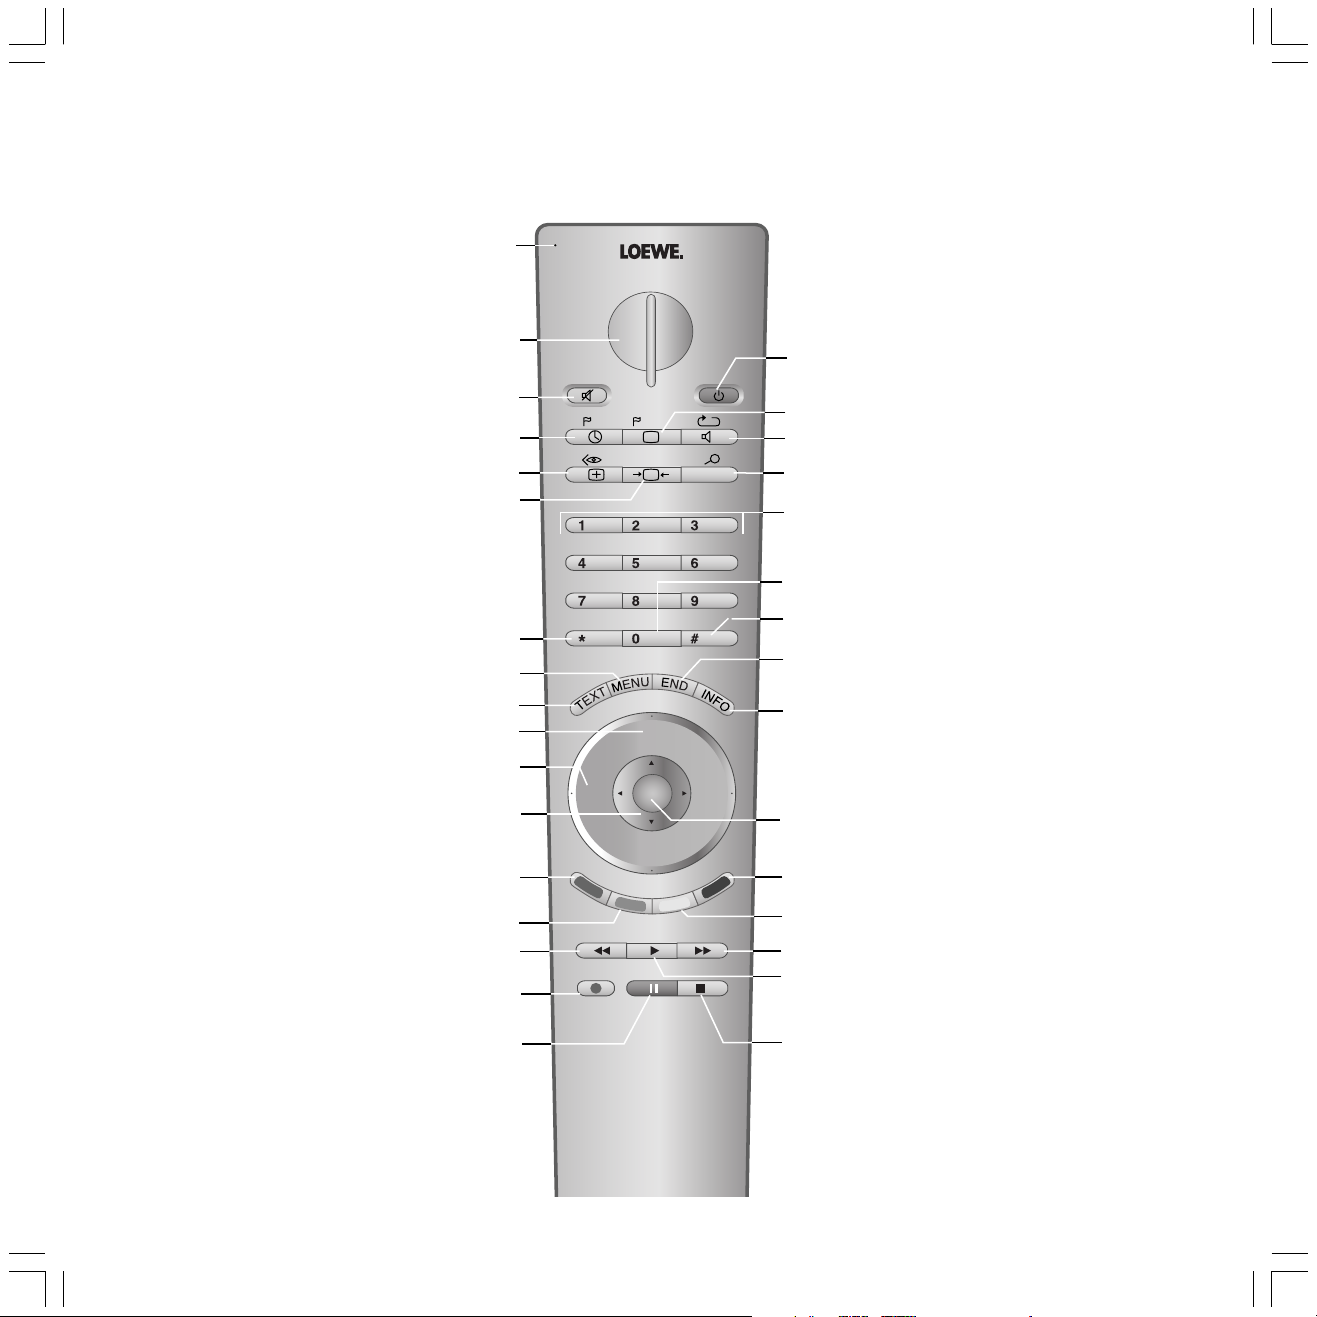
Remote operation – TV functions
Control LED for programming
the remote control
Change-over switch for operation of
TV, VCR, DVD recorder/player or Set Top Box
Sound off/on (mute)
Timer overview
Video operation with video operating lin on/off
Set picture format
EPG on/off
Call menu /in menu: back
Teletext mode on/off
P+/P– select program up/down
V–/V+ volume quieter/louder
in menu: select/set
✳ red key: DR archive on/off
✳ green key: call up personal settings
Digital Recorder: bookmark back/rewind
Digital Recorder: record immediately
TV
DVD STB
VCR
-List
-Set
REC-MENU
abc def
ghi jkl
pqrs
tuv
EPG
AV
DISC-M
P+
V– V+
OK
P–
C-SET
SV
TITLE
RADIO
mno
wxyz
PIP
CARD
Switch on/off – in standby
Picture menu on/off
Sound menu on/off
Radio mode on/off
Select programme directly
in menu: enter numbers or letters
Call AV selection
PIP on/off
Status display on/off
/in menu: hide menu
Call main information
/in menu: Info texts on/off
Station table list on
/in menu: confirm
blue key: programme info on/off
yellow key: last station
✳
✳
Digital Recorder: bookmark forward/fast forward
Digital Recorder: play/set bookmark
Digital Recorder: freeze frame/pause
(delayed viewing: start)
* You can assign other functions to the color
keys for the TV mode.
31936_021_Spheros42HDR+_GB 18.10.2004, 10:17 Uhr3
Digital Recorder: Stop (Live picture)
** In TV mode without "Digital Recorder Plus"
or TV and VCR mode. For operation with Digital
Recorder mode, see separate operator manual.
3
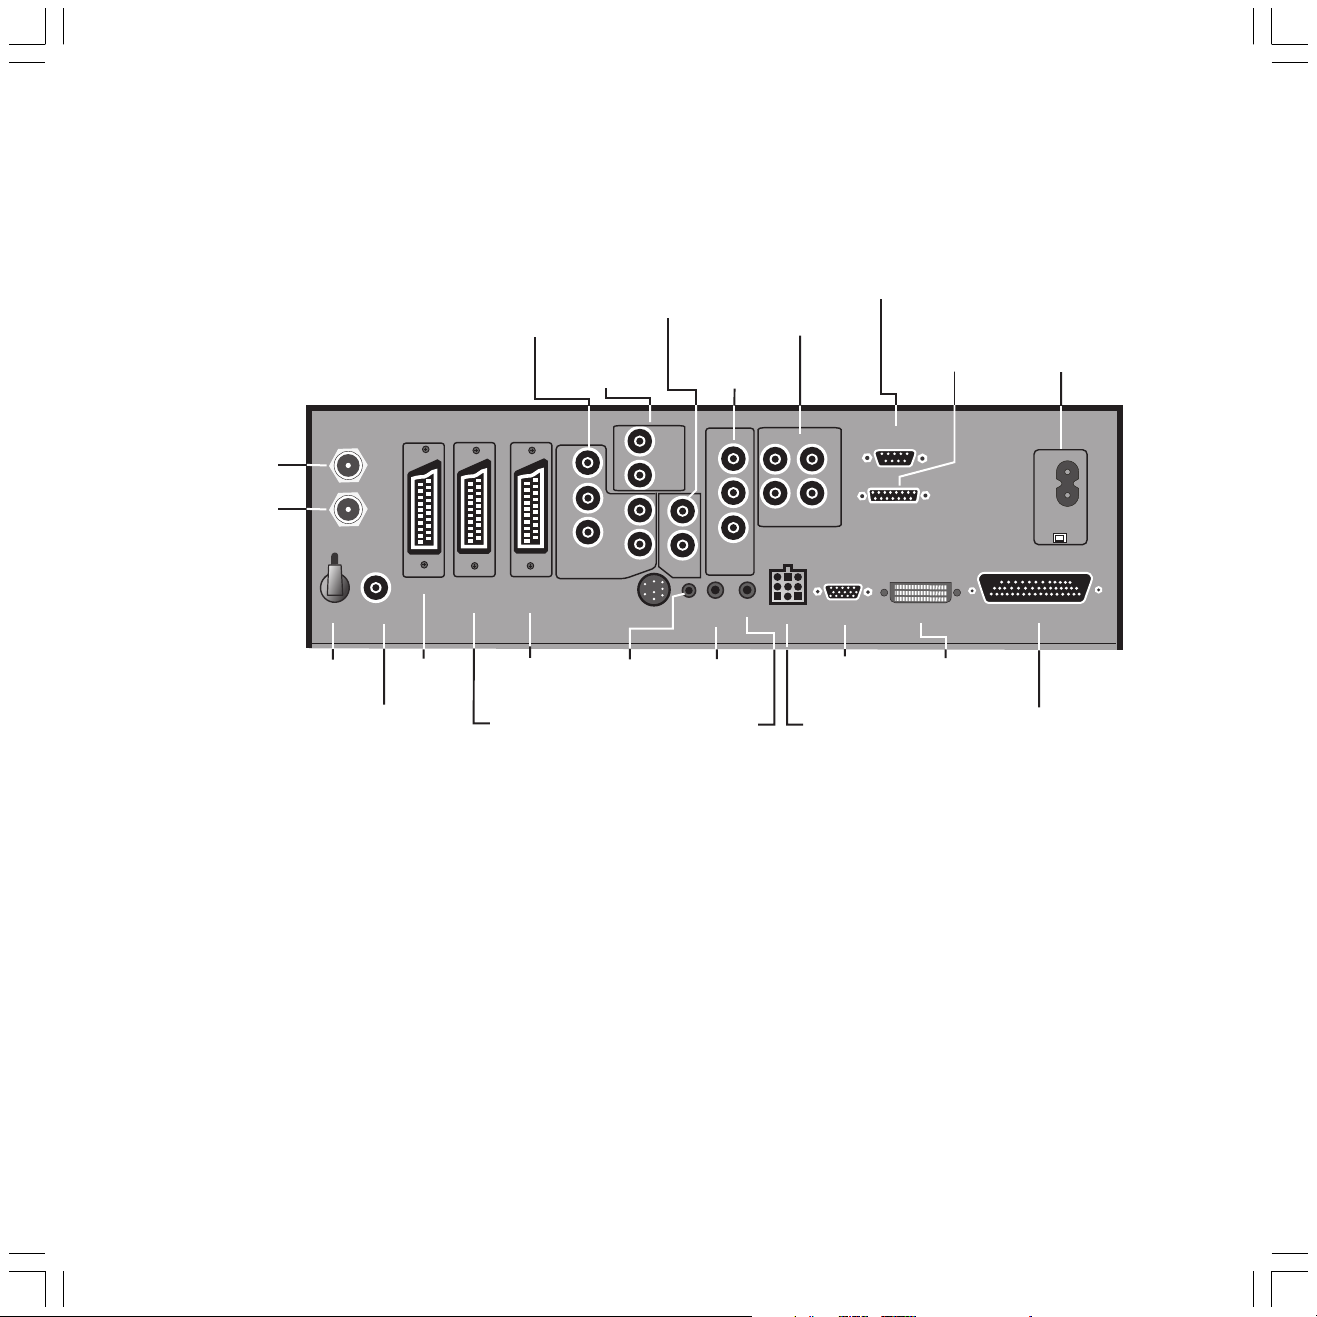
Connections Signal Box
✳
Satellite
antenna socket
analogue
✳
Satellite-
antenna socket
analogue/digital
PIP
SAT
SAT
A/D
UHF/VHF
AV 1
AV 2
(RGB)
Component
Video/Audio-
Inputs
Sound input
Y
CR/
PR
CB/
PB
COMPONENT
AV 3
(RGB/YUV)
Sound output
Left / Right
TV Active
R
L
R
L
AUDIO
IN
AUDIO
IN 1
SERVICE
Digital sound
input/output
IN 3
R
L
AUDIO
OUT
RC5/
RC6
1
IN
2
OUT
DIGITAL
IR-
LINK
✳✳
AUDIO
Connections
for active
speakers
C
SUB
IN 2
SYSTEM
✳
COM Digital TV
V24
R
COM DIGITAL TV
S
U
R
L
VGA
Connection for
Loewe Online Box
TVO
DVI
Socket for
power cable
120-240V~
50/60 Hz
DISPLAY
Antenna socket
PIP Tuner
Antenna socket
VHF/UHF/cable
Euro-AV-
socket 1
Euro-AV-
socket 3
Euro-AVsocket 2
Infrared
signal
* Only with upgrade "Digital-TV upgrade kit 2 Sat/Twin-Sat CI" or CIP
** Only with upgrade with Dolby Digital (AC3)
Note: For optimum picture resolution use the "Digital Visual Interface Input DVI"
Only connecting cables less than 2 meters long.
4
Infrared Link
RC5/RC6
Sound input
analogue
VGAinput
Connection
Speaker system
Digital Video
interface input
Connection for TFT-LCD
monitor
31936_021_Spheros42HDR+_GB 18.10.2004, 10:17 Uhr4
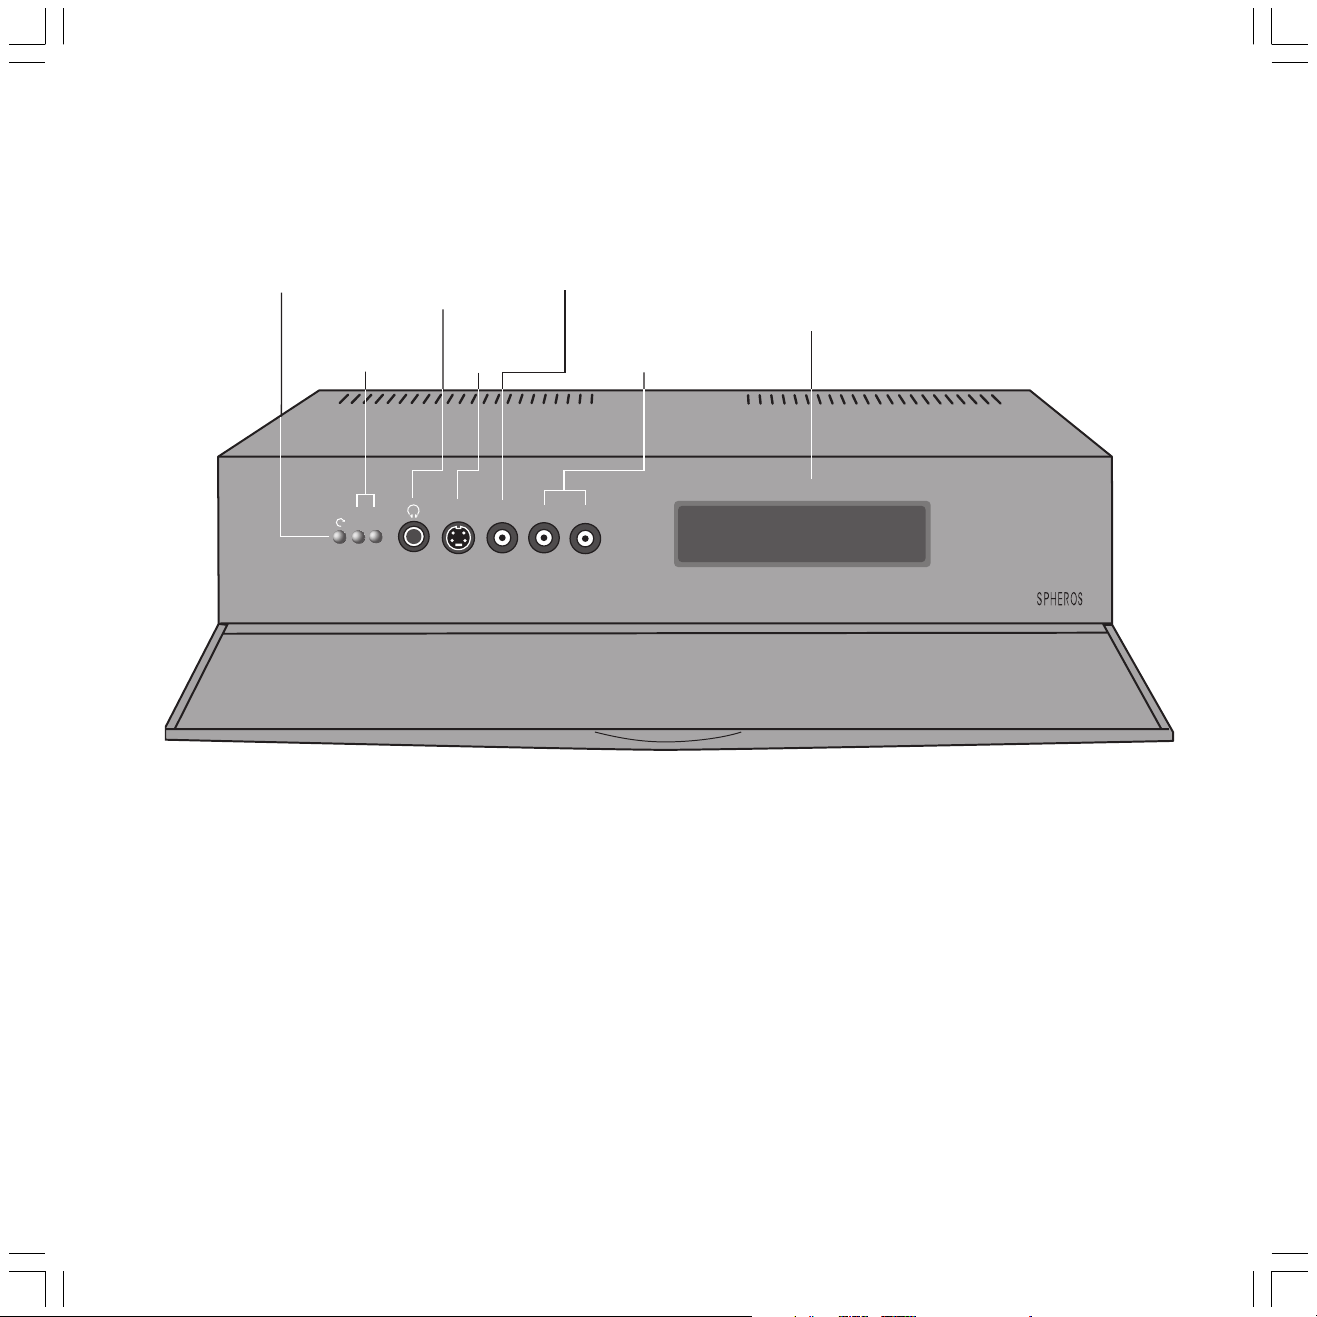
Operation on the signal box
Display menu
Channel up/down
Set in the menu
–
+
Headphone
socket
S-Video
input
AV-S
V IDEO
Video input
LR
AUDIO
Sound input
Left / Right
Sockets for
Common-Interface-
Modules*
COMMON INTERFACE
* Only with upgrade "Digital-TV upgrade kit 2 Sat/Twin-Sat CI" or CIP
31936_021_Spheros42HDR+_GB 18.10.2004, 10:17 Uhr5
5
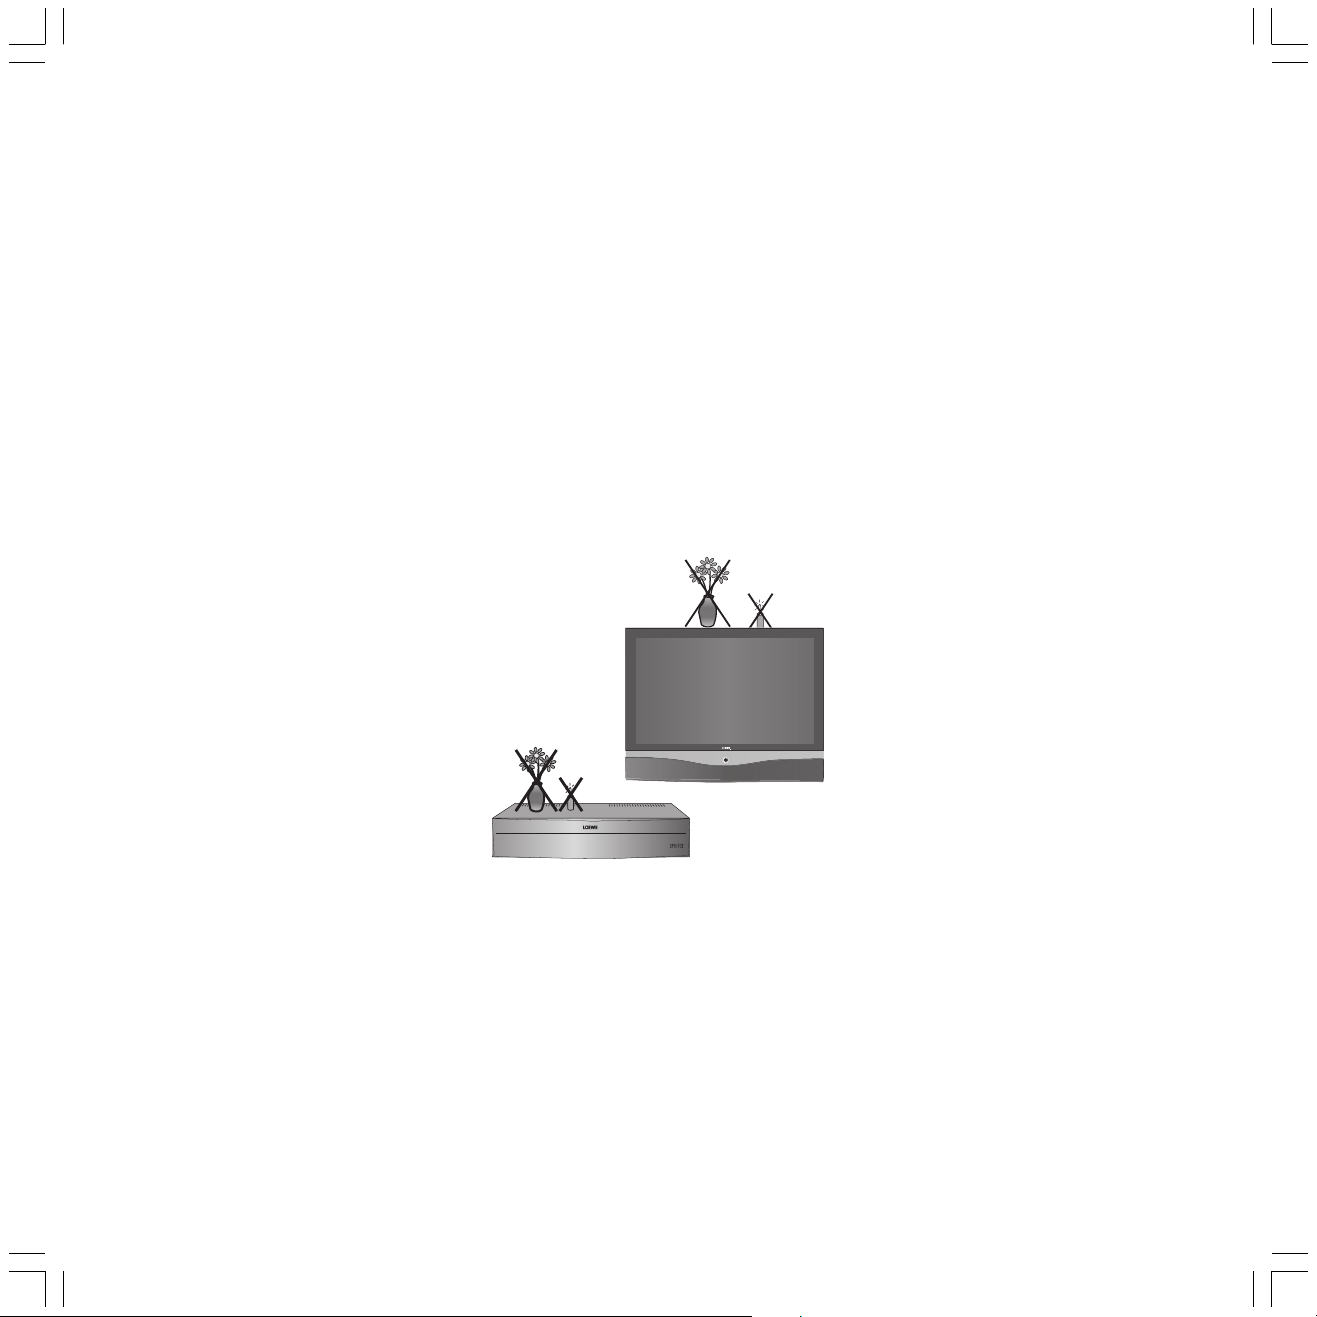
Setup
Installation possibilities
The Spheros comes in several design versions:
• The Standing unit
Swiveling bass booster as well as a
subwoofer integrated with a stand.
• The desk unit
You can easily align the stand/desk unit by
controlling its motor drive by means of the
remote control.
• The Wall unit, which you can hang on the
wall, just like a picture. You can tilt the flat
panel screen (Plasma display) within a
range of 0 to 12°.
• Spheros Plasma screen and Rack
System Cube 1/2 Spheros 42 HD
Wallmount
With motor drive for rotating the plasma
screen and drawers for the Signal Box and
video recorder, DVD player etc.
You can connect add-on devices, such as video
recorder, DVD player, Pay-TV decoder, Loewe
sound systems, a Loewe OnlinePlus-Box or a
Multimedia kit to the Spheros Signal Box.
Operation
We have designed the TV set in such a way that
it is easy to operate with menus. If you need
information on operating the set, simply press
the i key on the remote control to display the
help texts, which will quickly enable you to
understand the system.
If it is a matter of operating the TV, you can
access a function directly from the index.
This saves you from having to read through
detailed operating instructions and is the
reason, why this operating manual only
explains the most important operating steps.
6
For your safety...
For your own safety and to avoid any
unnecessary damage to your unit, please protect
it from...
• humidity, water sprays and droplets
• impacts and mechanical stresses
• cold, heat and heavy temperature variations
• dust
• cover allowing poor ventilation
• intervention inside the unit
Do not place vases filled with water, lighted
candles etc. on the top of the TV set.
If you have brought the unit from a cold
environment into a warm room, let it remain
switched off for about an hour, as condensation
may form on the set.
Take the swivel range into account when
positioning a TV set with rotary motor unit and
do not place any objects such as flower vases
etc. in this area.
Lightning strikes may damage your TV set
through the antenna and the mains power
circuit. Pull out the antenna and mains
plugs from their respective connecting
sockets during bad weather and long
periods of absence.
Transport the TV set only in vertical
position.
• Avoid metal parts, needles, paper clips,
liquids, wax or similar dropping inside the
TV set through the air venting slits in the
rear panel or cover.
This can lead to short-circuits and possibly
to fire. If something should get into the set
switch it off immediately at the on/off
switch, pull out the power plug and notify
the after-sales service for inspection.
•The TV power plug must be easily accessible
so that the TV can be disconnected from the
power supply at all times.
• Lay the power cable so that it cannot be
damaged. The power cable may not be
kinked or laid over sharp edges, not stood
on and not exposed to chemicals, the latter
also applies to the device as a whole. A
power cable with damaged insulation can
lead to electric shocks and is a fire risk.
• When removing the power plug, pull the
plug housing and not the cable. The wires in
the plug could be damaged and cause a
short circuit the next time it is plugged in.
•Your new TV has been built exclusively for
use in a home environment. The warranty
covers this normal use of the device.
• Only have repairs done by the
Loewe Service.
31936_021_Spheros42HDR+_GB 18.10.2004, 10:17 Uhr6

Setup
100 mm
For your safety...
The wall holder is designed to include the
weight of the wall unit / plasma screen.
So, avoid any additional load on it through
persons, playing children or objects. Instruct
children, in particular, about the danger of
excessive load on the plasma screens, the
wall holders or the stands.
Tilting Spheros wall unit
You can tilt the flat panel screen (Plasma display)
within a range of 0 to 12° by using a wall holder.
Keep the button under the wall holder pressed.
Tilt the flat panel screen with the other hand into
the desired position, then let go of the button.
The angle of tilt is retained.
Caution: Risk of injury!
showing dark strips to the right and left of
the image.
Select an image that fills up as much of the
screen area as possible, e.g. “Panorama”. This
way, you can prevent formation of different
contrast areas on the screen. If upper or lower
portions of the image are visible only partially
in this format, use the option “Shift image
vertically”; refer to page 10 Image Menu.
Display of TV images or static images / text
pages from a computer through the VGA/
DVI connection over a long time (over 10
minutes) should also be avoided;
otherwise the image contours can remain
static on the screen even on switching the
monitor off.
The DRM (Digital Refresh Mode) function in
this unit can eliminate or reduce such weakly
visible effects.
Effects, remnants of excessively long static
image display, cannot be reversed even
with the help of DRM.
Function Digital Recorder DR
Your Loewe TV set is equipped with a Digital
Recorder. This can be used like a VCR to record
and play picture and sound of TV programs.
Please read the enclosed "Digital
RecorderPlus" operator manual to find out how
to operate it.
Setup and cleaning
A detailed setting up and assembly instruction
accompanies every Spheros wall/desk and
stand unit.
• Set up the Spheros Signal Box and the
screen with sufficient space for ventilation.
The openings for ventilation must not be
covered with objects, such as magazines,
tableclothes, curtains etc.
20 mm
20mm
• Place the Signal Box not on its side, but
always on its feet.
100 mm
100
mm
.
20mm
100
mm
If you wish to tilt the flap screen again, do not
touch the mechanism of the wall holder!
Please note!
The plasma screen of the Loewe Spheros has the
modern image format 16:9 and is conceived for
displaying moving images.
The entire screen is utilized while displaying the
picture in the format 16:9.
As far as possible, avoid displaying the
image in the format 4:3 over a longer period
(some weeks), because then only the central
portions of the screen surface are used,
31936_021_Spheros42HDR+_GB 18.10.2004, 10:17 Uhr7
Note
The screen you have purchased meets the
highest quality requirements in this sector and
has been tested for pixel errors. Despite the
utmost caution in production of the display, it
cannot be totally ruled out that some of the
pixels might be defective for technological
reasons.
Please understand that such effects cannot be
considered as a unit defect in the sense of the
warranty as long as they are within the limits
specified by the standard.
• Make sure that the screen is not exposed to
bright light or sunlight, otherwise it creates
reflections and the brilliance of the screen is
lost.
Clean the glass plate of the screen only with a
soft piece of cloth.
Also clean the other components of the system,
such as the Signal Box and remote control, only
using a soft moist piece of cloth (without any
strong or scouring agents).
7
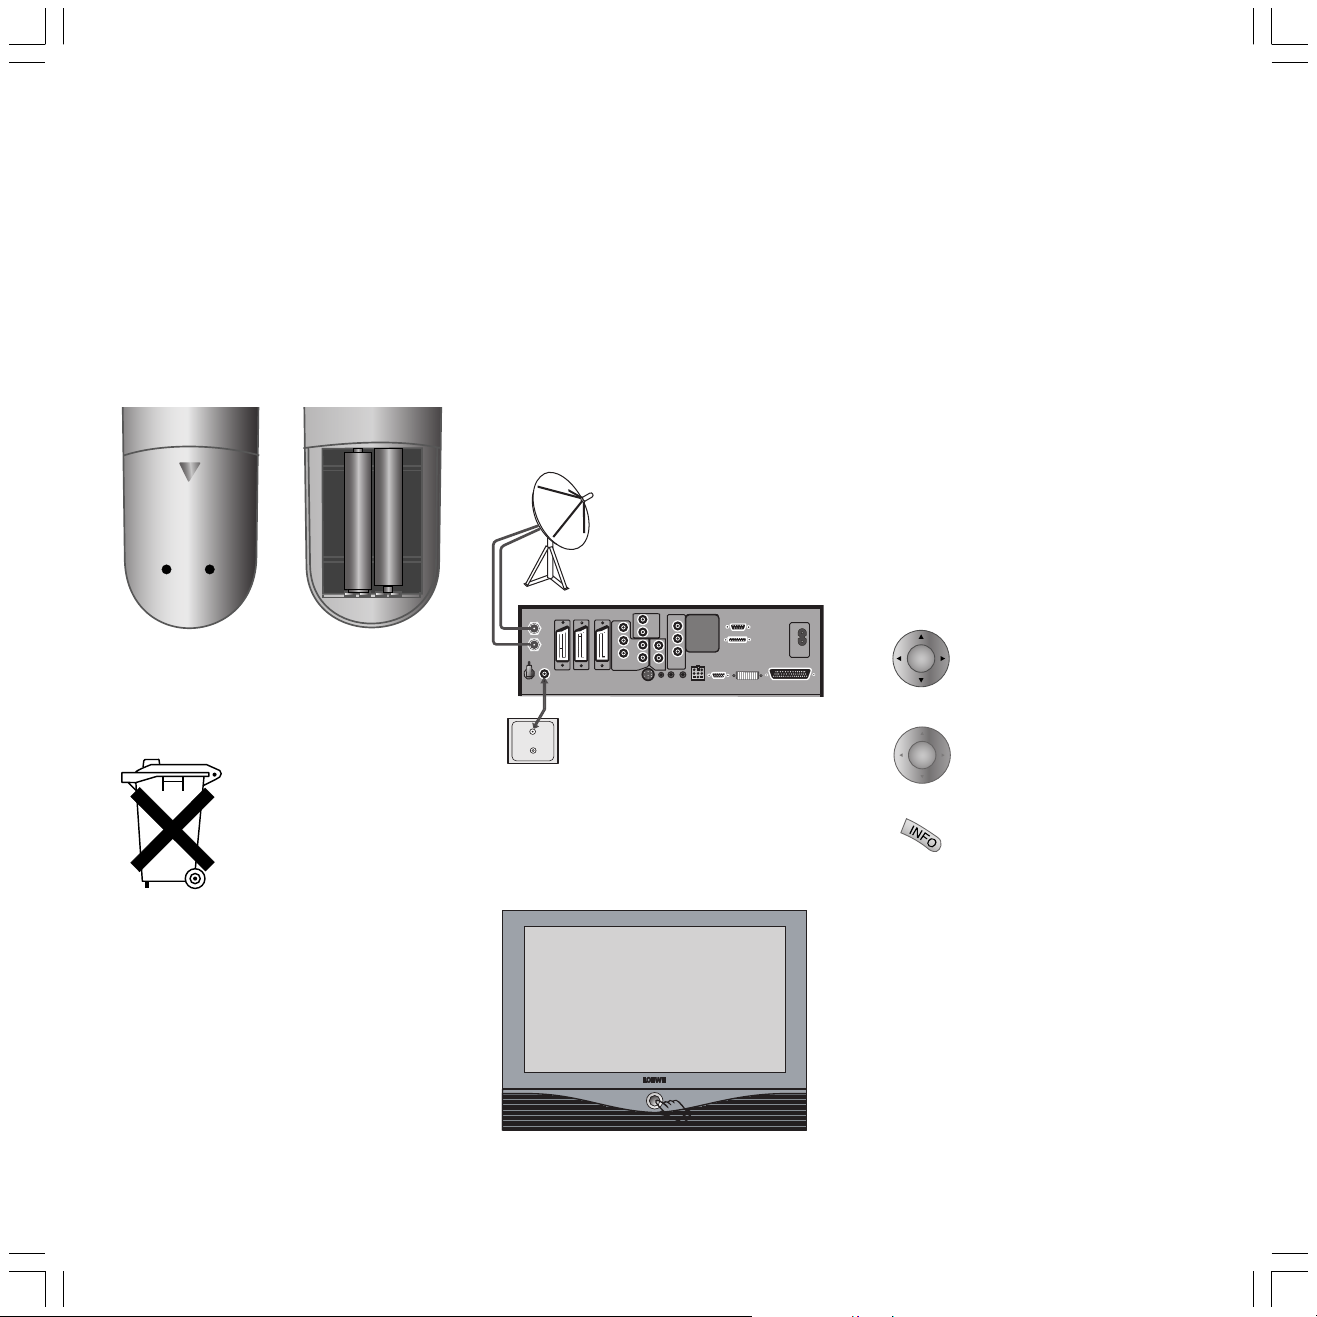
Initial installation
Batteries
To insert or change the batteries, press the
point marked by an embossed arrow. Push the
cover of the battery compartment down and
remove it. Insert the batteries of the alkaline
manganese type LR 03 (AAA) with the correct
polarity (+/-).
+
+
Then push the cover back on.
Note on disposal of batteries:
The original batteries do not
contain any pollutants such as
cadmium, lead and mercury.
Used batteries do not belong in
the domestic waste. They must
be taken to the appropriate
collection points according to
the national laws. Ask your
dealer.
Connection
Mains
Connect the TV set to a 230V/50-60 Hertz
outlet.
Antenna
Connect your antenna or cable system to the
antenna socket to the UHF/VHF antenna socket
on the back of the signal box.
When equipped with a satellite tuner, connect
the satellite antenna to the SAT sockets.
R
C
R
AUDIO
SAT
SAT
A/D
PIP
UHF/VHF
Y
IN 3
L
CR/
PR
R
R
CB/
PB
L
L
COMPONENT
AUDIO
AUDIO
IN 1
IN
OUT
AV 3
AV 2
AV 1
(RGB/YUV)
(RGB)
SERVICE
RC5/
RC6
COM DIGITAL TV
1
S
IN
U
2
R
TVO
SUB
L
OUT
DIGITAL
AUDIO
IR-
IN 2
SYSTEM
VGA
LINK
230V~
50/60 Hz
DVI
DISPLAY
Switching on
Press the On/Off button so that it is pressed in.
Initial installation
Automatic programming of the TV set is started
the first time you switch it on. Follow the
menus.
First you have to select the menu language for
your set. Then you specify which antenna you
have connected to your TV and in what country
you are using it. Then you start the station
search. The TV set searches for, stores and sorts
all the stations which your antenna system
receives. You then see a list of the stored
stations in which you can mark your favorites.
Finally log in your video recorders, decoders,
Loewe audio system and Home Automation
with the connection wizard and connect these
to the TV set according to the illustrated
connection plan.
OK
OK
You can repeat initial installation at any time,
e.g. after moving house. Call the index in the
main information (i button). Then select the
item "Repeat initial installation". Then start
"Initial installation" with OK.
Select the settings with the
arrows on the ring ...
... confirm the settings with
OK. You then move on to the
next menu ...
... press this button if you want
information about the settings.
8
31936_021_Spheros42HDR+_GB 18.10.2004, 10:17 Uhr8
.
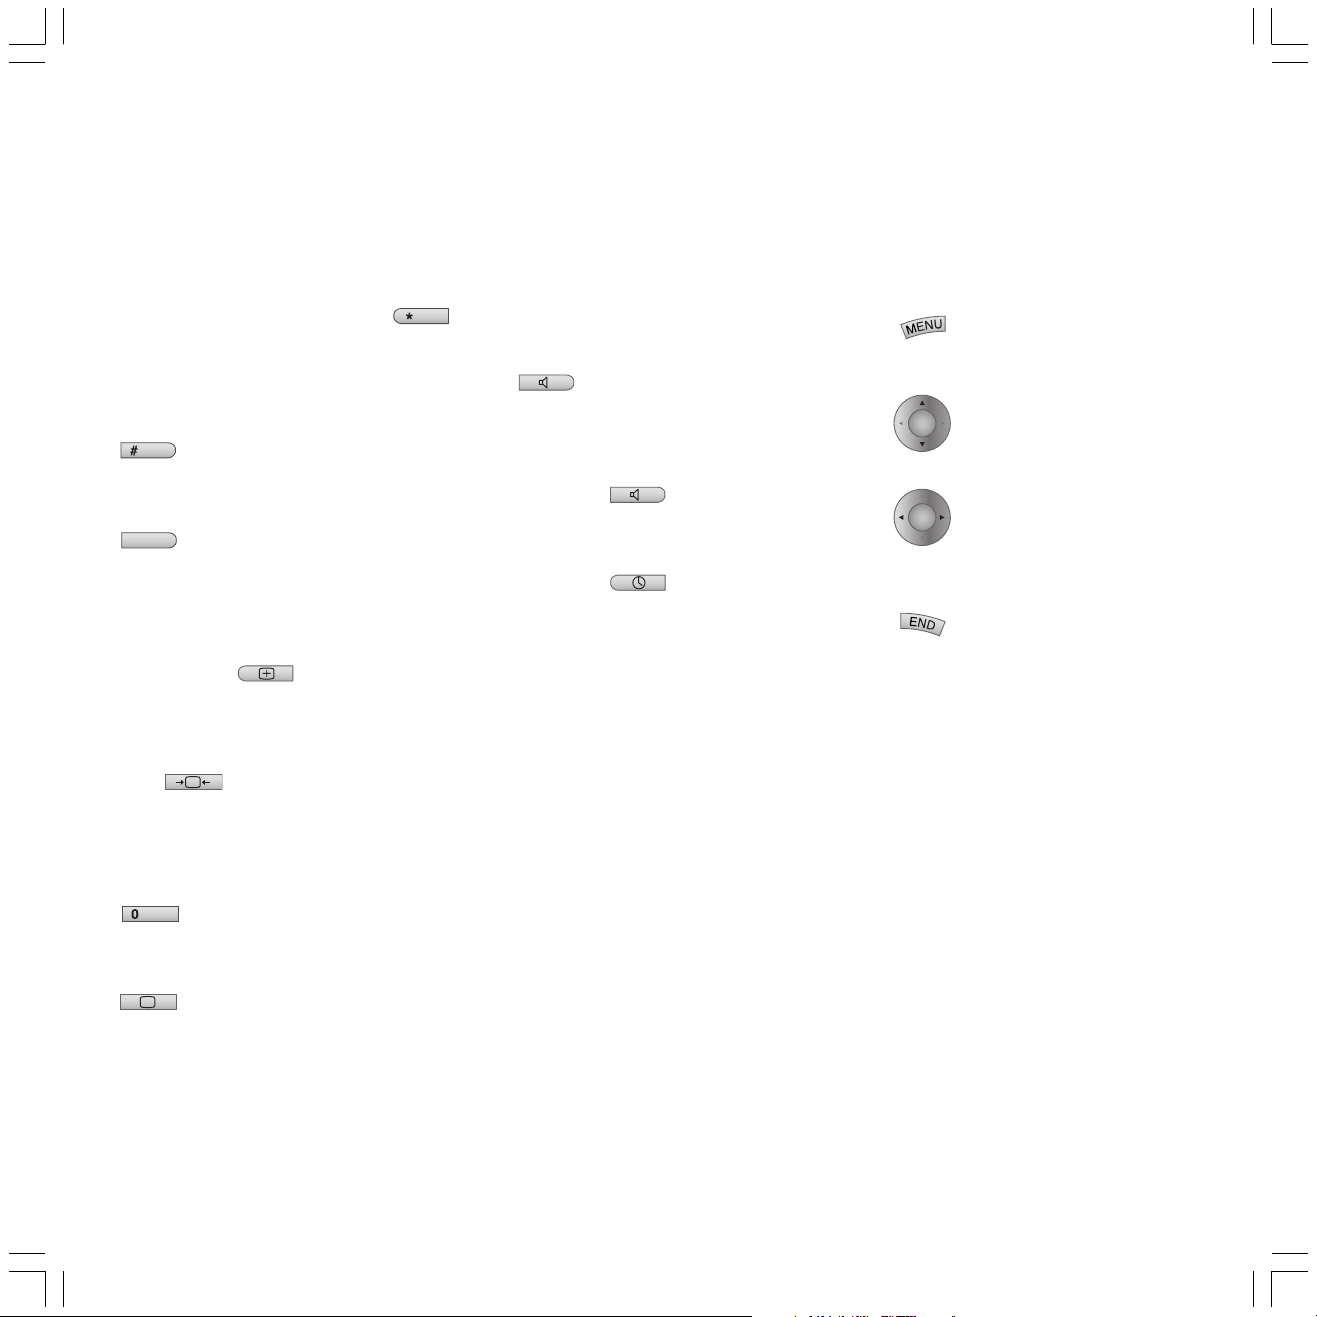
Daily handling
Menu functions in TV
EPG
Call the electronic program guide of the TV set.
EPG can be called and hidden with the
button.
PIP
Call/hide the picture in picture function of the
TV set. PIP can be called and hidden with the
PIP
button.
TV radio (SAT radio)
Switch the radio mode of the TV set on/off with
RADIO
button. Prerequisite: Your TV is
equipped with a satellite tuner (see on page
16).
Video
Call or hide the video control bar.
Press the button
.
Format
Call the selection for setting the picture format.
Select the picture format by repeated pressing
of the
button.
AV input
Call the AV selection for playing connected
equipment (e.g. VCR, camcorder or DVD player).
The AV selection can be made with the
AV
button.
EPG
Sound
Show/hide the Sound menu. You can set the TV
sound with the Sound menu. The Sound menu
can be opened under the ”TV menu – Sound”.
On the RC3 remote control also directly with
the
button.
Sound mode
Call the sound mode settings of the connected
Loewe DVD-Preceiver "Auro".
Press the button
.
Timer
Call the timer overview of the TV set.
Press the button
.
Digital Recorder Plus (DR+)
If a hard disk is integrated in the Signal Box
(set variant), you can record and play TV
programs. Depending on the selected recording
quality the possible recording capacity is
between about 20 and 100 hours.
The possibilities of the Digital Recorder are
much more versatile than those of a video
recorder. Use the separate ”Digital Recorder
Plus” operating manual for operation.
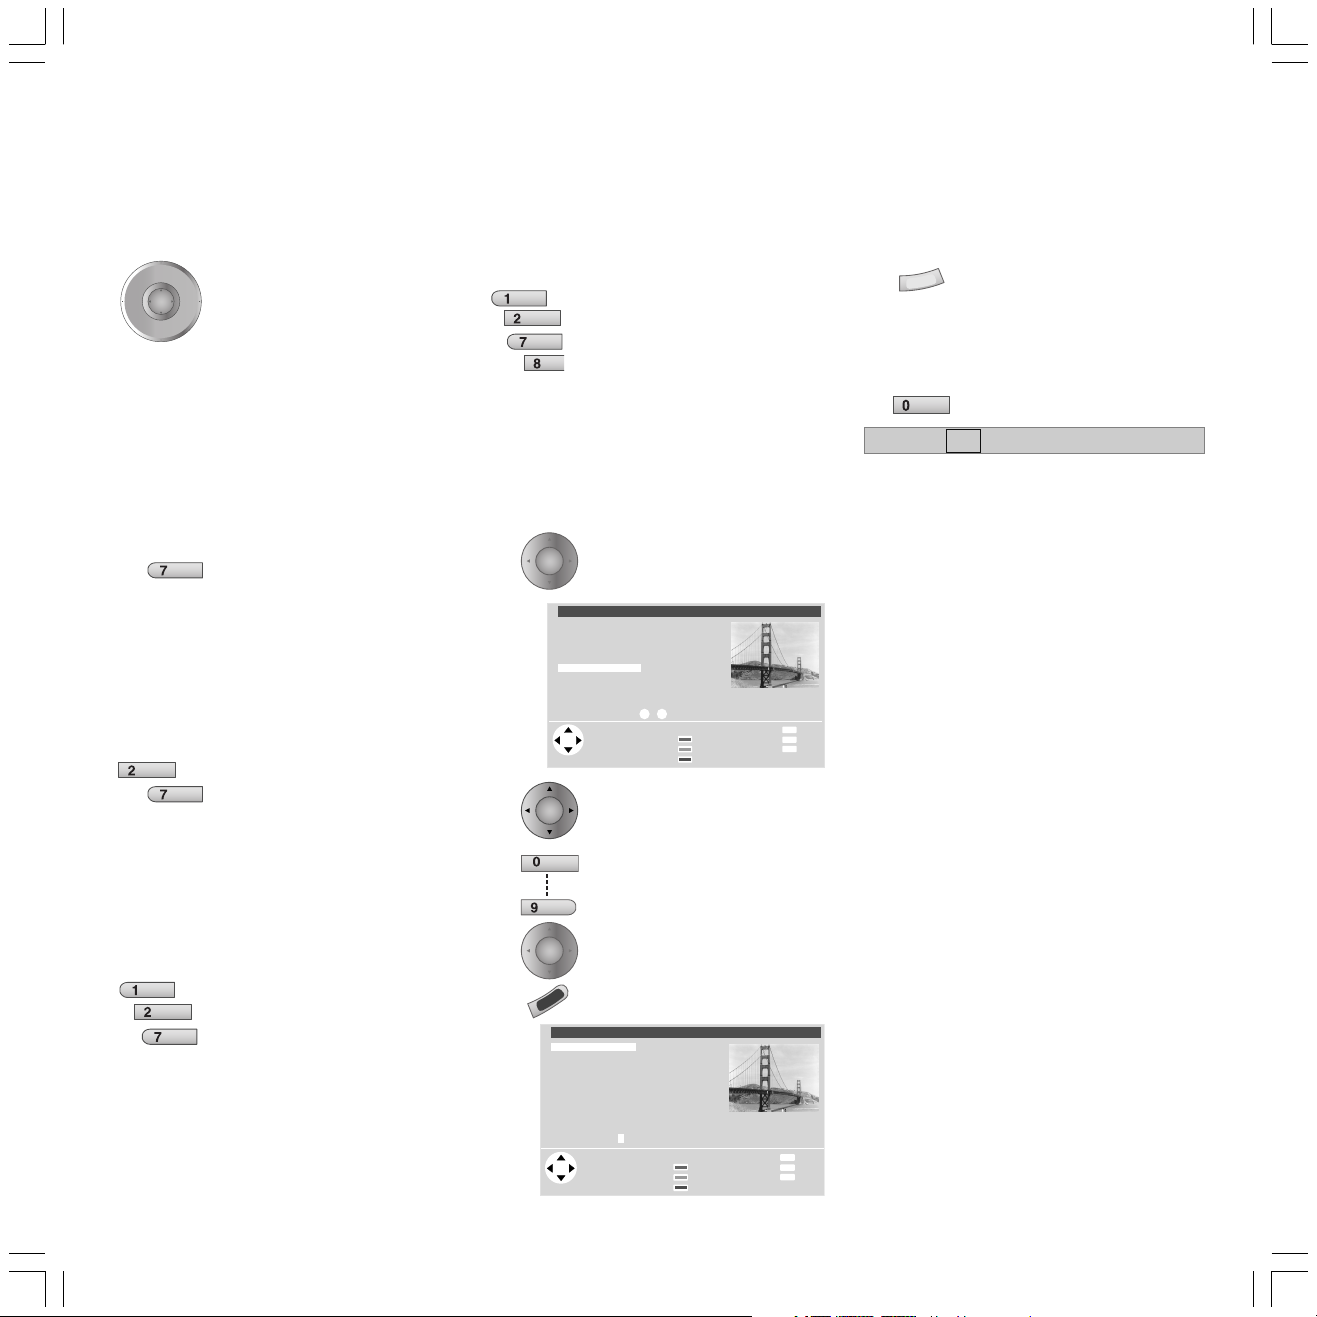
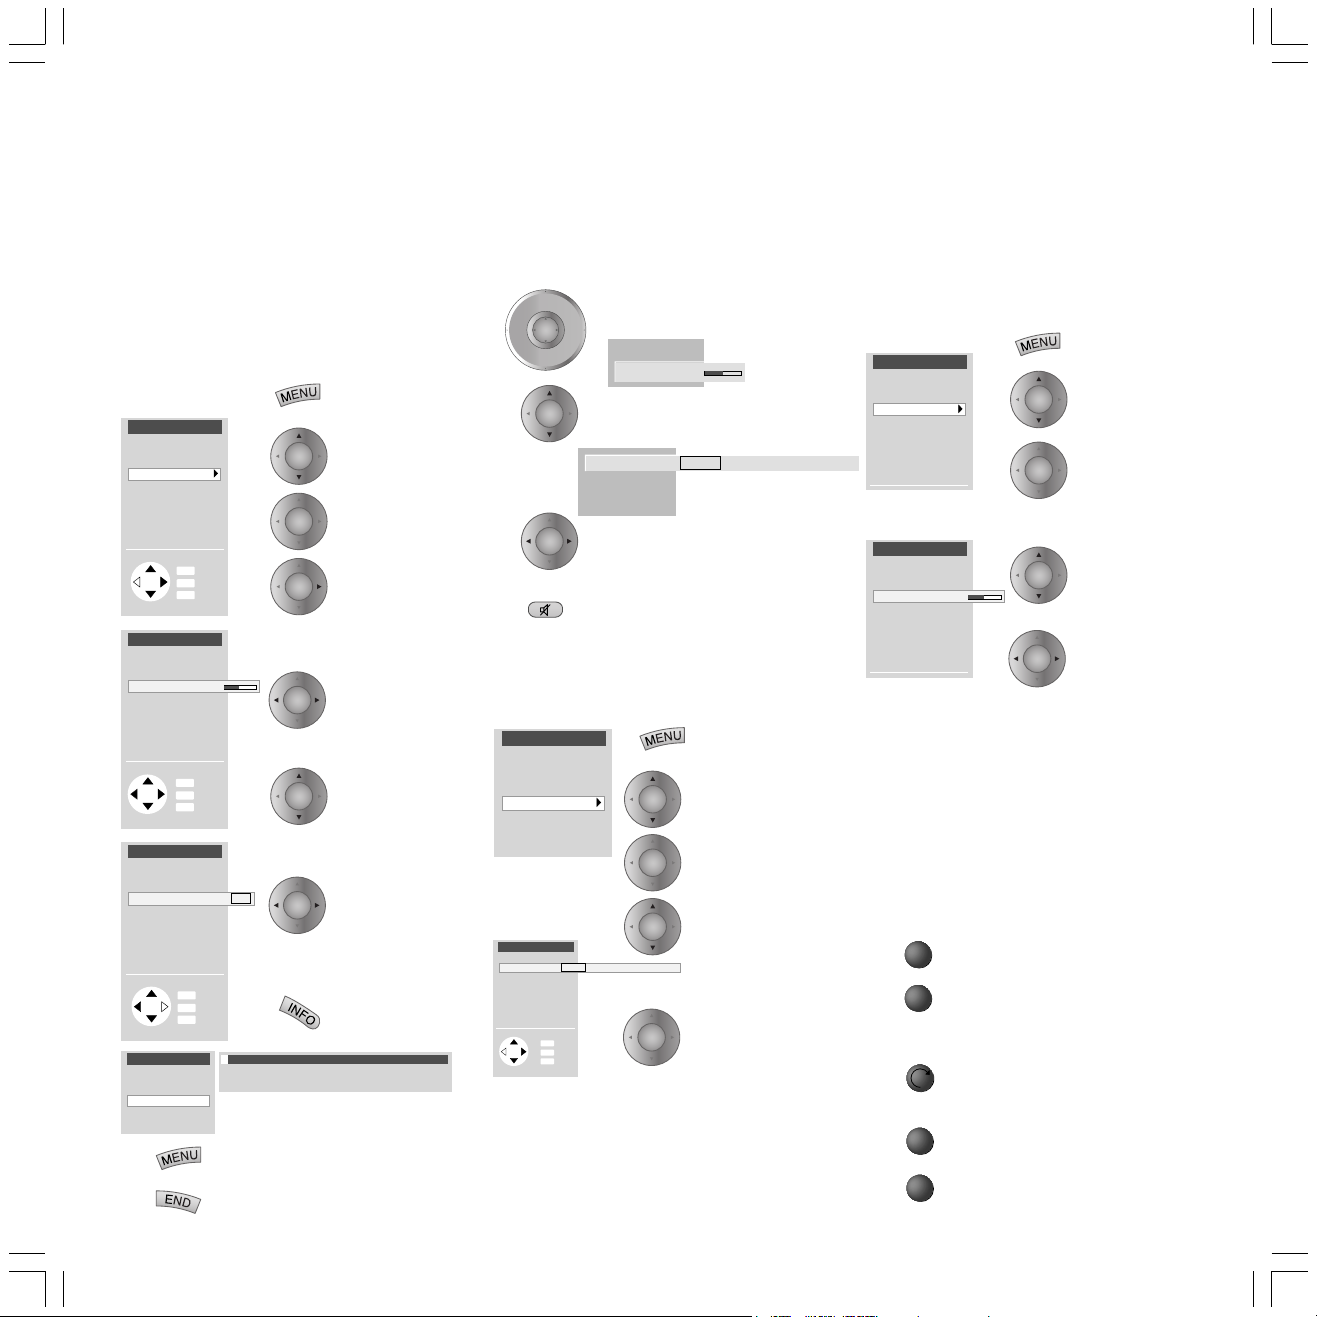
Rotating the TV set
(only when equipped with "Motor Unit")
Launch the TV menu:
Press MENU on the remote
control.
OK
OK
Note:
Do not place any objects in the range of
rotation of the TV set which could obstruct
rotation or be knocked over in the process.
Before activating the rotary function, make sure
that the set can rotate freely and unhindered.
You will find further setting possibilities on
page 28.
Select the ”Rotate TV” bar.
Using the arrows on the
circular pad you can set the
rotation direction to go right,
to stop or to go left.
Close the menu.
Picture
Show/hide the picture menu. Press the button
You can set the TV picture with the
help of the picture menu. The Picture menu can
also be called by the
TV menu ‘ Picture.
31936_021_Spheros42HDR+_GB 18.10.2004, 10:17 Uhr9
9

Daily handling
Remote control RC3
Remote control for operating different Loewe
units.
TV
DVD STB
VCR
Operating the TV:
Set the rotary switch to ”TV”.
Ex-factory settings are: Loewe video recorder,
Loewe DVD recorder and for STB (Set Top Box)
the d-box common in Germany.
The remote control must be switched for
operating a Loewe DVD player.
TV equipment
Functions marked by ✳ are not available in all
types of TV sets but can usually be retrofitted.
Ask your dealer if you are interested.
Menu contents may differ from the ones shown
depending on your TV equipment.
Operation of the ”Digital Recorder”, if
available, are described in a separate operating
manual.
You can show your TV
equipment by pressing the
INFO button on the remote
control.
OK
OK
Select the ”Equipment” line in
the ”Main information” menu.
Press the OK button.
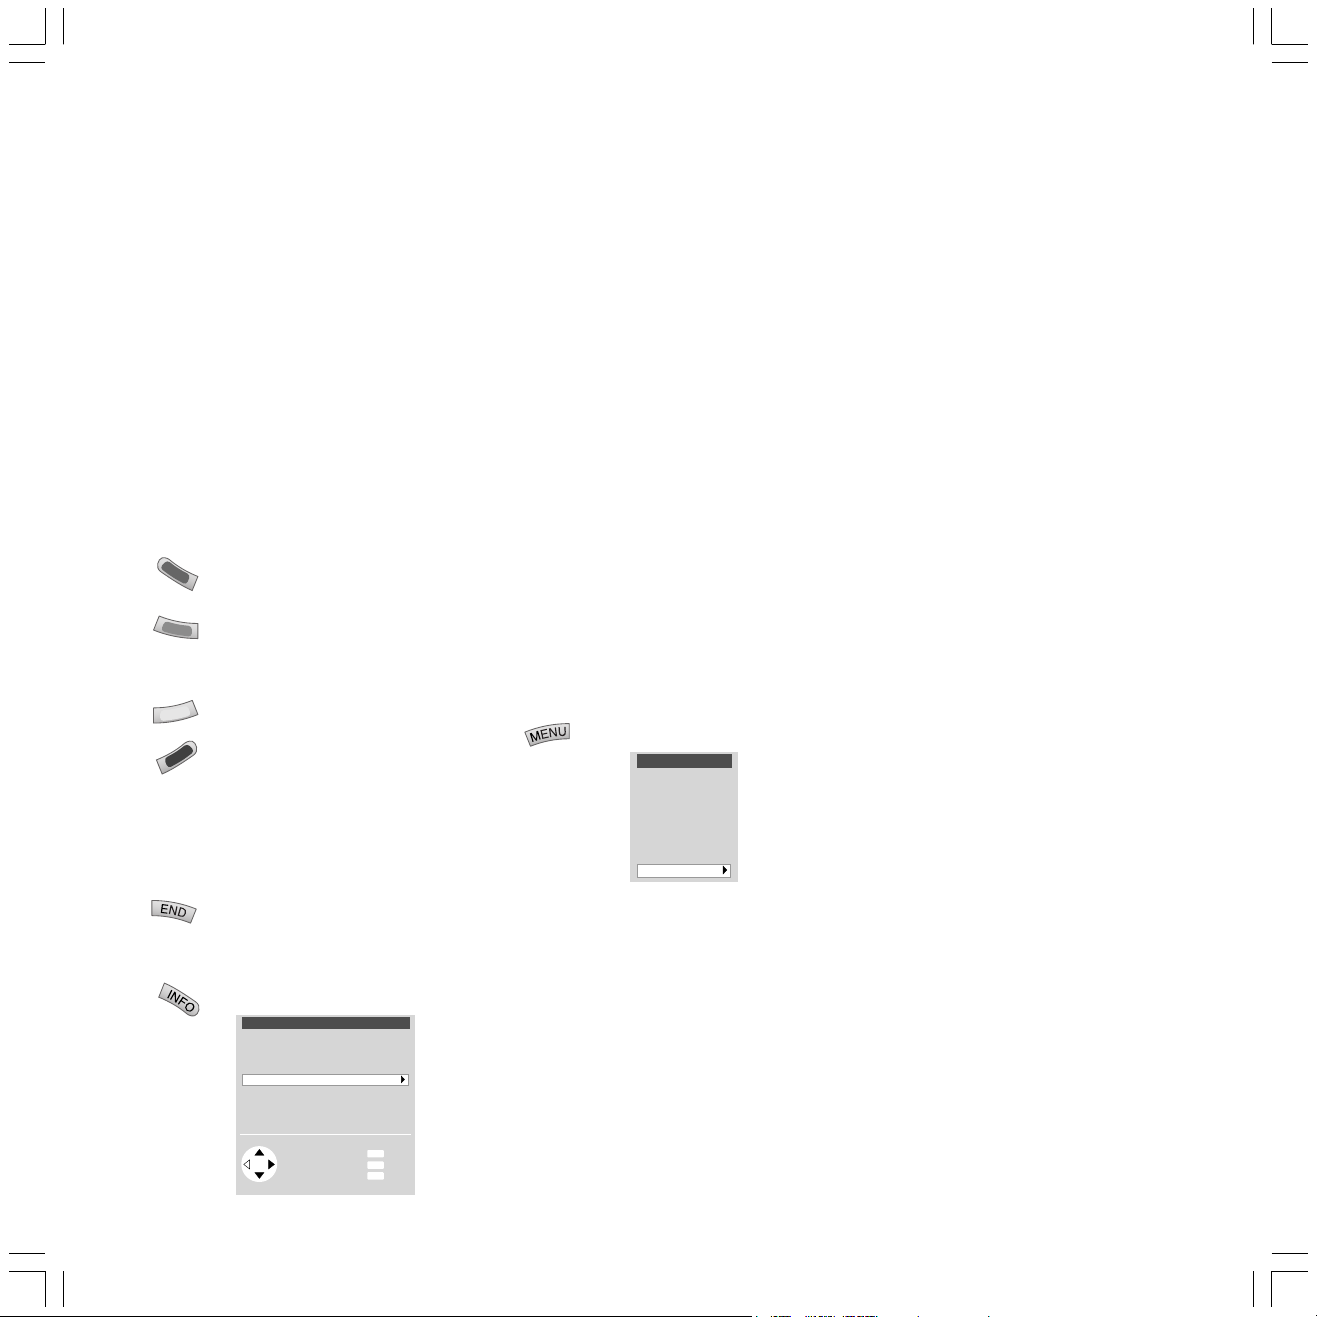
Use the drive buttons in TV- and STB
position for VCR, DVD or Digital Recorder
You can switch over the six drive buttons both
for TV and STB for operating a VCR or DVD
player/recorder. Operation of the built-in Digital
Recorder Plus is specified ex-factory.
TV
DVD STB
VCR
First turn the switch to the main
function TV or STB.
Press the END and
EPG
tons at the same time (5 secs).
EPG but-
*
The display at the top left of the
remote control flashes twice.
wxyz
Enter the numbers 988 one after
tuv
the other. The display again
tuv
flashes twice.
DVD STB
VCR
TV
Now turn the switch to the
required function for the drive
buttons. DVD, VCR or TV if the
Digital Recorder is to be used.
Press the # PIP button to com-
PIP
plete the setting. The display
flashes twice.
The setting is saved.
Switching on/off
Your TV set is equipped with an economy
standby power supply unit. On standby the
power consumption drops to low power. If you
want to save even more electricity, switch the
set off at the On/Off switch (Signal Box).
But remember that EPG data will then be lost
and timed recordings will not be made.
When the TV is switched on,
you can switch it to standby
with the blue on/off button.
The red standby indicator on
the set
lights up. If the green indicator
is also alight a timer recording
on the VCR is in progress, EPG
data input is taking place or
radio mode without on-screen
display is active.
From standby it is best to
switch back on with the blue
On/Off button or with a
numeric key (station 0-9). The
green (blue) operating LED
then lights up.
When you switch on the TV
OK
None of the indicators lights up when you
switch off the TV set with the On/Off button on
the set.
Switch on the TV set with the On/Off button
on the set when it is switched off.
with OK, you see the station
table and can choose a station.
Hide the menu again with the
END button.
10
31936_021_Spheros42HDR+_GB 18.10.2004, 10:17 Uhr10
Daily handling
v
Changing channels
P+
V— V+
OK
P–
With the numeric keys on the remote control
The set has a dynamic memory with 220 (with
DVB 1470) memory slots. If up to 9 stations are
stored, you only need to enter one number, up to
99 two numbers, up to 999 three numbers and
above 999 four numbers (please look in the
station table to find out how many stations have
been stored).
1-digit stations
2-digit stations
abc
3-digit stations
abc
pqrs
Channels up/down (only favorite
stations if these are shown in the
station table).
Keep the button 0 - 9 pressed for
pqrs
one second, the channel then
changes immediately.
or press the button 0 - 9 briefly,
the channel then changes after 2
seconds (immediately when up to
9 stations are stored).
Keep the second numeric key
pressed for one second, the
pqrs
channel then changes
immediately.
or press both numeric keys briefly,
the channel then changes after 2
seconds (immediately when up to
99 stations are stored).
Keep the third numeric key
pressed for one second, the
channel then changes
immediately.
or press the three numeric keys
briefly, the channel then changes
after 2 seconds (immediately
when up to 999 stations are
stored).
4-digit stations
Press the four numeric keys briefly,
abc
pqrs
the channel then changes
immediately.
tu
Depending on how many stations have been
stored, you can place one or more zeros in front of
the number and select for example station 7 = 07
or 007 or 0007.
With the station table
Call the station table with OK
OK
Station table TV
Channel overview: TV Numerical
AVS
AV3
AV2
AV1
0 VIDEO
1 ARD
2 ZDF
3 SAT.1
4 RTL
5 VOX
Select and
press OK to proceed
OK
6 S–RTL
7 N–TV
8 DSF
9 TM3
10 PRO7
11 RTL 2
12 WDR 3
13 BR 3
14 HR
15 MDR 3
0 9
... Select program:
Change programs
Favourite programs
Change sorting
INFO
Info
MENU
Menu
END
End
Mark the station
OK
(the marked station is shown in
the PIP pictures)
or
AV
Mark with numeric keys
wxyz
OK
Call the marked station
Sort alphabetically/numerically
(blue button)
Channel overview: TV Alphabetical
ARD
BR-ALPHA
BR3
CNN INT.
CAM
DSF
DVD
Select and
press OK to proceed
OK
EUROSPRT
HOT
HR
KIKA
MDR 3
N–TV
✳ABCDEFGHIJKLMNOPQRSTUVWXYZ
Change programs
Favourite programs
Change sorting
INFO
Info
MENU
Menu
END
End
Show favorites only (yellow
button), selectable in the "TV
Menu-Programs".
Call Audio/Video programs - AV selection
for playing AV equipment.
AV
AV Selection
VIDEO AV1 AV2 AV3 AVS VGA/XGA DVI COMP.IN
Select AV connection (jack) or
VIDEO for VCR station.
11
31936_021_Spheros42HDR+_GB 18.10.2004, 10:17 Uhr11
Daily handling
General menu operation
With the TV and picture menus, we show you
how to navigate within the menus. Which
buttons you can use for operation is shown at
the bottom of the appropriate menu.
Call the TV
OK
OK
OK
OK
OK
OK
menu
Mark
(white field)
Call the menu
with OK
or
Set
(setting value
and bar)
Mark other
menu items
Select
(frame)
Show/hide
info texts
TV menu
Rotate TV
Standard settings
Picture
Sound
zap2text
Connections
Settings
INFO
Info
OK
MENU
Back
END
Picture
Contrast
Picture adjustment
Colour 32
Brightness
Picture vert.
Sharpness
other ...
INFO
Info
MENU
Back
END
End
Picture
other ...
Picture format
DNC off on
DMI Plus
AMD
INFO
Info
MENU
Back
END
End
Picture
other ...
Picture format
DNC
DMI Plus
AMD
12
End
Grey menu items cannot be
selected
DNC (Digital Noise Control)
i
With DNC you can eliminate or reduce picture
interference, e.g. due to poor reception.
Back to the previous menu
level
Hide all menus
Adjusting the sound
Adjusting the volume
P+
V– V+
OK
P–
OK
OK
Mute
Other sound settings:
TV menu
Rotate TV
Standard settings
Picture
Sound
zap2text
Connections
Settings
Sound
Sound via
Listening mode Stereo Panorama Dolby Virtual
Sound adjust
Treble
Bass
Loudness
other ...
INFO
OK
MENU
END
Sound settings: Sound via the loudspeakers of
the TV set or another system. Listening mode
Stereo/Panorama/Dolby Virtual. Sound
adaptation, treble, bass and balance. Sound
select for loudspeakers and headphones, AV
Adjust the volume
other ...
Volume 36
with "others ..." you can select
and ...
Listening mode Stereo Panorama Dolby Virtual
Loudness
Sound adjust
Volume
... set other sound settings.
Sound off; Sound on: press
button again or adjust volume.
The status is displayed briefly
on screen.
Call TV menu
Info
Back
End
OK
OK
OK
OK
Mark "Sound"
Call sound
functions
Mark sound
function
Set/
select
output sound. Volume of the headphones,
automatic volume and max. volume.
Adjusting the picture
TV menu
Rotate TV
Standard settings
Picture
Sound
zap2text
Connections
Settings
OK
OK
Select picture settings
Picture
Contrast
Picture adjustment
Colour 32
Brightness
Picture vert.
Sharpness
other ...
OK
OK
Picture settings: Contrast, Picture adaptation,
Colour, Brightness, Vertical hold (not for 16:9 or
4:3), Focus, Tint (only for NTSC), Picture format,
Noise reduction (DNC), Movement
compensation (DMI) and automatic picture size
adaptation (AMD), DRM.
Call the TV
menu
Mark "Picture"
Call picture
functions
Mark picture
function
Set/
select
Operation on the TV set
Changing channels on the TV set
+
–
Volume, contrast and color
+
–
Channel up
Channel down
Press the function button until
the desired function is marked
More volume, contrast or color
Less volume, contrast or color
31936_021_Spheros42HDR+_GB 18.10.2004, 10:17 Uhr12
Modes of operation
TV mode
In initial installation and daily operation, the TV
set is in TV mode. This is also the case when
none of the other modes of operation such as
EPG, Teletext, PIP, Video or Radio is selected.
Every one of these modes of operation has a
menu which you can call with the MENU-
button and with some color button
assignments.
Function of the color buttons in TV mode
You can assign the functions of the four color
buttons yourself. The following functions are set
at the factory:
red: personal teletext page
(with DR+: call DR archive)
green: call picture format
setting (with DR+: call timer
overview)
yellow: call last viewed station
blue: call station info
You can assign other functions to the buttons
in the TV menu "Settings" - "Function keys".
Status display
Show/hide status
Main information
Call main information
Main information
Autom. channel search
Connections
Explanation of the remote control
Index
Technical spec. of TV set
Select control level
Select and call up
with OK
OK
MENU
Info
INFO
Back
END
End
The explanation of the remote control
shows the function of every button in different
modes of operation of the TV set and the
remote control.
The index answers many questions regarding
all aspects of the TV. If it is a question about
the operation, you have direct access to the
operating function from the index.
Loewe TV sets are supplied in different models
with different equipment. You can find out
what equipment your TV has under the menu
item "Technical spec. of the TV set".
When you have made all the settings and
connections, you can switch over to
"Simplified control"(not in digital TV) using
"Select Mode". Then the "Settings" and
"Connections" can no longer be launched in all
modes of operation menus. Switch "Simplified
control" back off when you want to make
settings.
TV menu
Launch the TV menu
TV menu
Rotate TV
Standard settings
Picture
Sound
zap2text
Connections
Settings
Standard values
You can save the setting for picture and sound
you have made in this menu and launch them
again later.
Connections
You will find information about this in the
chapter "Logging in and connecting AV
equipment" on page 20.
zap2text
Some stations use this service. If teletext pages
are referred to during a program, the TV set
saves and/or displays this page number. You
call the teletext page with the TEXT button
from the display during the program or from
this menu.
Some settings in the TV menu:
Child lock
Use the child lock if you want to prevent your
children watching after a certain time, once or
daily, all or certain programs.
On-screen displays
You can define duration and position of the
displays, the content of the program and status
display and activate or deactivate zap2text as a
display.
Timer functions
You can have your TV switch on and off at
specific times or have yourself reminded by a
signal tone.
Time and date
When you receive teletext, the TV records the
right date and time settings. The time serves as
information for timer recordings, timer
functions and EPG. If you do not receive
teletext you should set the date and time and
not switch the TV off with the mains button as
the settings will then be lost (Not all stations
transmit the full date, you may have to add
missing data manually).
Language
If "your" menu language is not set, you have
to select the "Language" menu in a language
you cannot understand:
Press the MENU-button (TV menu), mark the
last menu item (settings), press the OK button
and mark the last menu item (Language) under
"other ..." and press the OK button.
Now select the right language and confirm with
OK.
31936_021_Spheros42HDR+_GB 18.10.2004, 10:17 Uhr13
13
 Loading...