

Page 1

RANGELEY BED
Thank you for purchasing our Rangeley Bed. Assembly of this product requires a
Phillips and Flat head screwdriver. We have found it helpful to have a second person
present in at least one step of the assembly.
0X858/X859/X860070702
Page 2
STEP 1
Read through these instructions thoroughly before
beginning assembly. We have found this to be of
great value when first assembling this product.
STEP 2
Remove all parts and hardware from packing
material. Wooden pieces should be placed on a non
abrasive surface (like the carton or carpet) to prevent
damage to the finish.
STEP 3
Identify all parts using parts list at right.
PARTS
A. SIDE RAIL (2)
B. HEADBOARD
C. FOOTBOARD
D. LONG SUPPORT BAR (FULL AND QUEEN)
E. SMALL WOODEN LEG (QUEEN)
F. WEBBING SLAT SYSTEM
STEP 4
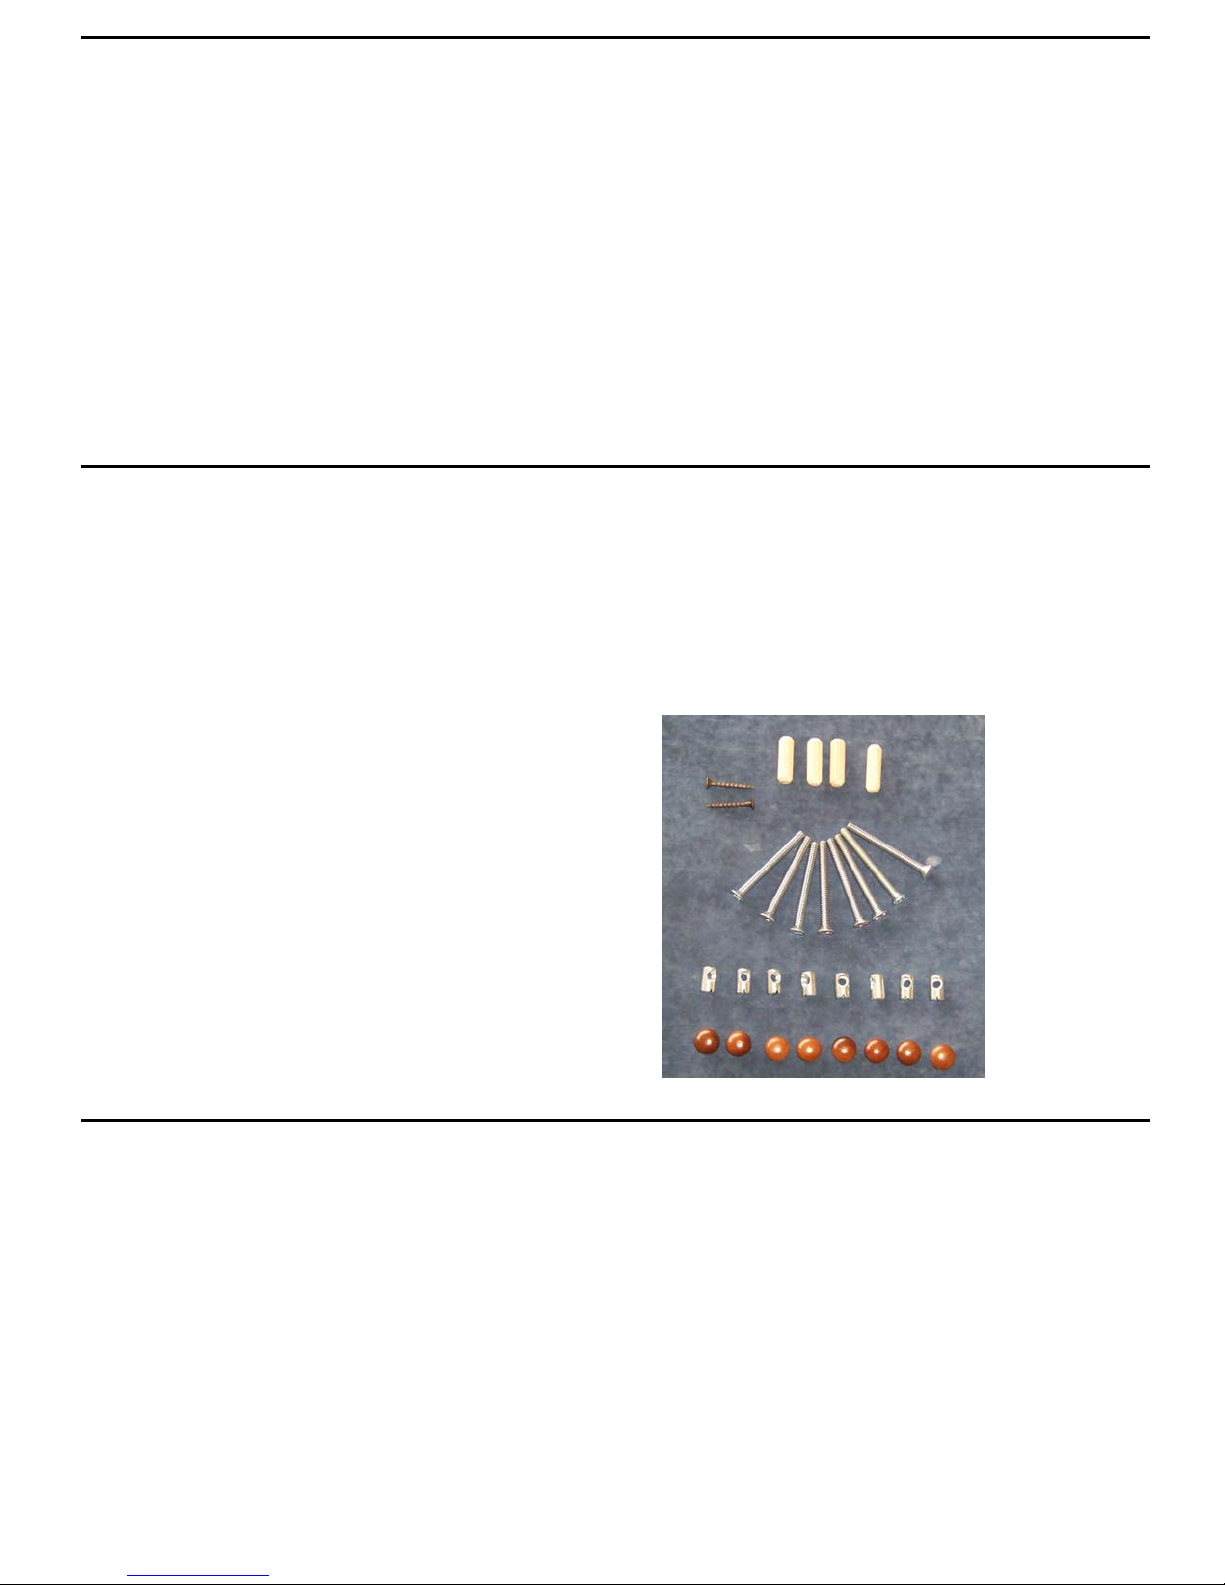
Identify and count hardware using diagram at right.
Assembly of this product requires A Phillips and flat
head screwdriver. We have found it helpful to
have a second person present in at least one step
of the assembly.
HARDWARE
4 1 ¼” FLUTED DOWELS
2 SCREWS
8 BOLTS
8 BARREL NUTS
8 WOOD BUTTONS
:
1 of 6
X859/X860/X858070702
Page 3

STEP 5
Locate the two side rails (A), the headboard (B), and the footboard (C).
Side Rails (A)
Headboard (B) Footboard (C)
STEP 6
Stand them headboard upright
STEP 7
Locate the 8 bolts and barrel nuts. Insert the barrel nuts
into the holes on the inside of the side rails. Turn the
groove on the end of each barrel nut so that it is going the
length of the rail.
2 of 6
X859/X860/X858070702
Page 4
Step 8
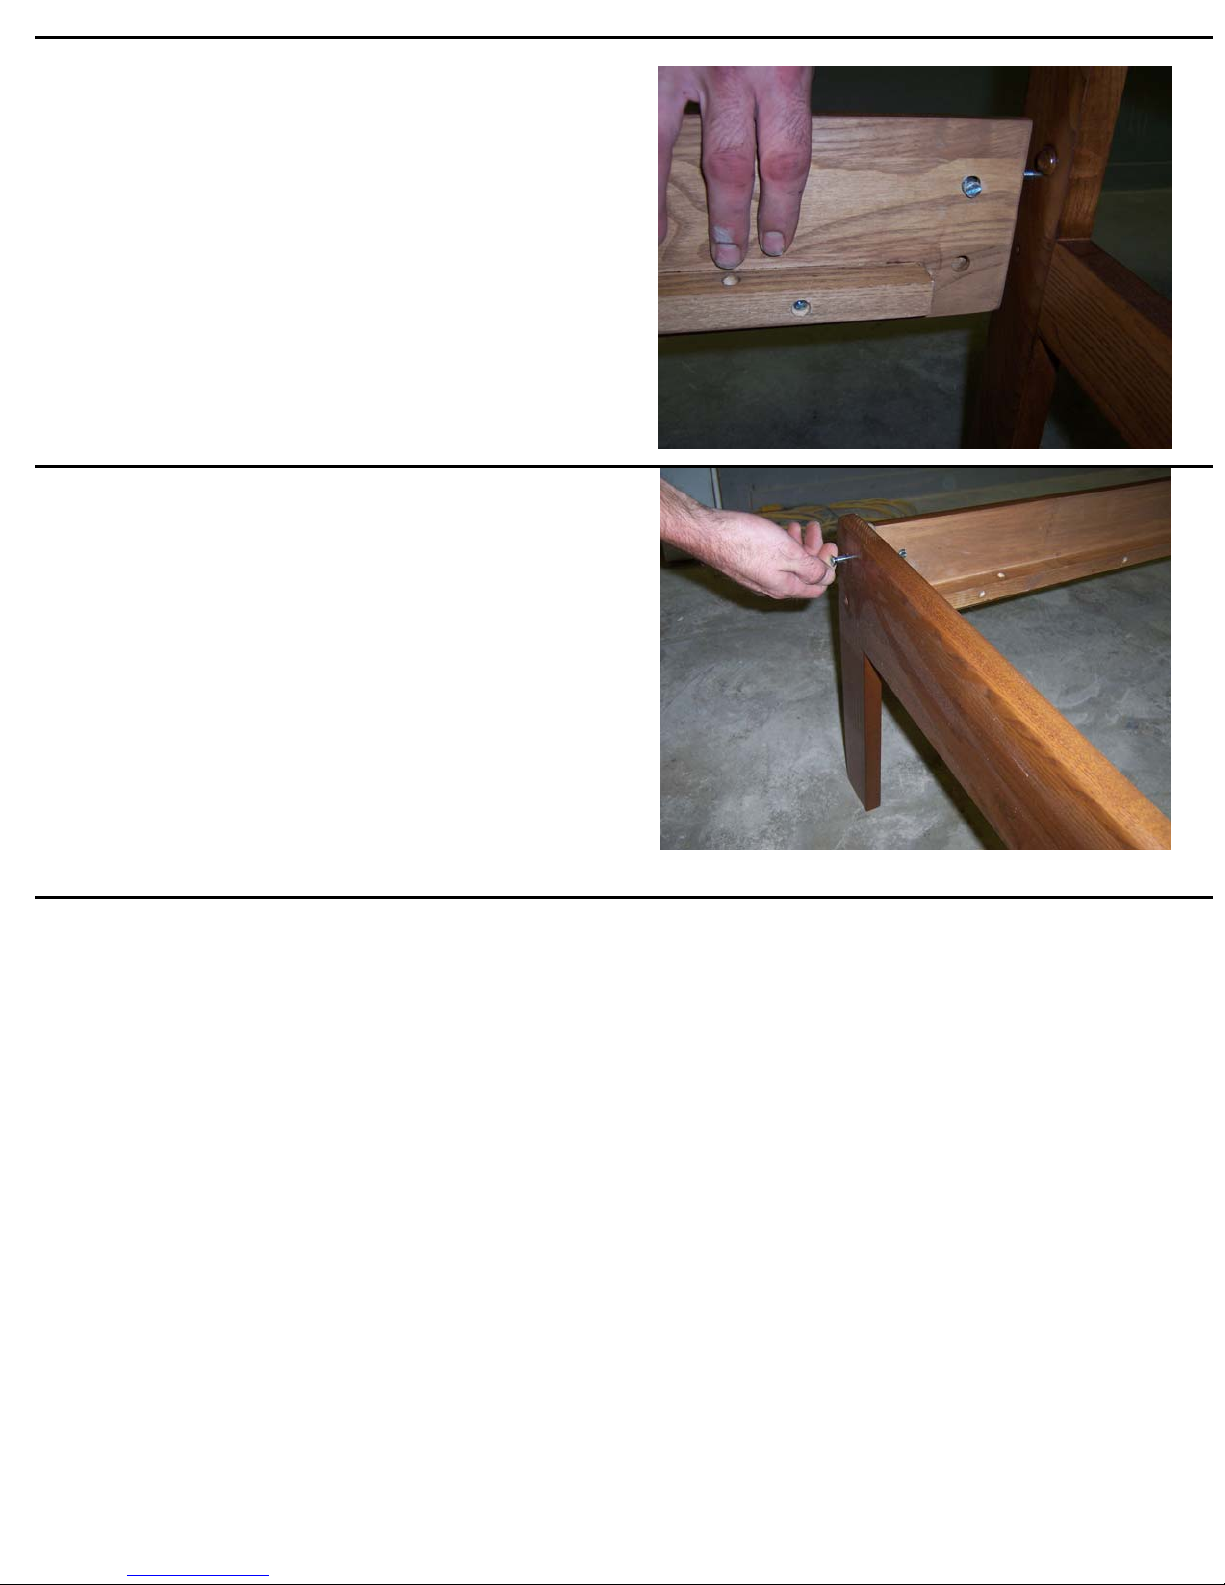
Line up the end of one rail (finished side out) with the
pre-drilled holes in the headboard (finished side with
wood button facing in toward rail). Insert a bolt through
each hole so that it screws into the barrel nut in the rail.
Using a Phillips head screwdriver tighten the bolt (the
use of a flat head screwdriver to hold the barrel nut in the
correct position is recommended).
Step 9
Place footboard end (wood button side in) at the foot of
the bed. Repeat step #8 to attach.
NOTE: Full and Queen size Only - Leave bolts a little
loose for step 10 and 11.
Twin size skip to step #12
3 of 6
X859/X860/X858070702
Page 5
Step 10
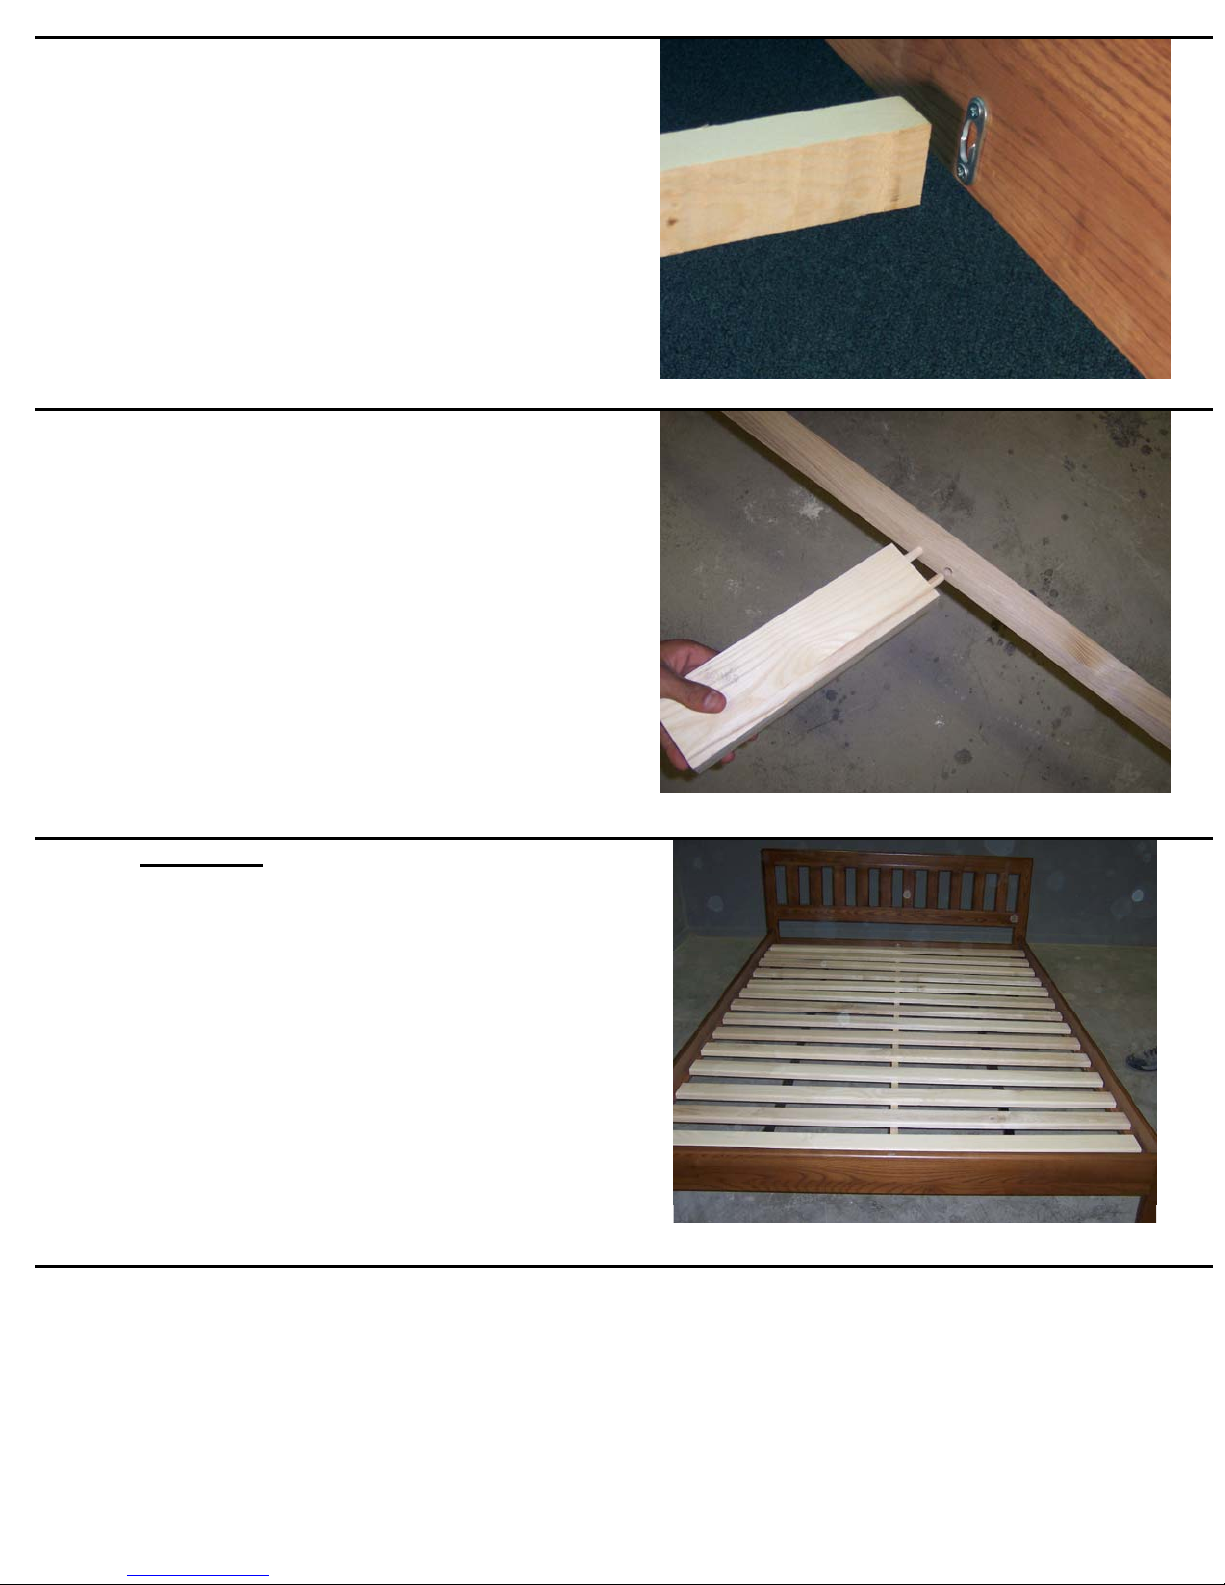
Full Size Only – Locate the long support bar with screws
attached to either end. Attach to the frame by positioning
the support bar so that the screws on either end are placed
into the notch on the metal brackets found on the frame
ends. Push down to lock into place. Tighten all bolts.
Step 11
Queen Size Only- Locate the long support bar with
screws attached to either end, and the small wooden leg
with the 2” wooden dowels attached. – Line up the
wooden leg with the dowels attached with the pre-drilled
holes in the center of the support bar. Tap into place.
Line up the support bar so that the screws at either end
are into the notch on the metal brackets found on the
frame ends. Push down to lock. Tighten all bolts.
Step 12 ALL SIZES
Locate the 4 - 1 1/4” fluted dowels. Put one dowel into
each of the pre-drilled holes located on the inside edges
of the rails. Tap into place.
Unroll the webbed slat system into the frame. The dowels
will hold the last slat on each into position. Using the
screws provided, screw the middle slat onto the rails
through the pre-drilled holes.
STEP 13
Tap wood buttons into place on outside of the headboard
and footboard to cover the bolt holes.
4 of 6
X859/X860/X858070702
Page 6

CARE
Use a clean soft cloth to dust.
www.llbean.com
Product Support 1 800 341 4341
5 of 6
X859/X860/X858070702
Page 7

6 of 6
X859/X860/X858070702
 Loading...