


MISSION STORAGE CONSOLE
Thank you for purchasing our Mission Storage Console. Assembly of this product
requires a Phillips screwdriver and a hammer. We have found it helpful to have a
second person present in at least one step of the assembly
ATF4/5062919
STEP 1
Read through these instructions
thoroughly before beginning
assembly. We have found this to be
of great value when assembling this
product.
STEP 2
Remove all parts and hardware from
packing material. Wooden pieces
should be placed on a non abrasive
surface (like the carton or carpet) to
prevent damage to the finish.
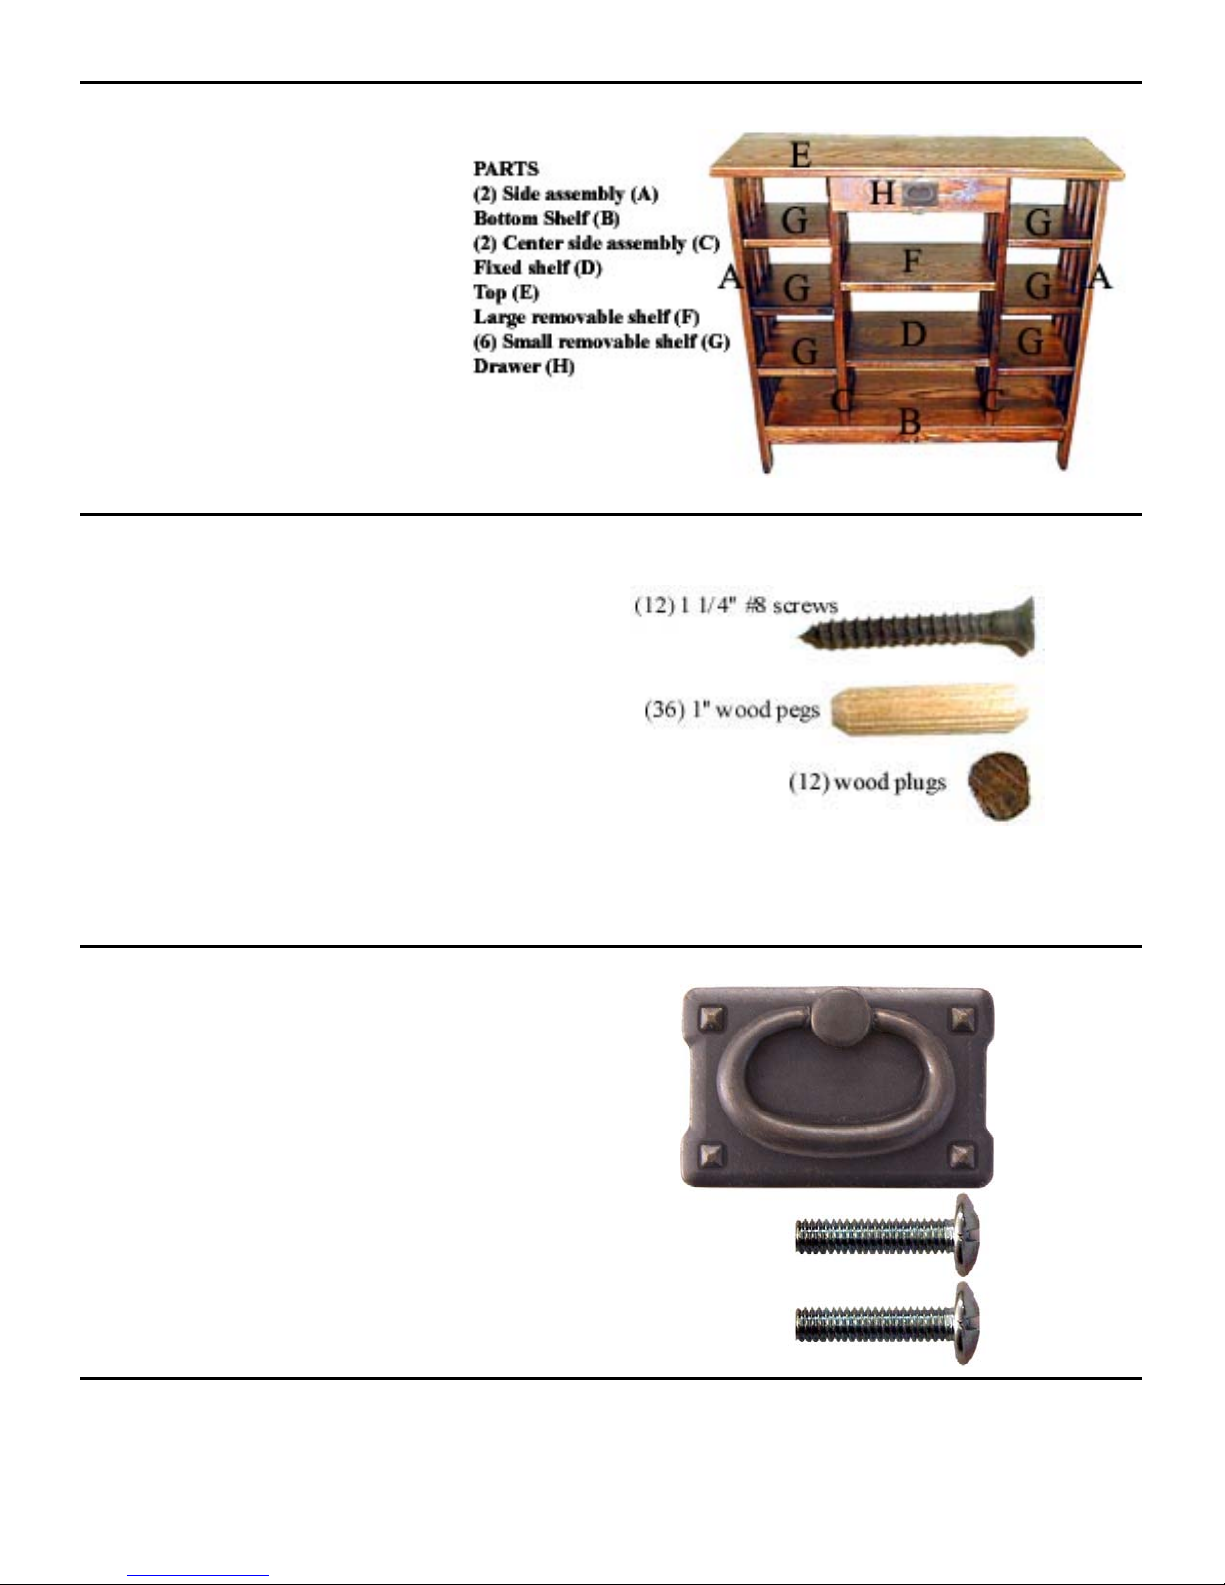
STEP 3
Identify all parts using diagram at
right.
STEP 4
Identify and count hardware using diagrams
at right.
Assembly of this product requires a phillips
screwdriver and a hammer. We have found
it helpful to have a second person assist in
the assembly of this product.
The 42” wide Mission Storage Console has
two sets of drawer hardware.
Drawer Hardware
ATF4/5041115
 Loading...