

Page 1
For the most current resources, helpful videos and live chat visit:
www.livewatchsecurity.com/login
Simon XTi with Plug & Protect™
Quick Start Guide
This guide covers the fundamentals of
Step 4 and Step 5:
Page 2
Thanks for choosing Plug & Protect™ from SafeMart. This product is designed to be quickly
placed in your home or office while offering comprehensive protection. Your home will be fully
protected in just a few minutes. This guide is designed to aid you in the placement of your
sensors and master control unit. Please read this guide in its entirety before placing your
sensors. This system has been programmed to your specifications and sensor placement labels
have been applied to each sensor. It is important not to separate the labeled boxes from the
sensors until you are ready to place the devices in the locations stated on the label.
Be sure to follow along with the “Plug & Protect™ Installation Video” sent to your
email address. This video can also be found online at www.Help.SafeMart.com.
Disclaimer – Important Information, Please read
Copyright: © 2002-2012 SafeMart, LiveWatch Security LLC St. Mary’s KS 66536. All Rights Reserved.
Trademarks and patents: SafeMart and LiveWatch logos, are registered trademarks of LiveWatch Security LLC.
Other trade names used in this document may be trademarks or registered trademarks of the manufacturers or
vendors of the respective products.
Warning: The unauthorized reproduction or distribution of this copyright work is illegal. Criminal copyright
infringement, including infringement without monetary gain, is investigated by the FBI and is punishable by up to
5 years in federal prison and a fine of $250,000.
Disclaimer: The information in this document is subject to change without notice. LiveWatch Security LLC
(“LiveWatch Security”) d/b/a SafeMart assumes no responsibility for inaccuracies or omissions and specifically
disclaims any liabilities, losses, or risks, personal or otherwise, incurred as a consequence, directly or indirectly,
of the use or application of any of the contents of this document. For the latest documentation, log in at
LiveWatchSecurity.com/Login.
This publication may contain examples of screen captures and reports used in daily operations. Examples may
include fictitious names of individuals and companies. Any similarity to names and address of actual businesses
or persons is entirely coincidental.
Safety Information: Before you install your products, please read the appropriate information, notices and other
material, including the safety and site preparation section in your product documentation. For your safety, please
consult a professional if you have any questions. There are certain components that connect to high voltage
electrical outlets. Improper installation or workmanship by you (the installer) can lead to severe injury, property
damage, system malfunction or death.
This guide is provided as information about low voltage products. Since every low-voltage project is unique, any
information contained herein WILL NOT constitute an endorsement of the suitability of any equipment or
application. Use this product only for the purpose it was designed. For the latest documentation, contact
LiveWatch Security d.b.a. SafeMart log in at LiveWatchSecurity.com/Login
Identify the Components in the Box
For the most current resources, helpful videos and live chat visit:
www.livewatchsecurity.com/login
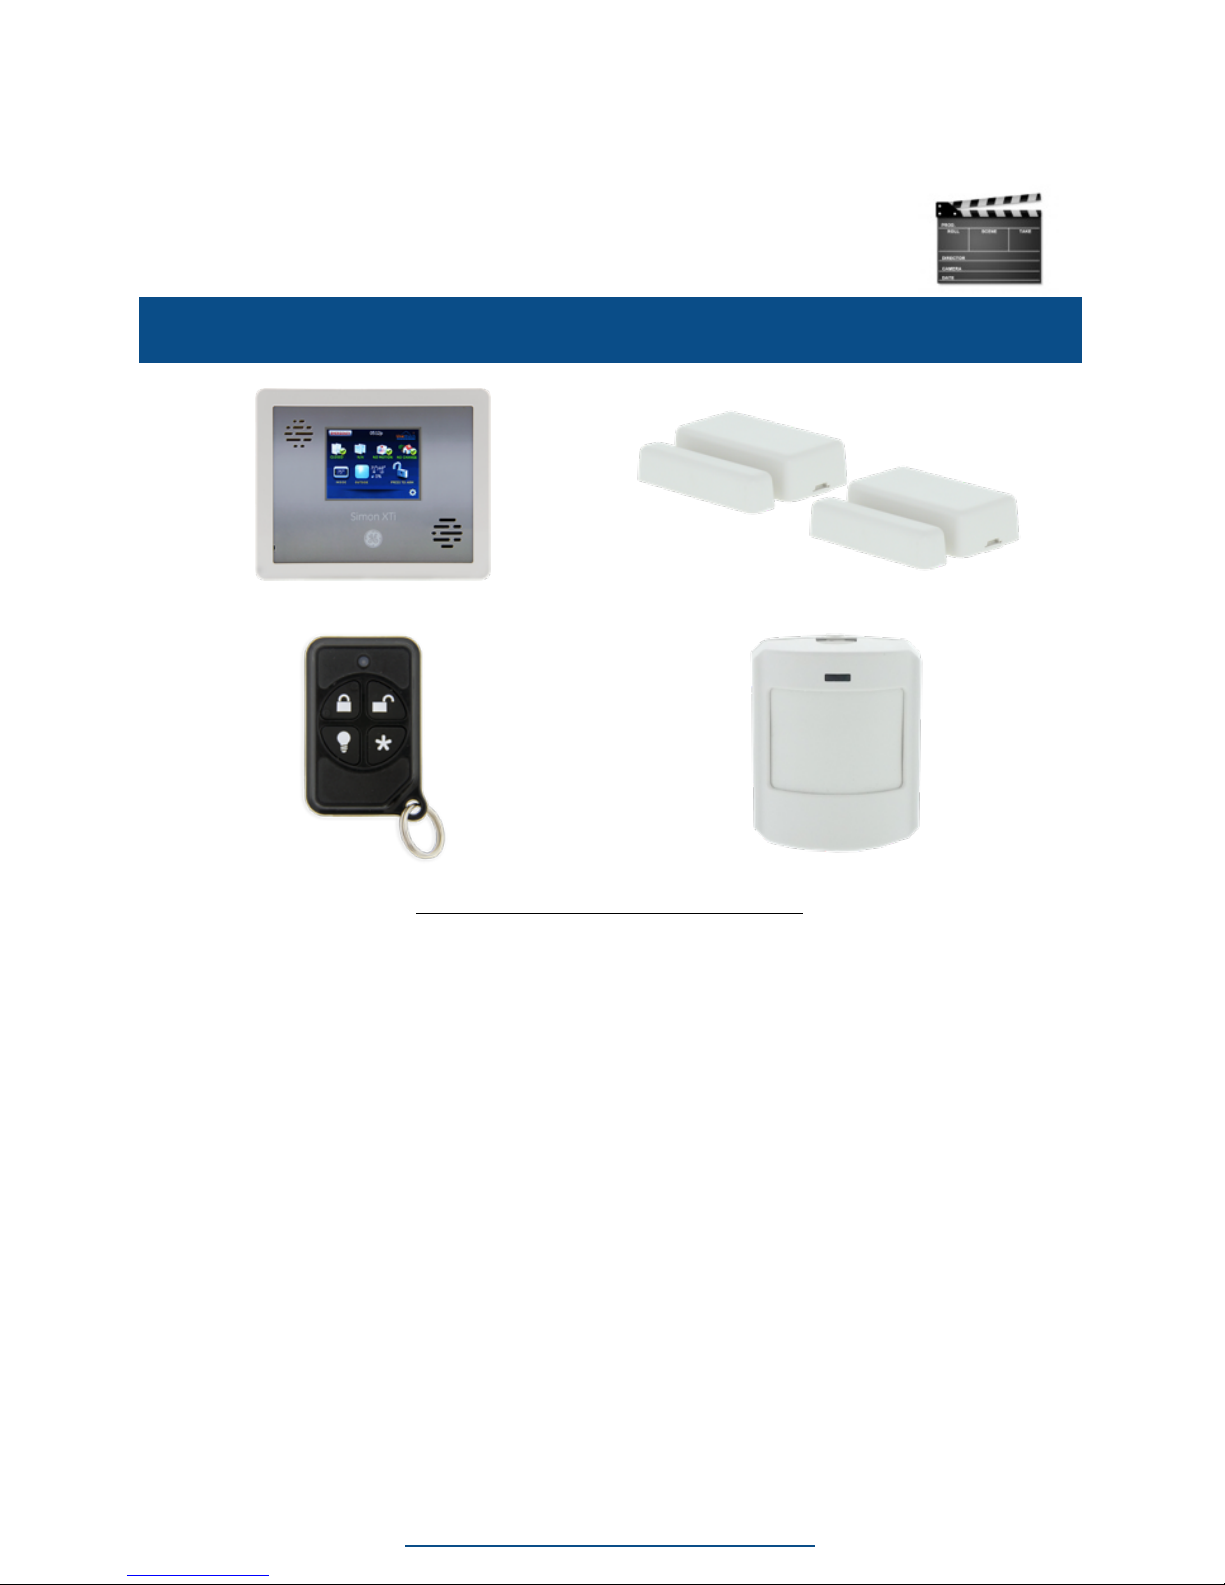
Motion Detector
Simon XTi (Master Control Unit) Door & Window Sensors
Optional Keychain Remote
Page 3
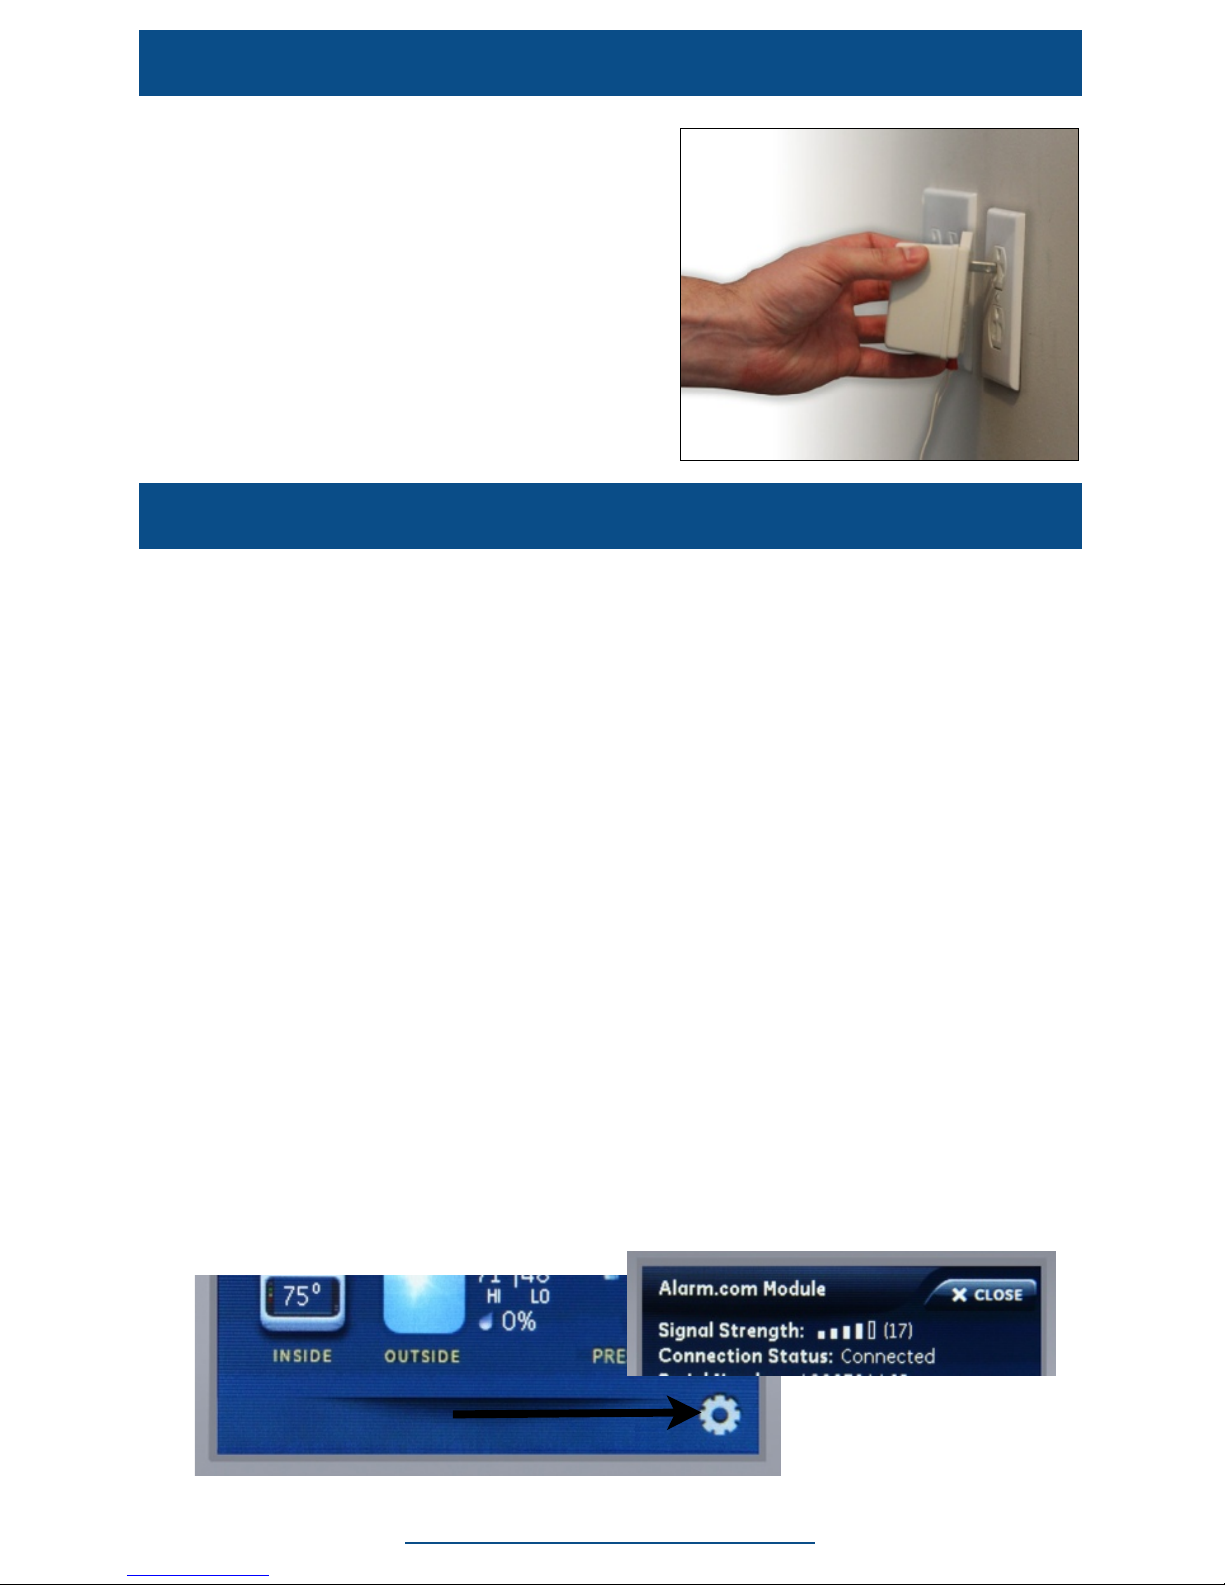
1. After taking all the items out of the
box, the first step is to plug in your
Master Control Unit into any outlet.
This will allow the rechargeable
backup battery, which is already
connected inside, to charge enough
for us to find a good location suitable
for the Master Control unit.
2. Your system should be powered up
and the display should be active.
Leave it plugged in for 5-10 minutes.
1. Tip: The location of your master control unit should be:
• Near a power outlet within reach of the unit’s power cord.
• Away from windows–the display cannot be seen from outside.
• On a surface that is easily accessible to you.
• Away from wireless routers, wireless telephones, or large
metallic objects such as a flat screen TV.
• In an area with cellular service (see next step).
2. Test: Test the strength of your cellular signal by pressing the Gear
Wheel in the lower right hand corner of the home screen. Press the
down arrow several times to scroll to the last page. Choose
“Programming” by pressing “Enter” next to this option. Enter your
Installer Code. By default this is 4, 3, 2, 1. Then press “OK”. Next,
choose “Interactive Services” and then “Module Status” on the next
screen. The strength of the cellular signal between the tower and your
panel is shown on the top line and indicated on a scale of 5 bars. You
need a minimum of 2 solid white bars to have a solid cellular
connection.
3. Complete: If you do not have a solid connection, unplug your Master
Control Unit and walk around your home performing the same test
until you receive 2 solid white bars or more. Once the panel has a good
connection, you may now plug in your Master Control Unit into a
nearby outlet.
1a: Plug in Your Master Control Unit
1b: Find a Location For Your Master Control Unit
For the most current resources, helpful videos and live chat visit:
www.livewatchsecurity.com/login
Gear Wheel
Page 4
After
Before
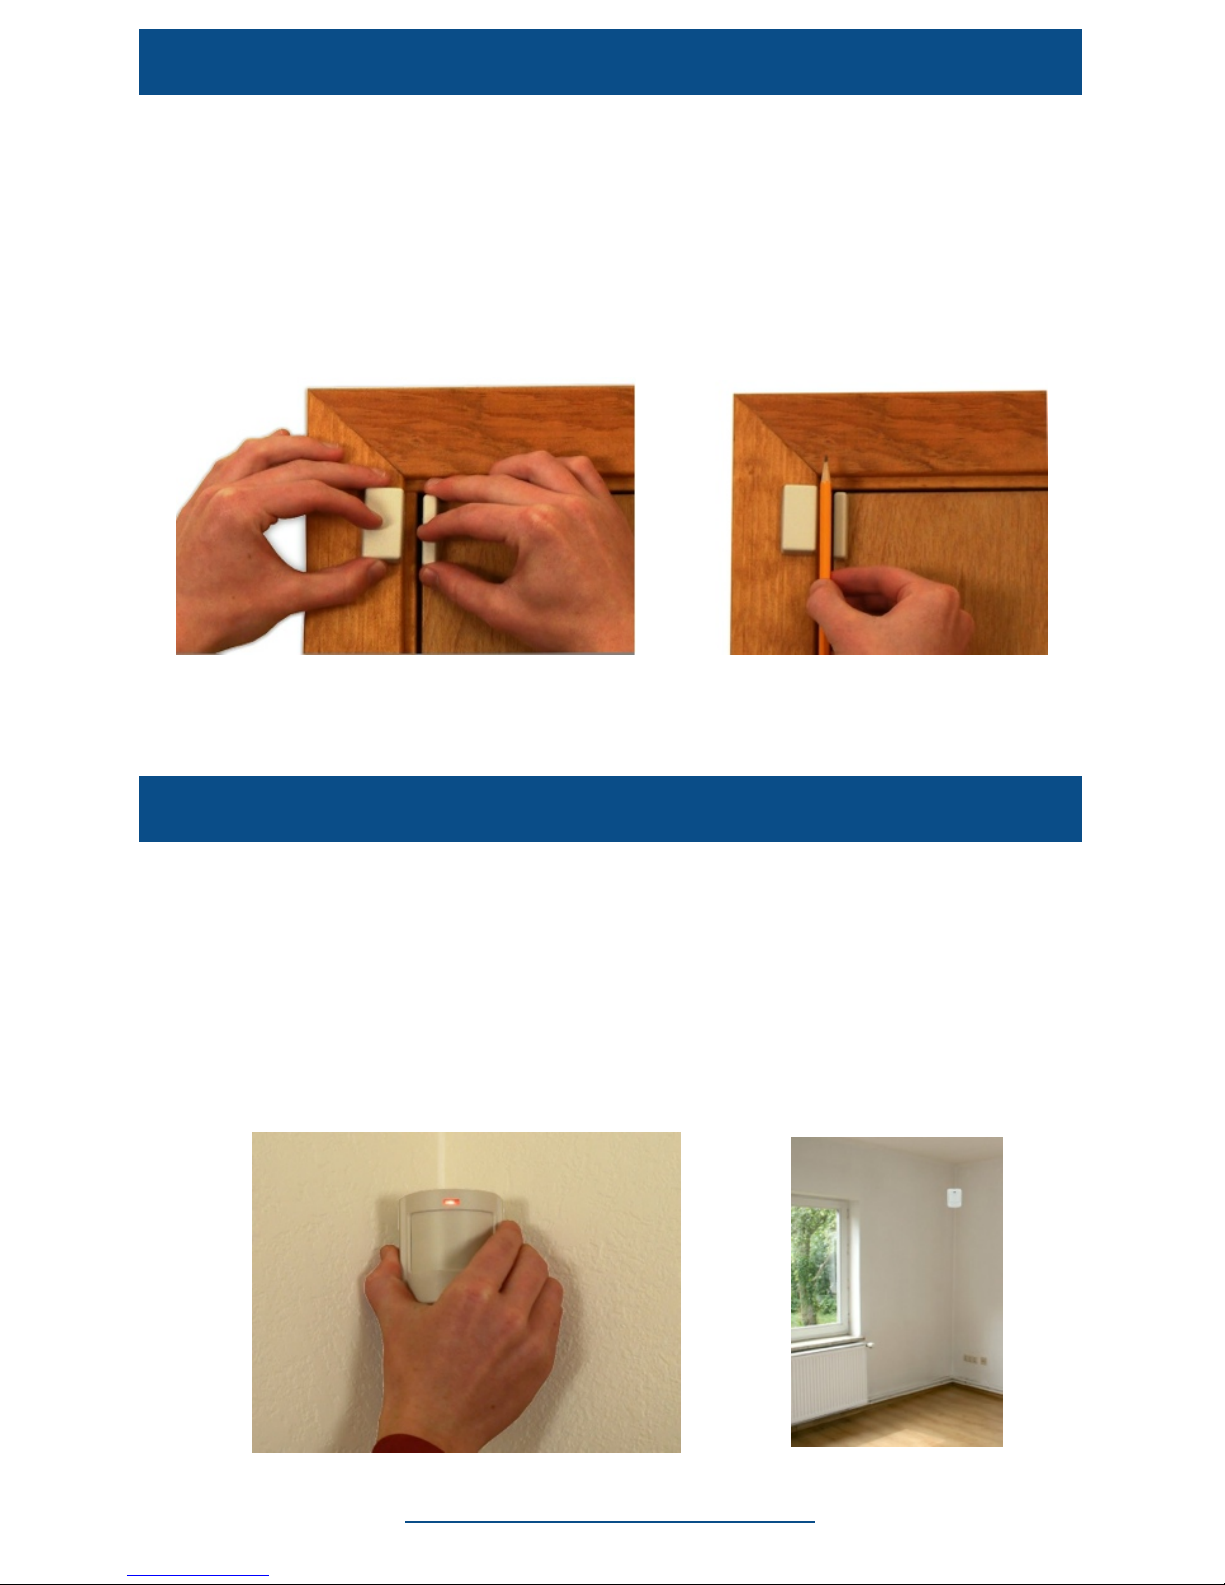
1. Select a location on the door or window you are going to protect. The
larger part of the contact should be on the non-movable part of the
door/window frame - see diagram.
2. After peeling off the wax paper backing on the tape, mount the two
contacts by applying pressure to the door/window. When you mount:
• Place the sensors at a maximum of ½” apart – closer is better.
• Do not exceed the width of a pencil between the sensors.
• The small arrows on the components need to be aligned and
facing each other on the inside of the mount.
1. Remove the double sided backing from the tape on the back of the
sensor.
2. We recommend mounting these sensors in the corners of the rooms
you are protecting. Do not place the motions towards a window facing
the outside; place them facing in, towards the inside of your home; in
an area where a burglar may pass. Once the tape is peeled place the
sensor about 7 or 8 feet high in the corner. Press the motion sensor
hard into place. Once the adhesive is secure, you have completed the
installation.
If your doors or windows do not allow you to properly place the large part of the
sensor on the frame, it is okay to place the smaller portion on the door or
window frame to make the placing work more easily. This is an acceptable
method of sensor placement although it should only be used when necessary.
2a: Place the Door and Window Sensors
2b: Place the Motion Sensors
For the most current resources, helpful videos and live chat visit:
www.livewatchsecurity.com/login
Page 5
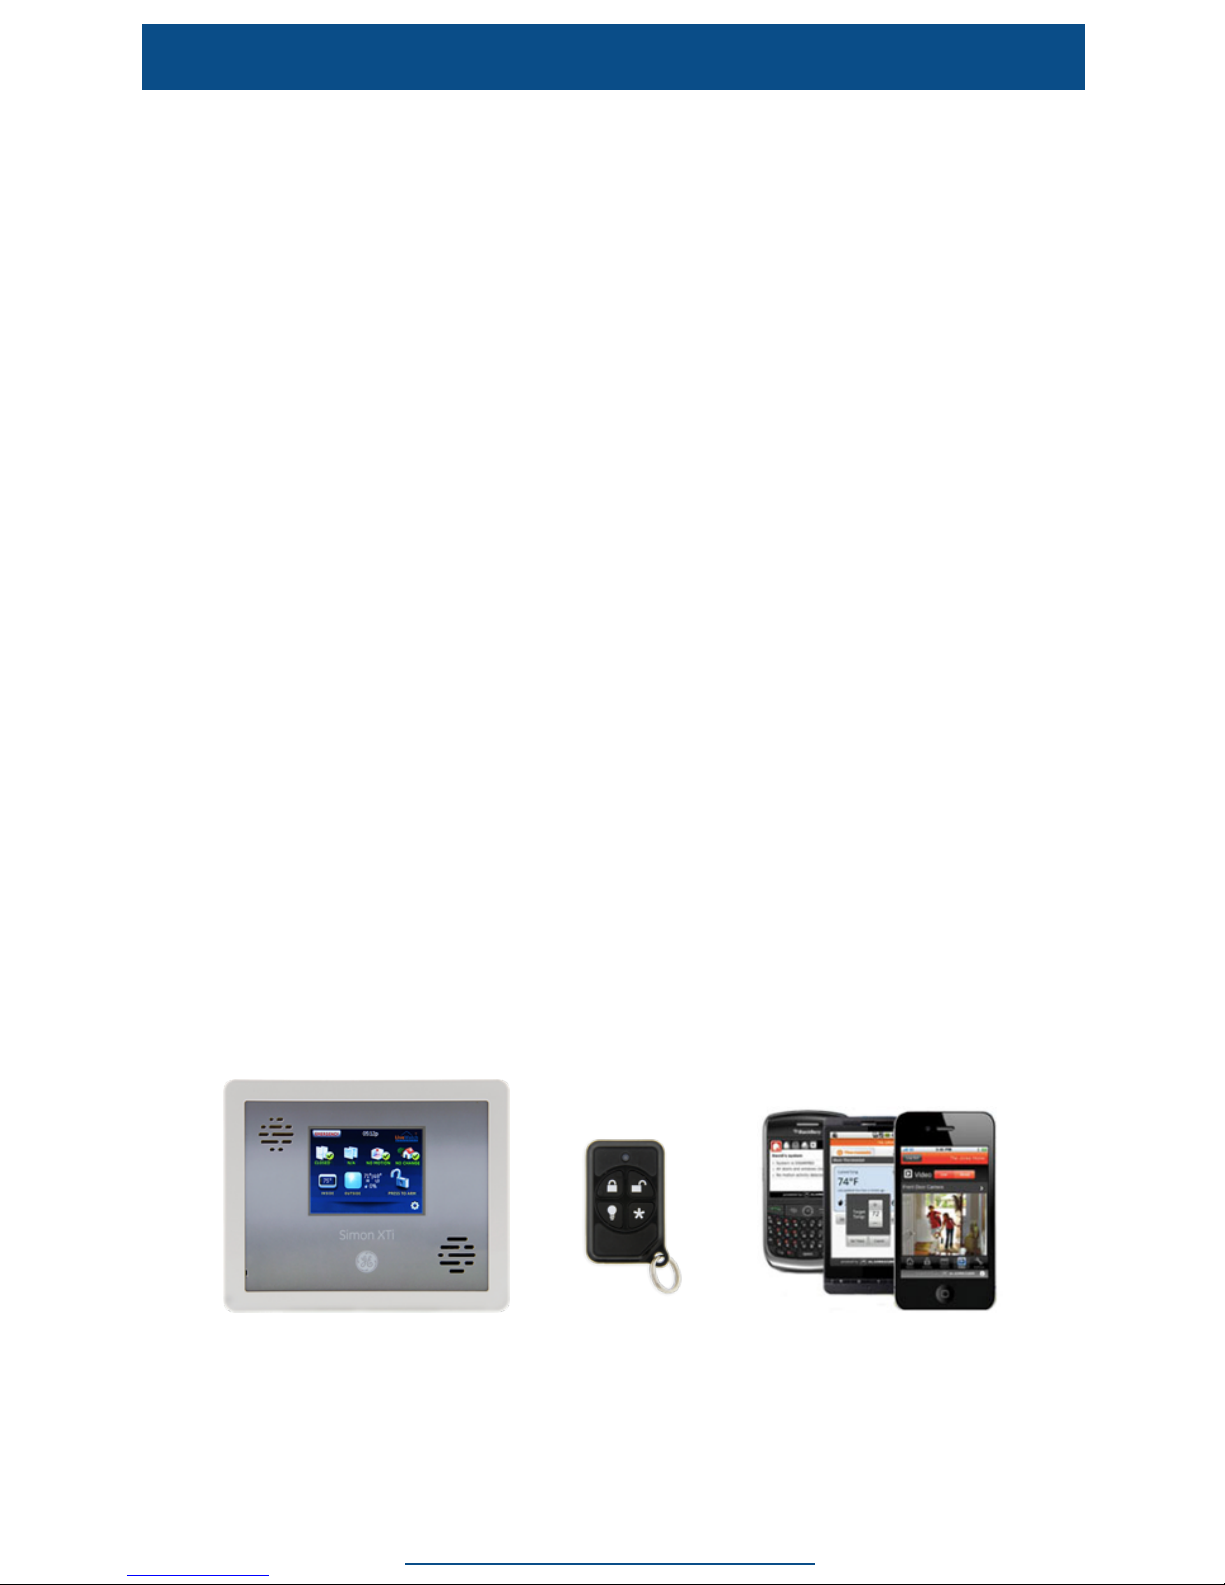
There are 2 “arming modes”: Stay Mode and Away Mode.
1. Stay Mode arms the perimeter (windows and exterior doors for
example) and is usually used while you are home.
2. Away Mode arms the perimeter as well as the interior sensors
(motion sensors for example) and is usually used while you are
away from the phone.
Arm your system
1. Master Control Unit
•
Stay Mode: Press the Open Lock Icon on the main screen and
then the “Doors & Windows Only” (Stay) button.
•
Away Mode: Press the Open Lock Icon on the main screen and
then the “Arm All” (Away) button.
2. Keychain Remote (Optional with purchase.)
•
Stay Mode: Press the Closed Lock Icon for two seconds.
•
Away Mode: Press the Closed Lock Icon for two seconds and
then press it once more for two seconds.
3. Alarm.com App or Website
•
Stay Mode: Press the “Arm (Stay)” icon.
•
Away Mode: Press the “Arm (Away)” icon.
Disarm your system
1. Master Control Unit
•
Press the Closed Lock Icon on the Master Control Unit. Enter
your Master Passcode and press “OK”. (Your Master Passcode
was created in the LiveWatch Customer Center and was sent to
you in a confirmation email.)
2. Keychain Remote (Optional with purchase.)
•
Press the Open Lock Icon on your keychain for 2 seconds.
3. Alarm.com App or Website
•
Press the “Disarm” icon on your phone.
When arming and disarming your system, the master control unit will beep to
indicate that you have a given amount of time to either exit when leaving or enter
your code when entering. This is known as Entry/Exit Delay. When the armed master
control unit begins the count down by beeping, the beeps that it gives off will cease
once the system is armed. Your system will not beep the entire time you are gone,
only the time that is set under Entry/Exit Delays; commonly 45 or 60 seconds.
3: Arm and Disarm Your System
For the most current resources, helpful videos and live chat visit:
www.livewatchsecurity.com/login
Optional Keychain RemoteMaster Control Alarm.com App
Page 6
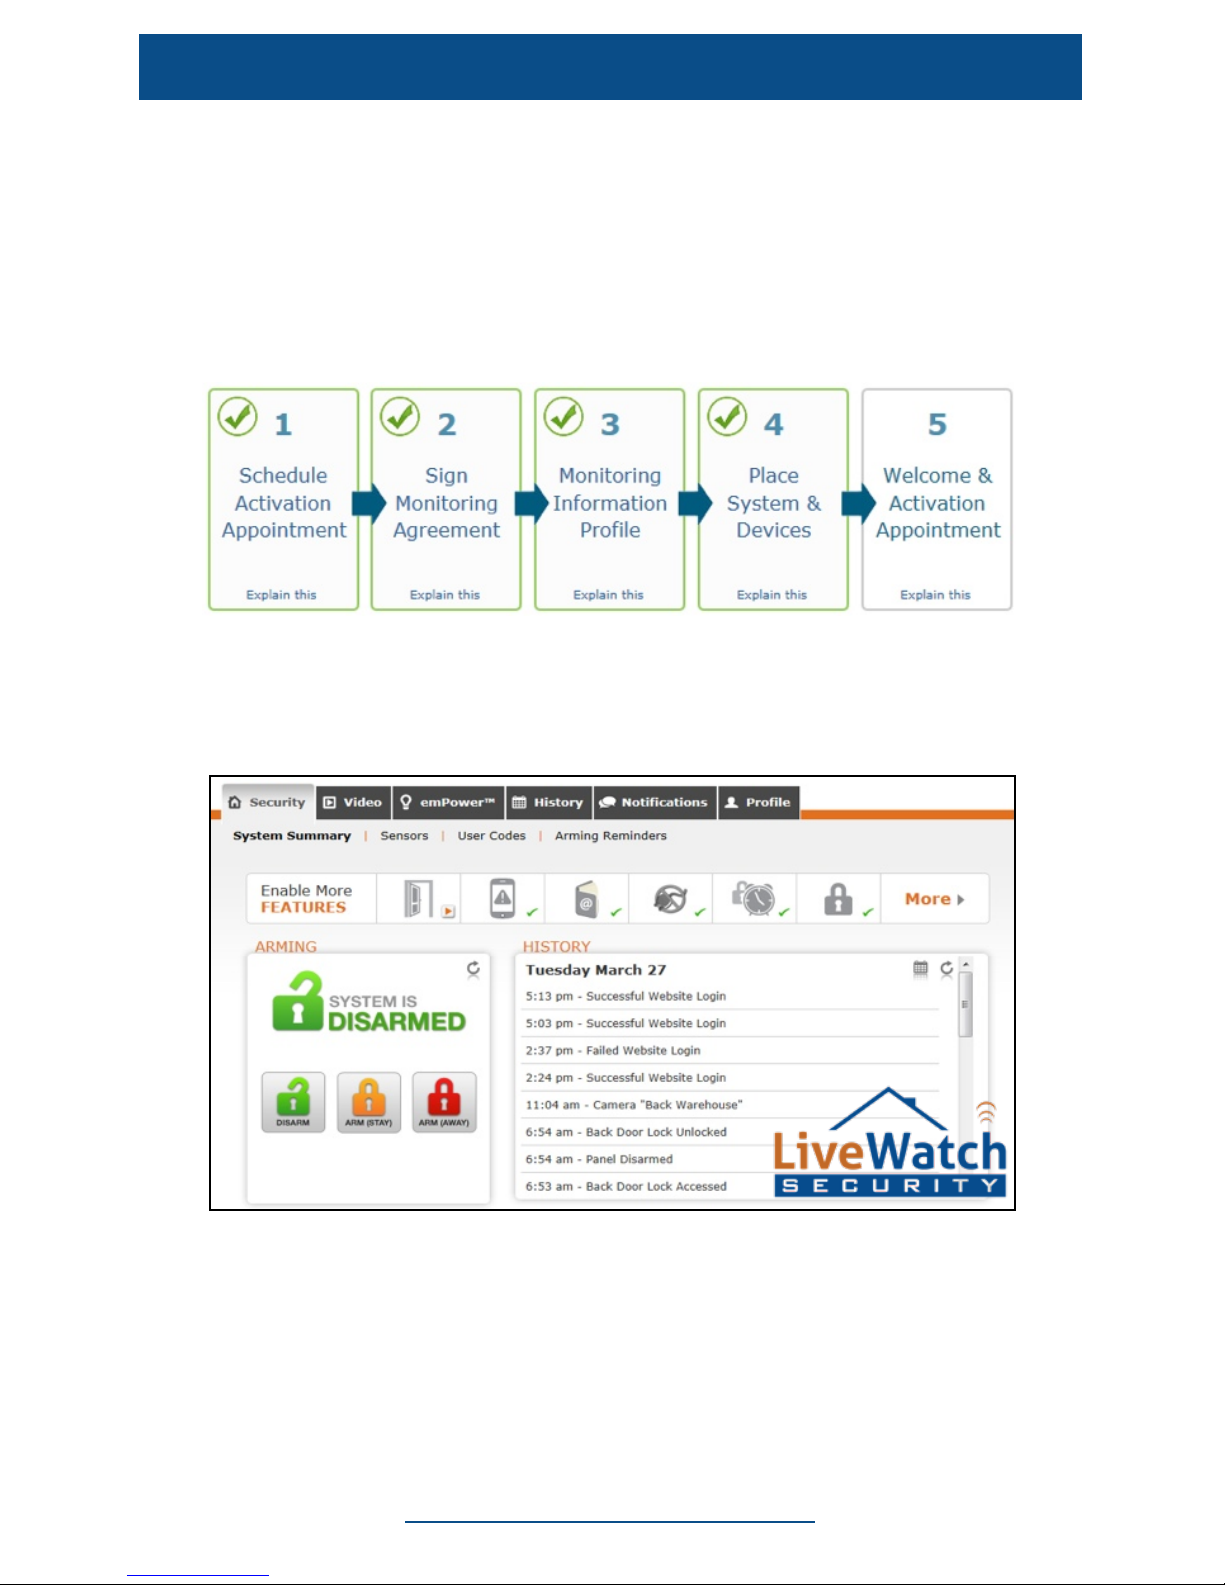
• Before you are ready to activate your system, log into your
LiveWatch Customer Account and make sure that you have
completed Steps 1-4 in your Customer Dashboard.
• A SafeMart support technician will call you on the date and time of
your scheduled appointment to test and activate the system. Please
be at the location of the system.
• If you are unable to make your scheduled appointment, please visit
www.livewatchsecurity.com/login to reschedule.
After your system is tested and activated you will receive:
• Your account number (eg: ABC7890)
• The phone number for our 24/7 Central Station
You can customize your system using the Alarm.com website. The
SafeMart technician will provide you with a login and password during
your activation appointment.
4: Activate and Test Your System
For the most current resources, helpful videos and live chat visit:
www.livewatchsecurity.com/login
Note: You must log in over a computer internet browser before using your Smartphone App.
Control Your Secure Home Remotely with LiveWatch!
Page 7
©2012%LiveWatch%Security%d.b.a.%SafeMart,%All%Rights%Reserved
The fastest answers 24/7 can be found
at: www.livewatchsecurity.com/login
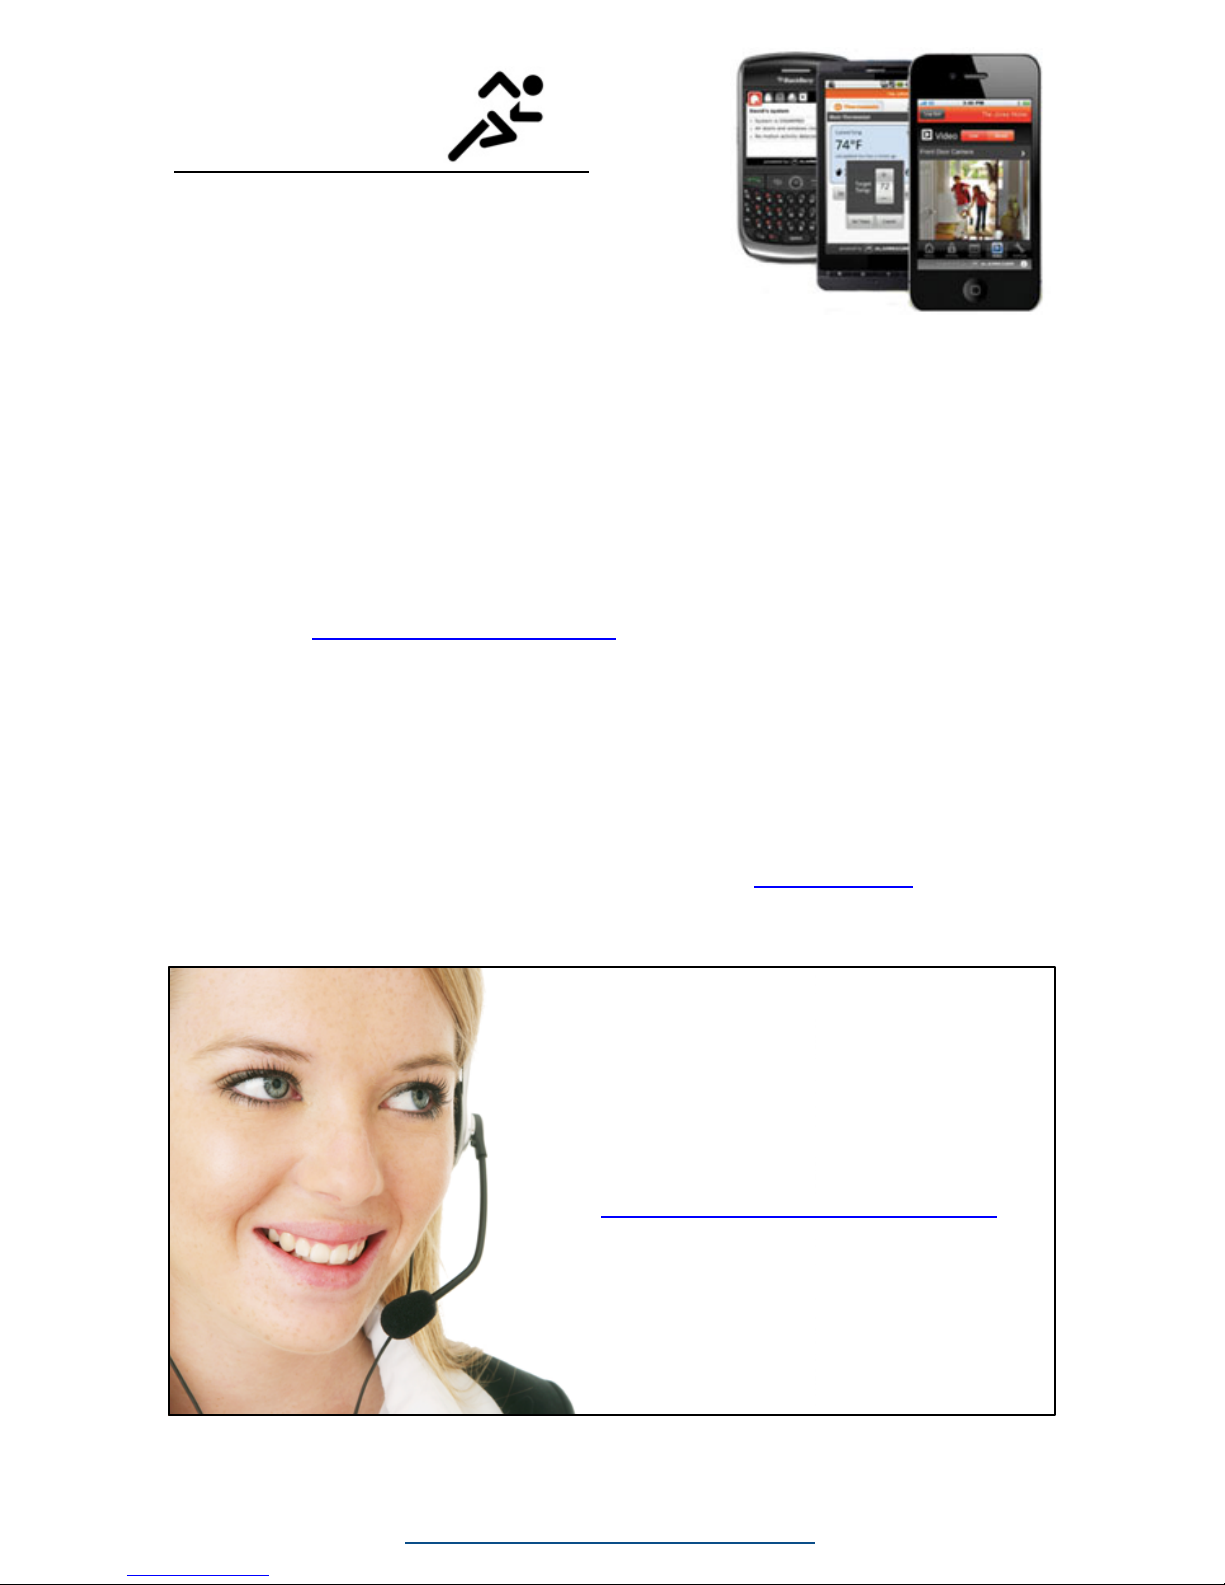
Mobile Apps
•
iPhone: Download the free Alarm.com App for your iPhone or iPod
touch (iOS 3.2 or later required). Search for "Alarm.com" in the
App Store.
•
iPad: Download the free Alarm.com App for your iPad (iOS 3.2 or
later required). Search for "Alarm.com" in the App Store.
•
BlackBerry: Download the free Alarm.com App for BlackBerry by
visiting www.alarm.com/bbinstall from the web browser of your
compatible BlackBerry device. (Requires OS 4.2.1 or later.
Compatible with the BlackBerry Curve, Pearl, Bold, and 8800 series
devices.)
•
Android: To download the free Alarm.com App for Android
(compatible with Android OS 1.6 or later), visit the Google Play
Store from your device and search for "Alarm.com".
•
Mobile Site: Have web access on your cell phone? Just open its
web browser and go to the Mobile Site URL (m.alarm.com) to log
into your account. The Mobile Site includes many features of the
primary website and is specially formatted to fit your mobile screen.
Monitor and control your system
from the road with these free tools
for mobile devices.
On the Go?
For the most current resources, helpful videos and live chat visit:
www.livewatchsecurity.com/login
Page 8

Thank*you*for*choosing*SafeMart*and*LiveWatch*Security.
For the most current resources, helpful videos and live chat visit:
www.livewatchsecurity.com/login
 Loading...