

Page 1

Basics Guide
Page 2

English 1
GETTING STARTED
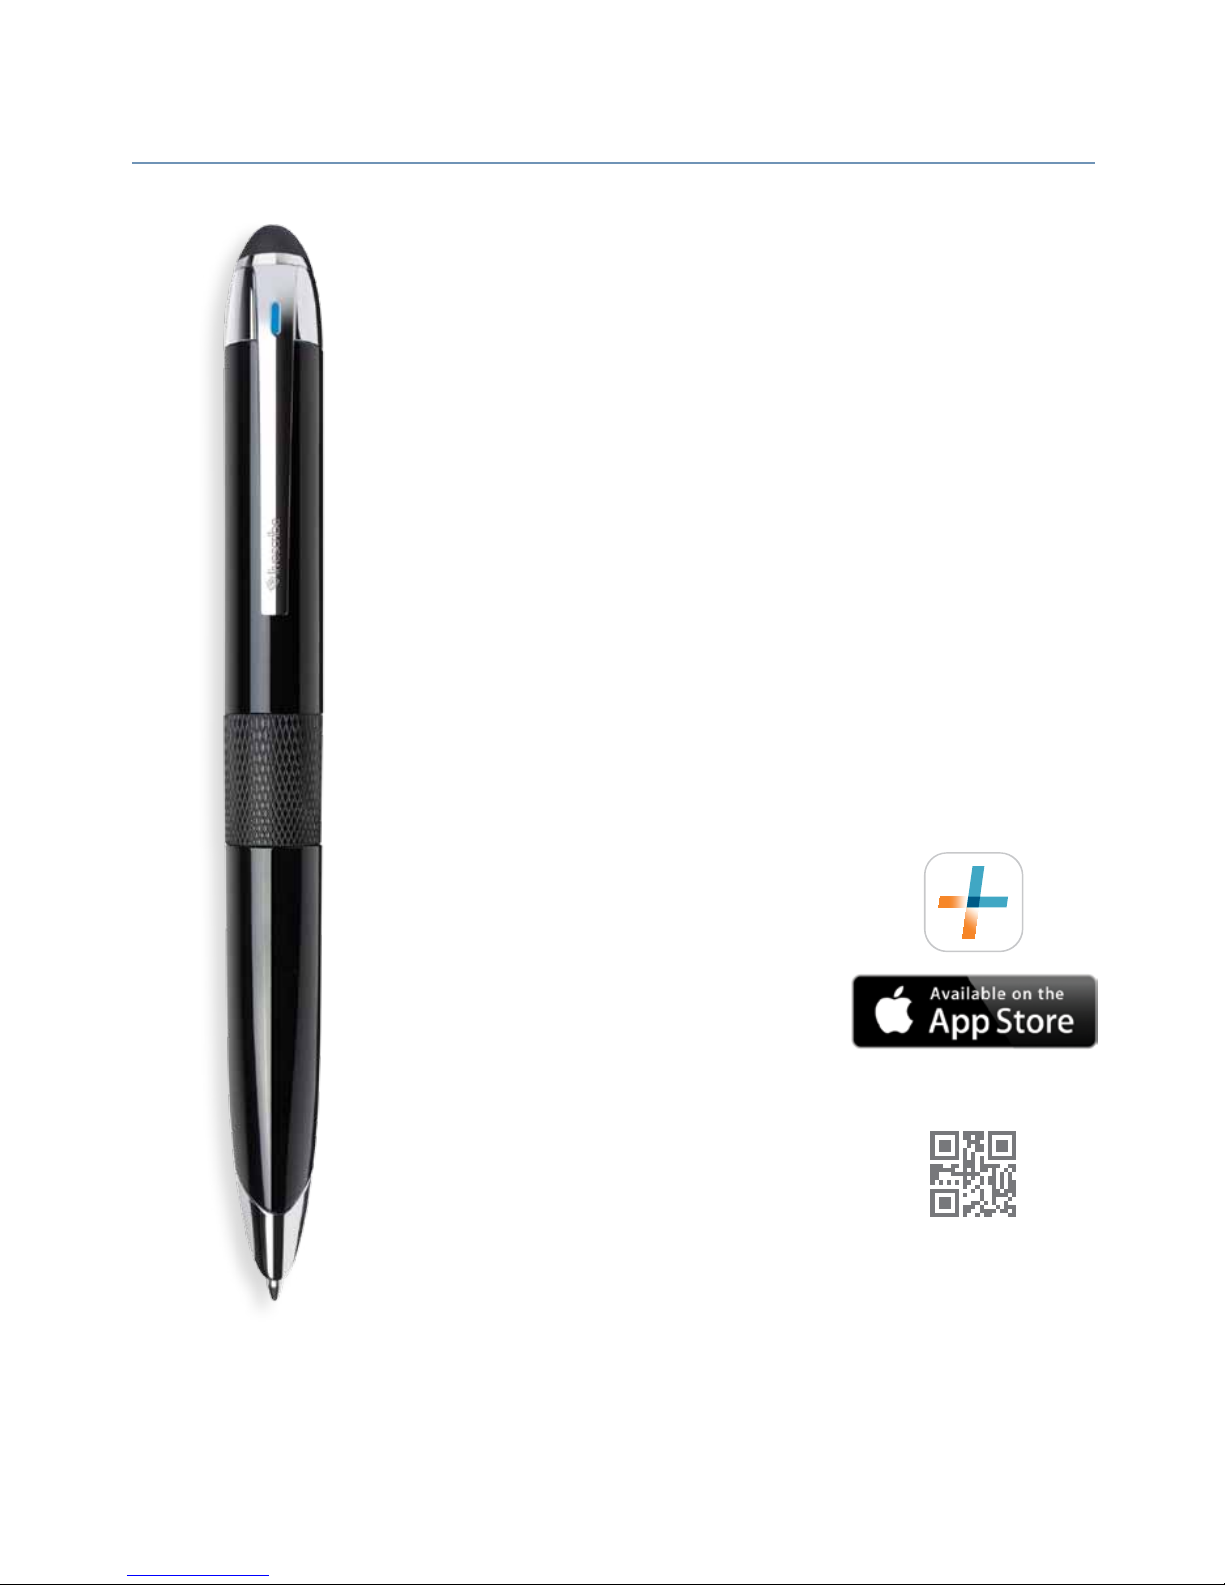
Thanks for purchasing your new Livescribe™ 3
smartpen. In a few moments, you’ll be able to
start writing in your new Livescribe notebook
and watch your notes appear instantly in the
Livescribe+ app! Just download Livescribe+
to your smartphone or tablet, then turn on
your smartpen to pair it to your mobile device.
DOWNLOAD THE LIVESCRIBE+ APP
The Livescribe+ app is available for free on the
App Store.
SM
Get started by downloading it to
your smartphone or tablet. Livescribe+ requires
iOS7 running on:
•
iPhone® 4S (or newer)
•
iPad® 3rd Gen (or newer)
•
iPad® mini 1st Gen (or newer)
•
iPod touch® 5th Gen (or newer)
We will be adding support for other
devices. For the latest updates
on compatible devices, please
check the Livescribe website at
www.livescribe.com/livescribe3
or scan the QR code using your
mobile device.
Scan
Page 3
English 2
POWER ON AND PAIR
After you’ve downloaded Livescribe+, make sure
Bluetooth
®
is turned on in your mobile device.
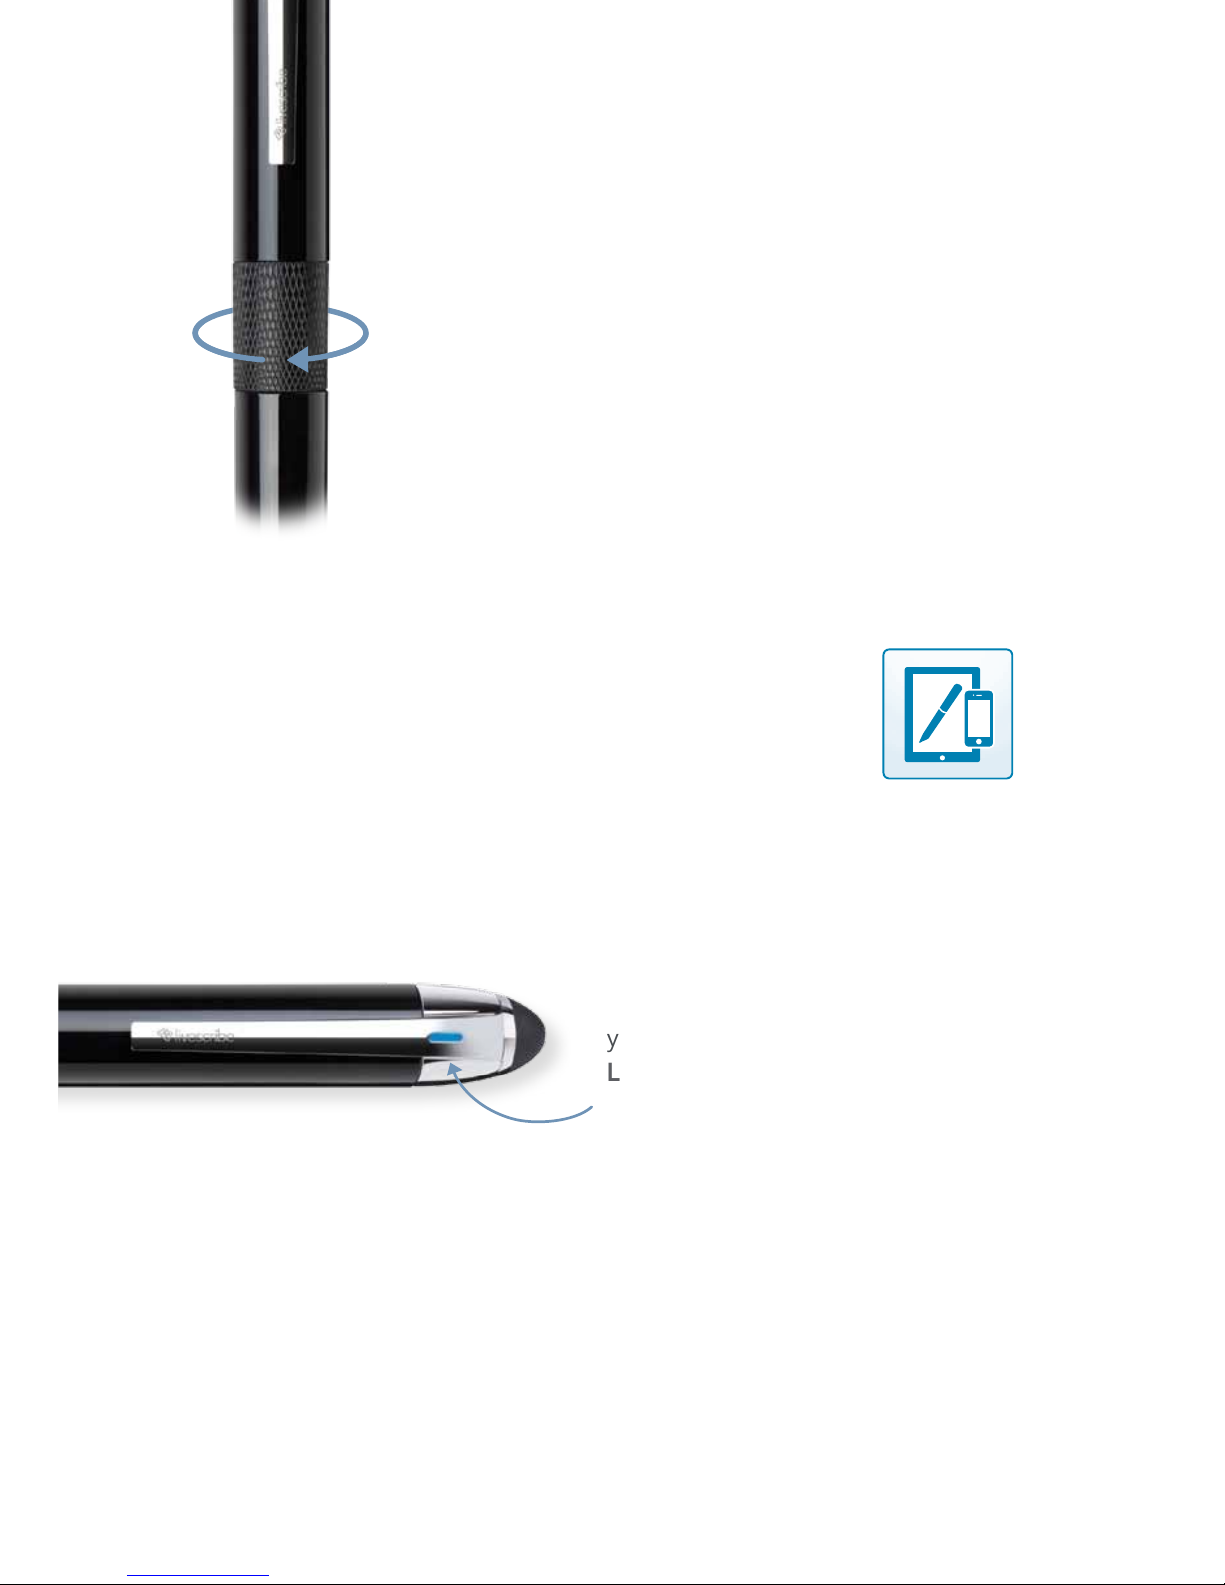
Power on your Livescribe 3 smartpen by twisting
the textured middle ring clockwise. If you have
not paired the smartpen to a device previously,
the LED indicator will blink Green to indicate the
smartpen is in pairing mode.
Once you’ve launched Livescribe+, it will automatically
detect your Livescribe 3 smartpen. A notication will
appear, asking if you want to pair your new smartpen.
Select “Pair”. You’ll only need to pair your smartpen
once with each device you use it with. Each time
you launch the app, it will pair automatically.
Once you’ve successfully paired
your smartpen to your device, the
LED indicator will display Solid Blue.
WRITE
Test the connection by writing in your Livescribe notebook.
Your writing should instantly appear in the app.
Page 4
English 3
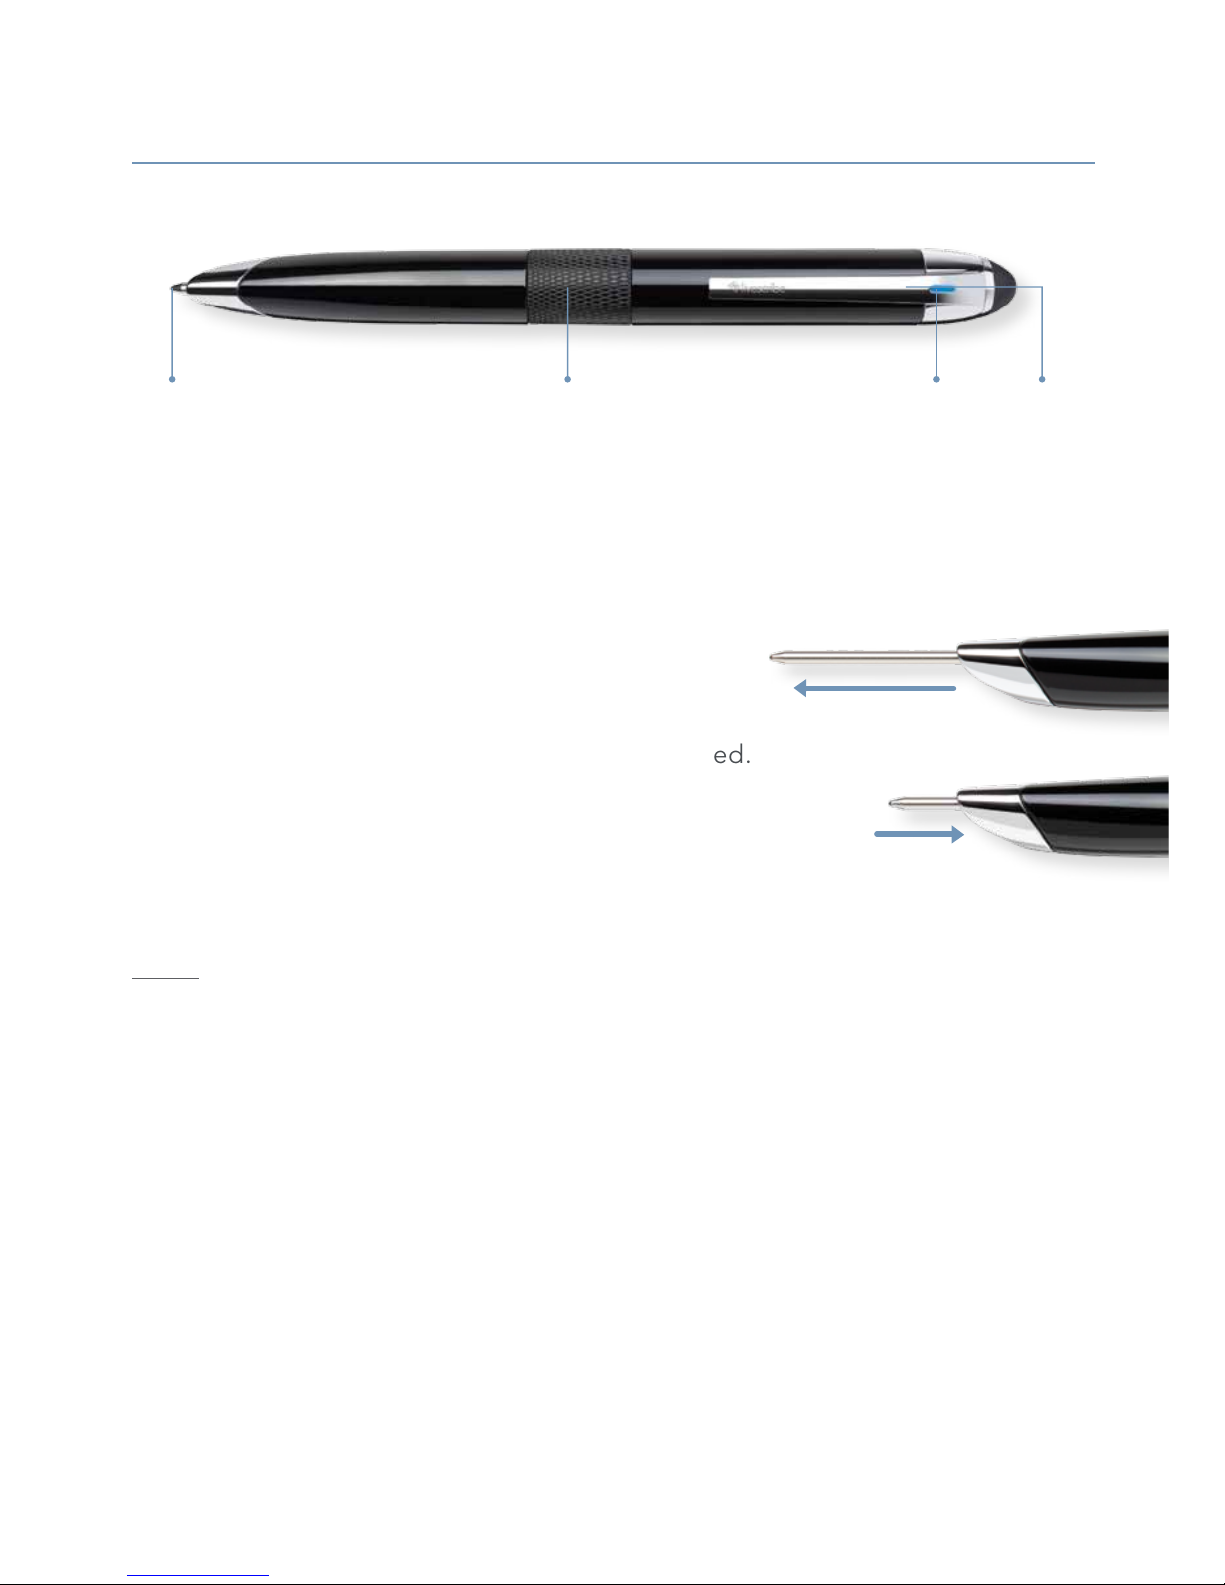
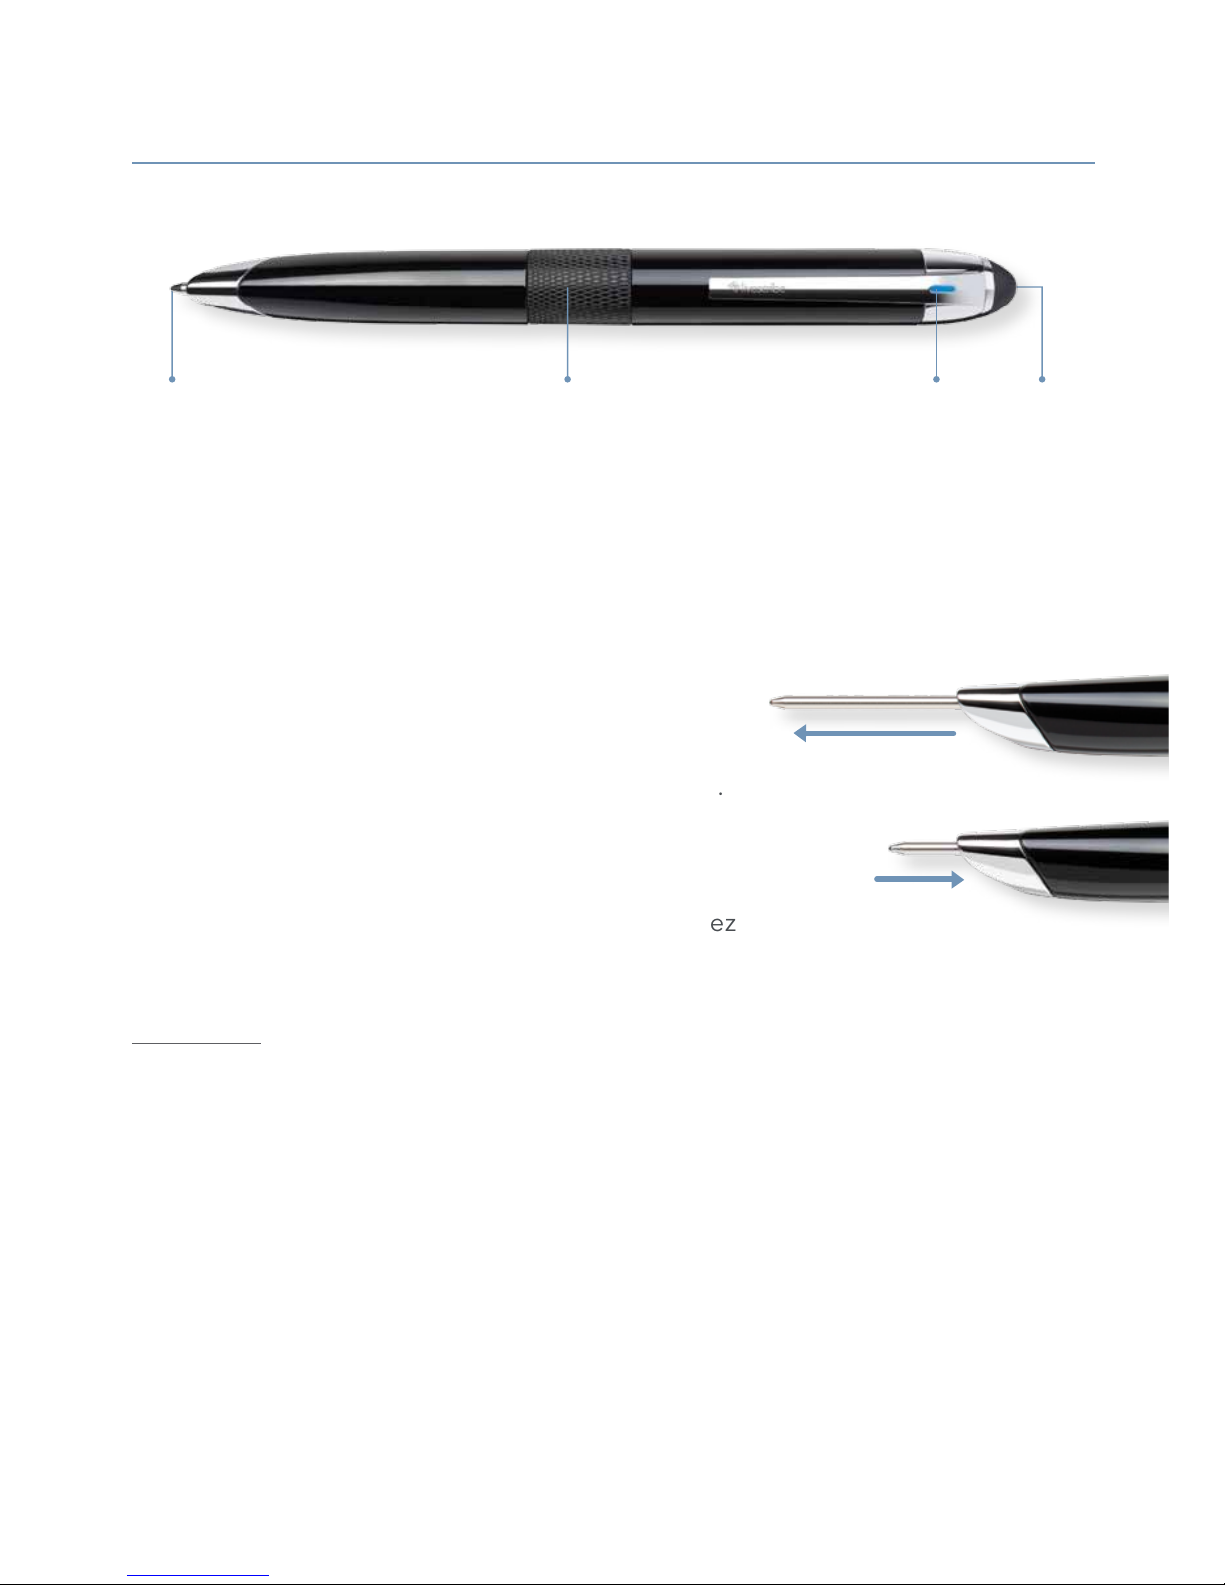
SMARTPEN FEATURES
1 • INK CARTRIDGE
Your Livescribe™ 3 smartpen comes with a replaceable medium-tip
tungsten carbide ballpoint ink cartridge.
To replace the ink cartridge:
· Power on your smartpen by turning the middle
twist ring until the ink cartridge is fully extended.
· Pull out the ink cartridge with your fingers.
· Push the new cartridge back into the smartpen
until it clicks into place.
NOTE: We recommend compatible Livescribe branded replacement ink cartridges
(67 mm x 2.5 mm diameter). Older ink cartridges used for Pulse™/Echo™/Sky™/Livescribe
wi smartpens will NOT t in the Livescribe 3 smartpen.
Ink cartridges that meet the same size specications and contain carbon free ink
may also be used, though Livescribe does not guarantee the performance of
non-Livescribe branded replacement ink cartridges.
2 • ON/OFF TWIST RING
The ink cartridge automatically extends when the smartpen is powered
on and retracts into the housing body when the smartpen is off.
1 2 3 4
Page 5

English 4
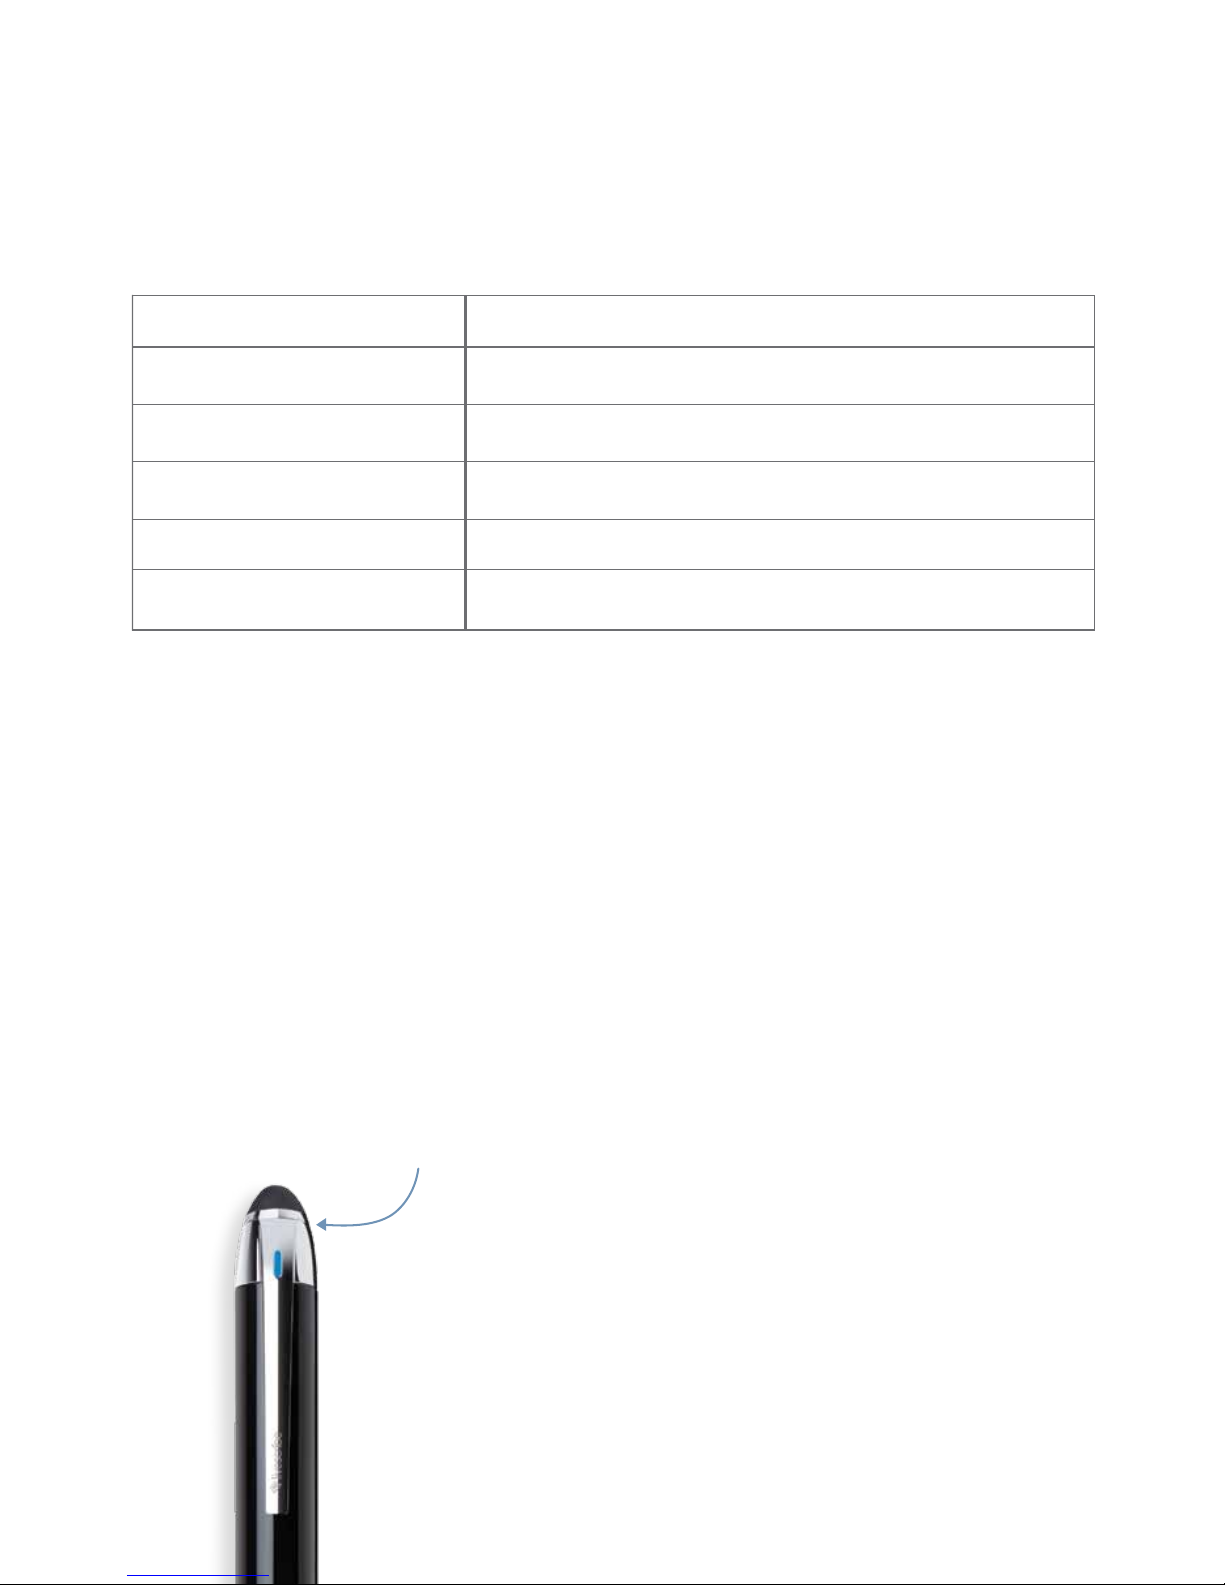
3 • LED STATUS LIGHT
The LED status light communicates important information about your smartpen.
4 • INTEGRATED STYLUS
A removable capacitive stylus tip covers the Micro USB port at the top
of your smartpen.
LITHIUM-ION BATTERY
To check the battery level, access the smartpen settings in your Livescribe+
app. Your smartpen must be powered on and paired with your mobile device
(LED indicator Solid Blue).
Charge your smartpen by plugging the Micro USB
cable into the connector that is located underneath
the removable stylus tip at the top of your smartpen.
Plug into your computer’s USB port or an available
USB charger.
The LED indicator will blink yellow 3 times when you
have approximately 15% of battery life remaining.
LIGHT COMMUNICATES
Blinking Green Powered On/Waiting for a Bluetooth
®
connection
Solid Blue Powered On/Bluetooth connected to mobile device
Blink Yellow 3 Times Approximately 15% of battery life remaining
Solid Red Audio recording in process on mobile device
Blinking Yellow Firmware update in process
Other LED status descriptions can be found in the online help on our website.
Page 6
English 5
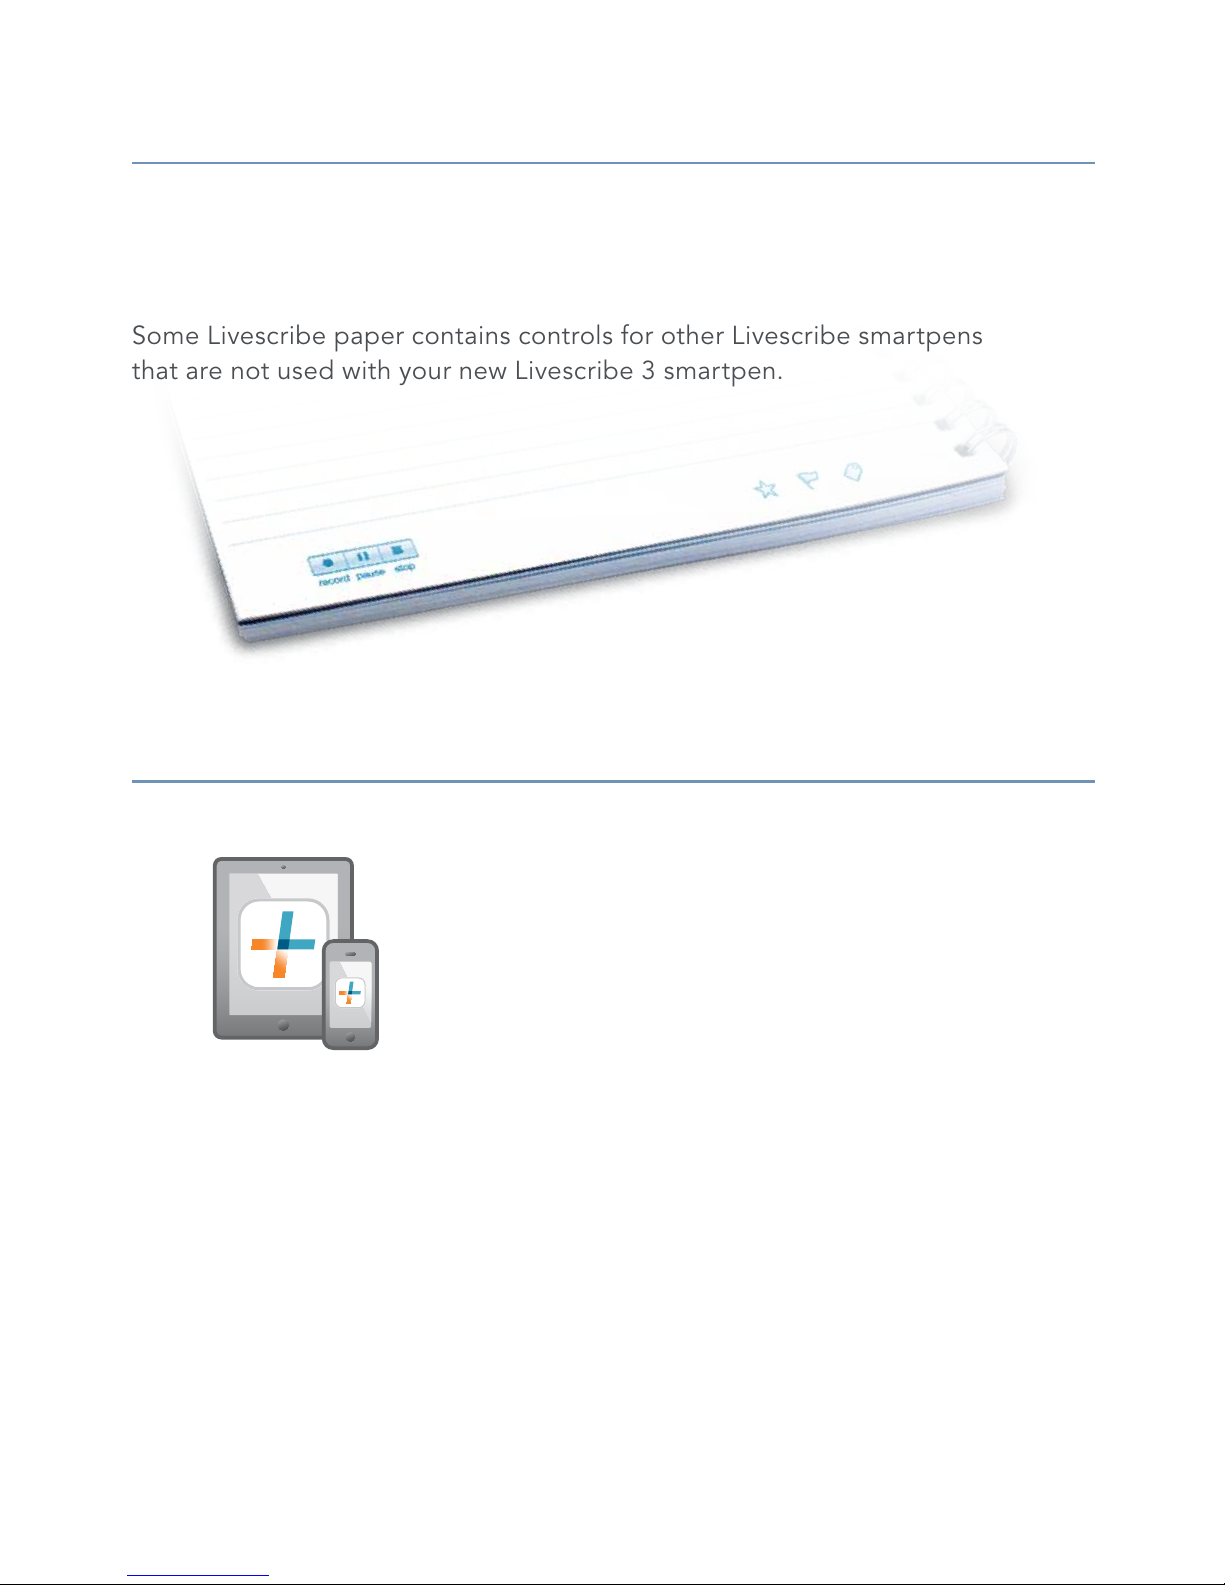
LIVESCRIBE™ DOT PAPER
Your Livescribe 3 smartpen is compatible with all Livescribe notebooks.
Livescribe dot paper is available in different sizes and formats.
Some Livescribe paper contains controls for other Livescribe smartpens
that are not used with your new Livescribe 3 smartpen.
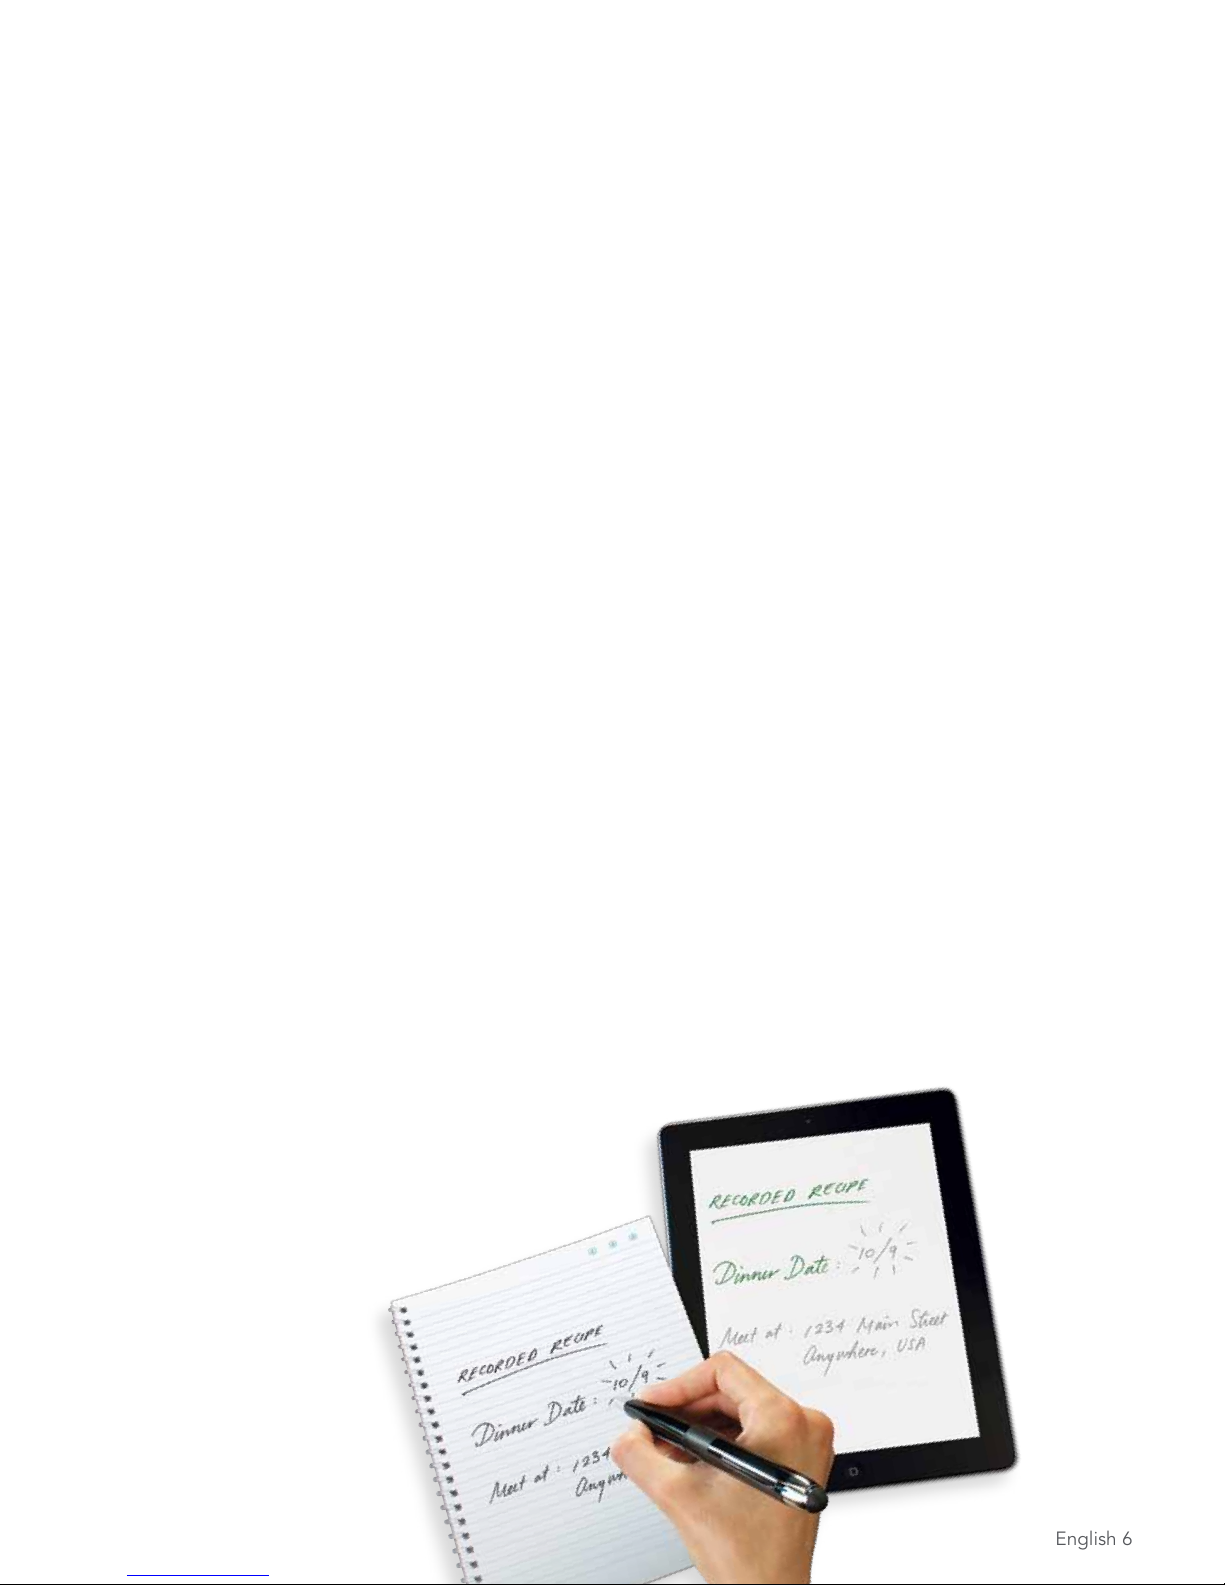
CREATING PENCASTS
Pencasts are interactive documents containing audio
that is synchronized to your handwritten notes.
To create pencasts using your Livescribe 3 smartpen,
make sure that your smartpen is on and Livescribe+
is the active app on your smartphone or tablet.
Audio is recorded using the microphone on your
mobile device.
FROM PAPER
Start any audio recording session by tapping your
smartpen on the record button printed on the
bottom of the page in your Livescribe notebook.
FROM LIVESCRIBE+
Tap the record control in the Page or Feed view.
Page 7
English 6
TIPS
•
When recording, the LED indicator on your smartpen will be Solid Red
and the Livescribe+ app will display a recording progress bar (in red).
•
Once you’ve started recording, the app does not have to be in the
foreground for the recording to continue.
•
Phone calls will interrupt your recording. Be sure to restart your recording
at the completion of your call.
•
After you’ve nished recording, you can play back the audio by tapping
your handwritten notes in the session view, or tapping directly onto the
ink strokes on your paper with your smartpen.
Page 8

English 7
FAQS
What do I do if my Livescribe™ 3 smartpen has lost its connection to my
mobile device?
You’ll know you are not paired with your mobile device if the LED indicator is not
Solid Blue and your app is active. First, you may need to restart your smartpen
to restore your connection. You may also need to quit and restart the app.
In some instances, you may need to put your smartpen into pairing mode by
tapping on the Device Pairing icon in the front of your Livescribe notebook.
What are the star , ag , and label icons on the bottom of each
page of my Livescribe notebook?
The icons are pre-printed controls that allow you to tag your handwritten
content. Just tap the relevant control on the paper and start writing. Once it
is sent to your device, Livescribe+ will organize that content into easily viewed
groupings. You can also customize your tags from within the Livescribe+ app.
What are the buttons at the top of each page of my
Livescribe notebook?
These icons are shortcut controls that have pre-programmed functions.
Access the Livescribe+ preferences panel for more information.
record pause stop
record pause stop
Page 9

English 8
LEARN MORE
Videos, tips and tricks, and documentation
about your Livescribe 3 smartpen
www.livescribe.com/livescribe3support
Online Help
www.livescribe.com/livescribe3onlinehelp
Livescribe Customer Support
support.livescribe.com
FOLLOW US
Fan Page
www.facebook.com/livescribe
Global Twitter Page
www.twitter.com/livescribe
Livescribe Blog
www.livescribe.com/blog
YouTube
www.youtube.com/nevermissaword
Livescribe Inc. Model: V1110 FCC ID: CKD-00072 IC: 10240A-00072
REGULATORY
This device complies with part 15 of the FCC Rules. Operation is subject to the following two conditions: (1) This
device may not cause harmful interference, and (2) this device must accept any interference received, including
interference that may cause undesired operation. Caution: Any changes or modication to the equipment not
expressly approved by Livescribe, Inc. could void your authority to operate this equipment. Note: This equipment has
been tested and found to comply with the limits for a Class B digital device, pursuant to part 15 of the FCC Rules.
These limits are designed to provide reasonable protection against harmful interference in a residential installation.
This equipment generates, uses and can radiate radio frequency energy and, if not installed and used in accordance
with the instructions, may cause harmful interference to radio communications. However, there is no guarantee that
interference will not occur in a particular installation. If this equipment does cause harmful interference to radio or
television reception, which can be determined by turning the equipment off and on, the user is encouraged to try to
correct the interference by one or more of the following measures:
• Reorient or relocate the receiving antenna.
• Increase the separation between the equipment and receiver.
• Connect the equipment into an outlet on a circuit different from that to which the receiver is connected.
• Consult the dealer or an experienced radio/TV technician for help.
This device complies with Industry Canada license-exempt RSS standard(s). Operation is subject to the following
two conditions: (1) This device may not cause harmful interference, and (2) this device must accept any interference
received, including interference that may cause undesired operation.
Page 10
Français 1
PRISE EN MAIN
Merci d’avoir acheté le nouveau smartpen
Livescribe
™
3. Dans quelques instants, vous
pourrez commencer à écrire dans votre nouveau
carnet Livescribe et voir vos notes apparaître
instantanément dans l’application Livescribe+!
Il vous suft de télécharger Livescribe+ sur votre
smartphone ou tablette, puis d’activer votre
smartpen pour le coupler à votre appareil mobile.
TÉLÉCHARGEZ L’APPLICATION LIVESCRIBE+
L’application Livescribe+ est disponible gratuitement
dans l’App Store.
SM
Pour commencer, téléchargez-la
sur votre smartphone ou tablette. Livescribe+ nécessite
iOS7 s’exécutant sous:
•
iPhone® 4S (ou ultérieur)
•
iPad® 3e génération (ou ultérieur)
•
iPad® mini (ou ultérieur)
•
iPod touch® 5e génération
(ou ultérieur)
Pour la liste la plus récente
des appareils compatibles,
visitez le site Web Livescribe,
www.livescribe.com/livescribe3
ou numérisez le code QR avec
votre appareil mobile.
Scannez le code
Page 11

MISE EN MARCHE
Une fois Livescribe+ téléchargé, vériez que la
fonction Bluetooth
®
est activée sur votre appareil
mobile. Allumez votre smartpen Livescribe 3 en
tournant l’anneau central texturé dans le sens des
aiguilles d’une montre. Si vous n’avez pas encore
couplé le smartpen à un appareil, le voyant d’état
clignote en vert pour indiquer que le smartpen
est en mode couplage.
Une fois l’application Livescribe+ lancée, elle détecte
automatiquement votre smartpen Livescribe 3. Une
notication s’afche vous demandant si vous voulez
coupler votre nouveau smartpen. Sélectionnez
“Coupler”. Vous n’avez besoin de coupler votre
smartpen qu’une seule fois avec chaque appareil
utilisé. Chaque fois que vous relancerez l’application,
le couplage se fera automatiquement.
Une fois votre smartpen couplé à votre
appareil, le voyant d’état s’allume en bleu.
ÉCRIRE
Testez la connexion en écrivant dans votre carnet Livescribe.
Le texte écrit devrait apparaître instantanément dans l’application.
Français 2
Page 12
Français 3
FONCTIONNALITÉS DU SMARTPEN
1 • CARTOUCHE D’ENCRE
Votre smartpen Livescribe 3 est fourni avec une cartouche d’encre
en carbure de tungstène de pointe moyenne remplaçable.
Pour remplacer la cartouche d’encre:
· Mettez votre smartpen sous tension en
tournant l’anneau central jusqu’à ce que
la cartouche d’encre soit entièrement déployée.
· Retirez la cartouche d’encre avec les doigts.
· Faites glisser la nouvelle cartouche d’encre
dans le smartpen jusqu’à ce que vous entendiez
un léger clic d’enclenchement.
REMARQUE: Nous vous recommandons d’utiliser des cartouches d’encre de rechange Livescribe
compatibles (67 x 2,5 mm de diamètre). Les cartouches d’encre plus anciennes utilisées avec les
smartpens wi Pulse™/Echo™/Sky™/Livescribe wi ne sont PAS adaptées au smartpen Livescribe 3.
Les cartouches d’encre présentant les mêmes spécications de taille et contenant de l’encre sans
carbone peuvent aussi être utilisées, bien que Livescribe ne garantisse pas les performances des
cartouches d’encre de rechange non Livescribe.
2 • COMMUTATEUR MARCHE/ARRÊT
La cartouche d’encre s’extrait automatiquement lorsque le smartpen est
mis sous tension et se rétracte dans le corps du boîtier lorsqu’il est éteint.
1 2 3 4
Page 13
Français 4
3 • VOYANT D’ÉTAT
Le voyant d’état vous indique des informations importantes sur le smartpen.
4 • STYLET INTÉGRÉ
A la pointe du stylet capacitif amovible couvre le port micro USB sur
le dessus du smartpen.
BATTERIE LITHIUM-ION
Pour vérier le niveau de la batterie, accédez aux paramètres du smartpen dans
votre application Livescribe+. Votre smartpen doit être sous tension et couplé
à votre appareil mobile (voyant d’état en bleu).
Rechargez votre smartpen en branchant le câble
micro USB au connecteur situé sous la pointe du
capuchon amovible sur le dessus de votre smartpen.
Raccordez le câble au port USB de votre ordinateur
ou à un chargeur USB.
Le voyant d’état clignote en jaune 3 fois lorsqu’il ne
reste plus qu’environ 15 % de charge de la batterie.
VOYANT COMMUNICATION
Clignotement vert Sous tension/En attente d’une connexion Bluetooth
®
Bleu Sous tension/Bluetooth connecté à l’appareil mobile
Clignotement jaune 3 fois Environ 15 % de charge de la batterie restant
Rouge Enregistrement audio en cours sur l’appareil mobile
Clignotement jaune Mise à jour du microprogramme en cours
La description des autres statuts du voyant d’état gure dans l’aide en ligne de notre site Web.
Page 14

Français 5
PAPIER TRAMÉ LIVESCRIBE
™
Votre smartpen Livescribe 3 est compatible avec tous les carnets Livescribe.
Le papier tramé Livescribe est disponible dans différents formats et tailles.
Certains papiers Livescribe contiennent des commandes pour les autres
smartpens Livescribe non utilisés avec votre nouveau smartpen Livescribe 3.
CRÉATION DE PENCASTS
Les pencasts sont des documents interactifs contenant
du son synchronisé à vos notes écrites à la main.
Pour créer des pencasts avec votre smartpen
Livescribe 3, vériez que votre smartpen est allumé
et que Livescribe+ est l’application active sur votre
smartphone ou tablette. Le son est enregistré en
utilisant le microphone de votre appareil.
DANS PAPIER
Démarrez une session d’enregistrement audio
en appuyant votre smartpen sur le bouton
d’enregistrement imprimé au bas de la page
dans votre carnet Livescribe.
DANS LIVESCRIBE+
Appuyez sur la commande d’enregistrement
de la vue Page ou Chronologie.
Page 15

Français 6
CONSEILS
•
Pendant l’enregistrement, le voyant d’état de votre smartpen devient rouge
et l’application Livescribe+ afche une barre d’avancée d’enregistrement
(en rouge).
•
Une fois l’enregistrement démarré, il n’est pas nécessaire que l’application
demeure au premier plan pour que l’enregistrement se poursuive.
•
Les appels téléphoniques arrêtent l’enregistrement. Pensez à relancer
l’enregistrement à la n de l’appel
•
Lorsque l’enregistrement est terminé, vous pouvez écouter les données audio
en appuyant sur vos notes écrites à la main dans la vue de session ou en
appuyant directement sur les traits sur vos notes papier avec votre smartpen.
Page 16

Français 7
FAQ
Que faire si mon Livescribe™ 3 perd sa connexion à mon appareil mobile?
Vous saurez que vous n’êtes pas couplé à votre appareil mobile si le voyant
d’état n’est pas bleu et que votre application est active. Essayez d’abord de
redémarrer votre smartpen pour restaurer la connexion. Essayez ensuite de
quitter et redémarrer l’application. Dans certains cas, vous devrez peut-être
basculer votre smartpen dans le mode couplé en appuyant sur l’icône de
couplement d’appareil gurant sur le devant de votre carnet Livescribe.
Que sont les icônes d’étoile , de drapeau et d’étiquette gurant
au bas de chaque page de mon carnet Livescribe?
Ces icônes sont des commandes préimprimées vous permettant d’étiqueter
votre contenu écrit à la main. Appuyez simplement sur la commande pertinente
sur le papier et commencez à écrire. Une fois le contenu écrit envoyé à votre
appareil, Livescribe+ l’organise en regroupements faciles à afcher. Vous
pouvez aussi personnaliser vos étiquettes dans l’application Livescribe+.
Que sont les boutons gurant en haut de chaque page
de mon carnet Livescribe ?
Ces icônes sont des commandes de raccourci ayant des fonctions
préprogrammées. Consultez le panneau de préférences de Livescribe+
pour plus d’informations.
record pause stop
record pause stop
Page 17

Français 8
EN SAVOIR PLUS
Pour obtenir des vidéos, des conseils et astuces, ainsi
que la documentation sur votre smartpen Livescribe 3
www.livescribe.com/livescribe3support
Aide en ligne
www.livescribe.com/livescribe3onlinehelp
Service d’assistance technique
support.livescribe.com
NOTRE ACTUALITÉ
Page Facebook
www.facebook.com/livescribe
Page Twitter
www.twitter.com/livescribe
Blog de Livescribe
www.livescribe.com/blog
YouTube
www.youtube.com/nevermissaword
RÉGLEMENTATION
Cet appareil est conforme à la section 15 des règlements de la FCC, commission fédérale des communications
américaine. Son utilisation est soumise aux conditions suivantes: (1) cet appareil ne doit pas causer d’interférences
nuisibles, et (2) doit accepter toute interférence reçue, y compris les interférences pouvant entraîner un
fonctionnement indésirable. Attention: toute modication ou altération de cet équipement non expressément
reconnue par Livescribe, Inc. peut entraîner l’annulation de votre autorisation à utiliser cet équipement. Remarque:
cet équipement a été testé et déclaré conforme aux appareils numériques de classe B, au regard de la section 15 des
règles de la FCC. Ces critères de conformité ont été conçus an de protéger raisonnablement de toute interférence
nuisible dans une installation résidentielle. Ce matériel génère, utilise et peut émettre de l’énergie sous forme de
fréquences radio et, s’il n’est pas installé et utilisé conformément aux instructions, peut provoquer des interférences
perturbant les communications radio. Nous ne pouvons cependant pas garantir qu’aucune interférence ne se produira
dans une installation donnée. Si cet appareil interfère avec la réception radiophonique ou télévisuelle, ce qui se vérie
en allumant et éteignant successivement l’appareil, l’utilisateur est invité à corriger ces interférences en prenant l’une
des mesures suivantes:
• Changer l’orientation ou la position de l’antenne de réception;
• Augmenter la distance entre l’appareil et le récepteur;
• Connecter l’appareil à une prise d’un autre circuit que celui auquel le récepteur est connecté;
• Solliciter l’aide du revendeur ou d’un technicien radio/TV expérimenté.
Cet appareil est conforme aux normes d’exemption de licence RSS d’Industrie Canada. Son utilisation est soumise aux
conditions suivantes: (1) cet appareil ne doit pas causer d’interférences nuisibles, et (2) doit accepter toute interférence
reçue, y compris les interférences pouvant entraîner un fonctionnement indésirable.
Livescribe Inc. Model: V1110 FCC ID: CKD-00072 IC: 10240A-00072
Page 18

Italiano 1
OPERAZIONI PRELIMINARI
Grazie per aver acquistato la nuova smartpen
Livescribe
™
3. In pochi istanti, sarà possibile
iniziare a scrivere sul nuovo blocco note Livescribe
e visualizzare immediatamente gli appunti
nell’applicazione Livescribe+. Scarica Livescribe+
sul tuo smartphone o tablet e accendi la smartpen
per associarla al dispositivo mobile.
SCARICA L’APPLICAZIONE LIVESCRIBE+
L’applicazione Livescribe+ è disponibile gratuitamente
nell’App Store.
SM
Inizia scaricandola sul tuo smartphone
o tablet. Livescribe+ richiede iOS7 installato in:
•
iPhone® 4S
(o versione successiva)
•
iPad® terza generazione
(o versione successiva)
•
iPad® mini 1st Gen
(o versione successiva)
•
iPod touch® quinta generazione
(o versione successiva)
Aggiungeremo il supporto
per altri dispositivi. Per gli ultimi
aggiornamenti sui dispositivi compatibili,
consultare il sito Web Livescribe
www.livescribe.com/livescribe3 o
eseguire la scansione del codice QR
con il dispositivo mobile.
Scansione
Page 19

Italiano 2
POTENZA SU
Dopo aver scaricato Livescribe +, assicurarsi che
la funzione Bluetooth
®
del dispositivo mobile sia
attiva. Accendere la smartpen Livescribe 3 ruotando
l’anello centrale satinato in senso orario. Se la
smartpen non è stata precedentemente associata
a un dispositivo, l’indicatore LED lampeggerà in
verde per indicare la modalità di associazione.
L’applicazione Livescribe+, una volta avviata, rileverà
automaticamente la smartpen Livescribe 3. Verrà
visualizzata una notica in cui viene chiesto se associare
la nuova smartpen. Selezionare “Associa”. Sarà necessario
associare la smartpen solo una volta con ciascun dispositivo
con cui viene utilizzata. Ogni volta che si avvia l’applicazione,
la smartpen si assocerà automaticamente.
Dopo aver associato la smartpen
al dispositivo, l’indicatore LED si
illuminerà in blu sso.
SCRIVERE
Vericare la connessione scrivendo sul Livescribe notebook.
Le note scritte verranno visualizzate immediatamente nell’applicazione.
Page 20

Italiano 3
CARATTERISTICHE SMARTPEN
1 • CARTUCCIA DI INCHIOSTRO
La smartpen Livescribe™ 3 è dotata di una cartuccia di inchiostro
a sfera con punta media in carburo di tungsteno sostituibile.
Per sostituire la cartuccia di inchiostro:
· Accendere la smartpen ruotando l’anello
centrale nché la cartuccia di inchiostro
non sia completamente allungata..
· Estrarre la cartuccia di inchiostro con le dita.
· Inserire la nuova cartuccia nella smartpen
finché non si sente uno scatto.
NOTA: Si consiglia di utilizzare cartucce di inchiostro di ricambio Livescribe compatibili
(67 mm x 2,5 mm di diametro). Le cartucce di inchiostro utilizzate per le smartpen
Pulse™/Echo™/Sky™/Livescribe wi NON si adattano alla smartpen Livescribe 3.
Possono anche essere utilizzate cartucce con inchiostro senza carbonio e le cui dimensioni
corrispondano a quelle specicate in precedenza, tuttavia Livescribe non garantisce le
prestazioni di cartucce di inchiostro di ricambio non Livescribe.
2 • GHIERA DI ACCENSIONE/SPEGNIMENTO
All’accensione della smartpen, la cartuccia di inchiostro fuoriesce
automaticamente e rientra nel suo alloggiamento al momento dello spegnimento.
1 2 3 4
Page 21

Italiano 4
3 • SPIA LED DELLO STATO
La spia LED dello stato comunica informazioni importanti relative alla smartpen.
4 • STILO INTEGRATO
Un rimovibile stilo capacitivo punta copre la porta Micro USB sulla parte
superiore della smartpen.
BATTERIA AGLI IONI DI LITIO
Per vericare il livello della batteria, accedere alle impostazioni della smartpen
nell’applicazione Livescribe+. La smartpen deve essere accesa e associata al
dispositivo mobile (indicatore LED blu sso).
Caricare la smartpen inserendo il cavo Micro USB
nel connettore che si trova sotto la punta dello stilo
estraibile nella parte superiore della smartpen.
Collegarlo alla porta USB del computer o a un
caricabatterie USB.
L’indicatore LED lampeggia 3 volte in giallo quando
il livello della batteria raggiunge circa il 15%.
SPIA INDICA
Verde lampeggiante Accesa/In attesa di connessione Bluetooth
®
Blu sso Accesa/Bluetooth connesso al dispositivo mobile
Giallo lampeggiante per 3 volte Circa 15% di batteria rimanente
Rosso sso Registrazione audio in corso sul dispositivo mobil
Giallo lampeggiante Aggiornamento rmware in corso
Ulteriori descrizioni relative agli stati LED sono disponibili nella sezione guida in linea
del nostro sito Web.
Page 22

Italiano 5
CARTA ISOMETRICA LIVESCRIBE
™
La smartpen Livescribe 3 è compatibile con tutti i blocchi note Livescribe.
La carta isometrica Livescribe è disponibile in diverse dimensioni e formati.
Alcuni tipi di carta Livescribe contengono controlli per altre smartpen Livescribe
che non vengono utilizzati con la nuova Livescribe 3.
CREAZIONE DI PENCAST
I pencast sono documenti interattivi contenenti
audio sincronizzato agli appunti scritti a mano.
Per creare pencast utilizzando la smartpen
Livescribe 3, assicurarsi che la smartpen sia
accesa e che l’applicazione Livescribe+ sia
attiva sullo smartphone o tablet. L’audio viene
registrato con il microfono del dispositivo.
DA CARTA
Iniziare una sessione di registrazione audio
toccando con la punta della smartpen il pulsante
di registrazione stampato sulla parte inferiore
della pagina del blocco note Livescribe.
DA LIVESCRIBE+
Toccare il pulsante di registrazione nella pagina
o nella visualizzazione dei feed.
Page 23

Italiano 6
SUGGERIMENTI
•
Durante la registrazione, l’indicatore LED sulla smartpen sarà rosso
sso e nell’applicazione Livescribe+ verrà visualizzata una barra di
avanzamento della registrazione (in rosso).
•
Iniziata la registrazione, non è necessario tenere la schermata
dell’applicazione in primo piano per continuare.
•
Le chiamate in arrivo interromperanno la registrazione. Assicurarsi
di riavviare la registrazione al termine della chiamata.
•
Una volta conclusa la registrazione, è possibile riprodurre l’audio
toccando le note scritte a mano nella visualizzazione della sessione
o toccando con la smartpen direttamente i tratti di inchiostro sulla carta.
Page 24

Italiano 7
DOMANDE FREQUENTI
Cosa devo fare se Livescribe™ 3 ha perso la connessione al mio
dispositivo mobile?
La smartpen non è associata al dispositivo mobile se l’indicatore LED non è
blu sso e l’applicazione è attiva. In primo luogo, potrebbe essere necessario
riavviare la smartpen per ripristinare la connessione. Se necessario, chiudere
e riavviare l’applicazione. In alcuni casi, potrebbe essere necessario mettere
la smartpen in modalità associazione toccando l’icona relativa all’associazione
del dispositivo nella parte anteriore del blocco note Livescribe.
Cosa indicano le icone a forma di stella , bandiera ed etichetta
nella parte inferiore di ogni pagina del blocco note Livescribe?
Le icone sono i controlli prestampati che consentono di contrassegnare il
contenuto scritto a mano. Toccare il relativo controllo sulla carta e iniziare
a scrivere. Una volta inviato al dispositivo, Livescribe+ organizza il contenuto
in gruppi facilmente consultabili. È inoltre possibile personalizzare i tag
dall’applicazione Livescribe+.
Cosa indicano i pulsanti nella parte superiore di ogni
pagina del blocco note Livescribe?
Queste icone sono pulsanti di scelta rapida con funzioni preprogrammate.
Per ulteriori informazioni, accedere al pannello delle preferenze di Livescribe+.
record pause stop
record pause stop
Page 25

Italiano 8
MAGGIORI INFORMAZIONI
Per video, consigli, suggerimenti e documentazione
sull’utilizzo della smartpen Livescribe 3 visitare
www.livescribe.com/livescribe3support
Guida in linea
www.livescribe.com/livescribe3onlinehelp
Assistenza clienti
support.livescribe.com
SEGUICI
Pagina dei fan su Facebook
www.facebook.com/livescribe
Pagina Twitter globale
www.twitter.com/livescribe
Blog Livescribe
www.livescribe.com/blog
YouTube
www.youtube.com/nevermissaword
NORMATIVA
Questo dispositivo è conforme all’articolo 15 della direttiva FCC. L’utilizzo del presente dispositivo è soggetto
alle due seguenti condizioni: (1) il dispositivo non può causare interferenze dannose e (2) deve essere in grado di
accettare eventuali interferenze ricevute, incluse quelle che potrebbero provocare anomalie nel funzionamento.
Avviso: eventuali modiche o variazioni apportate al dispositivo in assenza dell’approvazione esplicita da parte di
Livescribe, Inc. possono rappresentare motivo di invalidazione del diritto dell’utente all’utilizzo del dispositivo stesso.
Nota: il presente dispositivo è stato sottoposto a test ed è risultato conforme ai limiti previsti per i dispositivi digitali
di classe B, ai sensi della direttiva FCC, articolo 15. Tali limiti intendono garantire un livello di protezione adeguato
da interferenze dannose nell’ambito di installazioni di tipo residenziale. Questo dispositivo genera, utilizza ed emette
energia a radiofrequenza e può causare interferenze con le comunicazioni radio, se non installato e utilizzato seguendo
le istruzioni fornite. Tuttavia, non esiste alcuna garanzia che tali interferenze non si verichino in una determinata
installazione. Qualora il dispositivo generasse interferenze dannose per la ricezione di segnali radio o televisivi
(condizione vericabile spegnendo e riaccendendo il dispositivo), si consiglia di adottare le seguenti misure correttive.
• Orientare o posizionare diversamente l’antenna ricevente.
• Aumentare la distanza tra dispositivo e ricevitore.
• Collegare il dispositivo a una presa di corrente su un circuito diverso da quello a cui è collegato il ricevitore.
• Rivolgersi al rivenditore o a un tecnico radio/TV per ulteriore assistenza.
Questo dispositivo è conforme agli standard canadesi RSS del settore che non richiedono una licenza. L’utilizzo del
presente dispositivo è soggetto alle due seguenti condizioni: (1) il dispositivo non può causare interferenze dannose
e (2) deve essere in grado di accettare eventuali interferenze ricevute, incluse quelle che potrebbero provocare
anomalie nel funzionamento.
Livescribe Inc. Model: V1110 FCC ID: CKD-00072 IC: 10240A-00072
Page 26

Deutsch 1
ERSTE SCHRITTE
Vielen Dank, dass Sie den neuen Livescribe™ 3
Smartpen gekauft haben. In Kürze können Sie
in Ihr neues Livescribe-Notizbuch schreiben
und Ihre Notizen anschließend sofort in der
Livescribe+ App abrufen. Laden Sie einfach
Livescribe+ auf Ihr Smartphone oder Tablet
herunter und schalten Sie Ihren Smartpen ein,
um ihn mit Ihrem Mobilgerät zu pairen.
LADEN SIE DIE LIVESCRIBE+ APP
HERUNTER
Die Livescribe+ App ist kostenlos im App Store
SM
erhältlich. Laden Sie sie als Erstes auf Ihr Smartphone
oder Tablet herunter. Livescribe+ erfordert iOS7 auf:
•
iPhone® 4S (oder höher)
•
iPad® 3. Gen. (oder höher)
•
iPad® (oder höher)
•
iPod touch® 5. Gen.
(oder höher)
In Zukunft werden auch andere
Geräte unterstützt. Aktuelle Infos
zu kompatiblen Geräten nden
Sie auf der Livescribe-Website unter
www.livescribe.com/livescribe3
Sie können auch den QR-Code
mit Ihrem Mobilgerät scannen.
Scannen
Page 27

Deutsch 2
SCHALTEN SIE
Nach dem Herunterladen von Livescribe+ sollten
Sie sich vergewissern, dass Bluetooth
®
auf Ihrem
Mobilgerät aktiviert ist. Schalten Sie Ihren Livescribe
3 Smartpen ein, indem Sie den strukturierten Ring
in der Mitte im Uhrzeigersinn drehen. Wenn Sie den
Smartpen noch nicht mit einem Gerät gepairt haben,
blinkt die LED-Anzeige grün, um anzuzeigen, dass
der Smartpen sich im Pairing-Modus bendet.
Livescribe+ erkennt automatisch Ihren Livescribe 3
Smartpen, sobald Sie das Programm starten.
Es wird eine Meldung angezeigt, in der Sie gefragt
werden, ob Sie Ihren neuen Smartpen pairen möchten.
Wählen Sie “Pairen”. Sie müssen Ihren Smartpen mit
jedem Gerät nur einmal pairen. Bei jedem Starten
der App wird der Smartpen automatisch gepairt.
Nachdem Sie Ihren Smartpen erfolgreich
mit Ihrem Gerät gepairt haben, leuchtet
die LED-Anzeige dauerhaft blau.
SCHREIBEN
Testen Sie die Verbindung, indem Sie etwas in Ihr Livescribe notebook
schreiben. Der Text sollte sofort in der App sichtbar sein.
Page 28

Deutsch 3
FUNKTIONEN DES SMARTPENS
1 • TINTENPATRONE
Im Lieferumfang Ihres Livescribe™ 3 smartpen ist eine austauschbare
Wolframcarbid-Tintenpatrone mittlerer Größe enthalten.
So ersetzen Sie die Tintenpatrone:
· Schalten Sie Ihren Smartpen ein, indem Sie
den Drehring in der Mitte so lange drehen, bis
die Tintenpatrone vollständig herausgefahren ist.
· Ziehen Sie die Patrone mit den Fingern heraus.
· Legen Sie die neue Patrone ein und achten Sie
dabei darauf, dass sie einrastet.
HINWEIS: Wir empfehlen, kompatible Ersatzpatronen von Livescribe zu verwenden
(67 mm Länge, 2,5 mm Durchmesser) Ältere Tintenpatronen der Pulse™/Echo™/Sky™/Livescribe
WiFi Smartpens sind NICHT mit dem Livescribe 3 Smartpen kompatibel.
Sie können auch Tintenpatronen derselben Größe verwenden, die kohlenstofffreie Tinte
enthalten. Livescribe garantiert allerdings nicht die optimale Leistung des Stifts bei
Verwendung von Ersatzpatronen anderer Hersteller.
2 • EIN-/AUSSCHALTER
Die Tintenpatrone fährt beim Einschalten des Smartpens automatisch heraus
und wird beim Ausschalten wieder in das Gehäuse eingezogen.
1 2 3 4
Page 29

Deutsch 4
3 • LED-STATUSANZEIGE
Die LED-Statusanzeige übermittelt wichtige Informationen zu Ihrem Smartpen.
4 • INTEGRIERTER STIFT
Kapazitiver Touchscreen-Stift mit abnehmbarer Kappe für Smartphones und
Tablets. Schützt den Mikro-USB-Port oben an Ihrem Smartpen.
LITHIUM-IONEN-AKKU
Öffnen Sie zum Überprüfen des Akkustands die Smartpen-Einstellungen in Ihrer
Livescribe+ App. Ihr Smartpen muss eingeschaltet und mit Ihrem Mobilgerät
gepairt sein (LED-Anzeige leuchtet durchgehend blau).
Laden Sie den Smartpen, indem Sie das Mikro-USBKabel in den Anschluss unter der abnehmbaren
Stiftkappe oben an Ihrem Smartpen stecken.
Stecken Sie das andere Ende des Kabels in einen
USB-Anschluss Ihres Computers oder ein USBLadegerät.
Die LED-Anzeige blinkt dreimal gelb, wenn etwa
15% Akkulaufzeit verbleiben.
LICHT BEDEUTET
Grünes Blinken Eingeschaltet/Wartet auf Bluetooth
®
-Verbindung
Dauerhaft blau Eingeschaltet/Per Bluetooth mit Mobilgerät verbunden
Dreimaliges gelbes Blinken Etwa 15 % Akkulaufzeit verbleiben
Dauerhaft rot Audioaufnahme läuft auf Mobilgerät
Gelbes Blinken Firmware-Update läuft
Weitere Beschreibungen zu LED-Statusanzeigen nden Sie in der Onlinehilfe auf der Website.
Page 30

Deutsch 5
LIVESCRIBE
™
-
PUNKTPAPIER
Ihr Livescribe 3 Smartpen ist mit allen Livescribe-Notizbüchern kompatibel.
Livescribe-Punktpapier ist in verschiedenen Größen und mit verschiedenen
Formfaktoren erhältlich.
Unter Umständen enthält Livescribe-Papier Steuerelemente für andere LivescribeSmartpens, die nicht mit Ihrem neuen Livescribe 3 Smartpen kompatibel sind.
ERSTELLEN VON PENCASTS
Pencasts sind interaktive Dokumente, die mit
Ihren handschriftlichen Notizen synchronisiertes
Audiomaterial enthalten.
Bevor Sie mit Ihrem Livescribe 3 Smartpen Pencasts
erstellen, sollten Sie sich vergewissern, dass Ihr
Smartpen eingeschaltet und Livescribe+ auf
Ihrem Smartphone oder Tablet aktiv ist. Audio
aufgezeichnet mit dem Mikrofon auf Ihrem Gerät.
ÜBER PAPIER
Starten Sie eine beliebige Audioaufnahme, indem
Sie mit Ihrem Smartpen auf die Aufnahmeschaltäche
unten auf der Seite Ihres Livescribe-Notizbuchs tippen.
ÜBER LIVESCRIBE+
Tippen Sie auf die Aufnahmeschaltäche auf der
Seiten- oder Feed-Ansicht.
Page 31

Deutsch 6
TIPPS
•
Während der Aufnahme leuchtet die LED-Anzeige auf Ihrem Smartpen
durchgehend rot, und die Livescribe+ zeigt eine Statusleiste für die
Aufnahme an (in rot).
•
Wenn die Aufnahme läuft, muss die App nicht im Vordergrund ausgeführt
werden, damit die Aufnahme fortgesetzt werden kann.
•
Eingehende Telefongespräche unterbrechen die Aufnahme. Denken Sie
daran, Ihre Aufnahme nach Beenden des Gesprächs wieder zu starten.
•
Nach Beenden der Aufnahme können Sie das Audiomaterial wiedergeben,
indem Sie in der Sitzungsansicht auf Ihre handschriftlichen Notizen tippen
oder mit dem Smartpen direkt auf die Tintenstriche auf dem Papier tippen.
Page 32

Deutsch 7
FAQS
Was soll ich tun, wenn die Verbindung meines Livescribe™ 3 Smartpens
zu meinem Mobilgerät verloren geht?
Wenn die LED-Anzeige nicht dauerhaft blau leuchtet und Ihre App aktiv
ist, ist der Smartpen nicht mit Ihrem Mobilgerät gepairt. Als Erstes müssen
Sie möglicherweise Ihren Smartpen neu starten, um die Verbindung
wiederherzustellen. Eventuell müssen Sie auch die App schließen und
neu starten. In manchen Fällen müssen Sie Ihren Smartpen in den PairingModus schalten, indem Sie vorne in Ihrem Livescribe-Notizbuch auf das
Symbol zum Pairen von Geräten tippen.
Was bedeuten die Stern- , Flaggen- , und Beschriftungssymbole
unten auf jeder Seite meines Livescribe-Notizbuchs?
Diese Symbole sind vorgedruckte Steuerelemente, mit denen Sie Ihren
handgeschriebenen Notizen Markierungen hinzufügen können. Tippen
Sie einfach auf das passende Steuerelement auf dem Papier und beginnen
Sie zu schreiben. Nachdem die Information an Ihr Gerät gesendet wurde
organisiert Livescribe+ den Inhalt in übersichtlichen Gruppen. Sie können
über die Livescribe+ App auch benutzerdenierte Markierungen erstellen.
Was bedeuten die Symbole oben auf jeder Seite meines
Livescribe-Notizbuchs?
Diese Symbole sind Verknüpfungen mit vorprogrammierten Funktionen.
Weitere Informationen nden Sie in Livescribe+ unter “Einstellungen.”
record pause stop
record pause stop
Page 33

Deutsch 8
WEITERE INFOS
Videos, Tipps und Tricks sowie Dokumentation
zum Livescribe 3 Smartpen nden Sie hier
www.livescribe.com/livescribe3support
Online-Hilfe
www.livescribe.com/livescribe3onlinehelp
Kundendienst
support.livescribe.com
FOLGEN SIE UNS
Facebook-Fanseite
www.facebook.com/livescribe
Globale Twitter-Seite
www.twitter.com/livescribe
Livescribe-Blog
www.livescribe.com/blog
YouTube
www.youtube.com/nevermissaword
RECHTLICHE
Dieses Gerät erfüllt Teil 15 der FCC-Bestimmungen. Der Betrieb unterliegt den folgenden beiden Bedingungen:
(1) Das Gerät darf keine störenden Interferenzen verursachen und (2) das Gerät muss Störungen von außen ertragen
können. Darunter fallen auch solche Störungen, die zu einer Beeinträchtigung der Funktion führen können. Achtung:
Jegliche Änderungen an den Geräten, denen Livescribe, Inc. nicht ausdrücklich zugestimmt hat, können Ihre
Berechtigung zur Verwendung dieses Geräts aufheben. Hinweis: Dieses Produkt wurde getestet und entspricht den
Grenzwerten für digitale Geräte der Klasse B gemäß Teil 15 der FCC-Bestimmungen. Die Grenzwerte wurden für eine
typische Wohnumgebung erarbeitet, um einen angemessenen Schutz vor störenden Interferenzen zu gewährleisten.
Das Gerät erzeugt, verwendet und gibt Strahlung im Radiofrequenzbereich ab. Wenn es nicht gemäß der Anleitung
installiert und benutzt wird, kann es den Funkverkehr anderer Geräte beeinträchtigen. Es kann jedoch nicht
ausgeschlossen werden, dass auch bei ordnungsgemäßer Installation und Verwendung in einigen Fällen Störungen
auftreten. Sollte das Gerät den Radio- oder Fernsehempfang stören, was sich durch Ein- und Ausschalten des Geräts
nachprüfen lässt, versuchen Sie die Störungen durch eine oder mehrere der folgenden Maßnahmen zu beheben:
• Verändern Sie die Position der Antenne oder richten Sie sie neu aus.
• Vergrößern Sie den Abstand zwischen dem Gerät und dem gestörten Empfänger.
• Schließen Sie das Gerät an einen anderen Stromkreis als den des Empfängers an.
• Suchen Sie Rat bei Ihrem Händler oder einem erfahrenen Radio/TV-Techniker.
Dieses Gerät erfüllt die Standards für lizenzfreie RSS-Feeds von Industry Canada. Der Betrieb unterliegt den
folgenden beiden Bedingungen: (1) Das Gerät darf keine störenden Interferenzen verursachen und (2) das Gerät
muss Störungen von außen ertragen können. Darunter fallen auch solche Störungen, die zu einer Beeinträchtigung
der Funktion führen können.
Livescribe Inc. Model: V1110 FCC ID: CKD-00072 IC: 10240A-00072
Page 34

Español 1
INTRODUCCIÓN
Gracias por haber adquirido el nuevo smartpen
Livescribe
™
3. En solo unos instantes podrá
empezar a escribir en su nuevo bloc de notas
Livescribe y ver cómo sus notas aparecen al instante
en la aplicación Livescribe+. Descargue Livescribe+
al smartphone o tablet y encienda el smartpen
para emparejarlo con su dispositivo móvil.
DESCARGA DE LA APLICACIÓN LIVESCRIBE+
La aplicación Livescribe+ está disponible de forma
gratuita en el App Store.
SM
Para empezar, descárguela
al smartphone o tablet. Livescribe+ requiere iOS7
en ejecución en:
•
iPhone® 4S (o posterior)
•
iPad® 3ª generación
(o posterior)
•
iPad® mini (o posterior)
•
iPod touch® 5ª generación
(o posterior)
Vamos a seguir añadiendo
compatibilidad para otros
dispositivos. Para conocer las
actualizaciones más recientes
sobre dispositivos compatibles,
visite el sitio web de Livescribe en
www.livescribe.com/livescribe3
o escanee el código QR con
el dispositivo móvil.
Escanear
Page 35

Español 2
ENCENDIDO
Cuando haya descargado Livescribe+, asegúrese
de que la opción de Bluetooth
®
está activada en el
dispositivo móvil. Encienda el smartpen Livescribe 3.
Para ello, gire el anillo central con textura en el sentido
de las agujas del reloj. Si previamente no emparejó el
smartpen con un dispositivo, el indicado LED emitirá
destellos verdes para indicar que el smartpen está en
modo de emparejamiento.
Cuando inicie Livescribe+, detectará automáticamente
el smartpen Livescribe 3. Aparecerá una noticación
que le preguntará si desea emparejarla con su nuevo
smartpen. Seleccione “Emparejar”. Solo tendrá que
emparejar el smartpen una vez con cada uno de los
dispositivos con los que lo use. Cada vez que inicie
la aplicación, se emparejará automáticamente.
Cuando haya emparejado correctamente
el smartpen con el dispositivo, el
indicador LED mostrará una luz de
color azul permanente.
ESCRIBIR
Pruebe la conexión. Para ello, escriba en Livescribe notebook.
Lo que escriba debería aparecer al instante en la aplicación.
Page 36

Español 3
FUNCIONES DEL SMARTPEN
1 • CARTUCHO DE TINTA
El smartpen Livescribe™ 3 incluye un cartucho de tinta de punta
de bolígrafo media de carburo de wolframio sustituible.
Para sustituir el cartucho de tinta:
· Encienda el smartpen. Para ello, gire el
anillo central hasta que el cartucho de tinta
se haya extendido por completo.
· Extraiga el cartucho de tinta con los dedos.
· Empuje ligeramente el cartucho de tinta nuevo
en el smartpen hasta que un clic indique que
se ha colocado correctamente.
NOTA: Recomendamos recambios de cartuchos de tinta Livescribe compatibles
(67 mm x 2,5 mm de diámetro). Los cartuchos de tinta antiguos para smartpens
Pulse™/Echo™/Sky™/Livescribe wi NO encajan en el smartpen Livescribe 3.
También se pueden usar cartuchos de tinta que cumplan las mismas especicaciones
de tamaño y que contengan tinta sin carbono, aunque Livescribe no garantiza el
rendimiento de los recambios de cartuchos de tinta que no sean de la marca Livescribe.
2 • ANILLO CONMUTADOR DE ENCENDIDO
El cartucho de tinta se extiende automáticamente al encender el smartpen
y se retrae en el cuerpo de la carcasa al apagar el smartpen.
1 2 3 4
Page 37

Español 4
3 • DIODO DE ESTADO
El LED de estado le comunica información importante sobre el smartpen.
4 • ESTILETE INTEGRADO
A extraíble capacitiva de la aguja punta cubre el puerto USB Micro en la
parte superior del smartpen.
BATERÍA DE ION LITIO
Para comprobar el nivel de la batería, acceda a la conguración del smartpen
en la aplicación Livescribe+. El smartpen debe estar encendido y emparejado
con el dispositivo móvil (indicador LED azul permanente).
Cargue el smartpen. Para ello, conecte el cable
micro USB al conector situado debajo de la punta de
estilete extraíble en la parte superior del smartpen.
Conéctelo al puerto USB del ordenador o a un
cargador USB.
El indicador LED emitirá tres destellos amarillos
cuando quede aproximadamente un 15% de
duración de batería.
LUZ COMUNICA
Destellos verdes Encendido/A la espera de una conexión Bluetooth
®
Azul permanente Encendido/Conexión Bluetooth con dispositivo móvil
Tres destellos amarillos Queda aproximadamente un15 % de duración de batería
Rojo permanente Grabación de audio en curso en dispositivo móvil
Destellos amarillos Actualización de rmware en curso
Podrá encontrar otras descripciones de estado de LED en la sección de ayuda en línea
de nuestro sitio web.
Page 38

Español 5
PAPEL PUNTEADO DE LIVESCRIBE
™
El smartpen Livescribe 3 es compatible con todos estos blocs de notas Livescribe.
Hay disponible papel punteado de Livescribe en diferentes tamaños y formatos.
Algunos papeles Livescribe contienen controles para otros smartpens Livescribe
que no se usan con su nuevo smartpen Livescribe 3.
CREACIÓN DE PENCASTS
Las pencasts son documentos interactivos que
contienen audio sincronizado con las notas manuscritas.
Para crear pencasts con el smartpen Livescribe 3,
asegúrese de que el smartpen está encendido y que
Livescribe+ es la aplicación activa en el smartphone
o tablet. El audio se graba con el micrófono en el
dispositivo.
EN PAPEL
Inicie cualquier sesión de grabación de audio.
Para ello, pulse con el smartpen el botón de
grabación impreso en la parte inferior de la página
del bloc de notas Livescribe.
EN LIVESCRIBE+
Pulse el control de grabación en la de la vista
Página o Fuente.
Page 39

Español 6
SUGERENCIAS
•
Al grabar, el indicador LED del smartpen será rojo permanente y la aplicación
Livescribe+ mostrará una barra de progreso de grabación (en rojo).
•
Cuando haya iniciado la grabación, no será necesario que la aplicación esté
en primer plano para que la grabación continúe.
•
Las llamadas telefónicas entrantes interrumpirán la grabación. Reinicie la
grabación una vez nalizada la llamada.
•
Cuando acabe la grabación, puede reproducir el audio si pulsa las notas
manuscritas en la vista de la sesión, o si pulsa directamente con el smartpen
los trazos en el papel.
Page 40

Español 7
PREGUNTAS HABITUALES
¿Qué hago si mi Livescribe™ 3 ha perdido la conexión al dispositivo móvil?
Sabrá si no existe emparejamiento con el dispositivo móvil si el indicador LED
no es azul permanente y la aplicación está activa. Primero, es posible que deba
reiniciar el smartpen para restaurar la conexión. También es posible que deba
cerrar la aplicación y reiniciarla. En algunos casos, es posible que deba poner el
smartpen en modo de emparejamiento mediante una pulsación en el icono de
emparejamiento de dispositivos en la parte frontal del bloc de notas Livescribe.
¿Qué indican los iconos de estrella , bandera , y etiqueta situados
en la parte inferior de cada página del bloc de notas Livescribe?
Los iconos son controles preimpresos que permiten etiquetar el contenido
manuscrito. Pulse el control relevante en el papel y empiece a escribir. Una vez
enviado al dispositivo, Livescribe+ organizará ese contenido en agrupaciones
fáciles de ver. También es posible personalizar las etiquetas en la aplicación
Livescribe+.
¿Qué son los botones situados en la parte superior de cada
página del bloc de notas Livescribe?
Estos iconos son controles de acceso directo con funciones preprogramadas.
Acceda al panel de preferencias de Livescribe+ para obtener más información.
record pause stop
record pause stop
Page 41

Español 8
MÁS INFORMACIÓN
Si quiere ver vídeos, sugerencias o documentación
relacionada con el smartpen Livescribe 3, visite
www.livescribe.com/livescribe3support
Ayuda en línea
www.livescribe.com/livescribe3onlinehelp
Servicio de atención al cliente
support.livescribe.com
SÍGANOS
Página de admiradores en Facebook
www.facebook.com/livescribe
Página global de Twitter
www.twitter.com/livescribe
Blog de Livescribe
www.livescribe.com/blog
YouTube
www.youtube.com/nevermissaword
NORMATIVAS
Este dispositivo cumple con el apartado 15 de las normas de la FCC. Su funcionamiento está sujeto a las dos
condiciones siguientes: (1) este dispositivo no debe causar interferencias perjudiciales y (2) este dispositivo debe
aceptar cualquier interferencia que reciba, incluidas aquellas que puedan causar un funcionamiento no deseado.
Precaución: los cambios o modicaciones en el equipo que no hayan sido expresamente aprobados por Livescribe,
Inc. podrían anular el derecho del usuario para utilizar este equipo. Nota: se han realizado pruebas de este equipo
y se ha determinado que cumple con los límites establecidos para los dispositivos digitales de clase B, según el
apartado 15 de las normas de la FCC. Estos límites se han establecido para ofrecer un nivel de protección razonable
contra las interferencias perjudiciales en instalaciones residenciales. Este equipo genera, utiliza y puede irradiar
energía de radiofrecuencia y, si no se instala y usa de acuerdo con las instrucciones, puede causar interferencias
perjudiciales en las radiocomunicaciones. No obstante, no se puede garantizar la ausencia de interferencias en una
instalación determinada. Si este equipo causa interferencias perjudiciales en la recepción de radio o televisión, lo
que se puede determinar desconectando y volviendo a conectar el equipo, se recomienda al usuario que las corrija
mediante una o más de las siguientes medidas:
• Reorientar o reubicar la antena receptora.
• Aumentar la separación entre el equipo y el receptor.
• Conectar el equipo a una toma de corriente de un circuito distinto al que se encuentra conectado el receptor.
• Consultar al distribuidor o a un técnico experimentado en radio y televisión para obtener asistencia.
Este dispositivo cumple las normas RSS de exención de licencia de Industry Canada. Su funcionamiento está sujeto
a las dos condiciones siguientes: (1) este dispositivo no debe causar interferencias perjudiciales y (2) este dispositivo
debe aceptar cualquier interferencia que reciba, incluidas aquellas que puedan causar un funcionamiento no deseado.
Livescribe Inc. Model: V1110 FCC ID: CKD-00072 IC: 10240A-00072
Page 42

Page 43

LIVESCRIBE, PULSE, ECHO, and SKY are trademarks of Livescribe Inc., Oakland, California 94621. Apple, iPhone, iPad, and
iPod touch are trademarks of Apple Inc. App Store is a service mark of Apple Inc. All other trademarks are properties of their
respective owners. ©2013 Livescribe Inc. All rights reserved.
LIVESCRIBE, PULSE, ECHO, et SKY sont des marques commerciales de Livescribe Inc., Oakland, Californie 94621. Apple, iPhone,
iPad, et iPod touch sont des marques commerciales d’Apple Inc. App Store est une marque de service d’Apple Inc. Toutes les
autres marques commerciales sont la propriété de leurs détenteurs respectifs. ©2013 Livescribe Inc. Tous droits réservés.
Page 44

Language #
P/N: 212-00024-000-AC
 Loading...