

Page 1

Smartpen User Guide
VERSION 2.5
This device complies with Part 15 of the FCC Rules. Operation is subject to the
following two conditions: (1) this device may not cause harmful interference, and (2)
this device must accept any interference received, including interference that may
cause undesired operation.
Page 2

Copyright and Trademark
Copyright and Trademark
LIVESCRIBE, PULSE, ECHO, and PAPER REPLAY are trademarks or registered trademarks of
Livescribe Inc.
Anoto is a trademark of Anoto Group AB. All other brand and product names are trademarks of their
respective owners.
Copyright © 2007-2010 Livescribe Inc. All rights reserved.
IMPORTANT: Please read the End User License Agreement with this product before using the
accompanying software program(s). You accept the terms of the End User License
Agreement by using any part of the software. Using any non-authorized charging
accessories or ink cartridges may damage the Livescribe™ smartpen and voids the
Livescribe smartpen warranty (see
Software Downloads Available
To download Livescribe Desktop software, go to www.livescribe.com/install.
Agency Compliance Information
Warranty Information on page 115.)
For product, regulatory, and compliance information, see Regulatory Information on page 111.
Livescribe™ Smartpen User Guide: Version 2.5-A
October 5, 2010 3:41 pm
Livescribe™ Smartpen User Guide ii
Page 3

About This Guide
About This Guide
This guide contains detailed descriptions of the Livescribe™ smartpen and applications that run on it.
Use this guide along with the Getting Started Guide included with the Livescribe smartpen. For
information about desktop software that works with the Livescribe smartpen, see the Livescribe™
Desktop User Guide.
NOTE: This guide instructs you to tap on paper controls to perform certain fun ctions. When you see th is
instruction, turn on your smartpen, and use the ink tip to tap on the printed buttons within the
Getting Started Guide and Livescribe™ Dot Paper notebooks.
Livescribe™ Smartpen User Guide iii
Page 4

Contents
Copyright and Trademark . . . . . . . . . . . . . . . . . . . . . . . . . . . . . . . . . . . . . . . . . . . . . . . . . . . . . . . .ii
About This Guide. . . . . . . . . . . . . . . . . . . . . . . . . . . . . . . . . . . . . . . . . . . . . . . . . . . . . . . . . . . . . . iii
1 Introducing the Livescribe™ Smartpen . . . . . . . . . . . . . . . . . . . . . . . . . . . . . . .1
Livescribe Smartpen . . . . . . . . . . . . . . . . . . . . . . . . . . . . . . . . . . . . . . . . . . . . . . . . . . . . . . . . . . . .1
Livescribe™ Dot Paper . . . . . . . . . . . . . . . . . . . . . . . . . . . . . . . . . . . . . . . . . . . . . . . . . . . . . . . . . .2
2 New in this Version. . . . . . . . . . . . . . . . . . . . . . . . . . . . . . . . . . . . . . . . . . . . . . .4
New Features . . . . . . . . . . . . . . . . . . . . . . . . . . . . . . . . . . . . . . . . . . . . . . . . . . . . . . . . . . . . . . . . .4
Support for Livescribe Paper Tablet . . . . . . . . . . . . . . . . . . . . . . . . . . . . . . . . . . . . . . . . . . . . .4
Livescribe Sticky Notes. . . . . . . . . . . . . . . . . . . . . . . . . . . . . . . . . . . . . . . . . . . . . . . . . . . . . . .4
Home Button. . . . . . . . . . . . . . . . . . . . . . . . . . . . . . . . . . . . . . . . . . . . . . . . . . . . . . . . . . . . . . .7
Shortcut Buttons . . . . . . . . . . . . . . . . . . . . . . . . . . . . . . . . . . . . . . . . . . . . . . . . . . . . . . . . . . .10
Improvements and Corrected Issues. . . . . . . . . . . . . . . . . . . . . . . . . . . . . . . . . . . . . . . . . . . . . . .15
Performance Improvement . . . . . . . . . . . . . . . . . . . . . . . . . . . . . . . . . . . . . . . . . . . . . . . . . . .15
Left-Tap: Exit the Way You Came In . . . . . . . . . . . . . . . . . . . . . . . . . . . . . . . . . . . . . . . . . . . .15
3 Getting to Know Your Livescribe™ Smartpen . . . . . . . . . . . . . . . . . . . . . . . . .16
Identifying Your Livescribe™ Smartpen Model . . . . . . . . . . . . . . . . . . . . . . . . . . . . . . . . . . . . . . .17
Anatomy of a Smartpen. . . . . . . . . . . . . . . . . . . . . . . . . . . . . . . . . . . . . . . . . . . . . . . . . . . . . . . . .18
Turning On Your Smartpen . . . . . . . . . . . . . . . . . . . . . . . . . . . . . . . . . . . . . . . . . . . . . . . . . . . . . .20
Writing and Recording Audio. . . . . . . . . . . . . . . . . . . . . . . . . . . . . . . . . . . . . . . . . . . . . . . . . . . . .20
Capturing Notes without Audio . . . . . . . . . . . . . . . . . . . . . . . . . . . . . . . . . . . . . . . . . . . . . . . .20
Capturing Notes with Audio. . . . . . . . . . . . . . . . . . . . . . . . . . . . . . . . . . . . . . . . . . . . . . . . . . .21
Livescribe™ Smartpen User Guide iv
Page 5

Recording Audio Only. . . . . . . . . . . . . . . . . . . . . . . . . . . . . . . . . . . . . . . . . . . . . . . . . . . . . . .21
Charging an Echo™ Smartpen . . . . . . . . . . . . . . . . . . . . . . . . . . . . . . . . . . . . . . . . . . . . . . . . . . .23
Charging a Pulse™ Smartpen. . . . . . . . . . . . . . . . . . . . . . . . . . . . . . . . . . . . . . . . . . . . . . . . . . . .24
Replacing the Ink Cartridge or Stylus . . . . . . . . . . . . . . . . . . . . . . . . . . . . . . . . . . . . . . . . . . . . . .25
Using a 3-D Recording Headset . . . . . . . . . . . . . . . . . . . . . . . . . . . . . . . . . . . . . . . . . . . . . . . . . .26
Renaming Your Smartpen in Livescribe™ Desktop. . . . . . . . . . . . . . . . . . . . . . . . . . . . . . . . . . . .27
Rebooting Your Livescribe™ Smartpen. . . . . . . . . . . . . . . . . . . . . . . . . . . . . . . . . . . . . . . . . . . . .28
4 Configuring Your Livescribe™ Smartpen. . . . . . . . . . . . . . . . . . . . . . . . . . . . .29
Setting the Date . . . . . . . . . . . . . . . . . . . . . . . . . . . . . . . . . . . . . . . . . . . . . . . . . . . . . . . . . . .31
Setting the Time . . . . . . . . . . . . . . . . . . . . . . . . . . . . . . . . . . . . . . . . . . . . . . . . . . . . . . . . . . .32
Setting Display Brightness . . . . . . . . . . . . . . . . . . . . . . . . . . . . . . . . . . . . . . . . . . . . . . . . . . .33
Setting the Display Orientation . . . . . . . . . . . . . . . . . . . . . . . . . . . . . . . . . . . . . . . . . . . . . . . .33
Setting Scroll Speed of the Display. . . . . . . . . . . . . . . . . . . . . . . . . . . . . . . . . . . . . . . . . . . . .34
Viewing Playback Latency . . . . . . . . . . . . . . . . . . . . . . . . . . . . . . . . . . . . . . . . . . . . . . . . . . .35
Viewing Audio (Recording) Quality Settings. . . . . . . . . . . . . . . . . . . . . . . . . . . . . . . . . . . . . .35
Viewing Microphone Sensitivity Settings. . . . . . . . . . . . . . . . . . . . . . . . . . . . . . . . . . . . . . . . .35
Viewing the Date and Time. . . . . . . . . . . . . . . . . . . . . . . . . . . . . . . . . . . . . . . . . . . . . . . . . . .36
Viewing the Battery Level . . . . . . . . . . . . . . . . . . . . . . . . . . . . . . . . . . . . . . . . . . . . . . . . . . . .36
Viewing Storage Available. . . . . . . . . . . . . . . . . . . . . . . . . . . . . . . . . . . . . . . . . . . . . . . . . . . .37
Viewing the Software Version . . . . . . . . . . . . . . . . . . . . . . . . . . . . . . . . . . . . . . . . . . . . . . . . .37
Using the Settings Menu . . . . . . . . . . . . . . . . . . . . . . . . . . . . . . . . . . . . . . . . . . . . . . . . . . . . . . . .38
Setting/Viewing Audio (Recording) Quality. . . . . . . . . . . . . . . . . . . . . . . . . . . . . . . . . . . . . . .41
Setting/Viewing Microphone Sensitivity . . . . . . . . . . . . . . . . . . . . . . . . . . . . . . . . . . . . . . . . .41
Setting/Viewing Playback Latency . . . . . . . . . . . . . . . . . . . . . . . . . . . . . . . . . . . . . . . . . . . . .42
Enabling/Disabling the Menu Voice. . . . . . . . . . . . . . . . . . . . . . . . . . . . . . . . . . . . . . . . . . . . .42
Setting/Viewing Display Brightness. . . . . . . . . . . . . . . . . . . . . . . . . . . . . . . . . . . . . . . . . . . . .42
Setting/Viewing Scroll Speed . . . . . . . . . . . . . . . . . . . . . . . . . . . . . . . . . . . . . . . . . . . . . . . . .42
Setting the Auto-Off Time . . . . . . . . . . . . . . . . . . . . . . . . . . . . . . . . . . . . . . . . . . . . . . . . . . . .43
Setting/Viewing Display Orientation . . . . . . . . . . . . . . . . . . . . . . . . . . . . . . . . . . . . . . . . . . . .43
Setting/Viewing the Date Format . . . . . . . . . . . . . . . . . . . . . . . . . . . . . . . . . . . . . . . . . . . . . .43
Setting/Viewing the Time Format . . . . . . . . . . . . . . . . . . . . . . . . . . . . . . . . . . . . . . . . . . . . . .43
Viewing the Smartpen Name . . . . . . . . . . . . . . . . . . . . . . . . . . . . . . . . . . . . . . . . . . . . . . . . .43
Switching Languages (Locales). . . . . . . . . . . . . . . . . . . . . . . . . . . . . . . . . . . . . . . . . . . . . . . . . . .44
Using the Language Switch Card for Chinese and Korean. . . . . . . . . . . . . . . . . . . . . . . . . . .44
Using the Getting Started Guide Controls to Switch Locales . . . . . . . . . . . . . . . . . . . . . . . . .45
Livescribe™ Smartpen User Guide v
Page 6

5 Navigating the Main Menu . . . . . . . . . . . . . . . . . . . . . . . . . . . . . . . . . . . . . . . .46
Using a Pre-Printed Nav Plus . . . . . . . . . . . . . . . . . . . . . . . . . . . . . . . . . . . . . . . . . . . . . . . . .46
Drawing a Nav Plus. . . . . . . . . . . . . . . . . . . . . . . . . . . . . . . . . . . . . . . . . . . . . . . . . . . . . . . . .48
Scrolling with Flick and Scrub . . . . . . . . . . . . . . . . . . . . . . . . . . . . . . . . . . . . . . . . . . . . . . . . . . . .50
Flick and Scrub Display Indicators . . . . . . . . . . . . . . . . . . . . . . . . . . . . . . . . . . . . . . . . . . . . .52
Using Quick Commands . . . . . . . . . . . . . . . . . . . . . . . . . . . . . . . . . . . . . . . . . . . . . . . . . . . . . . . .53
Launching Applications with a Quick Command. . . . . . . . . . . . . . . . . . . . . . . . . . . . . . . . . . .54
Locating and Playing a Recent Session with a Quick Command. . . . . . . . . . . . . . . . . . . . . .56
Doing Basic Math Calculations with a Quick Command . . . . . . . . . . . . . . . . . . . . . . . . . . . . .58
Viewing Audio Settings with a Quick Command. . . . . . . . . . . . . . . . . . . . . . . . . . . . . . . . . . .60
Viewing Available Storage with a Quick Command . . . . . . . . . . . . . . . . . . . . . . . . . . . . . . . .61
Viewing the Battery Level with a Quick Command. . . . . . . . . . . . . . . . . . . . . . . . . . . . . . . . .63
Viewing the Time and Date with Quick Commands . . . . . . . . . . . . . . . . . . . . . . . . . . . . . . . .65
Launch Line and Tap Around. . . . . . . . . . . . . . . . . . . . . . . . . . . . . . . . . . . . . . . . . . . . . . . . . . . . .67
6 Using the Paper Replay™ Application. . . . . . . . . . . . . . . . . . . . . . . . . . . . . . .69
Recording Sessions. . . . . . . . . . . . . . . . . . . . . . . . . . . . . . . . . . . . . . . . . . . . . . . . . . . . . . . . . . . .70
Starting Recording with a Pre-Printed Record button. . . . . . . . . . . . . . . . . . . . . . . . . . . . . . .70
Starting Recording Using Quick Record . . . . . . . . . . . . . . . . . . . . . . . . . . . . . . . . . . . . . . . . .70
Starting Recording Using a Nav Plus . . . . . . . . . . . . . . . . . . . . . . . . . . . . . . . . . . . . . . . . . . .71
Stopping a Recording or a Session Playback . . . . . . . . . . . . . . . . . . . . . . . . . . . . . . . . . . . . . . . .72
Pausing/Resuming a Recording or Session Playback . . . . . . . . . . . . . . . . . . . . . . . . . . . . . . . . .73
Playing a Session . . . . . . . . . . . . . . . . . . . . . . . . . . . . . . . . . . . . . . . . . . . . . . . . . . . . . . . . . . . . .73
Play a Session by Tapping on Your Notes . . . . . . . . . . . . . . . . . . . . . . . . . . . . . . . . . . . . . . .74
Play a Session by Tapping on Notebook Buttons. . . . . . . . . . . . . . . . . . . . . . . . . . . . . . . . . .74
Play a Session using the Nav Plus . . . . . . . . . . . . . . . . . . . . . . . . . . . . . . . . . . . . . . . . . . . . .74
Controlling Session Playback . . . . . . . . . . . . . . . . . . . . . . . . . . . . . . . . . . . . . . . . . . . . . . . . . . . .76
Changing Playback Volume . . . . . . . . . . . . . . . . . . . . . . . . . . . . . . . . . . . . . . . . . . . . . . . . . .76
Jumping Forward and Backward. . . . . . . . . . . . . . . . . . . . . . . . . . . . . . . . . . . . . . . . . . . . . . .77
Speed Jumping. . . . . . . . . . . . . . . . . . . . . . . . . . . . . . . . . . . . . . . . . . . . . . . . . . . . . . . . . . . .77
Jumping to a Position . . . . . . . . . . . . . . . . . . . . . . . . . . . . . . . . . . . . . . . . . . . . . . . . . . . . . . .77
Changing Playback Speed . . . . . . . . . . . . . . . . . . . . . . . . . . . . . . . . . . . . . . . . . . . . . . . . . . .77
Setting Session Bookmarks. . . . . . . . . . . . . . . . . . . . . . . . . . . . . . . . . . . . . . . . . . . . . . . . . . . . . .78
Livescribe™ Smartpen User Guide vi
Page 7

Adding Bookmarks . . . . . . . . . . . . . . . . . . . . . . . . . . . . . . . . . . . . . . . . . . . . . . . . . . . . . . . . .78
Reviewing Bookmarks. . . . . . . . . . . . . . . . . . . . . . . . . . . . . . . . . . . . . . . . . . . . . . . . . . . . . . .78
Recording Paperless (Audio Only) Sessions. . . . . . . . . . . . . . . . . . . . . . . . . . . . . . . . . . . . . . . . .79
Annotating - Linking Notes to Pre-Recorded Sessions. . . . . . . . . . . . . . . . . . . . . . . . . . . . . . . . .80
Browsing Paper Replay™ Sessions . . . . . . . . . . . . . . . . . . . . . . . . . . . . . . . . . . . . . . . . . . . . . . .81
Deleting Paper Replay™ Sessions . . . . . . . . . . . . . . . . . . . . . . . . . . . . . . . . . . . . . . . . . . . . . . . .83
Deleting Sessions from the Smartpen Main Menu . . . . . . . . . . . . . . . . . . . . . . . . . . . . . . . . .83
Using the Delete Current Session Shortcut . . . . . . . . . . . . . . . . . . . . . . . . . . . . . . . . . . . . . .86
Using Background Recording . . . . . . . . . . . . . . . . . . . . . . . . . . . . . . . . . . . . . . . . . . . . . . . . . . . .86
Paper Replay Password . . . . . . . . . . . . . . . . . . . . . . . . . . . . . . . . . . . . . . . . . . . . . . . . . . . . . . . .87
7 Additional Applications. . . . . . . . . . . . . . . . . . . . . . . . . . . . . . . . . . . . . . . . . . .90
Basic Math Functions . . . . . . . . . . . . . . . . . . . . . . . . . . . . . . . . . . . . . . . . . . . . . . . . . . . . . . .91
Using Scientific Functions. . . . . . . . . . . . . . . . . . . . . . . . . . . . . . . . . . . . . . . . . . . . . . . . . . . .92
Using the Translator Demo . . . . . . . . . . . . . . . . . . . . . . . . . . . . . . . . . . . . . . . . . . . . . . . . . . . . . .93
Translator Demo Word List . . . . . . . . . . . . . . . . . . . . . . . . . . . . . . . . . . . . . . . . . . . . . . . . . . .93
Launching Translator Demo from the Nav Plus . . . . . . . . . . . . . . . . . . . . . . . . . . . . . . . . . . .95
Re-Launching Translator Demo . . . . . . . . . . . . . . . . . . . . . . . . . . . . . . . . . . . . . . . . . . . . . . .96
Using the Piano . . . . . . . . . . . . . . . . . . . . . . . . . . . . . . . . . . . . . . . . . . . . . . . . . . . . . . . . . . . . . . .98
Launching Piano from the Nav Plus . . . . . . . . . . . . . . . . . . . . . . . . . . . . . . . . . . . . . . . . . . . .98
Drawing a Piano . . . . . . . . . . . . . . . . . . . . . . . . . . . . . . . . . . . . . . . . . . . . . . . . . . . . . . . . . . .99
Choosing an Instrument (PIano Sound) . . . . . . . . . . . . . . . . . . . . . . . . . . . . . . . . . . . . . . . .102
Choosing a Background Rhythm Track . . . . . . . . . . . . . . . . . . . . . . . . . . . . . . . . . . . . . . . .102
Getting New Applications . . . . . . . . . . . . . . . . . . . . . . . . . . . . . . . . . . . . . . . . . . . . . . . . . . . . . .103
8 Livescribe™ Desktop and Livescribe™ Online . . . . . . . . . . . . . . . . . . . . . . .106
9 Working with Dot Paper Products . . . . . . . . . . . . . . . . . . . . . . . . . . . . . . . . .107
Checking Paper Product Usage . . . . . . . . . . . . . . . . . . . . . . . . . . . . . . . . . . . . . . . . . . . . . . . . .108
About Livescribe™ Dot Paper Naming . . . . . . . . . . . . . . . . . . . . . . . . . . . . . . . . . . . . . . . . . . . .108
Livescribe™ Smartpen User Guide vii
Page 8

Using Notebooks with Same Names and Numbers . . . . . . . . . . . . . . . . . . . . . . . . . . . . . . . . . .109
Using Packs of Notebooks and Journals. . . . . . . . . . . . . . . . . . . . . . . . . . . . . . . . . . . . . . . . . . .109
Archiving Paper Products . . . . . . . . . . . . . . . . . . . . . . . . . . . . . . . . . . . . . . . . . . . . . . . . . . . . . .110
10 Regulatory Information. . . . . . . . . . . . . . . . . . . . . . . . . . . . . . . . . . . . . . . 111
Description of ESD . . . . . . . . . . . . . . . . . . . . . . . . . . . . . . . . . . . . . . . . . . . . . . . . . . . . . . . . 114
ESD-Susceptible Equipment. . . . . . . . . . . . . . . . . . . . . . . . . . . . . . . . . . . . . . . . . . . . . . . . . 114
Precautions against ESD . . . . . . . . . . . . . . . . . . . . . . . . . . . . . . . . . . . . . . . . . . . . . . . . . . .114
11 Product Safety and Maintenance . . . . . . . . . . . . . . . . . . . . . . . . . . . . . . .118
12 Frequently Asked Questions . . . . . . . . . . . . . . . . . . . . . . . . . . . . . . . . . .120
Recording Notes and Audio. . . . . . . . . . . . . . . . . . . . . . . . . . . . . . . . . . . . . . . . . . . . . . . . . . . . .120
Can I capture notes without recording audio?. . . . . . . . . . . . . . . . . . . . . . . . . . . . . . . . . . . .120
Can I record audio without Livescribe dot paper?. . . . . . . . . . . . . . . . . . . . . . . . . . . . . . . . .120
Can I add new notes to the audio that I’ve already recorded? . . . . . . . . . . . . . . . . . . . . . . .120
How do I change the audio recording quality? . . . . . . . . . . . . . . . . . . . . . . . . . . . . . . . . . . .120
Smartpen Accessories. . . . . . . . . . . . . . . . . . . . . . . . . . . . . . . . . . . . . . . . . . . . . . . . . . . . . . . . .121
How do I replace my ink cartridge?. . . . . . . . . . . . . . . . . . . . . . . . . . . . . . . . . . . . . . . . . . . .121
Livescribe Desktop . . . . . . . . . . . . . . . . . . . . . . . . . . . . . . . . . . . . . . . . . . . . . . . . . . . . . . . . . . .121
How do I organize my notes? . . . . . . . . . . . . . . . . . . . . . . . . . . . . . . . . . . . . . . . . . . . . . . . .121
What can I share?. . . . . . . . . . . . . . . . . . . . . . . . . . . . . . . . . . . . . . . . . . . . . . . . . . . . . . . . .122
How do I share my pencasts as .pencast files? . . . . . . . . . . . . . . . . . . . . . . . . . . . . . . . . . .122
How can I share pencasts using a MyLivescribe accoun t?. . . . . . . . . . . . . . . . . . . . . . . . . .123
How do I share my notes as a PDF? . . . . . . . . . . . . . . . . . . . . . . . . . . . . . . . . . . . . . . . . . .124
How do I share my recordings into an audio file?. . . . . . . . . . . . . . . . . . . . . . . . . . . . . . . . .124
How do I get the latest software updates? . . . . . . . . . . . . . . . . . . . . . . . . . . . . . . . . . . . . . .125
Can I convert my handwriting into text? . . . . . . . . . . . . . . . . . . . . . . . . . . . . . . . . . . . . . . . .125
Can I use my smartpen with more than one computer? . . . . . . . . . . . . . . . . . . . . . . . . . . . .125
How do I print my own dot paper? . . . . . . . . . . . . . . . . . . . . . . . . . . . . . . . . . . . . . . . . . . . .125
Can I change the date and time format?. . . . . . . . . . . . . . . . . . . . . . . . . . . . . . . . . . . . . . . .126
Livescribe™ Smartpen User Guide viii
Page 9

Smartpen Shortcuts. . . . . . . . . . . . . . . . . . . . . . . . . . . . . . . . . . . . . . . . . . . . . . . . . . . . . . . . . . .126
Double-tap. . . . . . . . . . . . . . . . . . . . . . . . . . . . . . . . . . . . . . . . . . . . . . . . . . . . . . . . . . . . . . .126
Draw your own Nav Plus. . . . . . . . . . . . . . . . . . . . . . . . . . . . . . . . . . . . . . . . . . . . . . . . . . . .126
Flick and Scrub (quickly scroll through menu items). . . . . . . . . . . . . . . . . . . . . . . . . . . . . . .126
Quick Launch (jump to an application and quickly launch it) . . . . . . . . . . . . . . . . . . . . . . . .127
Launch Line. . . . . . . . . . . . . . . . . . . . . . . . . . . . . . . . . . . . . . . . . . . . . . . . . . . . . . . . . . . . . .127
Paper Replay™ Password . . . . . . . . . . . . . . . . . . . . . . . . . . . . . . . . . . . . . . . . . . . . . . . . . . . . .127
13 Glossary. . . . . . . . . . . . . . . . . . . . . . . . . . . . . . . . . . . . . . . . . . . . . . . . . .129
14 Getting Help . . . . . . . . . . . . . . . . . . . . . . . . . . . . . . . . . . . . . . . . . . . . . . .133
Livescribe Online Support . . . . . . . . . . . . . . . . . . . . . . . . . . . . . . . . . . . . . . . . . . . . . . . . . . . . . .133
User Guides and Release Notes. . . . . . . . . . . . . . . . . . . . . . . . . . . . . . . . . . . . . . . . . . . . . .134
Knowledge Base (KB). . . . . . . . . . . . . . . . . . . . . . . . . . . . . . . . . . . . . . . . . . . . . . . . . . . . . .134
Forum . . . . . . . . . . . . . . . . . . . . . . . . . . . . . . . . . . . . . . . . . . . . . . . . . . . . . . . . . . . . . . . . . .134
Contacting Customer Service . . . . . . . . . . . . . . . . . . . . . . . . . . . . . . . . . . . . . . . . . . . . . . . . . . .134
Saving Data for Customer Service . . . . . . . . . . . . . . . . . . . . . . . . . . . . . . . . . . . . . . . . . . . .134
Returning Livescribe Products. . . . . . . . . . . . . . . . . . . . . . . . . . . . . . . . . . . . . . . . . . . . . . . . . . .135
Items Purchased Directly from Livescribe. . . . . . . . . . . . . . . . . . . . . . . . . . . . . . . . . . . . . . .135
Items Purchased from a Third Party. . . . . . . . . . . . . . . . . . . . . . . . . . . . . . . . . . . . . . . . . . .135
Livescribe™ Smartpen User Guide ix
Page 10
1 Introducing the Livescribe™
Smartpen
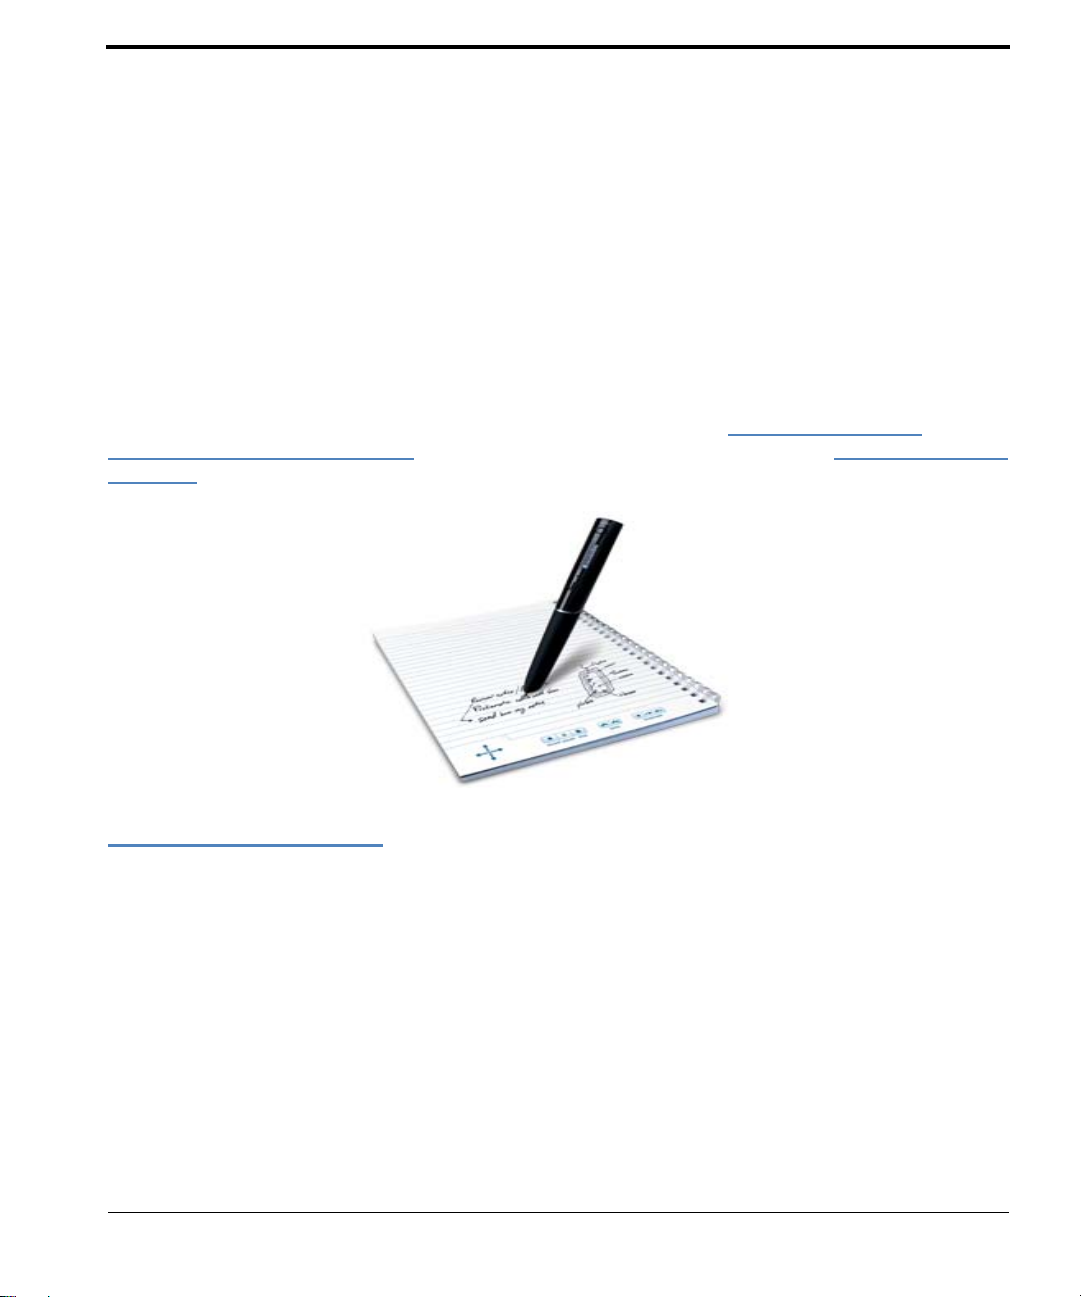
Congratulations on the purchase of your new Livescribe™ smartpen. This topic introduces you to the
Livescribe™ smartpen. To set up and begin using your smartpen, see
Livescribe™ Smartpen on page 16. To learn about what is new in this re lease, see New in this V ersion
on page 4.
Getting to Know Your
Livescribe Smartpen
Livescribe is fundamentally changing the way people capture, access and share information with pen
and paper. Livescribe has developed a breakthrough low-cost mobile computing platform, which
includes the award-winning Livescribe smartpen, dot paper , smartpen applications, Livescri be Desktop
software, Livescribe Online Community, and development tools.
The Livescribe™ smartpen is an advanced paper-based computer in the form of a pen that records
verything you hear and write. It synchronizes the audio your hear to what you write, so you neve r
e
miss a word. Just tap on your notes and the smartpen will play back what you recorded from that exact
moment in time.
Livescribe™ Smartpen User Guide 1
Page 11

Livescribe™ Dot Paper
The smartpen provides both audio and visual feedback, powerful processing capabilities, and
substantial built-in storage. The smartpen integrates several components and technologies. It also
uses firmware and application software to support the interaction of all of its components and to enable
built-in handwriting recognition, and applications such as Paper Replay™, among many others.
When you power on your Livescribe smartpen and
smartpen captures and stores the notes you write. To capture your writing, the smartpen uses its builtin infrared camera to take digital snap sh ot s of a special do t p atter n on the p ap er as the tip move s over
the paper while you write. See
When recording audio in a Paper Replay™ session, the smartpen links the recorded audio to your
tes based on the dot pattern on the page. With this information, the smartpen can play back the
no
audio that was recorded at the exact time you were writing your notes. Specifically, when you tap on
your notes with the smartpen, it locates the position where you are tapping and starts to play back the
audio at the position linked to that paper location.
Livescribe™ Dot Paper on page 2 for information about the dot pattern.
begin writing on Livescribe™ dot paper, the
Livescribe™ Dot Paper
To perform its many operations, your Livescribe smartpen requires Livescribe™ dot paper. This paper
is standard paper with printed microd ots on its surface. These dots are nearly invisible to the human
eye. However, the smartpen can easily see these dots and uses them to know which page you are
writing on and the exact location on that page. The smartpen can even see these dots through the ink
you write on your pages.
The microdot pattern on each page is based o n technolog
small dots (100 micrometers in diameter) arranged with a spacing of approximately 0.3 mm. The dot
pattern overlays an imaginary square grid. The dots are slightly displaced from the grid, with each dot
in one of four possible positions, forming the proprietary Anoto dot pattern.
y from Anoto AB. This dot pattern consists of
The dot pattern identifies the specific
Livescribe smartpen uses the dot pattern in a way similar to a geogra phica l positioning system (GPS).
But, instead of identifying locations on land, it finds locations on paper and stores yo ur writing as digit al
Livescribe™ Smartpen User Guide 2
page and locations on the page of the notes you write. Your
Page 12

Livescribe™ Dot Paper
ink using those locations. Using this patented dot-positioning system (DPS), the smartpen precisely
tracks its own movement on paper. As a result, anything you write – words, numbers or drawings – can
be stored, recognized, and intelligently responded to by the smartpen.
The area of the entire Anoto dot pattern is huge, and r epresent s a piece of p aper the combined size o f
Europe and Asia. Livescribe™ dot paper is based on a portion of this dot pattern.
Livescribe™ Smartpen User Guide 3
Page 13

2 New in this Version
In this version, Livescribe added new features and made improvements to correct known issues,
improve usability, and optimize performance. For detailed information about this release, read the
Release Notes
New Features
The following new features have been added in this version.
Support for Livescribe Paper Tablet
The Livescribe Paper Tablet enables your Echo smartpen to work as an input device on your computer. The Pape r Tablet is similar to a graphics tablet. You connect your smartpen to your computer
using its micro-USB cable and use it like a stylus. You then use one or more pages from a Livescr ibe™
dot paper product as the tablet. The Paper Tablet is available for purchase from the Livescribe Store
and from Livescribe retailers as a redeemable application card. To learn how to use the Paper Tablet,
download the Livescribe Paper Tablet User Guide from the Livescribe Store.
located here: www.livescribe.com/releasenotes.
Livescribe Sticky Notes
Livescribe Sticky Notes take the familiarity and convenience of sticky notes—small pieces of paper
with a strip of repositionable adhesive on the back—and add the power of Live scribe dots.
Y ou can quickly capture short n otes, lists, and reminder s while adding audio to them. Att ach Livescribe
Sticky Notes to any printout, magazine, or book page to add personalized interactive notes. As with
other Livescribe dot paper products, transfer your Sticky Notes to your desktop comput er to orga nize ,
search, or share them with others.
Livescribe™ Smartpen User Guide 4
Page 14

Sticky Notes pads come in two sizes. The 3”x3” Livescribe Sticky Note looks like this:
New Features
The 3” x 5” Livescribe Sticky Note looks like this:
Livescribe™ Smartpen User Guide 5
Page 15
New Features
Packs and Pads
Each pad of Livescribe Sticky Notes contains 75 sheets. Pads are sold in packs of six: three pads of
3”x3” and three pads of 3”x5”.
Use only one Livescribe pack at a time.
You should proceed as follows:
1. Use up all the pads in one pack.
2. Archive the pads.
3. Op e n a ne w pack.
Your smartpen can carry up to 6 pads (Sticky Notes
1, 2, 3) at the same time. When you are done with all six pads, archive them with Livescribe Desktop
fore starting a new 6-pack. Please do not use identical pads from different 6-packs at the same time,
be
because your smartpen will recognize them as the same pad.
To lear n ab out ar ch ivin g, see
New Buttons
Livescribe Sticky Notes come with the familiar Nav Plus and Paper Replay buttons printed along the
bottom edge. Along the top edge, Sticky Notes have buttons that are new to the Livescribe paper
product line.
The Home Button
shows the current time).
stops the current smartpen application and returns yo u to the default display (which
Archiving Paper Products on page 110.
3”x3” Pads 1, 2, 3 and Sticky Notes 3”x5” Pads
Livescribe™ Smartpen User Guide 6
Page 16

New Features
The three Shortcut Buttons have functionality that you assign to them.
To lear n mo re, se e Home Button on page 7 and Shortcut Buttons on page 10.
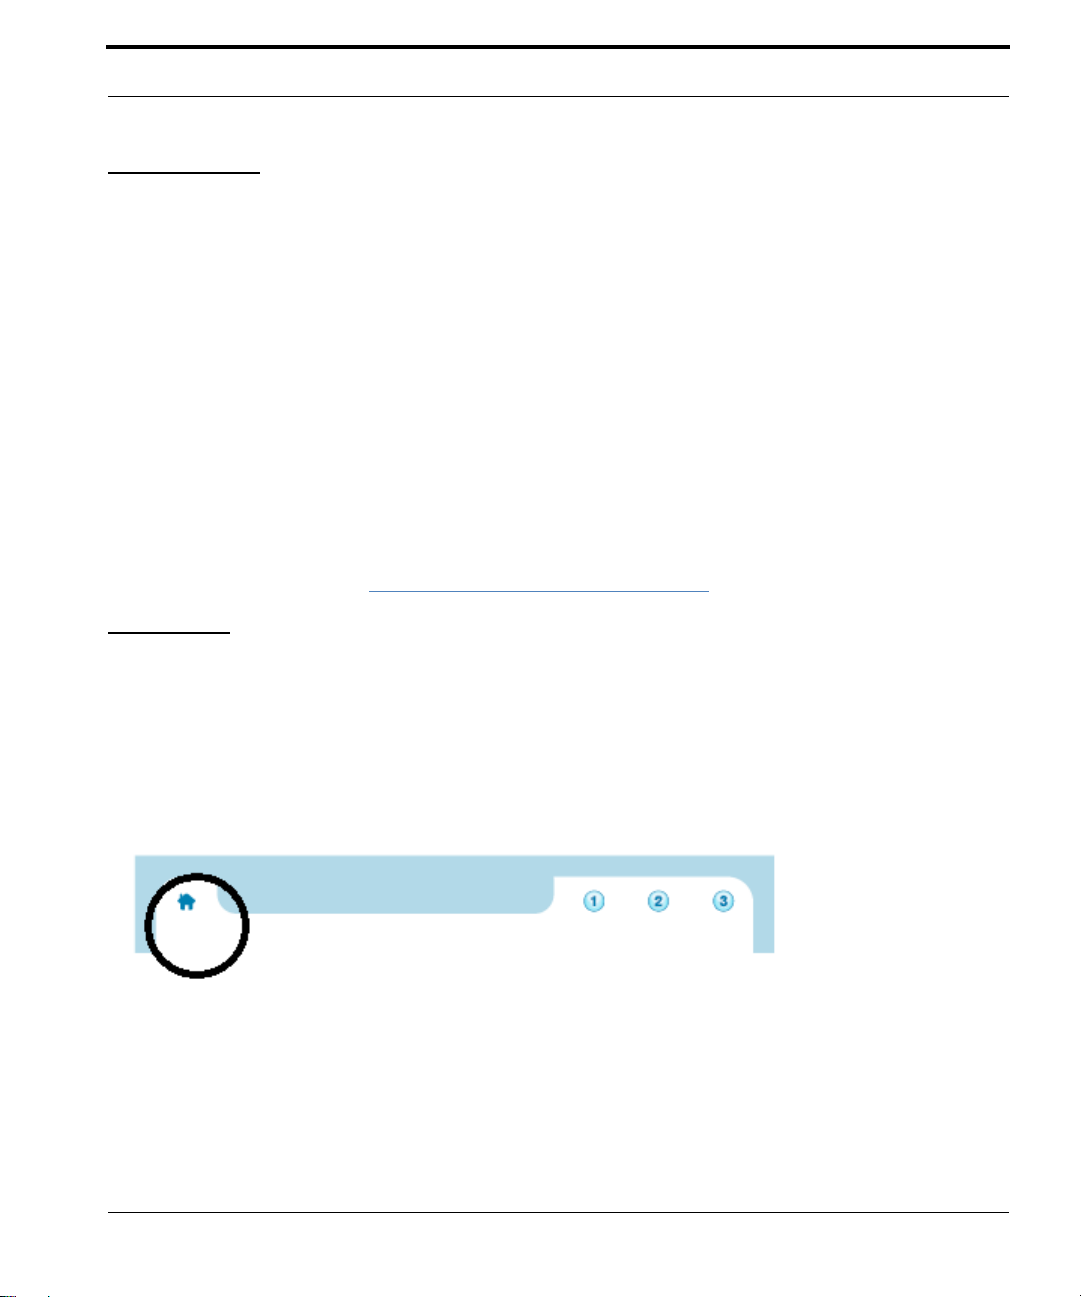
Home Button
Tapping on the Home Button stops the currently runn in g sm ar tp en applica tio n and retu rn s th e smar tpen to its default mode: The current time is showing
whatever you write on Open Paper.
Home Button in New and Old Livescribe Notebooks
on the display and the smartpen is ready to store
On Livescribe Sticky Notes and newer Livescribe notebooks and journals, the Home Button is represented by the icon of a house. For an illustration of the hous
Although new in this version, the Home Button fu
nctionality is available on older Livescribe notebooks
e icon, see New Buttons on page 6.
as well. Instead of a house, however, look for a faintly printed circle to the right of the pre-printed Nav
Plus in the corner of each page. The black arrow in the following illustration points to the circle that acts
as the Home Button.
Livescribe™ Smartpen User Guide 7
Page 17
New Features
Double-Tap Can Be Set by You
Besides single-tapping on the Home B utton, you ca n also double-t ap on it. By default, both actions do
the same thing. However, you can assign different functionality to double-tapping the Home Button.
You can assign any Open Paper smartpen applicatio n or Qu ick Comman d. For in stance, if you do lots
of calculations, you might want to go to Calc Quick Command when you double -tap on the Home But-
ton.
To set the Ho
Command:
me Button to launch an Open Paper smartpen application or perform a Quick
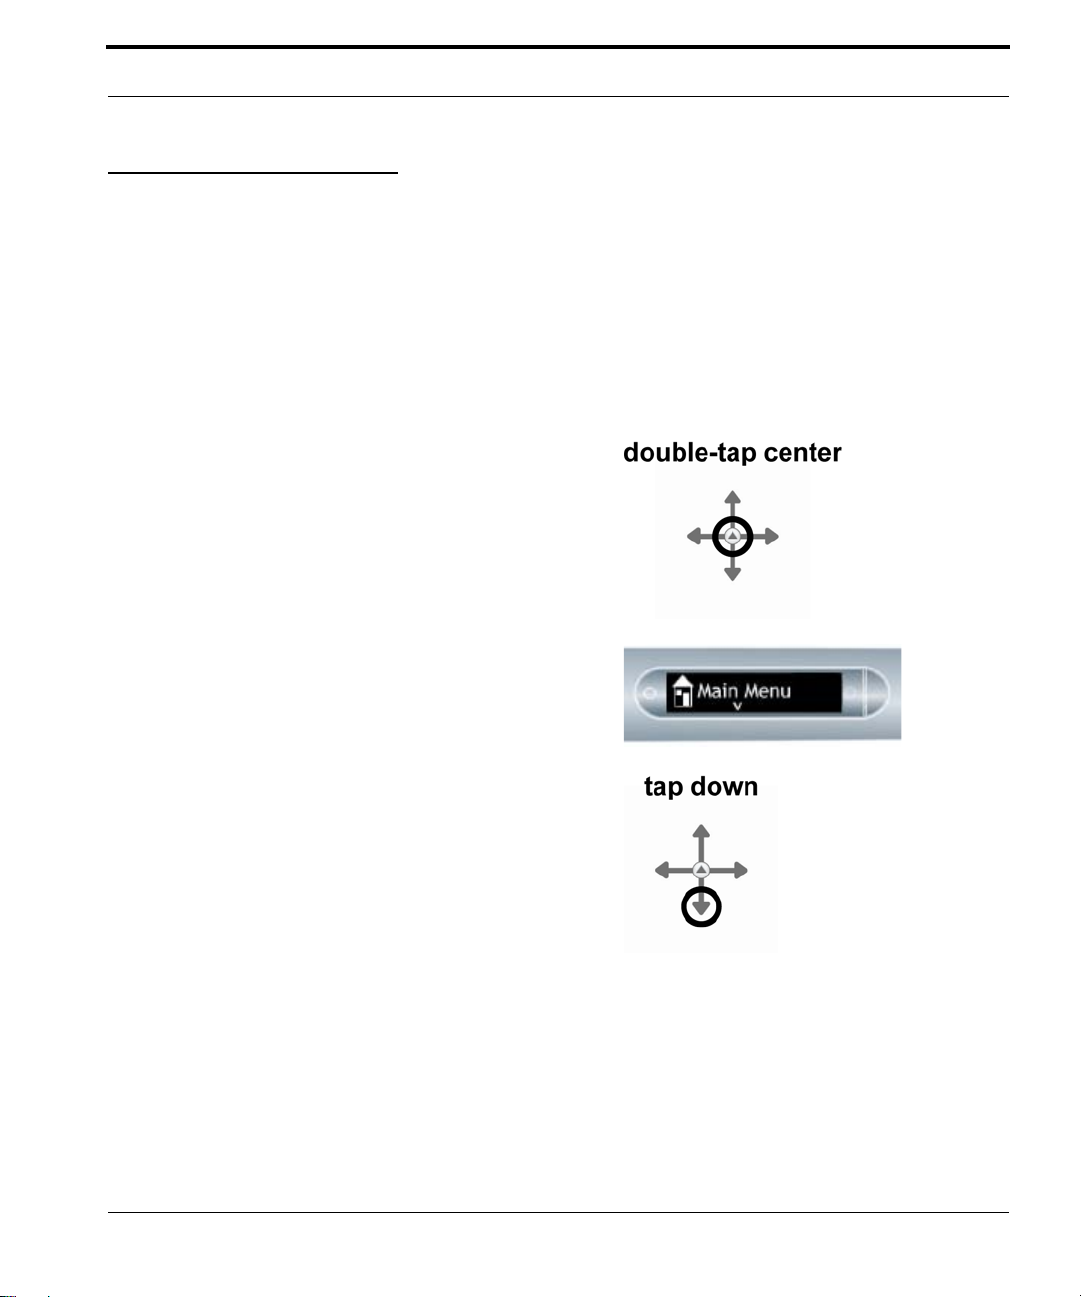
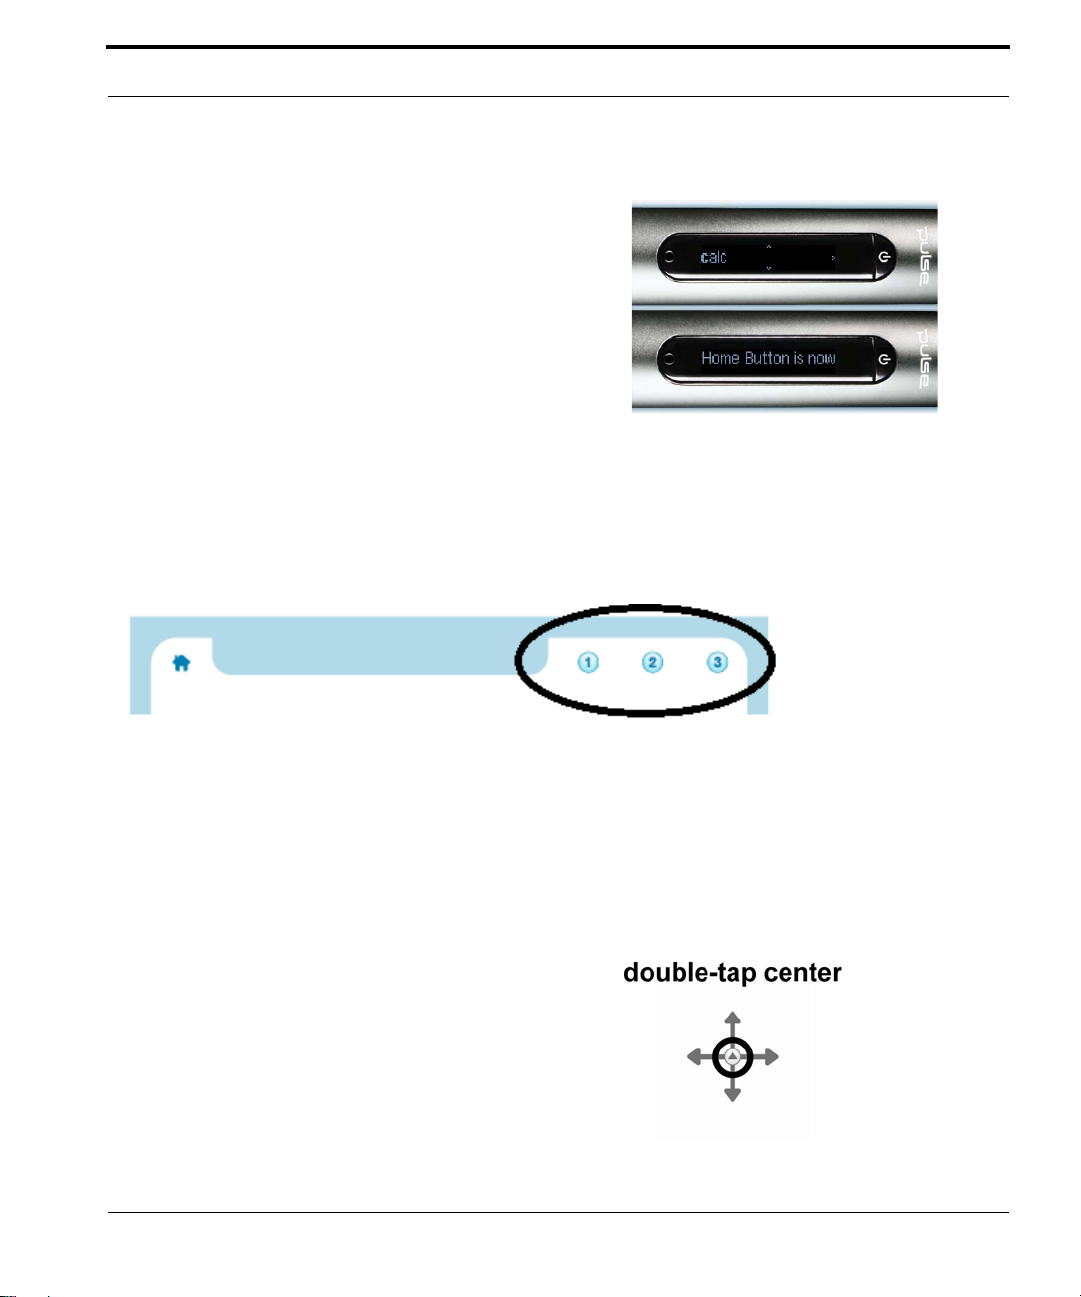
1. Double-tap the center of the Nav Plus. A double-tap
is two taps in quick succession.
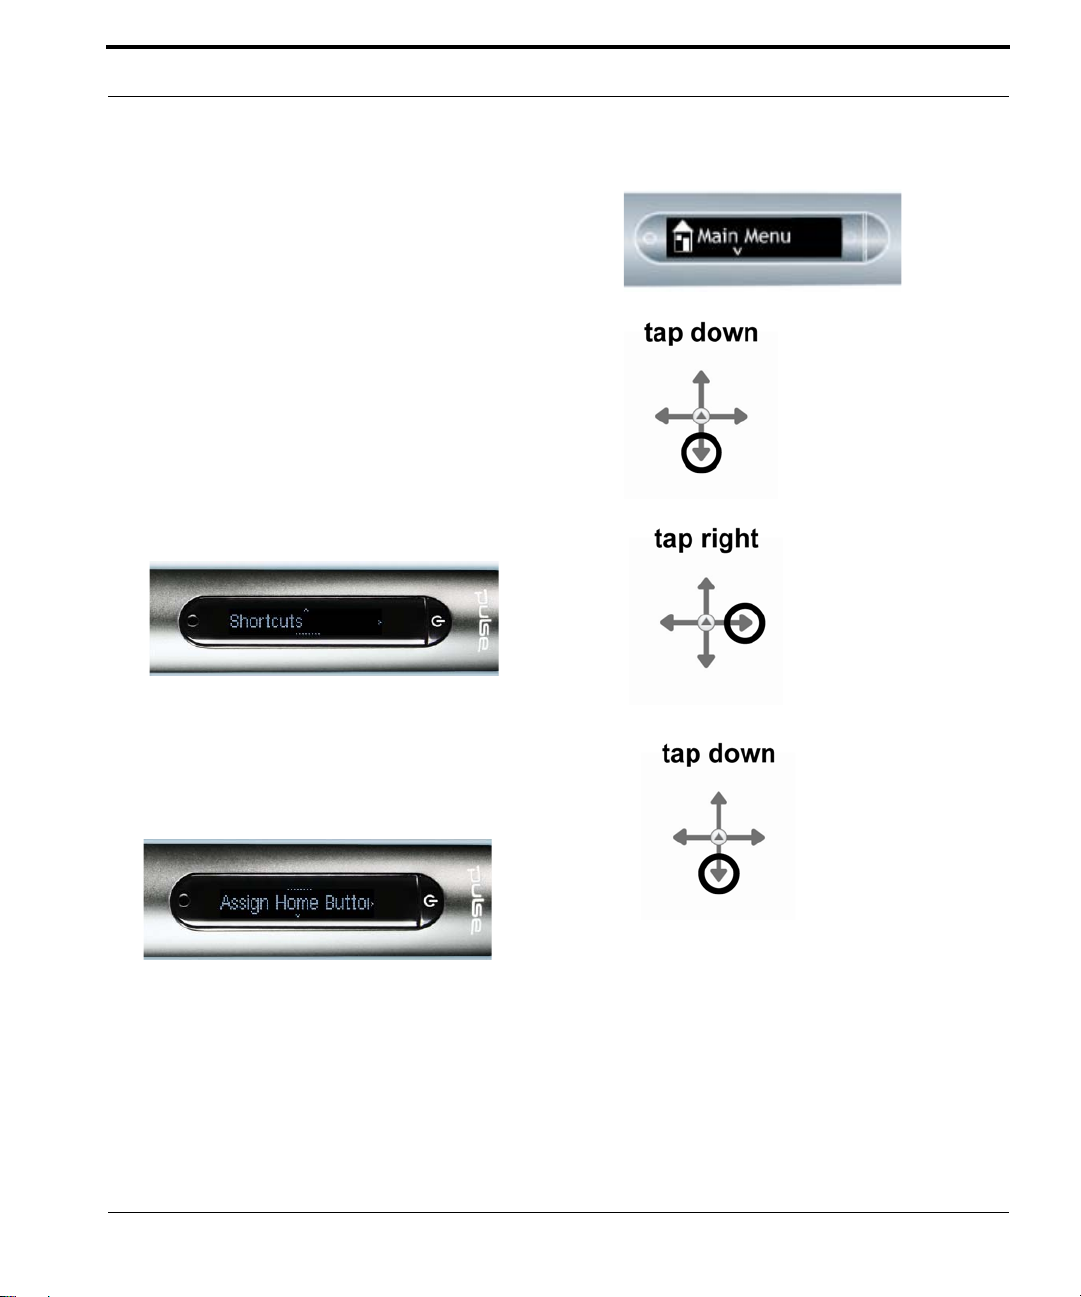
2. Main Menu will be displayed on the Livescribe
smartpen.
3. Tap do wn on the directional ar row of the Nav Plus to
scroll through a list of applications on the Livescribe
smartpen.
Livescribe™ Smartpen User Guide 8
Page 18
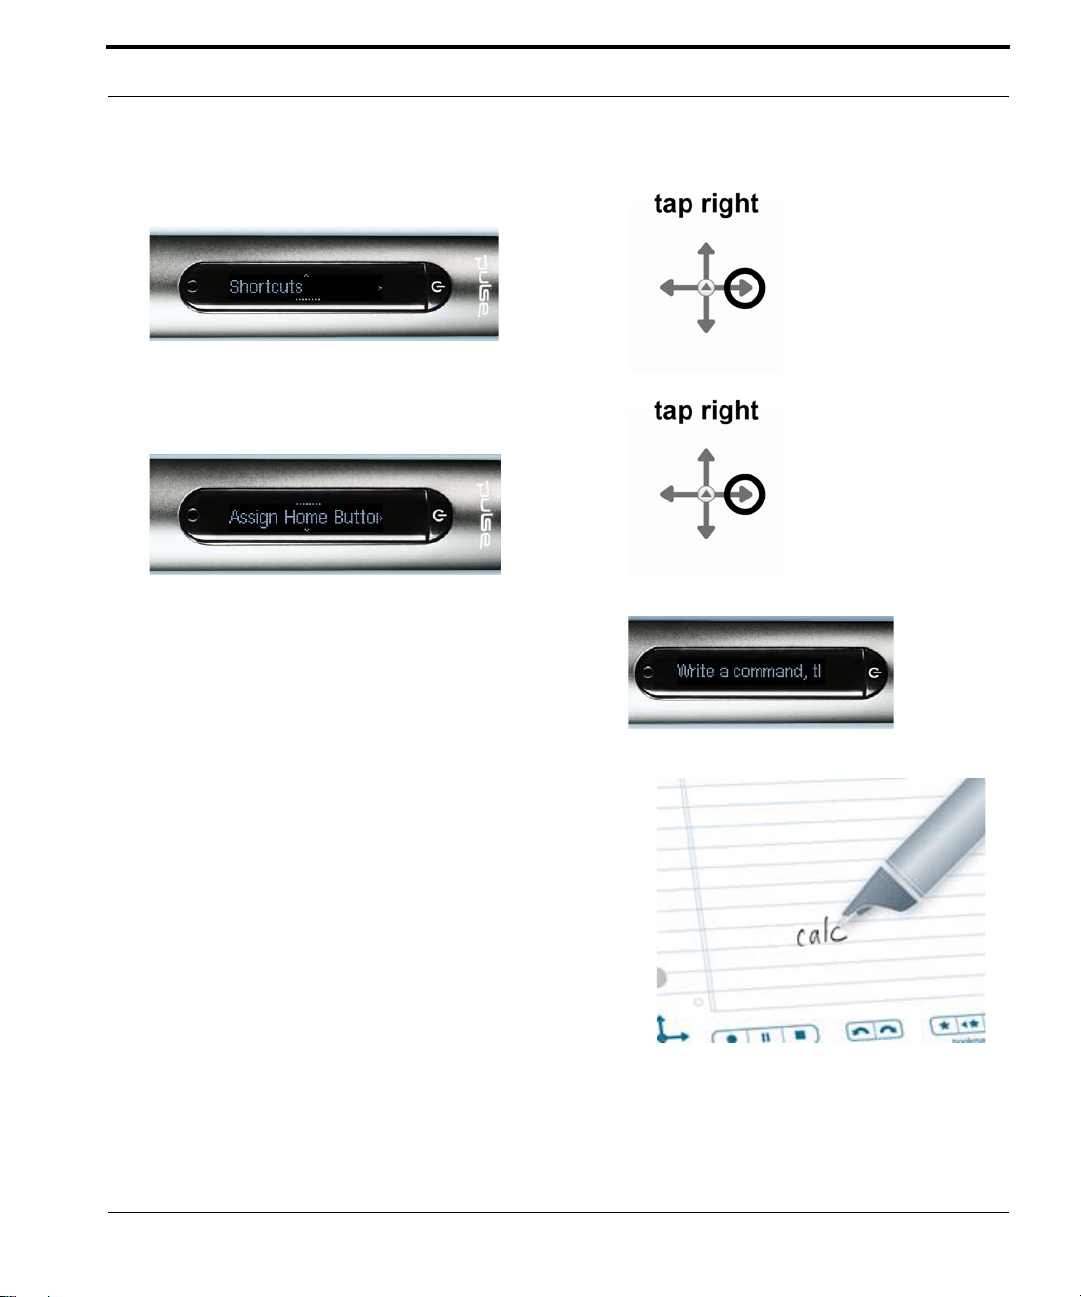
4. When Shortcuts is displayed, tap right to select it.
5. The display will scroll: Assign Home Button
double-tap. Tap right.
6. The display will scroll: Write a command, then
double-tap. You can write an application name or
a Quick Command.
New Features
7. Write any Open Paper smartpen application name
or write a Quick Command. For instance, write calc
NOTE: Do not double-tap the center of the Nav Plus or
write a doubled-back horizontal line. Write only
the letters that make up the Quick Command.
Livescribe™ Smartpen User Guide 9
Page 19
New Features
8. The display will briefly display the smartpen
application name or Quick Command. Then it will
confirm the new assignment.
For instance, it will briefly
Command. Then it will start scrolling:
Home Button is Now Assigned To [calc]
show the Calc Quick
Shortcut Buttons
Shortcut Buttons appear on some of the newer Livescribe™ dot p aper products, such as Livescribe
Sticky Notes. They are labeled with successive numbers: 1, 2, 3, etc.
You can assign functionality to the Shortcut Buttons, just as you can assign functionality to double-
tapping the Home Button. Assign any Open paper smartpen application or Quick Command to a
Shortcut Button.
To set Sh
Command:.
ortcut Button 1 follow these steps. We will set Shortcut Button 1 to the Calc Quick
1. Double-tap the center of the Nav Plus. A double-tap
is two taps in quick succession.
Livescribe™ Smartpen User Guide 10
Page 20
2. Main Menu will be displayed on the Livescribe
smartpen.
3. Tap do wn on the directional ar row of the Nav Plus to
scroll through a list of applications on the Livescribe
smartpen.
4. When Shortcuts is displayed, tap right to select it.
New Features
5. The display will scroll:
Assign Home Button double-tap.
Tap down to display Ass
(Tap down again to display Ass
Livescribe™ Smartpen User Guide 11
ign Shortcut 1.
ign Shortcut 2, etc.)
Page 21
New Features
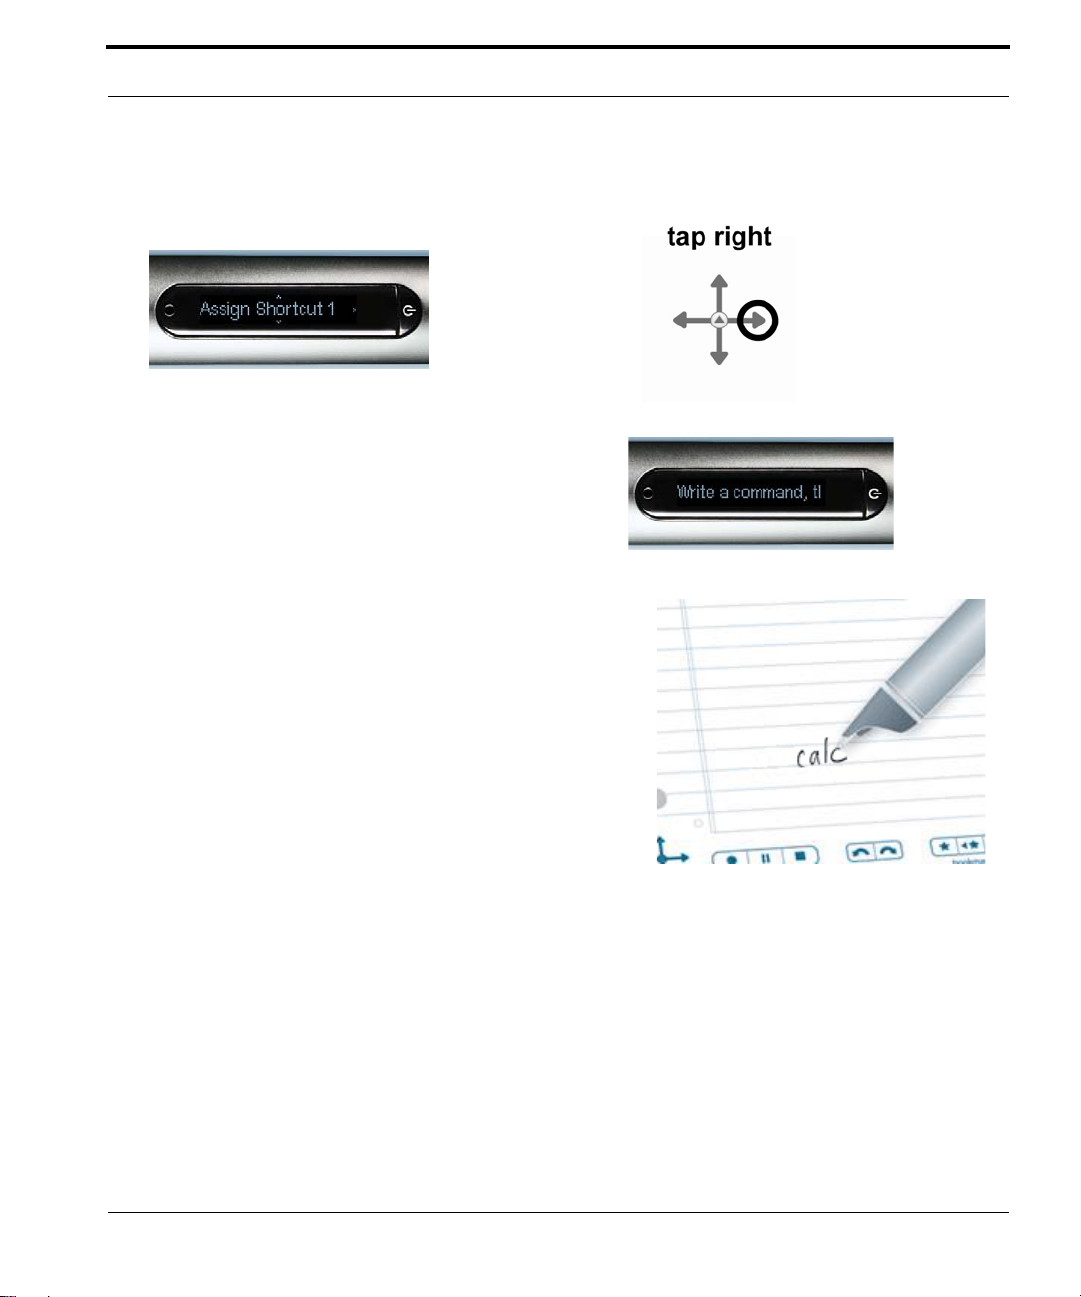
6. When you see the number of the shortcut you wish
to set, tap right.
7. The display will scroll: Write a command, then
double-tap. You can write an application name or
a Quick Command.
8. Write any Open Paper smartpen application name
or write a Quick Command. For instance, write calc
NOTE: Do not double-tap the center of the Nav Plus or
write a doubled-back horizontal line. Write only
the letters that make up the Quick Command.
Livescribe™ Smartpen User Guide 12
Page 22

9. The display will briefly show the smartpen
application name or Quick Command. Then it will
confirm the new assignment.
For instance, it will briefly
Command. Then it will start scrolling:
Shortcut Button 1 is Now Assigned To [calc]
Tapping on an Unassigned Shortcut Button
show the Calc Quick
New Features
Unlike the Home Button, the Shortcut Buttons have no default assignments. If you tap on an
unassigned Shortcut Button, the following message displays on the smartpen: To assign this
shortcut, tap and hold the button, then write the name of an application or Quick Command.
To set an unassigned Short
cut Button by tapping directly on it, follow these steps. We will set
Shortcut Button 1 to the Calc Quick Command.
1. Tap and hold the Shortcut Button you want to set
for three seconds—for instance, tap and hold
Shortcut Button 1.
Livescribe™ Smartpen User Guide 13
Page 23

2. The display will scroll: Write a command, then
double-tap. You can write an application name or
a Quick Command.
New Features
3. Write any Open Paper smartpen application name
or write a Quick Command. For instance, write calc
NOTE: Do not double-tap the center of the Nav Plus or
write a doubled-back horizontal line. Write only
the letters that make up the Quick Command.
4. The display will briefly show the smartpen
application name or Quick Command. Then it will
confirm the new assignment.
For instance, it will briefly
Command. Then it will start scrolling:
Shortcut Button 1 is Now Assigned To [calc]
show the Calc Quick
If you accidentally tap on an u nassigned Shortcu t Button and you do not wish to set it at this time, tap
on any Open Paper.
Livescribe™ Smartpen User Guide 14
Page 24

Improvements and Corrected Issues
Improvements and Corrected Issues
Smartpen performance has been optimized is several ways. Also, several existing features of the
smartpen software have been refined to increase intuitiveness and flexibility.
Performance Improvement
• Faster booting: When powering on, the smartpen loads its software more quickly and is ready to
use in less time.
• Faster transfer speed: Data transfer to and from the smartpen occurs at a faster rate.
• Faster file access in Echo: The Echo smartpen reads data from and writes data to its file system
more efficiently, improving responsiveness in the loading and operation of smartpen applications.
Left-Tap: Exit the Way You Came In
Left-tap is the way to the exit on the smartpen. You can tap left on the directional erro r of a Nav Plus to
exit a smartpen application or a Quick Command. You can also exit by left-tapping around any Launch
Lines you drew. See
Launch Line and Tap Around on page 67.
In this version of the smartpen software, the re sults of lef t-tapp ing in any situation were stan dardized to
be intuitive and helpful. If you are curious, the rule is: You exit the way you came in. This means that
left-tapping leads you back toward your starting place:
• If you started by tapping Nav Plus and navigating the Main Menu, then left-tap leads you back to
the Main Menu.
• If you started by drawing a Launch Line or Quick Command on Open Paper, then we assume you
do not care about the Main Menu right now: the current time is displayed instead.
• In either case, you end up in the same state: no app lication is run ning and th e smartpen is r eady to
store the next thing you write on Open Paper.
NOTE: Left-tapping from the submenu of a smartpen application or Quick Command backtracks up the
menu hierarchy toward the root level. Left-tappin g from the root level jump s to Main Menu or the
current time display, as described above.
N
OTE: The root level of a launched application is the initial menu displayed when you launch the
application. The root level of a running Quick Comma nd is the list dis playe d wh en you exec ut e
the Quick Command. In the case of Paper Replay when launched explicitly, the root level is the
initial menu containing items such as Record New Session, Play Session, etc. The root level of
the play Quick Command is the”Play Session” list of Paper Replay.
Livescribe™ Smartpen User Guide 15
Page 25

3 Getting to Know Your Livescribe™
Smartpen
This topic introduces you to the features of your Livescribe smartpen and provides step-by-step
instructions for setting it up and using it to capture your handwritten notes and recorded audio.
What is in the Box?
• Livescribe™ smartpen
• Starter Livescribe Dot paper notebook
• Interactive Getting Started Guide
• Ink cartridges
• Micro-USB cable (Echo™ smartpen only)
• Smartpen cap (Echo™ smartpen only)
• 3-D Recording Headset (Pulse™ smartpen only)
• USB mobile charging cradle (Pulse™ smartpen only)
• Protective soft case (Pulse™ smartpen only)
Other things get:
• A Warranty (See Warranty Information on page 115)
• Free downloads of Livescribe™ Desktop for Windows and Mac OS X.
• Free sign-up for a Livescribe Online account with 500 MB of online space to store and share your
smartpen content.
Livescribe™ Smartpen User Guide 16
Page 26
Identifying Your Livescribe™ Smartpen Model
Identifying Your Livescribe™ Smartpen Model
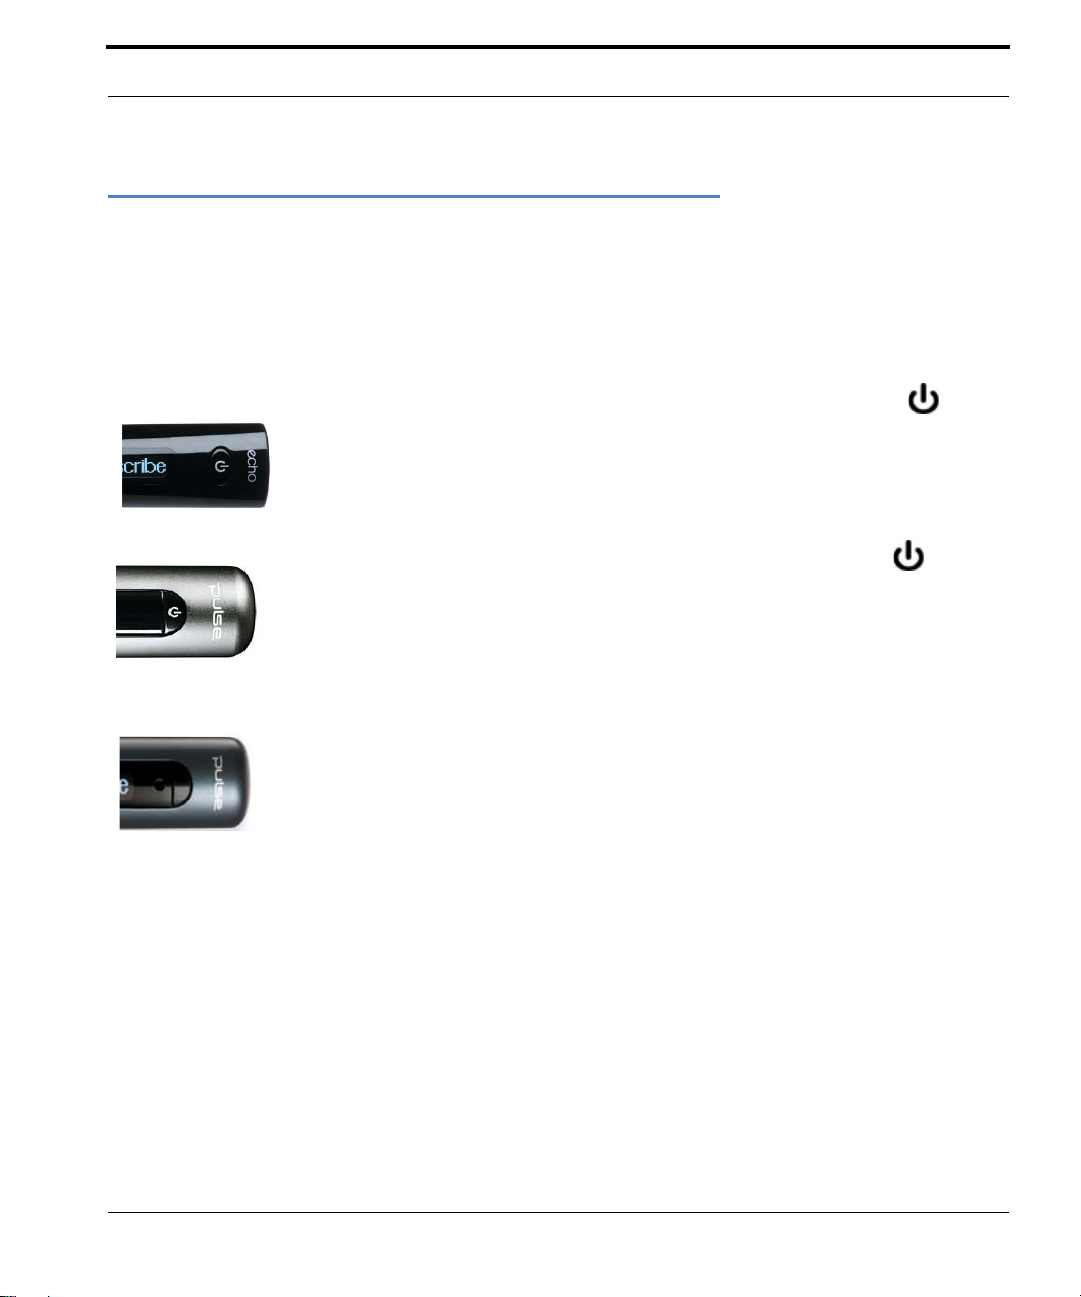
There are two Livescribe smartpen models: the Echo™ smartpen and the Pulse™ smartpen. Use the
table below to identify your model.
Smartpen Model Color Power Symbol
Black
Echo™ smartpen
Power button has a printed power symbol .
Pulse™ smartpen
Pulse™ smartpen
Titanium and Black Pro Pack
(Special Edition) Power button has printed power symbol
Charcoal-Blue Power button does not have a printed power symbol.
.
Livescribe™ Smartpen User Guide 17
Page 27
Anatomy of a Smartpen
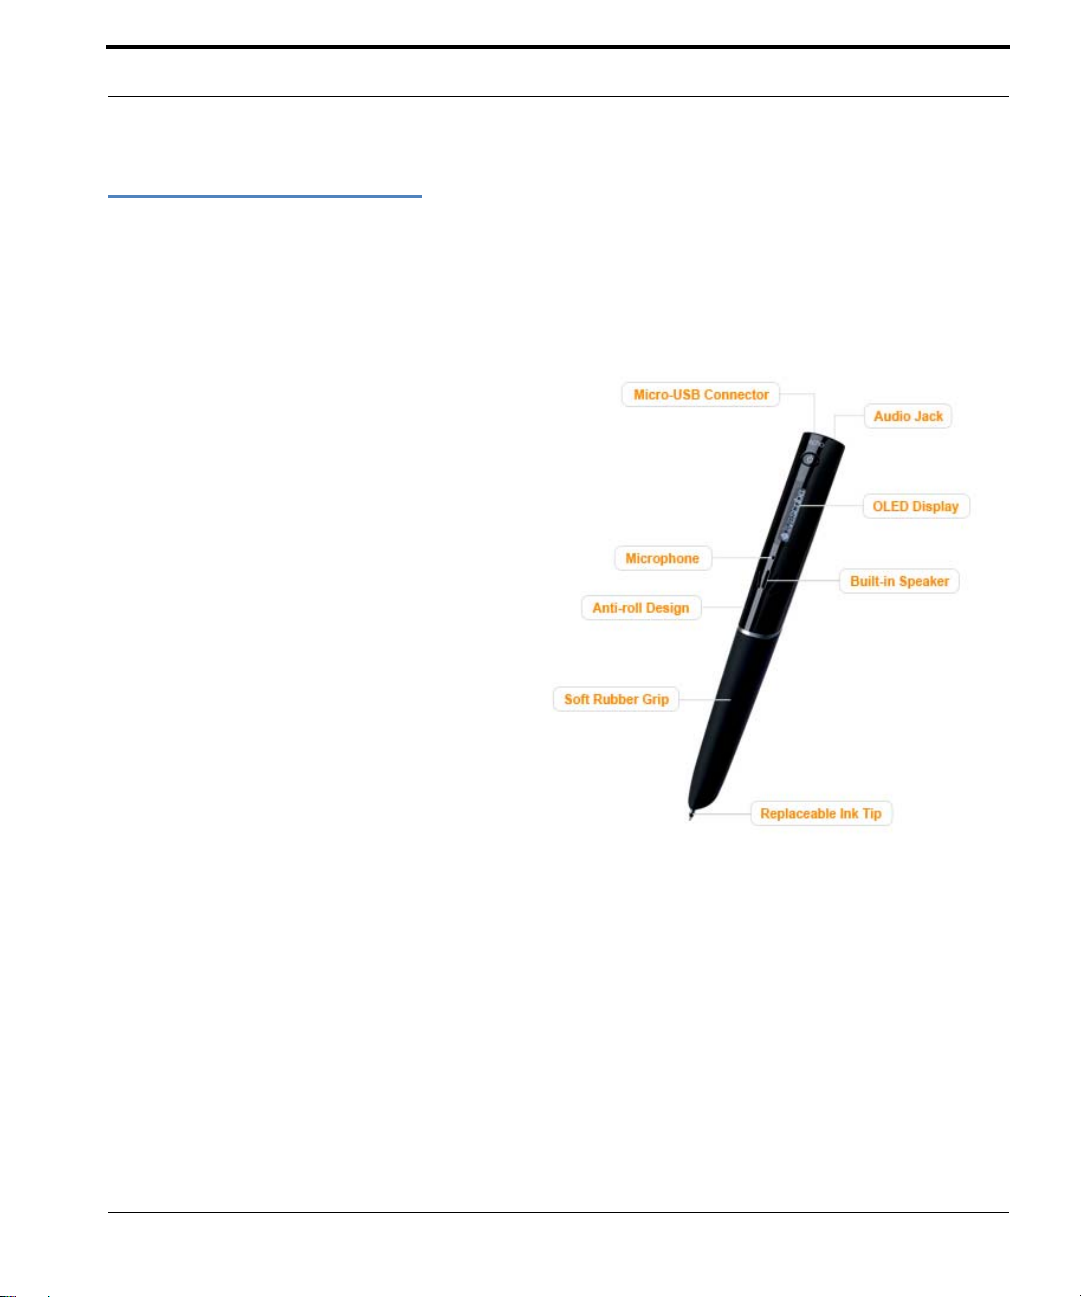
Anatomy of a Smartpen
If you own an Echo™ smartpen, use the diagram below to learn about its components.
• Micro-USB connector
• Headset/Audio jack
• Organic Light-Emitting Diode (OLED)
display
• Built-in microphone
• Built-in speaker
• Anti-roll design
• Soft rubber grip
• Replaceable ink tip
• Echo smartpen cap
Livescribe™ Smartpen User Guide 18
Page 28

Use the diagram below to learn about thePulse™ smartpen components.
1. Power button
2. Headset/Audio jack
3. Built-in microphone
4. Organic Light-Emitting Diode (OLED) display
5. Built-in speaker
6. USB connector
7. Infrared camera
8. Replaceable ink tip
9. Rechargeable lithium battery (non-removable)
10.Pulse smartpen cap (purchased separately)
Anatomy of a Smartpen
Livescribe™ Smartpen User Guide 19
Page 29
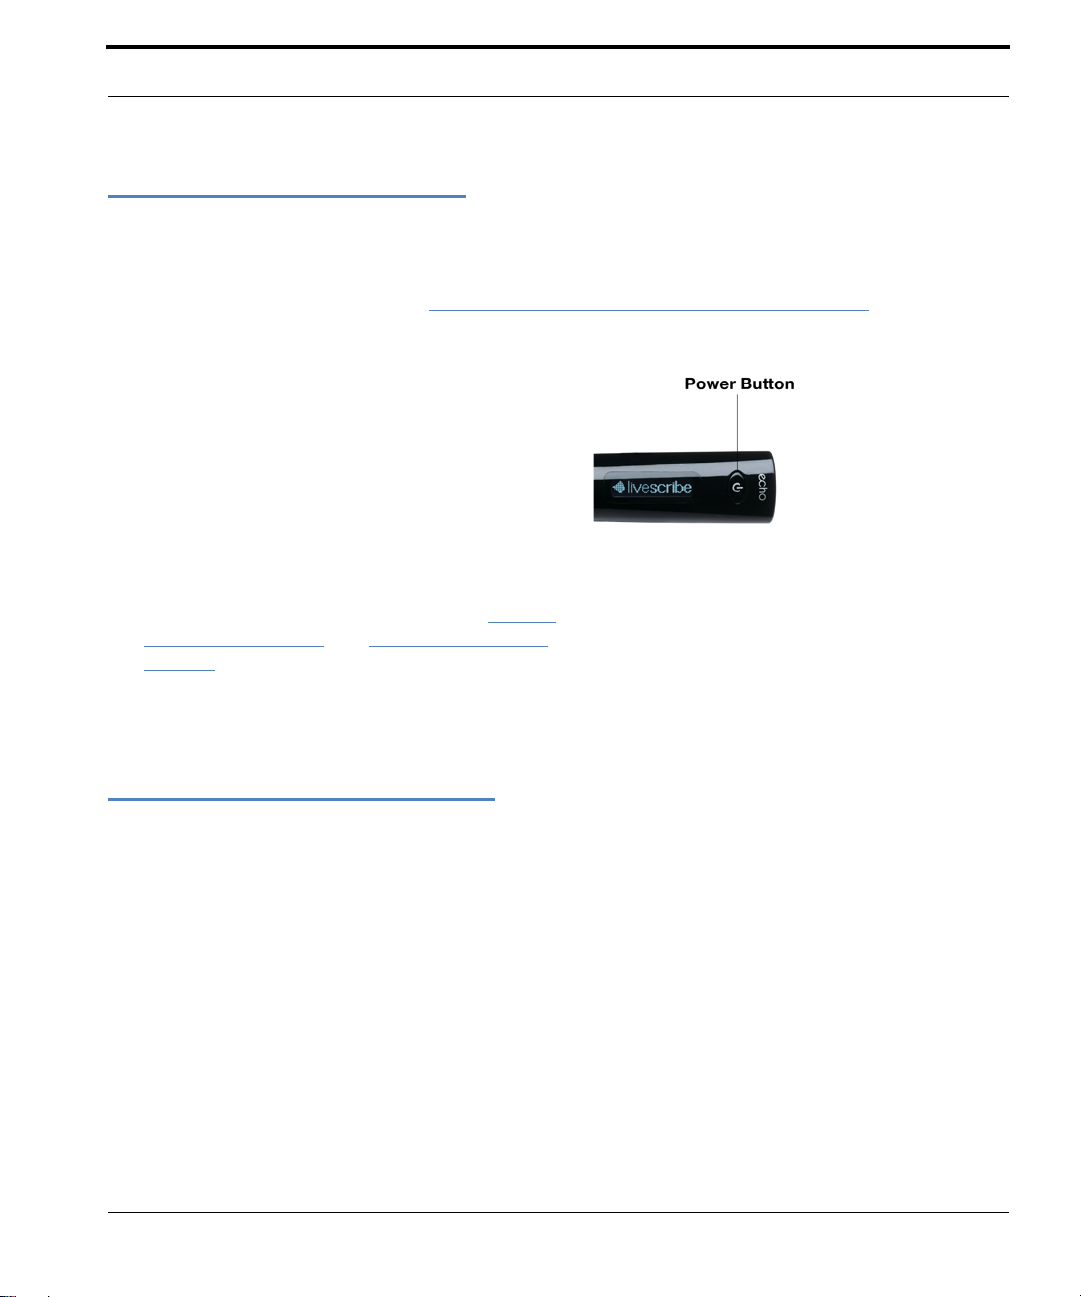
Turning On Your Smartpen
Turning On Your Smartpen
To use your smartpen, first turn it on. It must be running to capture written notes or enable its audio
recording or playback features. See
information.
1. Press the Power button to turn on your
smartpen. As the smartpen start s up, the display
shows the words Livescribe and then
Starting... After start-up completes, the display
shows the time.
N
OTE: If you have given your smartpen a name
using Livescribe Desktop, your smartpen will
display its name when you power it on.
2. The first time you use the smartpen, you must
set it to the current time and date. See
the Date on page 31 and Setting the Time on
page 32 for more information.
Using the Paper Replay™ Application on page 69 for more
Setting
3. When you are finished using your smartpen,
press the Power button again to turn it off.
Writing and Recording Audio
There are many features of your Livescribe smartpen. One of its primary uses is to capture notes and
optionally record audio.
Capturing Notes without Audio
To use your Livescribe smartpen to capture notes without audio, follow these steps.
1. Power on your Livescribe smartpen by pressing the power button.
2. If needed, remove the smartpen cap. If you are using a new ink cartridge, you may need to re move
possibly the small protective plastic coating from your ink cartridge tip. All new ink cartridges have
this coating to prevent the ink from drying up.
Livescribe™ Smartpen User Guide 20
Page 30

Writing and Recording Audio
3. Begin writing on any Livescribe™ dot paper product, such as a Livescribe notebook, journal, or flip
notepad. As long as the smartpen is on, it will capture your handwritten notes and drawings.
Capturing Notes with Audio
To use your Livescribe smartpen to capture notes and audio recordings follow these steps. For details
about Paper Replay™, see
Using the Paper Replay™ Application on page 69.
1. Power on your Livescribe smartpen by pressing the power button.
2. If needed, remove the smartpen cap. If you are using a new ink cartridge, you may need to re move
possibly the small protective plastic coating from your ink cartridge tip. All new ink cartridges have
this coating to prevent the ink from drying up.
3. Start the Paper Replay™ application to rec ord au d io as yo u write.
To start Paper Replay, tap on the Re
as a Livescribe notebook, journal, or flip notepad. See.
Record button on page 70
You can also launch the Paper Rep lay™ app lica tion dir ectly from th e Nav Plu s. See Using the Nav
Plus on page 46 for more information.
cord button in any Livescribe™ dot paper product, such
Starting Recording with a Pre-Printed
4. Begin writing on any Livescribe™ dot paper product. As long as the smartpen is on, it will capture
any handwritten notes and drawings.
5. When you have finished taking notes and recording audio, tap on the Stop button in any
notebook. Or, stop the Paper Repla
N
OTE: The St op button ends the Paper Replay audio recording. If you are taking notes without recording
Paper Replay audio, you do not need to use the Stop button.
y™ application with the Nav Plus.
6. Listen back to your recorded audio by tapping on your handwritten notes.
Recording Audio Only
You can use your smartpen to record audio only, without capturing notes. See Recording Paperless
(Audio Only) Sessions on page 79 for more information about this capability.
1. Power on your Livescribe smartpen by pressing the power button.
2. Start the Paper Replay™ application to record audio. To start Paper Replay audio recording, use
one of the following methods:
Livescribe™ Smartpen User Guide 21
Page 31

Writing and Recording Audio
• Use the Quick Record feature (see St arting Recording Using Quick Record on page 70). Press
and hold the Power button for approximately five seconds until the display indicates that the
recording started.
• Tap on the Record button in any Livescribe™ dot paper product, such as a Livescribe
notebook, journal, or flip notepad. See.Starting Recording with a Pre-Printed Record button
page 70
on
• Launch the Paper Replay™ application directly from the Nav Plus. See Using the Nav Plus on
page 46 for more information.
3. When you have finished recording audio, tap on the Stop button in any notebook. Or , stop the
Paper Replay™ application with the Nav Plus.
Livescribe™ Smartpen User Guide 22
Page 32

Charging an Echo™ Smartpen
Charging an Echo™ Smartpen
The USB connector for an Echo™ smartpen is located on the top next to the headset jack. This is a
standard micro USB connector that is comp atible with any st an dard USB charging cable. Fo llow these
steps to charge your smartpen
1. Before ch ar gin g your Echo ™ sm ar tp en ,
download and install the Livescribe
Desktop software from
www.livescribe.com/install.
http://
2. Plug your Micro-USB cable into the USB
port on your computer and plug the other
end of the cable into your smartpen.
NOTE: You can also charge the Echo
smartpen directly from an electrical
outlet with the Universal USB AC Wall
Adapter.
Livescribe™ Smartpen User Guide 23
Page 33

Charging a Pulse™ Smartpen
A battery and lightning bolt symbol will
e displayed on your Livescribe smart-
b
pen when it is charging.
A full charge can take up to 2.5 hours. To
termine if your Livescribe smartpen is
de
fully charged, see
Level on page 36.
TIP: The plug and blinking battery indicator
means your Livescribe smartpen needs
to be charged.
Viewing the Battery
Charging a Pulse™ Smartpen
The USB connector for a Pulse smartpen is located on its side. The connector is designed to fit into a
compatible Livescribe USB charging cradle. Follow these steps to charge your smartpen
1. Before ch ar gin g your Pulse ™ sm ar tp en ,
download and install the Livescribe Desktop
software from
www.livescribe.com/install.
2. Plug your USB mobile charging cradle into the
USB port on your computer. The smartpen will
charge directly from your computer’s USB port
when the computer is on. The USB connection
(located on the side of the Pulse smartpen) is
designed to dock into the compatible Livescribe
USB mobile charging cradle.
NOTE: You can also charge the Pulse smartpen
directly from an electrical outlet with the Pro
Charging Cradle or the Universal USB AC
Wall Adapter.
Livescribe™ Smartpen User Guide 24
Page 34

3. Place the Pulse smartpen in your USB mobile
charging cradle.
A battery and lightning bolt symbol will be dis-
played on your Livescribe smartpen when it is
arging.
ch
A full charge can take up to 2.5 hours. To deter-
mine if your Pulse™ smartpen is fully charged,
Viewing the Battery Level on page 36.
see
TIP: The plug and blinking battery indicator means
your Pulse™ smartpen needs to be charged.
Replacing the Ink Cartridge or Stylus
Replacing the Ink Cartridge or Stylus
To replace an ink cartridge, just use your fingers to grasp and pull out the old cartridge and insert a
new one. If you own a Pulse smartpen and have a USB mob ile cha rgi n g crad l e, yo u ca n inst ea d use
the cradle to help replace the cartridge as follow s .
1. Insert the smartpen ink tip into the ink cartridge removal ring.
2. Tilt the smartpen so that it firmly rests against the removal r ing and lift the smartpen away from the
ring.
3. Lifting the smartpen away from the cradle will safely separate the ink cartridge from the magnet
inside the smartpen that holds it in place.
Livescribe™ Smartpen User Guide 25
Page 35

Using a 3-D Recording Headset
4. Place your new ink cartridge in the smartpen. Before using the smartpen, be sure to remove the
protective plastic coating from your ink cartridge tip. All new ink cartridges have this coating in
place to prevent the ink from drying up.
NOTE: If you want to use the smartpen but do not want to make ink marks on your paper, purchase a
stylus from the Livescribe web store. To insert the stylus, follow the steps above, but substitute
the stylus for the replacement ink cartridge.
Using a 3-D Recording Headset
With your Livescribe smartpen, you can record audio with either the built-in micr ophone or a 3-D
Recording Headset. Livescribe designed the built-in microphone for monaural recordings in smaller
recording environments, such as a conference room. When recording in larger spaces, we recommend
using a 3-D Recording Headset, which contains a microphone in each earbud. The dual microphones
enable binaural recordings, which accurately recreate the spatial audio environment.
1. Left and right speakers
2. Left and right microphones
Binaural recording is a special type of stereo recording that uses two micr ophones, one placed in each
ear. This type of recordin g pro vides the mo st accurate sp a tial sou nd quality becau se the micr oph ones
Livescribe™ Smartpen User Guide 26
Page 36

Renaming Your Smartpen in Livescribe™ Desktop
effectively mimic your ears - when you play a binaura l recording back, it sounds like you are actually in
the location where you recorded.
Once you record audio, you can play back the binaural effect using stereo earphones. You can also
y back the binaural effect as a regular stereo recording over any type of headphones or speakers.
pla
The 3-D Recording Headset included with
binaural recordings. However, if you want to use a 3.5mm stereo headset just for playback, connect
your 3.5mm headset to your smartpen using a standard 2.5mm to 3.5mm adaptor.
If you own an Echo™ smartpen, you can use any standard 3.5mm stereo headset for playback. For
inaural recording, you need to use a Livescribe 3.5mm 3-D Recording Premium Headset. You can
b
purchase this separately from the Livescribe Online Store.
NOTE: Y ou can record binaural audio with the earbuds in your ears or around your neck as shown below .
Make sure the “L” earbud is in your left ear and the “R” ear bud is in your right ear.
OTE: Keep the earbuds about 6-8 inches apart to mimic the position of your ears.
N
each Pulse smartpen has a custom jack. This is required for
Renaming Your Smartpen in Livescribe™ Desktop
Your smartpen has a default name. You can rename your Livescribe smartpen to identify it from other
smartpens in Livescribe™ Desktop.
To rename your smartpen:
1. Install and Launch Livescribe™ Desktop. (See the Livescribe™ Desktop User Guide for details).
2. Do ck th e sm ar tp en to be renamed.
3. If it is not already selected, use the smartpen selector drop down to choose the smartpen you want
to rename.
4. Choose Tools > Smartpen > Rename. At the prompt, type the smartpen name and click OK.
Livescribe™ Smartpen User Guide 27
Page 37

Rebooting Your Livescribe™ Smartpen
Rebooting Your Livescribe™ Smartpen
If for some reason your Livescribe smartpen is unresponsive, perform the following steps:
1. Charge your smartpen using its cradle (for Pulse™ smartpens) or Micro-USB cable (for Echo™
smartpens) for at least five minutes. If your smartpen is still nonresponsive after five minutes of
charging, you may need to reboot it.
2. To reboot your Livescribe smartpen, press and hold the power button for 10 seconds.
Livescribe™ Smartpen User Guide 28
Page 38

4 Configuring Your Livescribe™
Smartpen
You can configure the Livescribe smartpen to your own preferences. There are generally two ways to
view current smartpen settings and optionally change them:
• Use printed buttons in the Status and Settings areas printed on the inside covers of Livescribe
notebooks.
• Use the Settings menu on your smartpen. Using the Settings Menu on page 38
NOTE: Y ou can also view and manage your smartpen content using Livescribe Desktop. For det ails, see
the Livescribe Desktop User Guide.
From your smartpen, you can view and change the following settings:
Setting Category Setting Values
Display Settings Display brightness
Using a Notebook’s Settings and Status Buttons on page 30
100%, 90%, 75%, 50%, 10%
Display orientation right-handed, left-handed
Auto-off time 30 minutes, 1 hour (default), 2 hours, 4 hours
Scroll speed 1-10 (1 is slowest, 10 is fastest)
Audio Settings Menu voice On, Off
Playback latency On, Off
Audio (Recording) quality High, Medium, Low
Microphone sensitivity Conference room, Lecture hall, Automatic
Date and Time Settings Set the date and time
Date format mm.dd.yy, dd.mm.yy, yy.mm.dd
Time format 12-hour, 24-hour
Locale Switch default locale of
ayed text and audio
displ
instructions
Livescribe™ Smartpen User Guide 29
English, French, Italian, German, Spanish, Korean,
or Simplified Chinese
Page 39

You can also view the status of your smartpen, including:
• Storage available
• Battery level
• Software version
Using a Notebook’s Settings and Status Buttons
Livescribe notebooks provide printed buttons you can use to view and change settings. Some
notebooks have more printed buttons than others for viewing and changing settings.Most notebooks
include Settings and Status areas, with various printed buttons.
Using the Settings area printed buttons you can change some smartpen settings, including:
• Date and time
• Display brightness
• Scroll speed
• Display orientation
• Audio volume and mute
Livescribe™ Smartpen User Guide 30
Page 40

The Status area provides buttons you can use to view current smartpen information, including:
• Date and time
• Battery level
• Storage
• Audio settings
• Software version
Setting the Date
IMPORTANT: It is critical that you set the correct time and date on your smartpen be cause Paper Replay
sessions you create with your smartpen are named using the time and date they are
created. Also, the Livescribe smartpen presents the date format as mm/dd/yy by default.
You can change this format either before or an y time af ter you set the date. To change the
date format, see
Setting/Viewing the Date Format on page 43.
1. With your smartpen turned on, open
the inside cover of your notebook.
Locate the Settings area.
2. Ta p the Set Date button
with the Livescribe smartpen.
Livescribe™ Smartpen User Guide 31
Page 41

3. Tap the printed keypad and type the
current date.
Example: Tapping 101809 sets the
d
ate to Sunday, October 18, 2009 for
the date format of mm/dd/yy.
Your smartpen will now display the
ate you entered.
d
NOTES:
• If you make a mistake while entering
the date, simply tap on the Set Date
buttons again to start over.
• To set the date format, see 19TUSetting/
Viewing the Date Format on page 43.
Setting the Time
1. With your smartpen turned on, open
the inside cover of your notebook.
Locate the Settings area.
Livescribe™ Smartpen User Guide 32
Page 42

2. In your notebook, tap the Set Time
button
smartpen.
with the Livescribe
3. Tap the printed Settings keypad and
enter the time as “hh:mm” format. Tap
the “AM” or “PM” button to select AM
or PM. For example, to enter
12:01PM, tap “1,” “2,” “0,” “1,” and the
“PM” button.
Your smartpen will now display the
you entered.
time
NOTES:
• If you make a mistake, entering the
time, simply tap on the Set Time buttons again to start over.
• To set the time format, see USetting/
Viewing the Time Format on page 43.
Setting Display Brightness
Tap the Display Brightness button on the inside covers of your notebook to select between
brightness settings. Tap multiple tim
100%, 90%, 75%, 50%, and 10%.
es to scroll through the display brightness settings. Values are
N
OTE: The lowest brightness setting is optimal for dark room environments, such as when a speaker
may be presenting a slideshow.
Alternatively, use the Set
tings menu on your smartpen to change the display brightness.
Setting the Display Orientation
You can configure your smartpen display for either left- or right-handed use. Tap the appropriate
button to configure your display orientation. Alternatively, use the Settings menu on your smartpen to
change the display orientation.
Livescribe™ Smartpen User Guide 33
Page 43

1. With your smartpen turned on, open the inside
cover of your notebook. Locate the Settings
area.
2. Under Settings, tap on the Left or Right button
to orient your display for left- or right-handed
use.
Setting Scroll Speed of the Display
Text that is too long to fit on your smartpen display will scroll across the display. You can increase or
decrease the rate at which text scrolls using the Scroll Speed settings.
• To increase the scroll speed, tap the button.
• To decrease the scroll speed, tap the printed button.
• Tap until you reach the desired speed, between 1 and 10.
Y ou can also view and set scroll speed using the Set
page 42.
Livescribe™ Smartpen User Guide 34
tings menu. See Setting/Viewing Scroll Speed on
Page 44

Viewing Playback Latency
To view the current playback latency setting, tap on the audio settings button on the inside
cover of your notebook.
You can also view and set playback latency using the Settings menu.
Latency on page 42. Or, view the cu rrent setting using a quick command. See Viewing Audio Settings
with a Quick Command on page 60.
See Setting/Viewing Playback
Viewing Audio (Recording) Quality Settings
To view the current audio (recording) quality, tap on the audio settings button on the inside
cover of your notebook.
You can also view and set audio
Audio (Recording) Quality on page 41. Or, view the current setting using a quick command. See
Viewing Audio Settings with a Quick Command on page 60.
(recording) quality using the Settings menu. See Setting/Viewing
Viewing Microphone Sensitivity Settings
To view the current microphone sensitivity, tap o n the a udio se tting s button on the inside cover
of your notebook.
You can also view the microphone
Microphone Sensitivity on page 41. Or, view the current setting using a quick command. See Viewing
Audio Settings with a Quick Command on page 60.
Livescribe™ Smartpen User Guide 35
sensitivity setting using the Settings menu. See Setting/Viewing
Page 45

Viewing the Date and Time
1. Ta p the Time button
to check the current
time.
2. Tap the Date button
to check the current
date.
You can also view the date and time using a quick command. See Viewing the Time and Date with
Quick Commands on page 65.
Viewing the Battery Level
1. Tap the Battery
button to see the
current battery
charge. The indicator
pictured shows a full
battery.
You can also view the battery level using a quick command. See Viewing the Battery Level with a
Quick Command on page 63.
Livescribe™ Smartpen User Guide 36
Page 46

Viewing Storage Available
1. Tap th e S torage button once to see
amount of remaining storage in
megabytes and tap a second time
to see the remaining recording
time based on the current audio
(recording) quality settings.
NOTE: If available space is less than 1
MB, your smartpen will display
memory in available KB.
IMPORTANT: If you see the circled
exclamation mark
indicator on the right side
of the display, check your
available memory on the
Livescribe smartpen as it
is almost full.
Y ou can also view the available storage using a quick command. See Viewing Available Storage with a
Quick Command on page 61.
Viewing the Software Version
Tap the Software version button to see
the current version of software installed
on your smartpen.
Livescribe™ Smartpen User Guide 37
Page 47

Using the Settings Menu
Using the Settings Menu
Using the Settings menu, you can change and view settings of the Livescribe smartpen, including:
Setting Values
Audio (Recording) quality High, Medium, Low
Microphone sensitivity Conference room, Lecture hall, Automatic
Playback latency On, Off
Menu Voice On, Off
Display brightness
Display orientation right-handed, left-handed
Auto-off time 30 minutes, 1 hour (default), 2 hours, 4 hours
Scroll speed 1-10 (1 is slowest, 10 is fastest)
Display orientation right-handed, left-handed
Date format mm.dd.yy, dd.m
100%, 90%, 75%, 50%, 10%
m.yy, yy.mm.dd
Time format 12-hour, 24-hour
Locale English
Français
Español
Deutsch
Italiano
Chinese
Korean
TIP: In the Settings menu, active options appear with a checkmark on the display.
Livescribe™ Smartpen User Guide 38
Page 48

1. Double-tap the center of a Nav Plus to go the
Main Menu.
2. Tap down u ntil Settings is displayed.
Using the Settings Menu
3. Tap right to select Settings.
4. Tap down and up to scroll through the setting
types list.
Livescribe™ Smartpen User Guide 39
Page 49

5. Tap right to select a setting type.
6. Tap down and up to scroll through the setting
options list.
7. Tap righ t to select an option. After activating an
option, a confirmation message will scroll
across your smartpen display and the active
option will have a checkmark beside it in the
display.
Using the Settings Menu
8. Tap left to return to the option setting list to
make a different selection.
Livescribe™ Smartpen User Guide 40
Page 50

Using the Settings Menu
9. Ta p left again to return to the option list to
select a different option.
Setting/Viewing Audio (Recording) Quality
Use the Audio (Recording) quality setting to change the compression rate of the recorded AAC audio:
the higher the audio quality, the lower the compression rate. As a result, files recorded with the highest
audio quality setting will be larger files that require more storage space.
• Use High to record at the highest audio quality. This setting will require the largest amount of
storage space and is optimal for very large environments or when the highest quality recording is
required.
• Use Medium to return to the default recommended audio quality setting.
• Use Low to record at lowest audio quality. This is a memory-saving setting that will utilize the least
amount of memory and is optimal for dictations or smaller quieter recording environments.
N
OTE: You cannot change these settings during recording. Always select the appropriate audio quality
setting before beginning a recording.
Setting/Viewing Microphone Sensitivity
You can set your smartpen microphone sensitivity for different recording situations.
• Use Conference Room to set the microphone sensitivity for quieter environments where the person
speaking is closer to the microphone. This setting is optimal for dictations, offices, or small
conference rooms.
• Use Lecture Hall to set the microphone to pick up sounds in a wider open area. This setting is
optimal for large rooms where the speaker’s voice is distant from your smartpen microphone. We
also recommend the use of the 3-D Recording Headset when record ing in this type of environment.
• Use Automatic to let your smartpen automatically set your microphone se nsitivity based on the
noise level of your environment. This is the recommended default setting for the Livescribe
smartpen.
Livescribe™ Smartpen User Guide 41
Page 51

Using the Settings Menu
NOTE: You cannot change settings while your smartpen is recording. Always select the appropriate
microphone setting before beginning a recording. The microphone will stay set at the last setting
you used.
Setting/Viewing Playback Latency
When you tap your notes to play back a Paper Replay™ session, the audio will play from a moment
five seconds before the note was actually written. This allows you to more accu rately replay the
moment because there is natural delay between the time when you hear an important point and the
time when you begin writing.
Set the Playback Latency to Off to turn off this latency. You will want to do this if you are playing back
a recording in which your audio and writing are perfectly synchronized.
Enabling/Disabling the Menu Voice
Your smartpen voice audibly announces certain menu items, specifically items in the Main Menu and
in Applications menu. Set Menu voice to Off to disable it.
NOTE: Turning off the Menu Voice will not affect Paper Replay™ audio or other smartpen sounds.
Setting/Viewing Display Brightness
To change the brightness of your smartpen display, use the Settings menu. Values are 100%, 90%,
75%, 50%, and 10%.
NOTE: The lowest brightness setting is optimal for dark room environments, such as when a speaker
may be presenting a slideshow.
Setting/Viewing Scroll Speed
To change the scroll speed of your smartpen display, use the Settings menu on your smartpen
available through the Nav Plus. Values are
Livescribe™ Smartpen User Guide 42
1-10. 1 is slowest and 10 is fastest.
Page 52

Using the Settings Menu
Setting the Auto-Off Time
Y o u smartpen has an auto -off feature to save po wer af ter long perio ds of inactivity. Using the Auto-Off
Time option, you can set the length of time before your smartpen automatically powers off. You can set
the auto-off time as 30 minutes, 1 hour (the default), 2 hours, and 4 hours.
To set the auto-off time, use the Nav Plus to go to Settings > Auto-off Time. Select the desired time
and Tap right.
NOTE: The auto-off time setting persists until you change it or the smartpen is completely reset.
Setting/Viewing Display Orientation
To change the orientation of your smartpen display, use the Settings menu. Values are right-handed
and left-handed.
Setting/Viewing the Date Format
To change the date format to “mm/dd/yy”, “dd/mm/yy”, or “yy/mm/dd”:
• Use the Settings menu and navigate to the Date Format option and select either mm/dd/yy, dd/
mm/yy, or yy/mm/dd.
Setting/Viewing the Time Format
To change the time format between 12 hour and 24 hour:
• Use the Settings menu and navigate to the Time format option . Select either 12 hour or 24 hour.
Viewing the Smartpen Name
If you use Livescribe Desktop to name your smartpen, you can view its name when the smartpen st arts
up or at any time using the Nav Plus to go to Settings > Smartpen Name.
Livescribe™ Smartpen User Guide 43
Page 53

Switching Languages (Locales)
Switching Languages (Locales)
You can use the Locale command in the Settings menu to change your Livescribe smartpen display
and audio instructions from one language to another. When you switch to another language, your
smartpen will change these things based on the locale:
• Language of text resources (such as menus a nd other on-screen prompts)
• Language of audio resources (such as application names and instructions)
• Date format
• Time format
• Number format
Livescribe also provides printed controls to switch between languages. See Using the Language
Switch Card for Chinese and Korean on page 44 and Using the Getting Started Guide Controls to
Switch Locales on page 45.
To use the Locale command in the Settings menu:
1. Use the Settings menu and navigate to the Locale op tion. Select one of the available locales. This
list includes:
• English
• Français
• Español
• Deutsch
• Italiano
• Chinese
• Korean
2. When prompted, tap right again to restart your smartpen. After your smartpen restarts, it will run
with the selected language as the default.
Using the Language Switch Card for Chinese and Korean
You can use the Language Switch Card to switch your L ivescribe sm artpen from English to Chinese or
Korean.
Livescribe™ Smartpen User Guide 44
Page 54

Switching Languages (Locales)
For example, to switch from English to Korean:
1. Tap the Korean button .
2. Tap the button again to restart your smartpen. After your smartpen restarts, it will run with Korean
as the default locale.
Using the Getting Started Guide Controls to Switch Locales
The Getting Started Guide that ships with your Livescribe smartpen may have printed controls to
switch your smartpen from English to other languages. If it does, you can use these controls as follows. Otherwise, use the Settings menu
For example, to switch from English to German:
to switch locales:
1. Tap the Deutsch button .
2. Tap the button again to restart your smartpen. After your smartpen restarts, it will run with German
as the default locale.
Livescribe™ Smartpen User Guide 45
Page 55

5 Navigating the Main Menu
You can use the Main Menu of the Livescribe smartpen to locate application s and settings for the Live scribe smartpen. This topic describes how to navigate around the Main Me
niques to quickly get to applications and information you want. Topics covered include:
• Using the Nav Plus. See Using the Nav Plus on page 46
• Scrolling with Flick and Scrub. See Scrolling with Flick and Scrub on page 50
• Quick Commands. See Using Quick Commands on page 53.
Using the Nav Plus
The Nav Plus is a paper-based, five-way navigator that enables you to navigate th rough your
smartpen Main Menu and application menus.
nu and use other tech-
Using a Pre-Printed Nav Plus
You can use any Nav Plus you see printed on any Livescribe™ dot paper product, such as the
included notebook. To use a printed Nav Plus:
Livescribe™ Smartpen User Guide 46
Page 56

1. Double-tap the center of the Nav Plus. A double-tap
is two taps in quick succession.
NOTE: Double-tapping on the center of a Nav Plus will
exit the current application or sub-menu and t ake
you to the Main Menu. The one exception to this
rule is that if you are recording using the Paper
Replay™ application, double-tapping the center
will take you to the Main Menu but background
recording will continue.
2. Main Menu will be displayed on the Livescribe
smartpen.
3. Tap do wn on the directional ar row of the Nav Plus to
scroll through a list of applications on the Livescribe
smartpen.
4. When the desired application name is displayed, tap
right to select that application.
5. Tap down to scroll through the application menu.
Livescribe™ Smartpen User Guide 47
Page 57

6. Tap rig ht to select an item in the application menu
list.
7. Tap left to return to the previous menu.
8. To return to the Main Menu, tap a series of left taps
or double-tap on the center of the Nav Plus to jump
to the Main Menu.
NOTE: The Livescribe smartpen will display small directional arrows to indicate the directions in the
menu that you can scroll through.
Drawing a Nav Plus
If a pre-printed Nav Plus is not easily accessible, create your own simply by drawing one.
To draw a Nav Plus:
Livescribe™ Smartpen User Guide 48
Page 58

1. Using any Livescribe™ dot paper
product, such as the included Starter
notebook, draw intersecting vertical
and horizontal lines. Y ou can draw the
intersecting lines in either order. The
lines should:
• Be fairly straight
• Be approximately the same
length
• Intersect near their centers
2. WIthin one second of drawing the
lines, double-tap in the center of the
Nav Plus. This will complete the
process of creating a Nav Plus.
NOTE: After you draw a Nav Plus, it is
always usable for future use.
3. Main Menu is displayed on your
smartpen when you have
successfully created a Nav Plus.
Nav Pluses drawn incorrectly:
Lines are not straight.
Livescribe™ Smartpen User Guide 49
Page 59

Scrolling with Flick and Scrub
Lines do not intersect in
the center of each line.
Scrolling with Flick and Scrub
Flick and Scrub is a way for you to quickly scroll through menu items and other displayed text on your
smartpen. This feature is useful when text presented by an application is longer than the display can
show horizontally or when multiple menus or options are available vertically.
Flicking
refers to quickly dragging your smartpen across paper and then lifting your smartpen off the
paper. The contents of the display scrolls rapidly, based on the speed of your smartpen when it was
lifted.
Scrubbing refers to dragging your smartpen acro ss the paper. The con te nts on the display moves and
scrolls in the same direction and at the same relative speed as the movement of your smartpen.
Livescribe™ Smartpen User Guide 50
Page 60

To use Flick and Scrub scrolling:
1. Navigate to a list of vertical menu items, such
as Main Menu or one of its submenus, such as
Applications or Settings.
Scrolling with Flick and Scrub
1. On any unused paper region, press the tip of
your smartpen down for one-half (1/2) second.
2. Wait until you hear a short beep, then without
lifting your smartpen tip off the paper, draw a
horizontal or vertical line.
Your smartpen assigns the area you draw as a
lick and Scrub control area for any applica-
F
tion.
TIP: Instead of drawing a line, you can draw a re ct-
angular box as the Flick and Scrub control
area. You may find the box easier to use
because it provides a wider area than a
straight line.
Livescribe™ Smartpen User Guide 51
Page 61

3. Move your smartpen on the flick and scrub
control area you drew to scroll through the
application’s display text.
The display text will scroll either up and down
r vertical controls) or left and right (for hori-
(fo
zontal controls), depending on the direction in
h you drew the control.
whic
NOTE: You can use both flicking and scrubbing
motions on the same control area. You do
not need to draw a separate area for flickin g
and another for scrubbing. However, you will
need separate control areas fo r vertical and
horizontal scrolling.
IP: After you have created a Flick and Scrub
T
control region, you can use it at any time for
scrolling. This is similar to the way you can reuse a hand-drawn Nav Plus after creating it.
T o return to use the Flick and Scrub regi on you
do not need to press down the smartpen tip
again for 1/2 a second. This is only needed
when first creating the region.
Scrolling with Flick and Scrub
Flick and Scrub Display Indicators
When using Flick and Scrub, the display shows indicators based on the dir ection of additiona l text and
the relative position of the displayed text to the contents.
Vertical Flick and Scrub Scroll
right side of the display. In this example, the text shown is close to the top of the current menu list.
Therefore, the vertical scroll indicator is near the top.
Horizontal Flick and Scrub Scroll Indicator. For horizontal Flick and Scrub, the scroll indicator is at
the bottom. In the examples below, the display scrolls through the phrase “there were two small
Livescribe™ Smartpen User Guide 52
Indicator. For vertical Flick and Scrub, the scroll indicator is on the
Page 62

Using Quick Commands
children”. The scroll bar along the bottom sh ows how far through the phrase th e current disp lay is. The
first display shows the position near the beginning of the phrase.
The second display shows the scroll bar position near the middle of the phrase after scrolling the
display horizontally.
Using Quick Commands
Quick Commands let you write a one-line command with th e L ive sc rib e sm ar tp en and ge t an
immediate response on your smartpen display. Quick Commands are useful when you do not have
access to the Status buttons on the inside cover of your Livescribe notebooks, or if you need to do a
quick calculation while writing.
The following is a list of Quick Commands available on the Livescribe smartpen.
OTE: Quick Commands are not case sensitive.
N
• Launch an application. See Launching Applications with a Quick Command on page 54.
• Show the top session in the Paper Replay™ “Play Session” list. See Locating and Playing a Recent
Session with a Quick Command on page 56.
• Write and solve a quick calculation. See Doing Basic Math Calculations with a Quick Command on
page 58.
• Show available battery power. See Viewing the Battery Level with a Quick Command on page 63.
• Show your audio (recording) quality settings. See Viewing Audio Settings with a Quick Comm and
on page 60“.
• Show your remaining smartpen storage. See Viewing Available S torage with a Quick Command on
page 61.
Livescribe™ Smartpen User Guide 53
Page 63

Using Quick Commands
• Show the current time or date. See Viewing the Time and Date with Quick Commands on page 65.
Launching Applications with a Quick Command
Quick Launch is a Quick Command you can use to start smartpen applications. You can use Quick
Launch to start any applications available in the Main Menu and other folders within it.
N
OTE: You can write Quick Launch commands in your native language for cert ain Livescribe smar tpen
applications. For example, a German user can launch Piano by creating a Quick Launch
command named Klavier.
1. Double-tap on the center of a Nav Plus. A
double-tap is two taps in quick succession.
2. Your smartpen displays the Quick Command
indicator (asterisk) in the Main Menu. It is
waiting for you to write a Quick Command.
Livescribe™ Smartpen User Guide 54
Page 64

3. Within three (3) seconds, write the first few
letters of the application you want to launch.
For example, writing “Pi” would scroll your
isplay to the Piano application. Writing the
d
letters “Pa” would scroll to Paper Replay.
Writing the letter P, would scroll to the first
application that begins with the letter P. From
there, you can scroll to the specific application
you want to start using the Nav Plus or Flick
and Scrub. See
Scrolling with Flick and Scrub
on page 50 for more information.
N
OTE: Using its predictive text feature, your
smartpen will display the first application
that matches your written input. As soon as
you see the application you want on the
display, you can stop writing.
4. Tap r ight on the Nav Plus, or double-t ap on any
open paper.
Using Quick Commands
5. Your smartpen will leave Quick Launch and
start the application.
Livescribe™ Smartpen User Guide 55
Page 65

Using Quick Commands
IP: Once you have written a Quick Command, you
T
can tap where you wrote it to repeat the
command. That is, you can re-launch the
application at any time by tapping your Quick
Command.
Locating and Playing a Recent Session with a Quick Command
Use the Play Quick Command to get fast access to your saved Paper Replay™ sessions. To quickly
show the top item in your “Play Session” list:
1. Double-tap on the center of a Nav Plus. A
double-tap is two taps in quick succession.
2. Your smartpen will display the Quick Command
indicator in the Main Menu. It is waiting for you
to write a Quick Command.
Livescribe™ Smartpen User Guide 56
Page 66

3. Within three (3) seconds, write the word “play.”
NOTE: Using its predictive text feature, your
smartpen will display the first command that
matches your written input. In this case,
“play” is displayed as soon as you write “p”.
As soon as you see the command you want
on the display, you can stop writing.
4. Right-tap on the Nav Plus, or double-tap on
any open paper.
Using Quick Commands
5. Your smartpen will display the top item in the
Play session list. You can tap down using the
Nav Plus to scroll through sessions and then
tap right to begin playback.
6. Once you have written a Quick Command, you
can tap where you wrote it to repeat the
command.
Livescribe™ Smartpen User Guide 57
Page 67

Using Quick Commands
Doing Basic Math Calculations with a Quick Command
You can use the Calc Quick Command to perform basic mathematical calculations.
1. Double-tap the center of a Nav Plus. A double-
tap is two taps in quick succession.
2. Your smartpen will display the Quick Command
indicator in the Main Menu. It is waiting for you
to write a Quick Command.
3. Within three (3) seconds, write the word “calc.”
NOTE: Using its predictive text feature, your
smartpen will display the first command that
matches your written input In this case, calc
is displayed as soon as you write a “c”. As
soon as you see the command you want on
the display, you can stop writing.
4. Right-tap on the Nav Plus, or double-tap on
any open paper.
Livescribe™ Smartpen User Guide 58
Page 68

5. Your smartpen will prompt you to write a
problem.
6. Write a basic math problem, such as 51 x 3 =
7. Your smartpen will display the result.
8. Once you have written a Quick Command, you
can tap where you wrote it to repeat the
command.
Using Quick Commands
Guidelines for Writing a Math Problem:
• Numbers can contain up to 12 characters, including a decimal point.
• Operators can include +, -, ×, *, /, and ÷.
• You can double-tap instead of writing the equals sign.
Example: 52 - 14 followed by a double-tap is an accepted entry.
N
OTE: If the length of the math problem exceeds the display size, the beginning of the problem scrolls
off the left of the display as new characters are added to the right.
Livescribe™ Smartpen User Guide 59
Page 69

Viewing Audio Settings with a Quick Command
To display the status of audio settings on the Livescribe smartpen, including:
• audio (recording) quality
• microphone sensitivity
• playback latency
1. Double-tap on the center of a Nav Plus. A
double-tap is two taps in quick succession.
Using Quick Commands
2. Your smartpen will display the Quick
Command indicator in the Main Menu. It is
waiting for you to write a Quick Command.
3. Within three (3) seconds, write the word
“audio.”
NOTE: Using its predictive text feature, your
smartpen will display the first command
that matches your written input. In this
case, audio is displayed as soon as you
write “a”. As soon as you see the command
you want on the display, you can stop
writing.
Livescribe™ Smartpen User Guide 60
Page 70

4. Right-tap on the Nav Plus, or double-tap on
any open paper.
5. Your smartpen will display its audio settings.
6. Once you have written a Quick Command,
you can tap where you wrote it to repeat the
command.
Using Quick Commands
Viewing Available Storage with a Quick Command
To disp la y th e am o unt of available memory on the Livescribe smartpen:
Livescribe™ Smartpen User Guide 61
Page 71

1. Double-tap on the center of a Nav Plus. A
double-tap is two taps in quick succession.
2. Your smartpen will display the Quick Command
indicator in the Main Menu. It is waiting for you
to write a Quick Command.
3. Within three (3) seconds, write the word
“storage.”
Using Quick Commands
NOTE: Using its predictive text feature, your
smartpen will display the first command that
matches your written input In this case,
storage is displayed as soon as you write an
“s”. As soon as you see the command you
want on the display, you can stop writing.
4. Right-tap on the Nav Plus, or double-tap on
any open paper.
Livescribe™ Smartpen User Guide 62
Page 72

5. Your smartpen will display the available
memory.
NOTES:
• If available space is less than 1 MB, your
smartpen will display memory in available KB.
• If you see the circled exclamation mark indica-
tor on the right side of the display, check your
available memory on the Livescribe smartpen
as it is almost full.
To learn about managing your smartpen storage, see Deleting Paper Replay™ Sessions
page 83 in this guide and Managing your
Smartpen in the Livescribe Desktop User
Guide.
on
6. Once you have written a Quick Command, you
can tap where you wrote it to repeat the
command.
Using Quick Commands
Viewing the Battery Level with a Quick Command
To view the current battery level of your Livescribe smartpen:
Livescribe™ Smartpen User Guide 63
Page 73

1. Double-tap on the center of a Nav Plus. A
double-tap is two taps in quick succession.
2. Your smartpen displays the Quick Command
indicator (asterisk) in the Main Menu. It is
waiting for you to write a Quick Command.
3. Within three (3) seconds, write the word
“battery.”
Using Quick Commands
NOTE: Using its predictive text feature, your
smartpen will display the first command that
matches your written input In this case,
battery is displayed as soon as you write a
“b”. As soon as you see the command you
want on the display, you can stop writing.
4. Right-tap on the Nav Plus, or double-tap on
any open paper.
Livescribe™ Smartpen User Guide 64
Page 74

5. Your smartpen will display the remaining
battery power.
6. Once you have written a Quick Command, you
can tap where you wrote it to repeat the
command.
Viewing the Time and Date with Quick Commands
Using Quick Commands
Y ou can use Qu ick Commands to check the time or date. Or, you can check the current Time and Date
by tapping on the printed Time
under St
atus.
and Date buttons on the inside cover of your notebook
1. Double-tap on the center of a Nav Plus. A
double-tap is two taps in quick succession.
Livescribe™ Smartpen User Guide 65
Page 75

2. Your smartpen will display the Quick Command
indicator in the Main Menu. It is waiting for you
to write a Quick Command.
3. Within three (3) seconds, write either “date” or
“time.”
NOTE: Using its predictive text feature, your
smartpen will display the first command that
matches your written input. In this case,
date or time is displayed as soon as you
write a “d” or “t”. As soon as you see the
command you want on the display, you can
stop writing.
Using Quick Commands
4. Right-tap on the Nav Plus, or double-tap on
any open paper.
5. Your smartpen will display the date or time.
Livescribe™ Smartpen User Guide 66
Page 76

Launch Line and Tap Around
6. Once you have written a Quick Command, you
can tap where you wrote it to repeat the
command.
Launch Line and Tap Around
Using Launch Line is similar to Quick Launch. You can use Launch Line to quickly launch any Open
Paper application installed on your smartpen. Open Paper applications are applications that do not
require pre-printed paper controls to function. Examples of these applications are Piano, Translator
Demo, and most applications on the Livescribe Online S to re.
Tap around is a feature of Launch Line that is
of an application.The areas immediately surrounding a Lau nch Line function as the Nav Plus controls:
Tap Up, Tap Down, Tap Left, Tap Right, and Tap Center.
The tap-around regions correspond to the feature
an alternative to using the Nav Plus to navigate menus
s and regions of the Nav Plus, except that:
• Tap around controls menus and navigation within its corresponding application only.
• You cannot use tap around controls to launch other applications.
To create and use Launch Line and tap around:
Livescribe™ Smartpen User Guide 67
Page 77

1. Draw a horizontal line on your notebook (starting
from right or left) and without removing your
smartpen tip from the page, immediately double
back on the line ending close to where you started.
2. Immediately write the name of the target application
above the line.
NOTE: Using its predictive text feature, your smartpen
will display the first command that matches your
written input.
3. To launch an app lication, tap on the application
name you have written.
OTE: If the text you write is a unique match to an
N
application, the application will launch
automatically.
Launch Line and Tap Around
4. You can use the tap around feature to navigate the
application: Tap just above (as shown), below, left,
or right of the name to perform the corresponding
functions of the Nav Plus.
5. After creating a Launch Line, it remains as an active
“button” that you can tap at any time to launch the
application.
Livescribe™ Smartpen User Guide 68
Page 78

6 Using the Paper Replay™
Application
With the Paper Replay™ application, your smartpen records audio and links it to wha t you write. Later,
you can tap on any of your notes and hear the audio recorded from that moment.
Whenever you turn on the Livescribe sm artpen, it capt ures a digital copy of your notes, whether or not
you also choose to record audio.
The Paper Replay™ control bar printed at the bottom of every n otebook page let s you beg in and end a
recording as well as manipulate the playback of your recording.
NOTE: The Paper Replay™ printed controls are not page-specific. You can tap Record on one page,
begin recording, and then tap Stop on a different page and the Livescribe smartpen will stop
recording.
About Paper Replay™ Sessions
When you begin recording with the Livescribe smartpen, your smartpen automatically links the audio
to anything you write on Livescribe™ dot paper. The recorded audio (and any associated written
notes) is called a Paper Replay™ session. A session begins when you start recording audio and ends
when you stop recording audio. A paused recording is still one session. A session always contains
audio and optionally can contain associated writte n not es (pages ).
A session can be any length of time and does not necessarily equal a single p age. Fo r example, if you
start and stop recording multiple times per page, you will have multiple Paper Replay™ sessions on
one page. Conversely, you may also have one Paper Replay™ session that spans multiple pages.
The Paper Replay™ playback controls such as jump, position bar, and bookmark, function within a
single Paper Replay™ session. You can jump forward or back or speed listen to only one Paper
Replay™ session at a time. If you created multiple Paper Replay™ sessions on one page, you will
need to tap on the notes associated with the specific desired recording to begin pla yback. After st arting
playback, you can then use the playback or bookmark controls to listen to that session.
Livescribe™ Smartpen User Guide 69
Page 79
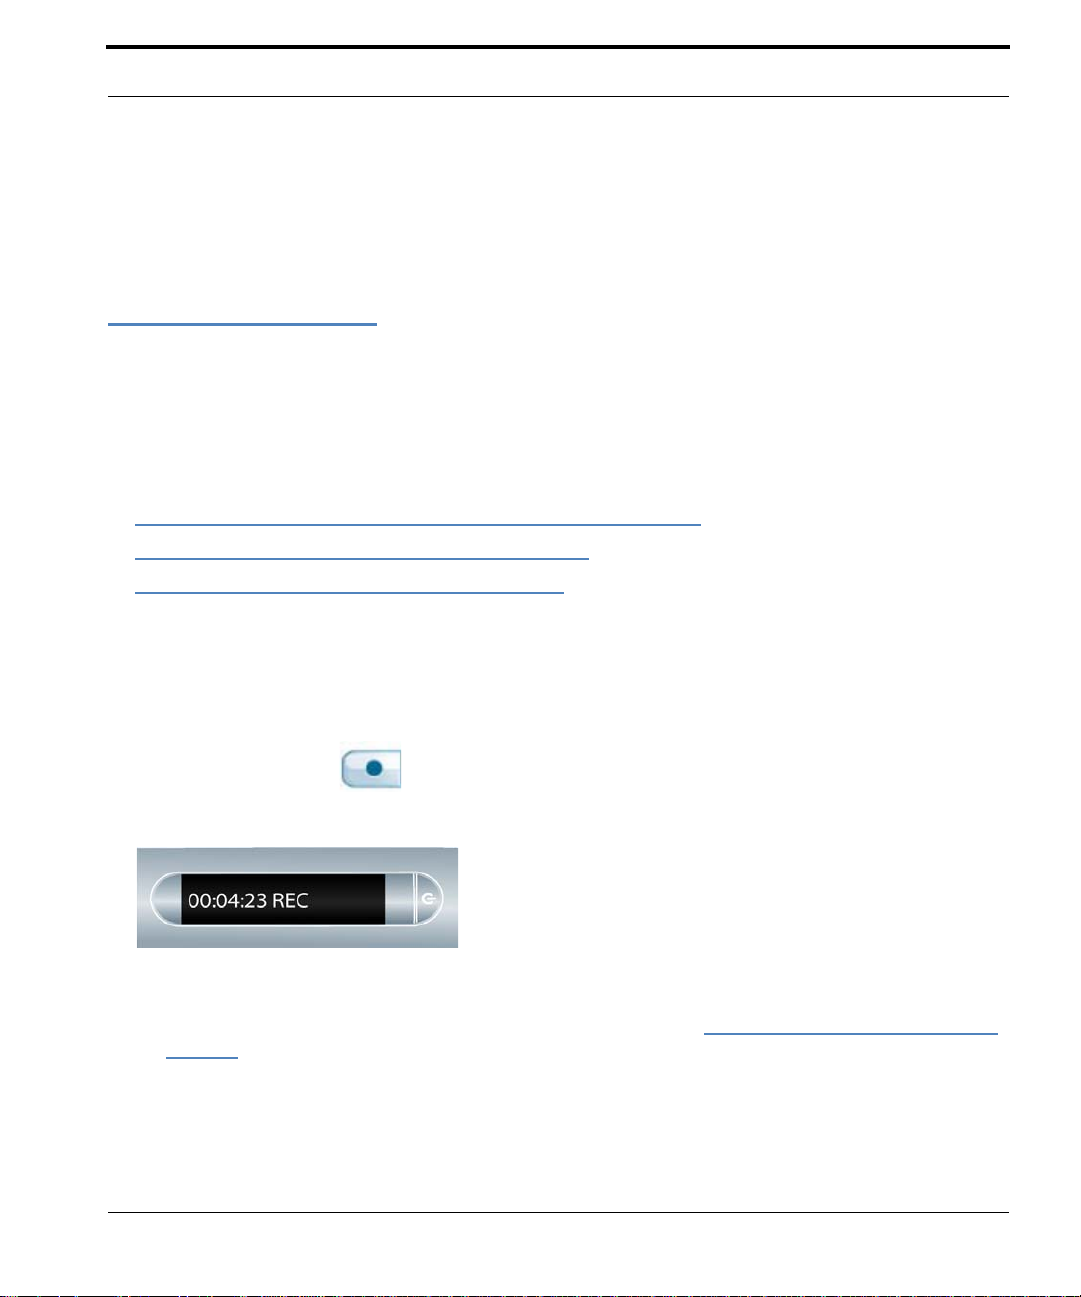
Recording Sessions
When you tap on the playback controls before tapping on any of the written notes on a page, your
most recently accessed audio recording will play back regardless of whether that recording or
those notes are on the current page . This feature allows you to quickly replay you r last recording even
if you have forgotten to write notes on paper.
Recording Sessions
IMPORTANT: Do not record without permission. By using Livescribe products and services, you agree to
comply with all laws regarding recording.
There are three ways to begin recording audio with the Livescribe smartpen:
• Starting Recording with a Pre-Printed Record button on page 70.
• Starting Recording Using Quick Record on page 70
• Starting Recording Using a Nav Plus on page 71
TIP: While yo u are recording with Paper Rep lay, you can use the Nav Plus to perform any normal set of
functions, such as scrolling through the menus and launching applications.
Starting Recording with a Pre-Printed Record button
1. Tap the Record button on the bottom of your notebook with the tip of your smartpen.
2. While your smartpen is recording, you will see an incrementing timer on your display.
NOTE: After you initiate a recording, you can use other applications on the Livescribe smartpen, such
as the Calculator. A blinking Record icon will appear in the bottom ri ght corner of your display to
indicate that recording is still in progress. To learn more, see Using Background Recording
page 86.
on
Starting Recording Using Quick Record
1. Press the Power button to turn on your smartpen.
Livescribe™ Smartpen User Guide 70
Page 80

Recording Sessions
2. Press and hold the Power button for approximately five seconds until the display indicates that the
recording started.
NOTE: If your smartpen is off, press and hold the Power button until the start sequence and the word
“REC…” appear on the display. Also, if you write on Livescribe™ dot paper after st arting
recording with Quick Record, your smartpen will link your notes and audio.
Starting Recording Using a Nav Plus
1. Double-tap on the center of the Nav Plus to
go to your smartpen Main Menu.
2. Tap down u ntil Paper Replay™ is displayed.
Livescribe™ Smartpen User Guide 71
Page 81

3. Tap rig ht to launch the Paper Replay™
application. You will see the Record new
session option.
4. Tap right to select Record new session. The
display will indicate that recording has been
initiated.
Stopping a Recording or a Session Playback
Stopping a Recording or a Session Playback
There are three ways to stop recording or playback of a session:
• Tap th e Stop button on the bottom of your notebook.
• Turn Power off.
• Use the Nav Plus label to stop recording.
1. During recording, single-tap the center of the
Nav Plus. Your smartpen will display Stop
Session.
Livescribe™ Smartpen User Guide 72
Page 82

Pausing/Resuming a Recording or Session Playback
2. Tap right to stop recording of the session
Pausing/Resuming a Recording or Session Playback
You can suspend recording or audio playback of a session with the Pause button printed on
the bottom of each notebook page. To resume recor
While your smartpen is paused, a pause icon will appear on the display.
ding or playback, simply tap Pause a seco nd time.
Paused during Playback
While your smartpen is paused, it will continue to capture a copy of your digital notes. Any notes that
you write after you tap pause are linked to the audio that occurred the moment before you tapped
Pause. When you tap on notes that were written while paused, your smartpen will play back the
recording from the moment just before you tapped Pause .
Paused during Recording
Playing a Session
There are three ways to play back a session:
Livescribe™ Smartpen User Guide 73
Page 83

Playing a Session
Play a Session by Tapping on Your Notes
Tap any note of the notes you wrote while you recorded using the Paper Replay™ application. The
recorded audio will play back from the moment the notes were taken. During playback, your smartpen
display will indicate the current position in the recording and the time remaining in your recording.
T
IP: As you record, remember to write something d own on your notepad so th at you can begin playback
by tapping on those notes. If you do not do this, you can instead browse a list of audio sessions
stored on your smartpen with the Nav Plus.
Play a Session by Tapping on Notebook Buttons
Tap on any of the following printed buttons in your notebook to access the most recently recorded or
played back session.
Jump forward/back
Position bar
Bookmark
Play a Session using the Nav Plus
Use the Nav Plus to browse a list of audio sessions and select the audio file by timestamp:
Livescribe™ Smartpen User Guide 74
Page 84

1. Double-tap the center of the Nav Plus to reach your
smartpen Main Menu.
2. Tap down until Paper Replay™is displayed.
Playing a Session
3. Tap right to select the Paper Replay™ application
menu. The first item in the list is Record new
session.
4. Tap down to locate Play Session.
Livescribe™ Smartpen User Guide 75
Page 85

5. Tap rig ht to view a list of sessions listed using their
timestamp.
1. Tap down to scr oll through the list of sessions.
2. Tap right to select the audio session that you want
to open. Playback will begin.
Controlling Session Playback
Controlling Session Playback
There are various ways that you can co ntrol the playback of an audio file on your smartpen and q uickly
locate any section of the audio file. All of the controls mentioned below are available on the bottom of
each page of your notebook.
Changing Playback Volume
Use the Volume controls to raise or lower the playback volume or mute playback
entirely. After muting the playback, you can un-mute
Livescribe™ Smartpen User Guide 76
it by tapping the mute button a second time.
Page 86

Controlling Session Playback
Jumping Forward and Backward
You can jump back or forward 10 seco nds in an audio file by t apping on the Jump controls .
Speed Jumping
Tap and hold down the Jump Back or Jump Forward button to continuously jump through
an audio file. As you continue to speed jump
, the length you jump increases.
Jumping to a Position
If you want to quickly jump to the beginning, end, or any position within an audio session, use the
Jump to Position bar.
• Tap anywhere on the position bar to jump to the corresponding position in the audio file.
• Tap th e 0% bu tto n to jump dir ec tly to th e beginning of the current audio session.
Changing Playback Speed
If you want to speed listen to the audio file or slow the audio session to replay a specific moment, use
the Playback Speed controls
.
• To slow down the audio from normal speed, tap the Slow Down Audio button. T ap repeatedly
to keep slowing down audio speed.
• To speed up the audio from normal speed, tap the Speed Up Audio button. Tap repeatedly to
keep increasing the playback speed.
• To return to normal speed—the speed at which the audio was recorded—tap the Normal Audio
Speed
Livescribe™ Smartpen User Guide 77
button.
Page 87

Setting Session Bookmarks
NOTE: Audio that is played back either sped up or slowed down is no longer in stereo. Audio plays in
mono until it is returned to normal speed.
Setting Session Bookmarks
Bookmarks allow you to flag a section of audio and later jump to it quickly and easily. You can add
bookmarks as you record, or add them later when listening to your recording.
Adding Bookmarks
• Tap th e Boo km a rk bu tt on during either recording or playback. A bookmark will be placed at
that point in the audio file.
Adding a bookmark during recording
Adding a bookmark during playback
Reviewing Bookmarks
After you have added bookmarks to an audio session, you can scan through the bookmarks using the
Previous
During playback, your smartpen display will in
Livescribe™ Smartpen User Guide 78
and Next bookmark buttons.
dicate the bookmarks in the audio timeline.
Page 88

Recording Paperless (Audio Only) Sessions
Recording Paperless (Audio Only) Sessions
If you want to record audio but cannot or do not want to write on Livescribe ™ dot paper, you can create
a paperless or pageless Paper Replay™ session.
NOTES:
• When recording a paperless session, you can at a ny time, link the recor ding to written notes by wr it-
ing on Livescribe™ dot paper. At that point, the paperless session will be associated with your
notes and will no longer be paperless.
• Similarly, if you have previously recorded a paperless session, you can play it back and begin writ-
ing on Livescribe™ dot paper. The p aperless session will be associated with your notes and will no
longer be paperless. See
UAnnotating - Linking Notes to Pre-Recorded Sessions on page 80.
To create a paperless session, begin recording audio but do not take any notes. You can start a
paperless session in various ways:
• Tapping the Record button on any notebook (see Starting Recording with a Pre-Printed Record
button on page 70)
• Using the Quick Record feature (see Starting Recording Using Quick Record on page 70).
• Using the Nav Plus (see Starting Recording Using a Nav Plus on page 71
The new paperless session will appear in the Paper Replay™ session list.
To access a paperless session, use the
Livescribe smartpen. Your smartpen indicates a paperless session with an asterisk (*) next to the
filename in the Select Session list.
Livescribe™ Smartpen User Guide 79
Nav Plus to browse Paper Replay™ sessions stored on the
Page 89

Annotating - Linking Notes to Pre-Recorded Sessions
N
OTE: If reco rding the paperless session was the last action you took with the Livescribe smartpen, you
can also access the session by tapping on the 0% point of the paper control position bar.
Annotating - Linking Notes to Pre-Recorded Sessions
You can write new notes and link them to a pre viously recorded audio file by writing on dot p aper while
you play back the audio recording. Your recorded audio can be already linked to your notes, or
paperless (see
when you need to clarify or expand on your note s later. For example, you may need to go back to your
tes to correct or clarify a point made in a meeting or lecture. Those written corrections are linked to
no
your original recorded audio.
Recording Paperless (Audio Only) Sessions on page 79). This feature is very useful
To link notes to previously-recorded audio:
1. Start audio playback by tapping on your partially written notes or using Nav Plus to play a
previously-recorded session.
2. After you start playback, begin writing with the Livescribe smartpen. Your smartpen automatically
links your new notes to your previously recorded audio.
3. Stop playback.
4. Tap on your newly written notes to play back the audio that you linked while writing the new notes.
Livescribe™ Smartpen User Guide 80
Page 90

Browsing Paper Replay™ Sessions
1. Double-tap the center of the Nav Plus to go
to the Main Menu.
2. Tap down to scroll through the applications
on your smartpen until Paper Replay™ is
displayed.
Browsing Paper Replay™ Sessions
3. Tap rig ht to launch the Paper Replay™
application menu. Record new session will
be the first item.
4. Tap down until you reach Play session.
Livescribe™ Smartpen User Guide 81
Page 91

5. Tap rig ht to browse sessions.
6. Tap d own to scroll through a list of sessions.
Browsing Paper Replay™ Sessions
Paper Replay™ sessions are named based
on the time and date they are created. For
example, if a session is started on June 03,
2008, at 12:22PM, it will be named and displayed as 06.03.08 12:22p.
NOTE: Your smartpen displays Paper Replay™
sessions in the order of the most recent
with paperless sessions coming before
regular sessions.
7. Tap right to select the session you want to
play .
Livescribe™ Smartpen User Guide 82
Page 92

Deleting Paper Replay™ Sessions
Deleting Paper Replay™ Sessions
If you wish to delete sessions from your smartpen for any reason, such as managing storage, we
recommend that you transfer your notes to Livescribe Desktop and then delete Paper Replay™
sessions from your smartpen.
When you delete a session from the Livescribe smartpen, your paper notes associated with that file
will no longer play back the Paper Replay™ audio that was associated with that ink. However, as long
as you have transferred your notes to Livescribe Desktop, you can continue to replay your notes from
your computer.
NOTE: Y ou cannot retrieve a sessio n after you delete it from both the Livescribe smartpen and Livescribe
Desktop. Deleting sessions does not affect the notes on the Livescribe smartpen - they will
remain on the Livescribe smartpen until you archive the notebook. To learn how to archive a
paper product, see the Livescribe™ Desktop User Guide located in the Livescribe Desktop Help.
There are various ways to delete Paper Replay™ sessions from the Livescribe smartpen:
• Using the Windows Livescribe Desktop ‘Remove Session from Smartpen’ option or using the Mac
Livescribe Desktop ‘Remove Recordings from Smartpen…’ option. For more information see
Managing your Smartpen in the Livescribe™ Desktop User Guide.
• Archiving your notebook, journal, or other paper product to remove all Paper Replay™ sessions
from your smartpen for that paper product. See the Managing your Smartpen in the Livescribe™
Desktop User Guide for more information.
• Using the Main Menu on the Livescribe smartpen. See Deleting Sessions from the Smartpen Main
Menu on page 83.
• Using the Delete Current Session shortcut to delete the most-recently accessed session. See
Using the Delete Current Session Shortcut on page 86.
Deleting Sessions from the Smartpen Main Menu
To delete Paper Replay™ sessions from your smartpen using the Main Menu:
Livescribe™ Smartpen User Guide 83
Page 93

1. Double-tap on the Nav Plus to go to the Main
Menu.
2. Tap down to scroll through the applications on
your smartpen until Paper Replay™is
displayed.
Deleting Paper Replay™ Sessions
3. Tap right to launch Paper Replay.
4. Tap down to locate Delete session from the
menu.
Livescribe™ Smartpen User Guide 84
Page 94

5. Tap rig ht to browse sessions.
6. Tap down to scroll through a list of sessions.
7. Locate the session to delete and tap right to
select it.
Deleting Paper Replay™ Sessions
8. Tap right to confirm deletion. Y o ur smartpen will
indicate that the session is deleted.
Livescribe™ Smartpen User Guide 85
Page 95

Using Background Recording
Using the Delete Current Session Shortcut
You can use a shortcut to delete the current session. In this context, the current session is the most
recently accessed session. This is the last session that was either played or recorded.
To activate the Delete Current Ses
:
sion shortcut:
1. On any Paper Replay Stop button, tap and hold for
three seconds. Y our smartpen will instruct you to tap
again to delete the current session.
2. Tap Stop again to confirm the deletion.
Using Background Recording
With background recording, you can launch and run another Livescribe smartpen applica tion (such as
a calculator) while continuing to run Paper Replay™. Paper Replay™will continue audio recording in
the background However , your smartpen will not link your notes to the audio while the ot her application
is running. This is because the new application receives your smartpen input (ink and strokes). The
newly-launched application has the focus of the Livescribe smartpen, and has control of your display
and audio output.
If you want to stop or pause recording, or add new ind
Paper Replay™ as the dominant application. There are several ways to make the Paper Replay™
application reactivate (also known as snap back) to receive input from the Livescribe smartpen:
ex points to your recording, you must reactivate
• Tap on any of the printed Paper Replay™ controls, or on any Paper Replay™ notes you have
written.
Livescribe™ Smartpen User Guide 86
Page 96

Paper Replay Password
• Do anything that would normally launch Paper Replay, such as tap in a session region or launch the
Paper Replay™ application using the Nav Plus.
• Do not write or tap anything with your smartpen for five seconds.
Y our smartpen display will indicate bac
lower right-hand corner of your display.
I
MPORTANT: TURNING OFF OR DOCKING YOUR SMARTPEN WILL STOP RECORDING.
kground recording is in effect with a blinking recording dot in the
Paper Replay Password
You can use Paper Replay Password to set a password for your Paper Replay sessions. Setting a
password can prevent others from listening to your recorded audio on your smartpen. When Paper
Replay is protected, audio play back is prevented until the password is entered. The password is a
four-digit number.
To use Paper Replay Password:
1. From the Main Menu, Tap down to locate Paper
Replay.
2. Tap right to launch Paper Replay.
3. Tap down to Password protection.
4. Tap right to set your password.
Livescribe™ Smartpen User Guide 87
Page 97

5. On your notepad, write four digits as your password.
To disguise your written password, Livescribe recommends using one of these methods:
• Write the numbers in a different order, for
example backwards.
• Write the numbers in various places on the
page.
• After writing and confirming your password, go
back and write other numbers over your
password to disguise it.
6. When you are finished entering your password, tap
right on the Nav Plus. Y o ur smartpen will confirm the
password is set.
Paper Replay Password
7. After setting your password, your smartpen will
prompt you each time you try to play back a session.
To listen to your sessions, write your password on
your notebook when prompted by your smartpen.
You smartpen will confirm if your password is
correct.
Canceling Paper Replay Password
To cancel Paper Replay password and erase your password:
1. Use the Nav Plus to navigate to the Paper Replay >
Password protection > Remove password.
Livescribe™ Smartpen User Guide 88
Page 98

2. Tap right on the Nav Plus to remove the password
and cancel password protection.
3. At the prompt, write the current password to be
removed.
NOTE: Passwords are not saved when password
protection is turned off. The pre vious password is
permanently erased. When you reactivate
password protection, you will need to set a new
password. You can re-use passwords. They are
not tracked across uses.
4. Your smartpen will confirm the password is
removed.
Paper Replay Password
NOTE: You can also cancel password protection and remove your Paper Replay password using
Livescribe Desktop. This is useful if you forget your password and need to regain access to your
Paper Replay sessions. The Livescribe Desktop you use to cancel the password must be
registered to the same account as your smartpen. You must dock your smartpen as well to
remove the password. See the Livescribe Desktop User Guide for instructions.
Livescribe™ Smartpen User Guide 89
Page 99

7 Additional Applications
In addition to Paper Replay, your Livescribe smartpen includes other applications, including:
• Printed Calculator. See Using the Printed Calculator on page 90.
• Translator Demo. See Using the Translator Demo on page 93.
• Piano. See Using the Piano on page 98.
You can also purchase additional applications from the Livescribe Online Store. See
Applications on page 103.
Getting New
Using the Printed Calculator
The calculator located on the inside cove rs of your notebook perfor ms basic math functions, as well as
many useful scientific functions. To use the calculator, tap on the printed keys with the tip of the
Livescribe smartpen.
Livescribe™ Smartpen User Guide 90
Page 100

NOTE: A stylus is available for purchase from the Livescr ibe web store. Use the stylus instead of a n ink
cartridge to keep your calculator free and clear of ink marks. Fo r information on using the stylus,
please see Using a 3-D Recording Headset
on page 26.
Basic Math Functions
The calculator displays results and accepts input of numbers up to a length of 11 characters. If a result
is longer than 1 1 digits, the calcula tor displays it in exponential not ation. You can tap on the
toggle between positive and negative numbers.
Using Basic Math Operators
Basic math operators function like a typical desk calculator. Tap a number, an operator, another
number, and an equal sign to see the answer displayed.
If you tap the equal sign directly after the operator, th
number that you tapped.
Example: Tap ‘6 x =’. The displayed result is 36.
If you tap more than one operator in a row, only the last operator is kept.
Example: Tap ‘6 x + 4 =’. The result is 10. The ‘+’ replaces the ‘x’.
If you tap the equal sign repeatedly in succession,
Example: Tap ’3 + 4 = =’ The initial result is
Using Parentheses in Expressions
7. Then, 4 is added to 7 equaling 11.
e calculator performs the operation on the initial
it will repeat the previous calculation.
key to
Normally the calculator respects the st andard order of ope rations in an extended expres sion. However ,
you can use parentheses in an expression to control the sequence of execution. You can nest
parentheses in order to further control of the calculation sequence. Each time you tap a close
parenthesis, the calculator calculates and displays the result of the enclosed expression.
Livescribe™ Smartpen User Guide 91
 Loading...