

Page 1
LED-DECKENLEUCHTE MIT BLUETOOTH-LAUTSPRECHER /
LED CEILING LIGHT WITH BLUETOOTH SPEAKER /
PLAFONNIER À LED AVEC HAUT-PARLEUR BLUETOOTH
LED-DECKENLEUCHTE MIT
BLUETOOTH-LAUTSPRECHER
Montage-, Bedienungs- und Sicherheitshinweise
PLAFONNIER À LED AVEC
HAUT-PARLEUR BLUETOOTH
Instructions de montage, d‘utilisation et
consignes de sécurité
LED STROPNÍ SVÍTIDLO S
BLUETOOTH REPRODUKTOREM
Pokyny k montáži, obsluze a bezpečnostní pokyny
LÂMPADA LED PARA TETO
COM BLUETOOTH
Indicações de montagem, utilização e segurança
IAN 288149
LED CEILING LIGHT WITH
BLUETOOTH SPEAKER
Assembly, operating and safety instructions
LED-PLAFONDLAMP MET
BLUETOOTH-LUIDSPREKER
Montage-, bedienings- en veiligheidsinstructies
LÁMPARA LED DE TECHO CON
ALT AVOZ BLUETOOTH
Instrucciones de montaje, de uso y de seguridad
Page 2
Klappen Sie vor dem Lesen die beiden Seiten mit den Abbildungen aus und machen Sie sich anschließend
mit allen Funktionen des Gerätes vertraut.
Before reading, unfold the page containing the illustrations and familiarise yourself with all functions of the
device.
Avant de lire le mode d‘emploi, ouvrez la page contenant les illustrations et familiarisez-vous ensuite avec
toutes les fonctions de l‘appareil.
Vouw vóór het lezen de pagina met de afbeeldingen open en maak u vertrouwd met alle functies van het
apparaat.
Antes de empezar a leer abra la página que contiene las imágenes y, en seguida, familiarícese con todas
las funciones del dispositivo.
Před čtením si otevřete stranu s obrázky a potom se seznamte se všemi funkcemi přístroje.
Antes de começar a ler abra na página com as imagens e, de seguida, familiarize-se com todas as
funções do aparelho.
DE / AT / CH Montage-, Bedienungs- und Sicherheitshinweise Seite 5
GB / IE Assembly, operating and safety instructions Page 13
FR / BE Instructions de montage, d‘utilisation et consignes de sécurité Page 21
NL / BE Montage-, bedienings- en veiligheidsinstructies Pagina 29
CZ Pokyny k montáži, obsluze a bezpečnostní pokyny Strana 37
ES Instrucciones de montaje, de uso y de seguridad Página 45
PT Indicações de montagem, utilização e segurança Página 53
Page 3

1
4 5
A B
C
2
D
13
2
24
23
22
3
21
6
14
15
16
17
18
19
20
12
1
1
Page 4

6
FE
81
7
5
G H
1
4
I
8
9
410 9 10
1
10
2
11
10
27
25
26
26
Page 5

Inhaltsverzeichnis
Legende der verwendeten Piktogramme ........................................................... Seite 6
Einleitung ......................................................................................................................................... Seite 6
Bestimmungsgemäße Verwendung .................................................................................................... Seite 6
Lieferumfang ........................................................................................................................................ Seite 6
Teilbeschreibung .................................................................................................................................Seite 7
Technische Daten ................................................................................................................................ Seite 7
Sicherheit ......................................................................................................................................... Seite 7
Sicherheitshinweise ............................................................................................................................. Seite 7
Sicherheitshinweise zu Batterien ........................................................................................................ Seite 8
Vorbereitung ................................................................................................................................ Seite 8
Benötigtes Werkzeug und Material ................................................................................................... Seite 8
Vor der Installation ................................................................................................................. Seite 8
Inbetriebnahme ......................................................................................................................... Seite 9
Leuchte montieren / installieren ..........................................................................................................Seite 9
Wandhalterung montieren .................................................................................................................Seite 9
Batterien einlegen / wechseln ............................................................................................................. Seite 9
Leuchte über den Lichtschalter bedienen ........................................................................................... Seite 10
Fernbedienung verwenden ................................................................................................................. Seite 10
Licht ein- / ausschalten ......................................................................................................................... Seite 10
Licht dimmen ........................................................................................................................................ Seite 10
30-Minuten-Timer ................................................................................................................................Seite 10
Bluetooth-Verbindung .........................................................................................................................Seite 10
Musiklautstärke regeln ........................................................................................................................ Seite 11
Musiktitel anwählen ............................................................................................................................ Seite 11
Wartung und Reinigung ..................................................................................................... Seite 11
Entsorgung ..................................................................................................................................... Seite 11
Garantie und Service ............................................................................................................Seite 12
Garantieerklärung ............................................................................................................................... Seite 12
Serviceadresse ....................................................................................................................................Seite 12
Konformitätserklärung ......................................................................................................................... Seite 12
5 DE/AT/CH
Page 6
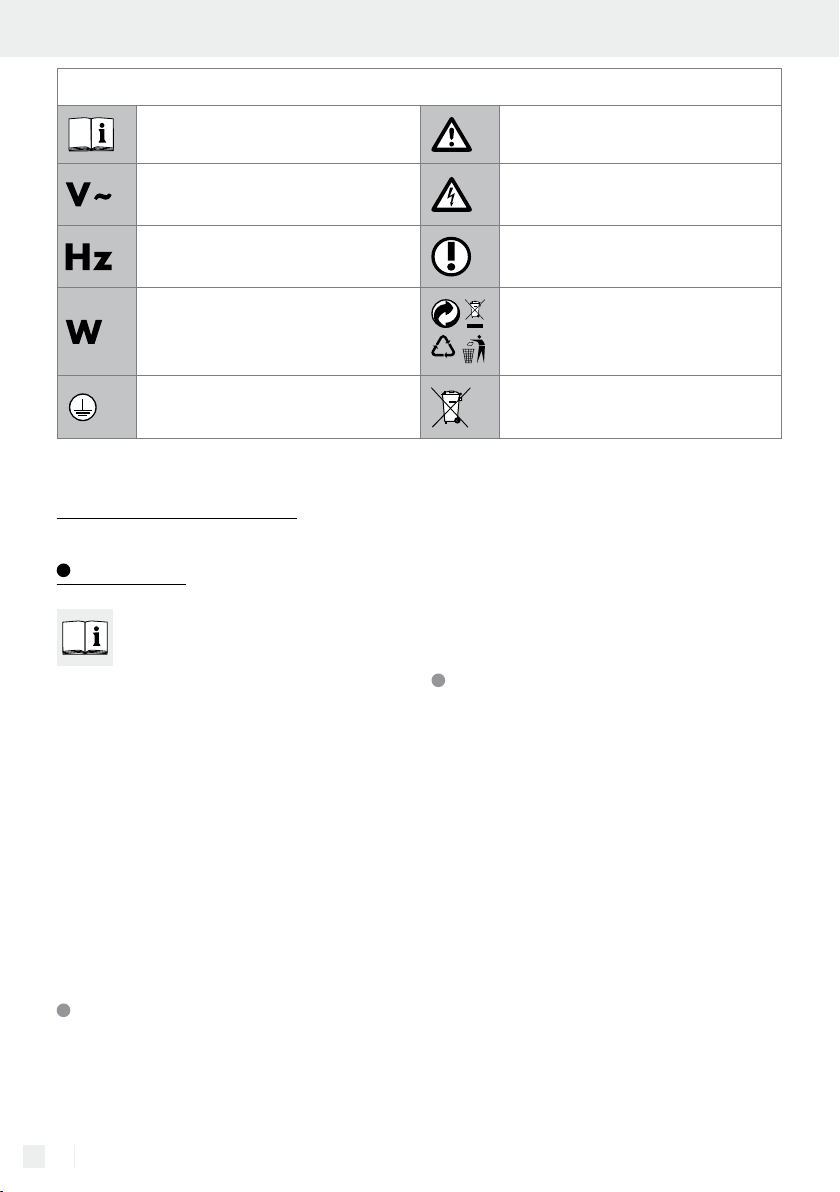
Legende der verwendeten Piktogramme
Bedienungsanleitung lesen!
Volt (Wechselspannung) Vorsicht! Stromschlaggefahr!
Hertz (Frequenz) So verhalten Sie sich richtig
Watt (Wirkleistung)
Schutzklasse I
LED-Deckenleuchte mit
Bluetooth-Lautsprecher
Einleitung
Wir beglückwünschen Sie zum Kauf Ihres
neuen Gerätes. Sie haben sich damit für
ein hochwertiges Produkt entschieden.
Bitte lesen Sie diese Bedienungsanleitung vollständig
und sorgfältig durch. Klappen Sie die Seiten mit den
Abbildungen aus. Diese Anleitung gehört zu diesem
Produkt und enthält wichtige Hinweise zur Inbetriebnahme und Handhabung. Beachten Sie immer alle
Sicherheitshinweise. Prüfen Sie vor der Inbetriebnahme, ob die korrekte Spannung vorhanden ist und
ob alle Teile richtig montiert sind. Sollten Sie Fragen
haben oder unsicher in Bezug auf die Handhabung
des Gerätes sein, setzen Sie sich bitte mit Ihrem
Händler oder der Servicestelle in Verbindung. Bewahren Sie diese Anleitung bitte sorgfältig auf und
geben Sie sie ggf. an Dritte weiter.
Bestimmungsgemäße
Verwendung
Warn- und Sicherheitshinweise
beachten!
Entsorgen Sie Verpackung
b
a
und Gerät umweltgerecht!
Entsorgen Sie Batterien
umweltgerecht!
Räumen geeignet. Die Leuchte kann auf allen normal entflammbaren Oberflächen befestigt werden.
Die Elektrofachkraft, die die Leuchte installiert, hat
darauf zu achten, dass die Leuchte nicht auf feuchtem oder leitendem Untergrund installiert wird! Dieses Gerät ist nur für den Einsatz in privaten
Haushalten vorgesehen.
Lieferumfang
Kontrollieren Sie unmittelbar nach dem Auspacken
immer den Lieferumfang auf Vollständigkeit sowie
den einwandfreien Zustand des Gerätes.
1 LED-Deckenleuchte mit Bluetooth-Lautsprecher
(Leuchten-Basis, Kunststoffabdeckung)
1 Fernbedienung
1 Wandhalterung für Fernbedienung (inkl. Mon-
tagematerial 1 x 3M-Klebepad, 2 x Schrauben)
2 Batterien (1,5 V; LR03; AAA)
3 Kunststoffdübel (Deckenmontage)
3 Schrauben (Deckenmontage)
1 Montage- und Bedienungsanleitung
Diese Leuchte ist ausschließlich für den Betrieb im
Innenbereich, in trockenen und geschlossenen
6 DE/AT/CH
Page 7
Einleitung / SicherheitEinleitung
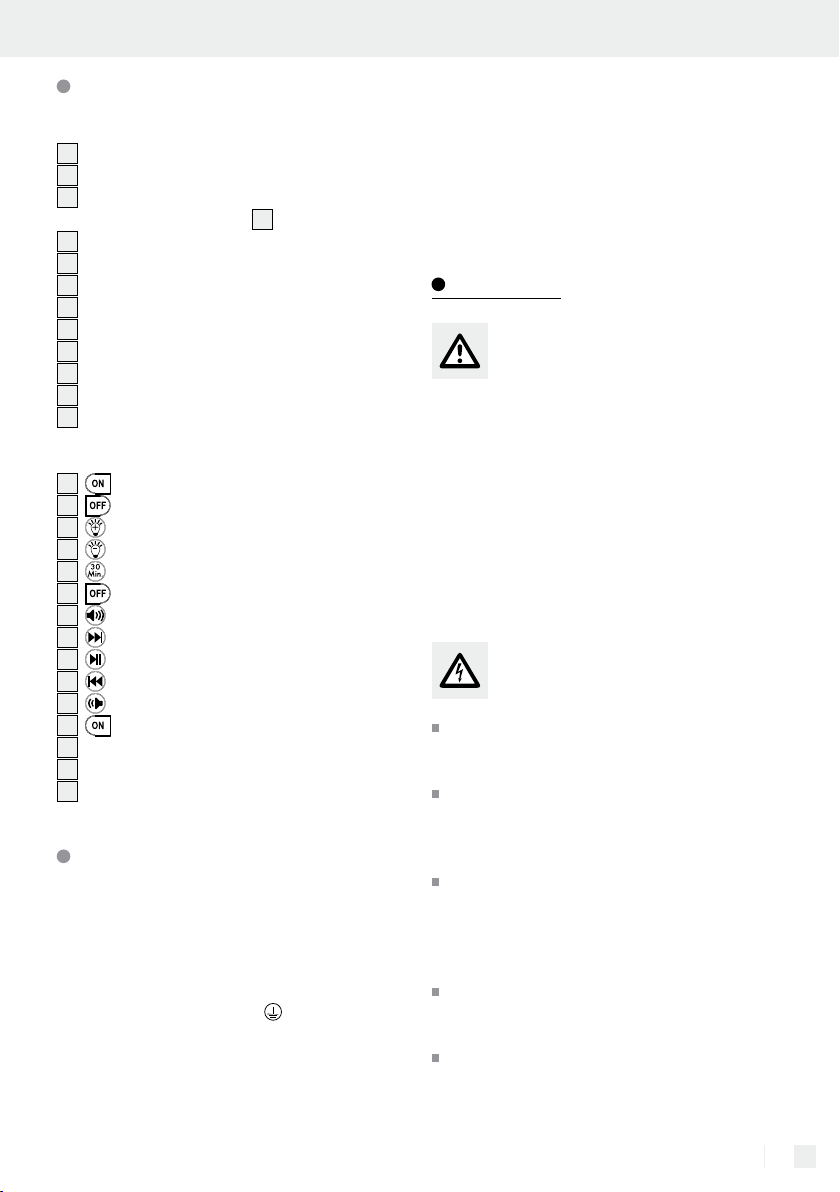
Teilbeschreibung
Leuchte:
1
Leuchten-Basis
2
Kunststoffabdeckung
3
Lautsprecherabdeckung
(in Kunststoffabdeckung
4
Schrauben
5
Dübel
6
Markierung Bohrlöcher (1, 2, 3)
7
Netzanschlusskabel (extern)
8
Lüsterklemme
9
Schraubenaufnahmelöcher
10
Haltebolzen
11
Aufkleber
12
LED-Deckenleuchte
2
integriert)
Fernbedienung:
13
Taste ON (Lighting)
14
Taste OFF (Lighting)
15
Taste Dimmer +
16
Taste Dimmer –
17
Taste 30-Minuten-Timer
18
Taste OFF (Audio)
19
Taste Lautstärke +
20
Taste Musiktitel anwählen (vor)
21
Taste Pause / Bluetooth-Verbindung Standby
22
Taste Musiktitel anwählen (zurück)
23
Taste Lautstärke –
24
Taste ON (Audio)
25
Schrauben (Wandhalterung)
26
Wandhalterung (Fernbedienung)
27
3M-Klebepad
Technische Daten
Modellnr.: 9000.034.080
Betriebsspannung: 220–240 V∼,
50 / 60 Hz
Leistung: max. 24 Watt (Laut-
sprecher max. 6 Watt)
Schutzklasse: I /
Schutzart: IP20
Maße: Ø ca. 40 cm,
Höhe ca. 8 cm
Frequenzbereich
Lautsprecher: 120–20.000 Hz
Bluetooth-Version: 4.0
Bluetooth-Reichweite: ca. 9 m
Steuerungsverfahren
Fernbedienung: Infrarot
Reichweite Fernbedienung: 5–6 m
Sicherheit
Sicherheitshinweise
Bei Schäden, die durch Nichtbeachtung dieser Bedienungsanleitung verursacht werden, erlischt der
Garantieanspruch! Für Folgeschäden wird keine
Haftung übernommen! Bei Sach- oder Personenschäden, die durch unsachgemäße Handhabung
oder Nichtbeachtung der Sicherheitshinweise verursacht werden, wird keine Haftung übernommen!
Lassen Sie die Leuchte oder Verpackungsmaterial
nicht achtlos liegen. Plastikfolien / -tüten, Kunststoffteile etc. können für Kinder zu einem gefährlichen
Spielzeug werden.
Vermeiden Sie Lebensgefahr
durch elektrischen Schlag
Lassen Sie die Elektroinstallation durch einen
ausgebildeten Elektriker oder eine für Elektroinstallation eingewiesene Person durchführen.
Überprüfen Sie vor jedem Netzanschluss das
Netzanschlusskabel auf etwaige Beschädigungen. Benutzen Sie Ihre Leuchte niemals, wenn
Sie irgendwelche Beschädigungen feststellen.
VORSICHT! Beschädigte Netzkabel bedeu-
ten Lebensgefahr durch elektrischen Schlag.
Wenden Sie sich bei Beschädigungen, Reparaturen oder anderen Problemen an der Leuchte
an die Servicestelle oder eine Elektrofachkraft.
Entfernen Sie vor der Montage die Sicherung
oder schalten Sie den Leitungsschutzschalter im
Sicherungskasten aus (0-Stellung).
Vergewissern Sie sich vor der Montage, dass die
vorhandene Netzspannung mit der benötigten
Betriebsspannung der Leuchte übereinstimmt
(220–240 V∼, 50 / 60 Hz).
7 DE/AT/CH
Page 8
Vermeiden Sie unbedingt die Berührung der
Leuchte mit Wasser oder anderen Flüssigkeiten.
Öffnen Sie niemals das Gehäuse der Leuchte
oder stecken irgendwelche Gegenstände in
dieselbe. Derartige Eingriffe bedeuten Lebensgefahr durch elektrischen Schlag.
Das LED-Modul ist nicht ersetzbar. Sollte das
LED-Modul am Ende seiner Lebensdauer ausfallen, muss die ganze Leuchte ersetzt werden.
Die Leuchte nicht auf feuchtem oder leitendem
Untergrund installieren!
Vermeiden Sie Brand- und
Verletzungsgefahr
Lassen Sie die Leuchte oder Verpackungsmate-
rialien nicht achtlos liegen. Plastikfolien / -tüten,
Kunststoffteile etc. könnten für Kinder zu einem
gefährlichen Spielzeug werden.
Decken Sie die Leuchte nicht mit Gegenständen
ab. Eine übermäßige Wärmeentwicklung kann
zu Brandentwicklung führen.
Batterien von Kindern fernhalten, nicht kurz-
schließen oder auseinandernehmen.
Alle Batterien eines Satzes gleichzeitig aus-
wechseln. Nur Batterien des gleichen Typs,
keine unterschiedlichen Typen oder gebrauchte
und neue Batterien miteinander verwenden.
Batteriekontakte und auch die Kontakte im
Gerät vor dem Einlegen der Batterien reinigen.
Sicherstellen, dass die Batterien richtig eingelegt
werden, d.h. Polarität (+ und –) beachten.
Erschöpfte Batterien umgehend entfernen.
Erhöhte Auslaufgefahr!
Kontakt der Batterieflüssigkeit mit Haut, Augen
und Schleimhäuten vermeiden. Bei Kontakt die
betroffenen Stellen sofort mit reichlich klarem
Wasser spülen und umgehend einen Arzt aufsuchen.
Vorbereitung
Benötigtes Werkzeug
und Material
So verhalten Sie sich richtig
Montieren Sie die Leuchte so, dass sie vor
Feuchtigkeit und Verschmutzung geschützt ist.
Bereiten Sie die Montage sorgfältig vor und
nehmen Sie sich ausreichend Zeit. Legen Sie
alle Einzelteile oder Material vorher übersichtlich und griffbereit zurecht.
Seien Sie stets aufmerksam! Achten Sie immer
darauf was Sie tun und gehen Sie stets mit
Vernunft vor.
Montieren Sie die Leuchte in keinem Fall, wenn
Sie unkonzentriert sind oder sich unwohl fühlen.
Sicherheitshinweise
zu Batterien
Batterien dürfen nicht übermäßiger Wärme wie
Sonnenschein, Feuer oder ähnlichem ausgesetzt
werden. Die Batterien können explodieren!
Nicht aufladbare Batterien niemals wieder auf-
laden. Explosionsgefahr!
8 DE/AT/CH
Die genannten Werkzeuge und Materialien sind
im Lieferumfang enthalten. Es handelt sich hierbei um
unverbindliche Angaben und Werte zur Orientie
Die Beschaffenheit des Materials richtet sich nach
den individuellen Gegebenheiten vor Ort.
– Bleistift / Markierwerkzeug
– Spannungsprüfer
– Schraubendreher
– Bohrmaschine
– Bohrer (ca. Ø 6 mm)
– Hammer
– Seitenschneider
– Leiter
nicht
rung.
Vor der Installation
Wichtig: Der elektrische Anschluss muss durch
einen ausgebildeten Elektriker oder eine für Elektroinstallation eingewiesene Person erfolgen. Diese
muss Kenntnis über die Eigenschaften der Leuchte
und Anschlussbestimmung haben.
Page 9

Vor der Installation / InbetriebnahmeSicherheit / Vorbereitung / Vor der Installation
Machen Sie sich vor der Installation mit allen
Anweisungen und Abbildungen in dieser Anleitung sowie mit der Leuchte selbst vertraut.
Stellen Sie vor der Installation sicher, dass an
der Leitung, an der die Leuchte angeschlossen
werden soll, keine Spannung vorliegt. Entfernen
Sie hierfür die Sicherung oder schalten Sie den
Leitungsschutzschalter im Sicherungskasten aus
(0-Stellung).
Überprüfen Sie die Spannungsfreiheit mittels
Spannungsprüfer.
LED-Deckenleuchte 12 auspacken und auf eine
rutschfeste Unterlage legen (Seien Sie vorsichtig, dass hierbei keine Kratzer entstehen).
Mit zwei Händen die Kunststoffabdeckung 2
greifen und leichten Druck auf die feste Unterlage ausüben. Hierbei die Kunststoffabdeckung
2
bis zum Anschlag gegen den Uhrzeigersinn
drehen (entgegen der Pfeilrichtung) und die
Kunststoffabdeckung
2
nach oben abnehmen.
Inbetriebnahme
Leuchte montieren / installieren
(s. Abb. A–I)
Stellen Sie vor der Installation sicher, dass an
der Leitung, an der die Leuchte angeschlossen
werden soll, keine Spannung vorliegt. Entfernen Sie hierfür die Sicherung oder schalten Sie
den Leitungsschutzschalter im Sicherungskasten
aus (0-Stellung).
Halten Sie die Leuchten-Basis 1 an die ge-
wünschte Montageposition. Beachten Sie hierbei
die Bohrung in der Leuchten-Basis
welche das Netzanschlusskabel eingeführt wird.
Markieren Sie drei Bohrlöcher 6 (siehe Abb. D).
Bohren Sie die Löcher. Stellen Sie sicher, dass
Sie das Netzanschlusskabel (extern)
beschädigen (siehe Abb. E).
Stecken Sie die Dübel 5 in die Bohrlöcher.
Nehmen Sie falls notwendig einen Hammer
zur Hilfe (siehe Abb. E).
1
, durch
7
nicht
Führen Sie das Netzanschlusskabel durch die
dafür vorgesehene Bohrung in der Leuchten-
1
Basis
und befestigen Sie die Leuchte an der
Decke (siehe Abb. F–G).
Die drei Leitungen der Hausinstallation entspre-
chend den vorgegebenen Farben an die Lüsterklemme
8
der Leuchten-Basis 1 anschließen.
Hinweis: Achten Sie darauf, dass Sie die ein-
zelnen Leiter des Netzanschlusskabels (extern)
7
jeweils richtig anschließen: stromführender
Leiter, schwarz oder braun = Symbol L,
Neutralleiter, blau = Symbol N,
Schutzleiter, grün-gelb = Symbol
Montieren Sie die Kunststoffabdeckung 2 der
Leuchte. Setzen Sie hierzu die Abdeckung mit
den drei Kerben an den entsprechenden
Haltebolzen
10
(siehe Abb. H) an und drücken diese nach oben. Drehen Sie die Abdeckung im Uhrzeigersinn rechts (Pfeilrichtung),
um diese zu befestigen. Der Aufkleber mit dem
11
Pfeil
kann nun entfernt werden.
Setzen Sie die Sicherung wieder ein oder
schalten Sie den Leitungsschutzschalter am
Sicherungskasten ein (I-Stellung).
Ihre LED-Deckenleuchte
12
mit Bluetooth-Lautspre-
cher ist betriebsbereit.
Wandhalterung montieren
Montieren Sie die Wandhalterung für die Fern-
bedienung
des Klebepads
26
anhand der Schrauben 25 oder
27
wie in Abbildung I dargestellt.
Batterien einlegen / wechseln
Hinweis: Für die Fernbedienung sind zwei Batte
v
om Typ AAA / LR03 zu verwenden (im Lieferum-
fang enthalten).
Die Abdeckung des Batteriefaches (Rückseite)
zum Öffnen ca. 1 cm nach unten schieben und
dann den Deckel abheben.
Z
wei Batterien vom mitgelieferten Typ AAA / LR03
in das Batteriefach legen. Auf richtige Polarität
achten!
rien
9 DE/AT/CH
Page 10

Abdeckung aufsetzen und zurückschieben, um
das Batteriefach zu schließen.
Ihre Fernbedienung ist betriebsbereit.
Leuchte über den
Lichtschalter bedienen
Die LED-Deckenleuchte 12 kann über den
lichtschalter ein- und ausgeschaltet werden. Die
Lichtintensität entspricht hierbei immer der zuletzt eingestellten Helligkeit. Alle anderen Funktionen werden ausschließlich über die
Fernbedienung gesteuert.
Wand-
Fernbedienung verwenden
ACHTUNG! Alle Funktionen der Fernbedienung
sind nur gegeben, wenn die LED-Deckenleuchte
mit dem Wandlichtschalter eingeschaltet wurde.
Licht ein- / aussc halten
1. Licht einschalten
Drücken Sie die „ “ Taste (Lighting) 13, um
die LED-Deckenleuchte
Das Empfangssignal wird mit einem Piep-Ton
bestätigt.
2. Licht ausschalten
Drücken Sie die „ “ Taste (Lighting) 14, um
die LED-Deckenleuchte
Das Empfangssignal wird mit einem Piep-Ton
bestätigt.
12
einzuschalten.
12
auszuschalten.
Licht dimmen
1. Beleuchtungsstärke erhöhen
Drücken Sie die „ “ Taste Dimmer + 15, um
die Beleuchtungsstärke zu erhöhen. Ist das Maximum der Beleuchtungsstärke erreicht, ertönt
ein Piep-Ton. Bei kurzzeitigem Drücken dieser
Taste erhöht sich die Beleuchtungsstärke
stufenweise je Druckvorgang. Wird die „
Taste Dimmer +
die Beleuchtungsstärke automatisch bis zur maximalen Helligkeit.
2. Beleuchtungsstärke verringern
Drücken Sie die „ “ Taste Dimmer – 16, um
die Beleuchtungsstärke zu verringern. Ist das
Minimum der Beleuchtungsstärke erreicht, ertönt
ein Piep-Ton. Bei kurzzeitigem Drücken verring
sich die Beleuchtungsstärke stufenweise je Druckvorgang. Wird die „ “ Taste Dimmer – 16 l
gedrückt, verringert sich die Beleuchtungsstärke
automatisch bis zur minimalen Helligkeit.
15
lange gedrückt, erhöht sich
30-Minuten-Timer
1. Timer einschalten
Drücken Sie die „ “ Taste 17, um die LED-
12
Deckenleuchte
Das Licht und auch die Bluetooth-Funktion (Musik)
werden automatisch nach ca. 30 Minuten ausgeschaltet.
2. Timer ausschalten
Möchten Sie die Timer-Funktion während der
30 Minuten ausschalten, drücken Sie die
Taste 17 erneut für länger als
das Signal von der LED-Deckenleuchte 12 empfangen, ertönt ein langgezogener Piep-Ton und
bestätigt das Abschalten der Timer-Funktion.
12
automatisch auszuschalten.
3 Sekunden. Wird
Bluetooth-Verbindung
1. Bluetooth-Verbindung herstellen
Drücken Sie die Audio „ “ Taste (Audio) 24.
Das Empfangssignal wird mit einem Piep-Ton
bestätigt.
Ca. 1–2 Sekunden später wird die Bluetooth-
Verbindung akustisch untermalt automatisch
aufgebaut, die blaue LED innerhalb der
LED-Deckenleuchte
blinken.
12
beginnt schnell zu
“
ert
ange
„ “
10 DE/AT/CH
Page 11

Inbetriebnahme / Wartung und Reinigung / EntsorgungInbetriebnahme
Ist die Verbindung hergestellt, ertönt eine kurze
Melodie.
Bei einer ersten Verbindung mit Ihrem Handy,
Tablet etc. wählen Sie die Bluetooth-Verbindung
„LBT00738“.
2. Bluetooth-Verbindung beenden
Drücken Sie die Audio „ “ Taste (Audio) 18.
Das Empfangssignal wird mit einem Piep-Ton bestätigt. Die Bluetooth-Verbindung wird beend
et.
Nach erfolgter Verbindung stehen Ihnen
folgende Audiosteuerungen zur Verfügung:
Musiklautstärke regeln
1. Musiklautstärke verringern
Drücken Sie die „
“ Taste Lautstärke – 23, um die
Lautstärke zu verringern. Ist das Minimum der Lautstärke erreicht, ertönt ein Piep-Ton. Bei kurzzeitigem
Drücken verringert sich die Lautstärke stufenweise je
Druckvorgang. Wird die „
“ Taste Lautstärke – 23
lange gedrückt, verringert sich die Lautstärke automatisch bis zu einem Minimum.
2. Musiklautstärke erhöhen
Drücken Sie die „
“ Taste Lautstärke + 19, um die
Lautstärke zu erhöhen. Ist das Maximum der Lautstärke erreicht, ertönt ein Piep-Ton. Bei kurzzeitigem
Drücken erhöht sich die Lautstärke stufenweise je
Druckvorgang. Wird die „
“ Taste Lautstärke + 19
lange gedrückt, erhöht sich die Lautstärke automatisch bis zur maximalen Lautstärke.
Musiktitel anwählen
1. Musiktitel zurück
Drücken Sie die „
(zurück)
22
wählen oder das Lied noch einmal von Anfang an
abspielen zu lassen.
2. Musiktitel vor
Drücken Sie die „ “ Taste Musiktitel anwählen
20
, um den nächsten Musiktitel anzuwählen.
“ Taste Musiktitel anwählen
, um einen vorherigen Musiktitel anzu-
(vor)
3. Pause
Drücken Sie die „
bindung Standby
aktivieren. Wird die „
Verbindung
“ Taste Pause / Bluetooth-Ver-
21
kurz, um die Pausefunktion zu
“ Taste Pause / Bluetooth-
21
lang gedrückt, wird die BluetoothVerbindung für ca. 10 min auf Standby gesetzt. Danach wird die Bluetooth-Verbindung abgeschaltet.
Wartung und Reinigung
VORSICHT! STROMSCHLAGGEFAHR!
Trennen Sie zur Reinigung die Leuchte zuerst vom
Stromnetz. Entfernen Sie hierfür die Sicherung
oder schalten Sie den Leitungsschutzschalter im
Sicherungskasten aus (0-Stellung).
Benutzen Sie kein Lösungsmittel, Benzin o. ä.
Die Leuchte würde hierbei Schaden nehmen.
Lassen Sie die Leuchte vollständig abkühlen.
VORSICHT! STROMSCHLAGGEFAHR!
Aus Gründen der elektrischen Sicherheit darf
die Leuchte niemals mit Wasser oder anderen
Flüssigkeiten gereinigt oder gar in Wasser getaucht werden.
Verwenden Sie zur Reinigung nur ein trockenes,
fusselfreies Tuch.
Setzen Sie die Sicherung anschließend wieder
ein oder schalten Sie den Leitungsschutzschalter
am Sicherungskasten ein (I-Stellung).
Entsorgung
Die Verpackung besteht aus umweltfreundlichen Materialien, die Sie über
die örtlichen Recyclingstellen entsorgen
können. Der Grüne Punkt gilt nicht für
Deutschland.
Beachten Sie die Kennzeichnung der
b
Verpackungsmaterialien bei der Abfall-
a
trennung, diese sind gekennzeichnet mit
Abkürzungen (a) und Nummern (b) mit
folgender Bedeutung: 1–7: Kunststoffe /
20–22: Papier und Pappe / 80–98:
Verbundstoffe.
11 DE/AT/CH
Page 12
Entsorgung / Garantie und Service
Das Produkt und die Verpackungsmaterialien sind recycelbar, entsorgen
Sie diese getrennt für eine bessere Abfallbehandlung. Das Triman-Logo gilt nur
für Frankreich.
Möglichkeiten zur Entsorgung des
ausgedienten Produkts erfahren Sie bei
Ihrer Gemeinde- oder Stadtverwaltung.
Werfen Sie Ihr Produkt, wenn es ausgedient hat, im Interesse des Umweltschutzes
nicht in den Hausmüll, sondern führen
Sie es einer fachgerechten Entsorgung
zu. Über Sammelstellen und deren Öffnungszeiten können Sie sich bei Ihrer
zuständigen Verwaltung informieren.
Bitte entsorgen Sie die Batterien umweltgerecht. Werfen Sie Batterien nicht in den
Hausmüll. Benutzen Sie bitte die Rückgabe- und Sammelstellen in Ihrer Gemeinde oder
wenden Sie sich an den Händler, bei dem das
Produkt gekauft wurde.
Garantie und Service
Serviceadresse unter Angabe folgender Modellnummer: 9000.034.080.
Von der Garantie ausgeschlossen sind Schäden dur
nicht sachgemäße Handhabung, Nichtbeachtung
der Bedienungsanleitung oder Eingriff durch nicht
autorisierte Personen sowie Verschleißteile. Durch
die Garantieleistung wird die Garantiezeit weder
verlängert noch erneuert.
Serviceadresse
Action GmbH
Im Langel 6
DE-59872 Meschede
DEUTSCHLAND
Tel.: +49 (0) 2903 / 449 555
Fax: +49 (0) 2903 / 449 48410
E-Mail: [email protected]
www.action-leuchten.de
IAN 288149
Bitte halten Sie für alle Anfragen den Kassenbon
und die Artikelnummer (IAN 288149) als
Nachweis für den Kauf bereit.
ch
Garantieerklärung
3 Jahre Garantie ab Kaufdatum auf dieses Gerät, gilt
nur gegenüber dem Ersteinkäufer, nicht übertragbar.
Bitte Kassenbon als Nachweis aufbewahren. Die
Garantieleistung gilt nur für Material- oder Fabrikationsfehler, nicht aber für Verschleißteile oder für
Beschädigungen durch unsachgemäßen Gebrauch.
Die Garantie erlischt bei Fremdeingriff. Ihre gesetzlichen Rechte werden durch diese Garantie nicht
eingeschränkt. Im Garantiefall mit der Servicestelle
telefonisch in Verbindung setzen. Nur so kann eine
kostenlose Einsendung Ihres Gerätes gewährleistet
werden. Das Gerät wurde sorgfältig produziert und
einer genauen Qualitätskontrolle unterzogen. Innerhalb der Garantiezeit beheben wir kostenlos alle
Material- oder Herstellerfehler. Sollten sich dennoch
während der Garantiezeit Mängel herausstellen,
senden Sie das Gerät bitte an die aufgeführte
12 DE/AT/CH
Konformitätserklärung
Dieses Produkt erfüllt die Anforderungen der
geltenden europäischen und nationalen Richtlinien
(RED-Richtlinie 2014/53/EU, Ökodesign Richtlinie
2009/125/EG, RoHS-Richtlinie 2011/65/EU).
Die Konformität wurde nachgewiesen. Entsprechende
Erklärung und Unterlagen sind beim Hersteller
hinterlegt.
Hiermit erklären wir, dass der Funkanlagentyp
9000.034.080 der Richtlinie 2014/53/EU entspricht.
Der vollständige Text der EU-Konformitätserklärung
ist unter der folgenden Internetadresse verfügbar:
www.action-leuchten.de/service/
konformitätserklärungen/
Page 13

Table of contents
List of pictograms used ........................................................................................................ Page 14
Introduction ................................................................................................................................... Page 14
Intended use ........................................................................................................................................ Page 14
Scope of delivery ................................................................................................................................ Page 14
Parts Description .................................................................................................................................. Page 14
Technical Data ....................................................................................................................................Page 15
Safety ................................................................................................................................................. Page 15
Safety instructions ................................................................................................................................Page 15
Safety Instructions for batteries ..........................................................................................................Page 16
Preparation ................................................................................................................................... Page 16
Required tools and material ............................................................................................................... Page 16
Prior to installation .................................................................................................................Page 16
Initial use ......................................................................................................................................... Page 17
Mounting / installation of the light......................................................................................................Page 17
Installing the wall bracket ................................................................................................................... Page 17
Inserting / replacing batteries ............................................................................................................. Page 17
Operating the light by switch ............................................................................................................. Page 17
Using the remote control.....................................................................................................................Page 17
Switching the light on / off .................................................................................................................. Page 17
Dimming the light ................................................................................................................................Page 18
30 minute timer ...................................................................................................................................Page 18
Bluetooth connection ..........................................................................................................................Page 18
Controlling the music volume .............................................................................................................Page 18
Selecting a song .................................................................................................................................. Page 18
Maintenance and Cleaning .............................................................................................. Page 19
Disposal ............................................................................................................................................ Page 19
Warranty and Service .......................................................................................................... Page 19
Warranty Declaration ......................................................................................................................... Page 19
Service address ................................................................................................................................... Page 19
Declaration of conformity ................................................................................................................... Page 20
13 GB/IE
Page 14

Introduction
List of pictograms used
Please read the operating instructions!
Volt (AC) Caution! Risk of electric shock!
Hertz (mains frequency) For your safety
Watt (effective power)
Safety class I
LED Ceiling light with
Bluetooth speaker
Introduction
Congratulations on the purchase of your
new device. You have selected a high
quality product. Please be sure to carefully read the complete instructions for use. Unfold the
pages with the illustrations. These instructions are
part of the product and contain important information
on setup and handling. Always follow all safety instructions. Before using this product for the first time
verify the correct voltage and that all parts are properly installed. Should you have any questions or you
are unsure about operating the product, please
contact the dealer or service centre. Please keep
these instructions in a safe place and pass them on
to third parties as applicable.
Observe the warning and safety
instructions!
Dispose of packaging and device in
b
a
an environmentally-friendly manner!
Please dispose of the batteries in an
environmentally-friendly manner!
or conductive surface! This product is intended for
private household use only.
Scope of delivery
Check immediately after unpacking that the parts
are complete and that the product is in proper
condition.
1 LED Ceiling light with Bluetooth speaker (Lights;
plastic cover)
1 Remote control unit
1 Wall bracket for remote control (incl. mounting
materials 1 x 3M adhesive pad, 2 x screws)
2 Batteries (1.5 V; LR03; AAA)
3 Plastic wall plugs (ceiling mounting)
3 Screws (ceiling mounting)
1 Set of assembly instructions and instructions for use
Intended use
This light is only suitable for indoor use in dry and
enclosed spaces. The light can be fastened to any
normally inflammable surface. The electrician installing the light must not install the light on a moist
14 GB/IE
Parts Description
Light:
1
Light fixture
2
Plastic cover
3
Speaker cover
(integrated within plastic cover
4
Screws
2
)
Page 15
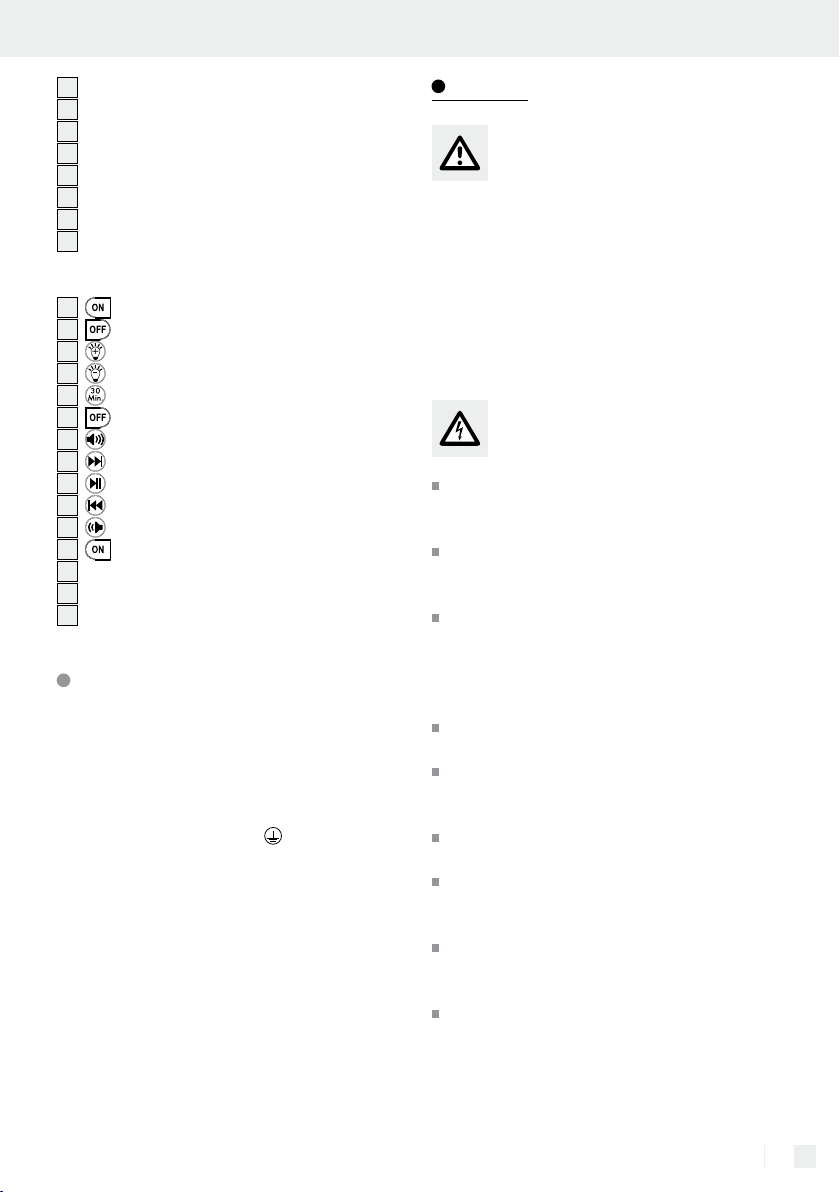
5
Wall plug
6
Drill hole markers (1, 2, 3)
7
Mains connection cable (external)
8
Terminal block
9
Screw holes
10
Retaining bolts
11
Adhesive labels
12
LED Ceiling lights
Remote control:
13
ON button (lighting)
14
OFF button (lighting)
15
Dimmer + button
16
Dimmer – button
17
30 minute timer button
18
OFF button (audio)
19
Volume + button
20
Select song button (next)
21
Pause / Bluetooth Connection Standby button
22
Select song button (previous)
23
Volume – button
24
ON button (audio)
25
Screws (Wall mount)
26
Wall bracket (remote control)
27
3M-Self-adhesive pad
Technical Data
Item no.: 9000.034.080
Operating voltage: 220–240 V∼,
50 / 60 Hz
Power: max. 24 Watt (speaker
max. 6 Watt)
Protection class: I /
Protection type: IP20
Dimensions: Ø approx. 40 cm,
height approx. 8 cm
Frequency range
Speaker: 120–20,000 Hz
Bluetooth version: 4.0
Bluetooth range: approx. 9 m
Control method
Remote control: infrared
Remote control range: 5–6 m
Safety
Safety instructions
Damage due to failure to comply with these instructions for use will void the warranty! We assume no
liability for consequential damages! We assume no
liability for property damage or personal injury due
to improper handling or failure to comply with the
safety instructions! Do not leave the lamp or packaging material lying unattended. Plastic film or bags,
plastic parts, etc. can be dangerous for children to
play with.
Avoid the risk of fatal injury
from electric shock
Have the electrical installation performed by
an electrician or a person trained in electrical
installation.
Always check the mains supply for damage be-
fore connecting it to the mains. Never use the
light if it shows any signs of damage.
CAUTION! A damaged mains cable poses a
danger to life due to electric shock. In the event
of damage, repairs or other problems with the
light please contact the service centre or an
electrician.
Prior to installation, remove the fuse or switch off
the circuit breaker (0 setting) in the fuse box.
Prior to installation, verify the mains voltage on
site corresponds with the operating voltage required for the light (220–240 V∼, 50 / 60 Hz).
Never allow the light to come into contact with
water or other liquids.
Never open the housing of the light or insert
any objects into it. This will pose a risk of fatal
injury from electric shock.
The LED module is not replaceable. If the LED
module fails at the end of its life, the entire light
must be replaced.
Do not install the light on a wet or conductive
surface!
15 GB/IE
Page 16
Safety / Preparation / Prior to installation
Prevent fire and risks
of injury
Do not leave the light or packaging lie about
carelessly. Plastic film or bags, plastic parts,
etc. are dangerous for children to play with.
Do not cover the lamp with objects. Excessive
heat can result in fire.
Safe working
Mount the light so it is protected from moisture
and dirt.
Carefully prepare for assembly and allow your-
self adequate time. First organise all parts or
materials so they are easy to reach.
Always be attentive! Always pay attention to
what you are doing and proceed with caution
at all times.
Never assemble the lamp whilst unfocused or
feeling unwell.
Safety Instructions for batteries
Never expose batteries to excessive heat such
as sun, fire, etc. The batteries may explode!
Never recharge non-rechargeable batteries.
Explosion hazard!
Keep batteries away from children, do not
short-circuit or take apart.
Replace all batteries in a set. Only use the same
types of batteries together, never mix types or
used and new batteries.
Clean battery contacts and the contacts inside
the device before inserting the batteries.
Be sure to insert the batteries correctly, i.e. note
the polarity (+ and –).
Remove drained batteries immediately.
In
creased risk of leaks!
Avoid battery fluid coming into contact with the
skin, eyes and mucous membranes. In the event
of contact, immediately rinse the affected area
with plenty of clear water and seek immediate
medical attention.
Preparation
Required tools and material
The tools and materials specified are not included.
This information and these values are non-binding
and are only provided as a reference. The nature
of the material is determined by the individual local
conditions.
– Pencil / marking tool
– Voltage tester
– Screwdriver
– Electric drill
– Drill bit (approx. Ø 6 mm)
– Hammer
– Side cutter
– Ladder
Prior to installation
Important: The electrical connection must be per-
formed by a trained electrician or a person instructed
in electrical installation. This person must be familiar
with the properties of the light and connection regulations.
Familiarise yourself with all the instructions and
illustrations in this manual, as well as with the
light itself, before installing it.
Prior to installation, verify the circuit to which the
light will be connected is not energised. To do s
remove the fuse or switch off the circuit breaker
in the fuse box (0 position).
Use the voltage tester to verify the de-ener-
gised status.
Unpack the LED Ceiling lights 12 and lay on a
stable surface (be careful that they don‘t
become scratched).
Take hold of the plastic cover with two hands 2
and gently press on the stable surface. Now
turn the plastic cover
stops (in the opposite direction of the arrow)
and remove the plastic cover
bottom up.
2
anti-clockwise until it
2
from the
o,
16 GB/IE
Page 17

Initial use
Installing the wall bracket
Mounting / installation of t he
light (see Fig. A–I)
Before installation ensure that the circuit, to
which the light will be connected, is not energised. To do so, remove the fuse or switch off
the circuit breaker in the fuse box (0 position).
Mount the light fixture 1 in the desired posi-
tion. While doing so, observe the drill hole in
the light fixture
cable is introduced.
Mark three drill holes 6 (see Fig. D).
Drill the holes. Be sure not to damage the
mains cable (external)
Insert the wall plugs 5 in the drilled holes. If
necessary, use a hammer (see Fig. E).
Guide the power cable through the drill hole in
the light fixture
and attach the light to the ceiling (see Fig. F–G).
Connect the three building wires in the light fix-
1
ture‘s
the colours.
Note: Be sure to correctly connect the individ-
ual leads on the mains cable (external)
wire, black or brown = symbol L, neutral wire,
blue = symbol N, earth wire, green-yellow=
symbol
Install the lights‘ plastic cover 2. To do this,
match the cover‘s three notches to the corre-
sponding retaining bolts
press it from the bottom up. Turn the cover
clockwise (right, following the direction of the
arrow) to fix it. The adhesive label with the
11
arrow
Replace the fuse or switch on the circuit
breaker in the fuse box (I position).
1
through which the power
7
(see Fig. E).
1
provided for this purpose
terminal block 8, as indicated by
7
10
(see Fig. H) and
can now be removed.
: live
Install the wall bracket for the remote control 26
using the screws
shown in Figure I.
25
or adhesive pads 27 as
Inserting / replacing batteries
Note: The remote control requires two batteries type
AAA / LR03 (included).
Slide the battery case cover (reverse) down by
approx. 1 cm to open and then lift off the cover.
Insert two batteries of the included type
AAA / LR03 in the battery compartment. Please
note the correct polarity!
Slide back the cover to close the battery
compartment.
Your remote control is ready to use.
Operating the light by switch
The LED ceiling light 12 may be switched on
and off using the wall switch. Here the brightness will always be 100 %. All other functions
are solely controlled via remote control.
Using the remote control
ATTENTION! The functions of the remote control
can only be used after switching the LED ceiling
12
light
on with the wall switch.
Switching the light on / off
Your LED ceiling light
now ready.
12
with Bluetooth speaker is
1. Switching the light on
Press the “ “ button (lighting) 13, to switch the
LED ceiling light
tion of the signal.
2. Switching the light off
Press the “ “ button (lighting) 14, to switch
the LED ceiling light
reception of the signal.
12
on. A beep confirms recep-
12
off. A beep confirms
17 GB/IE
Page 18

Initial use
Dimming the light
1. Increasing brightness
Press the “ “ button Dimmer + 15, to increase
the brightness. A beep will sound when reach-
ing the maximum brightness. Briefly pressing this
button will gradually increase the brightness as
pressed. Holding the “
will automatically increase the brightness to the
maximum.
2. Reducing the brightness
Press the “ “ button Dimmer – 16, to reduce
the brightness. A beep will sound when reaching
the minimum brightness. Pressing it briefly will
gradually decrease the brightness as pressed.
Holding the “
matically decrease the brightness to the minimu
“ button Dimmer – 16 will auto-
“ button Dimmer + 15
30 minute timer
1. Activating the timer
Press the “ “ button 17 to switch the LED ceil-
ing light
The light and the Bluetooth function (music) will
automatically switch off after approx. 30 minutes.
2. Deactivating the timer
To deactivate the timer function during the 30
minute period, press the “
holding more than 3 seconds. A long beep will
sound when the LED ceiling light
the signal, confirming deactivation of the timer
function.
12
off automatically.
“ button 17 again,
12
receives
A brief melody will sound once connected.
When connecting with your mobile, tablet, etc.
for the first time, select Bluetooth connection
“LBT00738“.
2. Disconnecting Bluetooth
Press the audio “ “ button (audio) 18. A b
confirms reception of the signal. Bluetooth has
been disconnected.
Once connected you may use the
following audio controls:
Controlling the music volume
1. Lowering the music volume
m.
Press the “ “ button Volume – 23 to lower the
volume. A beep will sound when reaching the
minimum volume. Pressing it briefly will gradually decrease the volume as pressed. Holding
the “
“ button Volume – 23 will automati-
cally lower the volume to the minimum.
2. Increasing the music volume
Press the “ “ button Volume + 19 to increase
the volume. A beep will sound when reaching
the max
imum volume. Pressing it briefly will grad-
ually incr
ease the volume as pressed. Holding
the “
“ button Volume + 19 will automati-
cally increase the volume to the maximum.
Selecting a song
eep
Bluetooth connection
1. Bluetooth connection
Press the audio “ “ button (audio) 24. A b
confirms reception of the signal.
Approx. 1–2 seconds later the Bluetooth con-
nection will be accompanied by music and es-
tablished automatically, the blue LED inside the
LED ceiling light
18 GB/IE
12
begins to flash rapidly.
1. Previous song
Press the “ “ button Select song (previous)
22
to select a previous song or to replay the
song from the beginning.
eep
2. Next song
Press the “ ” button Select song (next) 20 to
select the next song.
Page 19
3. Pause
Press the “ ” button Pause / Bluetooth Con-
nection Standby
the “
” button Pause / Bluetooth Connection
Standby
standby for approx.
21
briefly to pause. Holding
21
will set the Bluetooth connection to
10 min. The Bluetooth con-
nection will then be closed.
Maintenance and Cleaning
CAUTION! RISK OF ELECTRIC SHOCK!
Disconnect the light from the mains circuit before
cleaning. To do so, remove the fuse or switch off
the circuit breaker in the fuse box (0 position).
Do not use solvents, petrol, etc. They could
damage the light.
Allow the light to cool down completely.
CAUTION! RISK OF ELECTRIC SHOCK!
For electrical safety, never clean the light with
water or other liquids, or immerse it in water.
Only use a dry, lint-free cloth for cleaning.
Then replace the fuse or switch on the circuit
breaker in the fuse box (I position).
Disposal
The packaging is made entirely of recyclable materials, which you may dispose
of at local recycling facilities. The Green
Dot is not valid for Germany.
Observe the marking of the packaging
b
materials for waste separation, which
a
are marked with abbreviations (a) and
numbers (b) with following meaning:
1–7: plastics / 20–22: paper and fibreboard / 80–98: composite materials.
Contact your local refuse disposal
authority for more details of how to
dispose of your worn-out product.
Please dispose of the batteries in an environmentally-friendly manner. Do not
dispose of the batteries in your household refuse. Please use your municipal return and
collection points or contact the retailer where the
product was purchased.
Warranty and Service
Warranty Declaration
This product has a 3 year warranty from the date of
purchase, which applies only to the original buyer
and is non-transferable. Please keep your receipt as
proof of purchase. The warranty applies to material
or manufacturing defects only. It does not cover w
items or damage caused by improper use. Any modifications will void the warranty. This warranty does
not limit your legal rights. Please phone the service
centre for warranty claims. This is the only way to
return your product free of charge. The appliance
has been carefully produced under strict quality
control. Within the warranty period we shall rectify
without charge all material and manufacturing defects. In the event a defect arises during the warranty
period, please return the device to the service address listed, specifying the following item number:
9000.034.080.
Damage caused by improper handling, failure to
comply with the instructions for use or unauthorised
product modification as well as wear parts are excluded from warranty. The performance of services
under the warranty does not extend or renew the
warranty period.
orn
The product and packaging materials
are recyclable, dispose of it separately
for better waste treatment. The Triman
logo is valid in France only.
Service address
Action GmbH
Im Langel 6
DE-59872 Meschede
GERMANY
19 GB/IE
Page 20

Warranty and Service
Tel.: +49 (0) 2903 / 449 555
Fax: +49 (0) 2903 / 449 48410
E-Mail: [email protected]
www.action-leuchten.de
IAN 288149
Please have your receipt and the item number
(IAN 288149) ready as your proof of purchase
when enquiring about your product.
Declaration of conformity
This product meets the requirements of applicable
European and national regulations (RED directive
2014/53/EU, Ecodesign directive 2009/125/EC,
RoHS directive 2011 / 65 / EU). Conformity has
been demonstrated. The relevant declaration and
documents are held by the manufacturer.
We hereby declare that the wireless system type
9000.034.080 complies with the provisions of
2014/53/EU.
The full text of the EU declaration of conformity is
available at: www.action-leuchten.de/service/
konformitätserklärungen/
20 GB/IE
Page 21

Légende des pictogrammes utilisés .......................................................................... Page 22
Introduction ................................................................................................................................... Page 22
Utilisation conforme ............................................................................................................................Page 22
Contenu de la livraison ....................................................................................................................... Page 22
Description des éléments .................................................................................................................... Page 23
Caractéristiques techniques ................................................................................................................ Page 23
Sécurité .............................................................................................................................................Page 23
Indications de sécurité ........................................................................................................................Page 23
Consignes de sécurité relatives aux piles .......................................................................................... Page 24
Préparation ................................................................................................................................... Page 24
Outils et matériel nécessaires ............................................................................................................. Page 24
Avant l‘installation .................................................................................................................. Page 24
Mise en service ........................................................................................................................... Page 25
Montage / installation de la lampe .................................................................................................... Page 25
Montage du support mural ................................................................................................................Page 25
Insérer / remplacer les piles ................................................................................................................ Page 25
Commander la lampe via l‘interrupteur ............................................................................................. Page 26
Utiliser la télécommande .................................................................................................................... Page 26
Allumer / éteindre la lumière ..............................................................................................................Page 26
Faire varier l‘intensité de la lumière ................................................................................................... Page 26
Minuteur 30 minutes ........................................................................................................................... Page 26
Connexion Bluetooth ..........................................................................................................................Page 26
Régler le volume de la musique ......................................................................................................... Page 27
Sélection d‘un titre ..............................................................................................................................Page 27
Entretien et nettoyage..........................................................................................................Page 27
Mise au rebut ............................................................................................................................... Page 27
Garantie et service après-vente ..................................................................................Page 28
Déclaration de garantie .....................................................................................................................Page 28
Adresse du service après-vente .......................................................................................................... Page 28
Déclaration de conformité .................................................................................................................. Page 28
21 FR/BE
Page 22
Introduction
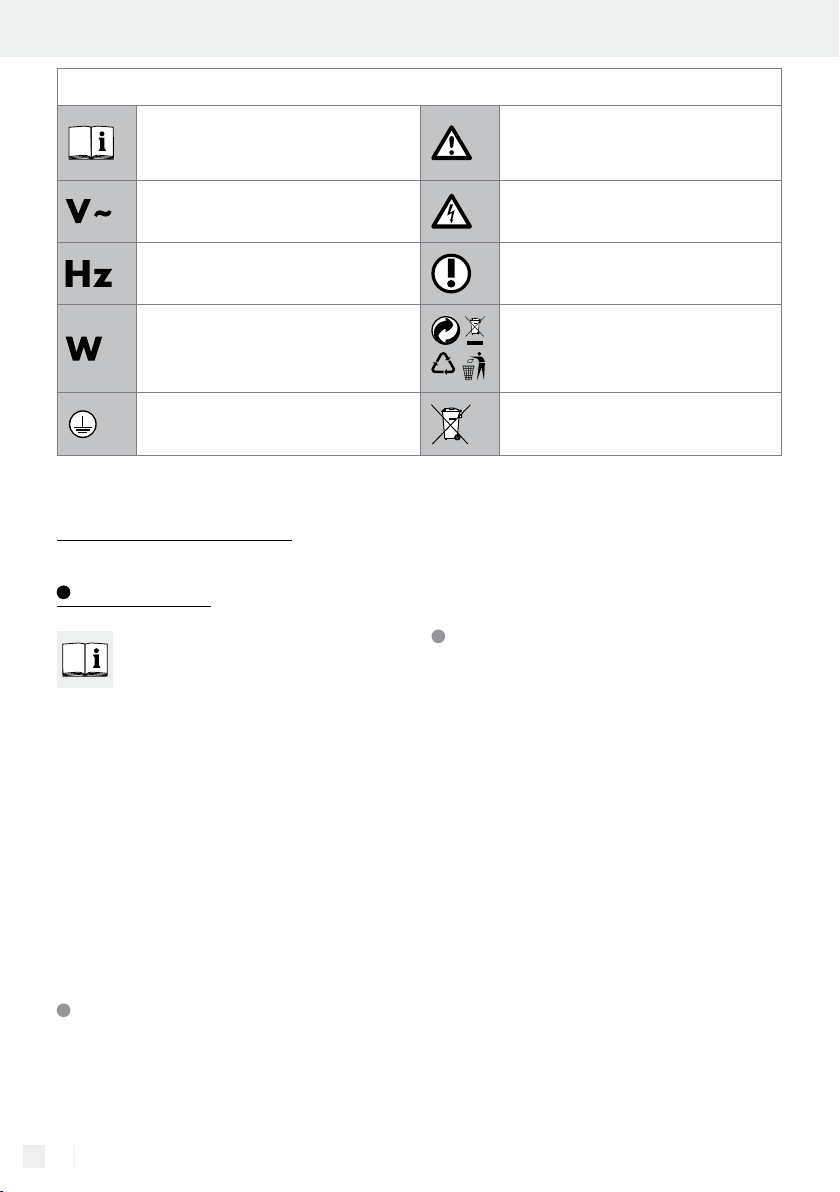
Légende des pictogrammes utilisés
Lire le mode d'emploi !
Volt (tension alternative) Attention ! Risque d'électrocution!
Hertz (fréquence) Conduite à tenir
Watt (puissance active)
Classe de protection I
Plafonnier à LED avec
haut-parleur Bluetooth
Introduction
Nous vous félicitons pour l‘achat de votre
nouvel appareil. Vous avez opté pour
un produit de grande qualité. Veuillez
lire ce mode d‘emploi intégralement et attentivement.
Ouvrez les pages contenant les illustrations. Ce
mode d‘emploi fait partie du produit et contient des
instructions essentielles pour sa mise en service et sa
manipulation. Respectez toujours toutes les consignes
de sécurité. Avant la mise en service, vérifiez si la
tension est correcte et si toutes les pièces sont correctement montées. Si vous avez des questions ou
des doutes concernant la manipulation de l‘appareil, veuillez contacter votre revendeur ou le service
après-vente. Veuillez conserver soigneusement ce
mode d‘emploi et remettez-le aux autres utilisateurs.
Respectez les avertissements et les
consignes de sécurité !
Mettez l’emballage et l’appareil au
b
a
rebut dans le respect de l'environnement !
Mettez les piles au rebut dans le
respect de l'environnement !
inflammables. L‘électricien qui a installé cette lampe
doit veiller à ce qu‘elle ne soit pas placée sur une
surface humide ou conductrice ! Cet appareil est
uniquement destiné à un usage domestique privé.
Contenu de la livraison
Contrôlez toujours immédiatement après le déballage du produit que le contenu de la livraison est
complet et que l’appareil se trouve en parfait état.
1 Plafonnier à LED avec haut-parleur Bluetooth
(base de la lampe, cache en plastique)
1 Télécommande
1 Attache murale pour la télécommande (avec du
matériel de montage 1 x patin adhésif 3M, 2 x vis)
2 Piles (1,5 V; LR03; AAA)
3 Chevilles en plastique (montage au plafond)
3 Vis (montage au plafond)
1 Notice de montage et mode d’emploi
Utilisation conforme
Cette lampe est exclusivement conçue pour un usage
intérieur, dans des locaux secs et fermés. Cette lampe
peut être fixée sur toutes les surfaces normalement
22 FR/BE
Page 23
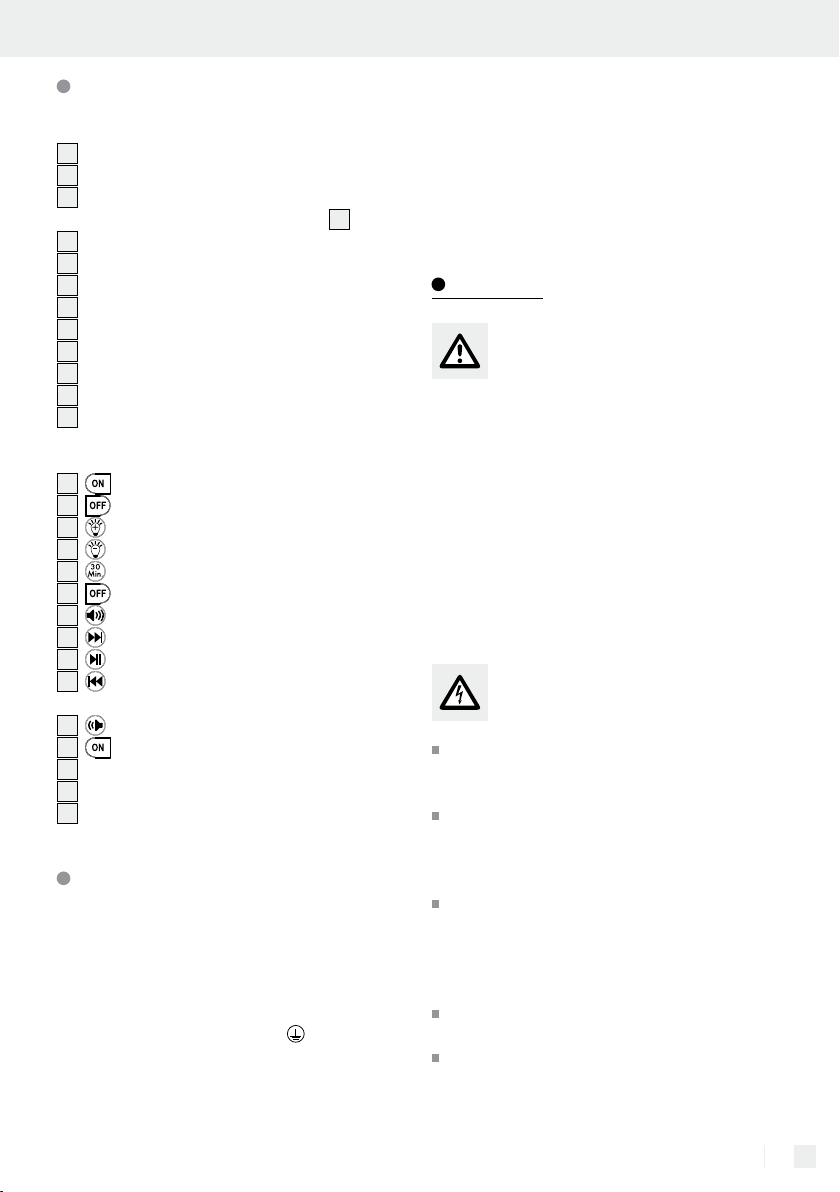
Description des éléments
Lampe:
1
Base de la lampe
2
Cache en plastique
3
Grille de haut-parleur
(intégré dans le cache en plastique
4
Vis
5
Cheville
6
Marquage des trous à percer (1, 2, 3)
7
Câble d‘alimentation électrique (externe)
8
Domino de raccordement
9
Trou de réception des vis
10
Boulon d‘assemblage
11
Autocollant
12
Plafonnier LED
2
)
Télécommande :
13
Touche ON (Lighting)
14
Touche OFF (Lighting)
15
Touche variateur +
16
Touche variateur -
17
Touche minuteur 30 minutes
18
Touche OFF (Audio)
19
Touche volume +
20
Touche de sélection du titre à jouer (suivant)
21
Touche pause / Connexion Bluetooth Veille
22
Touche de sélection du titre à
jouer (précédent)
23
Touche volume –
4
Touche ON (Audio)
25
Vis (fixation murale)
26
Attache murale (télécommande)
27
Patin adhésif 3M
Caractéristiques techniques
Réf. d‘article : 9000.034.080
Tension de service: 220–240 V∼,
50 / 60Hz
Puissance : max. 24 watts (en-
ceinte 6 watts max.)
Classe de protection : I /
Indice de protection : IP20
Dimensions : Ø env. 40 cm, hau-
teur env. 8 cm
Plage de fréquence
Enceinte : 120–20.000 Hz
Version Bluetooth : 4.0
Portée Bluetooth : env. 9 m
Procédé de commande
de la télécommande : infrarouge
Portée de la télécommande : 5–6 m
Sécurité
Indications de sécurité
Les droits de recours en garantie sont annulés en cas
de dommages résultant du non-respect du présent
mode d’emploi ! Le fabricant décline toute responsabilité pour les dommages consécutifs ! Toute resp
sabilité est déclinée pour les dommages matériels
ou corporels causés par une manipulation incorrecte
ou par le non-respect des consignes de sécurité !
Ne laissez pas la lampe ou le matériel d‘emballage
traîner sans surveillance. Les films / sachets en plastique, les éléments en matières synthétiques, etc.
peuvent devenir des jouets dangereux dans les m
des enfants.
Prévention de risques
mortels par électrocution
L‘installation électrique doit être effectuée par un
électricien ou par une personne dûment formée
à cet effet.
Avant chaque branchement au secteur, contrôlez
le câble afin de détecter d‘éventuels endommagements. N‘utilisez jamais la lampe si vous
constatez le moindre dommage.
ATTENTION ! Des câbles d‘alimentation en-
dommagés impliquent un danger de mort par
électrocution. En cas de détériorations, de réparations ou d’autres problèmes, veuillez
contacter le SAV ou un électricien.
Avant le montage, retirez le fusible ou coupez le
disjoncteur de la boîte à fusibles (position 0).
Avant le montage, vérifiez que la tension sec-
teur correspond à la tension de service requise
de la lampe (220–240 V∼ 50 / 60 Hz).
on-
ains
23 FR/BE
Page 24
Sécurité / Préparation / Avant l‘installation
Évitez impérativement tout contact de la lampe
avec de l‘eau ou d‘autres liquides.
Ne jamais ouvrir le boîtier de la lampe ou y coin-
cer d‘objet quelconque. De telles interventions
impliquent un danger de mort par électrocution.
Le module LED n‘est pas remplaçable. Si le mo-
dule LED devait arriver en fin de vie, l‘ensemble
de la lampe doit alors être remplacé.
N‘installez jamais la lampe sur un support hu-
mide ou conducteur de courant!
Prévention de risque
d‘incendies et de blessures
Ne laissez pas la lampe ou le matériel d‘em-
ballage traîner sans surveillance. Les films et les
sachets en plastique, les éléments en matières
synthétiques, etc. peuvent devenir des jouets
dangereux dans les mains des enfants.
Ne couvrez pas la lampe avec des objets. Un
dégagement de chaleur excessif peut provoquer
un incendie.
Conduite à tenir
Montez la lampe de telle sorte qu‘elle soit pro-
tégée de l‘humidité et des salissures.
Soigneusement préparer le montage du produit
et l‘effectuer sans précipitation. Préparez toutes
les pièces détachées ou le matériel requis et
posez-les à portée de main.
Soyez toujours vigilant ! Faites toujours attention
à ce que vous faites et agissez raisonnablement.
Ne montez en aucun cas cette lampe si vous
n‘êtes pas concentré ou si vous vous sentez mal.
Consignes de sécurité
relatives aux piles
Conserver les piles hors de portée des enfants,
ne pas les jeter au feu, ne pas les court-circuiter
et ne pas les désassembler.
Remplacer toutes les piles en même temps. Uti-
liser uniquement des piles du même type. Ne
pas mélanger différents types de piles, ou des
piles usagées avec des piles neuves.
Nettoyer les contacts des piles et les contacts
de l‘appareil avant d‘insérer les piles.
S‘assurer que les piles sont correctement insé-
rées, c.-à-d. veiller à respecter la polarité (+ et -).
Les piles usagées doivent être immédiatement
retirées. Risque élevé d’écoulement!
Si les piles fuient, évitez tout contact avec la
peau, les yeux et les muqueuses. Si vous entrez
en contact avec l‘acide des piles, rincez immédiatement et abondamment à l‘eau claire les
parties touchées et consultez un médecin le plus
rapidement possible.
Préparation
Outils et matériel nécessaires
Les outils et matériels indiqués ne sont pas inclus
dans le contenu de la livraison. Il s‘agit là de données et de valeurs indicatives vous permettant de
vous orienter. Les caractéristiques du matériel dépendent des conditions spécifiques sur place.
– Crayon à papier / outil de marquage
– Détecteur de tension
– Tournevis
– Perceuse
– Foret (env. Ø6 mm)
– Marteau
– Pince coupante
– Escabeau
Les piles ne doivent pas être exposées à des
sources de chaleur extrêmes, comme des rayons
solaires, du feu ou d‘autres sources similaires.
Les piles risquent d’exploser !
Les piles non rechargeables ne doivent jamais
être rechargées. Risque d‘explosion!
24 FR/BE
Avant l‘installation
Important : Le raccordement électrique doit être
réalisé par un électricien professionnel ou par une
personne formée pour exécuter une installation
Page 25

électrique. Celle-ci doit connaître les caractéristiques
de la lampe et ses conditions de raccordement.
Avant l‘installation, familiarisez-vous avec l‘en-
semble des instructions et des illustrations du présent mode d‘emploi et avec la lampe elle-même.
Avant l‘installation, vérifiez l‘absence de tension
au niveau du câble auquel doit être raccordé
la lampe. Retirez à cet effet le fusible ou coupez
le disjoncteur de la boîte à fusible (position 0).
Vérifiez l‘absence de tension à l‘aide d‘un
détecteur de tension.
Déballer le plafonnier LED 12 et le poser sur
un support solide (soyez prudents afin d‘éviter
les éraflures).
Saisir le cache en plastique 2 à deux mains
et exercer une légère pression sur le support
solide. Tourner le cache en plastique
2
dans
le sens inverse des aiguilles d‘une montre
(dans le sens opposé de la flèche) jusqu‘à la
butée et retirer le cache en plastique
2
vers le
haut.
Passez le câble d‘alimentation dans le trou
prévu à cet effet dans la base de la lampe
1
et fixez la lampe au plafond (voir ill. F–G).
Brancher les trois fils de l‘installation intérieure
au domino
8
de la base de la lampe 1 en
respectant les couleurs indiquées.
Remarque : veillez à ce que les fils du câble
d‘alimentation électrique (externe)
7
aient
leur raccord respectif : fil conducteur, noir ou
brun = symbole L, fil neutre, bleu = Symbole N
prise de terre, vert-jaune = symbole
Montez le cache en plastique 2 de la lampe.
Poser le cache avec les trois encoches sur les
boulons d‘assemblages
10
correspondants
(v. ill. H) et poussez-les vers le haut. Tournez le
cache dans le sens des aiguilles d‘une montre
à droite (en direction de la flèche) afin de le
fixer. L‘autocollant avec la flèche
11
peut
désormais être retiré.
Remettez le fusible en place ou remettez en
route le disjoncteur dans le boîtier à fusibles
(position I).
Mise en service
Montage/installation de la
lampe (v. ill. A-I)
Avant l‘installation, vérifiez l‘absence de ten-
sion au niveau du câble auquel doit être raccordé la lampe. Retirez à cet effet le fusible
ou coupez le disjoncteur de la boîte à fusible
(position 0).
Placez la base de la lampe 1 dans la posi-
tion de montage souhaitée. En faisant cela,
prenez en compte le trou dans la base de la
1
lampe
d‘alimentation.
Marquez trois trous à percer 6 (voir ill. D).
Percer les trous. Veillez à ce que le câble d‘ali-
mentation électrique (externe)
endommagé (voir ill. E).
Enfoncez les chevilles 5 dans les trous per-
cés. Si nécessaire, aidez-vous d‘un marteau
(voir ill. E).
à travers lequel doit passer le câble
7
ne soit pas
Votre plafonnier LED
12
et son enceinte Bluetooth
sont désormais prêts à utilisation.
Montage du support mural
Montez le support mural pour la télécommande
26
en vous servant des vis 25 ou du patin ad-
27
hésif
, comme le montre l‘illustration I.
Insérer / rem placer les piles
Remarque : Deux piles de type AAA / LR03 d
être utilisées pour le fonctionnement de la télécommande (fournies dans la livraison).
Pousser d‘env. 1 cm vers le bas le couvercle du
compartiment à piles (verso) pour l‘ouvrir, avant
de le retirer.
Insérer deux piles fournies de type AAA / LR03
dans le compartiment à piles. Vérifier que la
polarité est correcte !
oivent
25 FR/BE
Page 26

Mise en service
Remettre le couvercle, afin de refermer le
compartiment à piles.
Votre télécommande est prête à l‘emploi.
Commander la lampe via
l‘interrupteur
La lampe plafonnier à LED 12 peut être allumée
et éteinte via l‘interrupteur mural. L‘intensité lu-
mineuse correspond alors toujours à 100 %.
L‘ensemble des autres fonctions sont exclusive-
ment contrôlées via la télécommande.
Utiliser la télécommande
ATTENTION! L‘ensemble des fonctions de la té-
lécommande sont uniquement activées, lorsque la
lampe plafonnier à LED
rupteur mural.
12
est connectée à l‘inter-
Allumer / éteindre la lumière
1. Allumer la lumière
Appuyer sur la touche « » (Lighting) 13, afin
d‘allumer la lampe plafonnier à LED
signal de réception est confirmé par un bip.
2. Éteindre la lumière
Appuyer sur la touche « » (Lighting) 14, afin
d‘éteindre la lampe plafonnier à LED
signal de réception est confirmé par un bip.
12
. Le
12
. Le
progressivement, selon le nombre de pression
effectuées. Si la touche de variation + «
15
est pressée plus longtemps, le niveau d‘intensité lumineuse augmente automatiquement,
jusqu‘à atteindre le niveau de luminosité maximum.
2. Diminuer le niveau d‘intensité
de l‘éclairage
Appuyer sur la touche de variation - « » 16,
afin de baisser l‘intensité de l‘éclairage. Si le
niveau d‘intensité minimum est atteint, un bip
retentit. En appuyant brièvement sur cette touche,
le niveau d‘intensité lumineuse diminue progressivement, selon le nombre de pression effectuées.
Si la touche de variation - «
plus longtemps, le niveau d‘intensité lumineuse
diminue automatiquement, jusqu‘à atteindre le
niveau de luminosité minimum.
» 16 est pressée
»
Minuteur 30 minutes
1. Allumer le minuteur
Appuyer sur la touche « » 17, afin d‘éteindre
automatiquement la lampe plafonnier à LED
La lumière et la fonction Bluetooth (musique)
s‘éteignent automatiquement après 30 minutes.
2. Éteindre le minuteur
Si vous souhaitez éteindre la fonction minuteur
pendant ces 30 minutes, appuyez de nouveau
sur la touche « » 17 durant plus de 3 se
Si le signal a été reçu par la lampe plafonnier
5
à LED
confirme la désactivation de la fonction minuteur.
, un bip plus long se fait entendre, et
condes.
12
.
Faire varier l‘intensité
de la lumière
1. Augmenter le niveau d‘intensité
de l‘éclairage
Appuyer sur la touche de variation + « » 15,
afin d‘augmenter l‘intensité de l‘éclairage. Si le
niveau d‘intensité maximum est atteint, un bip
retentit. En appuyant brièvement sur cette touche,
le niveau d‘intensité lumineuse augmente
26 FR/BE
Connexion Bluetooth
1. Établir la connexion Bluetooth
Appuyer sur la touche Audio « » (Audio) 24.
Le signal de réception est confirmé par un bip.
Env. 1–2 secondes plus tard, la connexion
Bluetooth est établie avec un son ; la LED bleue
commence à clignoter rapidement à l‘intérieur
de la lampe plafonnier à LED
12
.
Page 27
Si la connexion est établie, une brève mélodie
retentit.
Lors d‘une première connexion avec votre
portable, tablette, etc., choisissez la connexion
Bluetooth «LBT00738».
2. Interrompre la connexion Bluetooth
Appuyer sur la touche Audio « » (Audio) 18.
Le signal de réception est confirmé par un bip.
La connexion Bluetooth est interrompue.
Après avoir établi une connexion, les
contrôles audio suivants sont disponibles :
2. Titre suivant
Appuyez sur la touche de sélection du titre
(suivant) «
3. Pause
Appuyez brièvement sur la touche « »
Pause / Connexion Bluetooth Veille
d‘activer la fonction de pause. Si la touche «
» Pause / Connexion Bluetooth Veille 21 est
pressée de manière prolongée, la connexion
Bluetooth est mise en veille durant 10 minutes
env. La connexion Bluetooth est ensuite interrompue.
» 20, afin de jouer le titre suivant.
1
, afin
Régler le volume de la musique
1. Diminuer le volume de la musique
Appuyer sur la touche - « » 23,afin de bais-
ser le volume. Si le niveau de volume minimum
est atteint, un bip retentit. En appuyant brièvement sur cette touche, le volume diminue progressivement, selon le nombre de pression
effectuées. Si la touche de vol
est pressée plus longtemps, le volu
automatiquement, jusqu‘à atteindre le volume
minimum.
2. Augmenter le volume de la musique
Appuyez sur la touche + « » 19,afin d‘aug-
menter le volume. Si le niveau de volume maximum est atteint, un bip retentit. En appuyant
brièvement sur cette touche, le volume augmente progressivement, selon le nombre de
pression effectuées. Si la touche de volume + «
» 19 est pressée plus longtemps, le volume
augmente automatiquement, jusqu‘à atteindre
le volume maximum.
ume - « » 23
me diminue
Sélection d‘un titre
1. Titre précédent
Appuyez sur la touche de sélection du titre
(précédent) «
sique jouée précédemment, ou de revenir au
début du titre actuellement joué.
» 22, afin de sélectionner la mu-
Entretien et nettoyage
ATTENTION ! RISQUE D’ÉLECTROCU-
TION ! Pour procéder au nettoyage, coupez
tout d‘abord l‘alimentation secteur de la lampe.
Retirez à cet effet le fusible ou coupez le disjoncteur de la boîte à fusible (position 0).
N‘utilisez ni solvants, ni essence, ni autres pro-
duits similaires. Ceci endommagerait la lampe.
Laissez refroidir la lampe complètement.
ATTENTION ! RISQUE D’ÉLECTROCU-
TION ! Pour des raisons de sécurité électrique,
il est interdit de nettoyer la lampe à l‘eau ou
avec d‘autres liquides ou encore de la plonger
dans de l‘eau.
Pour procéder au nettoyage, utilisez uniquement
un chiffon sec et non pelucheux.
Remettez ensuite le fusible en place ou remettez
en route le disjoncteur dans le boîtier à fusibles
(positionI).
Mise au rebut
L’emballage se compose de matières
recyclables pouvant être mises au rebut
dans les déchetteries locales. Le «point
vert» n‘est pas valable en Allemagne.
27 FR/BE
Page 28
Mise au rebut / Garantie et service après-vente
Veuillez respecter l‘identification des ma-
b
tériaux d‘emballage pour le tri sélectif,
a
ils sont identifiés avec des abbréviations
(a) et des chiffres (b) ayant la signification suivante : 1–7 : plastiques /
20–22 : papiers et cartons / 80–98 :
matériaux composite.
Le produit et les matériaux d’emballage
sont recyclables, mettez-les au rebut
séparément pour un meilleur traitement
des déchets. Le logo Triman n’est
valable qu’en France.
Votre mairie ou votre municipalité vous
renseigneront sur les possibilités de mise
au rebut des produits usagés.
Veuillez mettre au rebut les piles ans le
respect de l‘environnement. Ne pas jeter
les piles dans les ordures ménagères.
Veuillez utiliser les points de collecte et de retour de
votre municipalité, ou vous adresser au distributeur
qui vous a vendu ce produit.
Garantie et service après-vente
garantie, veuillez envoyer l‘article à l‘adresse S.A.V.
indiquée en mentionnant le numéro d‘article suivant:
9000.034.080.
La garantie exclut les dommages dus à une manipulation non conforme, au non-respect des instructions
du mode d’emploi ou à une intervention par une
personne non autorisée, ainsi que les pièces d’usure.
La durée de garantie n’est aucunement prolongée
ou renouvelée par une prestation de garantie.
Adresse du service après-vente
Action GmbH
Im Langel 6
DE-59872 Meschede
ALLEMAGNE
Tél.: +49 (0) 2903 / 449 555
Fax : +49 (0) 2903 / 449 48410
E-mail: [email protected]
www.action-leuchten.de
IAN 288149
Pour toute demande, veuillez tenir à disposition le
ticket de caisse et le numéro d‘article (IAN 288149)
comme preuve d‘achat.
Déclaration de garantie
Ce produit bénéficie d‘une garantie de 3ans à
compter de la date d‘achat, valable uniquement
pour le premier acheteur, non transmissible.
Conservez le ticket de caisse en tant que justificatif.
La garantie couvre uniquement les défauts matériels
ou de fabrication, et exclut l‘usure des pièces ou les
dommages résultant d‘une utilisation inappropriée.
La garantie est annulée en cas d‘intervention externe.
Cette garantie ne constitue pas une restriction de
vos droits légaux. Veuillez contacter le S.A.V. par
téléphone pour toute réclamation. Il est autrement
impossible d‘assurer l‘envoi gratuit de votre appareil. Cet appareil a été fabriqué avec soin et soumis
à un contrôle qualité minutieux. Pendant la durée
de la garantie, nous réparons gratuitement tous les
défauts de matériaux ou de fabrication. Si toutefois
vous constatez des défauts pendant la durée de la
28 FR/BE
Déclaration de conformité
Ce produit répond aux exigences des réglementations européennes et nationales en vigueur
(Directive RED 2014/53/UE, directive sur
l‘écoconception 2009/125/EG, directive
RoHS 2011/65/UE). La conformité a été attestée.
Les déclarations et documents correspondants sont
en possession du fabricant.
Par la présente, nous déclarons que les équipements
radioélectriques de type 9000.034.080 sont
conformes aux directives 2014/53/UE.
La déclaration de conformité européenne est disponible en version complète à l‘adresse Internet
suivante : www.action-leuchten.de/service/
konformitätserklärungen/
Page 29

Legenda van de gebruikte pictogrammen ..................................................... Pagina 30
Inleiding ....................................................................................................................................... Pagina 30
Correct gebruik ............................................................................................................................... Pagina 30
Omvang van de levering ................................................................................................................ Pagina 30
Beschrijving van de onderdelen ..................................................................................................... Pagina 30
Technische gegevens ...................................................................................................................... Pagina 31
Veiligheid .................................................................................................................................... Pagina 31
Veiligheidsinstructies ....................................................................................................................... Pagina 31
Veiligheidsinstructies voor het gebruik van batterijen ................................................................... Pagina 32
Voorbereiding ........................................................................................................................ Pagina 32
Benodigd gereedschap en materiaal ............................................................................................ Pagina 32
Voor de installatie ............................................................................................................... Pagina 32
Ingebruikname ...................................................................................................................... Pagina 33
Lamp monteren / installeren ............................................................................................................ Pagina 33
Wandhouder monteren .................................................................................................................. Pagina 33
Batterijen plaatsen / vervangen ...................................................................................................... Pagina 33
Lamp via de lichtschakelaar bedienen .......................................................................................... Pagina 33
Afstandsbediening gebruiken ......................................................................................................... Pagina 34
Licht aan- / uitschakelen .................................................................................................................. Pagina 34
Licht dimmen .................................................................................................................................... Pagina 34
30 minuten-timer .............................................................................................................................. Pagina 34
Bluetooth-verbinding ....................................................................................................................... Pagina 34
Muziekvolume regelen ................................................................................................................... Pagina 35
Muziektitel selecteren ..................................................................................................................... Pagina 35
Onderhoud en reiniging ................................................................................................. Pagina 35
Afvoer ............................................................................................................................................ Pagina 35
Garantie en service ............................................................................................................ Pagina 36
Garantieverklaring .......................................................................................................................... Pagina 36
Serviceadres .................................................................................................................................... Pagina 36
Conformiteitsverklaring ................................................................................................................... Pagina 36
29 NL/BE
Page 30
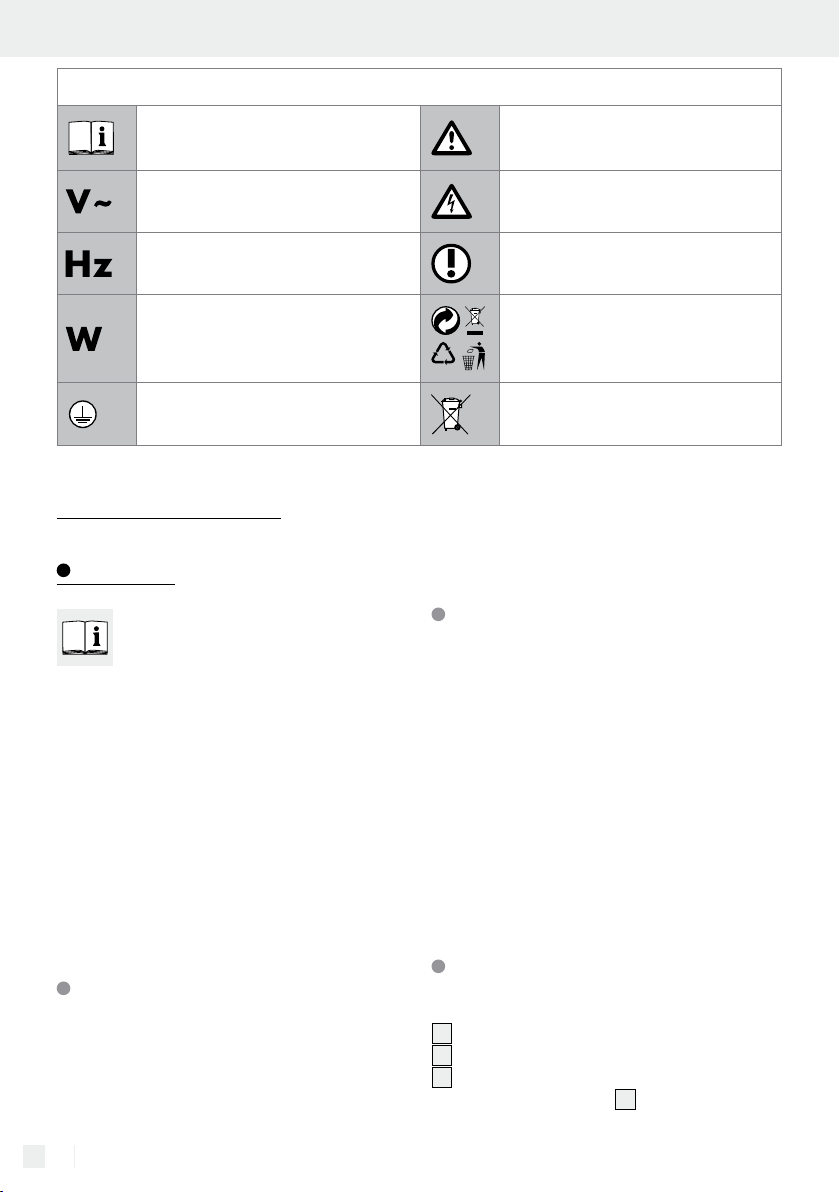
Legenda van de gebruikte pictogrammen
Lees de gebruiksaanwijzing!
Volt (wisselspanning)
Hertz (frequentie) Zo handelt u correct
Watt (nuttig vermogen)
Beschermingsklasse I
LED-plafondlamp met
bluetooth-luidspreker
Inleiding
Gefeliciteerd met de koop van uw nieuwe
apparaat. U hebt voor een hoogwaardig
product gekozen. Lees deze gebruiksaanwijzing volledig en zorgvuldig door. Klap de
pagina‘s met de afbeeldingen uit. Deze gebruiksaanwijzing hoort bij dit product en bevat belangrijke
aanwijzingen voor de ingebruikname en bediening.
Neem altijd de veiligheidsinstructies in acht. Controleer vóór de ingebruikname of de juiste spanning
beschikbaar is en of alle onderdelen goed gemonteerd zijn. Wanneer u vragen hebt of onzeker bent
in verband met de bediening van het apparaat, kunt
u contact opnemen met uw leverancier of met het
servicepunt. Bewaar deze handleiding op een veilige plaats en geef hem evt. aan derden door.
Waarschuwings- en
veiligheidsinstructies in acht nemen!
Voorzichtig! Kans op een elektrische
schok!
Verwijder e verpakking en het appa-
b
a
raat op een milieuvriendelijke manier!
Verwijder de batterijen op een
milieuvriendelijke manier!
dient erop te letten, dat de lamp niet op een vochtige
of geleidende ondergrond geïnstalleerd wordt! Dit
product is bestemd voor het gebruik in privé-huishoudens.
Omvang van de levering
Controleer de levering altijd direct na het uitpakken
op volledigheid en optimale staat van het product.
1 LED-Plafondlamp met Bluetooth-luidspreker
(Voet van de lamp, kunststof afdekking)
1 afstandsbediening
1 wandhouder voor de afstandsbediening (incl. mon-
tagemateriaal 1 x 3M-kleefpad, 2 x schroeven)
2 batterijen (1,5 V; LR03; AAA)
3 kunststof pluggen (plafondmontage)
3 schroeven (plafondmontage)
1 montage- en gebruiksaanwijzing
Correct gebruik
Deze lamp is uitsluitend bedoeld voor gebruik binnenshuis, in droge en gesloten ruimtes. De lamp kan
op alle normaal ontvlambare oppervlakken bevestigd worden. De elektricien, die de lamp installeert,
30 NL/BE
Beschrijving van de onderdelen
Lamp:
1
Voet van de lamp
2
Kunststof afdekking
3
Luidsprekerafdekking
(in kunststof afdekking
2
geïntegreerd)
Page 31
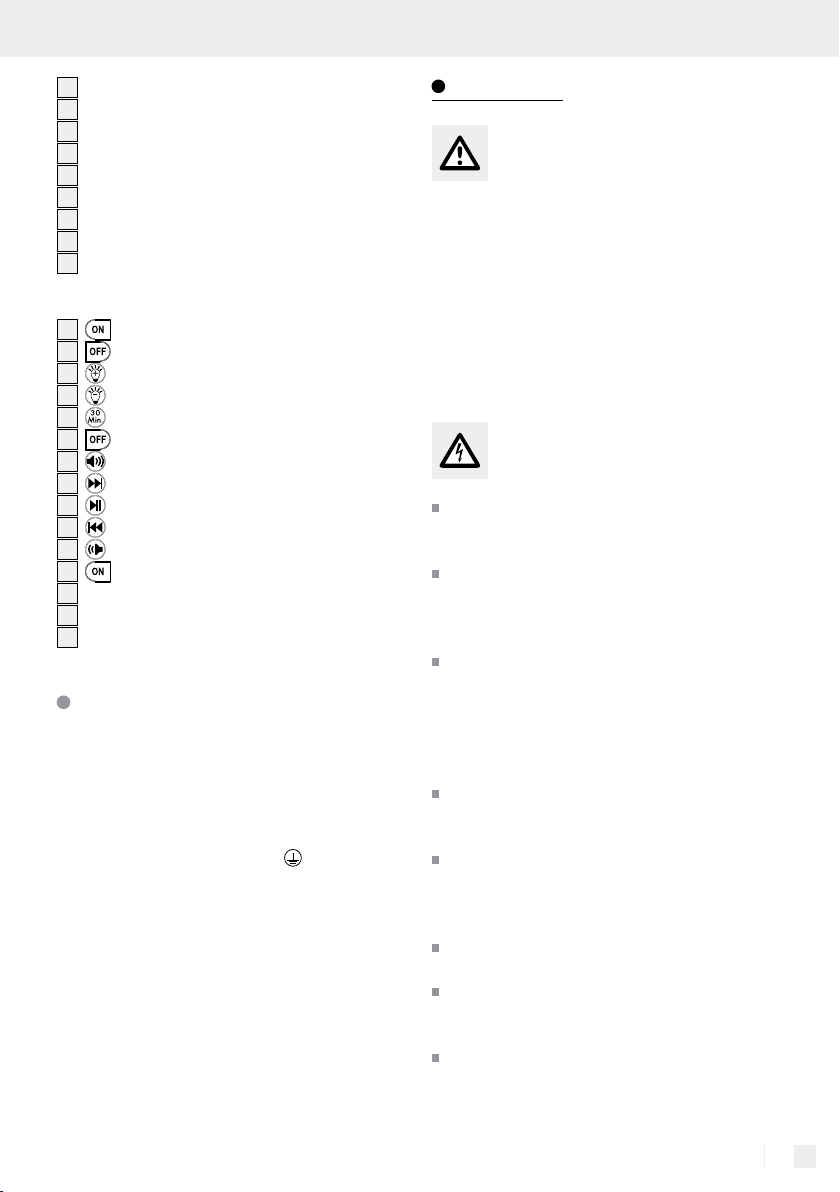
4
Schroeven
5
Plug
6
Markering boorgaten (1, 2, 3)
7
Stroomkabel (extern)
8
Kroonsteentje
9
Opnamegaten voor de schroeven
10
Bevestigingsbouten
11
Sticker
12
LED-plafondlamp
Afstandsbediening:
13
knop ON (lighting)
14
knop OFF (lighting)
15
knop dimmer +
16
knop dimmer –
17
knop 30 minuten-timer
18
knop OFF (audio)
19
knop volume +
20
knop muziektitel selecteren (voor)
21
knop pauze / Bluetooth-verbinding standby
22
knop muziektitel selecteren (terug)
23
knop volume –
24
knop ON (audio)
25
schroeven (wandbevestiging)
26
wandhouder (afstandsbediening)
27
3M-kleefpad
Technische gegevens
Artikelnr.: 9000.034.070
Bedrijfsspanning: 220–240 V∼,
50 / 60 Hz
Vermogen: max. 24 Watt (luid-
spreker max. 6 Watt)
Beschermingsklasse: I /
Beschermingsgraad: IP20
Afmetingen: Ø ca. 40 cm,
hoogte ca. 8 cm
Frequentiebereik
Luidspreker: 120–20.000 Hz
Bluetooth-versie: 4.0
Bluetooth-reikwijdte: ca. 9 m
Besturingsproces
Afstandsbediening: infrarood
Reikwijdte afstandsbediening: 5–6 m
Inleiding / Veiligheid
Veiligheid
Veiligheidsinstructies
Bij beschadigingen die worden veroorzaakt door
het niet in acht nemen van deze gebruiksaanwijzing
vervalt de garantie! Wij zijn niet aansprakelijk voor
gevolgschade! Bij materiële schade of persoonlijk
letsel die worden veroorzaakt door onjuist gebruik
of het niet in acht nemen van de veiligheidsinstructies zijn wij niet aansprakelijk! Laat de lamp of de
verpakking niet onbeheerd liggen. Plastic folie of
zakken, kunststofdeeltjes etc. kunnen voor kinderen
gevaarlijk speelgoed zijn.
Vermijd levensgevaar
door elektrische schok
Laat de elektrische installatie door een opge-
leide elektricien of een voor de elektrische installatie geïnstrueerde persoon uitvoeren.
Controleer iedere keer voor het aansluiten op
het stroomnet of de stroomkabel beschadigd is.
Gebruik uw lamp nooit, wanneer u een beschadiging hebt geconstateerd.
VOORZICHTIG! Beschadigde stroomkabels
zorgen voor levensgevaar door elektrische
schokken. Neem in geval van beschadigingen,
reparaties of andere problemen aan de lamp
contact op met de klantenservice of met een
elektricien.
Verwijder voor de montage de zekering of scha-
kel de aardlekschakelaar in de groepenkast uit
(0-stand).
Wees er voor de montage zeker van dat de
beschikbare spanning overeenkomt met de
benodigde voedingsspanning van de lamp
(220–240 V∼, 50 / 60 Hz).
Vermijd dat de lamp in contact komt met water
of andere vloeistoffen.
Open nooit de behuizing van de lamp en steek
er geen voorwerpen in. Bij dergelijke ingrepen
bestaat levensgevaar door elektrische schokken.
De LED-module kan niet worden vervangen.
Mocht de LED-module aan het einde van zijn
31 NL/BE
Page 32
levensduur uitvallen, moet de complete lamp
worden vervangen.
De lamp niet op vochtige op geleidende on-
dergrond installeren!
Vermijd brand- en
letselgevaar
Laat de lamp of het verpakkingsmateriaal niet
achteloos rondslingeren. Plastic folie / -zakken,
kunststof delen etc. kunnen voor kinderen een
gevaarlijk speelgoed zijn.
Dek de lamp niet af met voorwerpen. Een over-
matige warmteontwikkeling kan tot brand leiden
Zo handelt u correct
Monteer de lamp zo, zodat hij tegen vocht en
vuil beschermd is.
Bereid de montage zorgvuldig voor en maak hi
voldoende tijd voor vrij. Leg de afzonderlijke
onderdelen of materiaal vooraf overzichtelijk
en binnen handbereik klaar.
Wees altijd alert! Let altijd op wat u doet en
ga steeds met overleg te werk.
Monteer de lamp in geen geval, als u niet ge-
concentreerd bent of als u zich niet lekker voelt.
Veiligheidsinstructies voor
het gebruik van batterijen
Zorg ervoor, dat de batterijen correct worden
geplaatst, d.w.z. dat u rekening moet houden
met de polariteit (+ en –).
Verwijder lege batterijen direct.
Verhoogd risico op lekkage!
Voorkom contact van de batterijvloeistof met
huid, ogen en slijmvliezen. Bij contact dient u de
desbetreffende plekken direct met voldoende
schoon water af te spoelen en direct een arts
te raadplegen.
Voorbereiding
.
Benodigd gereedschap
en materiaal
Het genoemde gereedschap en materiaal wordt niet
meegeleverd. Het gaat hierbij om niet-bindende informatie en waarden ter oriëntatie. De hoedanigheid
van het materiaal is afhankelijk van de individuele
er
omstandigheden ter plekke.
– Potlood / markeerstift
– Spanningstester
– Schroevendraaier
– Boormachine
– Boor (ca. Ø 6 mm)
– Hamer
– Zijsnijder
– Geleider
Batterijen mogen niet worden blootgesteld aan
overmatige warmte zoals direct zonlicht, vuur of
soortgelijke. De batterijen kunnen exploderen!
Niet oplaadbare batterijen mogen nooit worden
opgeladen. Explosiegevaar!
Houd batterijen uit de buurt van kinderen, sluit
ze niet kort en demonteer ze niet.
Vervang altijd alle batterijen gelijktijdig. Alleen
batterijen van hetzelfde type gebruiken. Geen
verschillende of gebruikte en nieuwe batterijen
door elkaar gebruiken.
De contacten van de batterijen en ook de con-
tacten in het apparaat reinigen voor het plaatsen van de batterijen.
32 NL/BE
Voor de installatie
Belangrijk: de elektrische aansluiting moet door
een opgeleide elektricien of een voor elektro-installaties geïnstrueerde persoon worden uitgevoerd.
Deze moet op de hoogte zijn van de eigenschappen van de lamp een de aansluitbepalingen.
Maak uzelf voor de installatie vertrouwd met
alle aanwijzingen en afbeeldingen in deze gebruiksaanwijzing alsook met de lamp zelf.
Wees er voor de installatie zeker van dat de
leiding, waaraan de lamp wordt aangesloten,
geen spanning heeft. Verwijder hiervoor de
Page 33

Voor de installatie / Ingebruikname
zekering of schakel het betreffende stroomcircuit in de groepenkast uit (0-stand).
Controleer hiervoor de spanningsvrijheid met
een spanningzoeker.
LED-plafondlamp 12 uitpakken en op een
vaste ondergrond plaatsen (wees voorzichtig,
dat hierbij geen krassen ontstaan).
Met twee handen de kunststof afdekking 2
pakken en een beetje druk op de vaste ondergrond uitoefenen. Hierbij de kunststof afdek-
2
king
tot aan de aanslag linksom draaien
(tegen de richting van de pijl) en de kunststof
afdekking
2
naar boven eraf halen.
Ingebruikname
Lamp monteren / installeren
(zie afb. A–I)
Wees er voor de installatie zeker van dat de
leiding, waaraan de lamp wordt aangesloten,
geen spanning heeft. Verwijder hiervoor de zekering of schakel het betreffende stroomcircuit
in de groepenkast uit (0-stand).
Houd de voet van de lamp 1 op de gewenste
montageplek. Houd hierbij rekening met het
boorgat in de voet van de lamp
de kabel wordt geleid.
Markeer de boorgaten 6 (zie afb. D).
Boor de gaten. Zorg ervoor, dat de stroomka-
bel (extern)
afb. E).
Steek de pluggen 5 in de boorgaten. Ge-
bruik indien nodig een hamer (zie afb. E).
Steek de kabel door het hiervoor bestemde
boorgat in de voet van de lamp
tig de lamp aan het plafond (zie afb. F-G).
De drie kabels van de huisinstallatie overeen-
komstig de aangegeven kleuren aansluiten aan
het kroonsteentje
lamp
Opmerking: Let erop dat u de individuele
geleider van de netaansluitkabel (extern)
steeds correct aansluit: fasedraad, zwart of
bruin = symbool L, nuldraad, blauw = symbool
N, aarddraad, groen-geel = symbool
7
niet beschadigd raakt (zie
8
van de voet van de
1
.
1
waardoor
1
en beves-
7
.
Monteer de kunststof afdekking 2 van de
lamp. Plaats hiervoor de afdekking met de drie
inkepingen aan de desbetreffende bevestigingsbout
boven. Draai de afdekking rechtsom (richting
van de pijl) om deze te bevestigen. De sticker
met de pijl
Plaats de zekering weer terug of schakel de
hoofdzekering in de zekeringskast weer aan
(I-stand).
Uw LED-plafondlamp
is nu gereed voor gebruik.
10
(zie afb. H) en druk deze naar
11
kan nu worden verwijderd.
12
met Bluetooth-luidspreker
Wandhouder monteren
Monteer de wandhouder voor de afstandsbe-
26
diening
of de kleefplads
beelding I.
met behulp van de schroeven 25
27
zoals weergegeven op af-
Batterijen
plaatsen / vervangen
Opmerking: voor de afstandsbediening zijn twee
batterijen van het type AAA / LR03 nodig (mee
inbegrepen).
De afdekking van het batterijvak (achterkant) om
te openen ca. 1 cm naar beneden schuiven en
dan het deksel eraf tillen.
Twee batterijen van het meegeleverde type
AAA / LR03 in het batterijvak plaatsen. Let op
de juiste polariteit!
Afdekking terug schuiven, om het batterijvak te
sluiten.
Uw afstandsbediening is gereed voor gebruik.
Lamp via de
lichtschakelaar bedienen
De LED-plafondlamp 12 kan via de wandscha-
kelaar in- en uitgeschakeld worden. De lichtintensiteit is hierbij altijd 100 %. Alle andere functies
33 NL/BE
Page 34

worden uitsluitend via de afstandsbediening
bestuurd.
verlichtingssterkte automatisch verminderd tot
de minimale helderheid.
Afstandsbediening gebruiken
OPGELET! Alle functies van de afstandsbediening
staan ter beschikking, als de LED-plafondlamp
wordt ingeschakeld met de wandschakelaar.
12
Licht aan- / uitsc hakelen
1. Licht inschakelen
Druk op de „ “ knop (lighting) 13, om de
LED-plafondlamp
vangstsignaal wordt bevestigd door middel
van een piep-geluid.
2. Licht uitschakelen
Druk op de „ “ knop (lighting) 14, om de
LED-plafondlamp
vangstsignaal wordt bevestigd door middel van
een piep-geluid.
12
in te schakelen. Het ont-
12
uit te schakelen. Het ont-
Licht dimmen
1. Verlichtingssterkte verhogen
Druk op de „ “ knop dimmer + 15, om de
verlichtingssterkte te laten toenemen. Als het
maximum qua verlichtingssterkte is bereikt, hoort
u een piep-geluid. Bij kortstondig drukken van
deze knop wordt de verlichtingssterkte trapsgewijs per keer drukken verhoogd. Wordt de „
knop dimmer +
verlichtingssterkte automatisch verhoogd tot de
maximale helderheid.
2. Verlichtingssterkte verminderen
Druk op de „ “ knop dimmer – 16, om de
verlichtingssterkte te verminderen. Als het minimum qua verlichtingssterkte is bereikt, hoort u
een piep-geluid. Bij kortstondig drukken van de
knop wordt de verlichtingssterkte trapsgewijs
per keer drukken verminderd. Wordt de „
knop dimmer –
15
langer ingedrukt, wordt de
16
langer ingedrukt, wordt de
ze
“
30 minuten-timer
1. Timer inschakelen
Druk op de „ “ knop 17, om de LED-plafond-
12
lamp
Het licht en ook de Bluetooth-functie (muziek)
worden automatisch na ca. 30 minuten uitgeschakeld.
2. Timer uitschakelen
Wilt u de timer-functie tijdens de 30 minuten
uitschakelen, drukt u nogmaals gedurende meer
dan 3 seconden op de „
signaal door de LED-plafondlamp
vangen, hoort u een langgerekt piep-geluid wat
het uitschakelen van de timer-functie bevestigd.
automatisch uit te schakelen.
“ knop 17. Als het
Bluetooth-verbinding
1.
Bluetooth-verbinding tot stand brengen
Druk op de audio „ “ knop (audio) 24. Het
ontvangstsignaal wordt bevestigd door middel
van een piep-geluid.
Ca. 1–2 seconden later wordt de Bluetooth-ver-
binding akoestisch ondersteund automatisch
opgebouwd, de blauwe LED in de LED-plafond-
12
lamp
Als de verbinding is opgebouwd, hoort u een
korte melodie.
“
Bij de eerste verbinding met uw mobiele tele-
foon, tablet etc. kiest u de Bluetooth-verbinding
„LBT00738“.
2. Bluetooth-verbinding beëindigen
Druk op de audio „ “ knop (audio) 18. Het
ontvangstsignaal wordt bevestigd door middel
van een piep-geluid. De Bluetooth-verbinding
wordt beëindigd.
begint snel te knipperen.
12
wordt ont-
34 NL/BE
Page 35
Ingebruikname / Onderhoud en reiniging / Afvoer
Na succesvolle verbinding staan u de volgende audiobedieningen ter beschikking:
Muziekvolume regelen
1. Muziekvolume verminderen
Druk op de „ “ knop volume – 23, om het
volume te verminderen. Als het minimum qua
volume is bereikt, hoort u een piep-geluid. Bij
kortstondig drukken van deze knop wordt het
volume trapsgewijs per keer drukken verminderd. Wordt de „
ger ingedrukt, neemt het volume automatisch
af tot aan het minimum.
2. Muziekvolume verhogen
Druk op de „ “ knop volume + 19, om het vo-
lume te verhogen. Als het maximum qua volume
is bereikt, hoort u een piep-geluid. Bij kortstondig drukken van deze knop wordt het volume
trapsgewijs per keer
de „
“ knop volume + 19 langer ingedrukt,
neemt het volume automatisch toe tot aan het
maximale volume.
“ knop volume – 23 lan-
drukken verhoogd. Wordt
Daarna wordt de Bluetooth-verbinding uitgeschakeld.
Onderhoud en reiniging
VOORZICHTIG! GEVAAR VOOR ELEK-
TRISCHE SCHOK! Verbreek voor de reini-
ging eerst de verbinding van de lamp met het
stroomnet. Verwijder hiervoor de zekering of
schakel het betreffende stroomcircuit in de
groepenkast uit (0-stand).
Gebruik geen oplosmiddel, benzine e.d. De
lamp zal hierdoor schade ondervinden.
Laat de lamp volledig afkoelen.
VOORZICHTIG! GEVAAR VOOR ELEK-
TRISCHE SCHOK! Op basis van de elektrische veiligheid mag de verlichting nooit met
water of andere vloeistoffen worden gereinigd
of in zijn geheel in water worden gedompeld.
Gebruik voor de reiniging alleen een droge,
pluisvrije doek.
Plaats de zekering vervolgens weer terug of
schakel de hoofdzekering in de zekeringskast
weer aan (I-stand).
Muziektitel selecteren
1. Muziektitel terug
Druk op de „ “ knop muziektitel selecteren
22
(terug)
teren of het lied nog een keer van begin af aan
te luisteren.
2. Muziektitel voor
Druk op de „ “ knop muziektitel selecteren
(voor)
selecteren.
3. Pauze
Druk eventjes op de „ “ knop pauze / Blue-
tooth-verbinding standby
functie te activeren. Als er lang op de „
knop pauze / Bluetooth-verbinding standby
wordt gedrukt, wordt de Bluetooth-verbinding
gedurende ca. 10 minuten op standby gezet.
, om een eerdere muziektitel te selec-
20
, om de volgende muziektitel te
21
, om de pauze-
Afvoer
De verpakking bestaat uit milieuvriendelijke grondstoffen die u via de plaatselijke recyclingcontainers kunt afvoeren.
De Grüne Punkt geldt niet voor Duitsland.
Neem de aanduiding van de verpak-
b
kingsmaterialen voor de afvalscheiding
a
in acht. Deze zijn gemarkeerd met de
afkortingen (a) en een cijfers (b) met de
volgende betekenis: 1–7: kunststoffen /
20–22: papier en vezelplaten / 80–98:
composietmaterialen.
Het product en de verpakkingsmateria-
“
21
len zijn recyclebaar; verwijder deze
afzonderlijk voor een betere afvalbehandeling. Het Triman-logo geldt alleen
voor Frankrijk.
35 NL/BE
Page 36
Afvoer / Garantie en service
Informatie over de mogelijkheden om
het uitgediende product na gebruik te
verwijderen, verstrekt uw gemeentelijke
overheid.
Verwijder de batterijen alstublieft op een
milieuvriendelijke manier. Gooi de batte-
rijen niet bij het huishoudelijk afval. Maak
gebruik van de teruggave- en verzamelpunten in
uw gemeente of neem contact op met de winkel,
waar u het product heeft gekocht.
Garantie en service
Garantieverklaring
3 Jaar garantie vanaf aankoopdatum op dit apparaat, geldt uitsluitend voor de eerste koper, niet overdraagbaar. Gelieve de kassabon als aankoopbewijs
te bewaren. De garantie geldt alleen voor materiaalof fabricagefouten, niet voor aan slijtage onderhevige
delen of voor beschadigingen door onzorgvuldig
gebruik. De garantie komt te vervallen bij ingrepen
door derden. Uw wettelijke rechten worden door
deze garantie niet beperkt. Neem in garantiegevallen telefonisch contact op met de klantenservice.
Alleen dan kan een kosteloze inzending van uw
apparaat gewaarborgd worden. Het apparaat werd
zorgvuldig vervaardigd en aan een nauwkeurige
kwaliteitscontrole onderworpen. Binnen de garantieperiode herstellen wij kosteloos alle materiaal- of
productiefouten. Mochten desalniettemin tijdens de
garantieperiode gebreken de kop opsteken, stuurt
u het apparaat dan alstublieft op naar het hier
genoemde service-adres met vermelding van het
volgende artikelnummer: 9000.034.070.
Beschadigingen door ondeskundig gebruik, negeren
van de handleiding of ingrepen door niet-geautoriseerde personen zijn van de garantieverlening
uitgesloten. Dit geldt eveneens voor aan slijtage
onderhevige delen. Door de garantieservice wordt
de garantieperiode noch verlengd noch vernieuwd.
Serviceadres
Action GmbH
Im Langel 6
DE-59872 Meschede
DUITSLAND
Tel.: +49 (0) 2903 / 449 555
Fax: +49 (0) 2903 / 449 48410
E-mail: [email protected]
www.action-leuchten.de
IAN 288149
Houd bij alle vragen alstublieft de kassabon en het
artikelnummer (IAN 288149) als bewijs van aankoop bij de hand.
Conformiteitsverklaring
Dit product voldoet aan de eisen van de van toepassing zijnde Europese en nationale richtlijnen
(RED-richtlijn 2014/53/EU, Ecodesign richtlijn
2009/125/EG, RoHS-richtlijn 2011/65/EU).
De conformiteit is aangetoond. Desbetreffende
verklaring en documenten liggen ter inzage bij de
fabrikant.
Hiermee verklaren wij, dat de radioverbindingsinstallatie 9000.034.080 voldoet aan de richtlijn
2014/53/EU.
De volledige tekst van de EU-conformiteitsverklaring
staat ook via het volgende internetadres ter beschikking: www.action-leuchten.de/service/
konformitätserklärungen/
36 NL/BE
Page 37

Vysvětlení použitých piktogramů ...........................................................................Strana 38
Úvod ................................................................................................................................................. Strana 38
Používání v souladu s určením ........................................................................................................ Strana 38
Obsah dodávky ............................................................................................................................... Strana 38
Popis dílů .......................................................................................................................................... Strana 38
Technická data ................................................................................................................................. Strana 39
Bezpečnost .................................................................................................................................. Strana 39
Bezpečnostní pokyny ....................................................................................................................... Strana 39
Bezpečnostní pokyny k bateriím ..................................................................................................... Strana 40
Příprava ........................................................................................................................................ Strana 40
Potřebné nářadí a materiál ..............................................................................................................Strana 40
Před instalací .............................................................................................................................Strana 40
Uvedení do provozu ...........................................................................................................Strana 41
Montáž a instalace svítidla ............................................................................................................. Strana 41
Montáž nástěnného držáku ............................................................................................................ Strana 41
Vložení a výměna baterií .................................................................................................................Strana 41
Zapínání a vypínání svítidla vypínačem ......................................................................................... Strana 41
Používání dálkového ovládání ........................................................................................................ Strana 41
Zapínání a vypínání světla .............................................................................................................. Strana 41
Tlumení světla ................................................................................................................................... Strana 42
Časovač až na 30 minut ................................................................................................................. Strana 42
Bluetooth spojení ..............................................................................................................................Strana 42
Regulace hlasitost hudby ................................................................................................................. Strana 42
Volba hudebního titulu .....................................................................................................................Strana 42
Údržba a čištění ...................................................................................................................... Strana 43
Zlikvidování ...............................................................................................................................Strana 43
Záruka a servis ....................................................................................................................... Strana 43
Prohlášení k záruce .......................................................................................................................... Strana 43
Adresa servisu .................................................................................................................................. Strana 44
Prohlášení o shodě ...........................................................................................................................Strana 44
37 CZ
Page 38
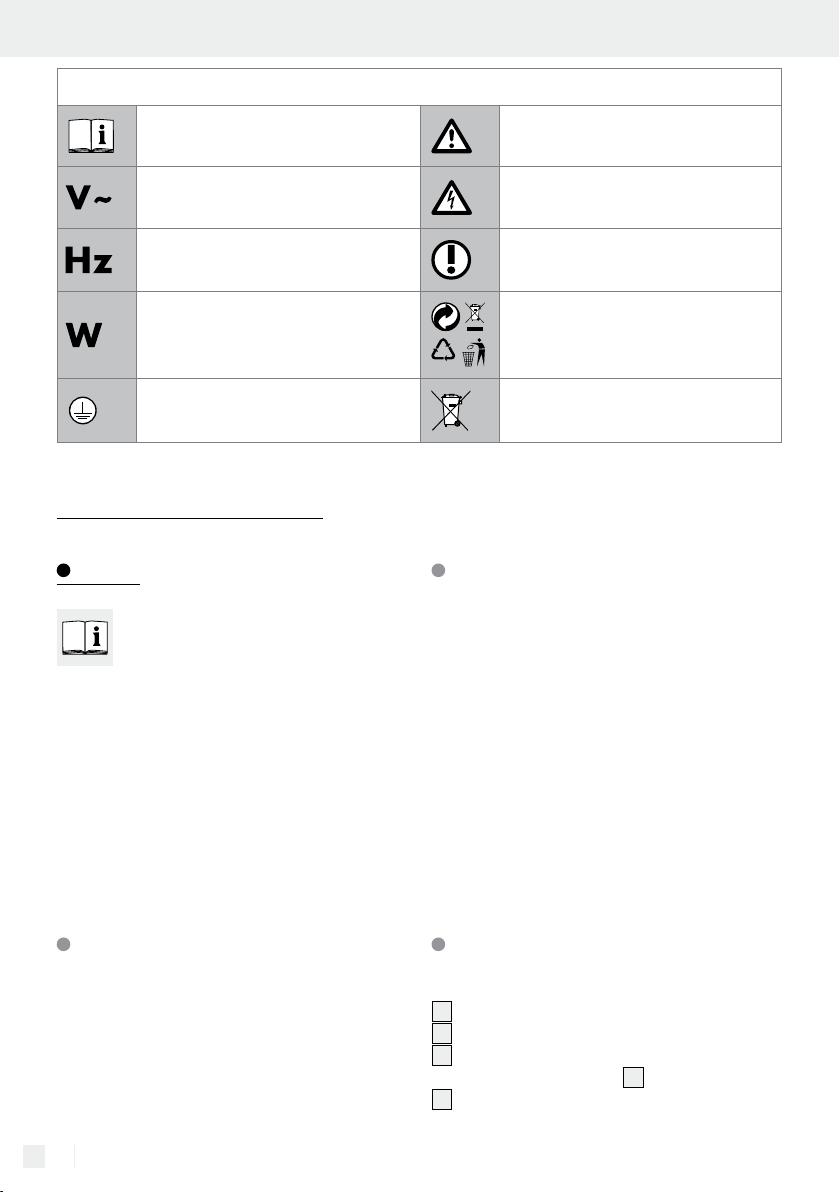
Vysvětlení použitých piktogramů
Přečtěte si návod kobsluze!
Volt (střídavé napětí)
Hertz (kmitočet) Tak postupujete správně
Watt (činný výkon)
Ochranná třída I
LED stropní svítidlo s
bluetooth reproduktorem
Úvod
Blahopřejeme vám ke koupi nového vý-
robku. Rozhodli jste se pro vysoce kvalitní
výrobek. Přečtěte si laskavě kompletně a
pečlivě tento návod k obsluze. Rozevřete stránky
sobrázky. Tento návod je součástí tohoto výrobku
a obsahuje důležité informace ouvedení zařízení do
provozu a kzacházení sním. Řiďte se vždy bezpečnostními pokyny. Před uvedením do provozu zkontrolujte, jestli je kdispozici správné napětí a jestli jsou
všechny díly správně namontované. Jestliže máte
ještě otázky nebo jste si nejistí při ovládání přístroje,
kontaktujte vašeho prodejce nebo servis. Návod
pečlivě uschovejte a případně jej předejte třetí osobě.
Dbejte na výstrahy a řiďte se
bezpečnostními pokyny!
Pozor! Nebezpečí zásahu elektrickým
proudem!
Obal i výrobek odstraňujte do
b
a
odpadu ekologicky!
Odstraňujte baterie do odpadu
ekologicky!
podkladu! Tento přístroj je určen pouze pro soukromé použití.
Obsah dodávky
Bezprostředně po vybalení vždy zkontrolujte úplnost
dodávky a bezvadný stav zařízení.
1 LED Stropní svítidlo s Bluetooth reproduktorem
(základna světla, umělohmotný kryt)
1 dálkové ovládání
1 nástěnný držák pro dálkové ovládání (včetně
montážního materiálu 1 x lepící polštářek 3M,
2 x šroub)
2 baterie (1,5 V; LR03; AAA)
3 umělohmotné hmoždinky (pro montáž na strop)
3 šrouby (pro montáž na strop)
1 návod k montáži a obsluze
Používání v souladu s určením
Svítidlo je určeno výhradně pro provoz vinteriéru,
vsuchých a uzavřených místnostech. Svítidlo lze
upevnit na všechny běžně hořlavé povrchy. Elektrikář, který je instalací svítidla pověřen, musí dbát na
to, aby ho neinstaloval na vlhkém nebo vodivém
38 CZ
Popis dílů
Svítidlo:
1
Základna světla
2
Umělohmotný kryt
3
Kryt reproduktoru
(v umělohmotném krytu
4
Šrouby
integrované)
Page 39
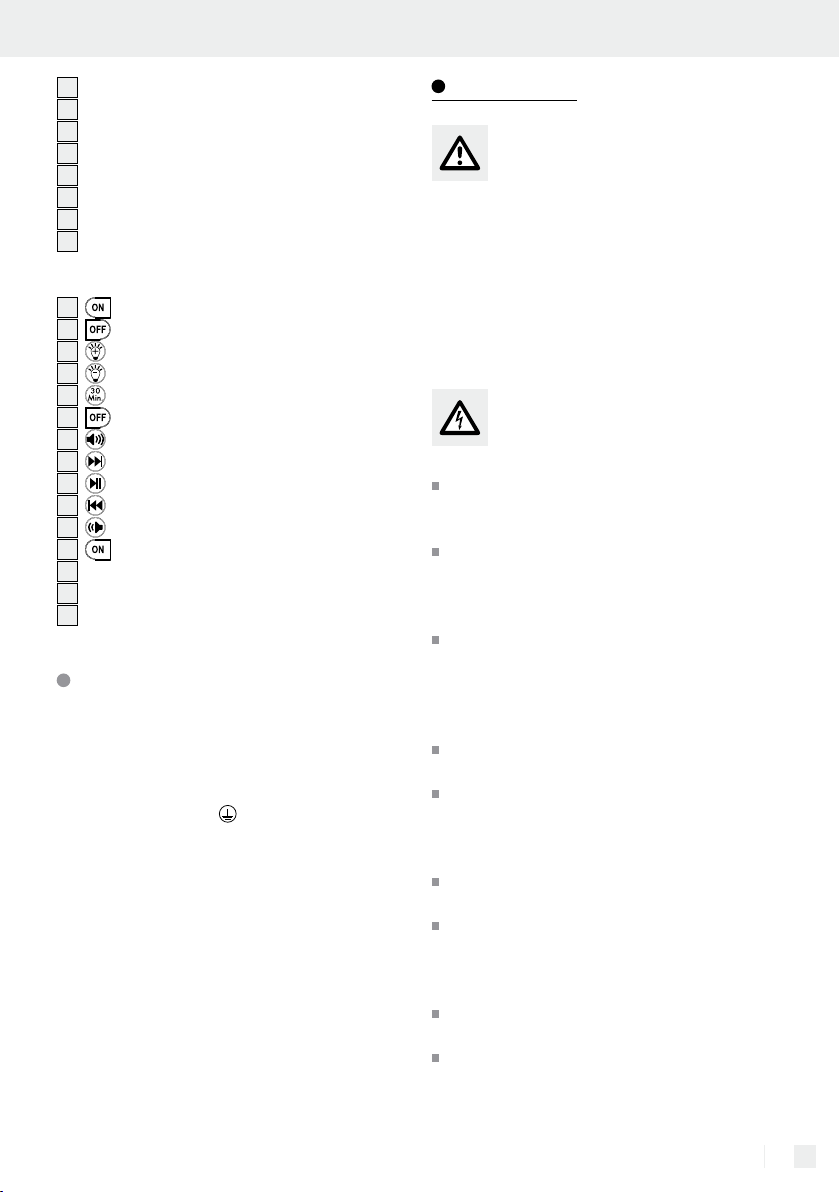
5
Hmoždinka
6
Značení otvorů (1, 2, 3)
7
Síťový připojovací kabel (externí)
8
Svorkovnice
9
Otvory pro šrouby
10
Čep
11
Nálepka
12
Stropní LED svítidlo
Dálkové ovládání:
13
Tlačítko ZAP (osvětlení)
14
Tlačítko VYP (osvětlení)
15
Tlačítko stmívače +
16
Tlačítko stmívače –
17
Tlačítko časovače až na 30 minut
18
Tlačítko VYP (audio)
19
Tlačítko hlasitosti +
20
Tlačítko volby hudebního titulu (vpřed)
21
Tlačítko přestávka / spojení Bluetooth standby
22
Tlačítko volby hudebního titulu (zpět)
23
Tlačítko hlasitosti –
24
Tlačítko ZAP (audio)
25
Šrouby (nástěnný držák)
26
Nástěnný držák (pro dálkové ovládání)
27
Lepící podložka 3M
Technická data
Artikl č.: 9000.034.080
Provozní napětí: 220–240 V∼, 50 / 60 Hz
Příkon: maximálně 24 W (reproduktor
maximálně 6 W)
Ochranná třída: I /
Druh krytí: IP20
Rozměry: Ø cca 40 cm, výška cca 8 cm
Frekvenční rozsah
Reproduktor: 120–20.000 Hz
Verze Bluetooth: 4.0
Dosah Bluetooth: cca 9 m
Způsob řízení
Dálkové ovládání: infračervené
Dosah dálkového
ovládání: 5–6 m
Úvod / Bezpečnost
Bezpečnost
Bezpečnostní pokyny
Při škodách způsobených nedodržením tohoto návodu k obsluze zaniká záruka! Za následné škody
se neručí! Za věcné nebo osobní škody, způsobené
neodborným zacházením nebo nerespektováním
bezpečnostních pokynů, se neručí! Nenechávejte
svítidlo nebo obalový materiál ležet bez dohledu.
Umělohmotné fólie / sáčky, umělohmotné díly atd.,
mohou být pro děti nebezpečnou hračkou.
Zabraňte ohrožení života
v důsledku zásahu
elektrickým proudem
Elektrickou instalaci nechte provádět jen vyuče-
ného elektrikáře nebo osobu s odpovídajícími
zkušenostmi.
Před každým připojením ksíti kontrolujte
připojovací kabel, jestli není poškozený. Nikdy
nepoužívejte svítidlo, pokud jste zjistili, že je
poškozené.
POZOR! Poškozené síťové kabely znamenají
nebezpečí ohrožení života úrazem elektrickým
proudem. Při poškozeních, opravách nebo jiných
problémech se obraťte na servisní místo nebo
na kvalifikovaného elektrikáře.
Před montáží odstraňte pojistku nebo vypněte
jistič v pojiskové skříni (poloha 0).
Před montáží se přesvědčte, jestli se shoduje na-
pětí elektrického proudu, které máte k dispozici
s napětím potřebným pro svítidlo (220–240 V∼,
50 / 60 Hz).
Bezpodmínečně zabraňte kontaktu lampy svo-
dou nebo jinými kapalinami.
Neotevírejte nikdy těleso svítidla ani nestrkejte
dovnitř žádné předměty. Takové zásahy znamenají nebezpečí ohrožení života elektrickým
proudem.
LED-modul nelze vyměnit. Po výpadku LED-mo-
dulu se musí celé svítidlo vyměnit.
Neinstalujte světlo na vlhkém nebo vodivém
povrchu!
39 CZ
Page 40
Vyvarujte se nebezpečí
požáru a poranění
Nenechávejte ležet svítidlo nebo obalový
materiál bez dohledu. Plastové fólie / pytlíky,
umělohmotné díly atd., by mohly být pro děti
nebezpečnou hračkou.
Nezakrývejte lampu žádnými předměty. Nad-
měrný vývin tepla může vést ke vzniku požáru.
Tak postupujete správně
Montujte svítidlo tak, aby bylo chráněné před
vlhkostí a znečištěním.
Montáž nejdříve pečlivě připravte, udělejte si na
ní čas. Rozložte si přehledně všechny jednotlivé
díly, abyste je měli po ruce.
Buďte vždy pozorní! Dbejte vždy na to, co
děláte, a postupujte s rozumem.
V žádném případě nemontujte lampu, jestliže
jste nekoncentrovaní nebo se necítíte dobře.
Bezpečnostní pokyny
k bateriím
Baterie se nesmí vystavovat vysokým teplotám,
slunečnímu světlu nebo ohni. Baterie mohou
vybuchnout!
Nikdy nenabíjejte nenabíjecí baterie. Nebez-
pečí výbuchu!
Chraňte baterie před dětmi, nespojujte je na
krátko ani je nerozebírejte.
Vyměňujte vždy všechny baterie najednou.
Nepoužívejte společně různé typy baterií nebo
nové baterie s použitými dohromady.
Před vložením baterií vyčistěte jejich kontakty
a kontakty v přístroji.
Dbejte na správnou polaritu baterií (+ a –).
Vybité baterie ihned odstraňte.
Zvýšené nebezpečí vytečení!
Vyhýbejte se kontaktu tekutiny z baterií s pokož-
kou, očima a sliznicemi. Při kontaktu ihned om
postižená místa dostatečným množstvím čisté
vody a okamžitě vyhledejte lékařskou pomoc.
yjte
Příprava
Potřebné nářadí a materiál
Uvedené nářadí a materiály nejsou součástí dodávky. Jedná se zde o nezávazné údaje a orientační hodnoty. Vlastnosti materiálu jsou závislé na
individuálních podmínkách v místě.
– tužka / nástroj koznačení
– zkoušečka napětí
– šroubovák
– vrtačka
– vrták (cca Ø 6 mm)
– kladivo
– štípací kleště
– žebřík
Před instalací
Důležité: Připojení musí provést vyučený elektrikář
nebo osoba zaškolená pro práce na elektrických
rozvodech. Tato osoba musí být seznámena svlastnostmi svítidla a spředpisy pro připojení.
Před instalací se nejdříve seznamte se světlem,
pokyny a obrázky v tomto návodu.
Před instalací zajistěte, aby byl přívod elektric-
kého proudu ke svítidlu bez napětí. Za tímto
účelem vyjměte pojistku nebo vypněte jistič
vpojistkové skříni (poloha0).
Zkontrolujte beznapěťový stav zkoušečkou.
Stropní LED svítidlo 12 rozbalit a položit na
pevnou podložku (dávejte pozor, abyste ho
nepoškrábali).
Umělohmotný kryt 2 uchopit oběma rukama
a mírně zatlačit na pevný podklad. Přitom
umělohmotný kryt
směru proti chodu hodinových ručiček (proti
směru, který ukazuje šipka) a kryt reproduktoru
2
zdvihnout nahoru.
2
pootočit až na doraz ve
40 CZ
Page 41

Uvedení do provozu
Uvedení do provozu
Montáž a instalace svítidla
(viz obr. A–I)
Před instalací zajistěte, aby byl přívod elektric-
kého proudu ke svítidlu bez napětí. Za tímto
účelem vyjměte pojistku nebo vypněte jistič
vpojistkové skříni (poloha0).
Přidržte základnu 1 v požadované poloze.
Dávejte přitom pozor na otvor v základně svíti-
1
dla
, skrz který se protahuje připojovací
síťový kabel.
Označte si místa pro vrtání tří otvorů 6
(viz obr. D).
Vyvrtejte potřebné otvory. Dbejte na to, abyste
nepoškodili vodiče síťového kabelu (externího)
7
(viz obr. E).
Nastrčte do otvorů hmoždinky 5. V případě
potřeby použijte kladivo (viz obr. E).
Protáhněte připojovací sítový kabel skrz
příslušný otvor v základně svítidla
něte svítidlo na strop (viz obr. F–G).
Připojit tři vodiče domovní instalace podle ba-
rev do svorkovnice
Upozornění: Dbejte na správné připojení
jednotlivých vodičů (externího) síťového připojovacího kabelu
hnědý= symbol L, neutrální vodič modrý=
symbol N, ochranný vodič zeleno-žlutý=
symbol
Namontujte umělohmotný kryt 2 světla. K
tomu nasaďte kryt se třemi zářezy na odpovídající čep
horu. K připevnění pootočte kryt ve směru
chodu hodinových ručiček doprava (směr
šipky). Nyní můžete nálepku se šipkou
odstranit.
Nasaďte zase pojistku nebo zapněte jistič
vpojistkové skříni (do polohy I).
Vaše stropní LED svítidlo
tory je připraveno k provozu.
10
8
základny svítidla 1.
7
: vodič proudu černý nebo
(viz obr. H) a zatlačte ho na-
12
s Bluetooth-reproduk-
1
a připev-
11
Montáž nástěnného držáku
Namontujte držák pro dálkové ovládání na
26
stěnu
štářků
pomocí šroubů 25 nebo lepících pol-
27
jak je znázorněno na obrázku I.
Vložení a výměna baterií
Upozornění: Pro dálkové ovládání se musí pou-
žít dvě baterie typu AAA / LR03 (v obsahu dodávky).
Pro otevření přihrádky na baterie (na zadní
straně) nejdříve posuňte víčko cca 1 cm dolů
a potom ho nadzvedněte.
Vložte do přihrádky dvě dodané baterie typu
AAA / LR03. Dbejte na správnou polaritu!
Nasuňte kryt zpátky na přihrádku pro baterie.
Vaše dálkové ovládání je připraveno k provozu.
Zapínání a vypínání
svítidla vypínačem
LED stropní svítidlo 12 můžete zapínat a vypínat
vypínačem na stěně. Intenzita světla je přitom
nastavena na 100 %. Všechny ostatní funkce se
řídí jen dálkovým ovládáním.
Používání dálkového ovládání
POZOR! Všechny funkce dálkového ovládání jsou
použitelné jen tehdy, jestliže bylo LED stropní
12
svítidlo
zapnuto vypínačem na stěně.
Zapínání a vypínání světla
1. Zapnutí světla
Stiskněte tlačítko „ “ (osvětlení) 13, abyste
LED stropní svítidlo
se potvrdí signálem.
12
zapnuli. Příjem povelu
41 CZ
Page 42

2. Vypnutí světla
Stiskněte tlačítko„ “ (osvětlení) 14, abyste
LED stropní svítidlo
se potvrdí signálem.
12
vypnuli. Příjem povelu
Tlumení světla
1. Zvýšení intenzity světla
Stiskněte tlačítko „ “ + stmívače 15, pro zvý-
šení intenzity světla. Po dosažení maximální intenzity světla se ozve signál. Po každém krátkém
stisknutí tohoto tlačítka se zvyšuje intenzita světla
o jeden stupeň. Jestliže stisknete tlačítko „
+ stmívače
světla automaticky na maximum.
2. Snížení intenzity světla
Stiskněte tlačítko „ “ – stmívače 16, pro sní-
žení intenzity světla. Po dosažení minimální intenzity světla zazní signál. Po každém krátkém
stisknutí se snižuje intenzita světla o jeden stupeň.
Jestliže stisknete tlačítko „
přidržíte ho, sníží se intenzita světla automaticky
na minimum.
15
a přidržíte ho, zvýší se intenzita
“ – stmívače 16 a
Časovač až na 30 minut
1. Zapnutí časovače
Stiskněte tlačítko „ “ 17, aby se LED stropní
12
svítidlo
Světlo a také funkce Bluetooth (hudba) se po
cca 30 minutách vypnou.
2. Vypnutí časovače
Jestliže chcete funkci časovače během 30 mi-
nut vypnout, stiskněte tlačítko „
déle než 3 vteřiny. Příjem povelu potvrdí LED
stropní svítidlo
cím vypnutí funkce časovače.
automaticky vypnulo.
12
dlouhým signálem, potvrzují-
“ 17 znovu,
Bluetooth spojení
1. Bluetooth spojení
Stiskněte tlačítko audio „ “ (Audio) 24. Příjem
povelu se potvrdí signálem.
Cca za 1 až 2 vteřiny dojde k automatickému
Bluetooth spojení, potvrzené akusticky, modrá
LED ve stropním svítidle
Po spojení zazní krátká melodie.
Při první spojením s Vaším mobilním telefonem,
tabletem, atd., zvolte Bluetooth spojení
„LBT00738“.
2. Ukončení Bluetooth spojení
“
Stiskněte tlačítko audio „ “ (Audio) 18. Příjem
povelu se potvrdí signálem. Bluetooth spojení
skončí.
Po úspěšném spojení máte k dispozici
následující možnosti řízení audia:
12
začne rychle blikat.
Regulace hlasitost hudby
1. Snížení hlasitosti hudby
Stiskněte tlačítko„ “ hlasitosti – 23, pro snížení
hlasitosti. Po dosažení minimální hlasitosti zazní
signál. Po každém krátkém stisknutí se snižuje
hlasitost o jeden stupeň. Jestliže stisknete tla-
čítko „
se hlasitost automaticky na minimum.
2. Zvýšení hlasitosti hudby
Stiskněte tlačítko „ “+ hlasitosti 19, pro zvý-
šení hlasitosti. Po dosažení maximální hlasitosti
zazní signál. Po každém krátkém stisknutí se
zvyšuje
tlačítko „
zvýší se hlasitost automaticky na maximum.
“ – hlasitosti 23 a přidržíte ho, sníží
hlasitost o jeden stupeň. Jestliže stisknete
“ + hlasitosti 19 a přidržíte ho,
Volba hudebního titulu
42 CZ
1. Hudební titul zpět
Stiskněte tlačítko „ “ pro volbu titulu hudby
22
(zpět)
, tzn. pro volbu předchozího
Page 43

Uvedení do ... / Údržba a čištění / Zlikvidování / Záruka a servis
hudebního titulu nebo pro přehrání písničky
znovu od začátku.
2. Volba dalšího hudebního titulu
Stiskněte tlačítko „ “ pro volbu hudebního
titulu (vpřed)
20
, tzn. pro volbu dalšího titulu
hudby.
3. Přestávka
Stiskněte krátce tlačítko „ “ přestávka / Blue-
tooth spojení Standby
21
pro aktivaci funkce
přestávka. Jestliže stisknete a přidržíte tlačítko „
“ přestávka / Bluetooth spojení Standby 21
delší dobu, přejde Bl
10 minut do režimu Standby.
uetooth spojení na cca
Potom se Bluetooth
spojení vypne.
Údržba a čištění
POZOR! NEBEZPEČÍ ZÁSAHU ELEKTRIC-
KÝM PROUDEM! Při čištění nejprve svítidlo
odpojte od elektrické sítě. Za tímto účelem vyjměte pojistku nebo vypněte jistič vpojistkové
skříni (poloha0).
Nepoužívejte na čištění ředidla, benzín nebo
podobné látky, svítidlo můžete poškodit.
Nechte reflektor úplně vychladnout.
POZOR! NEBEZPEČÍ ZÁSAHU ELEK-
TRICKÝM PROUDEM! Z důvodu elektrické
bezpečnosti se lampa nikdy nesmí čistit vodou
nebo jinými kapalinami či dokonce do vody
ponořovat.
Používejte na čištění suchou tkaninu, která
nepouští vlákna.
Nasaďte zase pojistku nebo zapněte jistič
vpojistkové skříni (do polohy I).
Zlikvidování
Obal se skládá zekologických materiálů, které můžete zlikvidovat prostřednictvím místních sběren recyklovatelných
materiálů. Zelený bod neplatí pro Německo.
Při třídění odpadu se řiďte podle ozna-
b
čení obalových materiálů zkratkami (a)
a
a čísly (b), s následujícím významem:
1–7: umělé hmoty / 20–22: papír a lepenka / 80–98: složené látky.
Výrobek a obalové materiály jsou recyklovatelné, zlikvidujte je odděleně pro
lepší odstranění odpadu. Logo Triman
platí jen pro Francii.
O možnostech likvidace vysloužilých
zařízení se informujte u správy vaší obce
nebo města.
Prosíme, odstraňujte baterie do odpadu
ekologicky. Nevyhazujte baterie do do-
mácího odpadu. Prosíme, používejte k
odstranění do odpadu služby sběren Vaší obce
nebo se obraťte na obchodníka, u kterého jste
výrobek zakoupili.
Záruka a servis
Prohlášení k záruce
Záruka 3 roky ode dne zakoupení platí jen pro prvního kupujícího, je nepřenosná. Prosíme uschovejte si
pokladní stvrzenku jako doklad o zakoupení. Záruka
platí jen pro vady materiálu nebo chyby z výroby,
nevtahuje se na díly podléhající opotřebení nebo
na škody vzniklé neodborným používáním. Cizím
zásahem do výrobku zaniká záruka. Vaše práva
vyplývající ze zákona touto zárukou nejsou omeze
V případě, že chcete uplatnit záruku, obraťte se
telefonicky na náš servis. Jen tak je možné zajistit
bezplatné zaslání Vašeho přístroje do servisu.
Přístroj byl svědomitě vyroben a podroben přesné
kontrole kvality. Během záruční doby odstraníme
bezplatně všechny vady materiálu a výrobní vady.
Vpřípadě, že se během záruční doby vyskytnou
závady, zašlete laskavě přístroj na uvedenou adresu servisu a uveďte následující číslo artiklu:
9000.034.080.
Ze záruky jsou vyloučeny škody způsobené neodborným zacházením, nerespektováním pokynů v
na.
43 CZ
Page 44
Záruka a servis
návodu kobsluze, zásahem neautorizované osoby
a rychle opotřebitelné díly. Záručním výkonem se
záruční doba neprodlouží ani neobnoví.
Adresa servisu
Action GmbH
Im Langel 6
DE-59872 Meschede
NĚMECKO
Tel.: +49 (0) 2903 / 449 555
Fax: +49 (0) 2903 / 449 48410
E-mail: [email protected]
www.action-leuchten.de
IAN 288149
Pro všechny požadavky si připravte pokladní blok a
číslo výrobku (IAN 288149) jako doklad o nákupu.
Prohlášení o shodě
Tento výrobek splňuje požadavky platných
evropských a národních směrnic (RED-směrnice
2014/53/EU, ekologický design směrnice
2009/125/EG, RoHS-směrnice 2011/65/EU).
Shoda byla prokázána. Příslušná prohlášení a
dokumentace jsou uloženy uvýrobce.
Tímto prohlašujeme, že typ rádiového zařízení
9000.034.080 odpovídá směrnicím 2014/53/EU.
Úplný text EU prohlášení o konformitě je k dispozici
na webové stránce: www.action-leuchten.de/
service/konformitätserklärungen/
44 CZ
Page 45

Leyenda de pictogramas utilizados ..................................................................... Página 46
Introducción .............................................................................................................................. Página 46
Uso adecuado ................................................................................................................................ Página 46
Volumen de suministro .................................................................................................................... Página 46
Descripción de las piezas .............................................................................................................. Página 47
Datos técnicos ................................................................................................................................. Página 47
Seguridad ................................................................................................................................... Página 47
Indicaciones de seguridad ............................................................................................................. Página 47
Indicaciones de seguridad respecto a las pilas ............................................................................ Página 48
Preparativos ............................................................................................................................. Página 48
Herramientas y materiales necesarios ........................................................................................... Página 48
Antes de la instalación ..................................................................................................... Página 48
Puesta en funcionamiento ............................................................................................ Página 49
Cómo montar / instalar la lámpara ................................................................................................ Página 49
Cómo montar el soporte para pared ............................................................................................ Página 49
Colocar / cambiar las pilas ............................................................................................................ Página 49
Manejar la lámpara a través del interruptor de la luz ................................................................. Página 50
Utilizar el mando a distancia ......................................................................................................... Página 50
Encender / apagar la luz ................................................................................................................ Página 50
Regular la luz .................................................................................................................................. Página 50
Temporizador de 30 minutos ......................................................................................................... Página 50
Conexión Bluetooth ........................................................................................................................ Página 50
Ajustar volumen ............................................................................................................................... Página 51
Seleccionar canción ....................................................................................................................... Página 51
Mantenimiento y limpieza............................................................................................ Página 51
Eliminación ................................................................................................................................. Página 51
Garantía y servicio técnico ........................................................................................... Página 52
Declaración de garantía ................................................................................................................ Página 52
Dirección del servicio técnico ......................................................................................................... Página 52
Declaración de conformidad ......................................................................................................... Página 52
45 ES
Page 46

Introducción
Leyenda de pictogramas utilizados
¡Leer las instrucciones de uso!
Voltio (corriente alterna)
Hercio (frecuencia) Cómo proceder de forma segura
Vatio (potencia efectiva)
Clase de protección I
Lámpara LED de techo
con altavoz bluetooth
Introducción
Le damos la enhorabuena por haber adquirido este nuevo producto. Ha elegido
un producto de alta calidad. Lea atenta
y completamente las siguientes instrucciones de uso.
Despliegue las páginas con las ilustraciones. Estas
instrucciones pertenecen a este producto y contienen
indicaciones importantes sobre la puesta en funcionamiento y el manejo. Tenga en cuenta siempre tod
las indicaciones de seguridad. Antes de poner el
artículo en funcionamiento, compruebe si dispone
de la tensión correcta y si todas las piezas están
montadas. Si tiene dudas o no sabe cómo manejar
el aparato, póngase en contacto con su distribuidor
o el servicio de asistencia. Conserve estas indicaciones en lugar seguro y, en caso necesario, entrégueselas a terceros.
as
bien
¡Tenga en cuenta las advertencias e
indicaciones de seguridad!
¡Precaución! ¡Peligro de descarga
eléctrica!
¡Deseche el embalaje y el aparato de
b
a
forma respetuosa con el medio
ambiente!
Le rogamos que deseche las pilas de
manera respetuosa con el medio
ambiente.
electricista cualificado que instale la lámpara tendrá
que asegurarse de que esta no se instale sobre superficies húmedas o conductoras! Este aparato ha
sido diseñado exclusivamente para uso doméstico.
Volumen de suministro
Compruebe siempre inmediatamente después de
desembalar el producto la integridad del contenido
y el perfecto estado del aparato.
1 lámpara led de techo con altavoz bluetooth
(base de la lámpara, cubierta de plástico)
1 mando a distancia
1 soporte para pared para el mando a distancia
(material de montaje incluido 1 x 3M adhesivos,
2 x tornillos)
2 pilas (1,5 V; LR03; AAA)
3 tacos de plástico (para montar el plafón)
3 tornillos (para montar el plafón)
1 manual de instrucciones de montaje y manejo
Uso adecuado
Esta lámpara solo es apta para el uso en interiores,
en espacios secos y cerrados. Puede montarse sobre
todas las superficies inflamables normales. ¡El
46 ES
Page 47
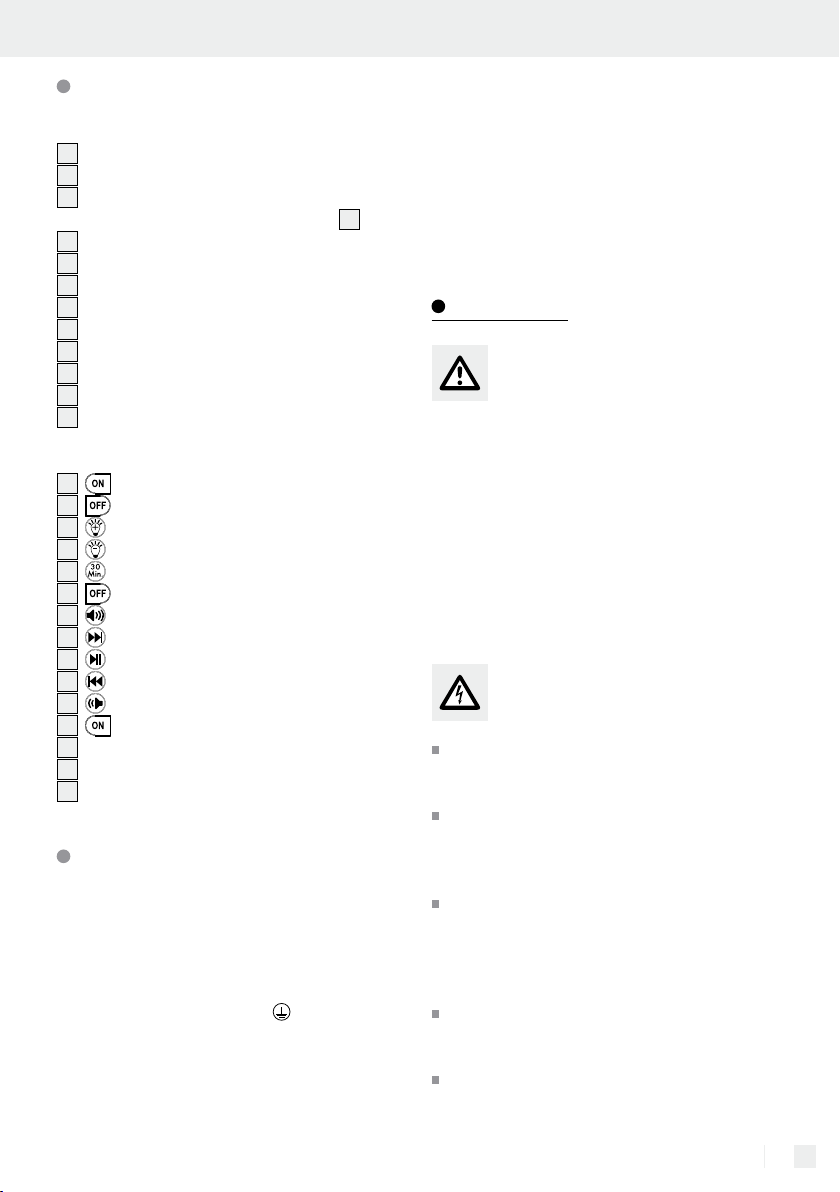
Descripción de las piezas
Lámpara:
1
Base de la lámpara
2
Cubierta de plástico
3
Cubierta del altavoz
(integrada en la cubierta de plástico
4
Tornillos
5
Taco
6
Marca para las perforaciones (1, 2, 3)
7
Cable de conexión a red (externo)
8
Regleta
9
Orificios para el alojamiento de los tornillos
10
Pernos de sujeción
11
Adhesivo
12
Lámpara LED para techo
2
)
Mando a distancia:
13
Botón ON (luz)
14
Botón OFF (luz)
15
Botón regulador +
16
Botón regulador –
17
Botón temporizador de 30 minutos
18
Botón OFF (audio)
19
Botón de volumen +
20
Botón para seleccionar canción (siguiente)
21
Botón pause / conexión Bluetooth Standby
22
Botón para seleccionar canción (anterior)
23
Botón de volumen –
24
Botón ON (audio)
25
Tornillos (soporte para pared)
26
Soporte de pared (mando a distancia)
27
Disco adhesivo 3M
Datos técnicos
N.º art.: 9000.034.080
Tensión de funcionamiento: 220–240 V∼,
50 / 60 Hz
Potencia: máx. 24 vatios (alta-
voz máx. 6 vatios)
Clase de protección: I /
Tipo de protección: IP20
Dimensiones: Ø aprox. 40 cm,
altura aprox. 8 cm
Radioespectro del
altavoz: 120–20.000 Hz
Versión Bluetooth: 4.0
Alcance del Bluetooth: aprox. 9 m
Procedimiento de control
del mando a distancia: infrarrojo
Alcance del mando a
distancia: 5–6 m
Seguridad
Indicaciones de seguridad
¡El derecho de garantía quedará anulado en caso
de producirse daños por no tener en cuenta estas
instrucciones de uso! ¡No se asumirá responsabilidad alguna por daños indirectos! En caso de que el
manejo inadecuado del producto o el incumplim
de las indicaciones de seguridad provoquen daños
materiales o personales, ¡no se asumirá ninguna
responsabilidad! No deje la lámpara ni el material
de embalaje sin supervisión. Las láminas y bolsas
de plástico, las piezas de plástico, etc., pueden
convertirse en juguetes peligrosos para los niños.
Cómo evitar el peligro de
muerte por descarga eléctrica
Deje que un electricista cualificado o una per-
sona instruida en instalaciones eléctricas lleve
a cabo la instalación.
Antes de realizar cualquier conexión compruebe
que los cables no presenten ningún tipo de
Nunca utilice la lámpara si detecta algún tipo
de daño.
¡CUIDADO! Los cables de red dañados conlle-
van peligro de muerte por descarga eléctrica.
En caso de daños, reparaciones u otros problemas en la lámpara, diríjase al servicio de
mantenimiento o a un técnico electricista.
Antes del montaje, retire el fusible o desco-
necte el interruptor automático de la caja de
fusibles (posición 0).
Antes del montaje asegúrese de que la tensión
de red disponible coincida con la tensión de
iento
daño.
47 ES
Page 48

Seguridad / Preparativos / Antes de la instalación
funcionamiento necesaria para la lámpara
(220–240 V∼, 50 / 60 Hz).
Evite que la lámpara entre en contacto con agua
u otros líquidos.
Nunca abra la carcasa de la lámpara ni intro-
duzca ningún objeto en la misma. Esto puede
suponer peligro de muerte por descarga eléctrica.
El módulo LED no es reemplazable. Si el módulo
LED falla al finalizar su vida útil deberá sustituir
la lámpara completa.
¡No instale la lámpara sobre una superficie
húmeda o conductora!
Cómo prevenir incendios
y lesiones
No deje la lámpara ni el material de embalaje
sin supervisión. Las láminas y bolsas de plástico,
las piezas de plástico, etc. pueden convertirse
en juguetes peligrosos para los niños.
No cubra la lámpara con ningún objeto. Si se
genera demasiado calor, podría provocarse un
incendio.
Cómo proceder de forma segura
Monte la lámpara de modo que esté protegida
de la humedad, el viento y la suciedad.
Prepare cuidadosamente el montaje y dedíquele
el tiempo suficiente. Antes de proceder con el
montaje, coloque todas las piezas individuales
o el material a la vista y téngalo todo a mano.
¡Proceda siempre con sumo cuidado! Preste
siempre mucha atención a lo que está haciendo
y actúe con prudencia.
Bajo ningún concepto monte la lámpara si está
distraído o no se encuentra bien.
Indicaciones de seguridad
respecto a las pilas
Las pilas no deben exponerse a temperaturas
excesivamente elevadas como a radiación solar,
fuego o similares. ¡Las pilas podrían explotar!
Nunca recargue pilas no recargables. ¡Peligro
de explosión!
Mantenga las pilas fuera del alcance de los ni-
ños, no las ponga en cortocircuito ni las desmonte.
Reemplace simultáneamente todas las pilas
del compartimento. Utilice únicamente pilas
del mismo tipo y nunca emplee pilas distintas
ni pilas gastadas junto con pilas nuevas.
Limpie los contactos de las pilas y los contactos
del aparato antes de colocar las pilas.
Asegúrese de que las pilas están colocadas
correctamente, es decir, tenga en cuenta la
polaridad (+ y –).
Retire inmediatamente las pilas gastadas.
¡Peligro de sulfatación!
Evite el contacto de la piel, los ojos y las
mucosas con el líquido de las pilas. En caso
de contacto, aclare inmediatamente las zonas
afectadas con agua limpia y acuda a un médico
en seguida.
Preparativos
Herramientas y materiales
necesarios
Las herramientas y los materiales mencionados no se
incluyen en el volumen de suministro. Los valores y
datos tratados son aproximados y meramente orientativos. Los materiales necesarios dependerán de
las circunstancias particulares de cada situación.
– Lápiz / herramienta de marcado
– Comprobador de tensión
– Destornillador
– Taladro
– Broca (aprox. Ø 6 mm)
– Martillo
– Alicates
– Escalera
Antes de la instalación
Importante: La conexión eléctrica debe realizarse
por un electricista cualificado o por una persona
48 ES
Page 49

instruida en instalaciones eléctricas. Este debe conocer las características de la lámpara y de la
disposición eléctrica.
Familiarícese antes de la instalación con todas
las indicaciones e imágenes de estas instrucciones, así como con la propia lámpara.
Asegúrese antes de la instalación de que el
cable al que se vaya a conectar la lámpara no
tenga tensión. Para ello, retire el fusible o desconecte el interruptor automático en la caja de
fusibles (posición 0).
Compruebe que no hay tensión con un compro-
bador de tensión.
Saque la lámpara LED para techo 12 del em-
balaje y colóquela sobre una superficie sólida
(proceda con sumo cuidado para evitar que se
arañe).
Agarre la cubierta de plástico 2 con las dos
manos y presione ligeramente sobre la superficie sólida. Gire la cubierta de plástico
2
hasta el tope en sentido contrario a las agujas
del reloj (en dirección contraria a la flecha) y
extraiga la cubierta de plástico
2
hacia
arriba.
Pase el cable de conexión por el orificio pro-
visto para ello en la base de la lámpara
fije la lámpara al techo (ver fig. F–G).
Conecte los tres cables de la instalación do-
méstica con los colores previstos a la clema
8
de la base de la lámpara 1.
Nota: Asegúrese de que cada uno de los
cables de conexión a red (externo)
7
esté
conectado correctamente: cable conductor,
negro o marrón = símbolo L, conductor neutro,
azul = símbolo N, toma de tierra, verde-amarillo = símbolo
Monte la cubierta de plástico 2 de la lám-
para. Para ello, coloque la cubierta con las
tres marcas en los pernos de sujeción
10
correspondientes (ver fig. H) y presione hacia
abajo. Gire la cubierta en el sentido de las
agujas del reloj (en la dirección de la flecha)
para fijarla. Ahora podrá retirar el adhesivo
con la flecha
11
.
Vuelva a colocar el fusible o conecte el inte-
rruptor automático de protección en la caja de
fusibles (posición I).
Su lámpara LED de techo
12
con altavoz Blue-
tooth está lista para funcionar.
1
y
Puesta en funcionamiento
Cómo montar / instalar la
lámpara (ver fig. A–I)
Asegúrese antes de la instalación de que el ca-
ble al que se vaya a conectar la lámpara no
tenga tensión. Para ello, retire el fusible o desconecte el interruptor automático en la caja de
fusibles (posición 0).
Mantenga la base de la lámpara 1 en la po-
sición de montaje que desee. Tenga en cuenta
el orificio de la base de la lámpara
que debe pasar el cable de conexión.
Marque tres agujeros de perforación 6
(ver fig. D).
Taladre los orificios. Asegúrese de no dañar el
cable de alimentación (externo)
Introduzca los tacos 5 en los orificios. Ayú-
dese de un martillo si fuese necesario (ver fig. E).
1
por el
7
(ver fig. E).
Cómo montar el
soporte para pared
Monte el soporte para la pared del mando a
distancia
vos
26
con los tornillos 25 o los adhesi-
27
tal y como se muestra en la figura I.
Colocar / cambiar las pilas
Nota: Para el mando a distancia se necesitan dos
pilas del tipo AAA / LR03 (incluidas en el suministro).
Para abrir la tapa del compartimento para pi-
las (de la parte posterior) empuje hacia abajo
aprox. 1 cm y levante la tapa.
Coloque dos pilas del tipo que se adjunta AAA /
LR03 en el compartimento para pilas. ¡Tenga
en cuenta la polaridad correcta!
49 ES
Page 50

Puesta en funcionamiento
Vuelva a empujar la tapa hacia arriba para
cerrar el compartimento.
Su mando a distancia está listo para funcionar.
Manejar la lámpara a través
del interruptor de la luz
El plafón LED 12 puede encenderse y apagarse
con el interruptor de la pared. En tal caso, la
intensidad de la luz será siempre del 100 %.
Todas las demás funciones solo podrán
controlarse a través del mando a distancia.
Utilizar el mando a distancia
¡ATENCIÓN! Todas las funciones del mando a
distancia se podrán utilizar siempre que el plafón
12
LED
haya sido encendido con el interruptor de
la pared.
Encender / apagar la luz
1. Encender la luz
Pulse el botón „ “ (Lighting, luz) 13 para
encender el plafón LED
será confirmada con un tono bip.
12
. La señal recibida
+ „
“ 15 durante un tiempo, la intensidad de
la luz se ajustará al máximo automáticamente.
2. Reducir la intensidad de la luz
Pulse el botón regulador – „ “ 16 para dismi-
nuir la intensidad de la luz. Cuando se alcance
la luminosidad mínima sonará un tono bip. Al
pulsar brevemente este botón disminuye la luminosidad de manera gradual según vaya pulsando. Si mantiene pulsado el botón regulador
– „
“ 16 durante un tiempo, la intensidad de
la luz se ajustará al mínimo automáticamente.
Temporizador de 30 minutos
1. Encender el temporizador
Pulse el botón „ “ 17 para que el plafón
12
LED
se apague automáticamente.
Tanto la luz como la función Bluetooth (música)
se apagarán automáticamente una vez transcurridos unos 30 minutos.
2. Apagar temporizador
Si quiere apagar la función del temporizador
durante los 30 minutos vuelva a pulsar el botón
„
“ 17 durante algo más de 3 segundos. Si
el plafón LED
un tono bip largo con el que se confirma que
se ha apagado la función del temporizador.
12
ha recibido la señal sonará
2. Apagar la luz
Pulse el botón „ “ (Lighting, luz) 14 para
apagar el plafón LED
confirmada con un tono bip.
12
. La señal recibida será
Regular la luz
1. Aumentar la intensidad de la luz
Pulse el botón regulador + „ “ 15 para aum
tar la intensidad de la luz. Cuando se alcance
la luminosidad máxima sonará un tono bip. Al
pulsar brevemente este botón aumenta la luminosidad de manera gradual según vaya pulsando. Si mantiene pulsado el botón regulador
50 ES
Conexión Bluetooth
1. Vincular una conexión Bluetooth
Pulse el botón de audio „ “ (Audio) 24. La
señal recibida será confirmada con un tono bip.
Tras unos 1–2 segundos, la conexión Bluetooth
será acompañada de una señal acústica y el
LED azul del plafón LED
en-
padear rápidamente.
Si se ha establecido la conexión sonará una
breve melodía.
Cuando conecte por primera vez su móvil,
tableta, etc. seleccione la conexión Bluetooth
„LBT00738“.
12
comenzará a par-
Page 51

2. Finalizar la conexión Bluetooth
Pulse el botón de audio „ “ (Audio) 18. La
señal recibida será confirmada con un tono bip.
La conexión Bluetooth se ha desconectado.
Una vez haya completado la conexión dispondrá de los siguiente ajustes de audio:
función de pausa. Si pulsa el botón pause / conexión Bluetooth
cho tiempo la conex
Standby „ “ 21 durante mu-
ión Bluetooth se quedará
en modo Standby durante unos 10 min. Después se desactivará la conexión Bluetooth.
Mantenimiento y limpieza
Ajustar volumen
1. Disminuir el volumen
Pulse el botón de volumen – „ “ 23 para dis-
minuir el volumen. Cuando se alcance el volumen mínimo sonará un tono bip. Al pulsar
brevemente este botón disminuye el volumen
de manera gradual según vaya pulsando. Si
mantiene pulsado el botón de volumen – „
23
durante un tiempo, el volumen se ajustará
al mínimo automáticamente.
2. Aumentar el volumen
Pulse el botón de volumen + „ “ 19 para
aumentar el volumen. Cuando se alcance el
volumen máximo sonará un tono bip. Al pulsar
brevemente este botón aumenta el volumen de
manera gradual según vaya pulsando. Si mantiene pulsado el botón de volumen + „
“ 19
durante un tiempo, el volumen se ajustará al
máximo automáticamente.
Seleccionar canción
1. Canción anterior
Pulse el botón de seleccionar canción (anterior) „
“ 22 para escuchar una canción anterior o
para volver a escuchar una canción desde el
principio.
2. Canción siguiente
Pulse el botón de seleccionar canción (siguiente)
„
“
20 para escuchar la siguiente canción.
3. Pause
Pulse el botón pause / conexión Bluetooth
Standby „
“ 21 brevemente para activar la
¡CUIDADO! ¡PELIGRO DE DESCARGA
ELÉCTRICA! Desenchufe la lámpara de la red
eléctrica para la limpieza. Para ello, retire el
fusible o desconecte el interruptor automático
en la caja de fusibles (posición 0).
Nunca utilice disolventes, bencinas o similares.
La lámpara se dañaría.
Deje que la lámpara se enfríe completamente.
“
¡CUIDADO! ¡PELIGRO DE DESCARGA
ELÉCTRICA! Por razones de seguridad eléctrica, nunca limpie la lámpara con agua u otros
líquidos ni la sumerja en agua.
Limpie la lámpara únicamente con un paño seco
y sin pelusas.
Vuelva a conectar el fusible o a conectar el
interruptor automático en la caja de fusibles
(posición I)
Eliminación
El embalaje está compuesto por materiales no contaminantes que pueden ser
desechados en el centro de reciclaje
local. El punto verde no se aplica en
Alemania.
Tenga en cuenta el distintivo del emba-
b
laje para la separación de residuos.
a
Está compuesto por abreviaturas (a) y
números (b) que significan lo siguiente:
1–7: plásticos / 20–22: papel y cartón / 80–98: materiales compuestos.
El producto y el material de embalaje
son reciclables. Separe los materiales
para un mejor tratamiento de los resi-
51 ES
Page 52

Eliminación / Garantía y servicio técnico
duos. El logotipo Triman se aplica solo
para Francia.
Para obtener información sobre las posibilidades de desecho del producto al
final de su vida útil, acuda a la administración de su comunidad o ciudad.
Para proteger el medio ambiente no tire
el producto junto con la basura doméstica cuando ya no le sea útil. Deséchelo
en un contenedor de reciclaje. Diríjase a
la administración competente para obtener información sobre los puntos de
recogida de residuos y sus horarios.
Le rogamos que deseche las pilas de
manera respetuosa con el medio am-
biente. No tire las pilas a la basura doméstica. Para ello utilice los puntos de recogida de su
comunidad o diríjase al distribuidor donde compró
el producto.
Garantía y servicio técnico
Declaración de garantía
técnica indicando el siguiente número de artículo:
9000.034.080.
Se excluye de la garantía los daños provocados
por una manipulación inadecuada, la inobservancia de las instrucciones de uso o la manipulación por
partes de personas no autorizadas, así como las
piezas de desgaste. Si se hace uso de la garantía, n
se prolongará ni renovará el período de garantía.
Dirección del servicio técnico
Action GmbH
Im Langel 6
DE-59872 Meschede
ALEMANIA
Tel.: +49 (0) 2903 / 449 555
Fax: +49 (0) 2903 / 449 48410
Correo
electrónico: [email protected]
www.action-leuchten.de
IAN 288149
Para realizar cualquier consulta, tenga a mano el
recibo y el número de artículo (IAN 288149) como
justificante de compra.
o
El aparato incluye una garantía de 3 años a partir
de la fecha de compra para el primer comprador, es
decir, no es transferible. Presente el ticket de compra
como comprobante. La garantía cubre defectos de
fabricación o de material, pero no el desgaste de
las piezas o los daños que puedan producirse por
un uso incorrecto del aparato. La garantía quedará
anulada en caso de que el aparato sea manipulado
por terceros. Esta garantía no restringe sus derechos
legales. En caso de que tenga que hacer uso de la
garantía, póngase en contacto con el servicio de
mantenimiento. Sólo de este modo podemos garantizarle el envío gratuito del aparato. Este aparato ha
sido meticulosamente fabricado y ha sido sometido
a estrictos controles de calidad. Dentro del período
de garantía, reparamos gratuitamente todos los
defectos de los materiales o de fabricación. Si
apareciesen fallos durante el periodo de garantía,
envíenos el aparato a la dirección de asistencia
52 ES
Declaración de conformidad
Este producto cumple las exigencias de las directivas europeas y nacionales vigentes (directiva RED
2014/53/UE, directiva sobre diseño ecológico
2009/125/CE, directiva RoHS 2011/65/UE).
ha comprobado la conformi
dispone de las declaraciones y documentos
correspondientes.
Por la presente declaramos que el tipo de equipo
de radio 9000.034.080 cumple con la directiva
2014 / 53 / UE.
Podrá acceder al texto completo de la declaración
de conformidad de la Unión Europea en la
siguiente dirección de Internet:
www.action-leuchten.de/service/
konformitätserklärungen/
dad. El fabricante
Se
Page 53

Legenda dos pictogramas utilizados .................................................................. Página 54
Introdução .................................................................................................................................. Página 54
Utilização adequada ...................................................................................................................... Página 54
Volume de fornecimento ................................................................................................................. Página 54
Descrição das peças ...................................................................................................................... Página 54
Dados técnicos ................................................................................................................................ Página 55
Segurança................................................................................................................................... Página 55
Indicações de segurança ............................................................................................................... Página 55
Indicações de segurança relativas às pilhas ................................................................................ Página 56
Preparação ................................................................................................................................ Página 56
Ferramentas e material necessário ................................................................................................ Página 56
Antes da instalação ............................................................................................................ Página 56
Colocação em funcionamento ................................................................................... Página 57
Montar / instalar candeeiro ............................................................................................................ Página 57
Montar suporte de parede ............................................................................................................. Página 57
Inserir / Substituir as pilhas ............................................................................................................. Página 57
Operar o candeeiro através do interruptor de luz ....................................................................... Página 58
Utilização do comando à distância .............................................................................................. Página 58
Ligar / desligar a luz ....................................................................................................................... Página 58
Regular a intensidade da luz ......................................................................................................... Página 58
Temporizador de 30 minutos ......................................................................................................... Página 58
Conexão Bluetooth ......................................................................................................................... Página 58
Regular volume da música ............................................................................................................. Página 59
Escolher música ............................................................................................................................... Página 59
Manutenção e limpeza .................................................................................................... Página 59
Eliminação .................................................................................................................................. Página 59
Garantia e assistência ...................................................................................................... Página 60
Garantia .......................................................................................................................................... Página 60
Endereço da assistência ................................................................................................................. Página 60
Declaração de conformidade ........................................................................................................ Página 60
53 PT
Page 54
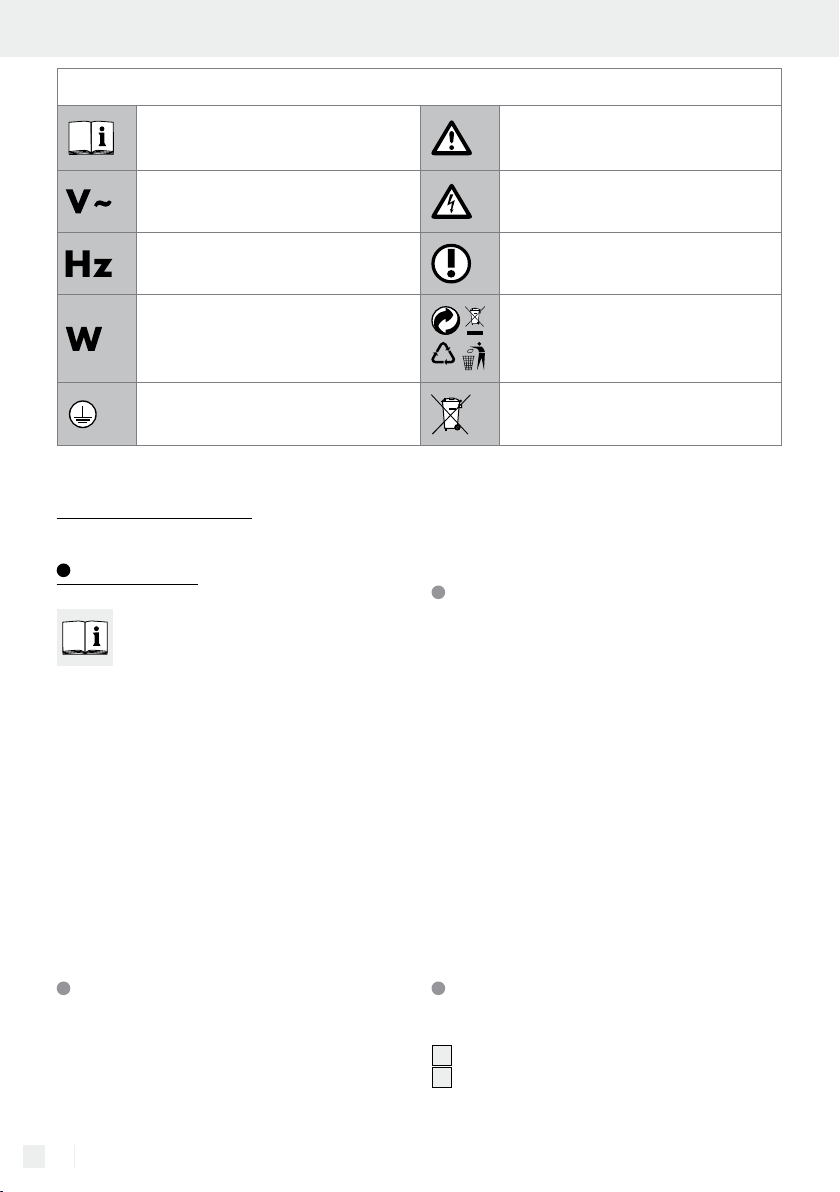
Introdução
Legenda dos pictogramas utilizados
Ler o manual de instruções!
Volt (tensão alternada) Cuidado! Perigo de choque elétrico!
Hertz (frequência) Procedimento correto
Watt (Potência efetiva)
Classe de protecção I
Lâmpada LED para
teto com bluetooth
Introdução
Congratulamo-lo pela aquisição do seu
novo aparelho. Decidiu-se, assim, por um
produto de elevada qualidade. Por favor,
leia atentamente todo o manual de instruções. Abra
nas páginas com as imagens. Este manual pertence
a este produto e contém informações importantes
relativas à colocação em funcionamento e ao manuseamento. Siga sempre todas as indicações de
segurança. Verifique, antes da colocação em funcionamento, se existe a tensão correta e se todas as
peças estão corretamente montadas. Caso tenha
dúvidas ou se sinta inseguro no que diz respeito ao
manuseamento do aparelho, contacte o fabricante
ou o ponto de assistência. Guarde este manual com
cuidado e, se necessário, entregue-o a terceiros.
Considerar as indicações de aviso e
de segurança!
Elimine a embalagem e o aparelho
b
a
de forma ecológica!
Elimine as pilhas usadas de forma
ecológica.
precisa estar atento para que ela não seja instalada
so
bre superfícies humidas ou condutoras! Este apare-
lh
o destina-se apenas ao uso doméstico e privado.
Volume de fornecimento
Após desembalar o aparelho, verifique sempre o
material fornecido quanto à integridade, bem como
o estado do aparelho.
1 lâmpada led para teto com bluetooth (base do
candeeiro, cobertura de plástico)
1 comando à distância
1 suporte para parede para comando à distância
(inclusive material de montagem 1 x fita adesiva
3M, 2 x parafusos)
2 pilhas (1,5 V; LR03; AAA)
3 buchas de plástico (montagem no teto)
3 parafusos (montagem no teto)
1 manual de montagem e instruções
Utilização adequada
Este candeeiro destina-se exclusivamente à utilização
no interior e em espaços secos e fechados. Este
pode ser fixado em qualquer superfície normalmente
inflamável. O eletricista que instala a lâmpada
54 PT
Descrição das peças
Candeeiro:
1
Base do candeeiro
2
Cobertura de plástico
Page 55

3
Cobertura do alti-falante
(integrado na cobertura de plástico
4
Parafusos
5
Bucha
6
Marcação dos orifícios de perfuração (1, 2, 3)
7
Cabo de conexão à rede (externo)
8
Bloco de terminais
9
Orifícios de recepção de parafusos
10
Pernos de fixação
11
Autocolantes
12
Candeeiro de teto LED
2
)
Telecomando:
13
botão ON (Lighting)
14
botão OFF (Lighting)
15
botão dimmer +
16
botão dimmer –
17
botão timer de 30 minutos
18
botão OFF (Áudio)
19
botão volume +
20
botão escolha de música (avançar)
21
botão pausa / conexão Bluetooth Standby
22
botão escolha de música (voltar)
23
botão volume –
24
botão ON (Áudio)
25
Parafusos (Suporte para parede)
26
suporte para parede (comando a distância)
27
Fita adesiva 3M
Dados técnicos
Número do artigo: 9000.034.080
Tensão de serviço: 220–240 V∼, 50 / 60 Hz
Potência: máx. 24 Watt (auto-falante
máx. 6 Watt)
Classe de proteção: I /
Tipo de proteção: IP20
Dimensões: Ø cerca de 40 cm, altura
cerca de 8 cm
Gama de frequências
Alto-falantes: 120–20.000 Hz
Versão-Bluetooth: 4.0
Alcance Bluetooth: cerca de 9 m
Processo de comando
Comando à distância: Infravermelho
Alcance telecomando: 5–6 m
Segurança
Indicações de segurança
Em caso de danos causados pela inobservância
deste manual de instruções, perde-se o direito à
garantia! Não assumimos a responsabilidade por
danos subsequentes! Não nos responsabilizamos
por danos materiais e pessoais, causados por um
manuseamento incorreto ou pela inobservância
das indicações de segurança! Não abandone o
candeeiro ou o material da embalagem em local
inadequado. Folhas e sacas de plástico, peças em
esferovite, etc. podem constituir brinquedos perigosos para as crianças.
Evite o perigo de morte
por choque elétrico
A instalação eléctrica deve ser efectuadas por
um electricista ou por uma pessoa especializada
em instalações eléctricas.
Antes da ligação à rede verifique se o cabo de
ligação à rede apresenta danos. Nunca utilize
a lâmpada quando detetar danos.
CUIDADO! Cabos elétricos danificados signi-
ficam perigo de vida devido a choques elétricos.
Em caso de danos, reparações ou outros problemas no candeeiro, entre em contacto com o
serviço de assistência técnica ou um eletricista
especializado.
Antes da montagem, retire o fusível ou desligue
o interruptor automático na caixa de fusíveis
(posição 0).
Antes da montagem, certifique-se de que a ten-
são da fonte de alimentação existente corresponde com a tensão de rede necessária para
o candeeiro (220–240 V∼, 50 / 60 Hz).
Evite sempre o contacto do dispositivo de ilumi-
nação com água ou outros líquidos.
Nunca abra a carcaça do candeeiro nem insira
qualquer objecto no mesmo. Isto significaria
perigo de morte por choque elétrico.
O módulo LED não pode ser substituído. Caso
o módulo LED não funcione mais no final da sua
vida útil, o candeeiro inteiro precisa ser reposto.
55 PT
Page 56
Segurança / Preparação / Antes da instalação
Não instale o dispositivo de iluminação numa
base húmida ou condutora de electricidade!
Evite perigos de queimadura
e de ferimento
Não deixe o dispositivo de iluminação ou os
materiais da embalagem de forma descuidada.
As películas / os sacos de plástico, peças em
plástico, etc. poderiam tornar-se num brinquedo
perigoso para as crianças.
Não cubra o candeeiro com objetos. Uma
formação excessiva de calor pode causar um
incêndio.
Procedimento correto
Monte o dispositivo de iluminação de modo
a que este fique protegido da humidade e da
sujidade.
Prepare cuidadosamente a montagem e demore
o tempo que for necessário. Mantenha todas as
peças individuais ou materiais acessíveis dispostos de forma visível.
Esteja sempre atento! Preste sempre atenção ao
que faz e proceda sempre de forma sensata.
Seja consciencioso e nunca monte o candeeiro
quando não está concentrado ou quando se
sentir indisposto.
Indicações de segurança
relativas às pilhas
Limpe os contactos das pilhas e o aparelho
antes de inserir as pilhas.
Certifique-se de que as baterias foram inseridas
correctamente, isto significa, esteja atento à
polaridade (+ e –).
Retire de imediato as pilhas gastas.
Elevado risco de derrame!
Evite o contacto do líquido da pilha com a
pele, olhos e mucosas. Em caso de contacto
com o ácido das pilhas, lave imediatamente as
zonas afectadas com água limpa abundante e
consulte um médico logo que possível.
Preparação
Ferramentas e material
necessário
A ferramenta e os materiais mencionados não estão
incluídos no fornecimento. Trata-se de indicações e
valores de referência, não vinculativos, para referência. O estado do material depende das circunstâncias individuais do local.
– Lápis / marcador
– Medidor de tensão
– Chave de parafusos
– Berbequim
– Broca (cerca de Ø 6 mm)
– Martelo
– Alicate de corte diagonal
– Escada
Pilhas não podem ser expostas ao calor ex-
tremo como sol, fogo ou similares. As pilhas
podem explodir!
Nunca recarregar pilhas não recarregáveis.
Perigo de explosão!
Manter as pilhas afastadas das crianças, pô-las
em curto-circuito ou decompô-las.
Sempre troque todas as pilhas de um conjunto
ao mesmo tempo. Somente utilize pilhas juntas
do mesmo tipo, nenhum tipo diferente ou usadas
e novas.
56 PT
Antes da instalação
Importante: A instalação eléctrica deve ser
efetuada por um electricista ou por uma pessoa especializada. Este deve ter suficiente conhecimento
acerca das propriedades do candeeiro e das especificações para a ligação.
Antes da instalação familiarize-se com todas as
instruções e figuras deste manual, bem como
com o próprio candeeiro.
Page 57

Antes da instalação, certifique-se de que no
cabo a que será ligado o candeeiro não haja
tensão. Para isso, retire o fusível ou desligue
o interruptor automático na caixa de fusíveis
(posição 0).
Verifique a ausência de tensão através de um
medidor de tensão.
Retire o candeeiro de teto LED 12 da embala-
gem e coloque osbre uma superfície firme
(esteja atento para não riscar o produto).
Com as duas mãos pegue a cobertura de plás-
2
tico
e crie uma leve pressão sob a superfície firme. Gire ao máxima a cobertura de
plástico
2
contra o sentido dos ponteiros
(sentido contra a seta) e puxe para cima a
cobertura de plástico
2
.
Colocação em funcionamento
Nota: Certifique-se de que os condutores indi-
viduais do cabo de alimentação (corrente)
7
estão ligados correctamente: condutor de corrente, preto ou castanho = símbolo L, condutor
neutro, azul = símbolo N, condutor de terra,
verde-amarelo = símbolo
Monte a cobertura de plástico 2 do can-
deeiro. Para isso, coloque a cobertura com as
três ranhuras nos respectivos pernos de su-
10
porte
(veja Fig. H e prima eles para cima.
Gire a cobertura no sentido dos ponteiros
(sentido das flechas) para fixar. O autocolante
com a flecha
11
pode ser removido.
Volte a colocar o fusível ou desligue o interrup-
tor automático na caixa de fusíveis (posição I).
O seu candeeiro de teto LED
12
com auto-falantes
Bluetooth está pronto para ser utilizado.
Montar / inst alar candeeiro
(veja Fig. A–I)
Antes da instalação, certifique-se de que no
cabo a que será ligado o candeeiro não haja
tensão. Para isso, retire o fusível ou desligue o
interruptor automático na caixa de fusíveis
(posição 0).
Segure a base do candeeiro 1 na posição
de montagem desejada. Esteja atento para o
furo na base do candeeiro
de conexão à rede é inserido.
Maruqe três orifícios de perfuração 6 (veja
Fig. D).
Proceda à perfuração dos orifícios. Certifique-
-se de que o cabo de conexão à rede
(externo)
7
não seja danificado (veja Fig. E).
Insira as buchas 5 nos orifícios de perfura-
ção. Se necessário, utilize um martelo como
ajuda (veja Fig. E).
Insira o cabo de conexão à rede através do
orifício especificado na base do candeeiro
e fixe o candeeiro no teto (veja Fig. F–G).
Fixe os três cabos da instalação doméstica de
acordo com as cores indicadas no bloco de
terminais
8
da base do candeeiro 1.
1
no qual o cabo
Montar suporte de parede
Monte o suporte para parede do comando a
distância
mofadas colantes
26
usando os parafusos 25 ou as al-
27
como ilustrado na Fig. I.
Inserir / Substituir as pilhas
Aviso: O comando a distância deve utilizar duas
pilhas do tipo AAA / LR03 (contidas no espectro de
fornecimento).
Para abrir a tampa do compartimento de pilhas
(lado traseiro), mova a para baixo cerca de 1
e retire a tampa.
Coloque duas pilhas do tipo AAA / LR03 forne-
cidas no compartimento de pilhas. Tenha em
atenção a polaridade correcta!
Mova a tampa de volta para fechar o compar-
timento de pilhas.
1
O seu comando à distância está operacional.
cm
57 PT
Page 58

Colocação em funcionamento
Operar o candeeiro através
do interruptor de luz
O candeeiro de teto LED 12 pode ser ligado e
desligado através do interruptor de luz na parede. A intensidade da luz corresponde aqui
sempre à 100 %. Todas as outras funções são
operadas somente através do comando a
distância.
Utilização do comando
à distância
ATENÇÃO! Todas as funções do comando à
distância somente estão disponíveis quando o candeeiro de teto LED
interruptor de luz na parede.
12
estiver sido ligado com o
Ligar / desligar a luz
1. Ligar a luz
Prima o botão „ “ (Lighting) 13 para ligar o
candeeiro de teto LED
é confirmado com um ruído de Piep.
2. Desligar a luz
Prima o botão „ “ (Lighting) 14 para desligar
o candeeiro de teto LED
ção é confirmado com um ruído de Piep.
5
. O sinal de recepção
12
. O sinal de recep-
2. Diminuir a intensidade de iluminação
Prima o botão „ “ Dimmer 16 para diminuir
a intensidade de iluminação. Quando a intensidade de iluminação mínima for alcançada, um
ruído de piep irá soar. Prima rapidamente este
botão para diminuir gradativamente a intensidade de iluminação. Caso o botão „
16
mer
for pressionado por muito tempo, a
intensidade de iluminação é diminuida ao mínimo automaticamente.
“ Dim-
Temporizador de 30 minutos
1. Ligar temporizador
Prima o botão „ “ 17 para desligar o cand
de teto LED
A luz e também a função Bluetooth (Música)
são desligadas automaticamente após cerca
de 30 minutos.
2. Desligar temporizador
Caso queiras desligar a função de temporizador
durante os 30 minutos, prima o botão „
novamente por mais de 3 segundos. Quando o
sinal for recebido pelo candeeiro de teto LED
um longo ruído de Piep confirma o desligamento
do temporizador.
5
automaticamente.
eeiro
“ 17
Conexão Bluetooth
12
,
Regular a intensidade da luz
1. Aumentar a intensidade de iluminação
Prima o botão dimmer „ “ + 15 para aumen-
tar a intensidade de iluminação. Quando a intensidade de iluminação máxima for alcançada,
um ruído de piep irá soar. Prima rapidamente
este botão para aumentar gradativamente a
intensidade de iluminação. Caso o botão „
Dimmer +
a intensidade de iluminação é aumentada ao
máximo automaticamente.
58 PT
15
for pressionado por muito tempo,
1. Estabelecer conexão Bluetooth
Prima o botão áudio „ “ (Áudio) 24. O sinal
de recepção é confirmado com um ruído de Piep.
Cerca de 1–2 segundos mais tarde a conexão
Bluetooth é automaticamente estabelecida com
ênfase acústica, o LED azul dentro do candeeiro
de teto LED
Quando a conexão for estabelecida um curta
melodia é ouvida.
“
Na primeira conexão com o seu telemóvel,
tablet etc. seleccione a conexão Bluetooth
„LBT00738“.
12
começa a piscar rapidamente.
Page 59
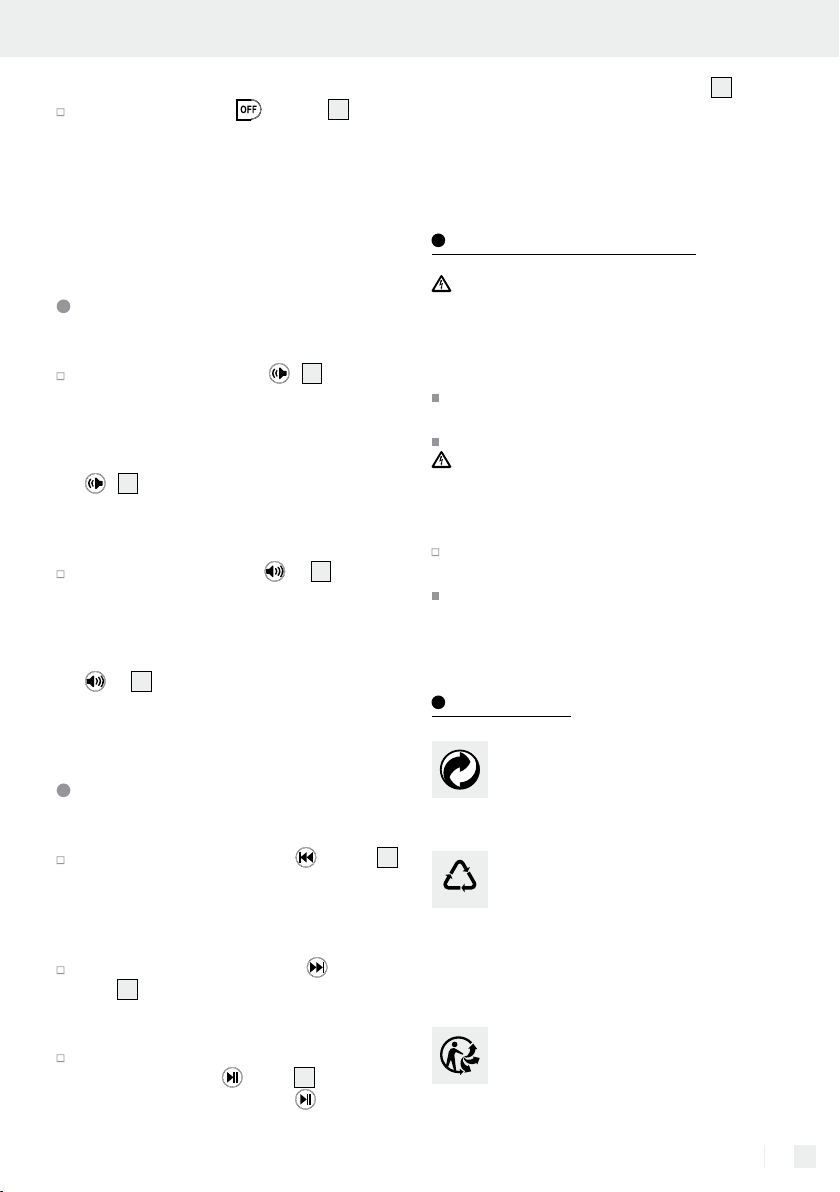
2. Encerrar conexão Bluetooth
Prima o botão áudio „ “ (Áudio) 18. O sinal
de recepção é confirmado com um ruído de
Piep.
A conexão Bluetooth é encerrada.
Após a conexão ser estabelecida, as
seguintes opções de áudio estão à
disposição:
Regular volume da música
1. Reduzir volume da música
Prima o botão de volume „ “ 23 para redu-
zir o volume. Quando o volume mínimo for alcançado, um ruído de piep irá soar. Prima
rapidamente este botão para diminuir gradativamente o volume. Caso o botão de volume „
“ 23 for pressionado por muito tempo, o vo-
lume é reduzido automaticamente ao mínimo.
2. Aumentar o volume da música
Prima o botão de volume „ “ + 19 para au-
mentar o volume. Quando o volume máximo for
alcançado, um ruído de piep irá soar. Prima
rapidamente este botão para aumentar gradativamente o volume. Caso o botão de volume „
“ + 19 for pressionado por muito tempo, o
volume é aumentado automaticamente ao máximo.
Escolher música
1. Voltar música
Prima o botão escolher música „ “ (voltar) 22
para seleccionar uma música anterior ou ouvir
a múscia novamente do início.
2. Avançar música
Prima o botão escolher música „ “ (avan-
20
çar)
para seleccionar a próxima música.
Pausa / Conexão Bluetooth Standby 21 seja
pressionado longamente, a conexão Bluetooth
será colocada em Standby por cerca de 10 minutos. Após isto, a conexão Bluetooth será desligada.
Manutenção e limpeza
CUIDADO! PERIGO DE CHOQUE ELÉ-
TRICO! Para limpeza, desligue primeiro o
candeeiro da corrente elétrica. Para isso, retire
o fusível ou desligue o interruptor automático
na caixa de fusíveis (posição 0).
Não utilize solventes, gasolina ou produtos
semelhantes. O candeeiro seria danificado.
P
ermite que a lâmpada arrefeça completamen
CUIDADO! PERIGO DE CHOQUE ELÉ-
TRICO! Por razões de segurança elétrica, o
candeeiro nunca pode ser limpo com água ou
outros líquidos, nem ser mergulhado em água.
Para a limpeza, utilize apenas um pano seco,
sem fios.
Posteriormente, volte a colocar o fusível ou
desligue o interruptor automático na caixa de
fusíveis (posição I).
Eliminação
A embalagem é feita de materiais não
poluentes que podem ser eliminados
nos contentores de reciclagem locais. O
ponto verde não vale para a Alemanha.
Esteja atento à especificação dos mate-
b
riais da embalagem para a separação
a
de lixo. Estas são identificadas com
abreviações (a) e números (b) com o
seguinte significado: 1–7: Plásticos /
20–22: Papel e papelão / 80–98:
Materiais compostos.
te.
3. Pausa
Prima rapidamente o botão Pausa / Conexão
Bluetooth Standby „
ção de pausa. Caso o botão „
“ para 21 activar a fun-
“
O produto e materiais de embalagem
são recicláveis, elimine-os separadamente para uma melhor reciclagem. O
59 PT
Page 60
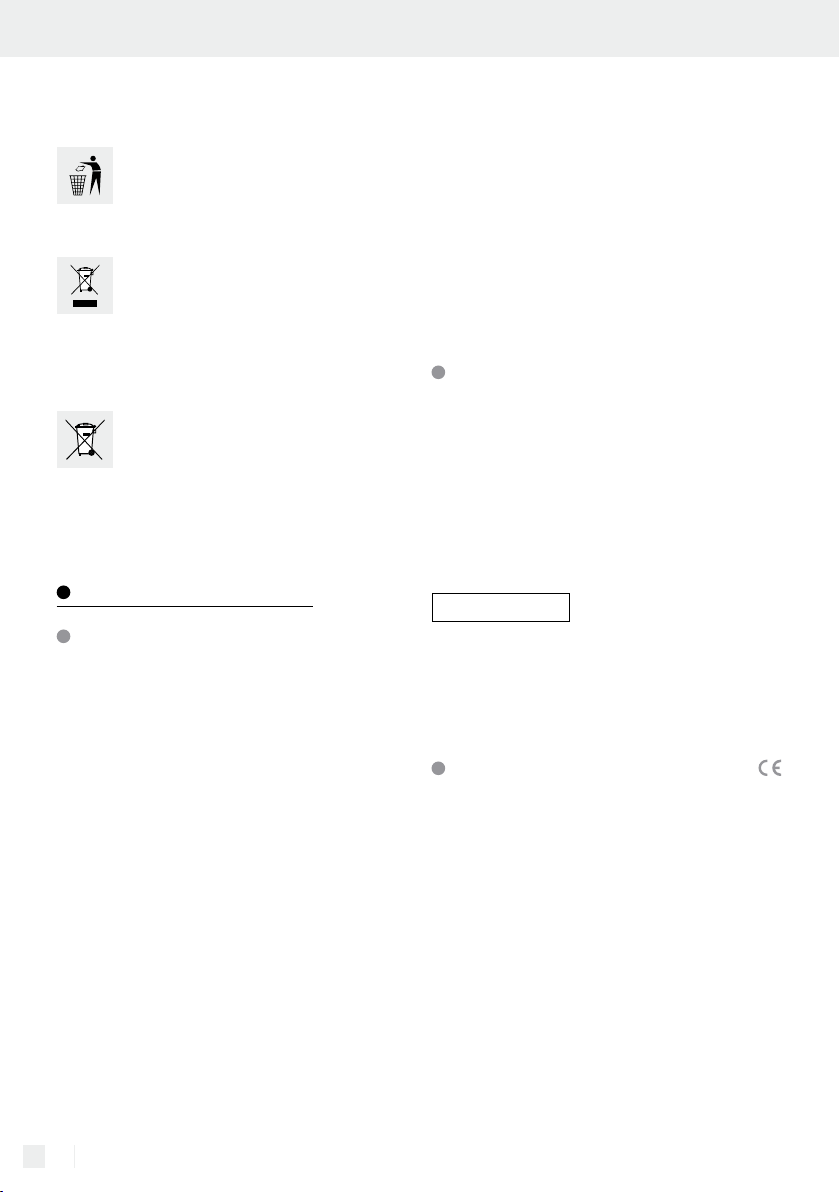
Eliminação / Garantia e assistência
logotipo Triman somente vale para a
França.
As possibilidades de reciclagem dos
artigos utilizados poderão ser averiguadas no seu Município ou Câmara
Municipal.
Não deposite o produto utilizado no
lixo doméstico, a favor da proteção do
ambiente. Elimine-o de forma responsável. Pode informar-se no seu município
sobre os locais de recolha adequados e
o seu período de funcionamento.
Por favor, elimine as pilhas usadas de
forma ecológica. Não coloque as pilhas
no lixo doméstico. Por favor, utilize os
locais de devolução e coleta da sua comunidade
ou entre em contato com o fabricante com o qual
o produto foi comprado.
Garantia e assistência
Garantia
Este aparelho possui 3 anos de garantia a partir da
data de compra, válida apenas para o primeiro
comprador e não transmissível. Guarde o talão de
compra como comprovativo. A garantia é válida
apenas para erros de material ou de fabrico e não
abrange peças de desgaste, nem danos provocados
por uma utilização incorreta. A garantia expira no
caso de uma intervenção externa no aparelho. Os
seus direitos legais não ficam limitados por esta
garantia. Em caso de garantia, contactar telefonicamente o departamento de serviço. Só assim é
possível garantir uma entrega gratuita do seu aparelho. O aparelho foi fabricado cuidadosamente e
submetido a um rígido controlo de qualidade. Dentro do período de garantia, reparamos gratuitamente
todas as falhas de material ou de fabrico. Caso detete alguma avaria durante o período de garantia,
envie o aparelho para a morada da Assistência,
tendo em conta a indicação do seguinte número
de artigo: 9000.034.080.
60 PT
Os danos causados por um manuseamento inadequado ou pela inobservância do manual de instruções ou uma intervenção por pessoal não autorizado
bem como as peças sujeitas a desgaste estão excluídos da garantia. Se tiver em conta todas estas
indicações, o período de garantia não pode ser
prolongado nem renovado.
Com a troca do aparelho, de acordo com
DL 67/2003, o tempo de garantia se inicia
novamente.
Endereço da assistência
Action GmbH
Im Langel 6
DE-59872 Meschede
ALEMANHA
Tel.: +49 (0) 2903 / 449 555
Fax: +49 (0) 2903 / 449 48410
E-Mail: [email protected]
www.action-leuchten.de
IAN 288149
Para qualquer questão, guarde o talão de compra
e o número de artigo (IAN 288149) como comprovativo da mesma.
Declaração de conformidade
Este produto cumpre os requisitos das directivas em
vigor a nível europeu e nacional (Diretriz RED
2014/53/UE, Design ecológico directriz
2009/125/CE, Diretriz RoHS 2011/65/UE). A
conformidade foi comprovada. As respetivas declarações e os respetivos documentos encontram-se
na posse do fabricante.
Declaramos através da presente que o tipo de
equipamento de rádio 9000.034.080 está em
conformidade com a Diretiva 2014/53/UE.
A versão integral da Declaração de Conformidade
UE está disponível no seguinte endereço Internet:
www.action-leuchten.de/service/
konformitätserklärungen/
,
Page 61

Action GmbH
Im Langel 6
DE-59872 Meschede
DEUTSCHLAND
Stand der Informationen · Last Information
Update · Version des informations · Stand van
de informatie · Stav informací · Estado de
las informaciones · Estado das informações:
07 / 2017 · Ident.-No.: 9000.034.080 072017-8
IAN 288149
 Loading...