

Page 1
INSTALLATION
INSTRUCTIONS
Upon receipt of fixture and accessories (packaged separately)
thoroughly inspect for any freight damage which should be
brought to the attention of the delivery carrier. Compare the
catalog description listed on the packing slip with the fixture
label on the outside of the ballast box to be sure you have
received the correct merchandise.
KVF
KVF Series
Area Lighting / Post-Top Mounting
Prior to Installation
Read carefully before installing light fixtures. If you do not understand these instructions, please
contact your local Lithonia Lighting distributor before installing.
Tools required: 3/4" socket w/extension, Philips-head screw driver, 5/16" nut driver (bridge
mount), slotted screw driver
INSTALLATION
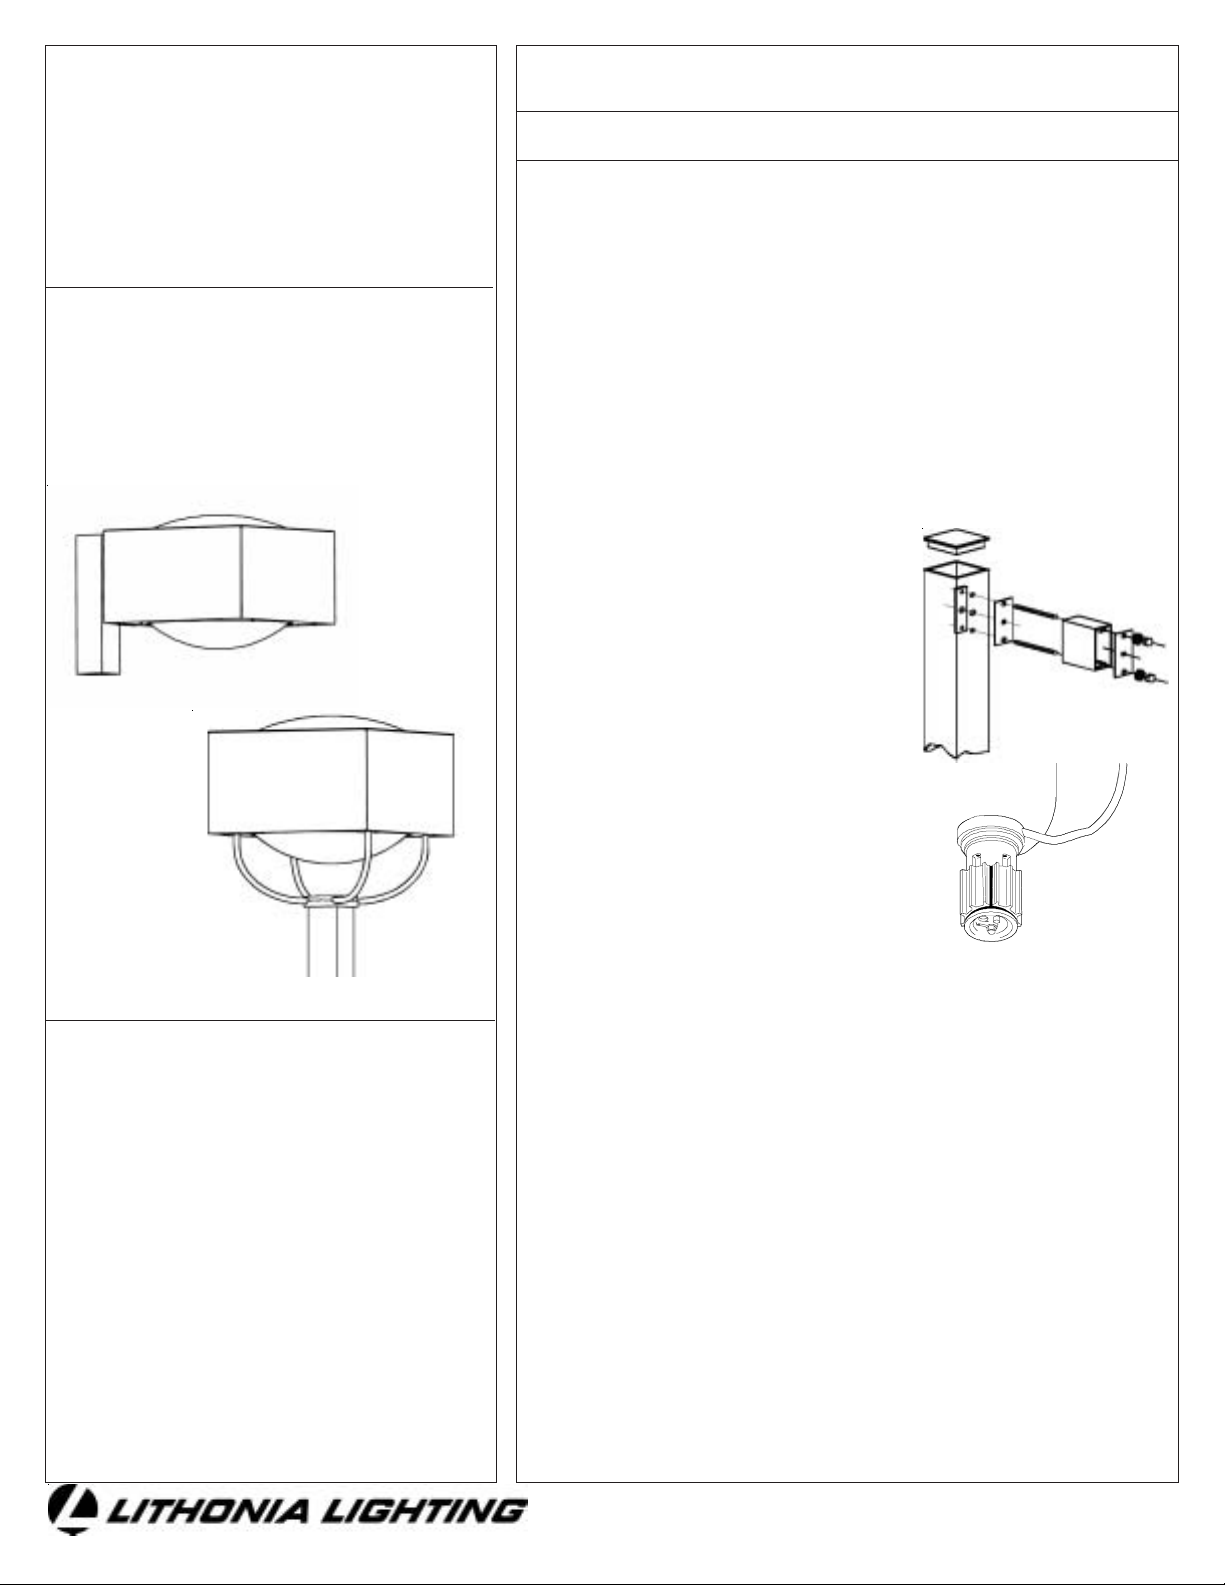
Mounting the fixture (Arm mount and Post-Top Instructions):
1. Remove reflector by loosening the 2 captive door frame screws and slowly open the
fixture. The reflector can be removed by gently prying and pulling the reflector loose.
Once loose, disengage the socket quick disconnect and remove from the fixture housing.
This will give you access for mounting and wiring the fixture.
2. For arm mount fixtures, remove the top cap from pole, if in place. Insert the mounting plate
inside pole or tenon adaptor, aligning the three (3) mounting holes in plate with the three
(3) mounting holes provided on the pole. Slide the two threaded rods through the top and
bottom mounting holes in the pole and start to thread the rods into the matching holes in
the mounting plate (three turns are sufficient). Place one of the gaskets over the threaded
rods and against the pole.
3. To mount the arm, slide arm over threaded rod using the bolt guides inside the arm. Place
remaining gasket over the threaded rods and against the mounting arm.
4. Position the housing at the end of the arm
and feed fixture wires through arm, pole backing
plate, and out pole top. Align the holes with
the threaded rods and insert the threaded rods
into the fixture. Install split lockwashers
and hex nuts (furnished) on the ends of the
threaded rods that are inside the fixture and
tighten securely. Make sure fixture is mounted
straight and square with pole before
raising pole.
5. Make wire connections observing voltage
and polarity. Connect green ground wire
from the fixture to field ground wire.
Arm Mount (SP09)
IMPORTANT SAFETY
INSTRUCTIONS
(For Your Protection, Read Carefully)
• This fixture must be wired in accordance with the National
Electrical Code and applicable local codes and ordinances.
• Proper grounding is required.
• Use approved connectors for all electrical connections.
• Be certain the green lead from the fixture is secured to
ground.
• ALL work should be performed by a qualified electrician.
WARNING Verify the proper fixture voltage lead has been
selected to match the supply voltage before energizing.
Improper wiring may result in ballast failure and void all
warranties. NEVER disconnect any component while power
supply is engaged.
Pole Top Mount
1. The KVF mounts to a 4, 4-1/2, 5, or 6" diameter pole
top determined by the option ordered).
2. Remove the top plate of the wiring compartment.
Make wire connections, replace the top plate.
3. Secure the fixture by slipping into the pole top and
tightening (1) internal fitter device.
Lamp Installation
1. Re-install reflector by plugging the lamp lead disconnect back in, line up the reflector to its
appropriate direction and gently push or pop back into place being sure to align the four pop
balls with their receptacles. Check to insure reflector is seated properly and secure before
installing lamp.
2. Prior to installing the lamp (not included) in the fixture, verify that the lamp source and wattage
corresponds with the fixture label. Screw the lamp securely into the socket, back it out one
or two turns, and tighten it securely again. This procedure properly seats the lamp in the
socket. Reconnect secondary disconnect plug and secure door assembly.
WTB (Terminal Block option)
Tools Required: Slotted screwdrive (WTB will accept 16 AWG - 4 AWG)
1. Insert correct ballast leads to one side of WTB. Secure by tightening the appropiate screws.
Place the corresponding incoming line voltage leads, being sure to observe proper polarity and
voltage. Secure by tightening screws.
2. Cap off any unused tap ballast taps with wire nuts and secure away from any exposure to the
WTB. (See below for TB option)
Internal
Fitter
SAVE THESE INSTRUCTIONS
01/06
RJ5210155
Page 2
Optical Rotation
(This fixture is designed with optical rotation ease in mind via tool-less design)
1. Open door assembly. Gently pry or pull reflector away from housing. Rotate optical assembly to desired light output as indicated by light distribution arrow on reflector.
Insert reflector assembly back into housing being sure to line up the four pop balls and their receptacles.
2. Check to make sure the reflector is seated properly and secure before installing lamp andclosing door assembly.
ASY Reflector:
Drop Lens: Paint on lens should be positioned toward the pole.
Flat Lens: Paint on Reflector should be positioned toward the parking lot.
Glass Lens Change
Tools Needed: 1/2" wrench (For convenience, the lens is interchangable from a flat full cutoff lens to a contoured drop lens or drop lens to flat lens)
1. Open the doorframe assembly, loosen the (4) lens clips securing nuts using a 1/2" wrench and remove them from the studs being careful to keep
the lens from falling or being damaged.
2. Take the existing lens gasket and place on new lens, place lens in doorframe assembly and re-apply the (4) lens securing clips and their (4) nuts securing well. (Do not
secure to the point of bending the clips)
Note: The optical reflectors are SPECIFICALLY designed for their respective lens option. We can not accept responsibility for photometric performance when these
are not matched.
KVFEHS External Houseside shield
Tools Required: Drill, 5/32" drill bit, phillips type screwdriver, slotted screwdriver
The KVF EHS is unique and aesthetically pleasing design that can be rotated to any desired side needed to help eliminate unwanted spill light.
1. Choose the side needed to apply the shield. Align the shield in this position and choose the four indicator dimples that need to be drilled out, mark or remember
which dimples will be drilled.
2. Setting shield aside, open doorframe in order to keep drill from penetrating reflector. Drill the indicator dimples chosen with 5/32" drill bit, being careful not
to penetrate the lens gasket by keeping drill perpendicular to the doorframe.
3. Close the doorframe and secure it. Align shield with chosen drilled holes, install the 4 screws provided with phillips type screwdrive.
01/06
RJ5210155
Page 3

FACTORY INSTALLED OPTIONS
TAPPED BALLAST - TB
This option offers multi-voltage capability. To wire a fixture that contains a tapped ballast, first determine correct line voltage. Then select the proper fixture
voltage lead, remove crimped cap and connect to supply voltage lead. The fixture lead marked COM should then be connected to the neutral supply lead
on all multi-voltage fixtures; be sure to cap off all unused fixture leads individually. The tapped ballast will be wired for 277 volt at the factory.
NEMA TWIST LOCK RECEPTACLES AND PHOTOCONTROL
SINGLE/DOUBLE FUSING - complete with fuses
SF - Single Fuse is internally accessible for use with 120, 277, or 347
Photocell receptacle: PER
The photocell receptacle is factory installed, and MUST be ordered with
the fixture.
Photocontrols: PE1, PE3, PE4, and PE7
The photocontrol is shipped separately and must be field installed.
volt fixtures
DF - Double Fuse is internally accessible for use
with 208, 240, or 480 volt fixtures.
Fusing is not available with tapped ballasts.
Note:
Important: The voltage of the photocontrol must be the same as the fixture
voltage.
PE1: 120, 208, and 240 volt operation
PE3: 347 volt operation
PE4: 480 volt operation
PE7: 277 volt operation
CAUTION: Observe lamp manufacturer’s recommendations and restrictions on lamp operations, particularly ballast type, burning position, etc.
MAINTENANCE: Your fixture is designed for years of trouble-free operation. For optimum performance, periodically clean reflector and lens with a soft, damp cloth.
IMPORTANT: DO NOT use abrasive materials, glass cleaner or other solvents on lens or paint. Use only mild, soapy water.
TROUBLESHOOTING
If this fixture fails to operate properly, check to make sure:
• The correct lamp is properly installed. • The fixture is grounded correctly.
• The fixture is wired correctly. • The line voltage at the fixture is correct.
• The lamp is not faulty.
If all these variables have been checked and the fixture still does not operate as specified, contact your local Lithonia Lighting distributor.
NOTE: On the 120V and 277V systems, connect voltage supply lead to fixture lead marked with voltage marker, then connect neutral supply lead to fixture marked
COM. On other voltage systems, connect one supply lead to fixture lead marked with proper voltage and connect other supply lead to fixture lead marked COM. On
multiple voltage fixtures, insulate all unused fixture leads individually.
01/06
RJ5210155
 Loading...