

Page 1

SAVE THESE INSTRUCTIONS AND DELIVER TO OWNER AFTER INSTALLATION
INSTALLATION INSTRUCTIONS
Aeris Bollard
ASBX ASBY ASBZ
WARNING: FAILURE TO FOLLOW THESE INSTRUCTIONS AND WARNINGS MAY RESULT IN DEATH,
INJURY, OR SIGNIFICANT PROPERTY DAMAGE
and instructions carefully before installing or maintaining this fixture. These instructions do not attempt to
cover all installation and maintenance situations. If you do not understand these instructions or additional
information is required, contact Lithonia Lighting or your local Lithonia Lighting distributor.
WARNING: RISK OF ELECTRIC SHOCK - To avoid electric shock, serious injury, or death, be certain that
all electrical power is disconnected from the supply branch circuit conductors before installing or maintaining this fixture. This product must be installed and maintained in accordance with the applicable installation codes by a person familiar with the construction and operation of the product and the hazards
involved.
WARNING: RISK OF PERSONAL INJURY - This product may have sharp edges. Wear gloves to
prevent cuts or abrasions when removing from carton, handling, installing and maintaining this product.
Lithonia Lighting, a division of Acuity Lighting Group, Inc. assumes no responsibility for claims arising out
of improper or careless installation or handling of this product.
IMPORIMPOR
IMPOR
IMPORIMPOR
TT
ANT SAFETY INSTRUCTIONSANT SAFETY INSTRUCTIONS
T
ANT SAFETY INSTRUCTIONS
TT
ANT SAFETY INSTRUCTIONSANT SAFETY INSTRUCTIONS
- For your protection, read and follow these warnings
WARNINGWARNING
WARNING
WARNINGWARNING
RISK OF FIRE - Lamps are hot. Keep
combustible material away from hot
parts.
WARNINGWARNING
WARNING
WARNINGWARNING
RISK OF FIRE - Observe lamp
manufacturer’s warnings, recommendations and restrictions on lamp operation
and maintenance.
IMPORTANT
SAFETY INSTRUCTIONS
• This fixture must be wired in accordance
with the National Electrical Code and
applicable local codes and ordinances.
• Proper grounding is required to ensure
personal safety. Be certain green lead
from the fixture is connected to supply
ground.
• Use code compliant connectors for all
electrical connections.
• ALL work should be done by a qualified
electrician.
• WARNING: NEVER connect or disconnect
any component while power supply is
engaged.
DELIVERY: Upon receipt of fixture and accesso-
ries (packed separately), thoroughly inspect for
any freight damage. All damage should be
reported to the delivery carrier. Compare the
catalog description listed on the packing slip with
the fixture label on the inside of the housing to be
sure you have received the correct merchandise.
TROUBLESHOOTING
If this fixture fails to operate properly, check to
make sure:
• The correct lamp is properly installed.
• The fixture is wired correctly.
• The lamp is not faulty.
• The fixture is grounded correctly.
• The line voltage at the fixture is correct.
Top Cover
Captive
Reflector
Observe lamp manufacturer's recommendations
and restrictions on lamp operations, including but
not limited to ballast type, burning position, and
cycling.
Maintenance: For optimum performance,
periodically clean reflector and lens with a soft,
damp cloth.
Important: DO NOT use abrasive materials, glass
cleaner or other solvents on lens or paint. Use only
mild, soapy water.
1. UNPACK: Leave protective covering on
fixture. Lay the fixture on its side. At the
bottom of the fixture, loosen the (4) 3/8"
set bolts with a 3/16" Allen wrench to dis engage the cast baseplates.
Keep set bolts for re-installation.
Lens
2. Make sure conduit does not extend more
than 2-1/2" above concrete.
3. Remove the (4) top nuts and washers
Main Housing
Power Module
Cast Baseplate
Anchor Bolts
from the anchor bolts ( Keep set bolts for
re-installation). Place the cast base-plate
on top of the leveling nuts, with the
embossed letters stated "DOWN" facing
toward the concrete. Place a hand level across
the cast baseplate and level the base by using
the leveling nuts. Check the level in both direc tions from 90° from each other, and then rein stall top washers and nuts on anchor bolts.
Before tightening anchor bolt nuts make sure
baseplate is aligned to the desired oreintation
along curb or walkway. Tighten anchor bolt nuts
(do not over tighten, over tightening will cause
stripping and void all warranties).
4. After baseplate is installed, wiring
connections can be made. NOTE: on
multiple-voltage fixtures insulate all unused fixture wires individually using wire
nuts (not provided). Make certain all
power is disconnect before making wiring
connections.
SAVE THESE INSTRUCTIONS
CAUTION
© Lithonia Lighting, Rev. [A]
RJ521309
Aeris Bollard Instru 05/06
Page 2
SAVE THESE INSTRUCTIONS AND DELIVER TO OWNER AFTER INSTALLATION
Refernece product warnings and instructions on Page 1 prior to beginning installation.
5. After wiring is done, the bollard should be carefully placed over the baseplate.
Make sure the bollard is vertically aligned and seated on the baseplate.
At this point, the 3/8" set bolts can be tightened (do not over tighten, over tightening will
cause stripping and void all warranties).
Each set bolt should be tightened a little at a time. Make one last check to see that the
set bolts are tight and the bollard is plumb, and sides are aligned with sidewalk or curb.
6. Next, loosen the top screw using a 5/32" Allen wrench. Note the top bolt
is captive and does not completely remove. Remove top cover and any plastic
protective covering. Lamp the fixture following lamp installation instructions below.
Replace the top cover making sure top cover is seated over lens before tightening top screw
(overtightening will void all warranties). It may be easier to fit the lens into the top, and
holding them as a unit, set them into place.
Page 2
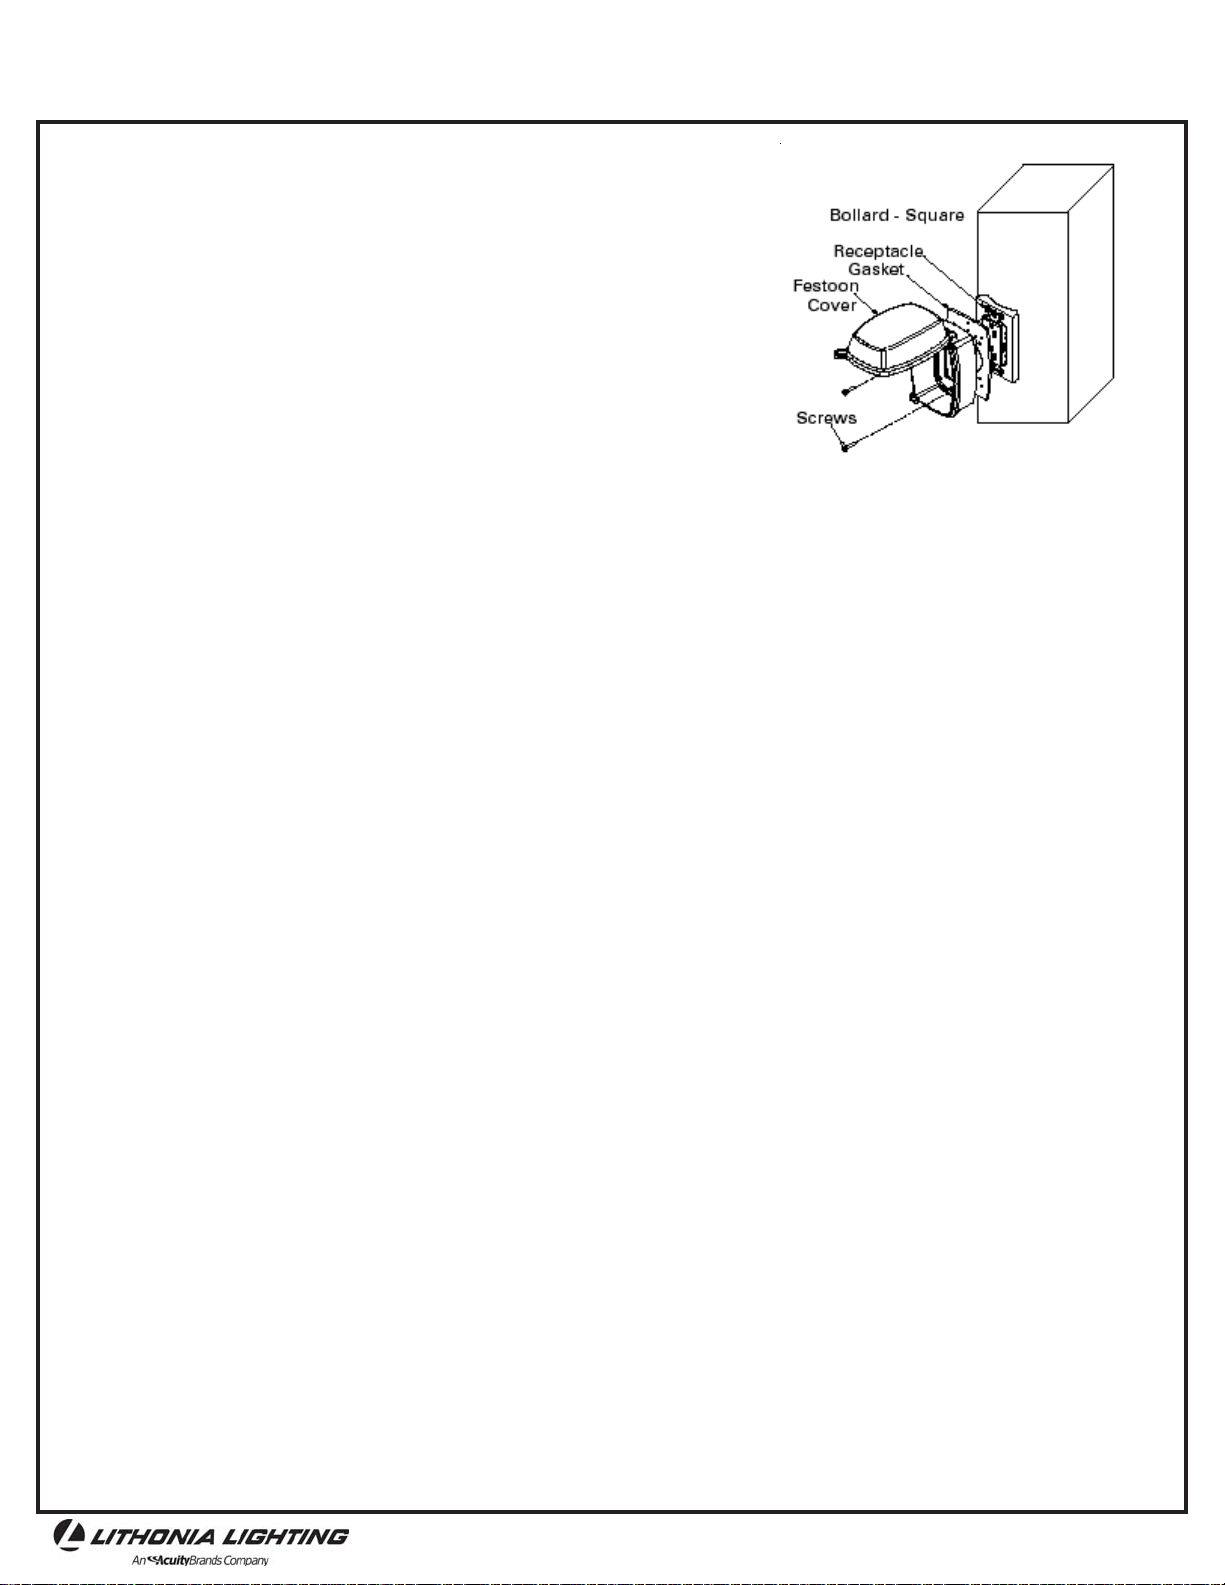
Follow the instruction sheets suppied with the feston
outlet for proper installation.
FESTOON OUTLET (See Figure 1 above Right; Not to Scale)
LAMP INSTALLATION
Prior to installing the lamp (not included) in the
fixture, check to make sure the lamp is the correct
source and wattage. Screw the lamp securely
into the socket, back it out one or two turns, then
screw lamp back in, making sure it is secure. This
procedure properly seats lamp in the socket.
Figure 1
SAVE THESE INSTRUCTIONS
© Lithonia Lighting, Rev. [A]
RJ521309
Aeris Bollard Instru 05/06
 Loading...