

Page 1
V
N910
User Guide
Page 2

VN910 User Guide: February2007
All reasonable attempts are made to ensure that this User Guide is up-to-date and accurate.
However, please note that due to circumstances beyond our control, certain appearances,
features or operations may vary slightly from those described here. Contents are subject to
change without notice.
Page 3

g
r
p
tor
Contents
Important Safety Instructions
Introduction
Initial Setup
General.......................................................................................6
Working Conditions ....................................................................6
Design Limitations ......................................................................7
User Scenario/Habit ...................................................................7
About the VN910 ........................................................................8
Package Contents ................................................................8
Features................................................................................9
Front ................................................................................9
Rear ............ ......... ..... ...... ..... ...... ........ ...... ........ ... ......... ... 9
Top ........................................................... .....................10
Bottom ...........................................................................10
Left and ri
Switch the Device On ...............................................................11
Screen Calibration ....................................................................11
Set the Time/Date.....................................................................11
Insert the SD/MMC Card ..........................................................12
ht sides........................................................10
Connecting to a Compute
Establishingdevice-PC connection ....................................13
Charging the Device
Battery Indicators......................................................................14
LED indicators ....................................................................14
UsingtheAC Ada
...............................................................14
Page 4

g
A
r
r
Car Installation
Setting up the VN910 in your vehicle .............. ...................... ... 15
Basics
Navigation Options................................................................... 19
Main menu screen ...................................................................19
Navigation
MP3 Playe
Accessing the MP3 Player ................... ...................... .............. 22
Mp3 Player Screen Definitions.................. ....................... ........ 23
Using the Player.......... ...................... ...................... ................. 24
the suction cup ...................................................15
Usin
Using the touch screen................ ...................... ................. 19
Using the hard keys.......... ................... .................... ........... 19
ccessingthe Navigation Function..........................................21
Display........................ ................. ...................... ................. 23
Buttons . ................... .................... .................... ................... 23
Playing music ........ ................... .................... ................... ... 24
Adjusting the volume ................ ....................... ................... 24
Changing the order of tracks ................... ...................... ..... 24
Repeating tracks ........... .................... ................. ................ 24
Creatingaplaylist...............................................................25
Photo Viewe
Accessing the Photo Viewer .......... ..................... ..................... 26
Using the Ph ot o Vi ewer ...........................................................27
Page 5

g
t
Viewing photos ...................................................................27
Usin
he slideshow............................................................28
Settings
Accessing the Setup Screen ....................................................29
Adjusting the Settings...............................................................30
Setting the Time/Date .........................................................30
Changing the Time Zone...............................................30
Changing the Time/Date ...............................................32
Volume................................................................................33
FM Transmitter ...................................................................34
Screen options ....................................................................36
Adjusting the Brightness ...............................................36
Adjusting the Idle Time..................................................36
Calibrating the Screen...................................................37
Choosing the Language......................................................38
System Information .............................................................39
Resetting the Device
Performing a soft reset .............................................................40
Performingahard reset............................................................40
TroubleshootingGuide
Page 6

t
p
Important Safety
Instructions
Please read and follow these safety instructions before using your device for
he first time, and save them forfuture reference.
General
•
Keep away from extremely hot, col d or humid conditions.
•
Do not allow the device to get wet.
•
Av oid shocks or vibrations .
•
Do not open your device. Any attempts to open this device will void the warranty.
•
Wipe the touch screen only with a lint- fr ee cloth, slightly dampened, while the devic e is
switch ed off.
•
Do not
lace objects on topof the device.
Working Conditions
•
Do not charge the device in extremely hot o r cold conditio ns.
•
If the red LED is flashin g, pleas e recharge the device immedi at ely.
•
Please use the car charger when poss ible during in-car use .
•
Please only use the supplied USB cable.
•
Please do not use other chargers or ada pt ors, as these may damage your device .
•
Only use the supplied MMC X equipment to c onnect to an external antenna.
•
Do not operate this device i n extremely hot or cold conditi ons.
6
Page 7

l
n
play
p
port
Important Safety Instructions
Design Limitations
•
Do not remove the SD/MMC card while using the photo viewer or MP3 functi ons.
•
If you need to format the SD/MMC card, p lease specify the FAT fi le s ystem.
•
Please only use images of an accepta ble format with the photo viewer.
•
During charging, the LED will be orange until charging is complete, at which time it wil
change to green. If the charger is remov ed and connected again, t he LED will remai
orange for approximately 30 minutes before changing to green.
•
The MP3
er su
s mp3, wav and wma formats.
User Scenario/Habit
•
Do not operate this device while y ou are driving.
•
Before first use, please charge this device for at least 8 hours.
•
For the best possible initial GPS fix, please be outdoors, in an open space, with a clear
sky.
•
When using the GPS function, the folding GPS antenna should be positioned so that it is
parallel with the gound (i .e. it is in a horizontal position).
•
Do not store this device in extremely hot or cold conditions.
•
Before first use, please make sure that the hardware reset switch is in the correct
posit ion. Leave in this posi tion from then on.
•
To switch the device on, press the power button for 3 seconds. To switch off, hold the
power button for 3 seconds.
•
Do not use this device in damp, wet or rainy conditions.
•
The use of FM transmitters is illegal in some countries. Make sure it is legal for you to
use the FM transmitter function of this device bef ore doing so.
•
The navigation information offered by this device is for reference only. We cannot
guarantee that the inf orm ation on this device will al ways be 100% accurate, so you
should watch the ro ad f or indications or dangers in the same way as usual. Pl ease use
7
Page 8

Introduction
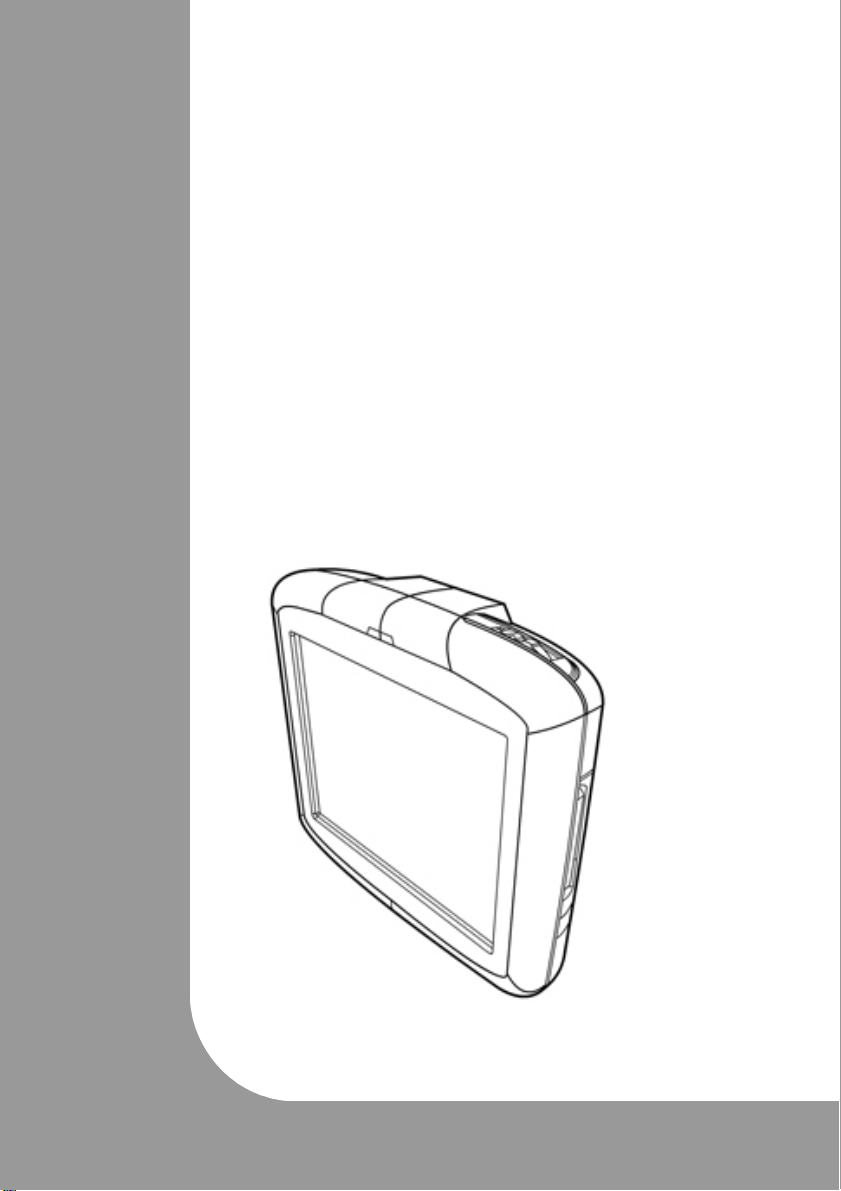
About the VN910
The VN910 is not only a portable GPS navigation system which can be used
in or out of the car, it is also an mp3 player with a built-in speaker (can still be
used with earphones if you prefer) and photo viewer. It can also transmmit
audio through an FM transmitter, which you can pick up on your car radio.
Package Contents
Please check that you have the following items (Note that some item s may be
optional, or in some cases extra items may be included. Please check with
your retailer if you are unsure). If any items are missing, please contact your
retailer immediately. Packaging should be saved for future use.
•
VN910 u nit
•
Car mount kit
•
Car charger
•
SD card (Optional)
•
AC Adaptor
•
Mini USB cable
•
VN910 Ge tting Started Guide (Optional)
•
VN910 Warranty Booklet (Optional)
•
Navigation software Quick Start Guide (Optional)
•
Navigation software CD (Optional)
8
Page 9
r
r
peaker
Introduction
Features
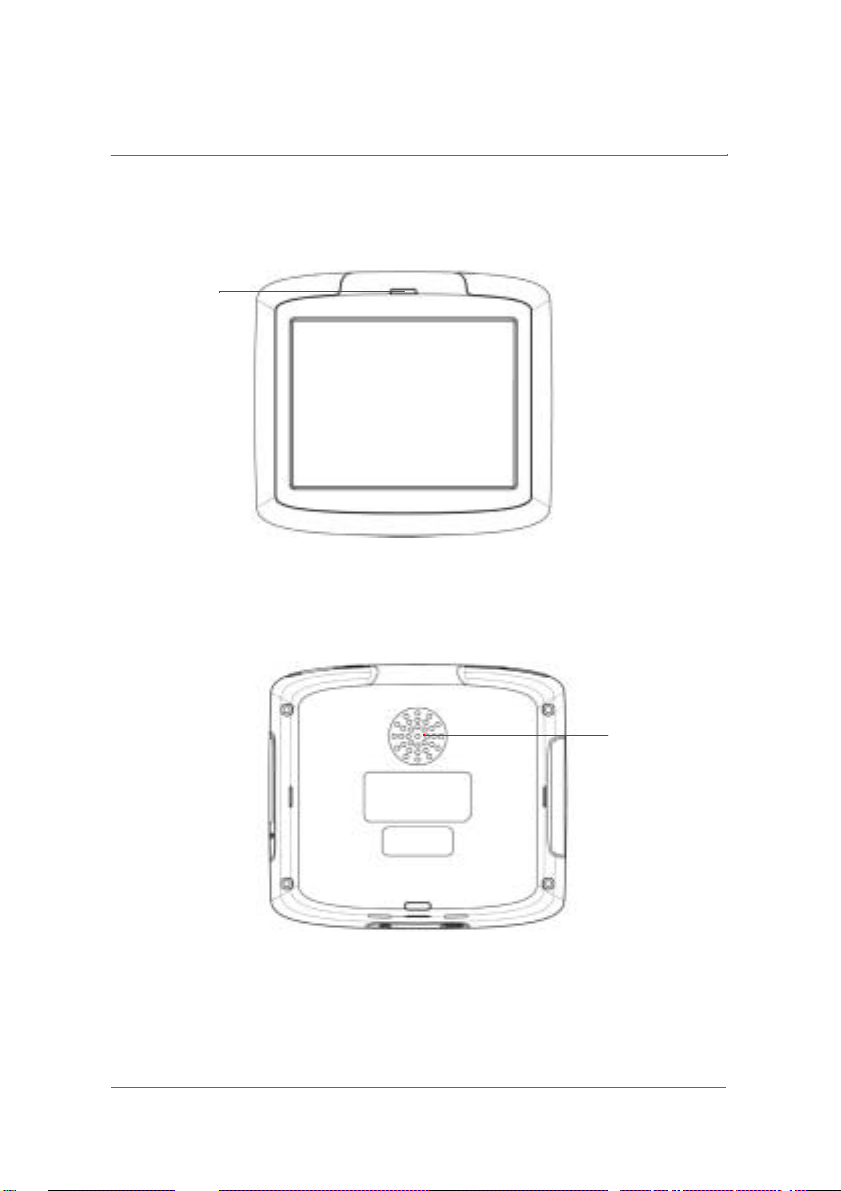
Front
1.
Powe
Rea
1
LED
1
1.
S
9
Page 10
r
t
rig
ter
r
t
Introduction
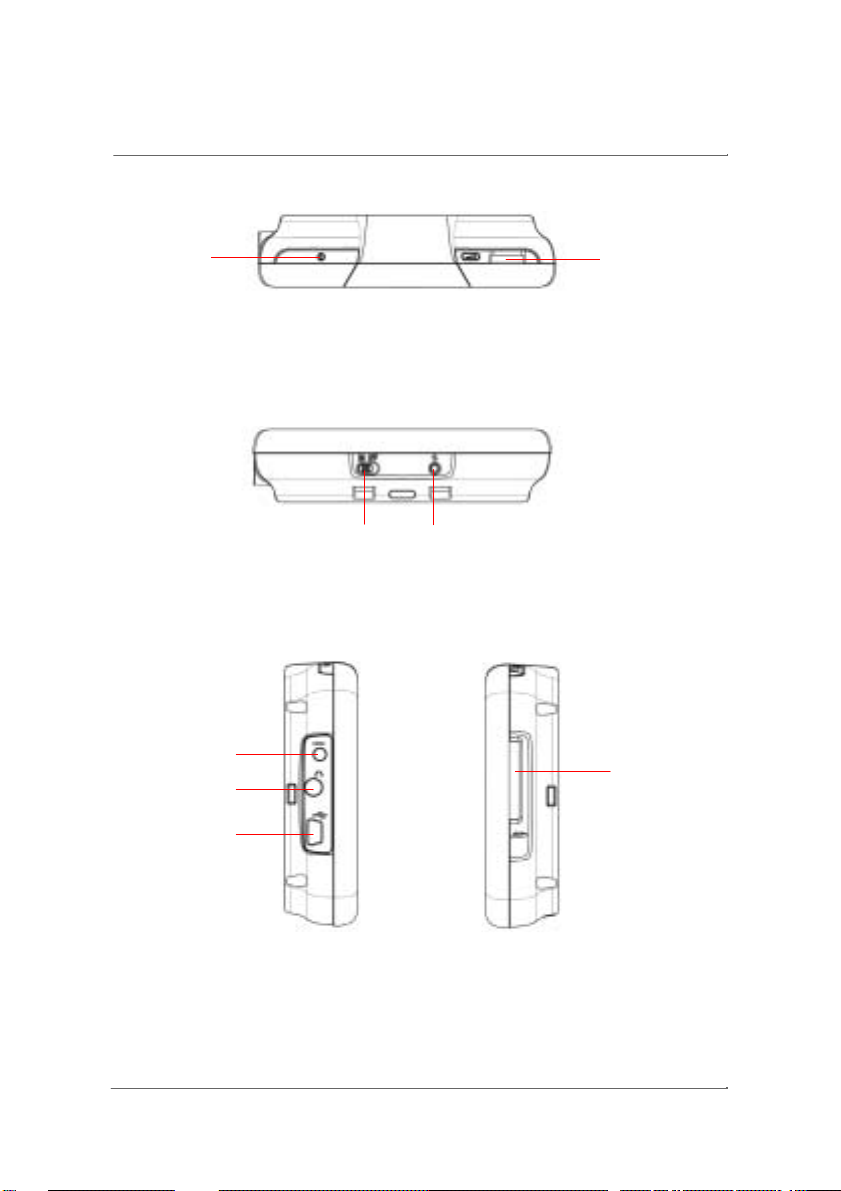
Top
1 2
1.
Powe
2.
Volume control
button
Bottom
1.
Hardware reset switch
2.
Sof
reset button
12
Left and
ht sides
1
4
2
3
1.
Ex
nal antenna connecto
2.
Headphone jack
3.
Mini USB port/DC in
4.
SD/MMC card slo
10
Page 11
e
n
Initial Setup
To use your VN910 forthe firsttime,please followthese instructions.
Switch the Device On
To switch on the device for the first time, slide the hardware reset switch left
to the “ON” position.
NOTE: After switching your device on for the first time, you should not use the hardwar
reset switc h a g ain unless you wa nt to do a hardware re set . See “Resettin g the Devic e ” o
page 40 for more information. Instead, use the power button on the top of the device.
Screen Calibration
When you switch the device on for the first time, you will have to calibrate the
screen. Follow the simple on-screen instructions to do this.
Set the Time/Date
You may wish to set the time before you first use the device. For information
on setting the time and date, see “Setting the Time/Date” on page 30.
For more information on othersetup options, see “Settings” on page 29.
11
Page 12
v
Initial Setup
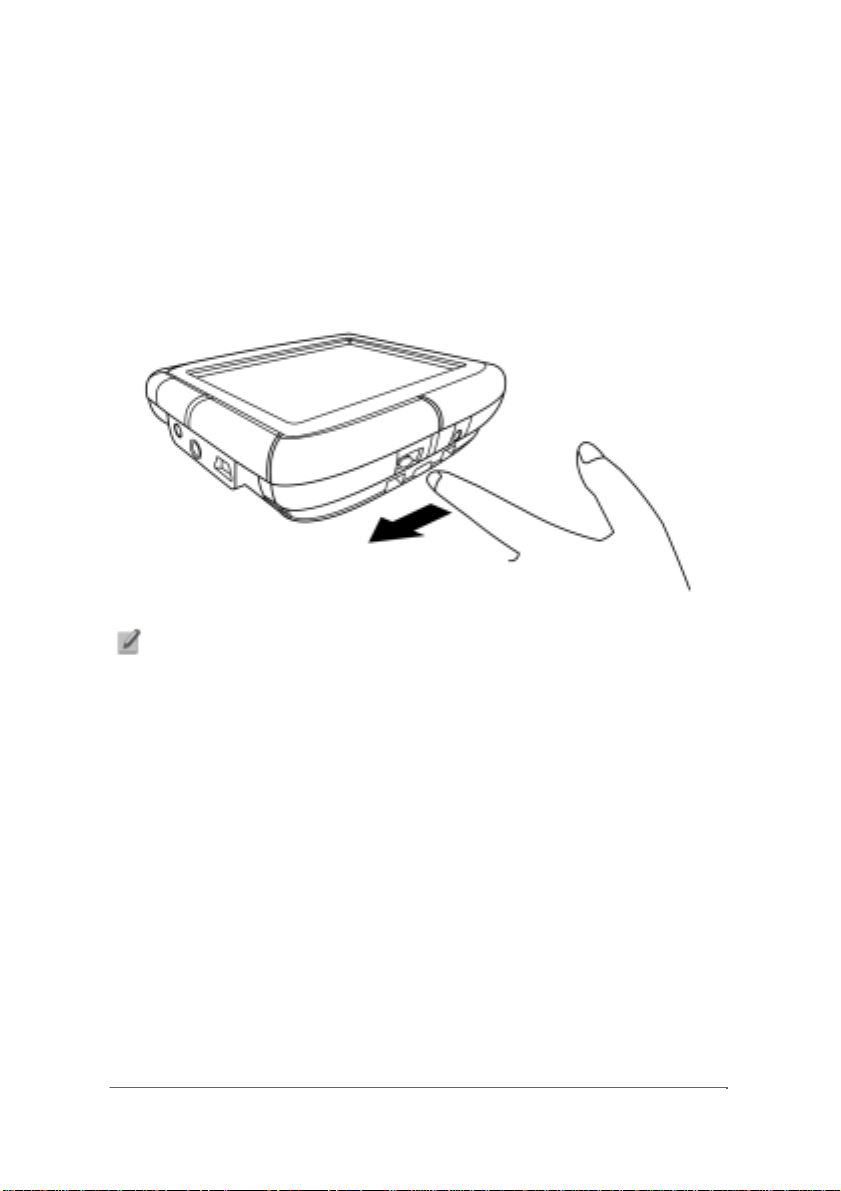
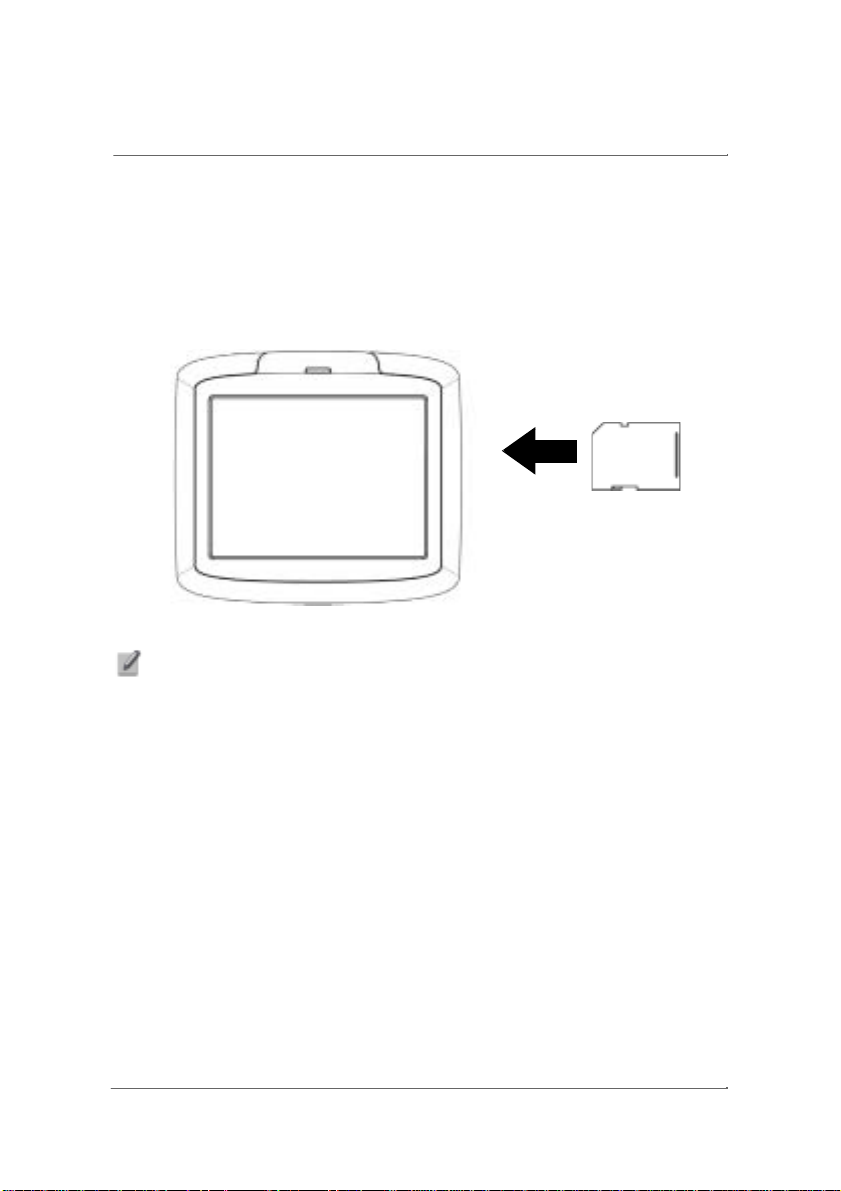
Insert the SD/MMC Card
Any music tracks or photos that you may transfer from your computer are
stored on the SD/MMC card.
To insert the SD/MMC card, make sure it is aligned correctly, and then push it
into the SD/MMC slot on the right-hand side of the device until you hear an
audible signal to say that it has been correctly inserted.
NOTE: Should you e
pop out.
er need to remove the SD/MMC card, push it in a little and let it
12
Page 13
n
o
Connecting to a Computer
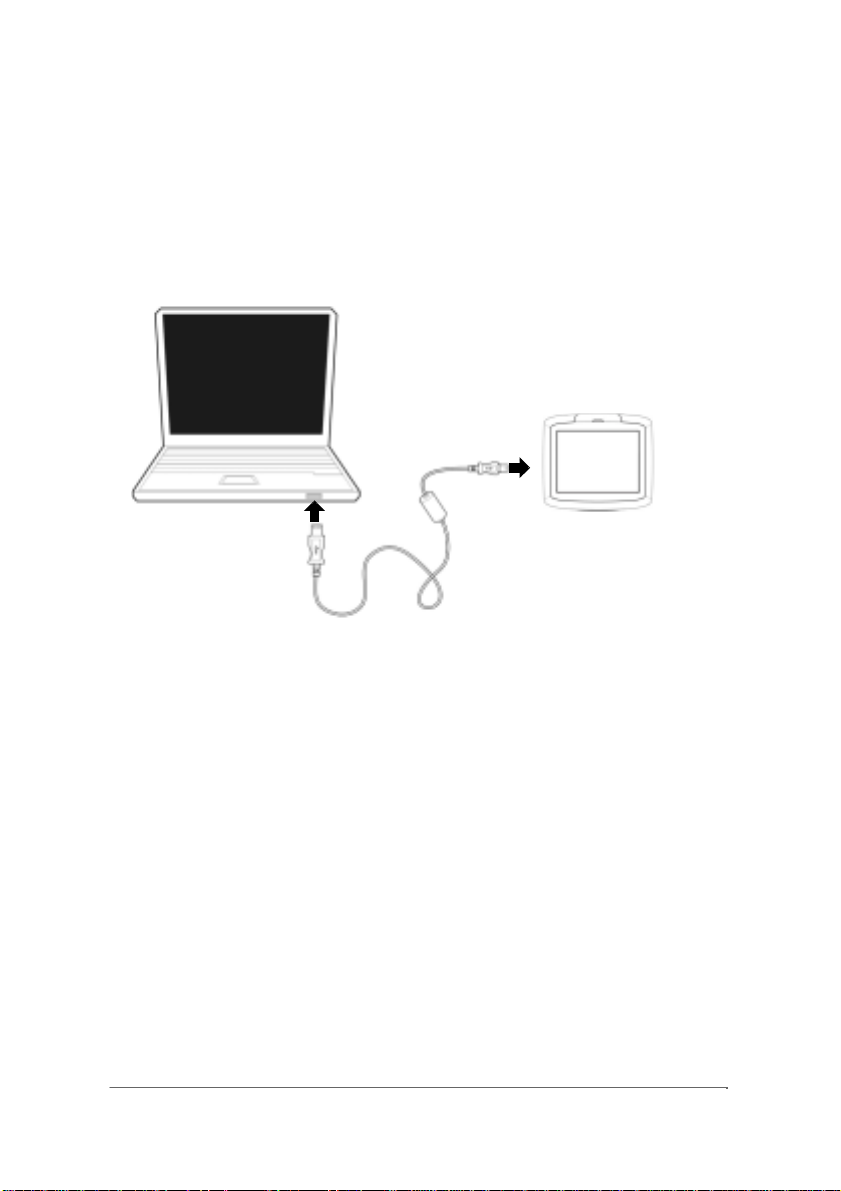
Establishing device-PC connection
Connect the smaller end of the supplied USB cable to the mini-USB port o
the left-hand side of your device. Connect the larger end of the USB cable t
an available USB port on your computer.
13
Page 14
r
y
g
r
r
r
r
Charging the Device
Battery Indicators
Your device uses a rechargeable 1200 mAh Lithium Ion battery. The battery
icon is located on the top right-hand corner of the Main Menu screen and
indicates the battery level, or charging state, as follows:
When the battery reaches an extremely low level, a warning message will
appear. When you see this message, you must recharge the battery
immediately.
LED indicators
•
•
•
- Charger attached. Battery charging.
- Running on battery power. Battery fully charged.
- Runningon batterypower.Batte
low. Chargin
Blue - Charging
Green - Fully charged (ch arger plugged in)
Fla s hing blue - Low battery
ecommended.
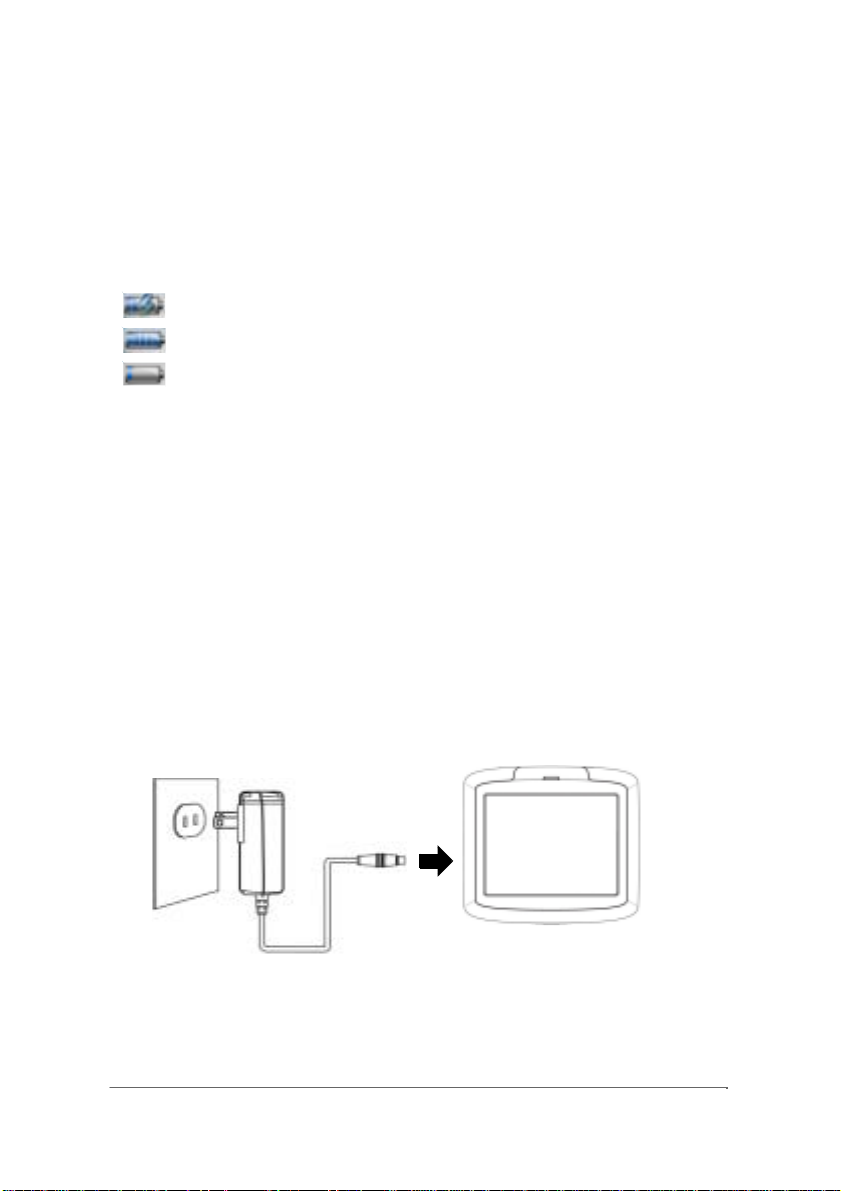
Using the ACAdapto
Plug the AC adaptor into an AC power souce, then plug the other end into the
Mini USB/DC in connecto
Please charge you
After the first charge, recharging the device will normally take approximately 4
hours.
device for8hours before initial use.
onthe left sideof yourdevice.
14
Page 15

A
x
Car Installation
Setting up theVN910 in your vehicle
Use the VN910 car kit to set up your device in your vehicle. The car kit can
either be used on the windshield (using the suction cup), or on the dashboard
(using the self adhesive disk and the suction cup together).
CAUTION: Please check with local l aw s regarding the mounting of devices on or close
to the windshield of your vehicle.
CAUTION: Do not mount the device where it obscures your view of the road.
UTION: Do not mount the device anywhere where it might affect the deployment of
C
any airbags.
Using the suction cup
NOTE: Make sure that the mounting surface is clean before mounting the car kit.
1.
Fi
the suction cup tothe selected area with the locking leverfacing up
(A), then flip the locking lever away from you to create a vacuum between
the suction cup and the mounting surface (B).
15
Page 16

Car Installati o n
NOTE: Make sure that the suction bond is strong enough before proceeding to the next
step.
2.
Feed the car charger cable down the back of the car holder.
3.
Insert the pegs on the car mount’s holder plate to the holes on the back of
the car holder, then move the car holder downwards until both parts are
16
Page 17

k
Adjust t
r
t
4.
Doc
5.
the deviceo n the carholder.
he carmount fo
he best viewing angle.
Car Installati o n
17
Page 18

A
t
t
Car Installati o n
6.
fter setting up the device on the carmount, connec
he carcharger.
18
Page 19

e
t
V
t
t
u
u
At
r
v
/
Basics
Navigation Options
Using the touch screen
This device does not require a stylus and can be operated with your finger.
This leads to a much more natural way to operate the device.
As well as tapping options on the screen, in certain cases it is also possibl
to drag, for example in the Photo Viewer it is possible to drag a ph oto when i
does not fit on the screen.
Using the hard keys
olume dial - Rotaterightorlef
Main menu screen
After going through the initial screen calibration, you will see the Main Men
screen. This is the screen that you will generally come back to each time yo
exit othe r fu n ct i ons.
oincrease or decreasethevolume.
the top of th e Main Menu screen, you will see the speake
date and battery icon.
•
To adjust the volume, use the volume dial on the right-hand side of the device.
•
To a djust the tim e/ date, see “Setting t he Time/Date” on page 30.
•
For more information on the batte ry icon, see “Charging the Device” on page 14.
19
olume, time
Page 20

g
r
Basics
There are also fourpro
Navigator. Refer to the Navigation software
documentation for more information on how to use the
devicein navigation mode.
MP3. See “MP3 Player” on page 22 for more
information.
Photo. See “Photo Viewer” on page 26 for more
information.
Setup. See “Settings” on page 29 for more information.
am icons onthe Main Menu panel.
20
Page 21

A
p
p
r
gat
Navigation
Accessing the Navigation Fu nc tio n
Switch the un i t on and tap Navigatorinthe Main Menu screen.
fter the application loads, the main Navigator menu will a
more information regardingthe Navigator function please seethe
Fo
Navi
or software’s documentation.
21
ear.
Page 22

r
y
r
c
f
MP3 Player
This chapter describes how to use the MP3playerincluded on this device.
Accessing the MP3 Playe
Switch the un i t on and tap MP3 inthe Main Menu screen.
The MP3 screen will now appear in the displa
NOTE: Music must be l o ad e d to th e SD memo
“Conne
ting to a Computer” on page 13 for more information.
NOTE: The
ollowing file formats can be played on the MP3 Player: MP3, WMA, WAV.
22
:
y card from your computer. See
Page 23

r
Rep
Mp3 PlayerScreen Definitions
Display
MP3 Playe
Distance through
Track
Buttons
Play / Pause
Skip back
Shuffle
Browse
Repeat
eat
Minimis Inf Exi
Shuffle
Volume
Stop
Volume
+/-
23
Page 24

r
T
t
Alt
r
p
right
MP3 Player
Using the Playe
Playing music
o play or pause music, tap the Play/Pause button .
To skip to
To go to the beginning of the current track or skip back to the previous track,
tap the Skip back button .
he nexttrack,tapthe Skipforward button .
Adjusting the volume
To adjust the volume, press the Volume +/- buttons .
ernatively, you can use the volume dial on the side of the device.
Changing the orderoftracks
To choose between playing tracks in random or sequential order, tap the
Shuffle button . The current order is indicated in the top right-hand side
of the scr e en (Play m o de).
Repeating tracks
To choose between repeating tracks or not, tap the Repeat button . T he
cu
rent mode is indicated in the to
-hand side of the screen.
24
Page 25

r
play
MP3 Playe
Creating a playlist
Tap the Browse button . The following screen will now appear in the
dis
NOTE: By default, all music tracks on the SD/MMC card are added to the playlist.
NOTE: To change which track is highlighted, tap the up/down arrow keys or tap the
track on the touch screen.
•
To remove ALL tracks from the play list, press the Remove all tracks button . You
will b e asked to confir m this op eration.
•
To remove only the currently highlighte d tra c k, pres s the Remove track button .
•
To add tracks, press the Add track button , then navigate to the track(s) you
would like to add.
•
NOTE: For more information, tap .
NOTE: To exit the mp3 player, tap .
25
Page 26

t
p
pear
cog
Photo Viewer
This chapter describes how to access and use thephoto viewer.
Accessing the Phot o Viewer
Switch the un i t on and tap Photo in the Main Menu screen.
The Pho
NOTE: Unre
o Viewerscreen will now a
nised files or folders will be appear with question marks (?).
in the display:
26
Page 27
r
r
V
r
(Y
y)
t
key)
t
rotat
t
r
Photo Viewe
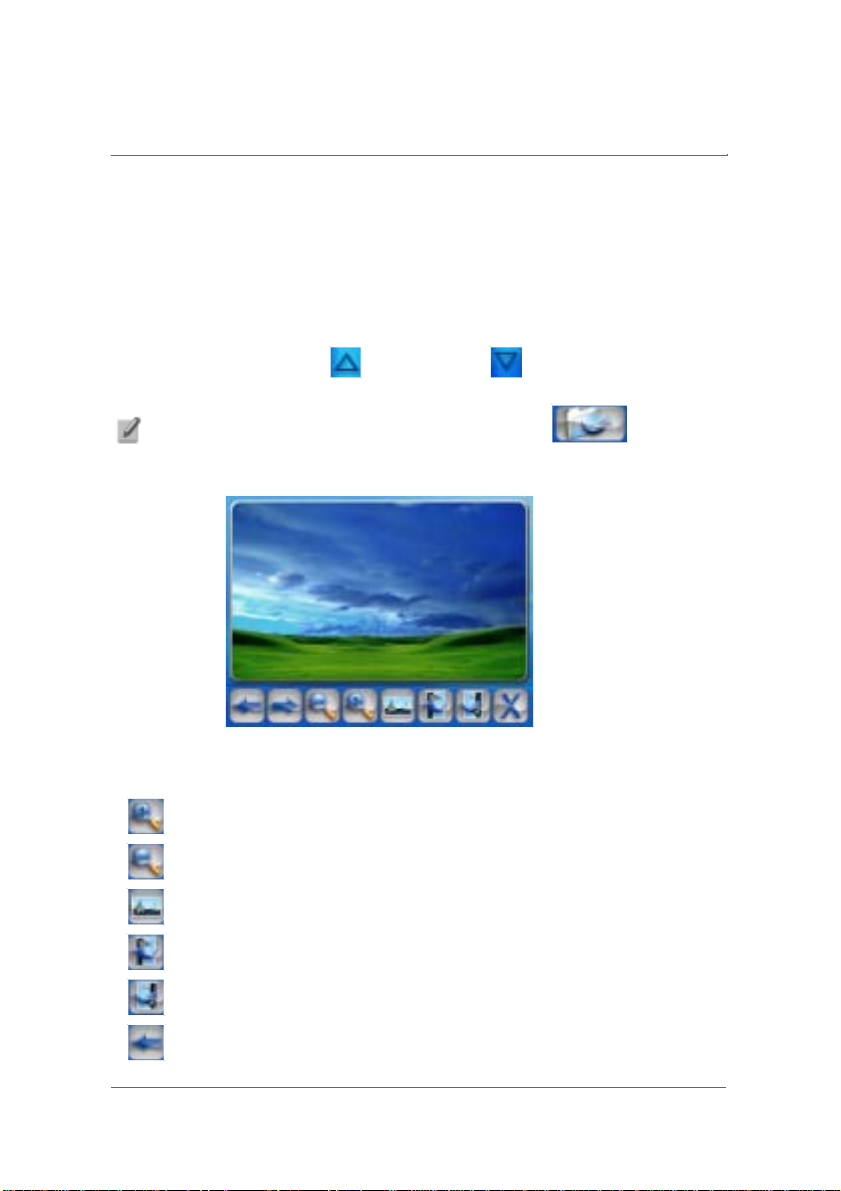
Using the PhotoViewe
You can view either individual photos orslideshows onyourdevice.
iewing photos
If you cannot immediately see the photo thumbnails you are looking for, but
see folders, then you can tap these to access their contents.
You can also tap Scroll up or Sc
list of folders or photos.
NOTE: To move up one level while browsing for photo s , tap
Once you tap on a thumbnail,you will see a screen similartothe following:
You will see several options at the bottom of the screen, which are defined as
follows:
- Zoom in
- Zoom out(You canalsousethezoom ou
- View photo at de faul
ou can also use the zoom in ke
oll down to search up or down the
ion
- View photo at 90° (clockwise) rotation
- View pho
- View p
o at 90° (anticlockwise)rotation
evious photo
27
Page 28

t
p
p
c
r
f
Photo Viewer
- View nex
- Exit screen
hoto
Using the slideshow
From the Photo Viewer screen, press the Slideshow button . The
slideshow will start.
To sto
the slideshow,click anywhereonthe screen.
NOTE: Photos must be loaded to the SD memory card from your computer. See
“Conne
ting to a Computer” on page 13 for more information.
NOTE: The following file formats can be viewe d on you
images), JPEG, PNG.
NOTE: When not all o
drag the photo by tapping anywhere on the photo and moving it in any direction.
NOTE: For more information, tap .
NOTE: To exit the photo viewer, ta p .
the photo is viewable (due to using the zoom function), you ca n
device: BMP, GIF (Still
28
Page 29

tup
t
A
t
t
r
Settings
Accessing the Setup Screen
To access the settings features on your device:
Switch the un i t on and tap Setup in the Main Menu screen.
The Se
screen will now appearinthe display:
his screen you can access:
From
udio Setting – Adjus
Screen Setting – Calibrate touch screen and adjust brightness and idle time.
Time/Date – Set the time/date
Language – Select the default language
System Info – View system information
he volume and setup the FM transmitte
29
Page 30

r
ging
p
Settings
Adjusting the Settings
Setting the Time/Date
Choose Time/Date from the Setup screen.
The Time/Date screen will now appea
Chan
Ta
the Time Zone
in the display:
30
Page 31

p
Tap on a region .
on a city .
Ta
Settings
Tap
31
Page 32

g
j
j
y
p
Settings
Changing the Time/Date
Tap
The followin
To change the Time, tap one of the time fields, then use and to
ad
ust.
To change the Date, tap one of the date fields, then use and to
ust.
ad
When
screen will appear: .
ou have finished adjustingthe time/date, ta
.
32
Page 33

V
A
p
p
r
t
t
y
Settings
olume
Choose Audio Settingfrom the Setup screen.
The
udio Setting screen will now a
ear in the display.
Tap o
When
to adjus
ou have finished adjustingthe volume, tap .
he volume.
33
Page 34

r
A
A
p
p
Settings
FM Transmitte
The FM transmitter can be used to transmit audio as a radio signal that can
be picked up on your car radio.
Choose
The
udio Settingfrom the Setup screen.
udio Setting screen will now a
ear in the display.
34
Page 35

t
per
,
y
j
r
r
t
r
Settings
Tap
You can specify two channels to transmit the audio to your radio. That way if
one channel ex
To choose which channel to ad
to adjust the frequencyforthatchannel.
To activate the FM
When you have finished adjusting the FM transmitter, tap .
Now simply tune your car radio into the same frequency.
o access the FM transmitterscreen.
iences interferences
ust, tap o
ansmitter, chack the check box.
ou can changetothe otherchannel.
,thentap o
35
Page 36

p
pear
j
t
t
Adj
Settings
Screen options
Choose Screen Settingfrom the Setup screen.
The Screen settingscreen will now a
usting the Brightness
Ad
Tap or to adjus
usting the Idle Time
he backlight brightness.
in the display:
To adjust the idle time (the time the device will wait before going to sleep if not
being used), tap the right or left arrows.
36
Page 37

t
r
Calibrating the Screen
Settings
To calibrate
Now follow the inst
he screen, tap .
uctionstocalibratethe screen.
37
Page 38

f y
guagey
Settings
Choosing the Language
Choose Language from the Setup screen.
The Language screen will now appear in the displ ay:
NOTE: I
up or Scroll down to search up or down the list of langauges.
Tap the la n
ou cannot immediately see the language you are looking for, you can Scroll
ou want to use, then tap .
38
Page 39

y
re y
System Information
Choose System Info from the Setup screen.
The S
stem Info screen will now appearin the display:
Settings
ou can see inf ormation about yourdevice.
He
Tap to exit this screen.
39
Page 40

t
y
r
Resetting the Device
If your device ever stops responding to your commands, you may need to
reset i t. Th e re a re two reset o ptio n s: a soft rese t and a hard reset. Alw ay s try
he soft reset first, asthis simpl
Performing a soft reset
Use a pen or similar object to press the soft reset button at the bottom of your
device.
Performing a hard reset
If a soft reset does not correct the problem, perform a hard reset. A hard reset
will delete settings and reset the GPS. To perform a hard reset, move the
hardware reset switch to the right and then back to the left.
estarts the device and clearsthe memory.
40
Page 41

Regulation & Safety & notices.
1. FCC Notices
Federal Communication Commi ssion
Interference Statement
This equipment has been tested and found to comply with the limits for a
Class B digital device, pursuant to Part 15 of the FCC Rules. T hese limits
are designed to provide reasonable protection against harmful interference in
a residential installation. This equipment generates, uses and can radiate
radio frequency energy and, if not installed and used in accordance with the
instructions, may cause harmful interference to radio communications.
However, there is no guarantee that interference will not occur in a particular
installation. If this equipment does cause harmful interference to radio or
television reception, which can be determined by turning the equipment off
and on, the user is encouraged
to try to correct the interference by one of the following measures:
z Reorient or relocate the receiving antenna.
z Increase the separation between the equipment and
receiver.
z Connect the equipment into an outlet on a circuit
different from that to which the receiver is connected.
z Consult the dealer or an experienced radio/TV
technician for help.
FCC Caution: Any changes or modifications not expressly
approved by the party responsible for compliance could
void the user's authority to operate this equipment.
This device complies with Part 15 of the FCC Rules.
Operation is subject to the following two conditions: (1)
This device may not cause harmful interference, and (2)
this device must accept any interference received,
including interference that may cause undesired operation.
Page 42

This device and its antenna(s) must not be co-located or
operating in conjunction with any other antenna or
transmitter.
2.R&TTE Notices
3.Caution
Caution:
1. risk of explosion if battery is replaced by an incorrect type.
2. Dispose of used batteries according to the instruction.
Page 43

t
e
pag
s
g
Troubleshooting Guide
Problem Possible Reason Solution
Device will not
switch on.
Bad reception. Folding antenna i
New Memory
Card doesn’t
work.
Screen is frozen,
or device is
behaving
strangely
I have a problem
with the
navigator
software.
I cannot play
music on the
device.
My music
appears to be
playing, but I
cannot hear it.
Hardware rese
switch is in th
wrongposition.
Battery is flat. Make sure that the battery is
in closed or wron
position.
Car windows are
tinted, blocking
GPS reception.
Signal is weak in
this area.
Card has not yet
been formatted
correctly.
Device is in need
of a reset.
Music may be the
wrong format
Music track(s)
may be corrupt.
Volume is set too
low.
Make sure the hardware reset
switch has not been moved to
the OFF position. If it has , move
it back to the ON position..
properly charged. See
“Charging the Device” on
e 14 for moreinformation.
Unfold the folding antenna and
make sure that it is parallel with
the ground, i.e. in a horizontal
position..
Use an external antenna.
Use an external antenna.
Format card using FAT file
system
Perform a soft reset, or if
necessary a hard reset. See
“Resetting the Device” on
page 40 for more information.
For all Navigator related
questions, please refer to the
specific Navigator software
manual.
Make sure that all music is MP3,
WMA, or WAV format.
Make sure that the track plays
correctly on your computer.
Increase the volume.
41
Page 44

ger
j
pag
Troubleshooting Guide
I cannot see my
photos.
The touch
screen does not
react correctly to
taps.
fin
Music track(s)
may be corrupt.
When earphones
are plugged in, the
speakers are
automatically
muted.
Images may be
the wrong format.
Image file(s) may
be corrupt.
The touch scre e n
may need to be
re-calibrated
Make sure that the track plays
correctly on your computer.
Listen through the earphones,
or disconnect them to hear
sound from the speakers.
Make sure that your images are
pg or bmp format.
Make sure that the image can
be viewed correctly on your
computer.
Re-calibrate the screen. See
“Calibrating the Screen” on
e 37 for moreinformation.
42
 Loading...