

Page 1
Page 2
1
2
3
4
5
6
7
8
9
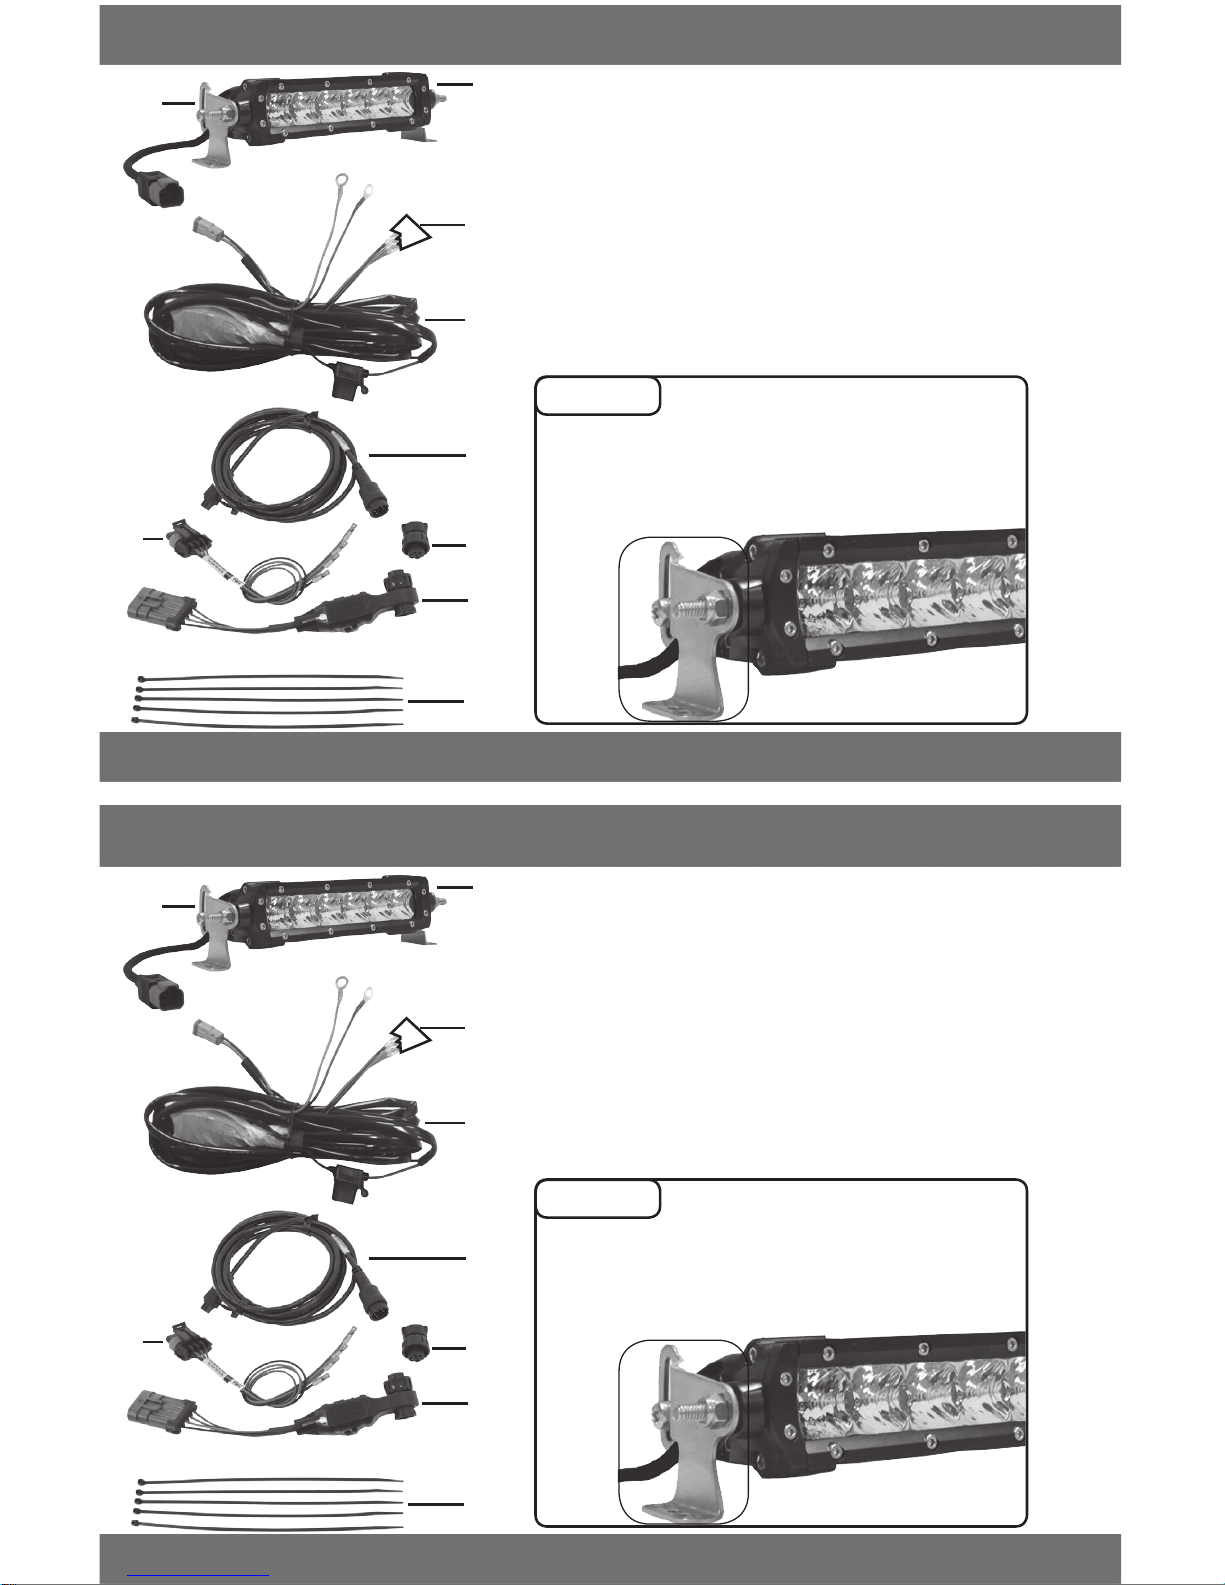
1 - LED Light
2 - Mount Hardware
3 - Toggle Switch (if not using Power Switch)
4 - Main Cable
5 - Display Adapter Cable
6 - Switch Adapter Cable
7 - Terminating Cap
8 - Power Switch
9 - Zipties
STEP 1
Install mount hardware to
both sides of LED light as shown.
Install the LED light on the vehicle
using the remaining hardware.
1
2
3
4
5
6
7
8
9
1 - LED Light
2 - Mount Hardware
3 - Toggle Switch (if not using Power Switch)
4 - Main Cable
5 - Display Adapter Cable
6 - Switch Adapter Cable
7 - Terminating Cap
8 - Power Switch
9 - Zipties
STEP 1
Install mount hardware to
both sides of LED light as shown.
Install the LED light on the vehicle
using the remaining hardware.
Page 3
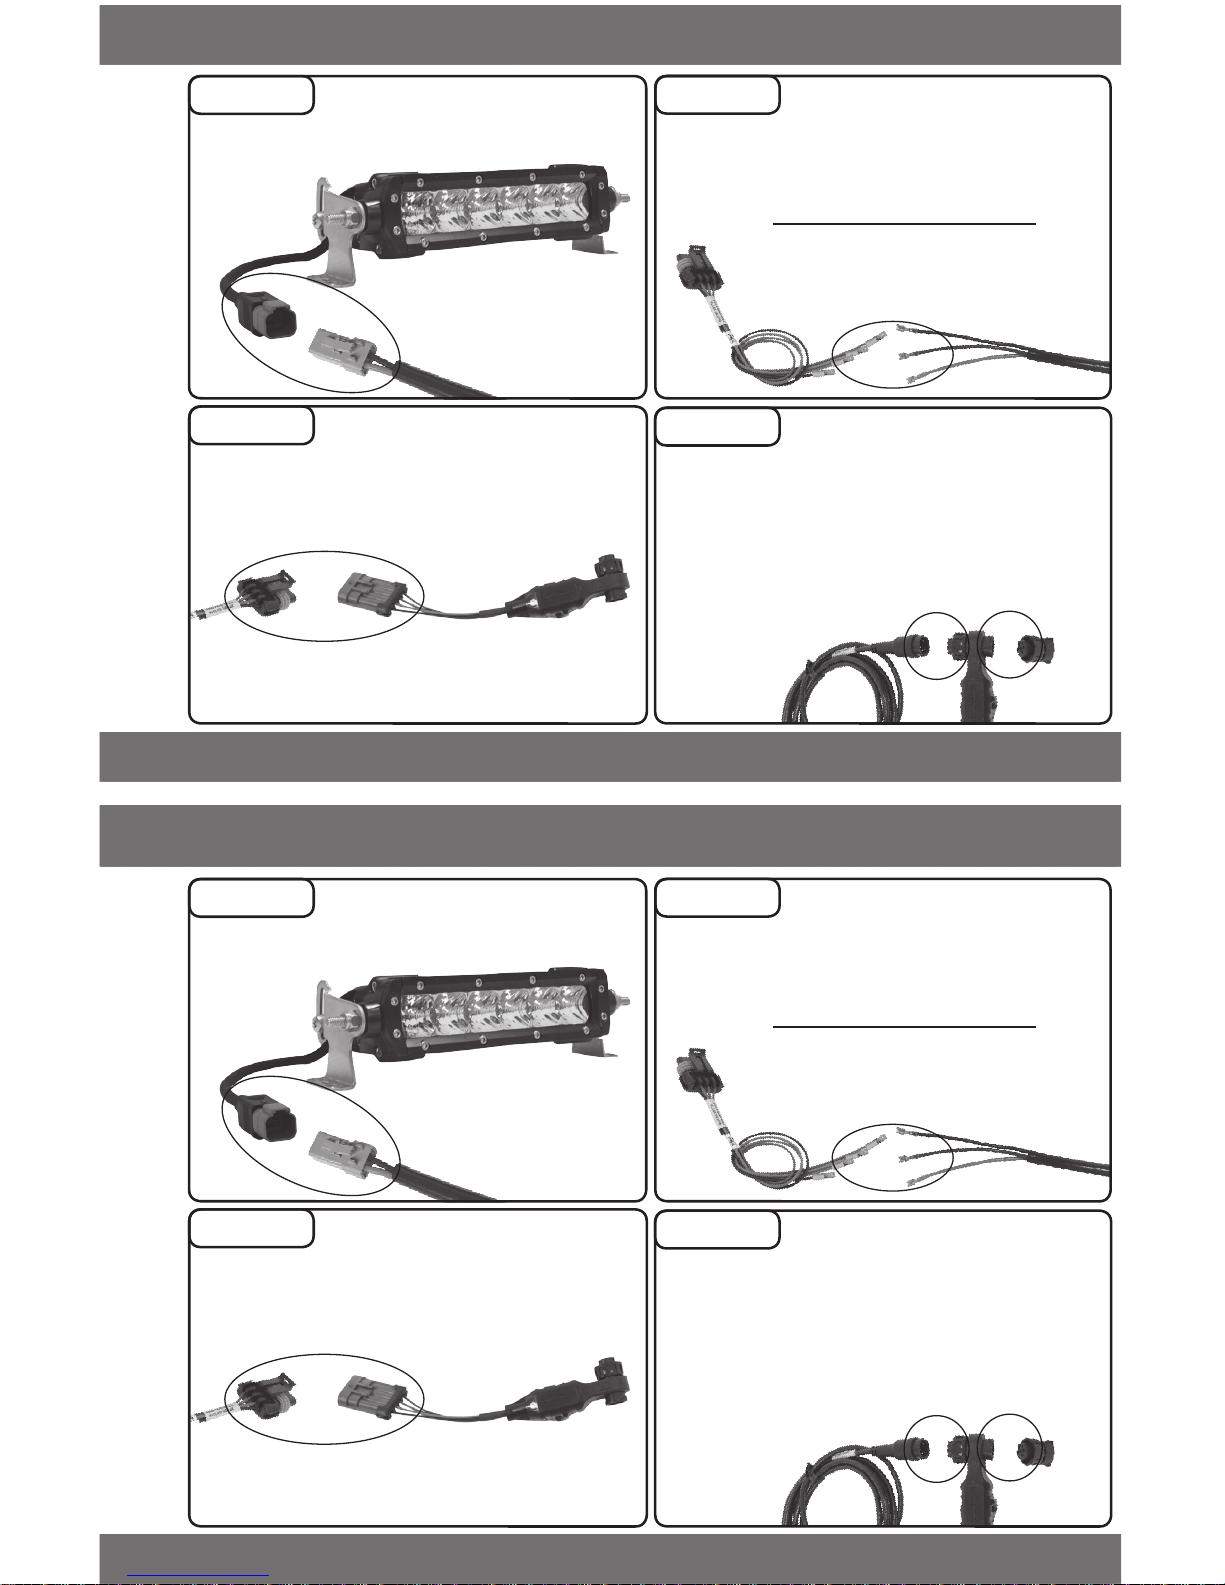
STEP 2
Connect Main Cable
connector to the LED connector.
STEP 3
Connect the 3 color
wires on the Main Cable to the
3 wires on the Switch Adapter.
STEP 4
Insert the Adapter
connector into the EAS
connector as shown.
STEP 5
Align and insert the
Display Adapter Cable and
Terminating Cap into the Power
switch connectors. Twist the
nut on each to tighten the
connections.
Adapter Main Cable
Black-----------------------Black
Red---------------------------Red
Blue--------------------------Blue
Green
STEP 2
Connect Main Cable
connector to the LED connector.
STEP 3
Connect the 3 color
wires on the Main Cable to the
3 wires on the Switch Adapter.
STEP 4
Insert the Adapter
connector into the EAS
connector as shown.
STEP 5
Align and insert the
Display Adapter Cable and
Terminating Cap into the Power
switch connectors. Twist the
nut on each to tighten the
connections.
Adapter Main Cable
Black-----------------------Black
Red---------------------------Red
Blue--------------------------Blue
Green
Page 4
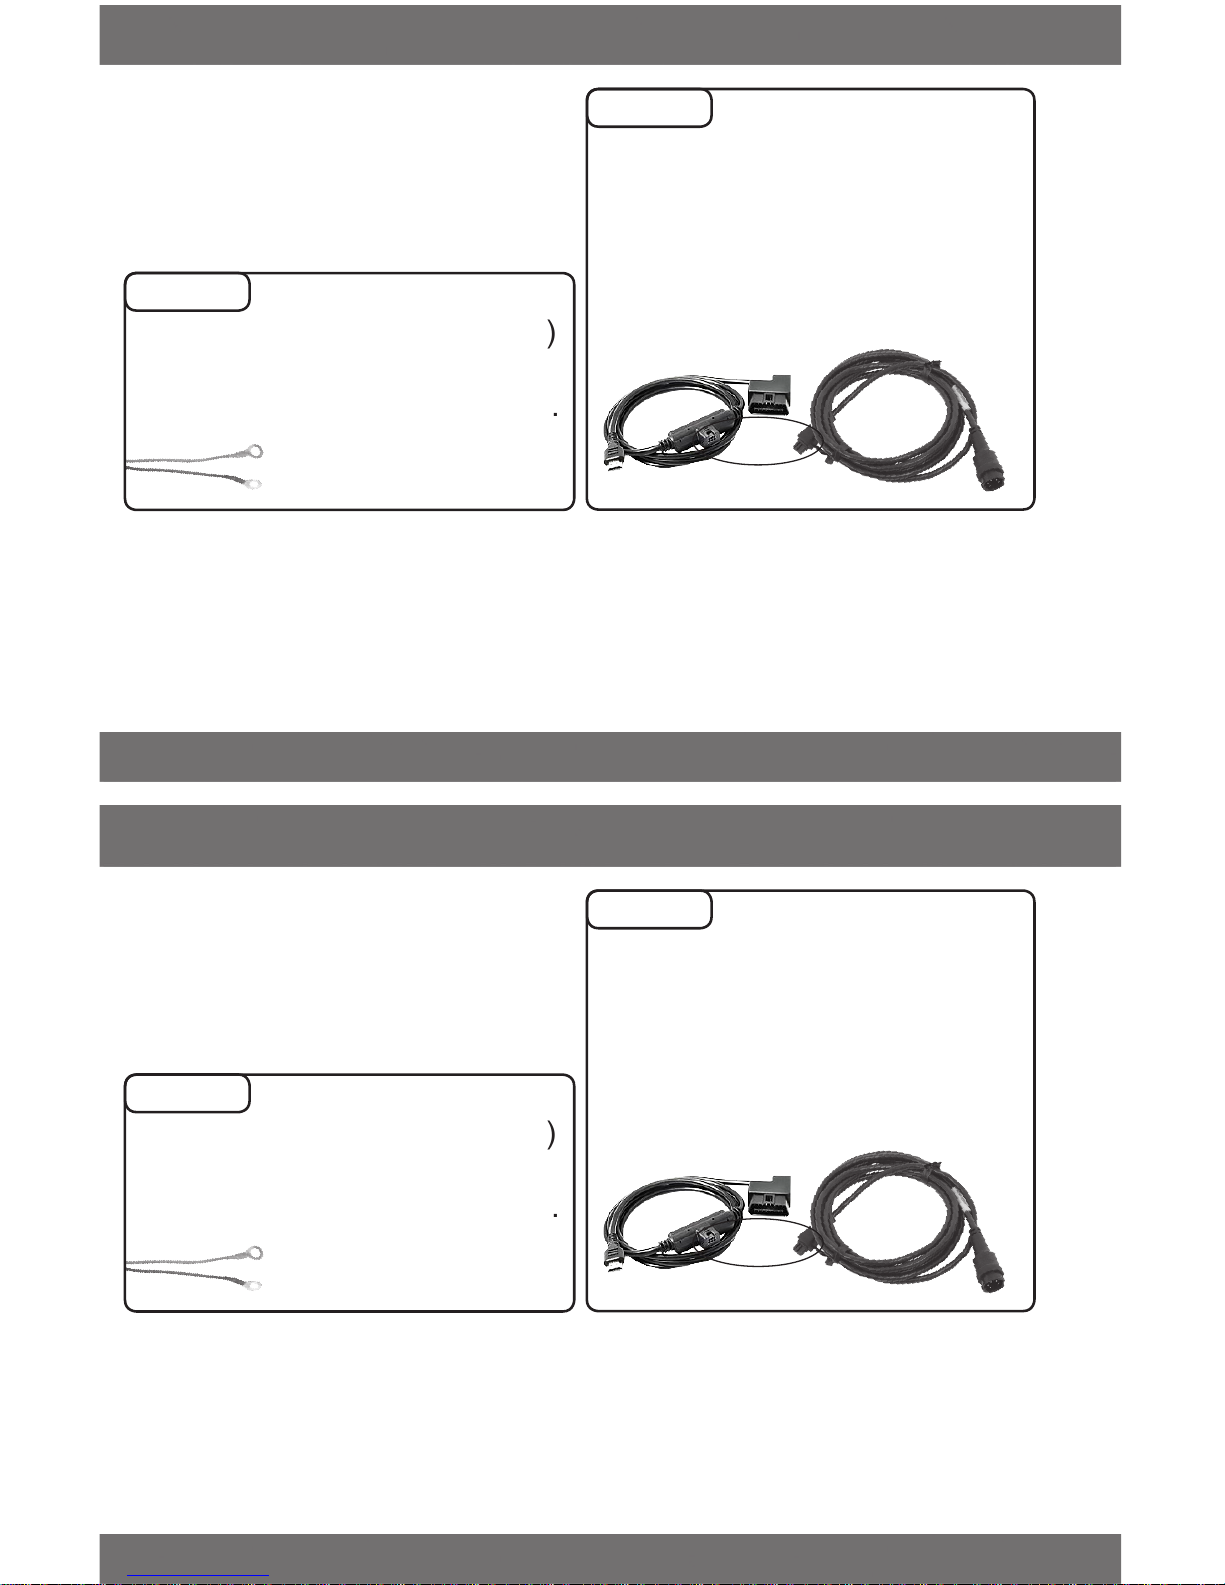
STEP 6
Connect the Red
wire terminal to the Positive (+)
side of the battery. Connect the
Black wire to a suitable ground.
Before moving to the next step,
double check the connections
and route the cables accordingly.
Use the zip ties to fasten the
cables in place.
STEP 7
Plug the Display
Adapter Cable into the already
installed display device HDMI
cable. For more information
refer to the Display’s User
Manuals.
BAT (+)
GND
Copyright© 2018 Rev 00
For additional questions not found in this guide call:
Technical Support: (855) 292-2121, 8:00 am - 5:00 pm MST
STEP 6
Connect the Red
wire terminal to the Positive (+)
side of the battery. Connect the
Black wire to a suitable ground.
Before moving to the next step,
double check the connections
and route the cables accordingly.
Use the zip ties to fasten the
cables in place.
STEP 7
Plug the Display
Adapter Cable into the already
installed display device HDMI
cable. For more information
refer to the Display’s User
Manuals.
BAT (+)
GND
Copyright© 2018 Rev 00
For additional questions not found in this guide call:
Technical Support: (855) 292-2121, 8:00 am - 5:00 pm MST
 Loading...