

Page 1
Wi-Fi/RF COMBO COMPLIANCE SYSTEMS
LCS-120-01, LCS-120-01- D, LCS-121-01 AND LCS-121-01-D
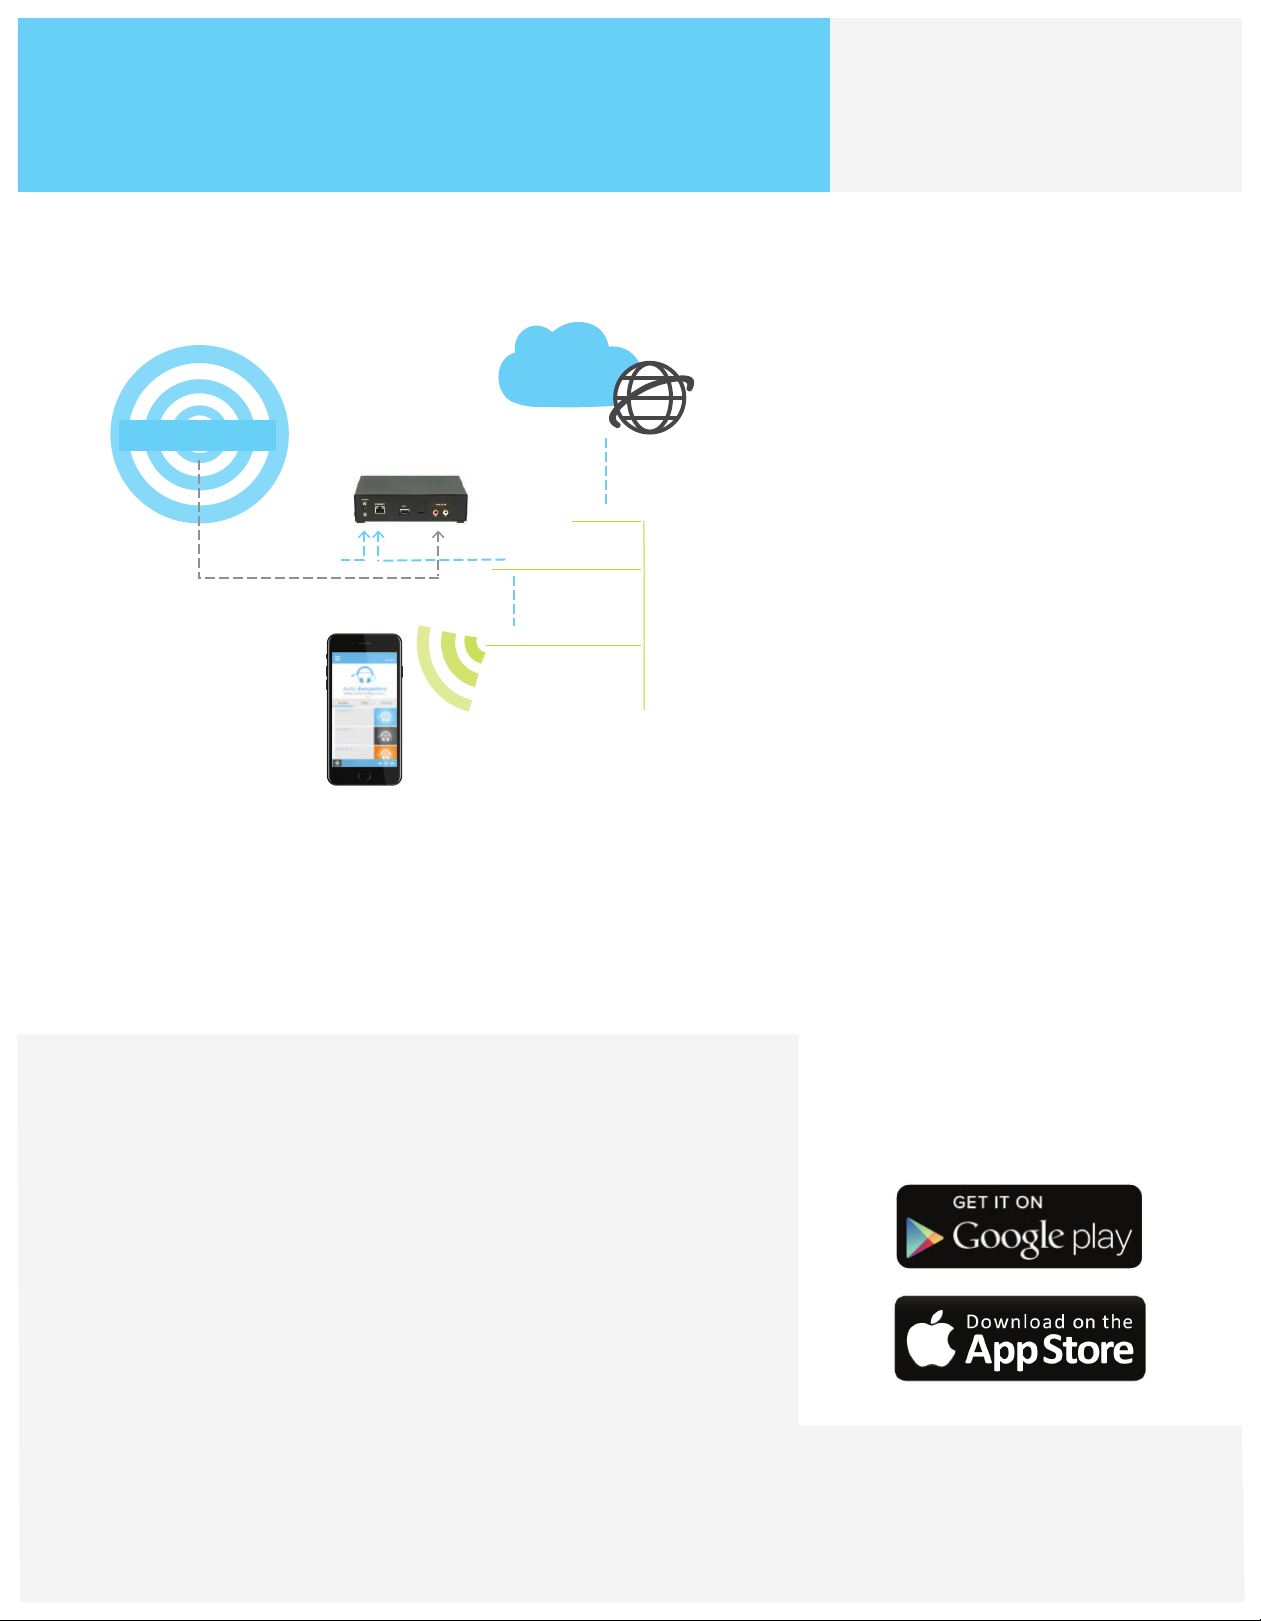
Let’s get this audio started!AUDIO EVERYWHERE SETUP
Audio Source
MX-5 AE Server
Power Input
Cloud Services
Internet
Router
Ethernet Switch
QUICK START GUIDE
1.
Connect Audio
Connect the audio source(s) to the
server via the RCA connectors on
the rear panel.
Note: The input jacks accept line-level mono
input. If stereo output is required, use two
audio inputs for L and R audio, then select
“stereo”, in the Cloud Server. (See Cloud
Service Setup on
www.listentech.com/support/manuals)
Line Level Audio
(Wireless Access Point)
WAP
Wireless
router combines
many features
Smartphone
TROUBLESHOOTING TIP
Experiencing lack of signal? Check IP addresses on the Venue Server
and smartphones to ensure they are on the same public network.
CLOUD SERVER SETUP (optional)
The cloud server offers in-app marketing features including banner
ads and promotional videos, web-based remote setup and
2.
Network Connection & Power
Connect the AE Server to your
local area network (LAN) via the
ethernet port on the back of the
server then plug in the power
cable. The LAN should have at
least one wireless access point
(WAP) and a router, wireless
router, or a DHCP server. The
server and smartphones need to
be on the same public network.
3.
Download App
Download the Audio Everywhere
app from the App Store or Google
Play. Join the Wi-Fi network associated with the Venue Server (i.e., on
the same LAN). Launch the app,
select channel to stream, enjoy!
maintenance, and advanced customization. Create an account with
the Cloud Server by sending an email to [email protected]
including the following information:
User Setup
Last Name
First Name
Phone
Email
Company Setup
Company Name
Phone
Venue Type
Address
AE Server Venue Serial Number
*Serial number looks like: AEL6-2345-43RF-TEW9
You will receive an email with login
credentials to
service.audioeverywhere.com
Page 2
LISTENRF SETUP
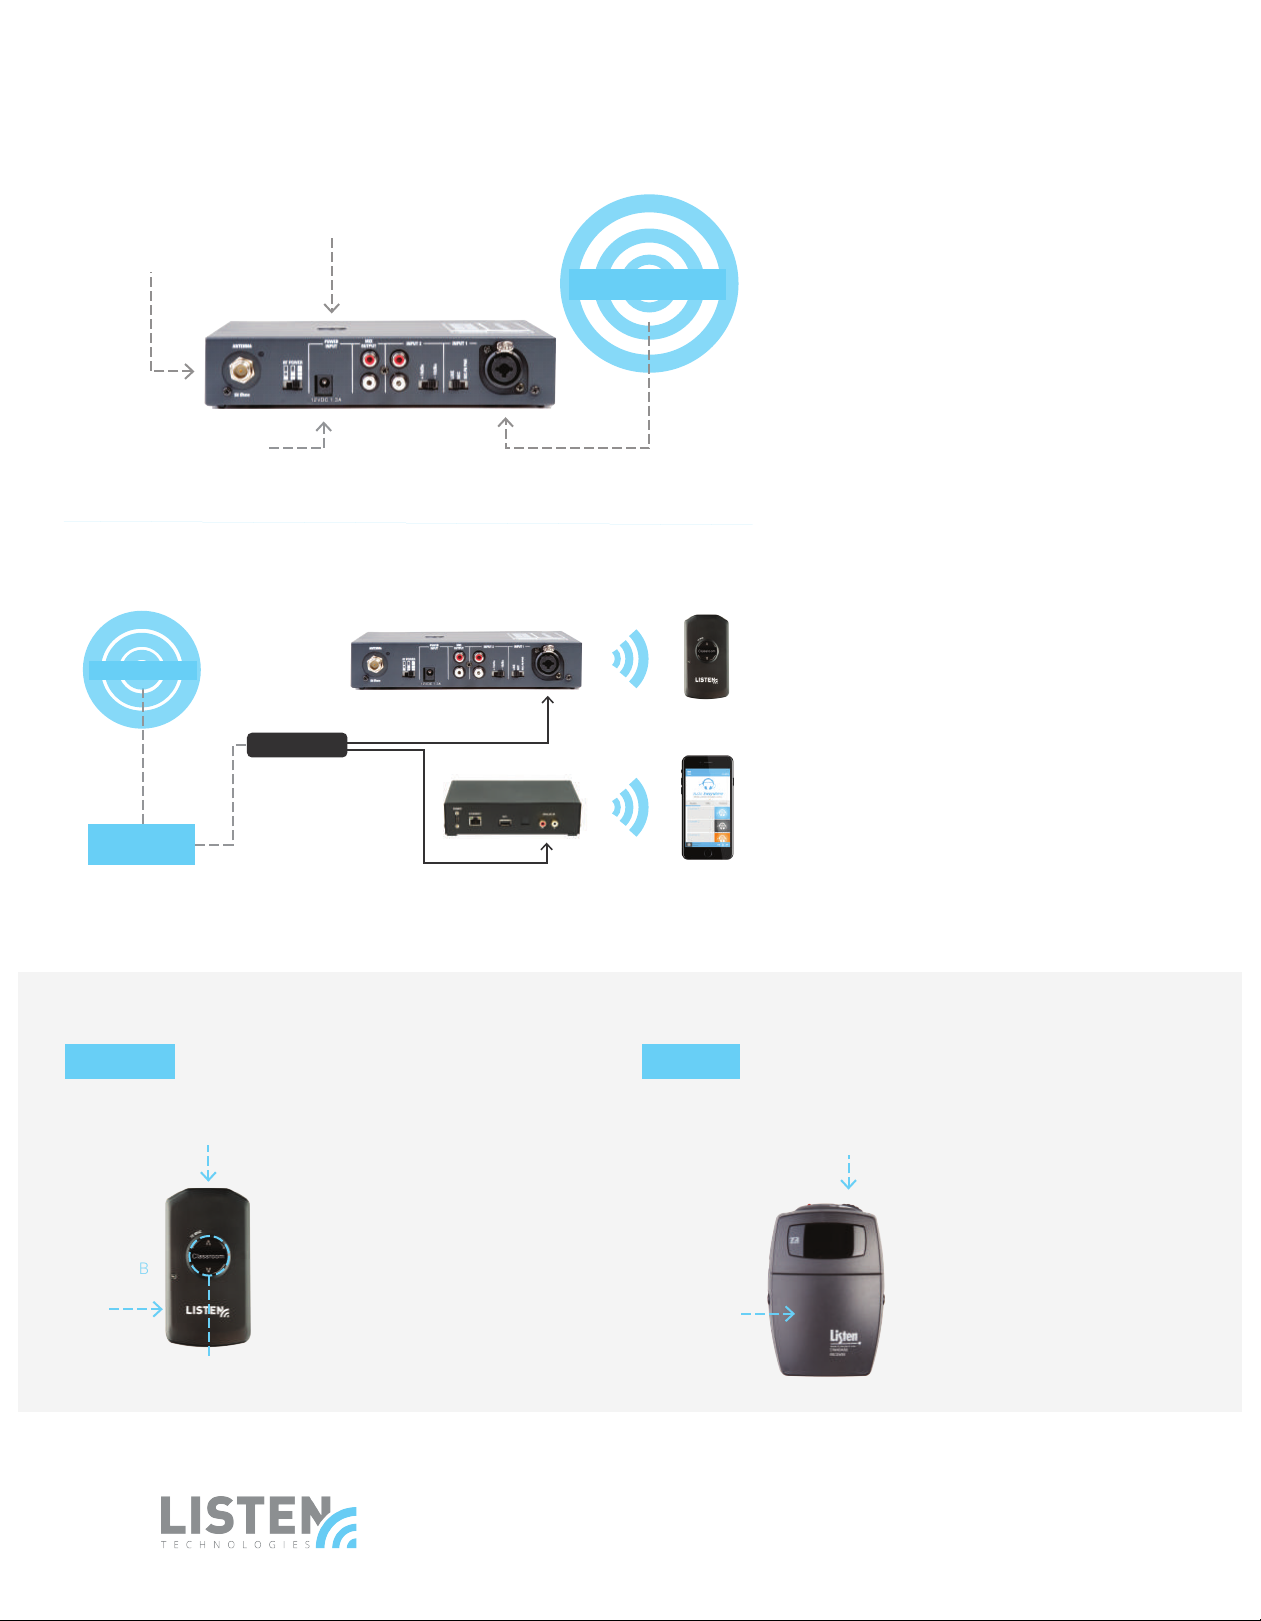
Antenna Output (LT-803)
Antenna Output (LT-800)
Power Input
Audio Source
Setting up Transmitter
Audio Source
RF Transmitter
RF Transmitter
Connect Antenna
1.
If using the LT-803, remove the
rubber plug on the top of the unit
and connect the antenna.
If using the LT-800, connect the
antenna to the back of the unit.
2.
Connect Power
Plug the power supply into the
power connector on the back
panel, then into an outlet. Turn on
by pressing the power button.
3.
Connect Audio
There are two audio inputs; input
1 is a balanced connection using
either an XLR or 1/4” phono
connector. Input 2 has two
unbalanced mixing RCA
connectors.
Dante Audio Adapter
Network
RJ45 Network Cable
Setting up Receivers
LR-4200
Power
Micro-USB
Charging
Port
Adjust Volume
MX-5 AE Server
1.
Power
To turn on the iDSP receiver, hold the
button for one second.
2.
Plug in Headset
3.
Adjust Volume
To desired level.
The receiver is charged with a micro
USB charging cable provided with the
system. When connected to the
charger, a blinking light indicates it is
being charged and a solid light
indicates a full charge.
OR
LR-200
Power & Volume Control
Front
access
door
Connect Dante Audio Adapter
with Audio (optional)
If you are using the Dante Audio
Adapter, connect the RJ45 network
cable into the Dante Adapter &
plug one of the XLR outputs to
input 1 on the LT-800/803 & the
other XLR output into the MX-5 AE
server.
1.
Power
Open the front access door, use
“battery” select switch to assign
battery type, install batteries. Rotate
the volume dial counterclockwise to
power on.
2.
Plug in Headset
3.
Adjust Volume
To desired level.
For further customization, view the QSGs (quick start guides) and manuals found at www.listentech.com/support/manuals
LISTEN TECHNOLOGIES 14912 Heritage Crest Way, Bluffdale, Utah 84065-4818 USA
Phone: +1.801.233.8992 Toll-Free: 1.800.330.0891 www.listentech.com
Copyright © 1998 - 2018 Listen Technologies Corporation. All rights reserved. 09142018-V1
 Loading...