

Lionel Operating Carousel Owner's Manual

Operating Carousel
Owner’s Manual
71-4109-250
6/01
LIONEL

Congratulations
2
C
ongratulations on your purchase of the
Lionel Operating Carousel. The
Operating Carousel is made of detailed
molded plastic, featuring hand-painted figures and a durable motor that will provide
years of reliable operation. Your Operating
Carousel can be placed on any Lionel O or
O-27 gauge three-rail layout and is
designed to operate at 12 – 18 volts alternating current.
Table of Contents
Operation and Installation of your Operating Carousel 3
Wiring your Operating Carousel 4
Operating your Operating Carousel in a Command Control Environment 5
Replacing the Lamps in your Operating Carousel 6-7
Limited Warranty/Lionel Service 8
3
Operation and Installation of your Operating Carousel
F
or optimum operation of your carousel,
your carousel can be placed on any flat,
level area of your layout that can accommodate its 10-inch diameter.
Prior to placing your carousel on your
layout, you must remove the foam that is
located between the roof and the top of the
horses. This foam is used to prevent the
horses from being damaged during transportation of your carousel. Not removing
this foam prior to operation will
permanently destroy the functionality of your carousel. After you have
removed the foam, you can place the flags
on the top of your carousel. Carefully push
the base of the flag poles into the three large
holes in the cupola at the top of the
carousel. (The smaller holes allow heat to
escape from the light bulb.)
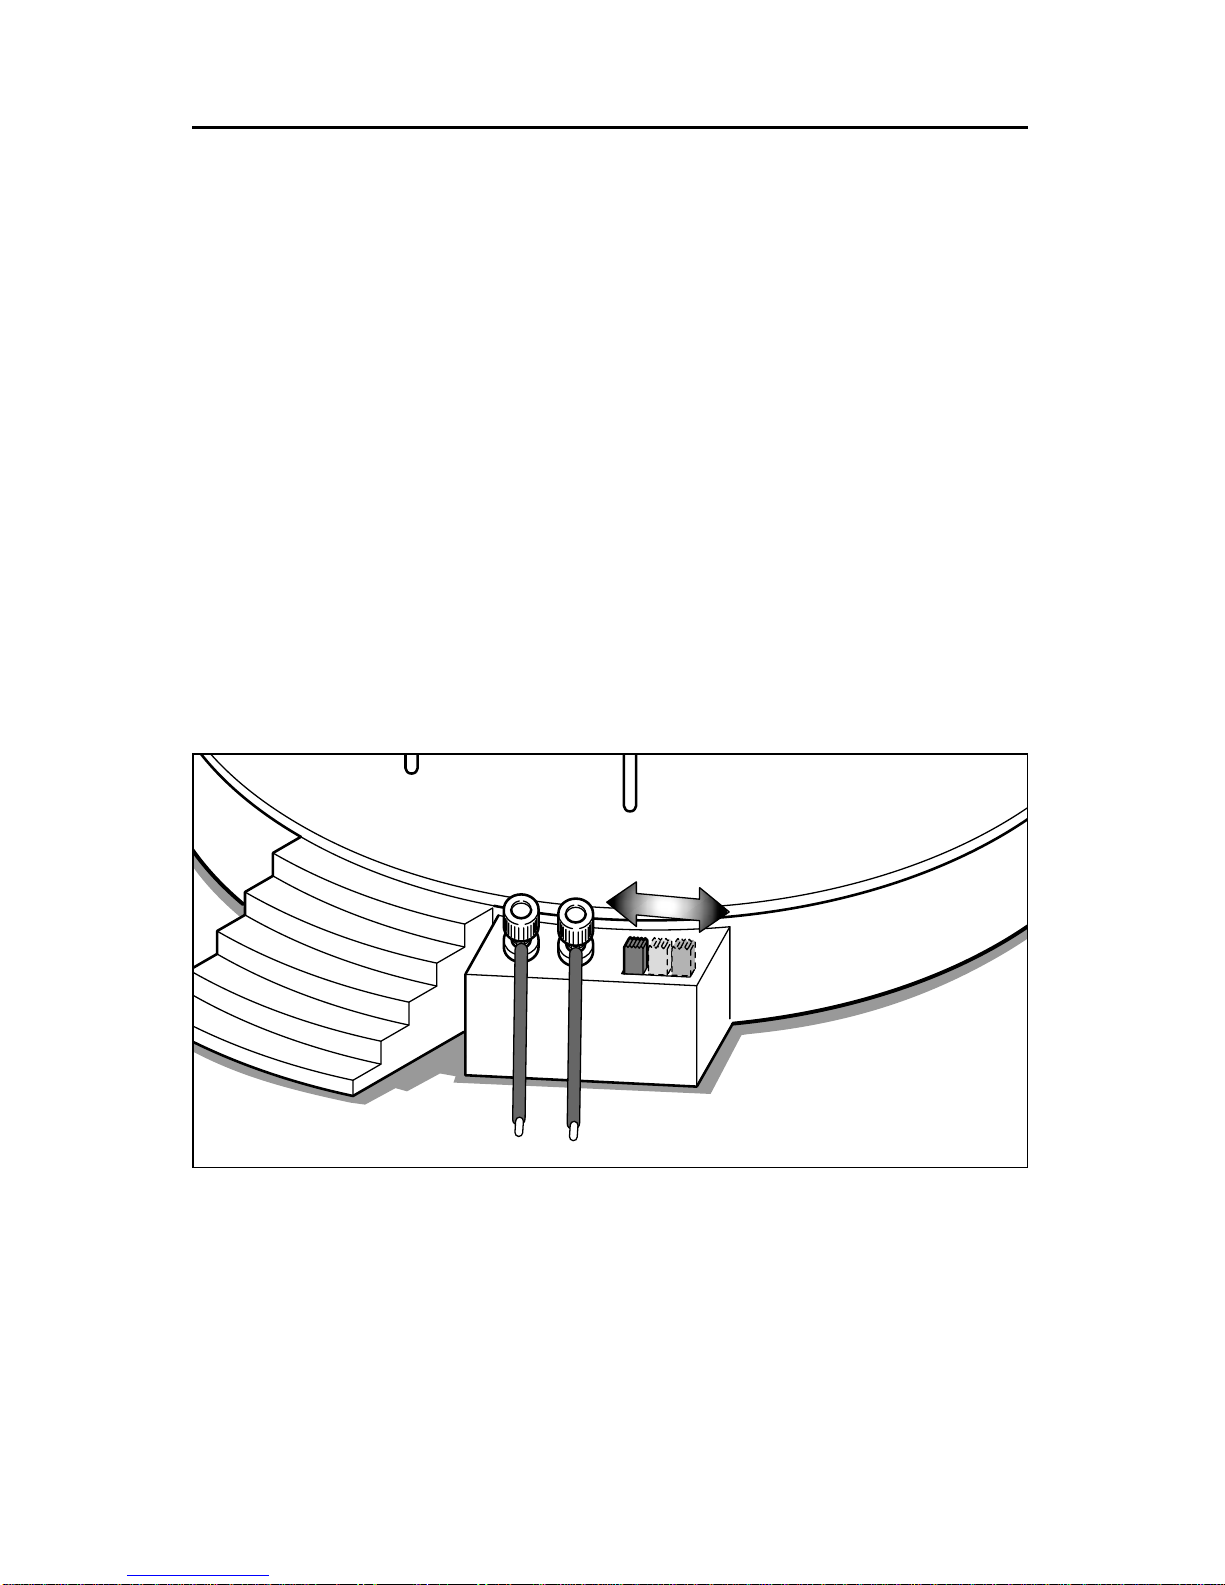
The operation of your carousel is simple.
Locate the switch located next to the thumbscrew posts. Slide the switch to the “ON”
position to activate the lighting and the
movement of the horses. Slide the switch to
the “SOUND” position to activate the music
with the lighting and movement. You can
now sit back and think of the first time that
you grabbed the brass ring on your first
carousel ride.
Sound
ON
OFF
 Loading...