

Lionel O72 Wye Remote Switch Fastrack Owner's Manual
71-2047-250
8/08
Lionel
O72 Wye Remote Switch
Owner’s Manual

C
ongratulations on your purchase of the Lionel FasTrack O72 Wye Remote Switch! This
switch features a non-derailing function, a lighted switch lamp, and a lighted controller.
The switch connects easily to other FasTrack track sections. Use the switch create a reversing
loop at the end of your mainline.
2
Table of contents
Joining the FasTrack track sections 3
Using the track extensions 3
Operating the switch 4
Changing the switch stand location 5
Routing the controller cable 6
Mounting the controllers 7
Numbering your switch controllers 7
Powering the switch through a separate power supply 8
Connecting the controller 9
Operating the switch in the TrainMaster Command Control environment 9-10
Servicing the lamps 11
Limited Warranty/Lionel Service 12
The following Lionel marks may be used throughout this instruction manual and are protected under law. All
rights reserved.
Lionel®, TrainMaster®, Odyssey®, RailSounds®, CrewTalk™, TowerCom™, DynaChuff™,
StationSounds™, Pullmor®, ElectroCoupler™, Magne-Traction®, CAB-1® Remote Controller,
PowerMaster®, Lionel ZW®, ZW®, PowerHouse®, TMCC®, Lionelville™, Lockon®, Wireless Tether™,
LionMaster®, FatBoy™, American Flyer®, TrainSounds™, PowerMax™, LEGACY™, PowerMax™ Plus
The name FasTrack® is used with permission from Pitsco, Inc.
3
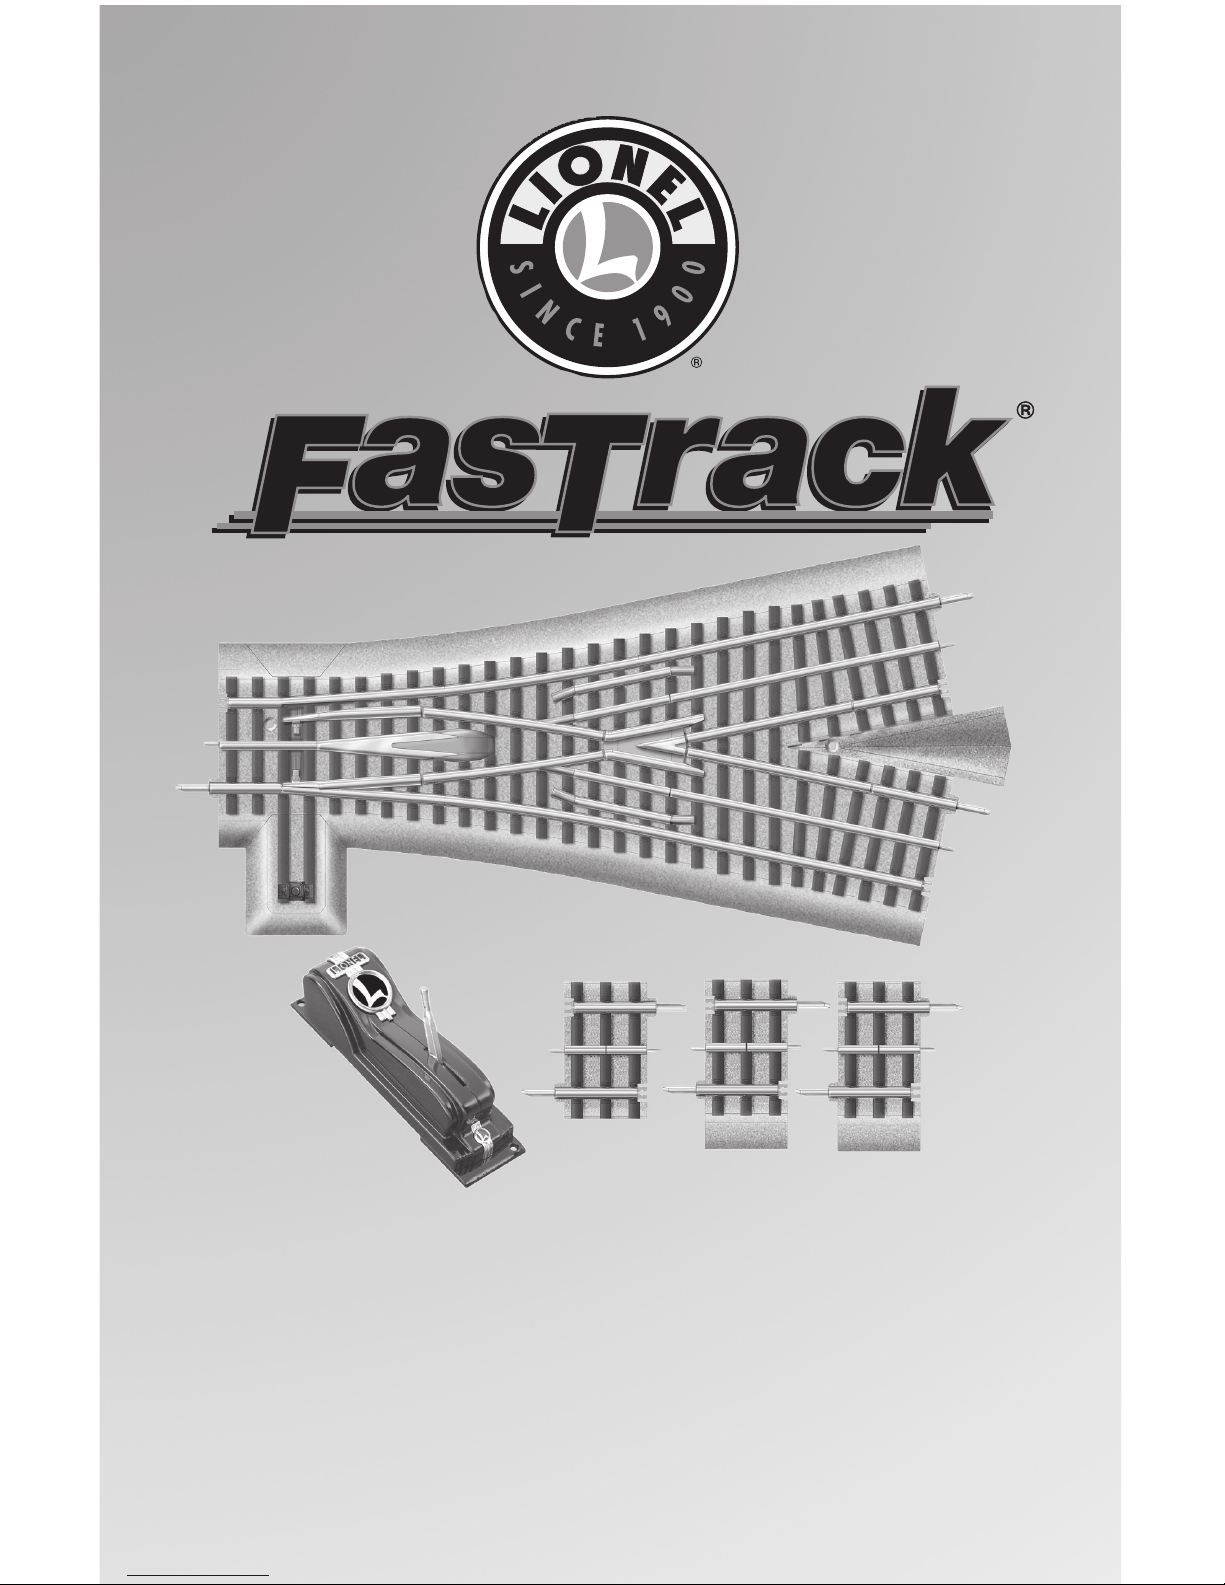
Joining the FasTrack track sections
F
asTrack track sections join together easily.
With interlocking roadbed sections and
large rail tabs, the track fits together securely
so you always get good electrical contact.
Refer to Figure 1 to see how to join the track
sections.
1. Line up your two sections of track.
2. Insert the rail tabs into the openings at
the ends of the corresponding rails.
3. Press the sections together until the
interlocking roadbed snaps into place.
Figure 1. Joining the track sections
Rail tab
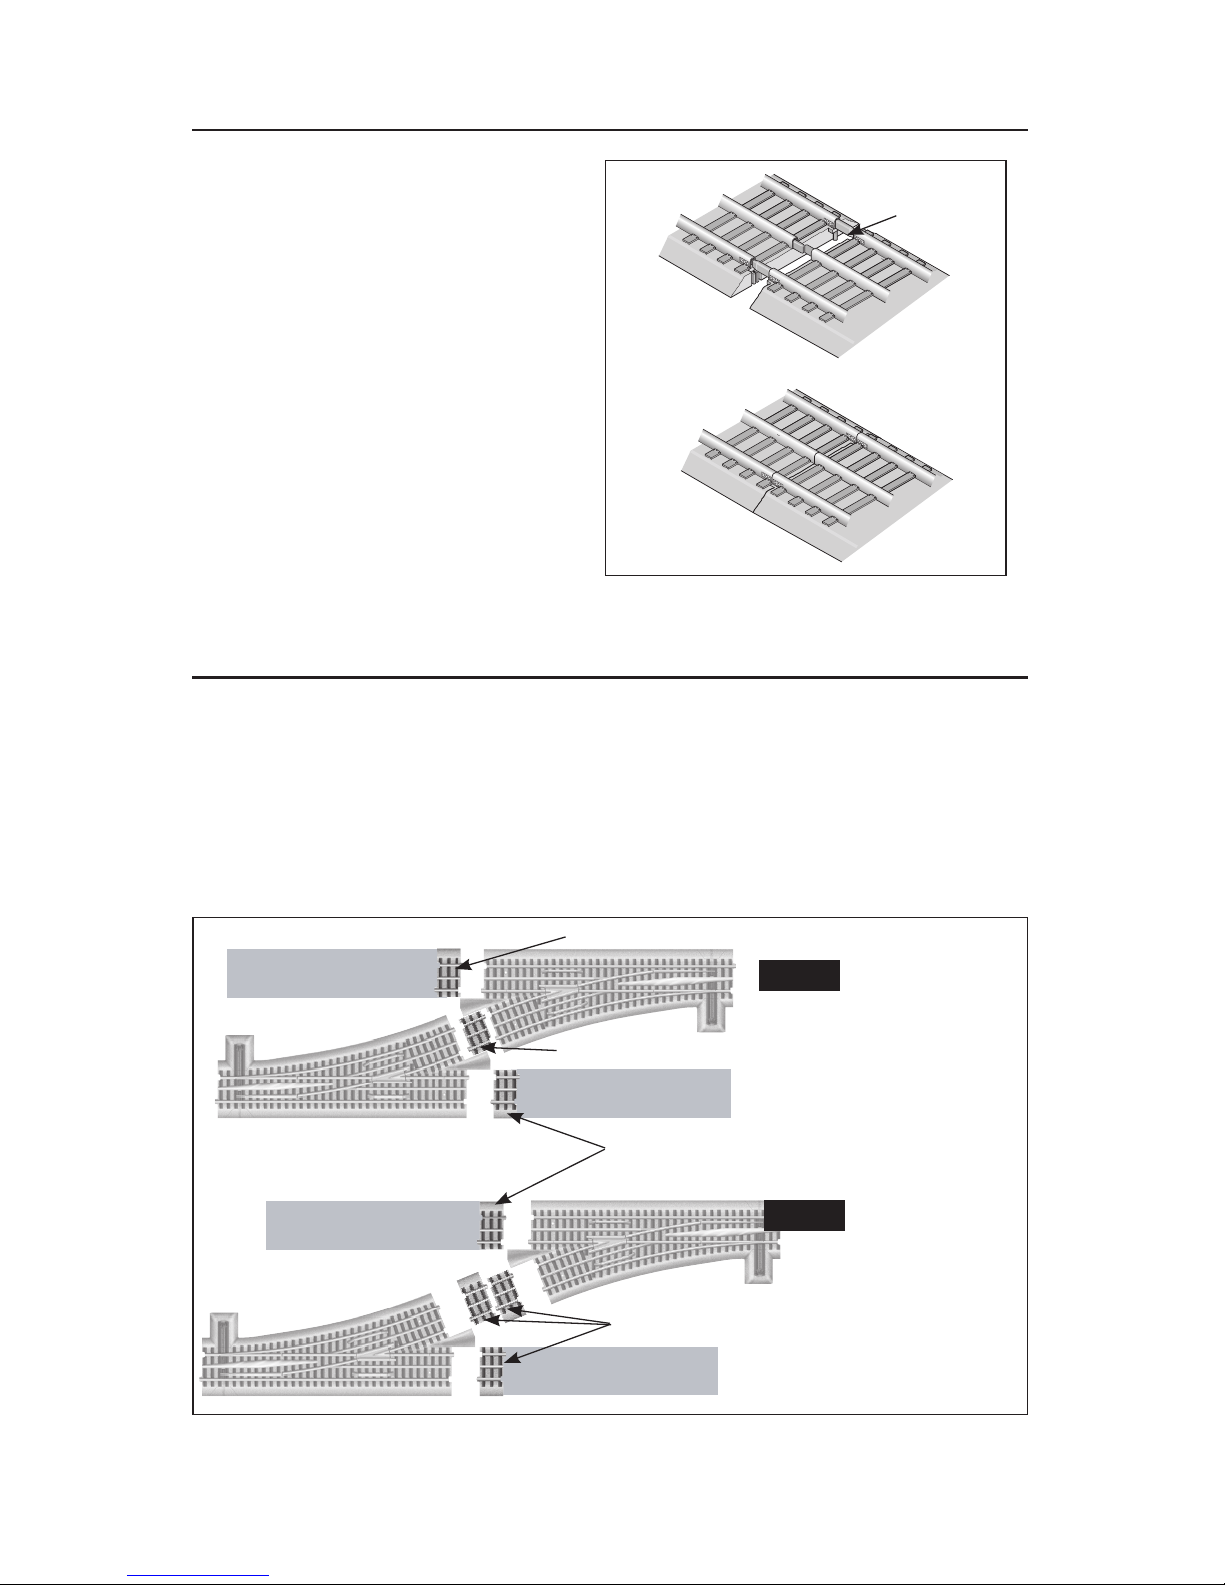
Using the track extensions
T
hree track extensions are included with your switch. Two of the extensions have beveled
roadbed on one side, and the other has no roadbed. The extensions work with the geometry
of the FasTrack roadbed.
To join the switch with a regular section of track, you will need to use an extension with
beveled roadbed. To join the track with another wye, a switch (larger than O36), or a 22.5
degree crossover, you will need to use an extension without roadbed. Refer to Figure 2.
Figure 2. Track extensions
Using two extensions
with roadbed, the
track are spaced
further apart. You
may choose to add
additional straight
sections between
Note!
Using one extension
without roadbed, two
mainlines are joined
by two switches.
The tracks keep 6”
centers.
Note!
Extension with roadbed
Extension with roadbed
Extension with roadbed
Extension without roadbed
4
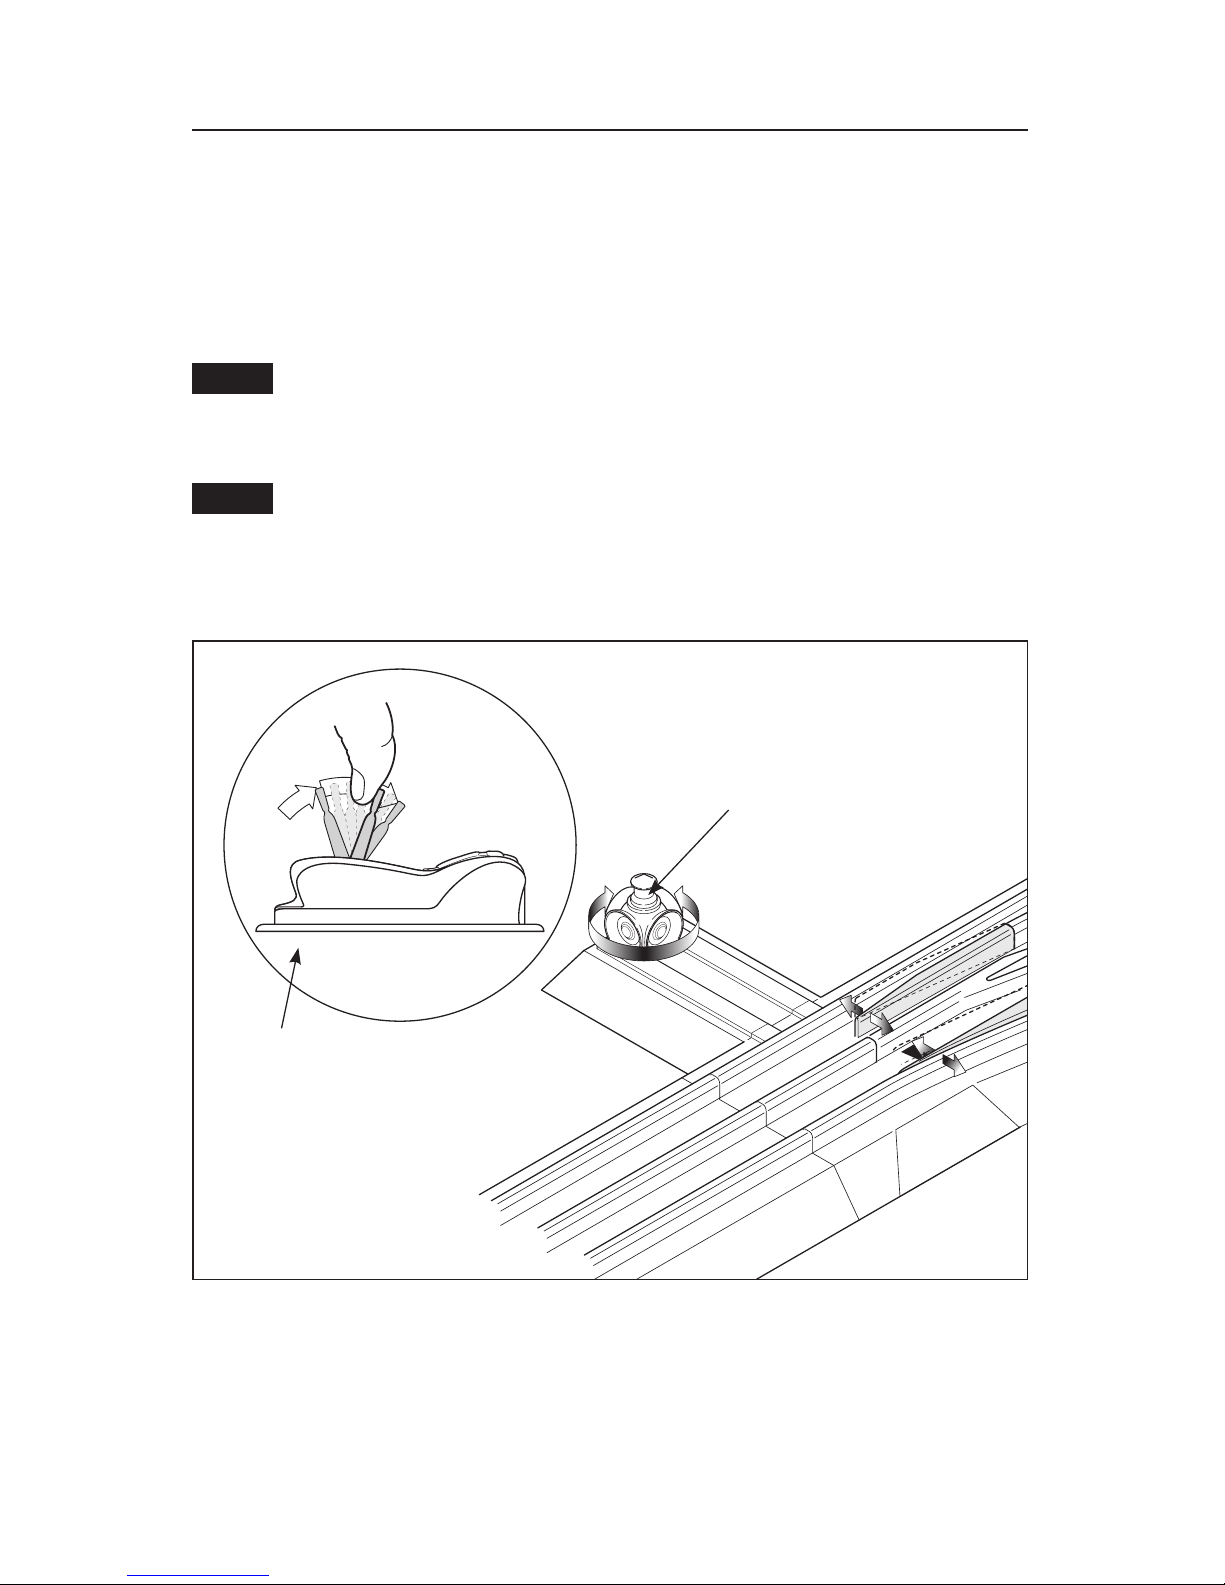
Operating the switch
Y
ou may operate the switch using the controller or the illuminated switch lamp on the
roadbed. Refer to Figure 3.
To operate the switch using the controller, power up the track, then pull the lever to
the opposite position. Gently press the lever past the end of its path. The lights inside the
controller will change colors to designate the change in switch positions. The red lights
designate the curved path. The green lights designate the straight path.
Track power must be on to operate the switch using the controller.
To operate the switch using the switch lamp, simply rotate the switch lamp. The new
position of the colored lenses on the lamp designate the change in switch positions.
This switch is equipped with a non-derailing feature. The train’s wheels
automatically throw the blades to the proper position when the train travels toward
the converging track. If you experience difficulties, simply use the controller or
switch lamp to throw the switch into the correct position for the train to travel.
Figure 3. Switch operation
Note!
Note!
Controller
Switch lamp
 Loading...