

Lionel O-27 Santa Fe FT Passenger set, Santa Fe FT Passenger ready-to-run O-27 set Owner's Manual

72-1973-250
8/00
Santa Fe FT Passenger
ready-to-run O-27 set
Owner’s Manual
CAUTION—ELECTRIC T O Y
NOT RECOMMENDED FOR CHILDREN UNDER EIGHT YEARS OF AGE. AS WITH ALL ELECTRIC
PRODUCTS, PRECAUTIONS SHOULD BE OBSERVED DURING HANDLING AND USE TO REDUCE
THE RISK OF ELECTRIC SHOCK.
TRANSFORMER RATINGS—INPUT: 120 VAC; 60 HZ ONLY.
AC OUTPUT: 18 V; 80 VA
LIONEL
I
N
S
T
R
U
C
T
I
O
N
S
H
E
E
T

Congratulations!
2
Y
ou’re now the proud owner of the Santa
Fe FT Passenger ready-to-run O-27 train
set. Everything you need to get started is
included. You’re already off to a great start
by reading this instruction manual. It has
important information on train setup and
operation. This booklet also covers proper
maintenance procedures to help your Lionel
trains live long, healthy lives.
If you have any questions after reading
this booklet, contact your nearest Lionel
Authorized Service Center using the list
included in a separate flier in this set or call
Lionel Service at 810-949-4100. And have
fun!
Locomotives
• Two powerful can motors
• Lionel electronic reversing unit
• SignalSounds horn and bell
• Tire-Traction
• Die-cast magnetic coupler
• Illuminated headlight
Passenger Cars
• Detailed/illuminated interior
• Opening Doors
• Die-cast magnetic coupler
Features found on both SignalSounds and Conventional RailSounds
sets
IMPORTANT NOTE
This FT Locomotive is intended for conventional operation only.
IT IS NOT UPGRADEABLE TO COMMAND CONTROL.

3
Table of contents
Track layout
Getting started 4
Joining the track sections 5
Suggested track layouts 5
Attaching the lockon to the track 6
Controller operations
See the instruction sheet (71-4003-250) that came with your 80-Watt Transformer for details.
Stripping the wire 7
Attaching the controller wires to the lockon 8
Installing the Lionel no 610-5906-001 sound activation button 9
Transformer operation
Coupling 10
Running your Lionel FTs with a Lionel transformer 11
Your locomotive’s electronic E unit 12
Using your locomotive’s magnetic coupler 13
Tire-Traction™ 13
Experiencing the SignalSounds/Conventional RailSounds system 14
Adjusting volume of sounds 15
Operating your SignalSounds™/Conventional RailSounds™ locomotive
Your FT’s Conventional RailSounds system—the basics 16
Enhanced TowerCom™ 17
Automatic CrewTalk™ 17
Train Brakes 17
Wheel Flange Squeal 17
Notes on Conventional Railsounds™ 17
Maintaining and servicing your FTs
Lubricating your FTs 18
Replacing your FT’s lamps and battery installation 19
Lionel Service 20
Track Layout
4
Getting started
B
efore you do anything else, we recom-
mend you check the contents of your set
box to ensure all of the parts of your set
have been included and that the quantities
(when applicable) are correct.
The parts list below will tell you what’s
included and the correct quantities. If you
find any discrepancies, contact the dealer
you purchased your set from for more
information or call 1-800-4-LIONEL for a
service center near you.
Now comes the fun part—deciding what
kind of layout you want. The only rule—let
your imagination be your guide.
• Santa Fe FT Diesel locomotive 1
– 6-21973 with Conventional RailSounds
– 6-21974 with SignalSounds
• Santa Fe Streamline Passenger Cars 2
• Santa Fe Streamline Observation Car 1
• 80-watt controller and power pack 1
• Lockon 1
• Straight track 8
• Curved track 8
• Service Center list 1
• Railroader Club application 1
• Warranty Card 1
Track Layout
5
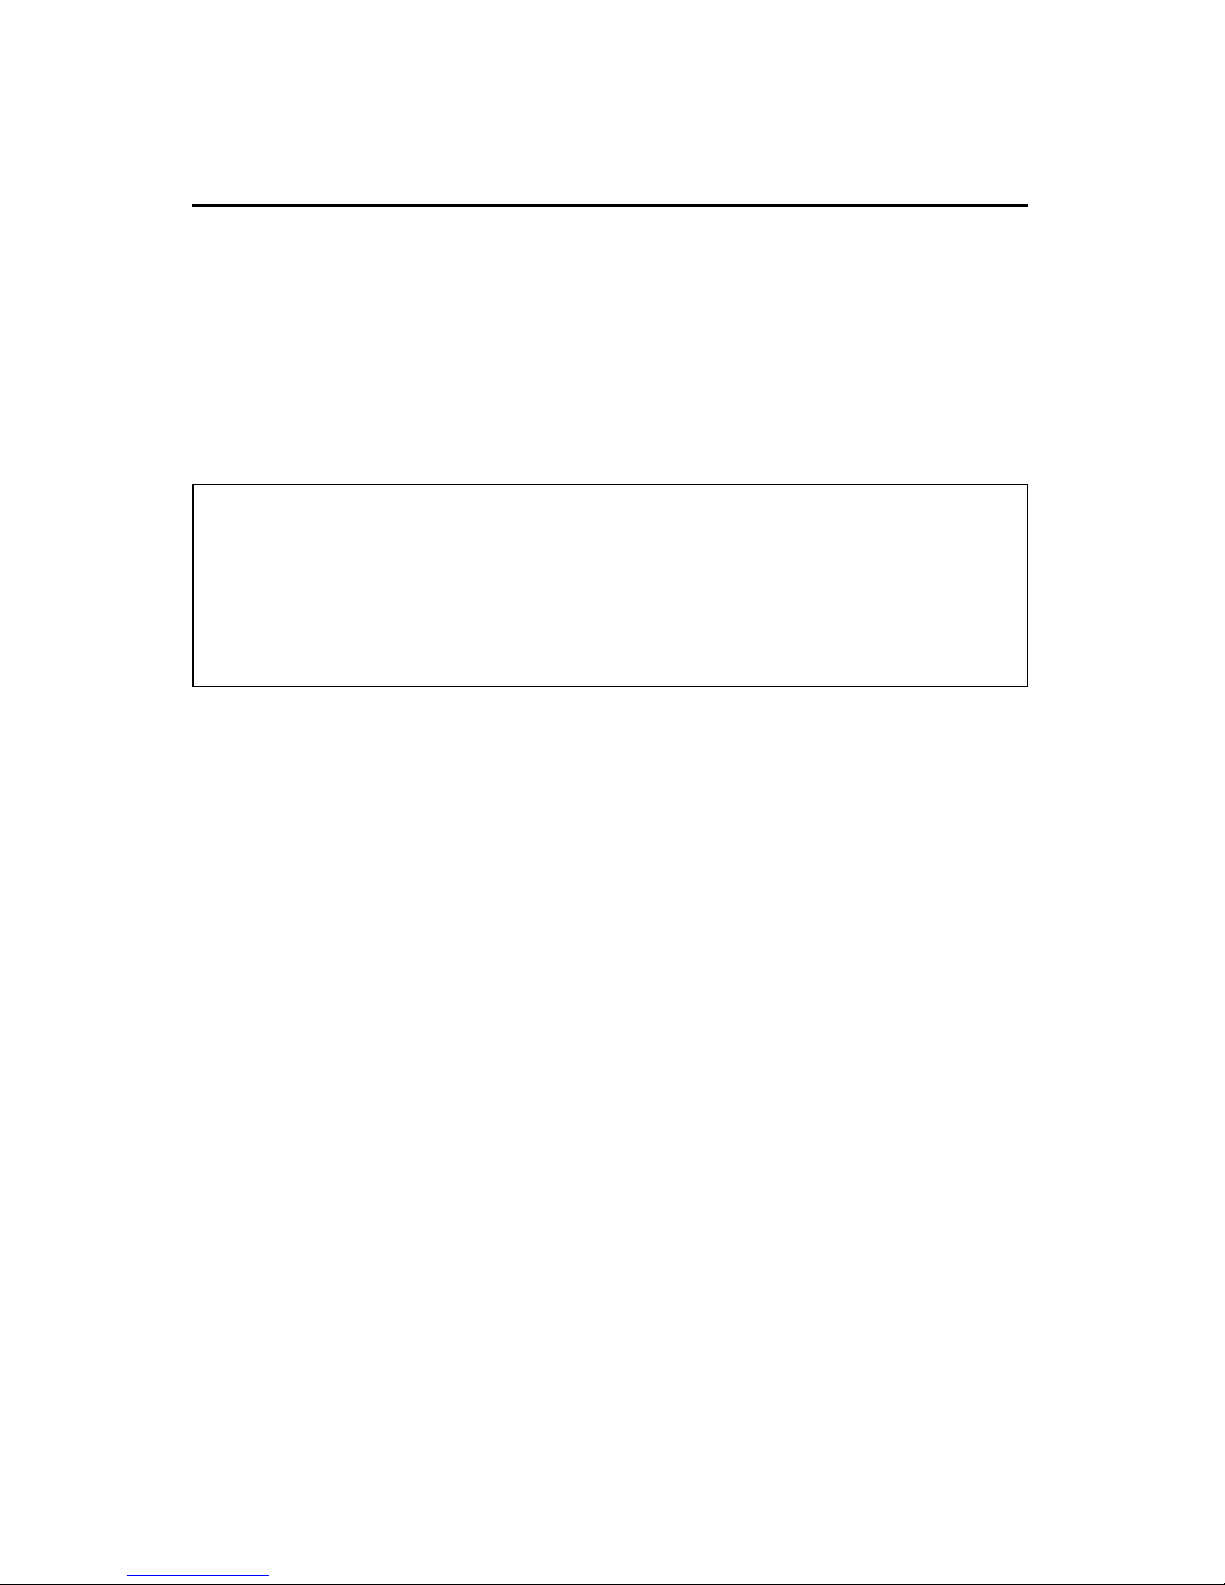
Joining the track sections
J
oin the track sec-
tions together
by inserting the pins of
one track section into
the rail openings of
another. For good electrical contact, pins
must be carefully
inserted and track joints
tightly fitted.
If the track is difficult
to connect, try this
installation tip. You can
“break in” O-27 track
sections by inserting
and withdrawing a
track pin into one rail
at a time before joining
the entire track section.
If the openings become too large (causing
the track to fit loosely), pinch the rail
together around a track
pin with a pair of pliers. If any pins fall out
of the track and are
missing, replace them
with extras available
from your Lionel dealer.
Maintenance tip: The
rails should be kept
clean, dry, and free
from oil and grease.
Clean rust and dirt
spots with a track eraser. Wipe the track using
a cloth dampened with
track cleaner from the
Lionel maintenance kit
(no. 6-62927), avail-
able from your nearest Lionel Authorized
Value Added Dealer or Lionel Service.
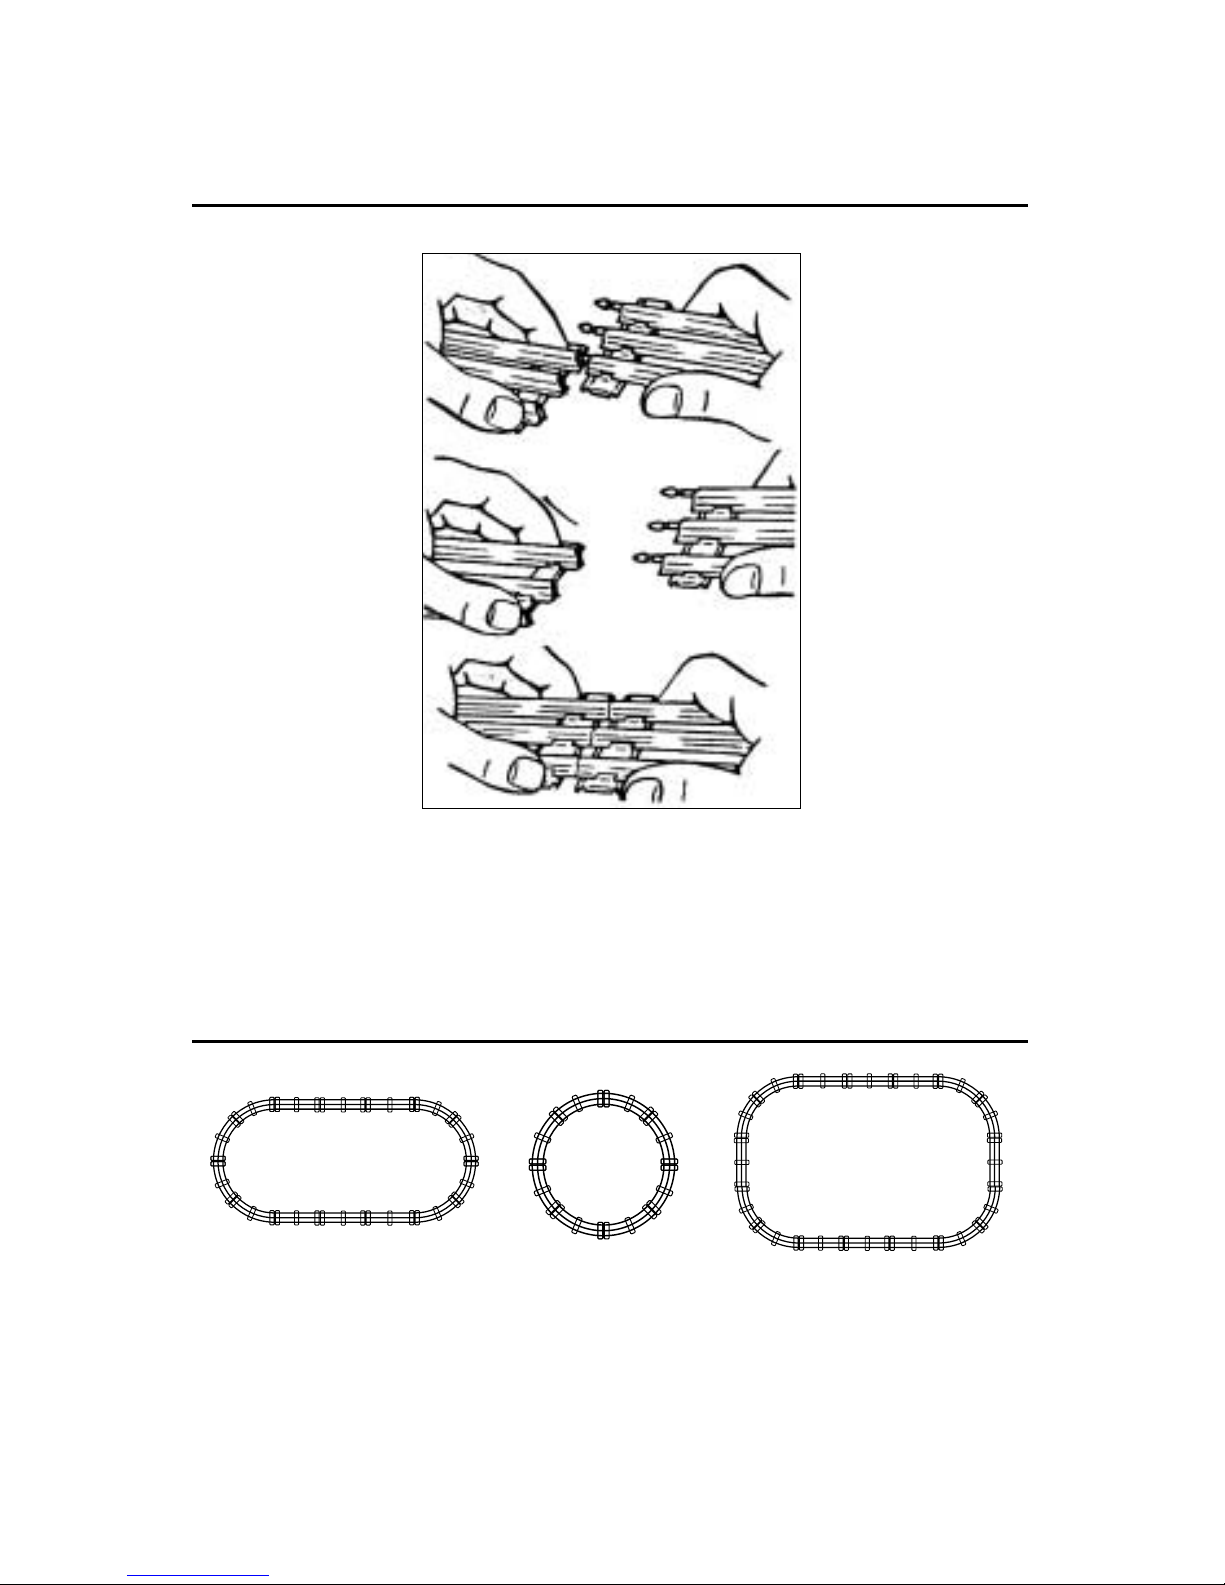
Suggested track layouts
Here are some examples of layouts you can build with 8 straight and 8 curved sections of track.
Remember—the more track you own, the more variations you can create in your train layout.
And that means more action and more fun!
Track layout
6
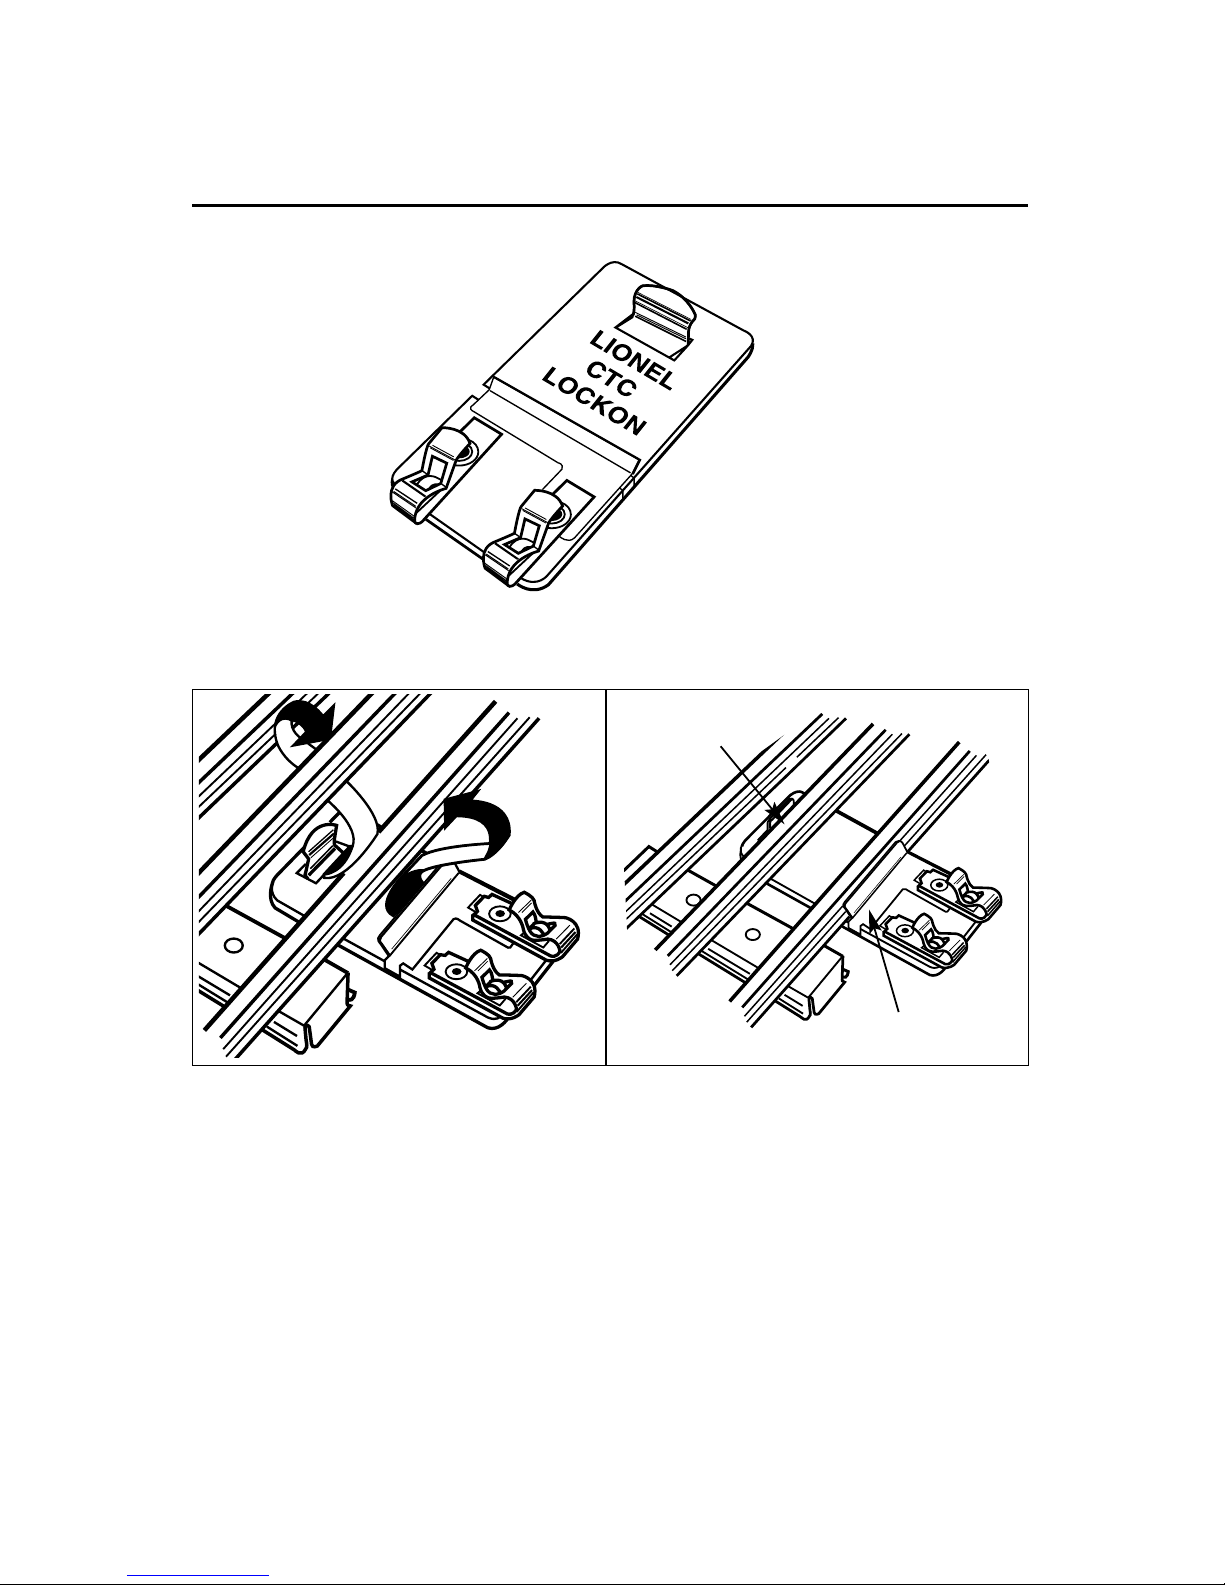
Attaching the lockon to the track
T
he lockon connects power from your
controller to the track. Attaching
the lockon to the track is quick
and easy. First, place the lockon under any straight section of track. Fit the
center lip of the
lockon onto the
edge of an outside
rail. Press the lockon upward so that
the spring contact snaps onto
the center rail. The lockon
should face outward when
setting up your track and
make sure it is firmly connected.
Use the illustrations below as a step-
by-step guide.
Once the lockon is securely attached to
the track, it’s time to insert the wires from
the controller into the two spring clips on
the lockon. See page 8 for easy-to-follow
steps.
2
1
Snap spring contact
to the middle rail
2
Hook lip to the
outside of the rail
1
 Loading...