

Lionel Hudson Owner's Manual
Hudson
Steam Locomotive
Owner’s Manual
Featuring Conventional RailSounds
71-8696-250
3/02

Table of Contents
Transformer operations
Running your locomotive with a Lionel transformer 3
Locking your locomotive into a single operational state 4
Using your locomotive’s magnetic coupler 5
Conventional RailSounds operations
Installing a Lionel no. 610-5906-001 Sound Activation Button 6
Experiencing the Conventional RailSounds system 7
Features of your locomotive’s RailSounds sound system 8
Notes on Conventional RailSounds 8
Maintaining and servicing your locomotive
Adding fluid to your locomotive’s smoke generator 9
Replacing your locomotive’s lamps 9
Lubricating your locomotive 10-11
Replacing your locomotive’s Traction Tires 11
Lionel Service 12
Congratulations!
2
• Conventional RailSounds sound system
• Powerful flywheel-equipped can motor
• Lionel electronic reversing unit
• Smoke generator that produces clean,
safe, and realistic smoke
• Brilliant headlight
• Die-cast metal locomotive and tender
• Die-cast magnetic coupler
(rear of tender)
Features of the locomotive
Y
ou own a tough, durable locomotive—
the Lionel Hudson steam locomotive.
From the crisp die-cast metal detail and the
authentic decoration on the outside to the
advanced technology and brute power within
the boiler, your steam locomotive is ready for
duty on your model railroad. Experience the
superiority of today’s Lionel.
The following Lionel marks may be used throughout this instruction manual and are protected under law.
All rights reserved.
Lionel
®
, TrainMaster®, Odyssey®, RailSounds™, CrewTalk™, TowerCom™, DynaChuff™,
StationSounds
™
, Pullmor®, ElectroCoupler™, Magne-Traction®, CAB-1 Remote Controller®,
Powermaster
®
, Lionel ZW®, ZW
®
Transformer operations
Move ‘em out!
Place your locomotive on Lionel or
Lionel-compatible O gauge track.
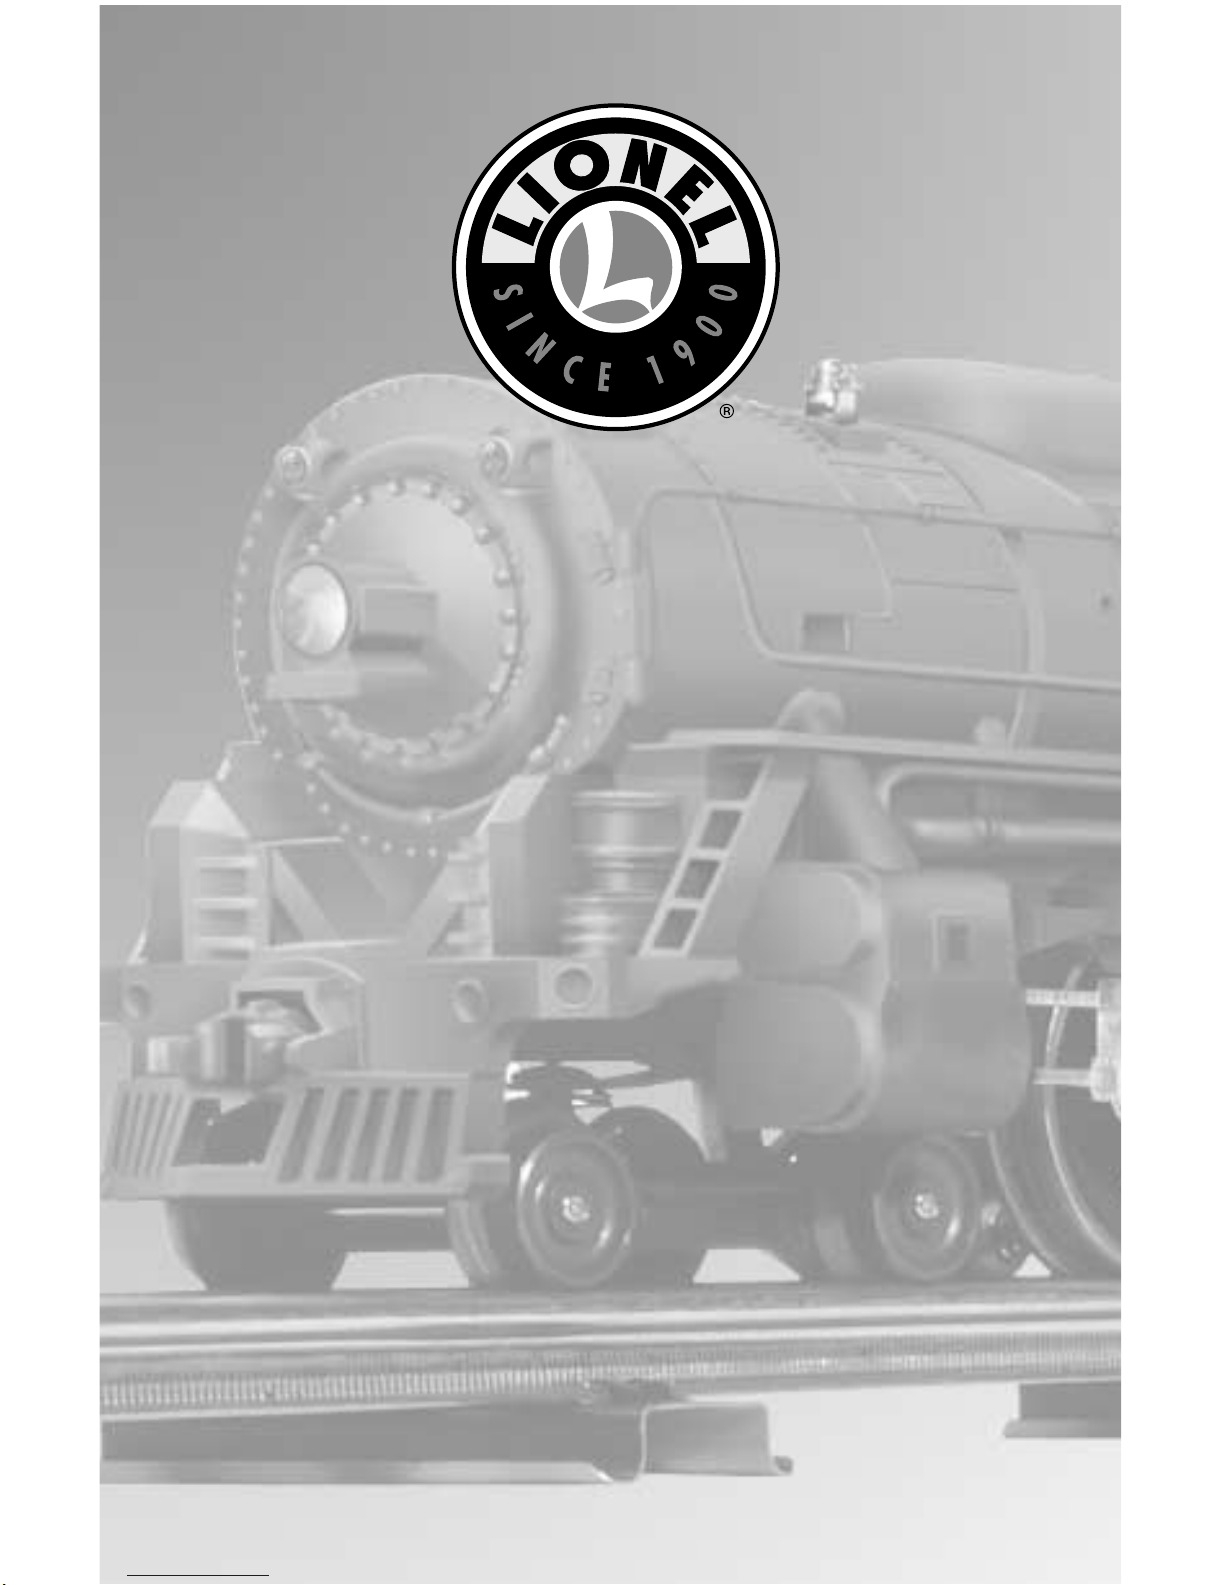
• With track power OFF, connect the drawbar between the locomotive and tender as
illustrated in Figure 1.
1
1
Running your locomotive with a Lionel transformer
Power up your steam locomotive with your transformer.
• Your locomotive is designed to operate on 8-16 volts alternating
current. Virtually all Lionel and Lionel-compatible alternating-current trans-
formers are suitable.
• Do not power your locomotive with direct current (DC). Damage to
sensitive electronic components may occur.
• When you first power up your track, your locomotive’s headlight
will illuminate. At this point, the locomotive is in neutral. When the power is
removed and again applied (by pressing the Direction button on your controller),
the train will move forward. This condition holds true if the engine is being powered up for the first time or if the engine has been powered down for longer than
five seconds.
• Get your locomotive moving. Press the DIRbutton on your CAB-1 remote or
Lionel transformer. This advances the Lionel reverse unit to the next operating
state in the repeating sequence: forward, neutral, reverse, and neutral.
• Adjust track voltage until your locomotive moves at your desired speed. To
increase speed, increase track voltage. To decrease speed, reduce voltage. To stop
the locomotive, turn off track power.
• See page 4 for information on locking your locomotive into a sin-
gle operating state.
3
3
4
4
Add smoke fluid to the locomotive or switch the smoke
generator off.
• See page 9 for more information.
2
2
3
Figure 1. Drawbar connection
Caution!
4
Transformer operations
Locking your locomotive into a single operational state
T
he reverse unit inside your Lionel loco-
motive is an electronic device that acts
like the transmission in your car. When you
apply power to the track, the locomotive
moves in the direction specified by the
reverse unit—or it sits in neutral, awaiting
another power interruption. Power interruptions are the signal that tells the reverse unit
to sequence to the next operational state.
To interrupt power and sequence the locomotive’s reverse unit, press the direction control button or turn the throttle to the OFF
position and then ON again. The reverse unit
alternates between these states: forward, neutral, reverse, and neutral.
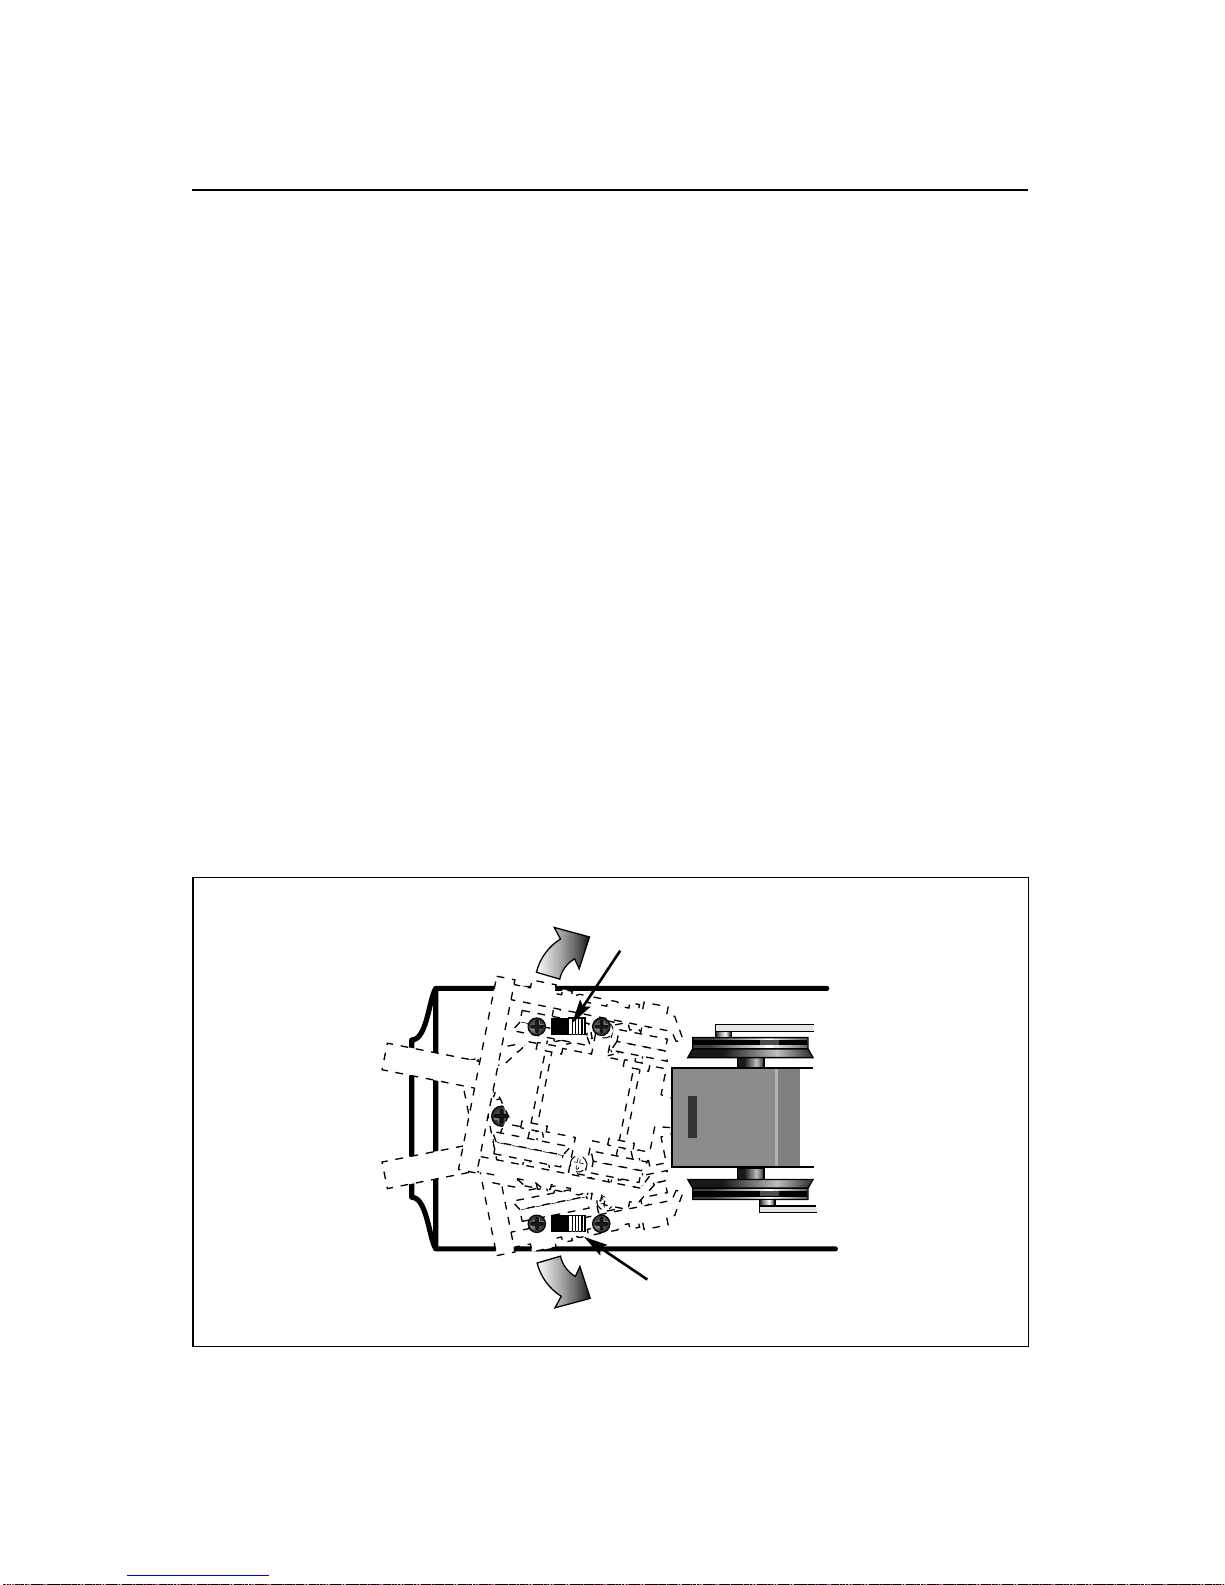
Also, the locomotive can be “locked” into a
particular mode of operation by throwing the
reverse unit switch located on the underside
of the frame (see Figure 2). When the switch
is thrown to the OFF position, the locomotive
will be locked in the next mode of operation
in the sequence. For instance, if the locomotive is moving forward, then is stopped and
the switch is thrown back, the locomotive
will be “locked” in neutral. If the switch is
thrown to the OFF position while the locomotive is under power, the locomotive will
remain in the mode it was in when the
switch was thrown. The controller direction
button will then have no affect on the direction of the locomotive.
Should the locomotive sit without power
for a short period of time, the reverse unit
will automatically reset and start in the forward direction when the transformer is
turned on, regardless of the reverse unit
switch position. If the switch is in the OFF
position, the locomotive will start in the forward direction and be “locked” there.
Figure 2. Switch locations
OFF
ON
Reverse
unit switch
Smoke
ON/OFF switch
OFF
ON
Rear of locomotive
 Loading...