

Lionel The Polar Express, Santa Fe, G-Gauge, A Christmas Story G Gauge Owner's Manual
71-1022-250
4/09
Owner's Manual
Lionel G-gauge
Adult assembly required
Congratulations!
C
ongratulations on your purchase of The Polar Express Train Set. This set features
everything you need to get started – a wireless remote control, a huge loop of easy-to-
assemble track, a string of detailed cars, a tender and locomotive.
Read this instruction manual thoroughly for important tips on operating and
maintaining your ‘G’ Gauge set.
The Polar Express Set Inventory
• 1 The Polar Express steam locomotive with head lamp and sounds
• 1 Tender
• 1 Passenger car
• 1 Observation car with disappearing hobo
• 12 curved tracks
• 4 straight tracks
• 1 Wireless remote controller
• 2 articulated figures with snow stand
• 2 ‘AA’ batteries for the wireless remote
• 6 ‘C’ batteries for the tender
• 1 Christmas bell
• 1 Owners manual
(s09)
This device complies with Part 15 of the FCC Rules. Operation is subject to the following
two conditions.
(1) This device may not cause harmful interference, and
(2) This device must accept any interference received. Including interference
that may cause undesired operation.
Warning: Changes or modifications to this unit not expressly aproved by the party responsible for
compliance could void the user's authority to operate the equipment.
Notes: This equipment has been tested and found to comply with the limits for a Class B digital
device, pursuant to Part 15 of the FCC Rules. These limits are designed to provide reasonable
protection against harmful interference in a residential installation. This equipment generates,
uses, and can radiate radio frequency energy and, if not installed and used in accordance with the
instructions, may cause harmful interference to radio communications.
However, there is not guarantee that interference will not occur in a particular installation. If this
equipment does cause harmful interference to radio or television reception, which can be determined
by turning the equipement off and on, the user is encouraged to trip to correct the interference by one
or more of the following measures:
• Reorient or relocate the receiving antenna.
• Increase the separation between the equipment and receiver.
• Connect the equipment into an outlet on a circuit different from that to which the receiver is
connected.
• Consult the dealer or an experienced radio/TV technician for help.
FCC Statement

3
Table of contents
Track assembly and layout
Joining the track sections 4
Layouts 5
Battery installation and options
Installation and options
Installing 'AA' batteries into the wireless controller 6
Installing 'C' batteries into the tender 7
Operating your train
Connecting the engine and coal tender 8
Power switches on the wireless controller 9
Power activation button on the engine 10
Operating your wireless controller 11
Maintenance and operations
Disappearing hobo feature on the Observation car 12
Using 9.6 volt rechargeable batteries (not included) 13
Battery Warning 14
Cleaning the track 14
Troubleshooting 15
Limited Warranty/Lionel Service 16
The following Lionel marks may be used throughout this instruction manual and are protected under law. All
rights reserved.
Lionel
®
, TrainMaster®, Odyssey®, RailSounds®, CrewTalk™, TowerCom™, DynaChuff™, StationSounds™,
Pullmor
®
, ElectroCoupler™, Magne-Traction®, CAB-1® Remote Controller, PowerMaster®, Lionel ZW®, ZW®,
PowerHouse
®
, TMCC®, Lionelville™, Lockon®, Wireless Tether™, LionMaster®, FatBoy™, American Flyer®,
TrainSounds
™
, PowerMax™, LEGACY™, PowerMax™ Plus, Odyssey II™, LEGACY RailSounds
™
The name FasTrack® is used with permission from Pitsco, Inc.
4
Track assembly and layout
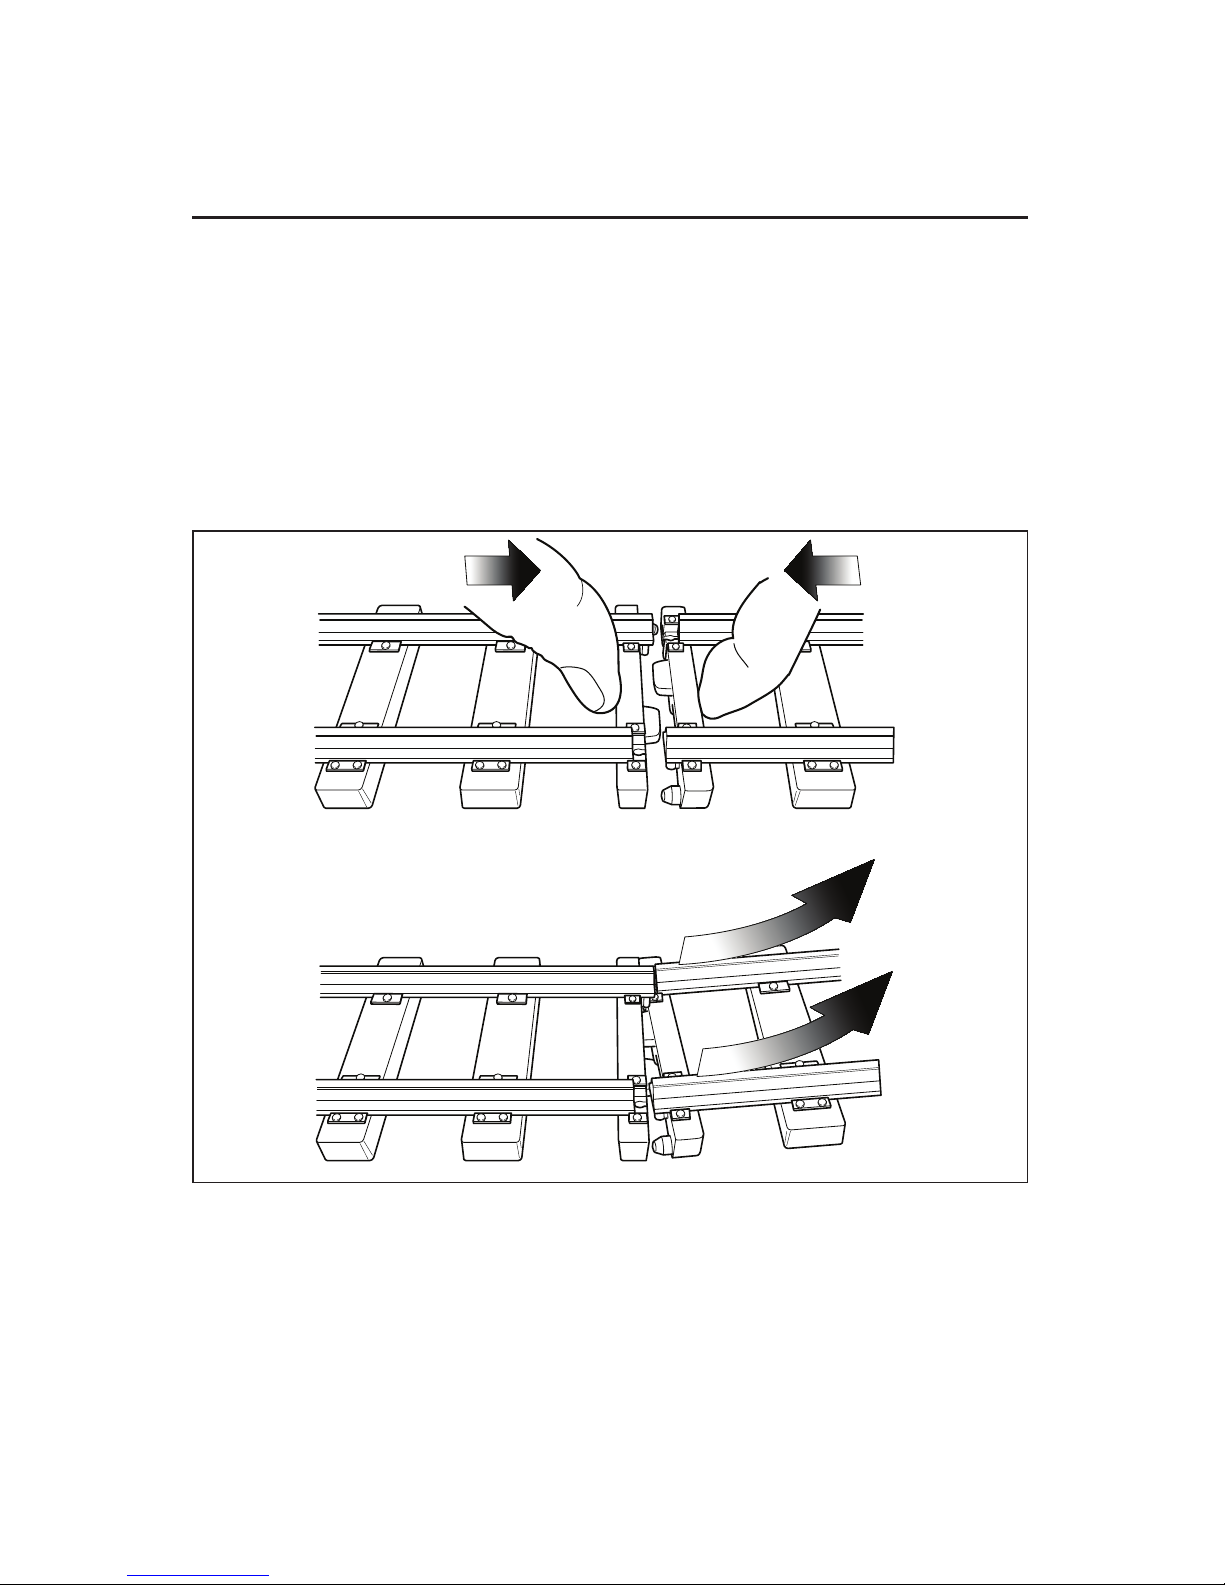
Joining the track sections
J
oin the track sections together by placing them on a flat surface and inserting the plastic
tabs of each track section into the corresponding openings of the next section. Press or
squeeze the ties together to connect. This may require the help of an adult. Recheck all track
connection points upon completing your layout to be sure they are secure.
To disassemble the track just lift one of the track sections slightly at an angle where they
join together and they will snap apart. See Figure 1.
The rails should be kept clean, dry, and free from oil, grease, and dirt. Clean the track
periodically with a clean soft cloth.
Figure 1. Assembling and disassembling the track
5
Track assembly and layout
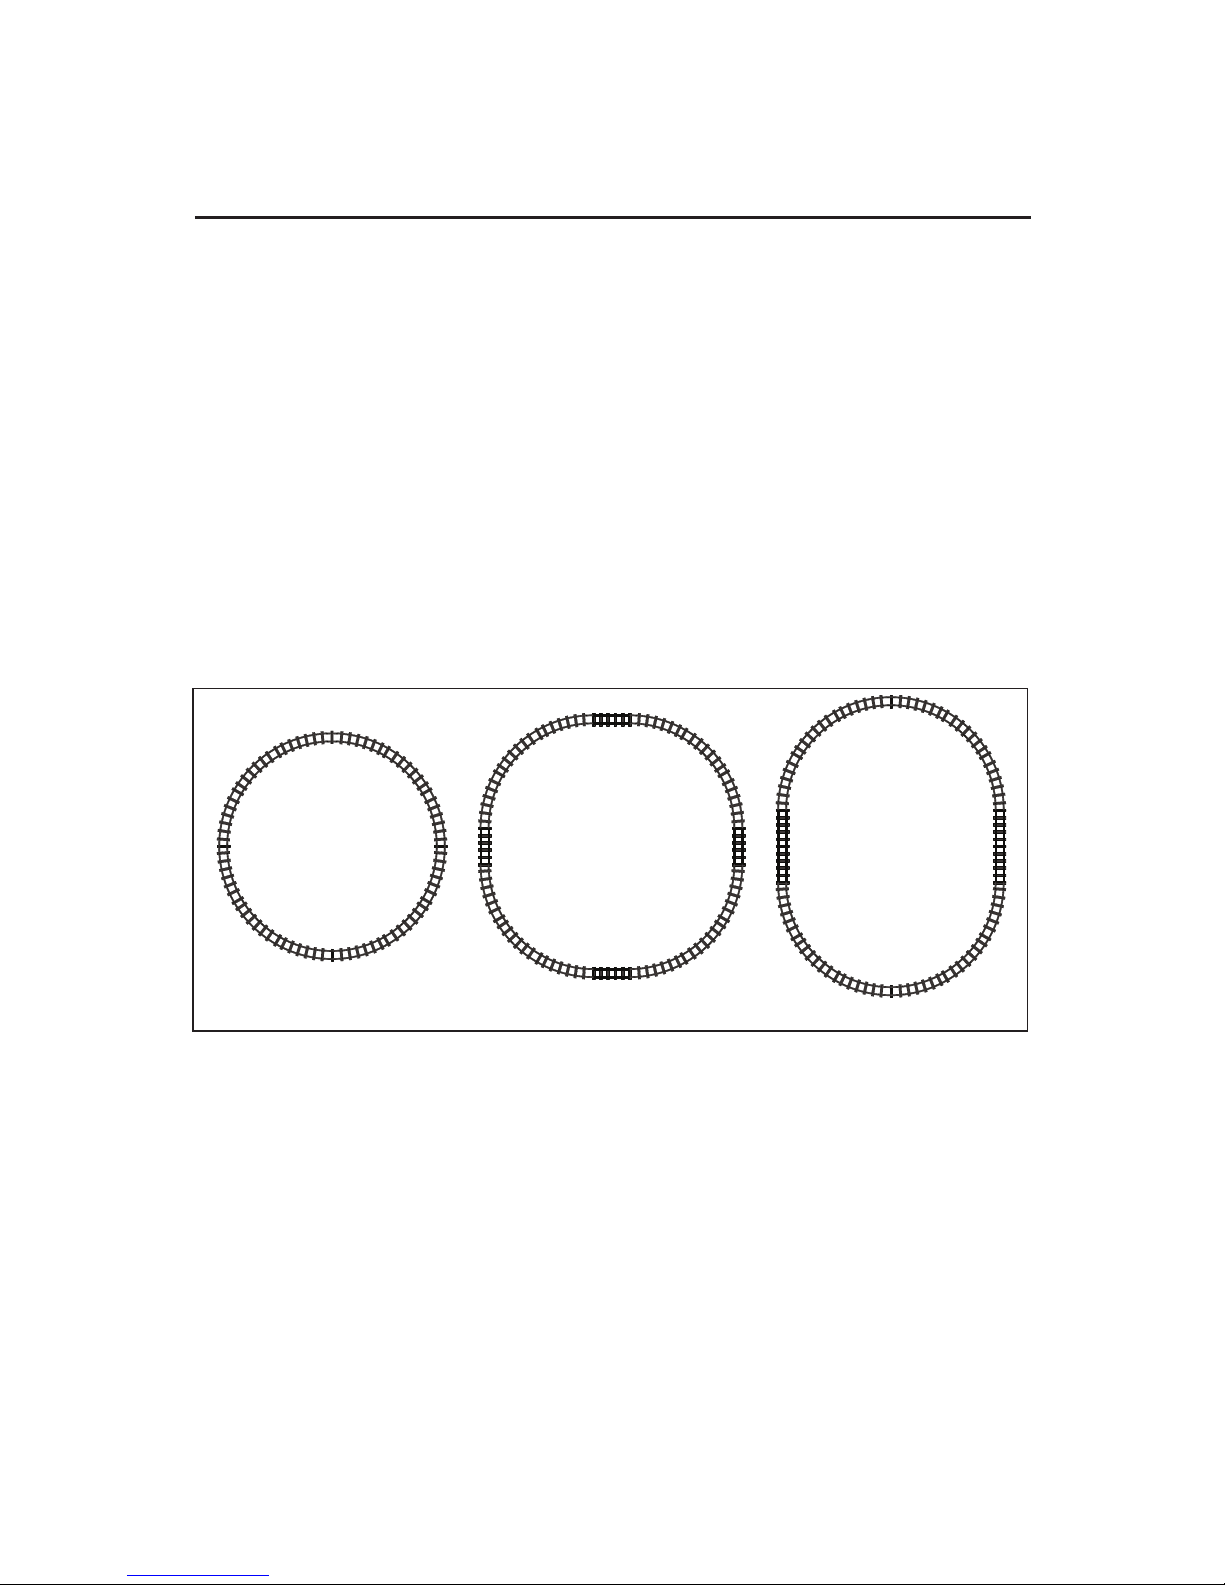
Layouts
These are three possible layouts you can make with the track provided. See Figure 2.
Circle
• Connect all curved track
Extended Circle
• Make 4 ninety degree curve sections by joining 3 curved sections each
• Connect each ninety degree curve section by using 1 section of straight to join each 3
section curve.
Oval
• Make 2 half circle using 6 curve tracks for each. Make 2 long straight tracks using 2
sections each. Join the curves using the 2 long straight sections.
Figure 2. Possible track layouts
 Loading...