

Lionel Elevated Tank Owner's Manual
71-4262-250
12/07
Lionel
Elevated Tank
Owner’s Manual

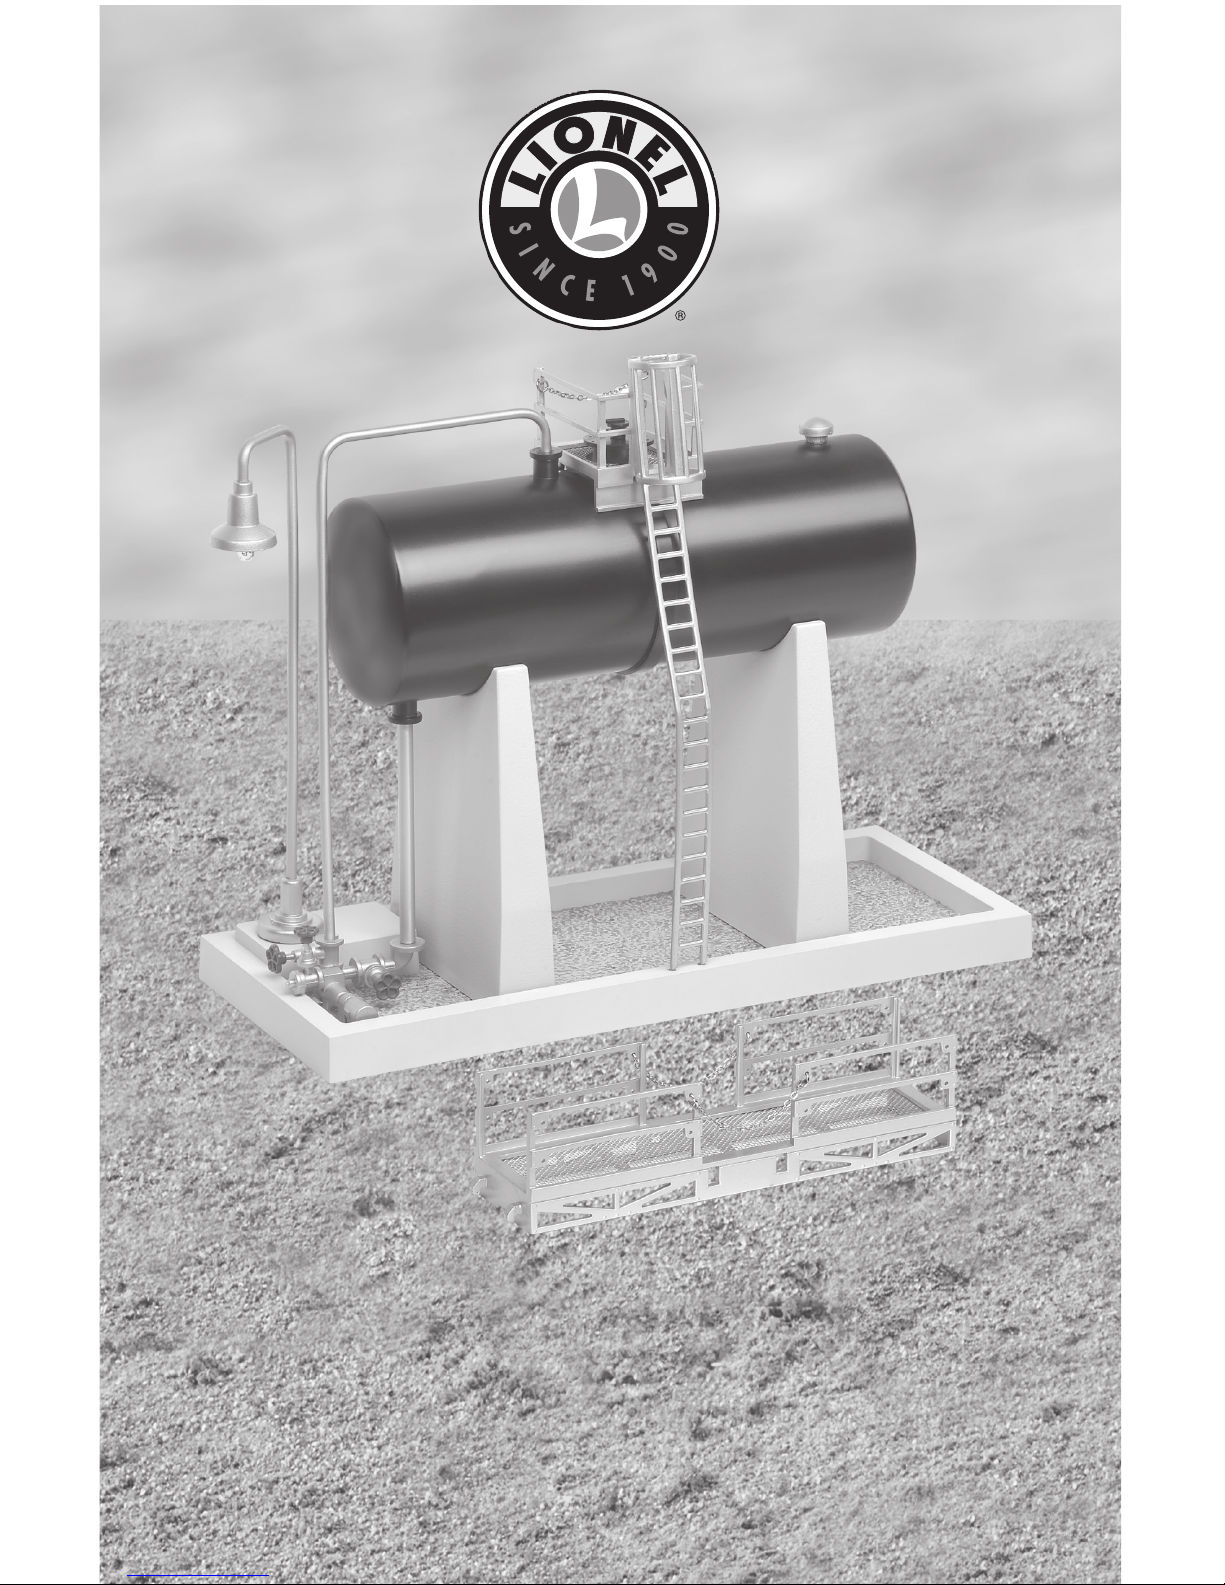
Congratulations!
C
ongratulations on your purchase of the Lionel Elevated Tank! This accessory features
an operating lamp and connecting walkways. Add a single unit to your layout or use the
included walkway to model your own Tank Town—a massive network of interconnected tanks.
2
Table of contents
Powering your Elevated Tank 3
Installing the lamps 4
Connecting the tanks 4-6
Replacing the lamps 7
Limited Warranty/Lionel Service 8
The following Lionel marks may be used throughout this instruction manual and are protected under
law. All rights reserved.
Lionel®, TrainMaster®, Odyssey®, RailSounds®, CrewTalk™, TowerCom™, DynaChuff™,
StationSounds™, Pullmor®, ElectroCoupler™, Magne-Traction®, CAB-1® Remote Controller,
PowerMaster®, Lionel ZW®, ZW®, PowerHouse®, TMCC®, Lionelville™, Lockon®, Wireless Tether™,
LionMaster®, FatBoy™, American Flyer®, TrainSounds™, PowerMax
™
The name FasTrack® is used with permission from Pitsco, Inc.
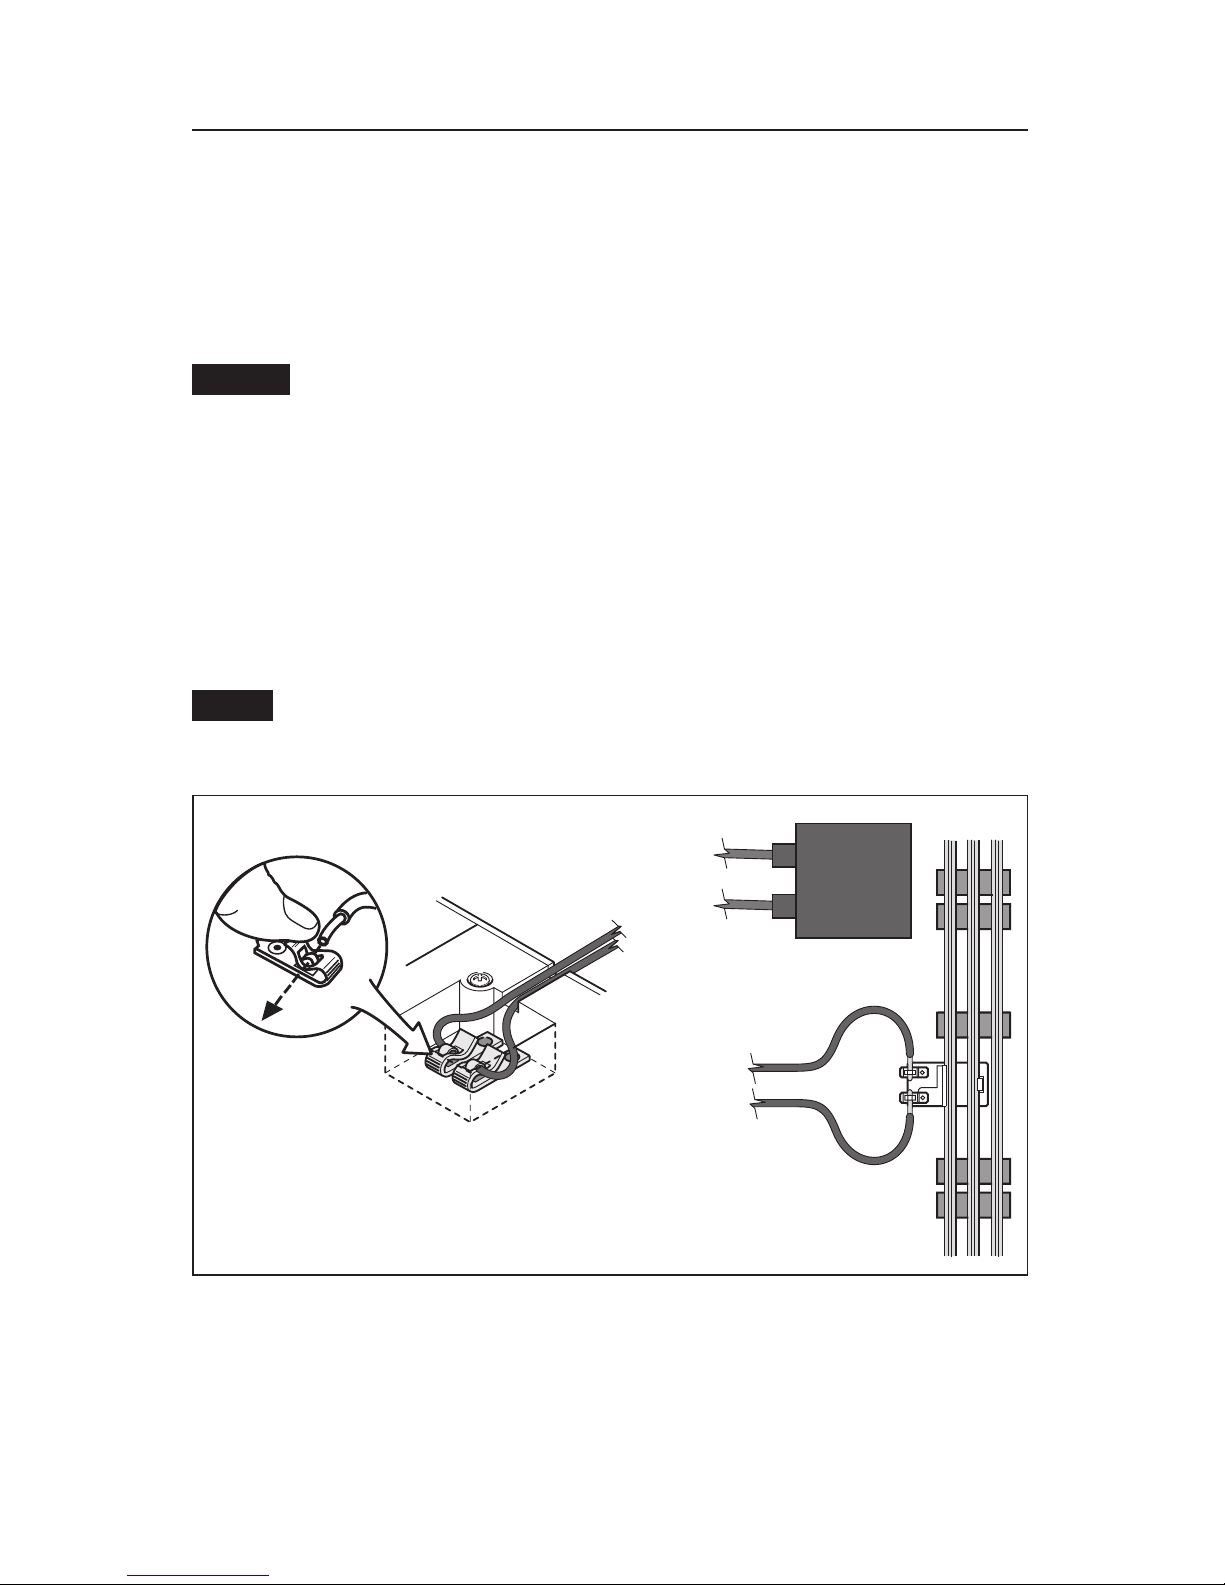
Powering your Elevated Tank
Y
our Elevated Tank operates best at 12-18 volts (AC). Because the power connections are
located on the underside of the base, we recommend that you attach the wires before you
attach the walkways.
Power the Elevated Tank with your transformer, a separate accessory power supply, or a
Lionel Lock-On (available separately, 6-62900). To make these connections, you need the ends
of the wires to be stripped back 1/4” to 3/8”.
Use a pair of wire strippers or a sharp knife to strip the wires. Only an adult
should perform this task! Always use care when stripping wires.
To wire this accessory, simply attach a wire to each of the spring clip terminals on the
bottom of the Elevated Tank and connect them to the POWER/A and COMMON/GROUND/U
terminals on your power supply or to the Lionel Lock-On as illustrated in Figure 1.
Spring clip terminal and Lock-On connections: Press down on the top of the terminal clip so that
the metal loop is exposed. Slide the bare end of the wire into the exposed loop. Release pressure on the
terminal clip, allowing the crimped metal to pinch the end of the wire in the metal loop. Give a little
tug on the wire to check if the hold is secure.
Polarity does not matter. Connect either wire to the Power/A terminal or to the
Common/Ground/U terminal.
3
POWER
SUPPLY
U
U
A
A
U
A
Figure 1. Power connections
Caution!
Note!
OR
 Loading...