

Lionel Duck Shooting Gallery Owner's Manual

72-4139-250
8/03
Lionel
Duck Shooting Gallery
Owner’s Manual

C
ongratulations on your purchase of the Duck Shooting Gallery from the Miniature Railroad
& Village™at Carnegie Science Center! The replica is based on an authentic attraction from
a western Pennsylvania amusement park. Listen to the calls of the barker, the bang of the rifles,
and the “Ping!” of the shot finding its target. Watch the targets parade past the shooters and fall
over to simulate a hit.
2
Table of contents
Powering the accessory 3
Controlling the accessory 4
Controlling the accessory in the Command Control environment 5-7
Limited Warranty/Lionel Service 8
The following Lionel marks may be used throughout this instruction manual and are protected under law.
All rights reserved.
Lionel
®
, TrainMaster®, Odyssey®, RailSounds®, CrewTalk™, TowerCom™, DynaChuff™,
StationSounds
™
, Pullmor®, ElectroCoupler™, Magne-Traction®, CAB-1 Remote Controller®,
PowerMaster
®
, Lionel ZW®, ZW®, PowerHouse®, TMCC®, Lionelville™, Lockon
®
The name FasTrack®is used with permission from Pitsco, Inc.
Powering the accessory
This accessory was designed to operate at 15-18 volts (AC). Because the accessory is equipped
with sensitive electronics, do not exceed the 18-volt maximum. If the accessory is powered at
less than 15 volts, you may find that the sound is distorted. You may choose to power the
accessory with a separate accessory power supply or through a Lionel Lockon (available
separately, 6-62900) or a FasTrack Accessory Power Wire (available separately, 6-12053). To
make the proper connections, the wires should be stripped back 1/8” to 1/4” using a pair of wire
strippers.
Only an adult should perform this task. Always use care when stripping wires.
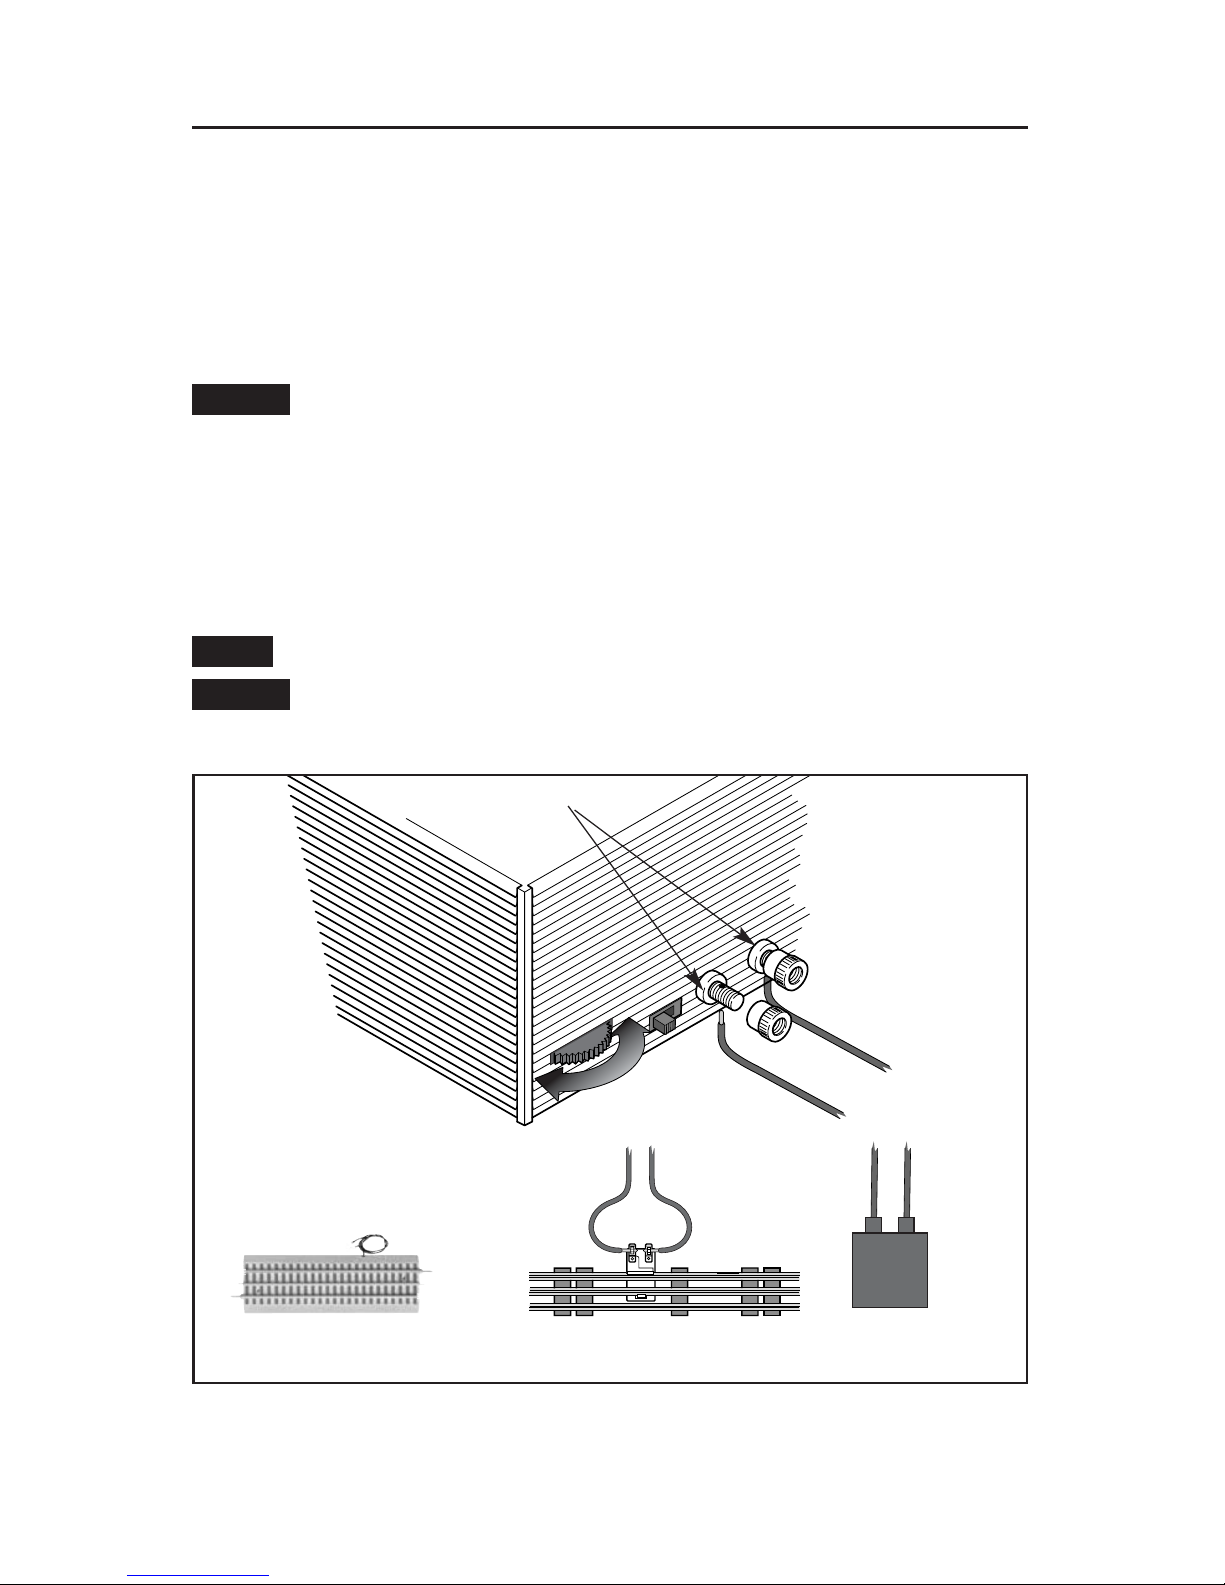
As illustrated in Figure 1, attach a wire to each of the thumbscrew terminals on the back of
the accessory, then connect the wires to the accessory terminals on the power supply or to the
spring clip terminals on the Lockon, or the Accessory Power Wire.
To make the thumbscrew terminal connections on the back of the accessory, loosen the
thumbscrew and slide the bare end of the wire into the hole in the shaft. Tighten the
thumbscrew to secure the connection.
For proper operation, set the accessory on a flat, level surface.
Do not exceed 18 volts. Damage to sensitive electronic components may occur.
3
POWER
SUPPLY
COMMON/GROUND/U
POWER/A
Figure 1. Power connections
Thumbscrew terminals
Lockon
FasTrack Accessory Power Wire
OR
OR
To track or
power supply
Note!
Back of accessory
Caution!
Caution!
 Loading...