

Lionel Dash 9 Diesel Locomotive Owner's Manual
Lionel Dash 9
Diesel Locomotive
Owner’s Manual
featuring
and
Congratulations!
2
Y
ou own one of the most sophisticat-
ed model trains ever built—the
Lionel TrainMaster Command-equipped
Dash 9 diesel locomotive. From the
crisp detail and expert decoration on
the outside to the advanced technology
and brute power under the hood, the
Lionel Dash 9 is ready for duty on your
model railroad. Experience the superiority of today’s Lionel.
• Two powerful Lionel
Pullmor®motors
• Liontech Command
TM
reverse unit for use
with the Lionel
TrainMaster®Command
TM
model railroad control
system
• Railsounds IITMdiesel
sound system—digital
samples from a real
engine
• Magne-Traction
®
• Die-cast mechanical
couplers
• Directional headlights,
direction-specific ditch
lights, and illuminated
interior
Table of contents
Transformer operations
Running your Dash 9 with a Lionel transformer 3
Using your Dash 9’s magnetic couplers 4
A note on Magne-Traction
®
4
Your Dash 9’s Railsounds IITMsystem—the basics 5
Experiencing the range of your Dash 9’s Railsounds II system 6
Notes on Railsounds 6
Installing the Lionel no. 610-5906-001 sound activation button 7
TrainMaster®CommandTMoperations
The command control environment 8
Running your Dash 9 in the TrainMaster Command environment 9
CAB-1 commands for your Dash 9 9
CAB-1 numeric keypad commands for your Dash 9 10
Tuning your Dash 9’s performance 11
Assigning your Dash 9 a new ID# 12
Maintaining and servicing your SD50
Lubricating your Dash 9 13
Lubricating your Dash 9’s Pullmor®motor armatures 14
Replacing your Dash 9’s lamps 15
Installing front and rear handrail chains 15
Attaching thesnow plow and hydraulic hose assembly 16
Lionel Service 16
3
Transformer operations
Running your Lionel Dash 9 with a Lionel transformer
T
o operate your Lionel Dash 9, place
it on Lionel or Lionel-compatible O
gauge three-rail track. Make sure all
twelve wheels are properly resting on
the railhead. Note the magnetic pull of
the wheels to steel rail. That’s MagneTraction®, Lionel’s legendary patented
feature that uses magnetized wheels
and axles to not only increase pulling
power (more than 25 cars on straight
and level track!) but also to help keep
the locomotive on track when it passes
swiftly through curves.
Your Dash 9 is designed to operate on
7-18 volts alternating current. Virtually
all Lionel alternating-current transformers
are suitable; we recommend the Lionel
TrainMaster Command model railroad
control system.
DO NOT power your
Dash 9 with direct current. Damage may occur.
To begin operations, power up your
track. The Dash 9 will wait 3-8 seconds
as it analyzes your railroad for the
presence of a Command Base. Then,
when it determines it’s on a conven-
tional railroad, the Dash 9’s light illuminates and Railsounds II starts up
(equipped locomotives). This occurs
when placing the Dash 9 on your railroad for the first time. Thereafter, it starts
in forward after every three-second
power interrupt.
To get your Dash 9 moving, press the
DIR button on your CAB-1 remote or
Lionel transformer. The Liontech Command reverse unit (LCRU) inside your
Dash 9 “sequences” to the next operating
state. The LCRU alternates between four
states: forward, neutral, reverse, neutral.
To select a single operational state
(for example, forward), you can deactivate the LCRU’s sequencing function.
Get your locomotive moving in the
desired direction, then stop it by powering down the track. Set the reverse
unit control switch on the locomotive’s
underside to PROGRAM/LOCK.
As with any conventional locomotive, control your Dash 9’s speed by
adjusting the amount of power applied
to your track. Note that the locomotive’s “ditch” lights installed in the
pilot illuminate only during forward
operation. Have fun!
Note!
Transformer operations
4
A note on Magne-Traction
®
Y
our Dash 9 is equipped with
Lionel Magne-Traction, magnetized wheel-sets and axles that help
increase tractive effort during operation. Because the wheelsets are magnetized, take care to prevent small
metallic objects from attaching to the
wheelsets and working their way into
the Dash 9’s motor assembly. They
can damage your locomotive.
Magne-Traction is not effective on nonfer-
rous track.
Note!
Using your Dash-9’s magnetic couplers
Y
our Lionel Dash 9 is equipped
with magnetic die-cast knuckle
couplers, a revolutionary design first
introduced by
Lionel in 1950.
Lionel magnetic couplers react
to the magnetic
field generated
by a Lionel UCS
remote-control
track section
(sold separately).
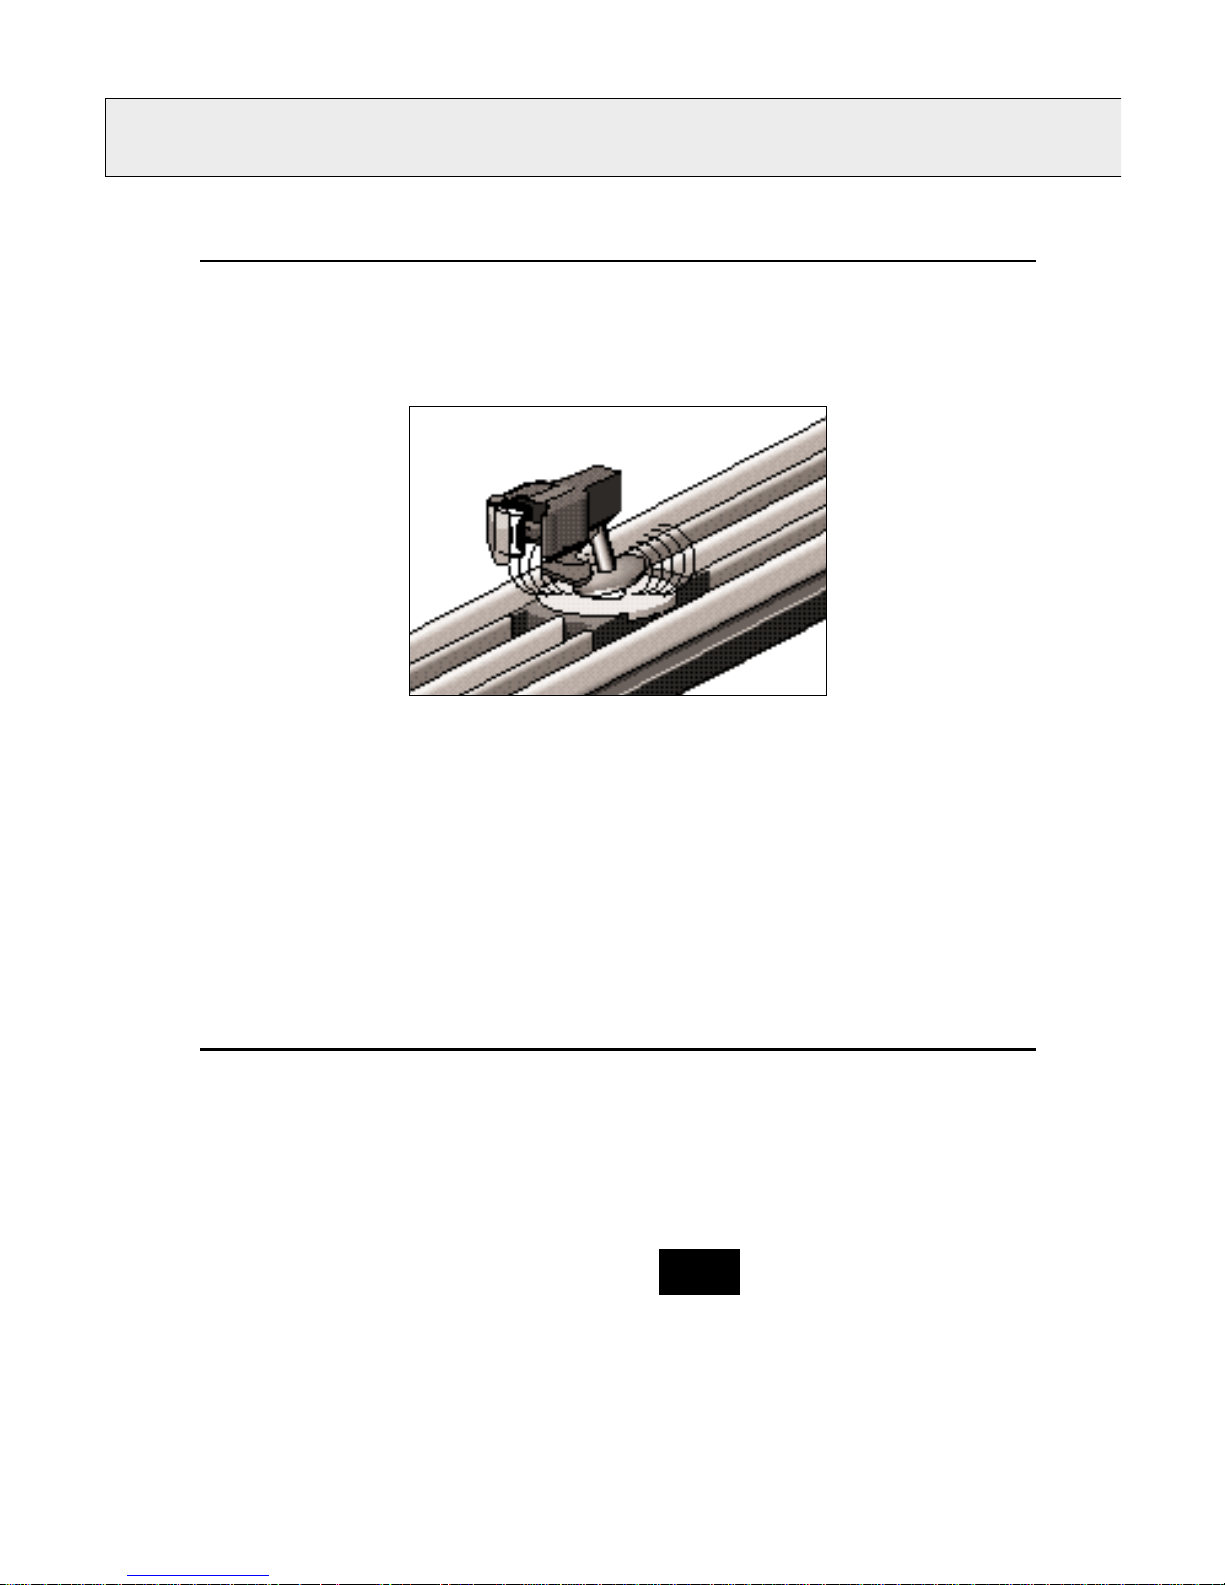
Place your locomotive’s coupler
“trigger disc”
over the central
coil of a UCS and press “uncouple”
on the UCS controller. The magnetic
field pulls the disc downward, and
the knuckle opens.
One operating technique favored by
Lionel railroaders is the “moving
uncouple.” Press
the UCS “uncouple” button as
the Dash 9 passes
over a remotecontrol section.
The magnetic
field will open
the coupler; the
consist remains
behind as the
locomotive
moves on.
But be careful—the speed of a newly uncoupled and moving locomotive can
increase dramatically.
Position your Dash-9's trigger disc over the
remote-control section, then press “uncouple.”
The coupler opens.
5
Your Dash 9’s Railsounds IITMsystem—the basics
L
ionel Railsounds II is the most realis-
tic model railroad sound system in
the world. Your Dash 9 features digital
samples from an authentic Dash 9 for the
ultimate in realism, including
a five-chime
horn with plenty
of character.
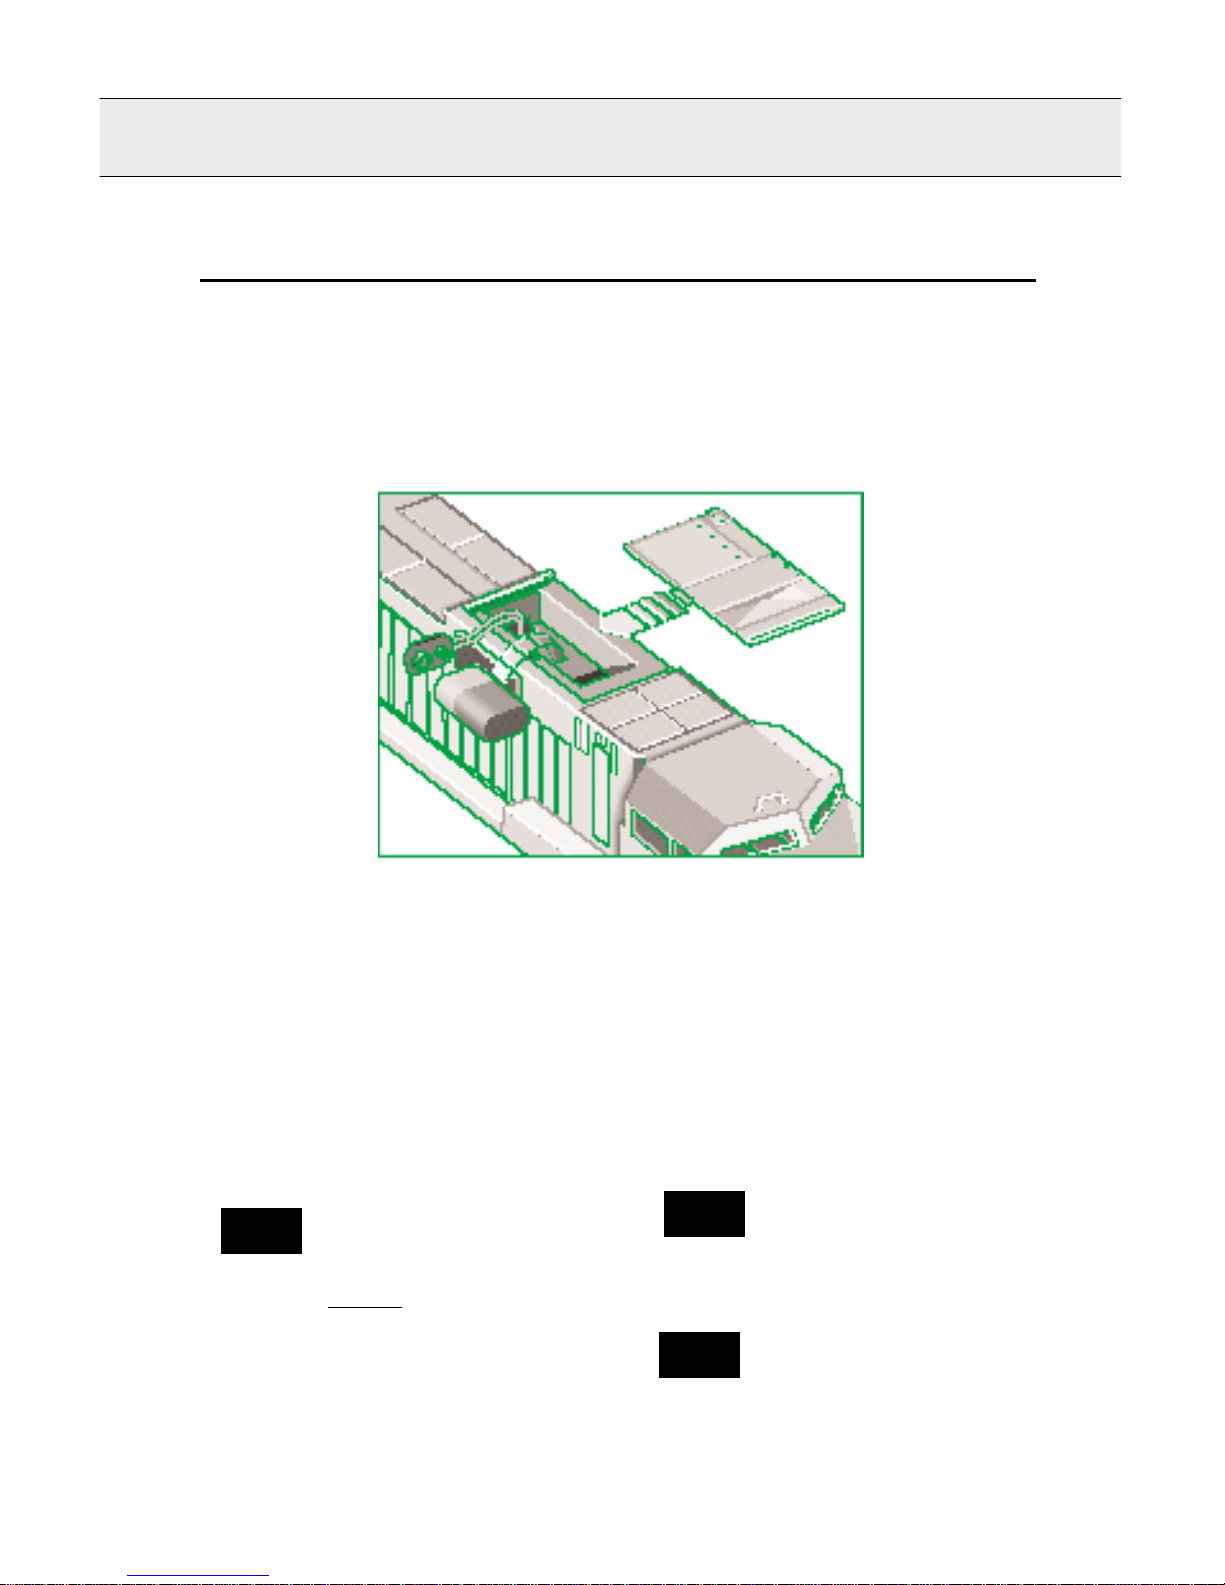
Begin by in-
stalling a 9-volt
alkaline battery.
This ensures
full-feature
operation of
Railsounds II.
Slide open the
access panel as
shown in the
illustration
above. Connect
the 9-volt battery to the battery clip, and place the battery in the cavity. Close the panel when finished.
Although track voltage
powers Railsounds II, the
battery is required for uninterrupted operation and shutdown sequences. Use only
alkaline
batteries; do not use
“heavy duty” batteries.
Apply track power and the Dash 9’s
Railsounds II system delivers an
authentic start-up sequence, followed
by sounds of the locomotive at idle. As
the Dash 9’s speed increases, the RPMs
move
through four
levels of roar.
Sounds
return to idle
only after the
locomotive
has come to a
complete
halt. To
silence diesel
RPM roar
(horn and
bell remain
unaffected),
slide the Railsounds II
on/off switch
to its “off”
position before powering up the locomo-
tive. See page 13 for the switch location
and positioning.
Discontinue locomotive
power for 10 seconds before
you change the Railsounds
II on/off switch position.
If Railsounds II “drops out”
during track power interrupts, replace the battery.
Install an alkaline 9-volt battery in your Dash 9.
Slide open the panel, connect the battery to the power
cord, and place the battery in the cavity. Close the
Note!
Note!
Note!
 Loading...