

Lionel BASE1L User Manual
73-7147-250
6/13
Lionel
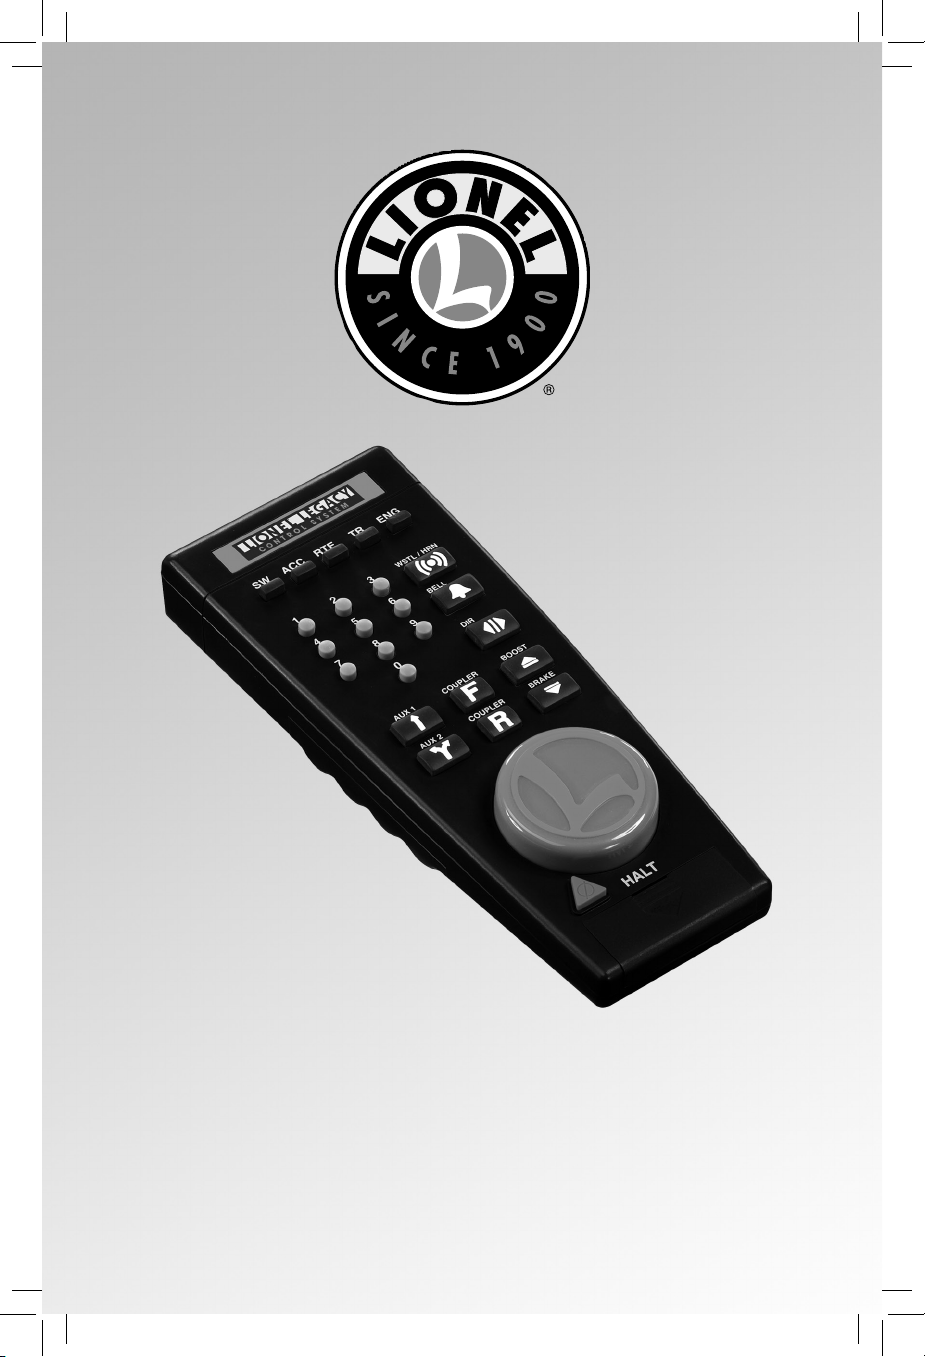
CAB-1L & BASE-1L
Owner’s Manual

Welcome to LEGACY command control
he CAB-1L is the simple way to start operating in the LIONEL LEGACY Command Control
T
environment – and an economical way to add operators when running trains with friends!
Whether you want to access the basic features of the LEGACY control or operate our older TrainMaster
command control (TMCC1) equipment, the CAB-1L remote controller allows you to walk around
your layout while controlling your trains. The Base-1L receives signals from the remote and sends
your commands across the layout.
If you already have a LEGACY Base (6-14295), you can simply add one or more CAB-1L remotes
to your existing LEGACY layout—no need for the Base-1L. If you are looking to get started with
the LEGACY Control System, the combination of CAB-1L and Base-1L are an affordable way to start
unlocking many of Lionel’s celebrated features. Only one Base (either the LEGACY Base or the Base1L) should be used on a layout.
You may use a combination of LEGACY CAB-2 and CAB-1L remotes with a single LEGACY Base.
However, only CAB-1L’s may be used with the Base-1L.
2

Table of contents
Introduction
Using this manual 4
Preparing your railroad for TrainMaster Command 4
Command Base
Installing the Command Base 5
Command-equipped locomotives
CAB-1L & Base-1L radio channel selection 6-7
Programming ID#s for your Command-equipped locomotives 8
Addressing locomotives 9
Activating whistle quilling on LEGACY locomotives (optional) 9
Sending basic commands to locomotives with CAB-1L 10
Tuning your locomotive’s performance 11
Sending numeric commands to locomotives 12
Adjusting locomotive’s smoke level 13
Switches
Controlling switches with CAB-1L 14
Notes on AUX1 and AUX2 14
Creating routes around your railroad 15
Activating routes 16
Clearing routes 16
The TR button
Tracks or Trains 17
Advanced operating techniques
Building lash-ups 18-19
Front, middle, rear and reverse-direction locomotives 20
Addressing lash-ups 20
Removing locomotives from lash-ups 21
Lash-up problem solving 22
Notes on lash-ups 23
Tuning lash-up performance 24
“Sticky” keys 25-36
Problem Solving
Answers to questions 27-30
Glossary
The language of command control 31-33
FCC Statement 34
Notes 35
Lionel Limited Warranty Policy & Service 36
3

Introduction
Using this manual
e designed this manual to give you more than just a solid start in command control. There’s
W
detailed discussion as you learn more, so you’ll find plenty of helpful information, no matter
what your level of expertise.
Getting started is easy. Just go section by section. For additional information, refer to smaller-print
sections marked Detail.
Example
There’s even a glossary to define the terms covered in the manual. If a word or concept is new to
you, look it up. The index helps you locate subjects by referencing key words.
Go through each example step by step, repeating the commmands. You can’t "hurt" the system
by pressing the wrong button. The LEGACY Control System is more than just a sophisticated way of
operating Lionel trains — it’s also a rugged example of modern technology.
The only rule: have fun.
Preparing your railroad for TrainMaster Command
ny three-rail, alternating current-powered model railroad can beome a LEGACY railroad. Before
A
you install the Command Base-1L, do these things.
First, make sure there are no short circuits anywhere on your railroad. Second, make sure all
power supplies are in phase. Finally, consider the power requirements for everything connected to the
track: switches, bulbs, operating cars, illuminated cars, and more.
TrainMaster Command operates on constant, high voltage, so some bulbs may burn out
prematurely. If they do, replace them with 18-volt bulbs. Remove or disconnect items you believe may
not benefit from constant voltage.
Most important are the Example boxes. Each is designed to make learning
TrainMaster Command quick and easy. Read the text, then press the button
commands listed in the Example. Before you know it, you’ll be operating
locomotives, switches, and accessories from CAB-lL’s keypad like a pro.
4
Command Base
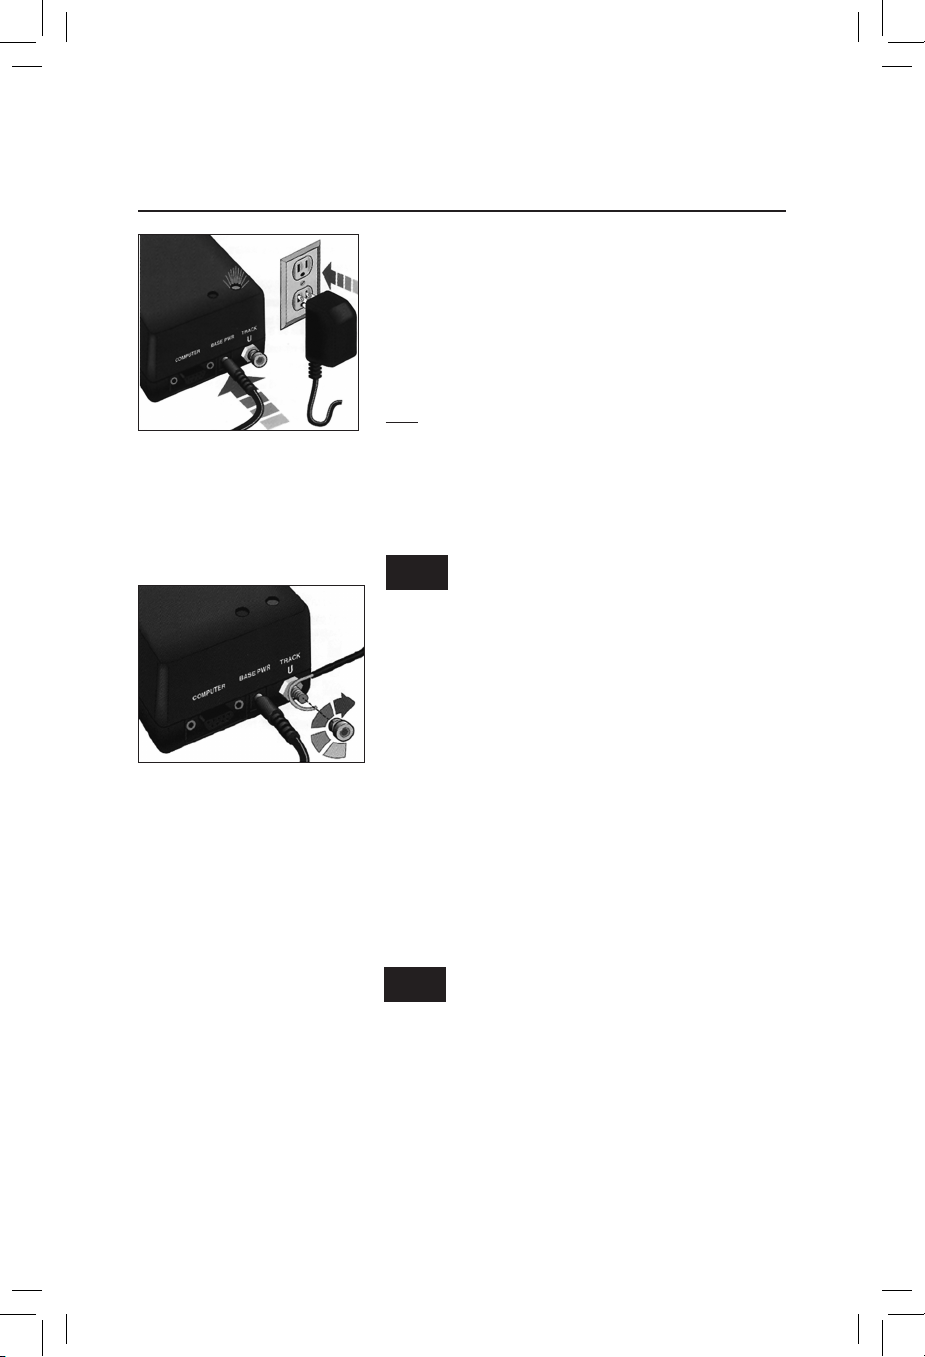
Installing the Command Base
Y
you can mix CAB-1L and CAB-2’s on the same layout by using
a LEGACY Base.)
power cable into the Base input. Plug the power supply into
a standard wall outlet (110 volts, 50 or 60 cycles). The outlet
must be properly grounded. The Base-1L’s top-mounted green
Plug the power supply’s cable
into the Base-1L’s power input,
then plug the power supply into
a properly grounded wall outlet
(110 volts, 50/60 cycles).
Connect a wire between the
Command Base's binding post
and the common ( U) terminal
on all transformers powering
your track. You can also connect
the wire between the Base-1L and
the outside rail of your track.
(Connect the wire to both outside
rails if you use hi·rail track.)
light will illuminate. The Command Base-1L doesn’t have an
on/off switch, so you may leave it on at all times. lf you prefer
to turn it off after operating sessions, use a power strip with a
circuit breaker and on/off switch. Doing so lets you electrify all
transformers and the Command Base at once.
post and the common (U) terminal on all transformers
powering your track. Or, connect the wire to your track’s
outside rail at any convenient location. You've just installed
The LEGACY Control System on your railroad.
continuous throughout your entire layout–this enables
unimpeded communication around the track plan. If your
layout has block control, make sure only the center (or "hot")
rail is insulated with insulating pins at block boundaries.
Insulating both outside rails at block boundaries will obstruct
the Command Base’s signaIs.
ou need a CAB-1L remote to operate the Command
Base-1L. (The CAB-2 won’t work with Base-1L. However,
To install the Command Base-1L, plug the power supply
Note!
Hint!
COMMAND BASE POWER SUPPLY. Do not use the
Command Base’s power supply to power any other
device. Its three-prong plug is unique.
Next, connect a wire between the Command Base binding
Be sure the outside (common) rail is electrically
Be sure the Command Base-1L is ON
before you place your Command Controlequipped locomotive on track. Then
bring up track power. When the Base-1L is
ON, your Command-equipped Lionel locomotives
instantly know they’re on a LEGACY railroad. If the
Base-1L is OFF, the locomotive will operate like an
ordinary engine when power is applied.
5
Setting the communication channel
CAB-1L & Base-1L radio channel selection
he CAB-1L communicates with the Base-1L at a frequency of 2.4 GHz. Within this band, there are
T
nine distinct channels available for your use, the default channel is 1. Chances are, channel 1
will be fine for your layout and you’ll have no need to change channels on your system.
However, the 2.4 Ghz frequency spectrum is also used by WiFi, cordless phones and various
other devices you may have near your layout. If you are having trouble maintaining reliable
communication between your Lionel remote and layout, experiment with different channels
following the instructions shown here.
Note!
Start by selecting the radio channel for Base-1L:
1. Press the button on the side of the Base-1L once. The Base’s green LED will blink up to
2. While the Base-1L is blinking its channel number, pressing the button a second time
Remember that all your remotes must be set to the same channel number as your
Base (this is true for Base-1L as well as the LEGACY Base). To see or change the current
channels on CAB-2 and LEGACY Base, refer to the owner’s manual for those products.
When changing channels, first change your BASE-1L to the desired channel, then change
Hint!
the CAB-1L to match.
nine times, which indicates the current channel number. After a pause the blink pattern
repeats. It will do this for a couple of minutes, and then return to normal operating mode
unless the button is pressed again.
changes the current radio channel to the next higher frequency. Keep pressing the button
until the desired radio channel is reached, as indicated by the blink pattern. Immediately
proceed to the next step (see next page), and change the radio channel selection for your
CAB-1L. Once that is done, the channel blinking pattern on your Base-1L will cease.
Channel Select
6
Setting the communication channel
CAB-1L & Base-1L radio channel selection (continued)
Then Select the radio channel for CAB-1L:
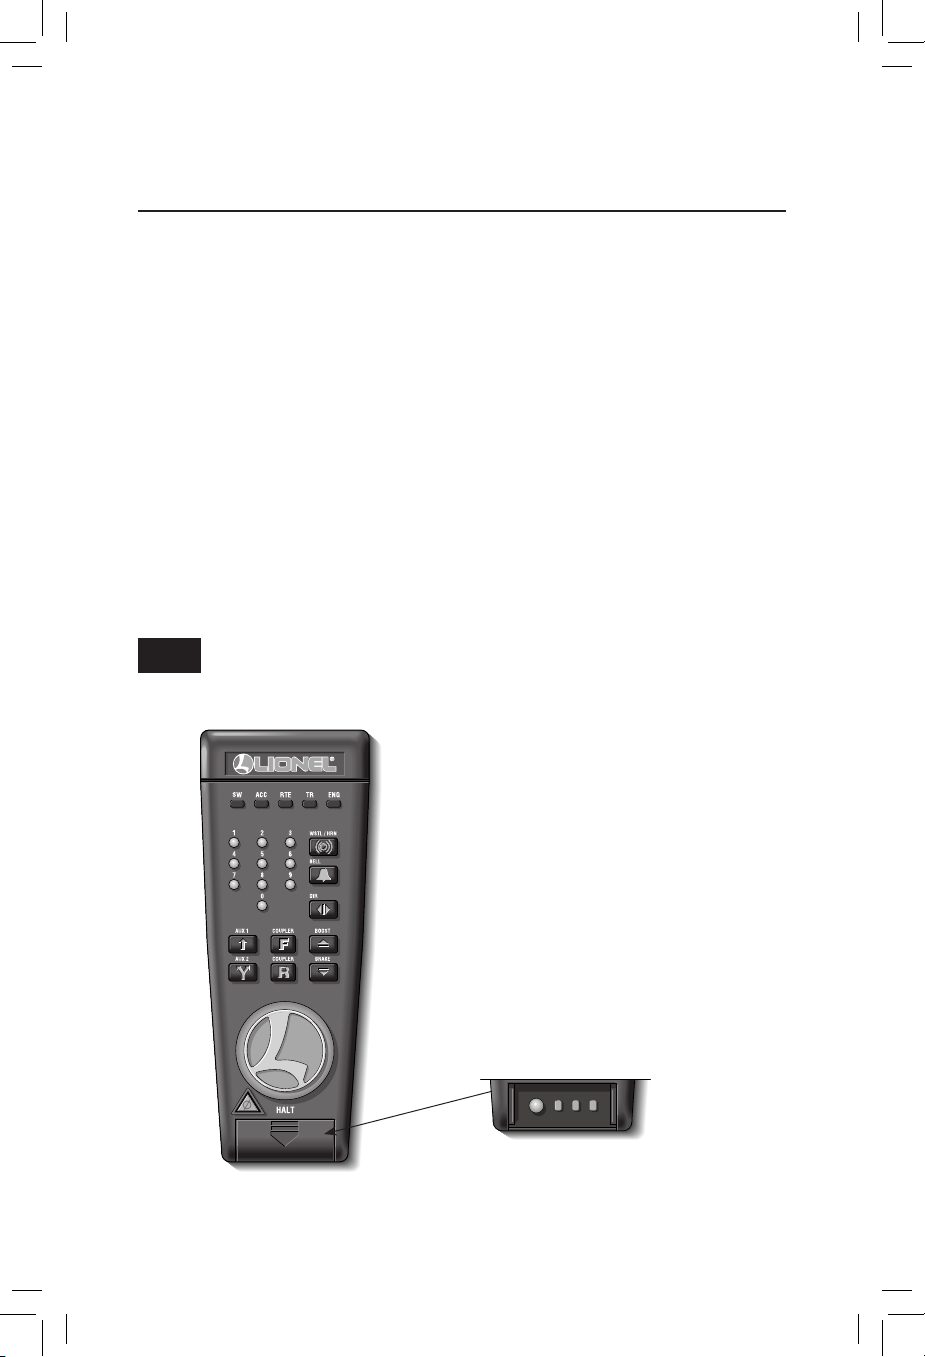
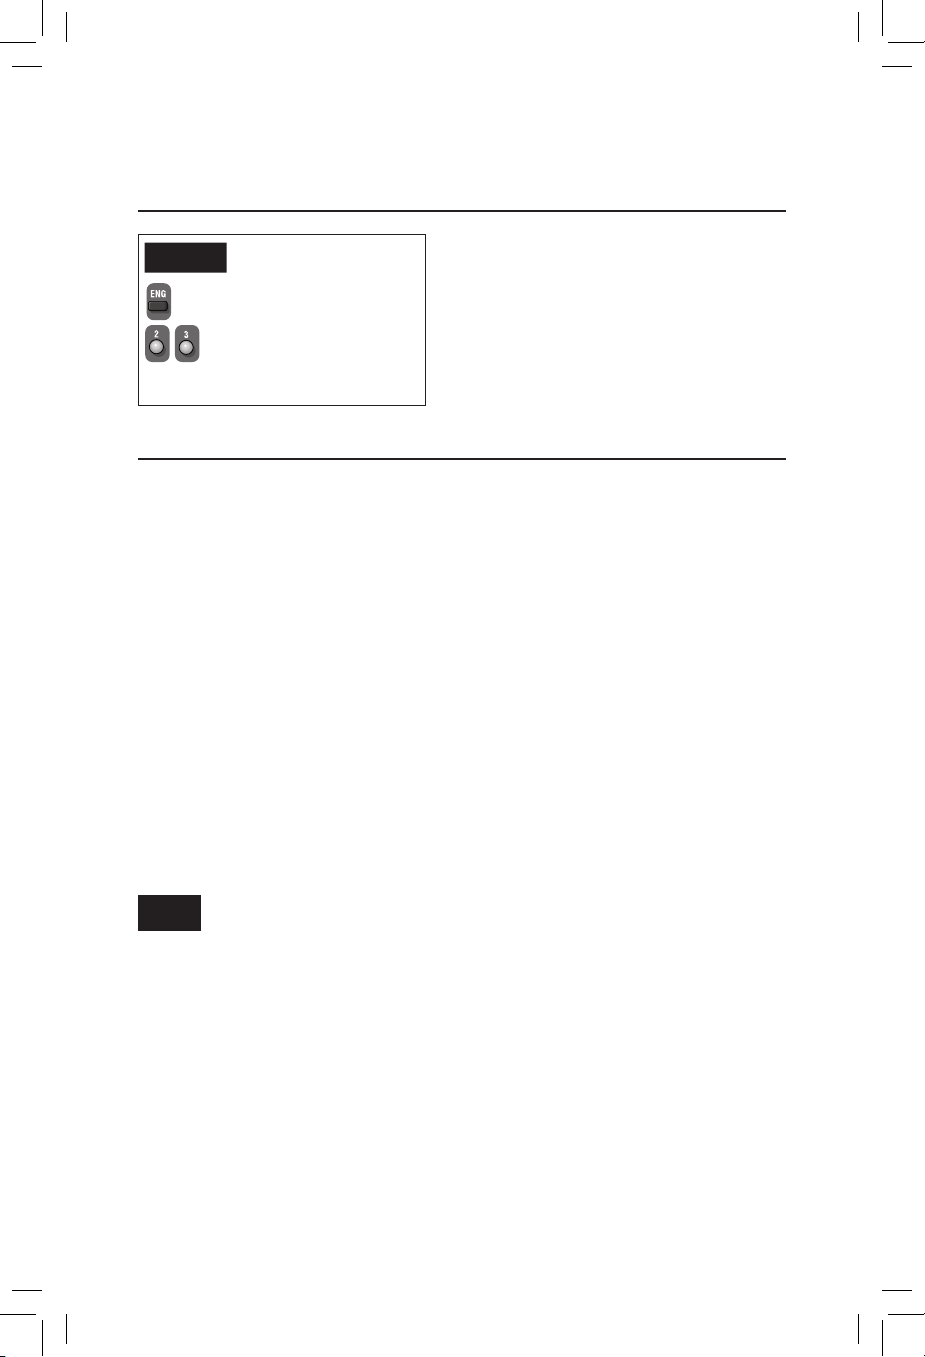
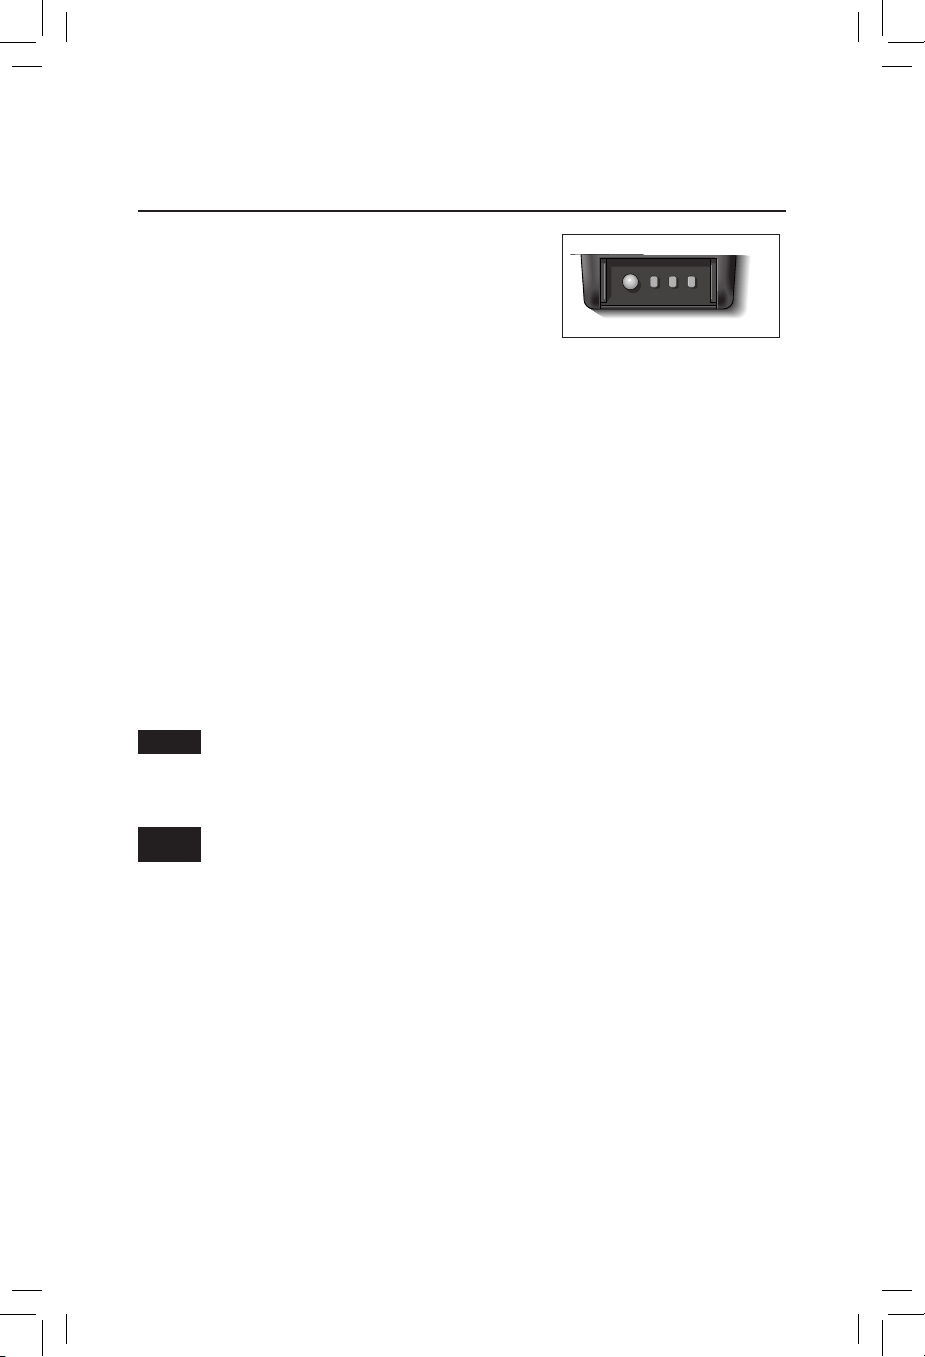
1. Remove the sliding cover over the SET key at the bottom front of the CAB-1L.
2. Hold down the SET key and press a number key (1 - 9) to pick the radio channel to transmit on.
3. The speaker will beep to give feedback when the channel is configured, either one beep if a base
responds, or three beeps if no base responds. The new channel number will be saved.
Both types of beeps mean that a channel has been configured, but if there happens to be a base
in range when the channel is set, then the one beep signal means that communication has been
established with the base. Three beeps means that no base responded when test commands were
transmitted by the CAB-1L during channel configuration. If this happens when a base is within range,
then it may be that the base is set to a different channel than the one you just selected for your CAB1L (see Base-1L channel selection).
Once you’ve heard the “single-beep” confirming your CAB-1L has connected to a Base (either
Base-1L or LEGACY Base) you’re all set. You can further confirm communication is working by
turning the throttle or pressing a button on your remote. The red LED on your base should illuminate
in response to incoming commands.
Note!
Once you start this process, make sure to change all remotes to the new channel
assignment!
SET LMH
7

Command-equipped locomotives
SET LMH
Programming ID#s for your Command-equipped locomotives
Example
Assign an engine ID# to
Santa Fe 2343 on Track #1
Command Base ON, track power off
Slide the locomotive PROGRAM/RUN
switch to PRG/PROG/PROGRAM
Place locomotive on track
Turn track power on
Set TMCC ID to Engine #23:
Press ENG
Press 23 (the ID#)
Press and release the SET (under
removable front panel at the
bottom-front of your CAB-1L)
Hear horn/whistle sound (or see the
headlight flash)
Slide the switch back to the RUN
position.
Your engine remembers its ID# forever;
change it any time—just repeat these
steps
very Command-equipped locomotive comes
E
factory-programmed with TMCC ID Engine #1.
You may wish to assign a new ID#, using any number
from 1 through 98 (do not use engine 99, as this is the
universal ID# that all LEGACY-equipped locomotives
will respond to). To make it easy to remember,
try using part of the locomotive cab number. For
example, ID your Lionel F3 no. 2343 to "#23" or
"#43." We use 23 in our example.
Here’ s how to give a Command-equipped
locomotive its new ID#. Make sure the Command
Base-1L is ON. Refer to the Command-equipped
locomotive owner’s manual(s) for PROGRAM/
RUN switch locations. Holding the locomotive, slide
its control switch to the PRG, PROG or PROGRAM
setting. Place the locomotive on track and power up
your railroad.
Using CAB-1L, press ENG, the ID# (any number 1
to 98), then press and release the SET button located
under the removable panel on CAB-1. Hear the horn
or whistle blow, or the headlight flash. This confirms
your new ID #. Slide the switch back to RUN and
you’re ready to go.
Want to change your locomotive’s ID#? Just repeat
these steps any time.
8
Command-equipped locomotives
Addressing locomotives
Address Engine #23
Example
Press ENG
Press 23 (the ID#)
Throttle up or press any comand button
To operate a Command-equippcd locomotive, press
ENG and its ID# on CAB-1. Turn the throttle or press
any command button; the sound system starts up
(equipped locomotives) and the engine is ready to
begin operations.
Activating whistle quilling on LEGACY locomotives (optional)
The Quilling Whistle is a key feature of LEGACY locomotives. “Quilling” allows you to
continuously vary the intensity of the whistle, creating your own unique signature sound. But by
default, CAB-1L sends TMCC style horn commands in order to be compatible with non-LEGACY
locomotives. Because LEGACY locomotives respond to these older commands, too, you’ll still hear
horn or whistle sounds, but you won’t be able to quill.
To set Quilling horn/whistle for one engine or train ID:
1. Remove the sliding cover to expose the SET key at the bottom-front of the CAB-1L.
2. Select a current engine or train in the usual way by pressing either ENG and enter the ID#
or TR and enter the ID#.
3. Hold down the SET key and press the WSTL/HRN key to toggle the whistle configuration
between TMCC1 and LEGACY style for the current engine or train. The CAB-1L will beep
once if the TMCC1 whistle style is selected, or it will beep twice if the LEGACY quilling
whistle is selected instead.
Repeat this process for each LEGACY locomotive ID. Note that this horn setting for engines and
trains is saved internally within the CAB-1L itself. This means that if more than one CAB-1L is being
used on your layout, each one must be programmed to set the horn style for a given engine or train.
Note!
Remember that older TMCC1 locomotives don’t support quilling and won’t sound at all
in response to LEGACY quilling commands. If an engine stops responding to the WSTL/
HRN button, but its bell is working correctly, change back to TMCC1-style whistle for that
particular Engine ID and all will be well.
9
Command-equipped locomotives
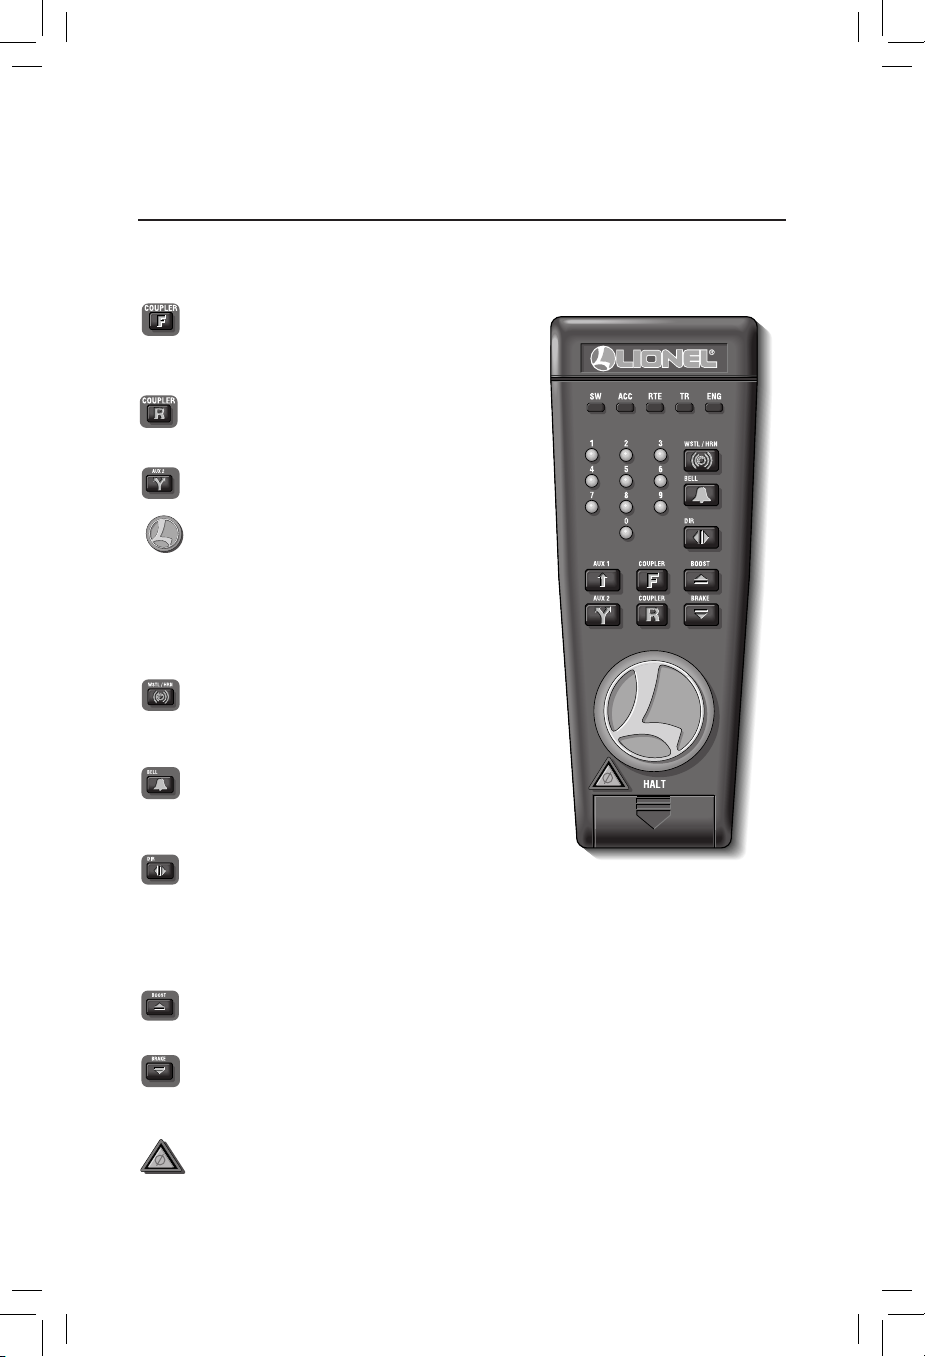
Sending basic commands to locomotives with CAB-1L
The corresponding RailSounds sound system effects are in bold italic type.
Some locomotives may not support all listed features.
Opens your locomotive's front coil coupler
(equipped locomotives). Coupler release
sound.
Opens your locomotive’s rear coil coupler (equipped
locomotives). Coupler release sound.
Toggles the locomotive's headlight on and off.
Controls the speed of your locomotive. Turn the
THROTTLE to the right to accelerate, to the left to
decelerate. There is no “stop.”If you don't press a
button or turn the throttle for 30 seconds, CAB-1L goes
into battery-saving “sleep” mode. Turn the
throttle or press any button to “wake” it up.
Activates the locomotive’s horn or whistle as long
as you hold the button. Steam whistle or
diesel horn sound.
Press BELL to activate the bell, again to
discontinue. Steam bell or diesel bell
sound.
In command control, DIR operates differently than
in conventional Lionel operations. Press DIR—the
locomotive decelerates to complete stop; turn the throttle up, and the locomotive will
accelerate in the new, opposite direction. THERE IS NO NEUTRAL. Steam or diesel
letoff sound.
Press and hold BOOST for extra power. Release BOOST and your locomotive returns to
its previous speed. Labored chuff sound, fuller diesel prime mover.
Press and hold BRAKE when you want to slow down or stop. Release BRAKE and your
locomotive returns to its previous speed. Squealing brake sounds. Coasting
chuff, quieter prime mover.
Press HALT for emergency stops only. HALT stops all Command-equipped locomotives
in action and shuts down all remotely-controlled track power transformers.
10
Command-equipped locomotives
SET LMH
Tuning your locomotive’s performance
SETTING MOMENTUM
The LEGACY system’s momentum feature simulates the
labored performance of a real life locomotive pulling a heavy
load. Press L, M, or H (located under CAB-lL’s removable
panel) for light, medium, or heavy momentum. The locomotive
remembers this setting until you change it. For normal (quick) locomotive response, press L.
Get a feel for the difference in momentum settings. Select L, M, or H. Turn your throttle slightly
and wait a few seconds for the locomotive to respond.
Note that on LEGACY/TMCC2 locomotives, L, M and H settings change the number of individual
speed steps your locomotive supports. A setting of L gives 32 speed steps, M yields100 speed steps and
H provides 100 speed steps with added momentum.
SETTING STALL
Make your locomotive feel more responsive with stall (this tip is especially applicable to Pulmorpowered TMCC locos). Get your locomotive moving and press SET; the locomotive will stop. Tum
the throttle clockwise to get the engine moving, then decrease speed until the looomotive just stops.
Press SET again. Even if your locomotive doesn't move after turning the throttle, just press SET
again. Stall will be set. Your locomotive remembers the stall setting until you change it. To clear
stall, press SET twice, holding it for one second each time.
Detail
Note!
STALL EXPLAINED. Set a command-equipped locomo tive's stall, and it skips from zero
power to stall when you turn the throttle. Stall eliminates unnecessary throttle rotation—
making your locomotive more responsive.
Not all engines support Stall.
11
 Loading...