

Page 1
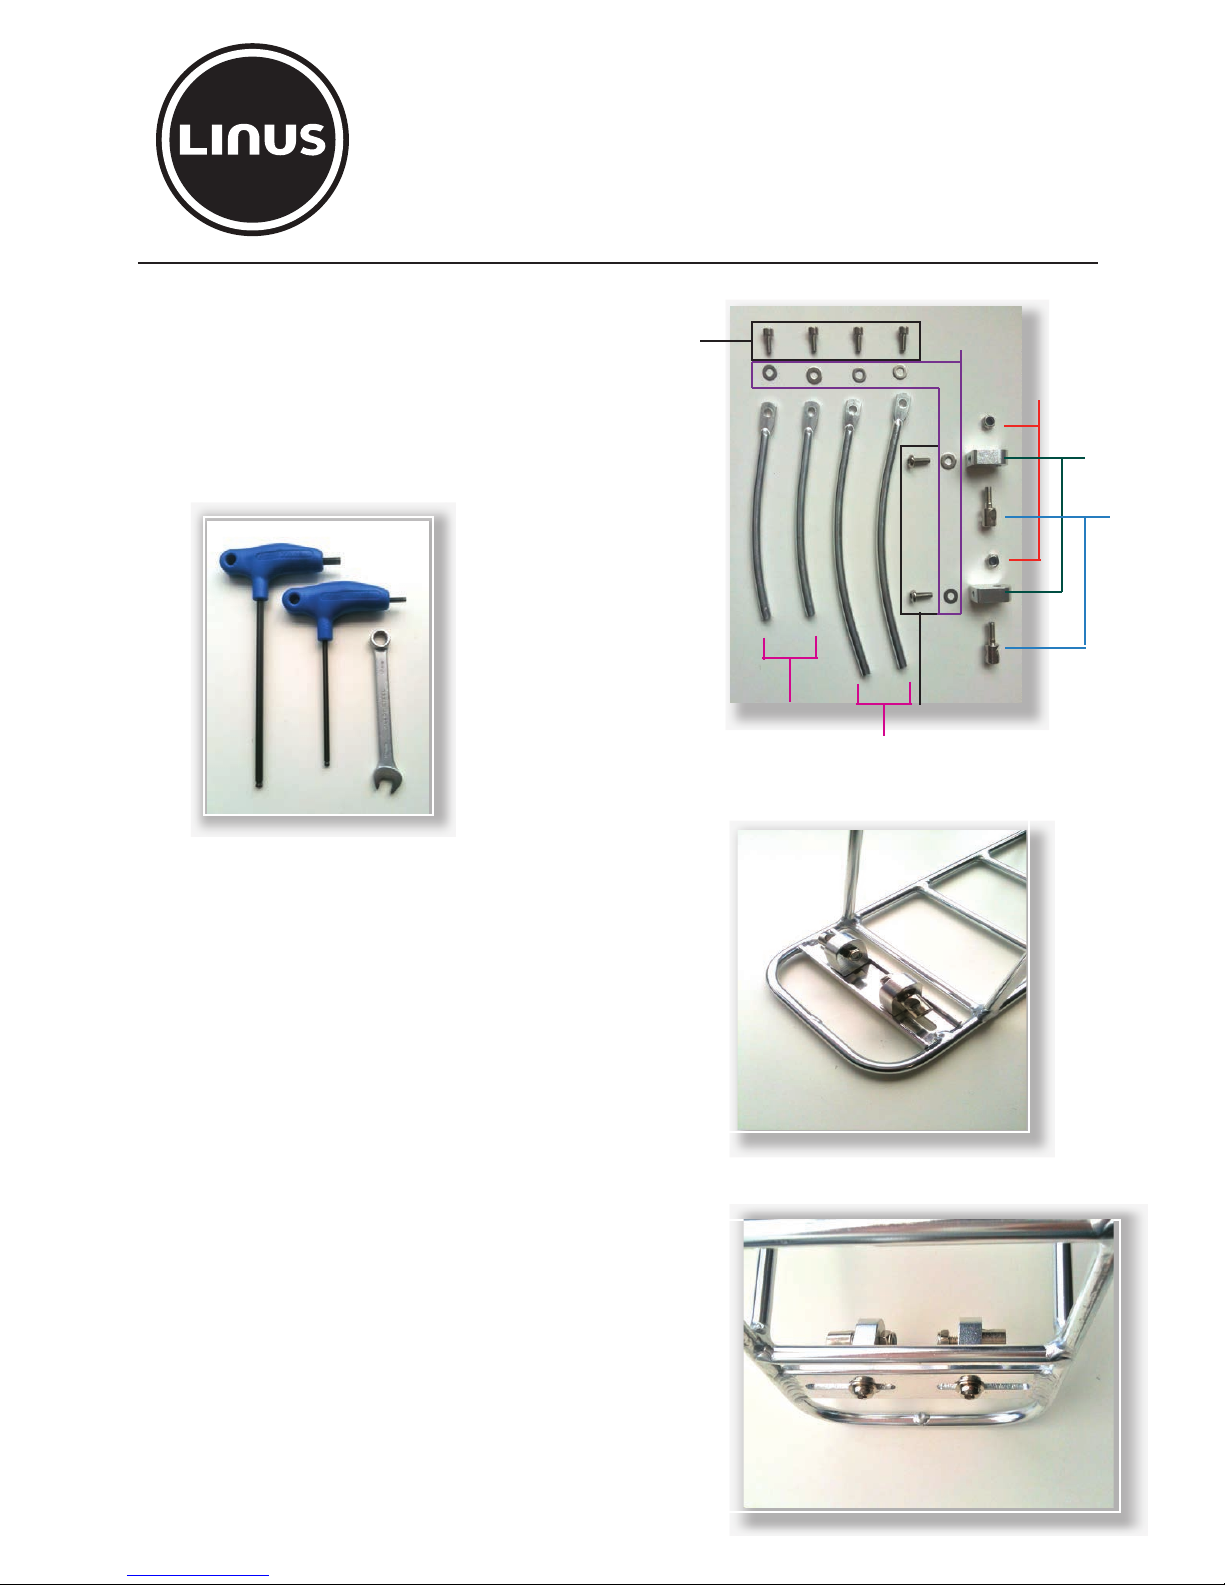
REQUIRED TOOLS:
• 5mm Hex Wrench
• 4mm Hex Wrench
• 10mm Box Wrench
ADJUSTABLE REAR RACK
INSTALLATION guide
M4x12mm Bolts (4)
Washers (6)
10mm Locknuts (2)
[SEE FIGURE 1. ]
FIGURE
1.
INCLUDED HARDWARE:
• M4 X 12mm bolts (4)
• M4 X 15mm bolts (2)
• Washers (6)
• Adjustable Brackets (2)
• Adjustable bracket bolts (2)
• Short Arms (2)
• Long Arms (2)
• 10mm Locknuts (2)
[SEE FIGURE 2. ]
Short
Arms (2)
M4x15mm Bolts (2)
Long
Arms (2)
FIGURE 3.
FIGURE 3.
Adjustable
brackets (2)
Adjustable
Bracket
Bolts (2)
FIGURE 2.
Ensure Adjustable Bracket Bolts are inserted through
•
Adjustable Brackets with 10mm Locknuts threaded
onto Bracket Bolts. Do not tighten down. Place the
Adjustable Bracket onto bottom side of rear rack within
the slotted face.
*Do note the 10mm Locknuts are positioned on the
inside against the flat side of the Adjustable Brackets.
[SEE FIGURE 3. ]
• While the Adjustable Brackets are in place insert
M4 X 15mm bolts with washers through the slot and
thread into Adjustable Brackets. Do not tighten down.
[SEE FIGURE 4. ]
FIGURE 4.
Page 2
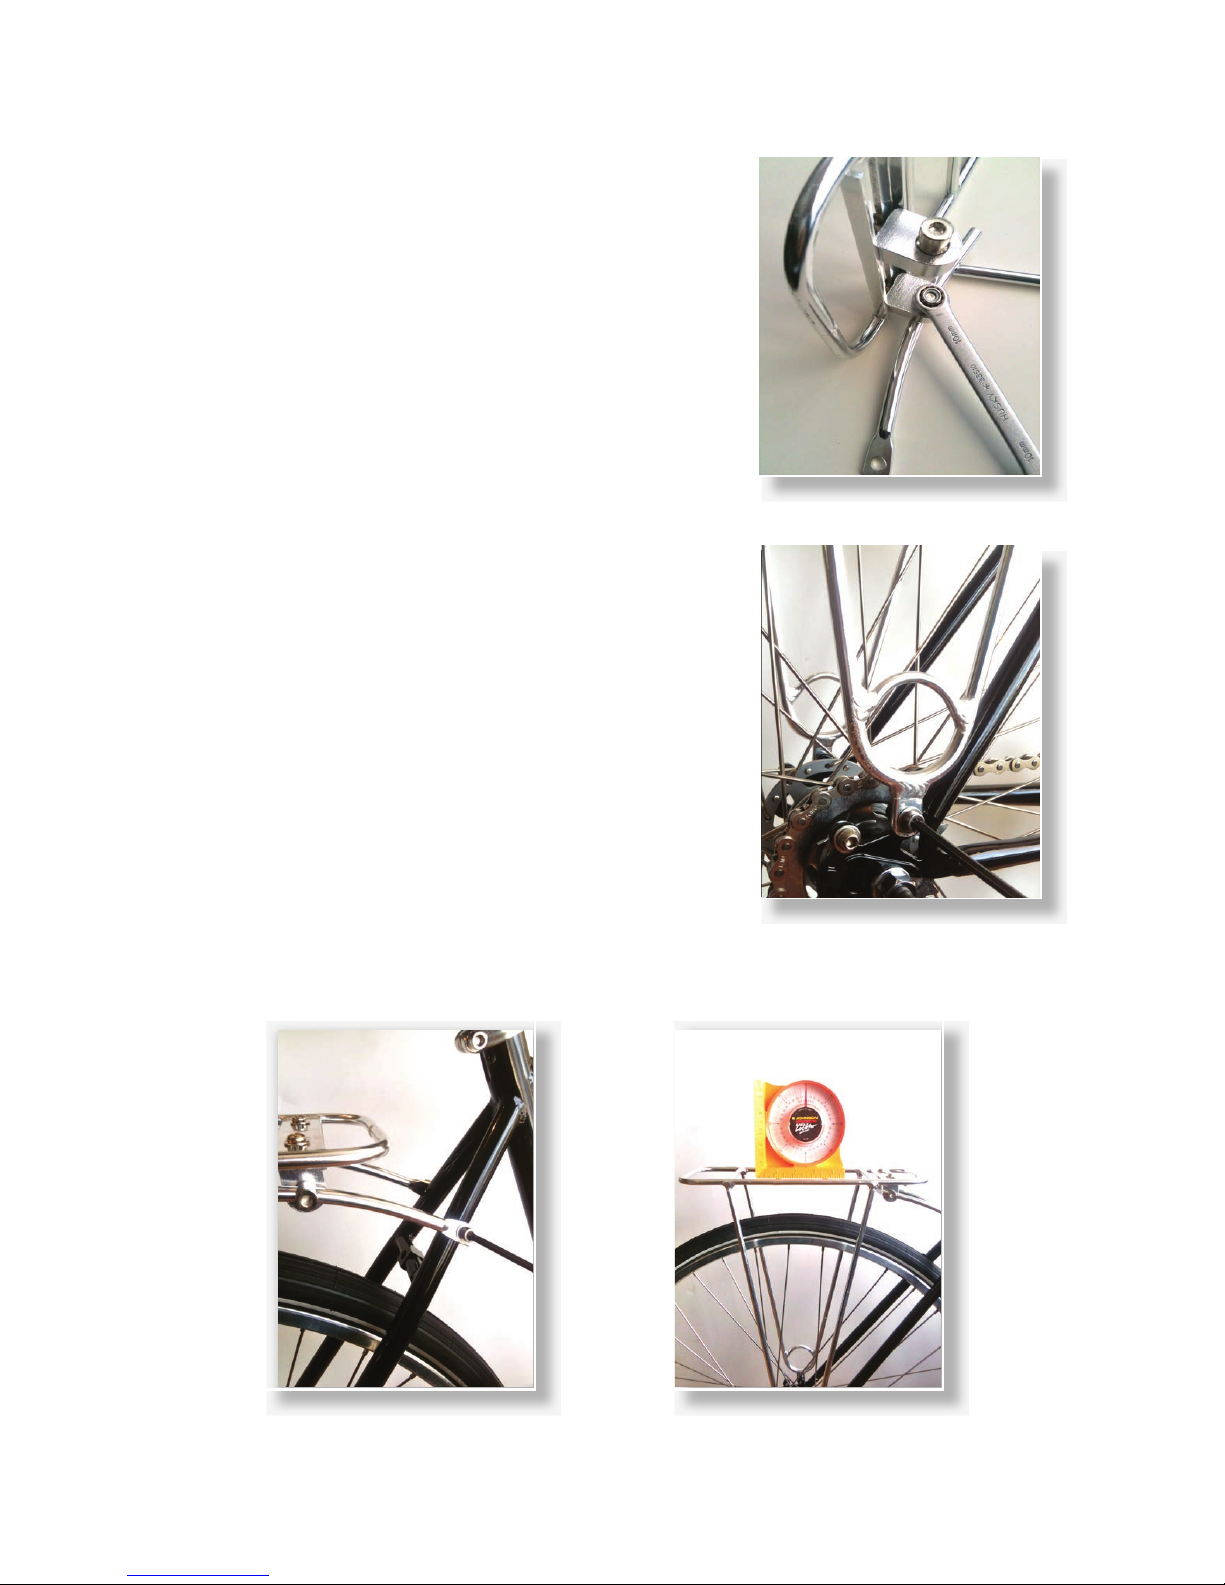
• Choose which Bracket Arms length will work best
with your bike frame. Slide the Bracket Arms into the
Adjustable Bracket Bolts and tighten down slightly
with the 10mm Box Wrench.
[SEE FIGURE 5. ]
*For extra stabilization of the Bracket Bolt
use the 5mm Hex Wrench on the outside of
the Bracket Bolt while tightening down.
• Bolt the M4 X 12mm bolts and Washers into the
rear drop out braze ons using the 4mm Hex Wrench.
[SEE FIGURE 6. ]
• Bolt the Bracket Arms into the seat stay braze ons
with M4 X 12mm Bolts using the 4mm Hex Wrench.
[SEE FIGURE 7. ]
FIGURE 5.
FIGURE 5.
• Using a level or by eye ensure the Adjustable Rear
Rack is level to the ground. Tighten all nuts and bolts.
Adjustable Rear Rack is installed.
[SEE FIGURE 8. ]
FIGURE 6.
FIGURE 6.
FIGURE 7. FIGURE 8.
 Loading...