

Page 1

Linpus Linux Lite
Operating System
User Manual
使用手冊
Linpus Technologies, Inc.
1
Page 2

Linpus Linux Lite
Operating System
User Manual
Linpus Technologies, Inc.
Page 3

2
Linpus Lite
Copyright © 2008. Linpus Technologies, Inc.
All Rights Reserved.
Linpus Linux Lite User’s Guide
Original Issue: 03/2008
Changes may be made periodically to the information in this publication
without obligation to notify any person of such revisions or changes.
Such changes will be incorporated in new editions of this manual or
supplementary documents and publications. This company makes no
representations or warranties, either expressed or implied, with respect to
the contents hereof and specifi cally disclaims the implied warranties of
merchantability or fi tness for a particular purpose.
Distribution of modifi ed versions of this document is prohibited without
the explicit permission of the copyright holder.
Distribution of the work or derivative of the work in any form for
commercial purposes is prohibited unless prior permission is obtained
from the copyright holder.
Linpus is a registered trademark of Linpus Technologies, Inc.
Linux is a registered trademark of Linus Torvalds.
Other companies’ product names or trademarks are used herein for
identifi cation purposes only and belong to their respective companies.
Linpus Technologies, Inc.
4F-3, 3-2 Yuanqu Street, Nangang District, Taipei 115, Taiwan.
TEL: 02-26533368
FAX: 02-26558368
E-mail:HelpDesk@Linpus.com
URL: http://www.linpus.com
Page 4
3
Manual Information
Question Answer
System and device basics
Chapter 1: Getting to Know Your System
Chapter 6: System Confi guration
Internet, connectivity and
browsing
2-1 Wired Network Setup
2-2 Wireless Network Setup
2-3 Web Browsing
Offi ce applications Chapter 3: Offi ce applications
Editing and printing
3-1 OpenOffi ce.org Writer main functions
6-3 Printer Setup
Playing disks 5-1 Multimedia Play
System recovery Appendix A
Symbols
Attention
Explanation
Page 5

4
Linpus Lite
Index
Chapter 1 Getting to Know Your System 6
1.1 Turn on your computer 6
1.2 Turn off your computer 7
1.3 Desktop Modes 8
1.4 Tool Bar 9
1.5 Windows 11
1.6 File Manager 12
1.7 Using Removable Devices 13
1.8 Using the Keyboard 15
Chapter 2 Using the Internet 16
2-1 Wired Network Setup 16
2-2 Wireless Network Setup 17
2-3 Web Browsing 19
2-4 Emails 22
2-5 Instant Messaging 26
Chapter 3 Offi ce Applications 27
3-1 Word Processor (OpenOffi ce.org Writer) 27
3-2 Spreadsheet ( OpenOffi ce.org Calc ) 31
3-3 Slide Presentation (OpenOffi ce.org Impress) 35
Chapter 4 Useful Tools 38
4-1 PDF Reader 38
4-2 Dictionary – StarDict 39
4-3 Ebook 40
4-4 Calculator 41
Chapter 5 Multimedia, Games 42
5-1 Multimedia Play 42
5-2 Image Viewer 44
5-3 Games 45
Page 6

5
Chapter 6 System Confi guration 46
6-1 Date and Time 46
6-2 System Monitoring 47
6-3 Printer Setup 48
6-4 Power Management Preferences 50
6-5 Bluetooth Functions and Preferences 51
Appendix A - Rapid System Recovery 58
GPL Copyright Notice 61
Trademark Statements 62
Service and Support 62
Page 7

Linpus Lite
6
Chapter 1
Getting to Know Your System
Linpus Linux Lite has brought you a brand new super-intuitive user
interface with a simple and easy-to-use system menu and more of your
favorite applications.
1.1 Turn on your computer
1. Switch on you PC monitor and press the power button to turn on your
PC.
2. The system will then auto-login to the Simple Mode using the default
user account “user”.
At default settings, the password for user account “user” is “null”,
the password of “root” is “111111”.
Page 8

7
Chapter 1
1.2 Turn off your computer
To safely turn off your computer and protect your data integrity, please
follow the steps below:
1. Click on the “Exit” icon on the right-hand side of the Tool Bar.
2. Then click on the “Turn Off” button on the pop-up dialog to safely
shutdown your computer.
Picture 1-1 Turn off your computer
Please Note: To avoid serious damage to the system and loss of
data, DO NOT directly switch-off the power of your computer
before the system is safely shutdown.
Page 9

Linpus Lite
1.3 Desktop Modes
Linpus Linux Lite offers a super-intuitive icon desktop mode. After the
system is started, you will see this Simple Mode user interface as shown
in Picture 1-2. All software applications are categorized into 5 tabs –
Internet, Work, Learn, Play and Setting.
To open a tab or an application simply to click on it.
Picture 1-2 The Simple Mode Desktop Environment
8
Page 10
9
Chapter 1
1.4 Tool Bar
The Tool Bar is located at the bottom of the desktop. There are some
application shortcuts, system notification, and permanent system utility
icons within (see picture below).
Picture 1-3 The Tool Bar
Application Shortcuts
Located on the left-hand side of the Tool Bar, there are 2 application
shortcuts. They are shortcuts for “Display Desktop” and “File Manager”
. You can minimize all running applications at once using the “Display
Desktop” - and browse through fi les using the “File Manager”.
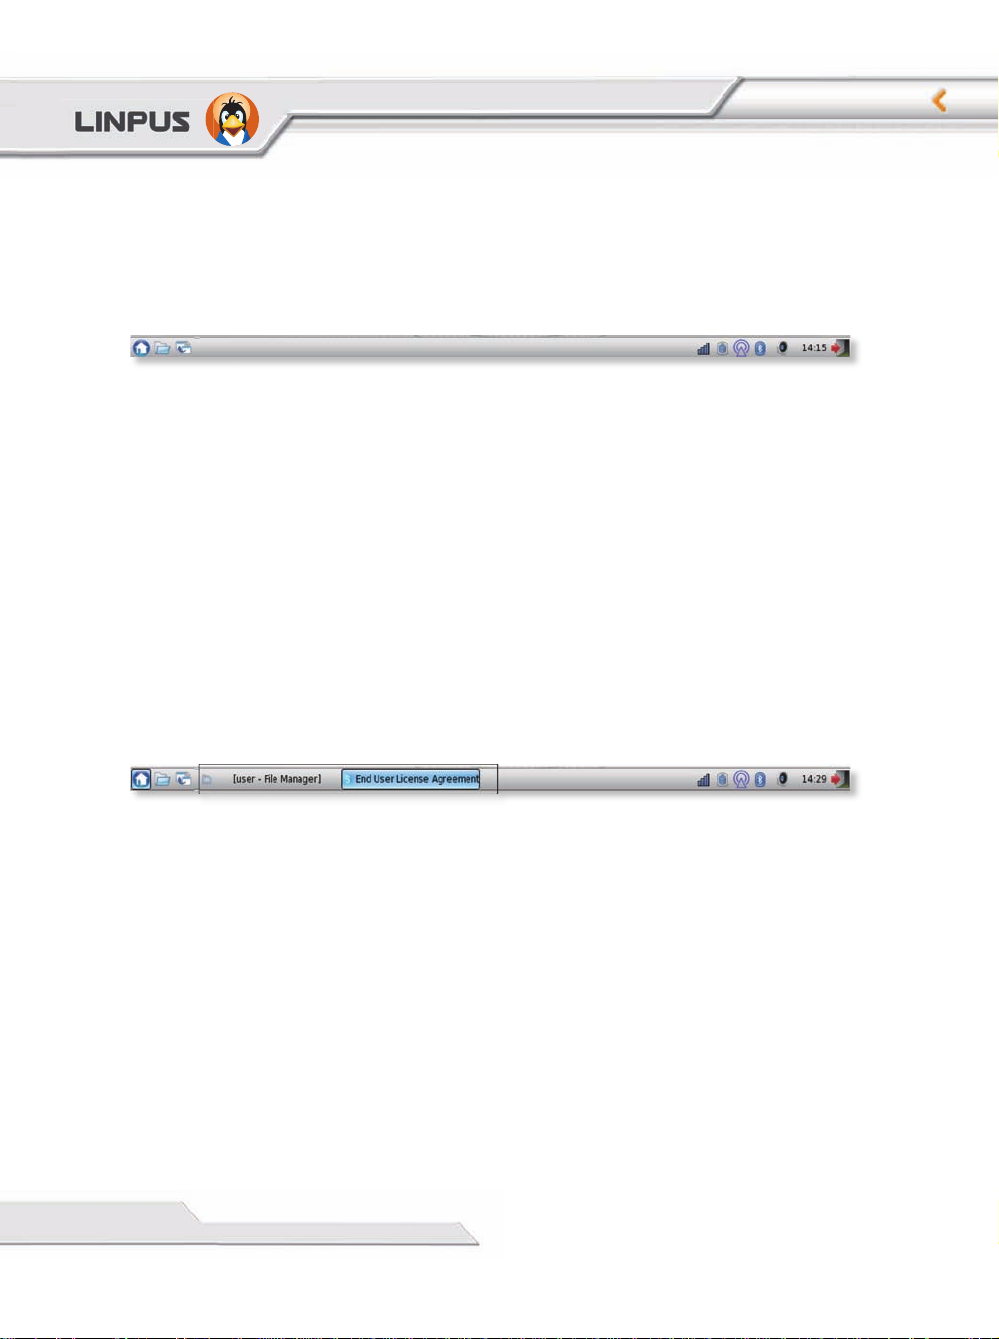
System Notifi cation Area
When an application program is started, it will remain running in the
system until you close it. At the middle of the Tool Bar is the system
notifi cation area. All running applications will reside in this area.
Picture 1-4 System Notifi cation Area
Page 11
Linpus Lite
10
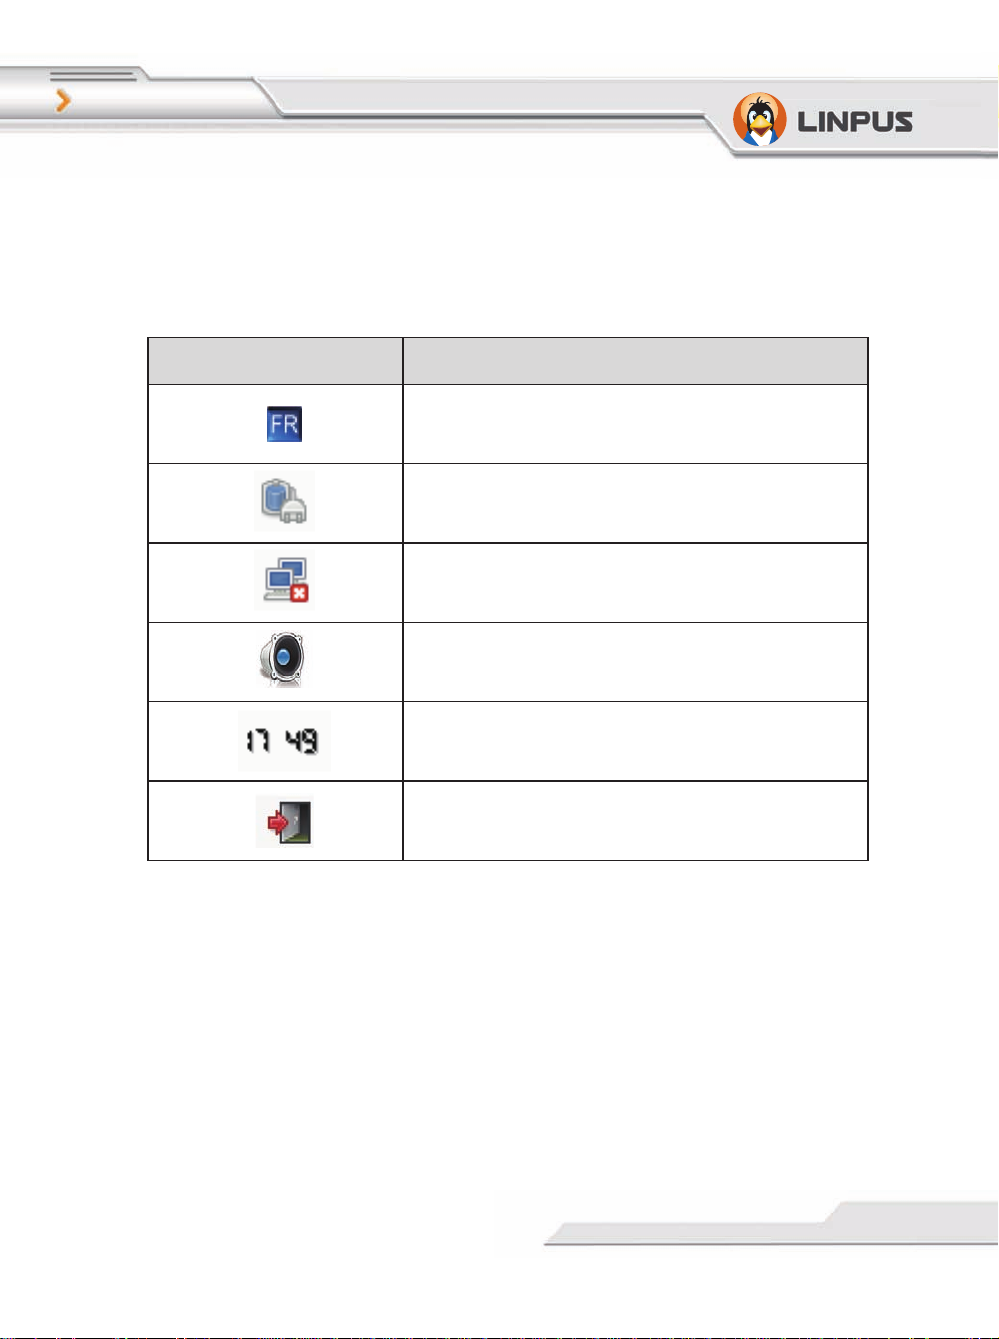
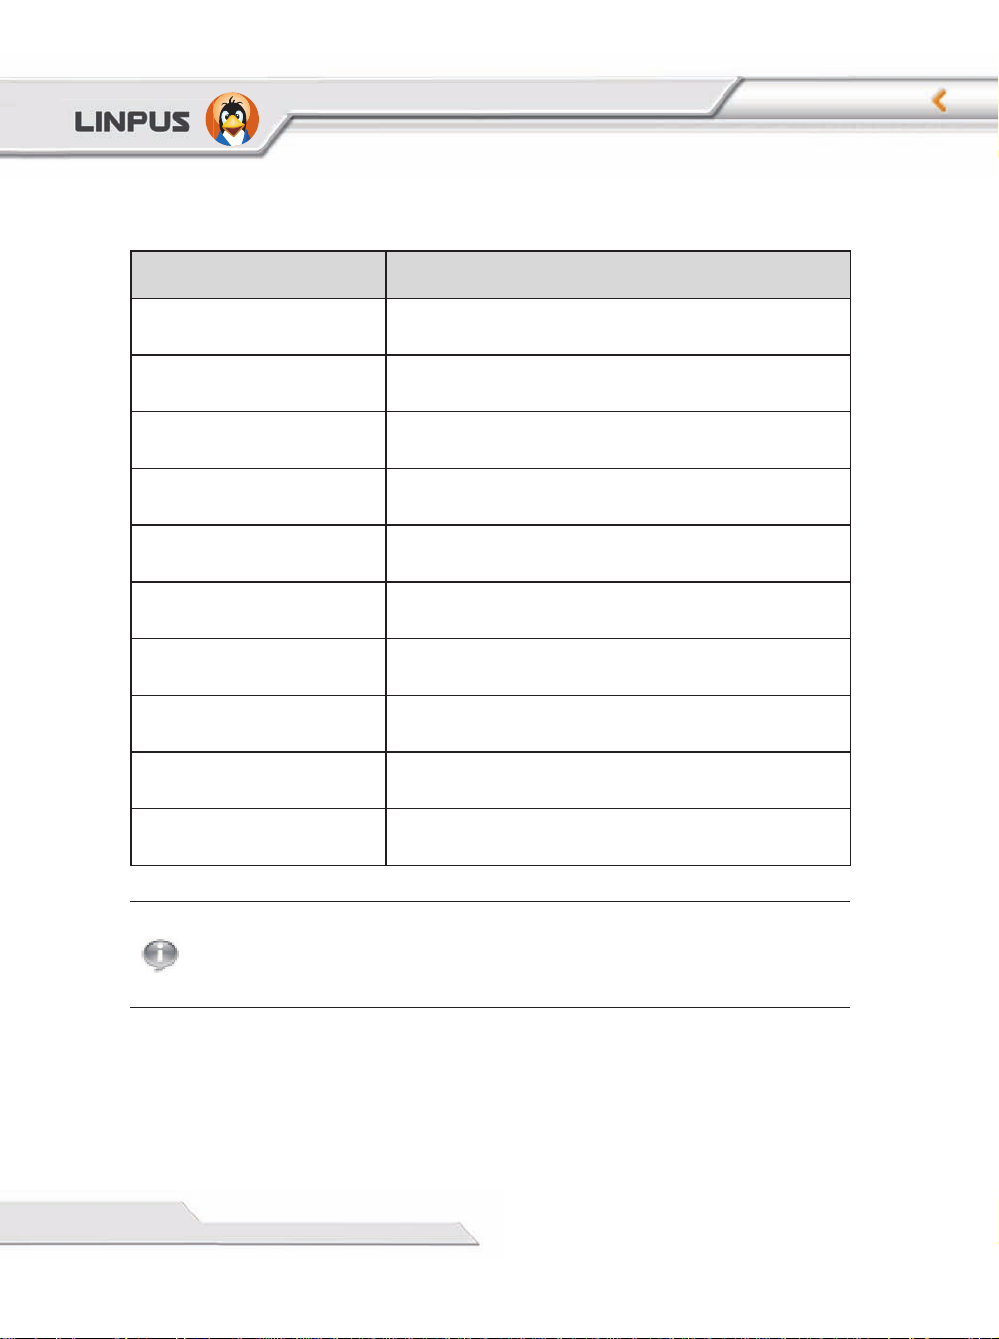
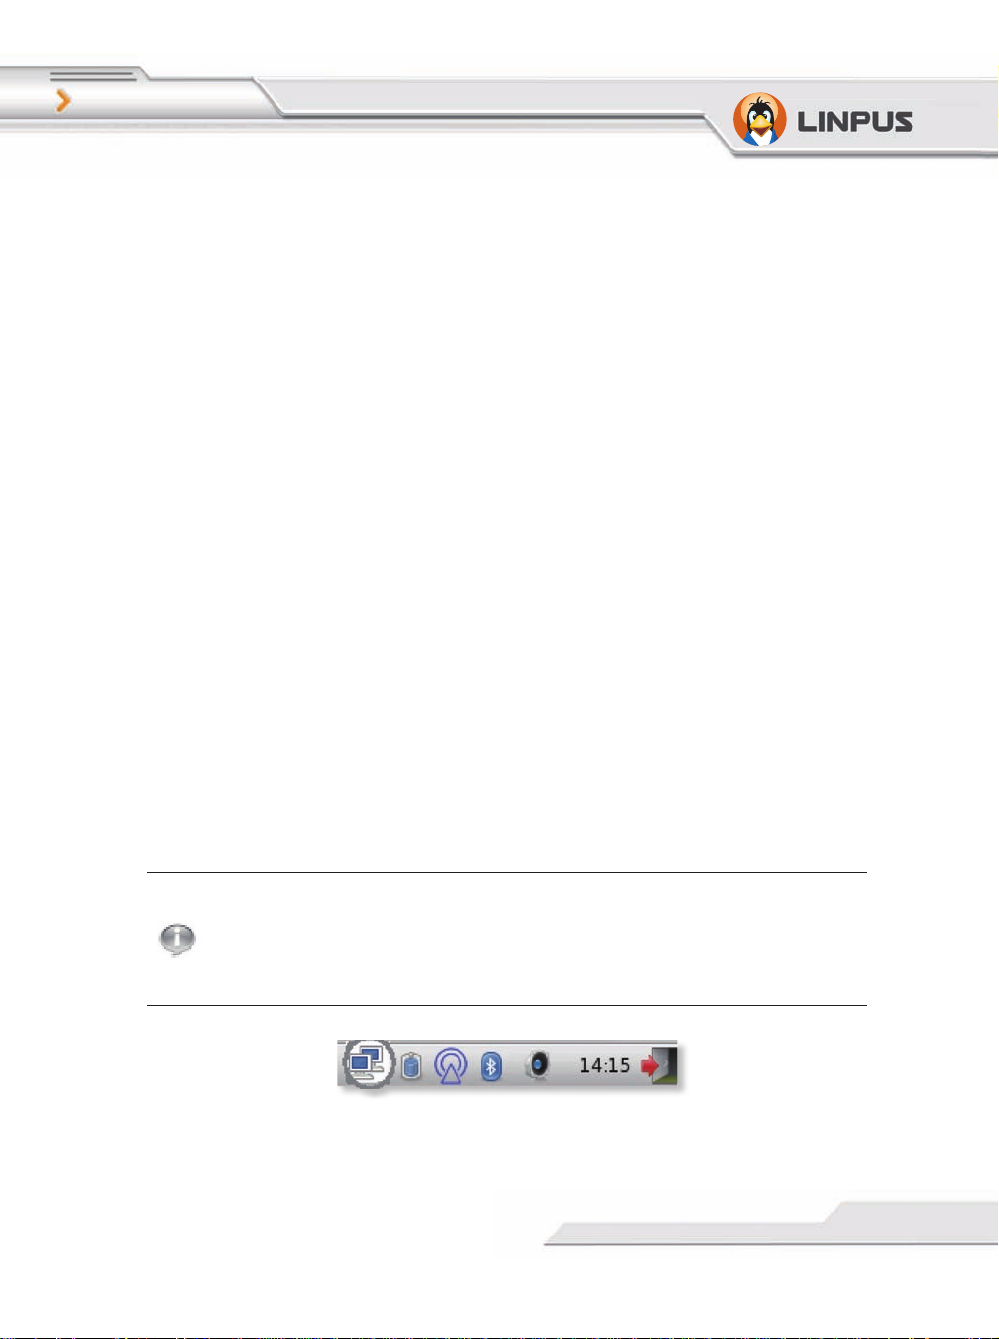
Permanent System Utilities
There are several permanent system utilities located at the right-hand
side of the Tool Bar. Details about these utilities will be introduced in
later chapters.
Utility Icon Description
Language input methods
System power supply status
System network connection status
System sound volume
System Date/Time
Exit
Page 12

11
Chapter 1
1.5 Windows
When you open a program, it should fit to your screen. If a running
application window does not fi t just right to your screen, you can make
adjustments using the steps below:
1. Hold down the [Alt] button, then move the mouse cursor over the
targeting window and hold down the left mouse key at the same time.
The mouse cursor will then become a palm like icon.
2. Move the mouse to adjust the windows to an appropriate position.
Page 13
Linpus Lite
12
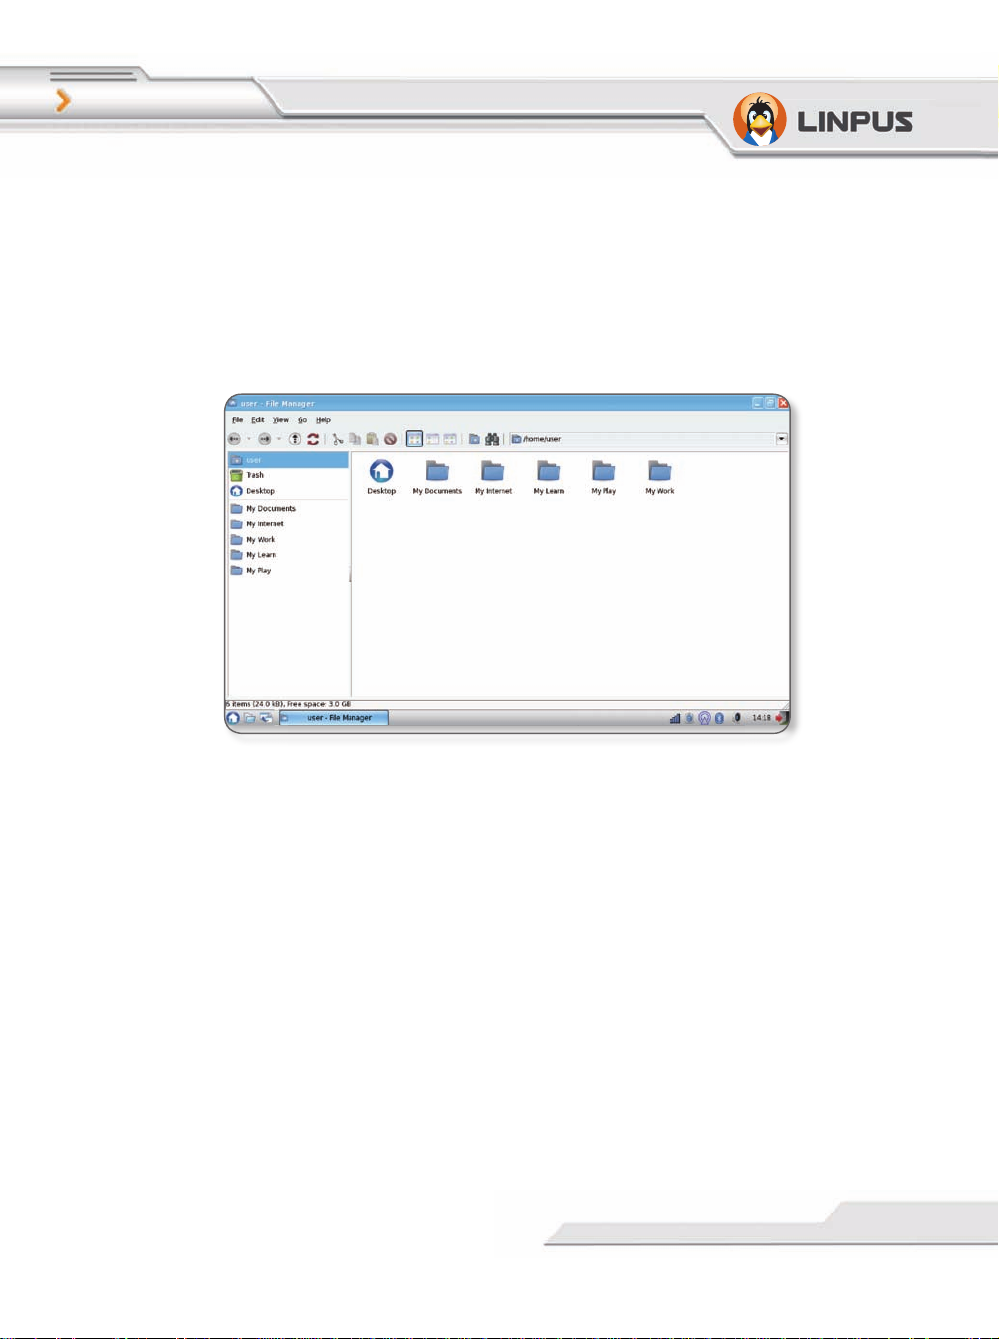
1.6 File Manager
Click on the “File Manager” icon located under the “Settings” feature
group tab to start the File Manager program. Alternatively, you can click
on the File Manager shortcut located at the left-hand side of the Tool Bar.
Picture 1-5 File Manager
Page 14
13
Chapter 1
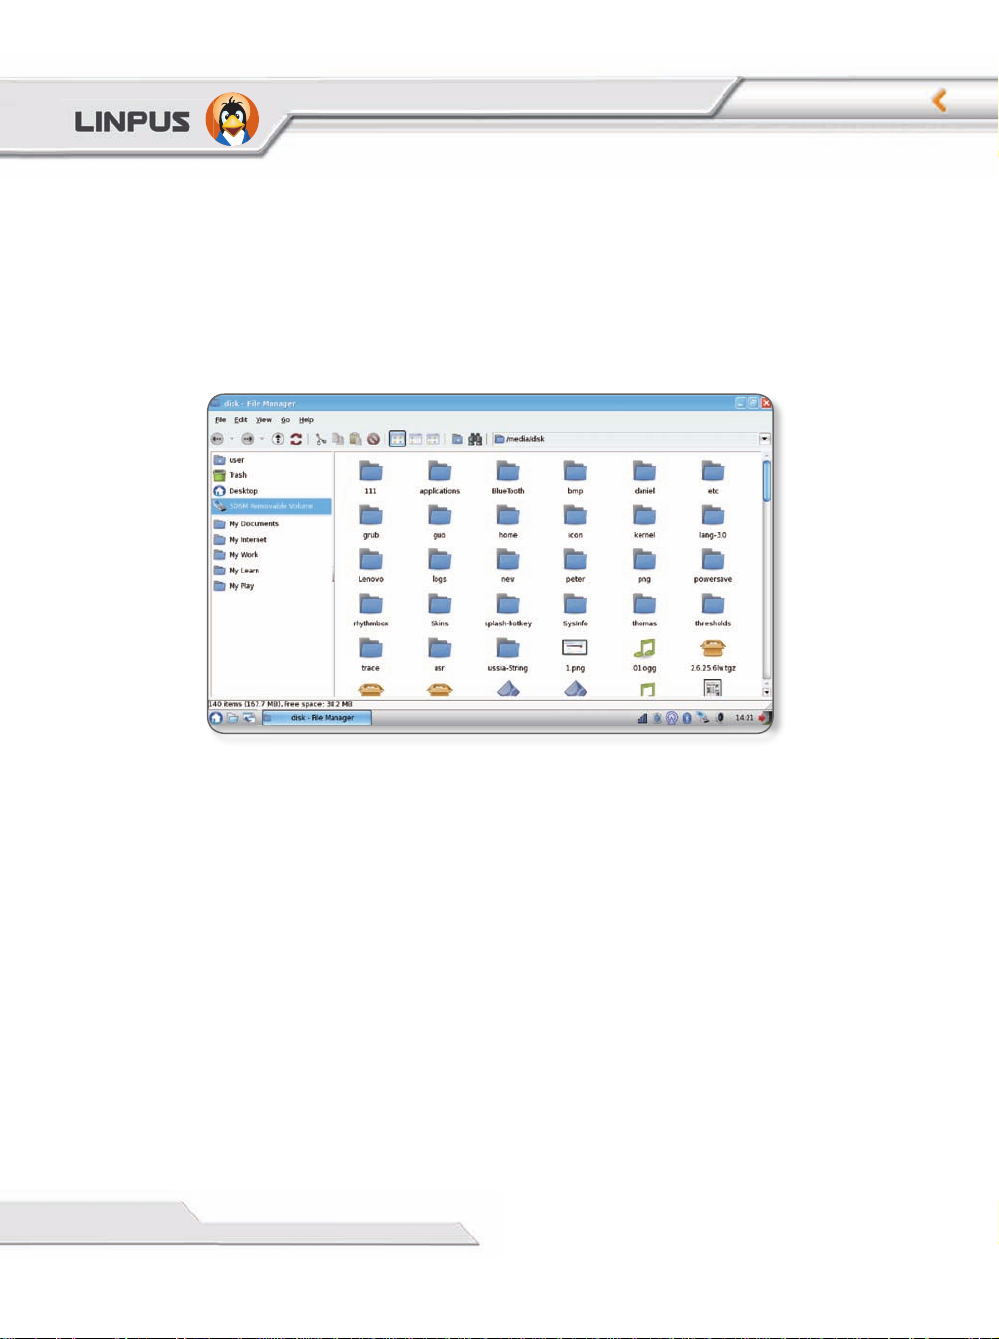
1.7 Using Removable Devices
When you plug-in removable storage devices such as USB Disks, the
system will automatically detect the device and, using the File Manager,
display its contents ( As shown in Picture 1-6). You can use the File
Manager to view, copy, modify, move and delete any files and folders
stored on that device.
Picture 1-6 Using File Manager to browse data stored in a USB Disk.
Page 15
Linpus Lite
14
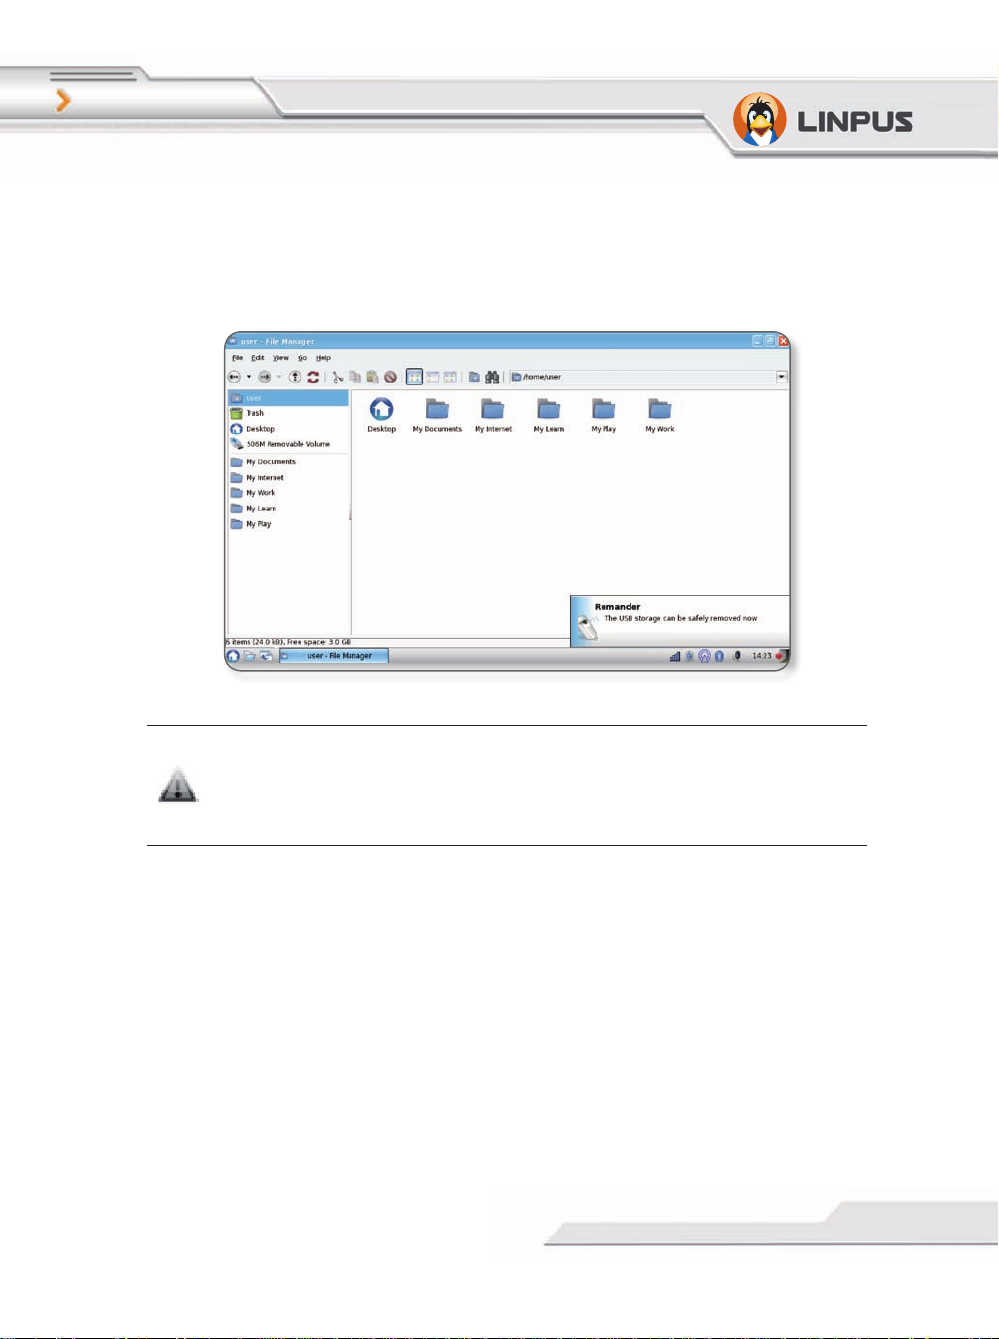
After you have fi nished your tasks, please fi rstly close all fi les saved to
the USB device. To remove the USB device safely, right click on the
USB storage device icon and select the “Unmount” option in the quick
menu, fi nally physically remove the USB storage device.
Picture 1-7 Safely unmount and remove a USB Disk.
Please DO NOT physically remove the USB storage device
while files saved on it are open as it may corrupt the files and
result in loss of data.
Page 16
15
Chapter 1
1.8 Using the Keyboard
Function Keys Description
[Fn][Esc] Camera on/off
[Fn] [F1] Suspend to RAM
[Fn] [F2] Screen On/Off
[Fn] [F3] LCD / CRT dual displayer
[Fn] [F5] WLAN & Bluetooth On/Off
[Fn] [F6] Touchpad On/Off
[Fn] [F7] NumLock On/Off
[Fn] [↑] Brightness Up
[Fn] [↓] Brightness Down
[Fn] [→] Volume Up
To use the Function Keys, you need to hold down the [Fn] key at
the bottom-left of the keyboard then press the Function Key.
Page 17
16
Linpus Lite
Chapter 2
Using the Internet
Linpus Linux Lite supports both wired and wireless network. Before you
start surfi ng on the Internet, please follow the steps below to setup your
Internet connection.
2-1 Wired Network Setup
Before proceeding with the setup, please make sure the following:
1. One end of the network cable is properly plugged into your computer’s
network adapter port;
2. Plug the other end of the cable into a Switch or Hub which is already
part of a LAN connected to the Internet.
LAN Network with Dynamic IP Allocation (DHCP)
Linpus Linux Lite wired network is automatically set to on. If you are
connected to a LAN confi gured with dynamic IP allocation (DHCP), the
Internet will connect as soon as you have plugged in the cable.
If you are connected to a wireless network and wish to switch
to a wired network, firstly plug the network cable into the
computer. Right click on the network adapter icon as shown in
Picture 2-1 then uncheck the “Wireless Network” option.
Picture 2-1: Switching from a wireless network connection to a wired connection.
Page 18
Chapter 2
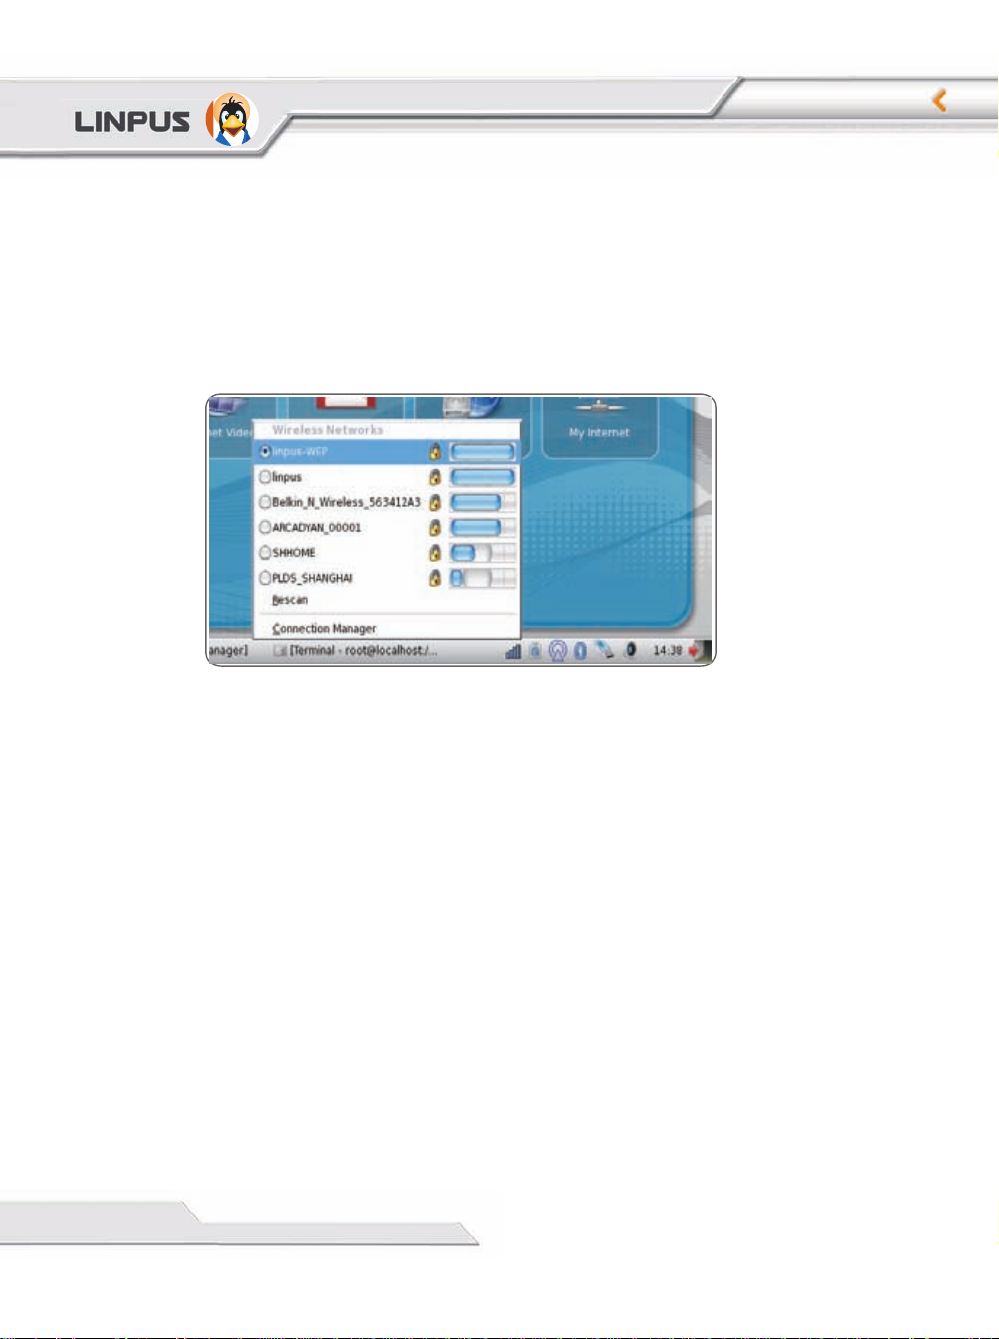
2-2 Wireless Network Setup
The wireless network adapter is turned on by default at startup. If no
wireless network is detected, please fi rstly check if your wireless network
access point is turned on. To get a list of all the wireless networks your
device has detected left click on the wireless icon in the Tool Bar (see
picture 2-2). Simply then click on the network you wish to connect to.
Picture 2-2: Selecting a wireless access point (AP)
17
Page 19
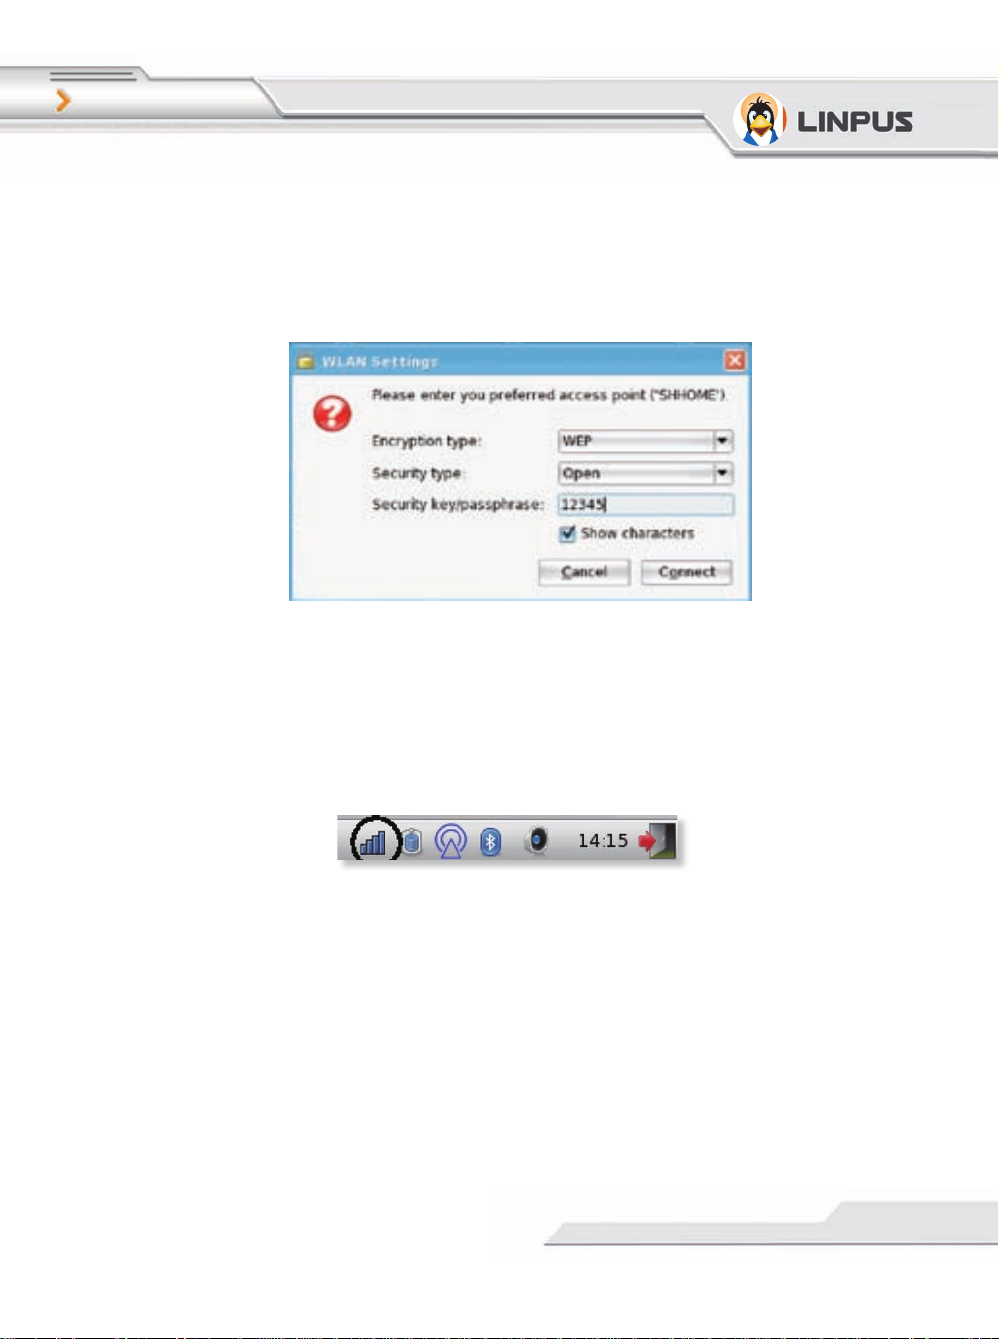
Linpus Lite
When a wireless access point is selected, the system might prompt you
for the password of the access point. Enter the correct password to the
dialogue box then click the “Login to Network” button as illustrated in
Picture 2-3.
Picture 2-3 Input password of a wireless access point.
When you are successfully connected, you can see an icon indicating the
connection signal strength at the Tool Bar.
Picture 2-4 Signal strength of the wireless network currently connected
18
Page 20
19
Chapter 2
2-3 Web Browsing
When you have fi nished setting up your network you can start browsing
the Internet. Linpus Linux Lite is equipped with the popular Firefox
Internet browser to bring you the best Internet surfi ng experience. In the
following sections, you can learn the basics of the Firefox user interface.
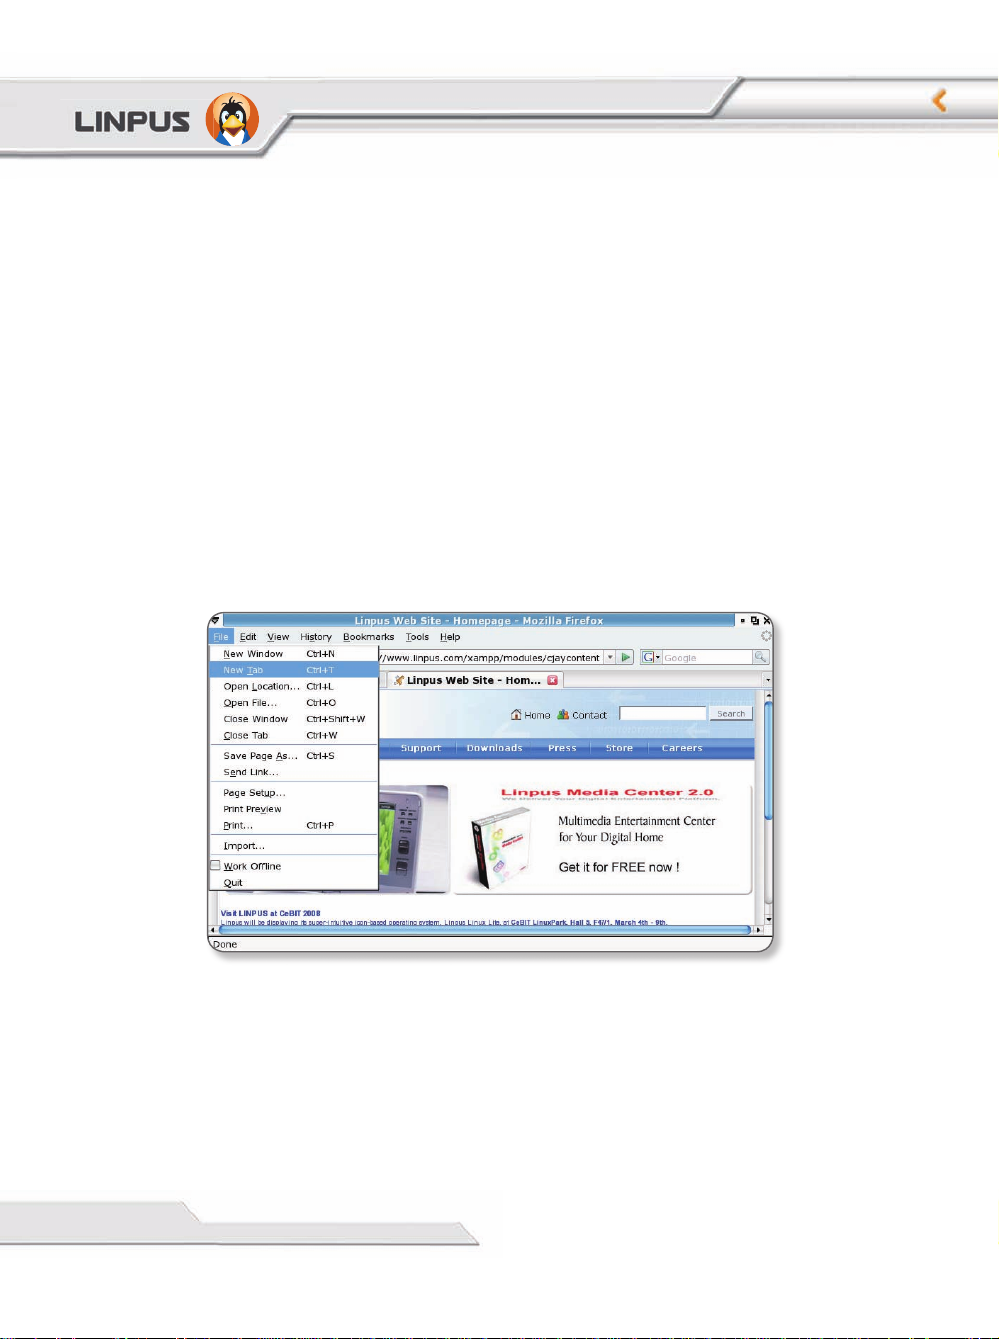
Tabbed Browsing
Tabbed Browsing is a page management feature for enhancing your
browsing experience. When you are browsing several web pages at the
same time, you can load these pages into “tabs” under the same browser;
by doing so you can open many web pages in one browser and quickly
switch between them. You may go to “File -> New Tab” to add an extra
tab or alternatively use the shortcut key [Ctrl] + [t].
Picture 2-5 Tabbed web browsing
Page 21

20
Linpus Lite
Using an Internet Search Engine
The Firefox Internet browser includes Google as shown in Picture 2-6. To
use this feature, simply input the search keyword into box and press the
Return/Enter key to start searching.
Picture 2-6: Keyword search using Google.
Other than Google, Firefox also has many other popular search engine
interfaces built-in like Yahoo, Amazon, eBay, Dictionary.com etc. You
can select your favourite search engine from the textbox located at the
top right-hand corner of Firefox browser. Input your search keyword
then hit Return/Enter to start searching.
Font Size Adjustment
You may adjust the web page font size by using the “Increase” and
“Decrease” options under the “View -> Text Size” setting in Firefox.
Bookmark Management
Click on “Bookmarks -> Book This Page” to bookmark the page you are
browsing. You may also edit and modify the bookmark label when you add
the bookmark.
Page 22
Chapter 2
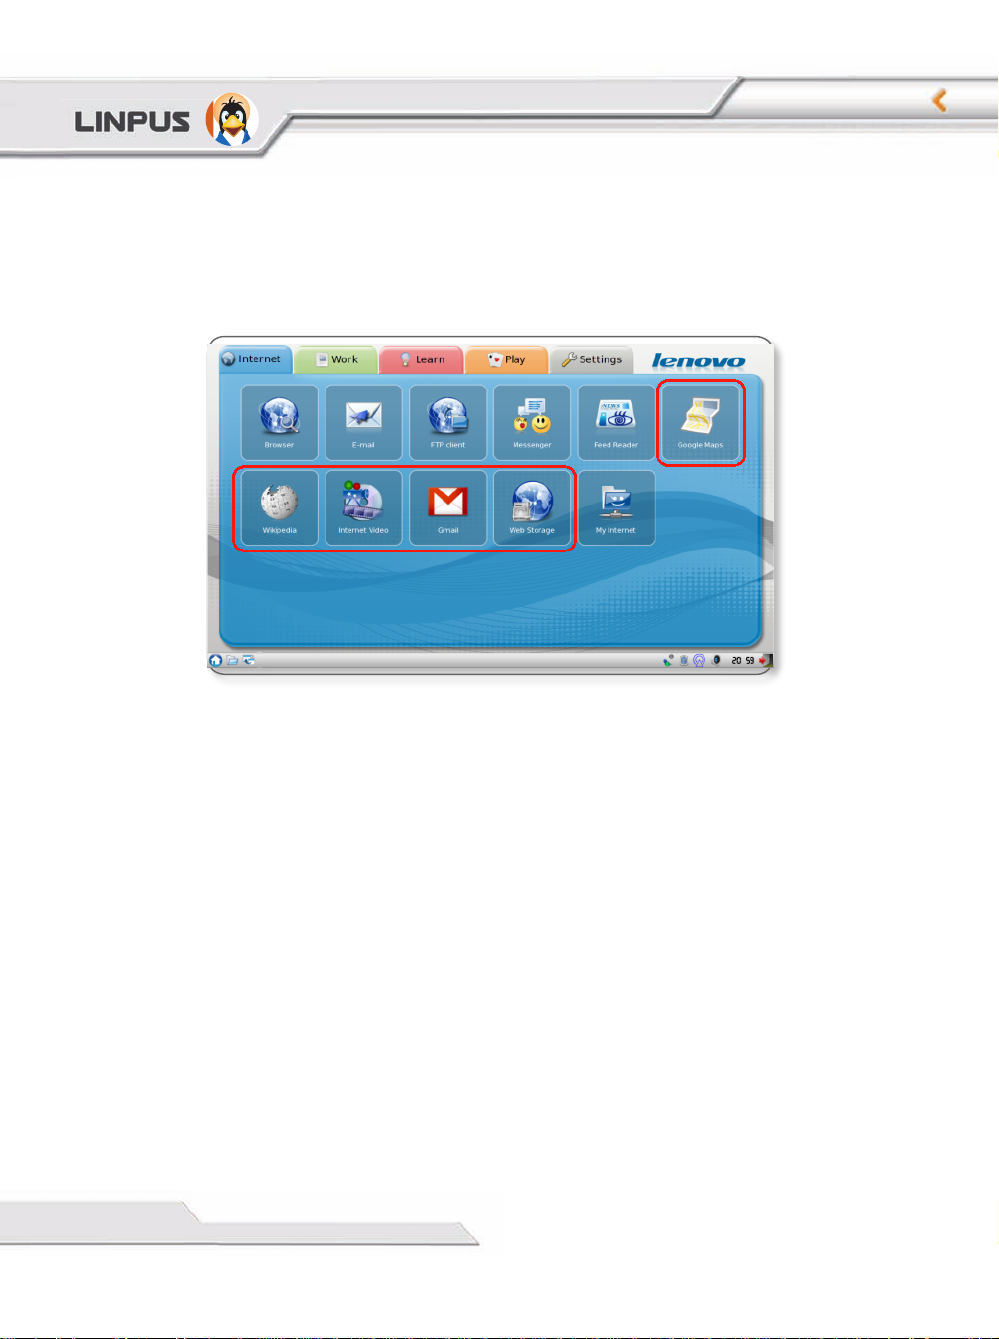
Popular Internet Website Services
Linpus Linux Lite desktop is preloaded with several popular website
shortcuts for your convenience. You may access these shortcuts in the
Internet group tab.
Picture 2-7 Shortcuts to popular Internet website services
21
Page 23
22
Linpus Lite
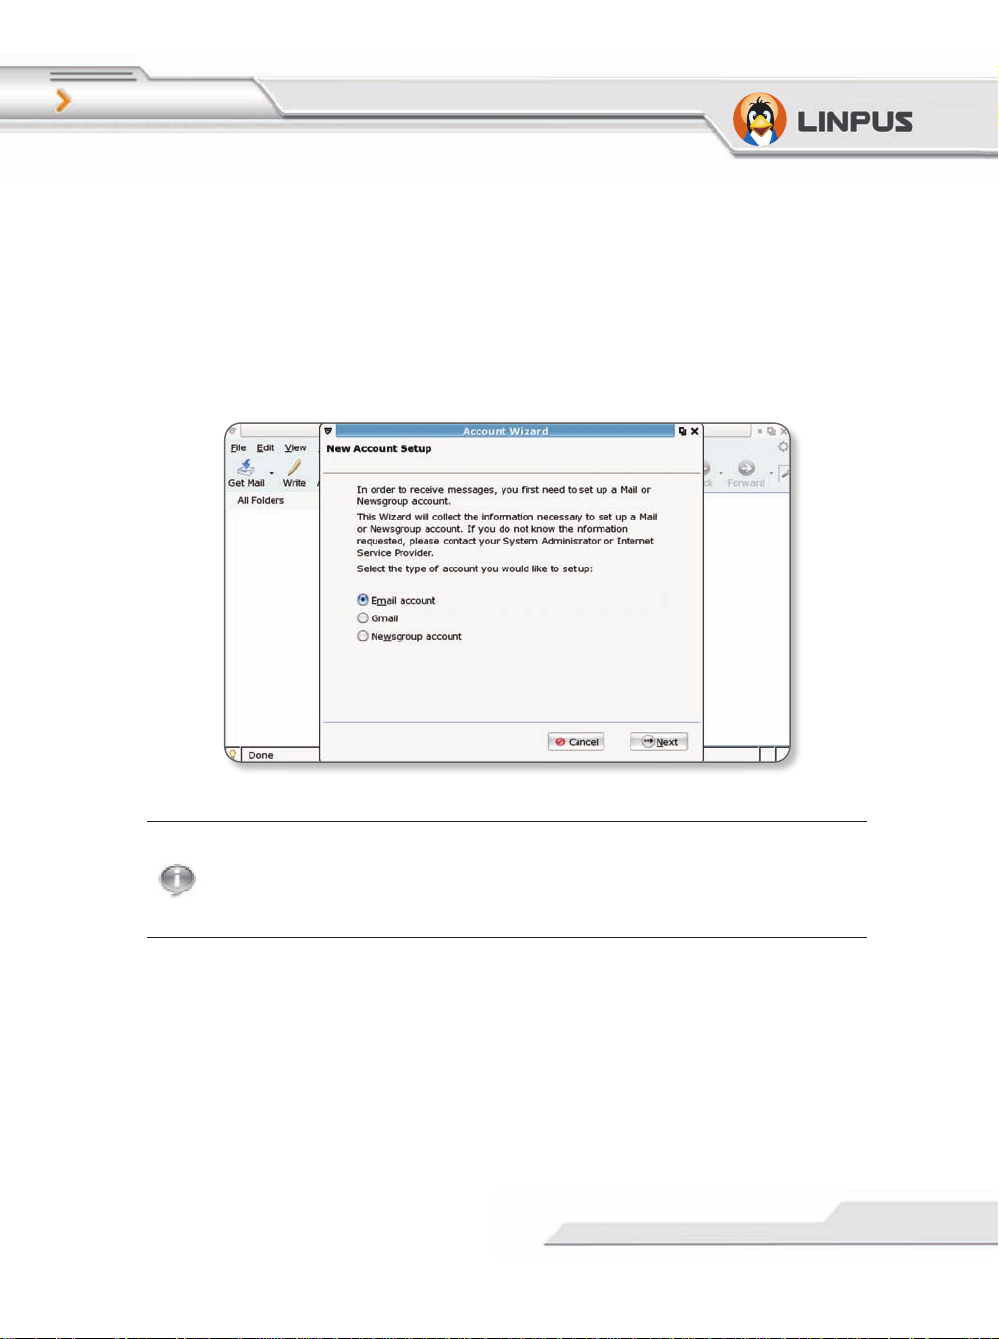
2-4 Emails
Email is another common Internet tool. Linpus Linux Lite uses
Thunderbird as the main email client software. You may start
Thunderbird by clicking the Email icon in the Internet group tab. When
Thunderbird is started for the fi rst time, you will see an Account Wizard
guiding you to setup your e-mail account configurations as illustrated
below.
Picture 2-8: Thunderbird -- Email account management wizard
If you do not wish to setup your e-mail account at this time, you
may choose to setup your accounts later by selecting the “Add”
option under the “Edit -> Account Setup” in Thunderbird.
Page 24
23
Chapter 2
Setup Email Accounts
If you would like to add an email account into Thunderbird, the targeting
email server should support SMTP and POP3 protocols for sending
and receiving emails respectively. After you start Thunderbird, please
following the steps below to complete your email account setup.
1. As illustrated in Picture 2-8, select “Email account” then click “Next”;
2. Following by inserting “Your Name” and “Email Address”;
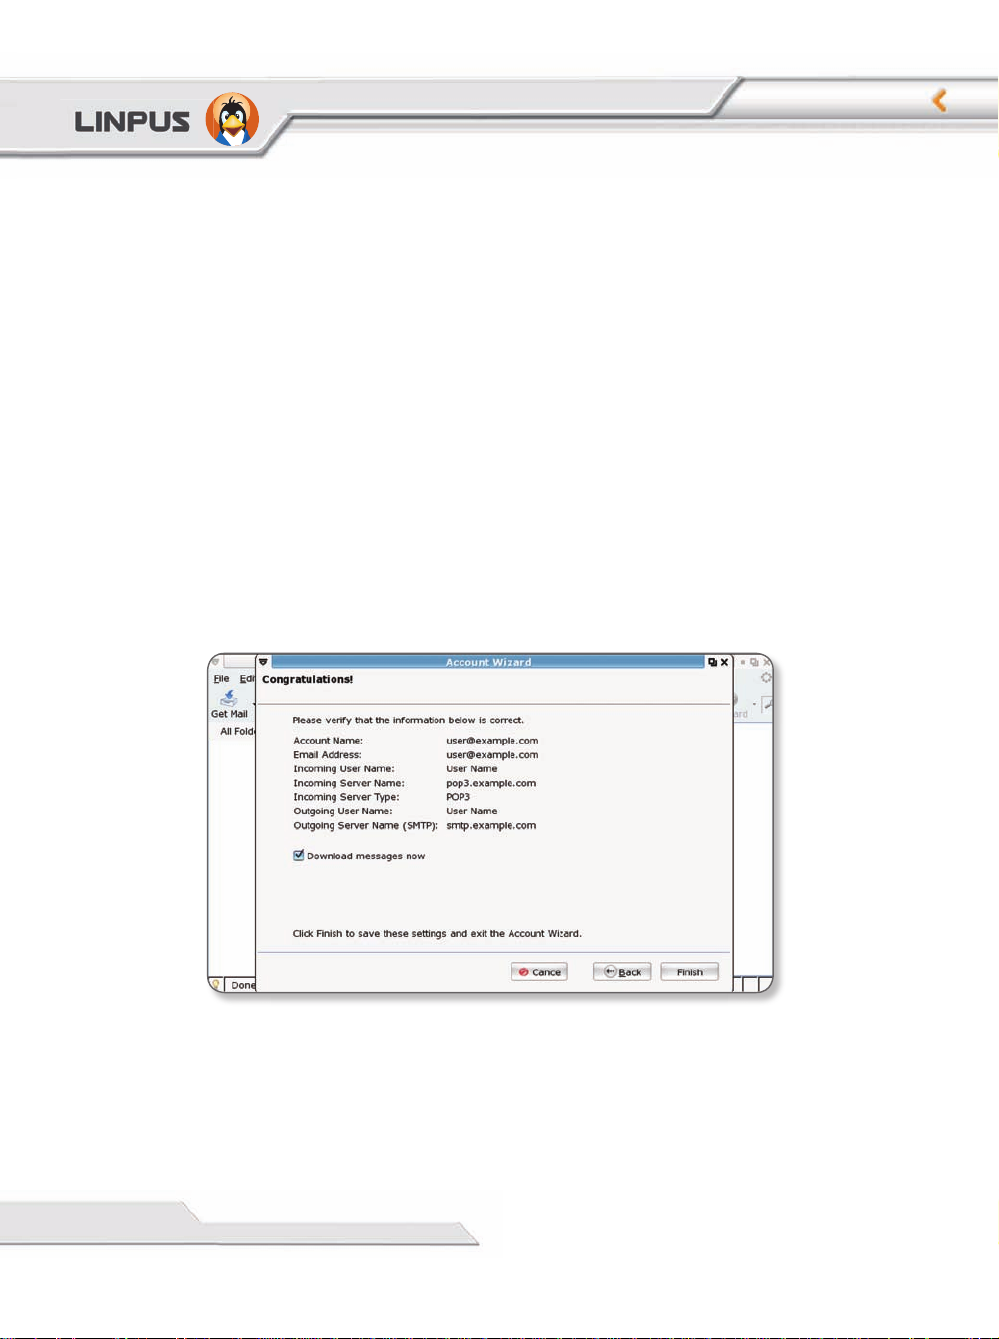
3. Choose POP as the server type for retrieving your e-mails then input
your email server address. Input your email SMTP server address as you
email sending agent as illustrated in Picture 2-9.;
4. Follow the Account Wizard to input the receiving user name and the
account name in the next two pages;
5. At last, check all the account details are correct and click on the “Finish”
button.
Picture 2-9: Confi rm e-mail account confi guration details.
Page 25
24
Linpus Lite
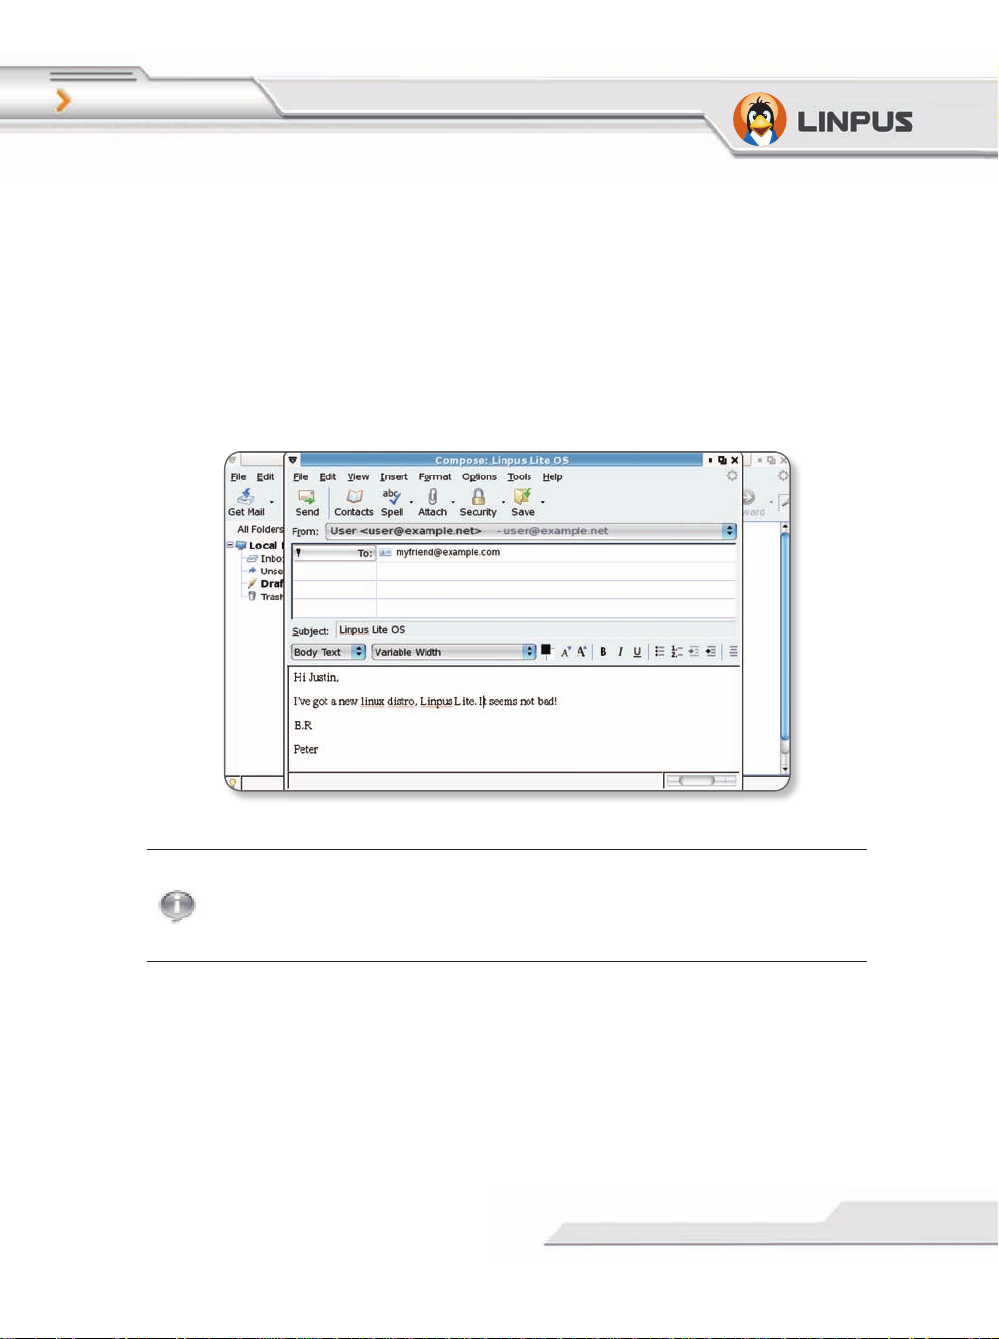
Composing Emails
After you have properly configured your email account with
Thunderbird, you can then start sending and receiving emails. All emails
can be accessed from the email folders in the left panel. You can use the
[<] and [>] controls to switch between email folders. If you would like to
write an email, simply click on the “Compose” button and you will see a
mail composer as illustrated below. To send your email, just click on the
“Send” button.
Picture 2-10: Composing an email
While composing your email you can use the “Attach” button to
attach fi les to the email and use the “Contacts” button to add your
friend’s email address in the existing contact list.
Page 26
25
Chapter 2
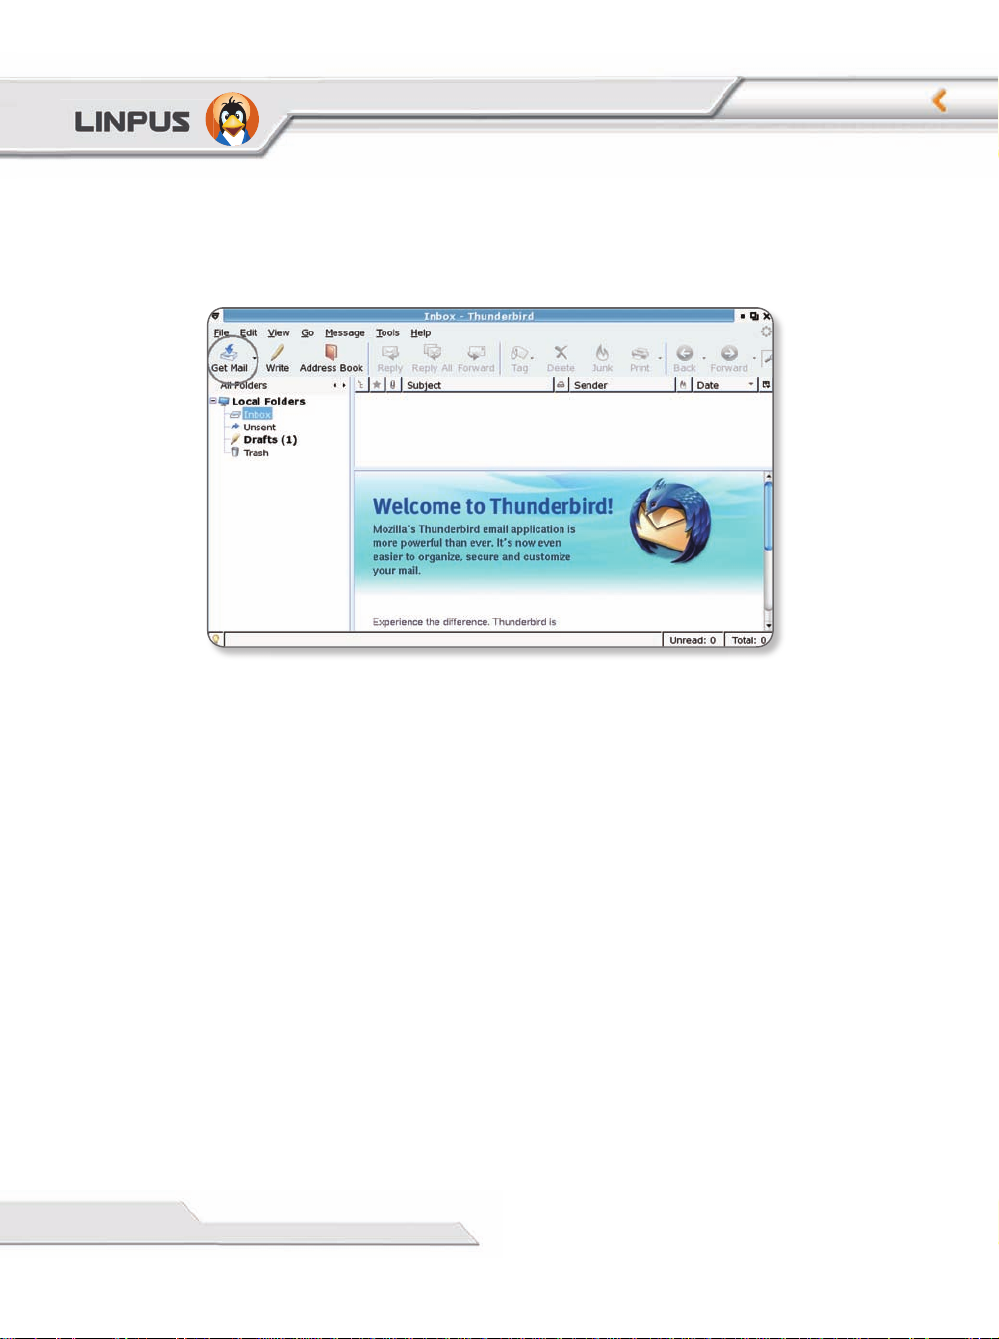
Receiving Emails
At the main control page in Thunderbird, click on the “Get Mail” button
to download your emails to Inbox.
Picture 2-11 Receiving emails
Page 27

26
Linpus Lite
2-5 Instant Messaging
Under the Internet tab, there is an instant messaging software that allows
you use popular instant messaging services like MSN, ICQ, Yahoo, AIM
etc. You can click on the “Messenger” icon to start the “Pidgin” instant
messaging application. Click the “Add” icon to add accounts from
various instant messaging services as illustrated in Picture 2-12.
Picture 2-12: Choose the instant messaging service you want.
Page 28

27
Chapter 3
Chapter 3
Offi ce Applications
The “Office” tab provides some common office applications, you can
double click the “Offi ce Software” icon to open any one of OpenOffi ce.
org product family, for example, word processor, spreadsheet,
presentation and others tools.
Picture 3-1 OpenOffi ce.org product family
OpenOffi ce.org and MS Offi ce has a good format compatibility
3-1 Word Processor (OpenOffi ce.org Writer)
Picture 3-1: Writer Introduction
Page 29
28
Linpus Lite
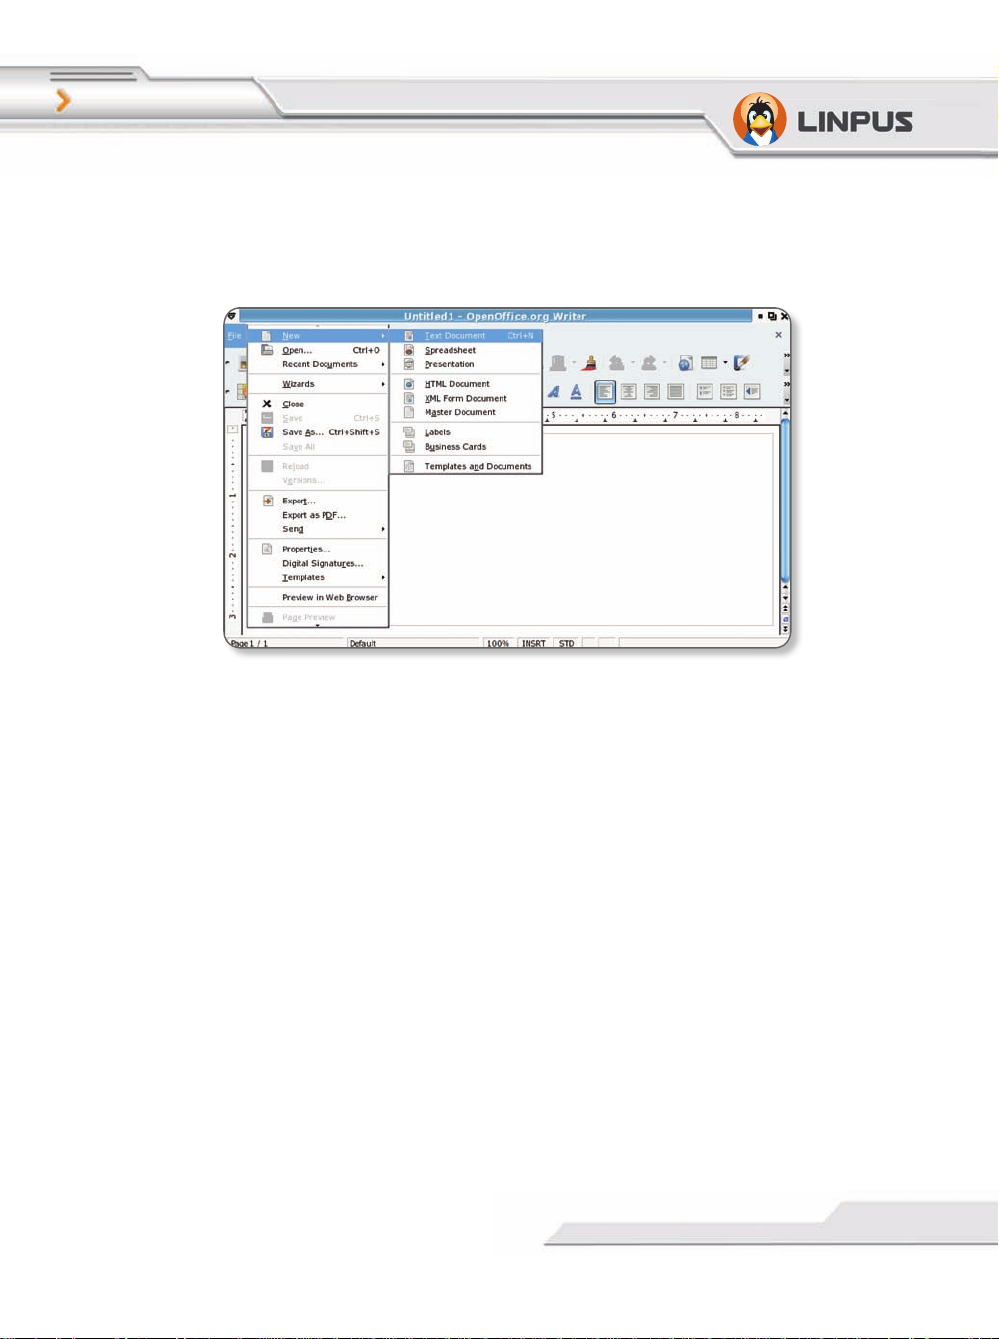
Create a New File
Select “File” and then “New’ from the top “Tool bar” to create a new
Writer Text document, like Picture 3-2
Picture 3-2: Open a new Write text document
Open an Old File
Select “File” and then “Open”. Use the “File System” to fi nd the fi le you
want to open.
Save File
Select “File” and then “Save”, enter the “Filename” and “File type”
when the “Save As” dialog window appears. This is the same for the
“Save As” option.
Page 30
29
Chapter 3
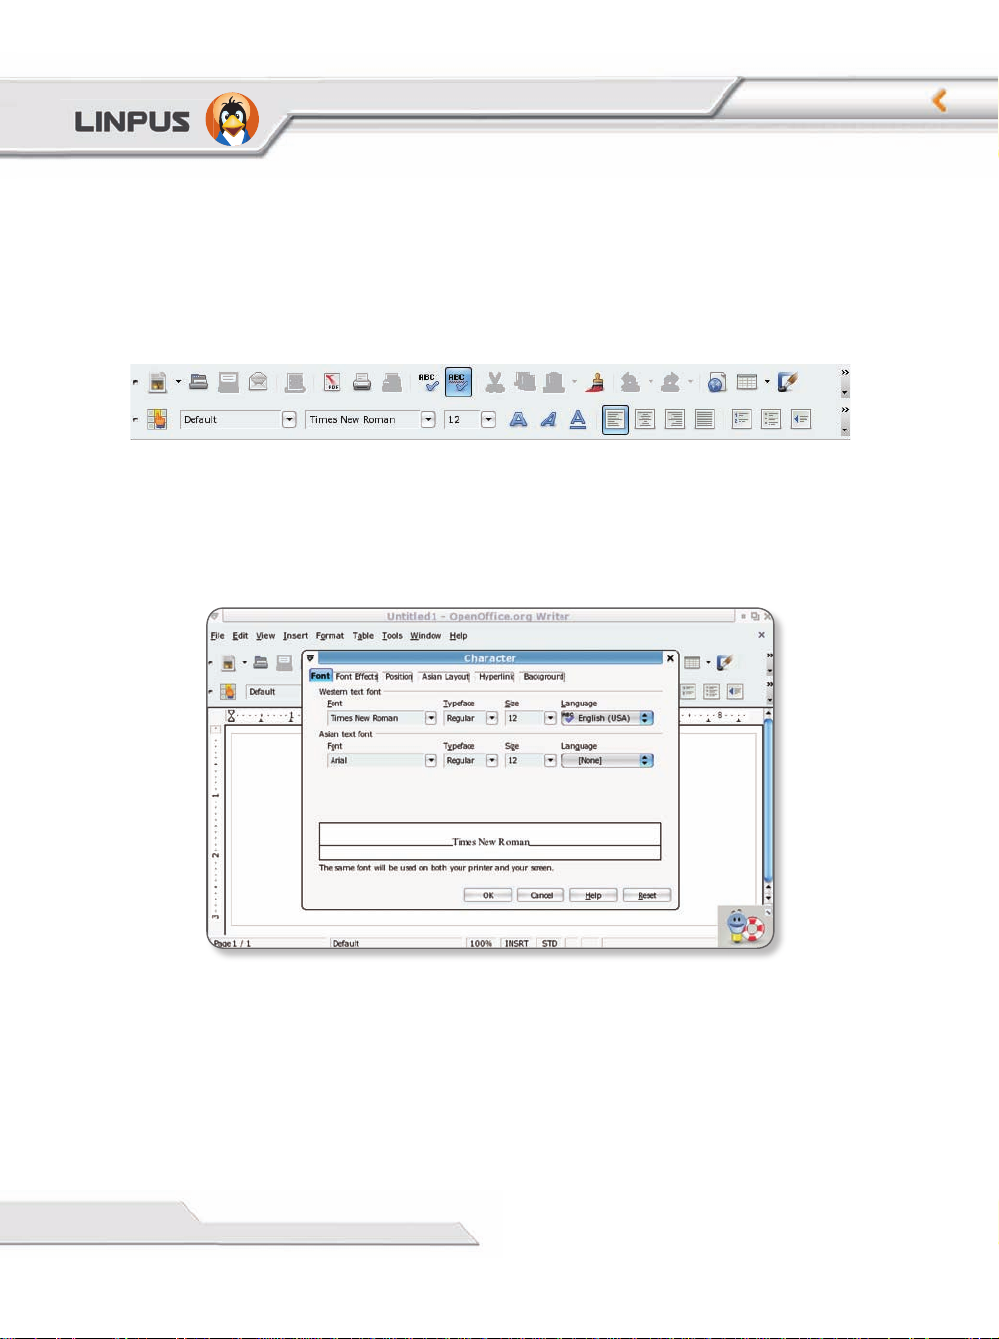
Change Font Type
In Writer, you can use a lot of different ways to define the character
appearance, such as font type, size, color and so on. The simple way is
to highlight and select the words that you want to change, select “Format”
and then “Character”.
Diagram 3-3: (Object Tool Bar)
To edit a character, you can also use the right-click button of the mouse,
and then select “Font”, “Size”, “Style” from the pop-up menu.
Picture 3-4: “Character” setting dialog box
Page 31

30
Linpus Lite
Insert Table
To insert a table into the document, select a location with your cursor,
then click on “Insert” and then “Table” on the top “Tool bar”; finally
input the table name, and number of columns and rows etc.
Point to the top frame boundary of the table and press the left
button of the mouse, move left/right and up/down to set the
height and width of the table
Insert a Picture
On the top toolbar click on “Insert”, “Picture” and then “From File”; at
the “Insert Picture” dialog window, input the “File Name” to open.
You can also set the picture size; first select and click on the
picture, then use the mouse to hold the tiny “Green” box on the
picture boundary and move to resize. While resizing, press the
“Shift” key to keep the picture size aligned in an even ratio.
Print
If you want to print - assuming that your printer is already setup – click
on “File” and then “Print” on the top “Tool bar”; choose a printer, and
number of copies.
Export to PDF format
If you want to export your document as a PDF format, please directly
click on “File” and then “Export as PDF” on the top “Tool bar”.
Page 32

31
Chapter 3
3-2 Spreadsheet ( OpenOffi ce.org Calc )
Calc Introduction
Picture 3-5: Calc Introduction
Cell
Many cells form a sheet; each cell is able to hold data. If you want to
select a whole row or column, just click the column name ( e.g. C ) or
row name ( e.g. 10 ). If you want to select non-sequential columns or
rows, you can hold down “Ctrl” and then click a row or column.
Edit the sheet
Use the left button of the mouse to click on the Cell. For example, if
you want to create a sheet for a top 10 ranking, you can create columns
named “Rank”, “Candidate”, “Score A” and “Score B” . At the
Candidate column, input “1” and “2” for the fi rst 2 Cells. Select these
2 Cells and using the left button of the mouse move in a downwards
direction the “Black” spot at the bottom right corner.
Page 33

32
Linpus Lite
Picture 3-6: The selected Cells are numbered “1,2,3,...”
If you want to change the background color, just select the Cells you
want to color and then right-click button on the mouse and select “Format
Cells”. In the “Background” tab, select the color and press “OK”.
Picture 3-7: Select the background color for the text within the Cell
Page 34

33
Chapter 3
Insert a Column/Row
If you want to add a column or a row move the cursor to the last column
or row; right-click on the mouse and select “insert”. At the “Insert
Cells” window dialog, you then select “Entire Row” or “Entire Column”
.
Automatically Summation
If you want to calculate the total scores of Ellen, you can use
“Summation” sign (
Σ ) to do so. For example, fi rst click on the “F3”
Cell and then press the “Σ” sign, a frame with blue color is shown to
surround “D3” and “E3” Cells. Press “Enter” and the result will be put
in the “F3” Cell.
Picture 3-8: Formula of Summing up
You can use “Sum(C1:C3)” in the formula, or use “Computation symbol”
and “number” to do the calculation. First, at the input line, type an “=”
sign and then type the equation ( e.g. C1+C2+C3 or Sum(C1:C3) ). The
result is given after pressing the “Enter” key
Page 35

34
Linpus Lite
Create a Chart
First Highlight and select the Cells, then select “Insert” and “Chart” on
the top “Tool bar”. A “Chart Wizard” will be shown and you can select
and input the “Chart Type”, “Data Range”, “Data Series” and “Chart
Element”. However, the most important information needed is the “Title”
, “X-axis” and “Y-axis” under “Chart Element”. Press “Finish” when
you are done and the chart will be inserted.
Picture 3-9: Result of inserting Chart
Page 36

35
Chapter 3
3-3 Slide Presentation (OpenOffi ce.org Impress)
Picture 3-10: Impress Introduction
Insert a New page
Select “Insert” and then “Slide” from the top “Tool bar”; in the right
window, you can select a slide layout.
Picture 3-11: Using Layouts windows to select the slide layout
Page 37

36
Linpus Lite
View Slide
Impress provides 5 different types of viewing modes. Use the right-hand
side windows to switch viewing modes.
Insert Text Editor Frame
Directly press the “T” icon on the bottom “Tool bar”, and use the left
button to insert a text editor frame.
Insert Picture
Select “Insert” and then “Picture” from the top “Tool bar”, in “From
File” dialog windows, select and open the needed picture.
Change Background Color
Select “Format” and then “Page” from the top “Tool bar”, then the
“Background” tab. You can select and apply “Color”, “Bitmap”,
“Gradient” and “Hatching” as background for the slide.
After setting the background color, the system will prompt you
with a dialog window, you can press “yes” to apply background
settings for all pages or “No” to apply the setting to the present
page
Page 38

37
Chapter 3
Insert a chart
Select “Insert” and then “Chart” to insert a chart. Use “Chart
information” to defi ne the columns and data, or to add/remove columns/
rows. You can also select the “Chart” icon on the top “Tool bar” to
defi ne different types of chart.
Picture 3-12: Insert a chart template
Page 39

38
Linpus Lite
Chapter 4
Useful Tools
Linpus Lite provides many useful tools, for example: PDF reader,
dictionary, ebook, calculator etc. In this chapter, we will introduce them.
4-1 PDF Reader
Click on the “Learn” tab, then click “PDF Reader”. You can open PDF
format fi les.
Picture: 4-1 PDF reader
Page 40

39
Chapter 4
4-2 Dictionary – StarDict
On the “Learn” tab, click “Dictionary” to open StarDict. StarDict by
default is a pure English dictionary. You can update or manager other
translation dictionaries by clicking the icon in Picture: 4-2.
Picture: 4-2 StarDict
Page 41

40
Linpus Lite
4-3 Ebook
On the “Learn” tab, click “eBook” to open the FBReader ebook software.
Through it you can open fb2, HTML, CHM and RTF etc format files.
FBReader can also open document fi les in the zip�tar etc. formats.
Picture 4-3 FBReader ebook
Page 42

41
Chapter 4
4-4 Calculator
On the “Learn” tab, click “Calculator” to open Gcalctool. By default,
Gcalctool starts in “Basic” mode. To change the mode, click “View�
Advanced, Financial or Scientifi c”.
Picture: 4-4 Calculator
Page 43

42
Linpus Lite
Chapter 5
Multimedia, Games
Linpus Lite has a number of multimedia tools and games, for example:
gThumb, LTris, Lpairs etc. In this chapter, we have some brief
introductions.
5-1 Multimedia Play
On the “Play” tab, click “Media Player” to open the SMPlayer (shown
below in Picture 5-1).
Picture 5-1: SMPlayer multimedia player
The “Media Player” can support the video and audio formats:
VCD, Audio CD, MPEG1,OGG, WAV etc.
Page 44

43
Chapter 5
Playing Disks
Please use the following steps to play a disk:
1. Connect the USB DVD or CD-ROM player to your device;
2. Insert a disk into the player – After the system detects the disk, the File
Manager will display the CD icon at the left side.
3. Click on the disk icon to play it.
4. On the “Play” tab, click “Media Player” to run the SMPlayer. Then click
“Open Disk” to play it.
While playing, you can find setting functions on the menu bar or the
screen right-click shortcut menu. Click “Video Fullscreen” or directly
press the [F] key to switch to Fullscreen mode.
Page 45

44
Linpus Lite
5-2 Image Viewer
On the “Play” tab, click “Picture” to open gThumb, the included picture
software. You can open BMP, JPEG, GIF, PNG etc. You can view images
in Folders, Catalogs, Image, Fullscreen and Slide Show modes. You
could confi gure the selected image. Use the following steps to confi gure:
1. After choosing an image.
2. Select the function that you want in the “gThumb” menu bar.
3. After confi gure�click “File”, “Save” or “File” or “Save As”.
Picture 5-2 Image Viewer
Page 46

45
Chapter 5
5-3 Games
On the “Play” tab, Linpus Lite provides some fun games as shown in
Picture 5-3.
Picture: 5-3 Fun games
Page 47

46
Linpus Lite
Chapter 6
System Confi guration
6-1 Date and Time
Click on the icon named “Date and Time” located in the “Settings” page
to launch the “Date and Time” application. Once there you can adjust
system time and date. Additionally, you can view and change the time
zone info by clicking into the “Time Zone” sub-tag.
Picture 6-1: Adjust System Date and Time
Page 48

47
Chapter 6
6-2 System Monitoring
Click on the “System Monitor” icon to view the status of all running
programs (processes). If a process is found to be behaving abnormally,
you may opt to terminate it by clicking the “Processes” sub-tag, selecting
the process and then clicking on the “End Process” button. In addition,
you can get an overview of the system load - CPU, memory and network
usage, by clicking into the “Resources” sub-tag.
Picture 6-2: Monitor System Running Status
Page 49

48
Linpus Lite
6-3 Printer Setup
If you are setting up your printer for the fi rst time, please click on the
“New” icon, a printer setup wizard will walk you through the steps of
setting up a printer.
Picture 6-3: Printer Setup
Page 50

49
Chapter 6
Add a local printer
As you follow the instructions in the printer setup wizard, you will be
prompted to enter a printer name and an optional description. Clicking
on the “Forward” button, a screen like Fig. 6-4 will show up. Here you
can select “Locally-connected” on the pull-down list and then select “/
dev/usb/lp0”. Click on “Forward” button to continue.
Picture 6-4: Setup Local Printers
Next, you will be asked to select the make and model of the printer you
wish to set up. Press the “Forward” button to continue and you will see
the summary of the printer configuration. Please review it and press
“Complete” if the information looks correct to you. A dialogue box
will then pop up asking if you want to print a test page. Select “Yes” to
print a test page and review the printed page to see if the printer works
properly as confi gured.
This application only includes some popular printer drivers and
can not support every printer type, please visit http://www.cups.
org to get more details.
Page 51

50
Linpus Lite
6-4 Power Management Preferences
Click on the “Power Management” icon in the Settings sub-page to
launch the power management application. In this application, you
can confi gure how your system behaves both on AC power and battery
power.
Picture 6-5: Power Management Preferences
You can also access Power Management Preferences by right
clicking the power icon located on the tool panel on the bottom
of the screen and select “Preferences”.
Page 52

51
Chapter 6
6-5 Bluetooth Functions and Preferences
If your device has Bluetooth built-in the icons for Bluetooth Manager
and Bluetooth File Receiver can be seen on the bottom toolbar as below.
Picture
6-6
Page 53

52
Linpus Lite
Bluetooth Preferences
Right click on “Bluetooth Manager” icon and select “Preferences”, you
will see the pop-up screen below where you have the following options:
Picture
6-7
Page 54

53
Chapter 6
1.Mode of Operation – Here you can choose to make yourself visible and
connectable by other devices; only allow other devices to connect; and
give yourself limited discoverability and connectibility.
Make Adapter Invisible After – In order to improve security, this
function makes your device invisible to another after a period of time.
Adapter Name – Here you can rename your adapter to make yourself
recognizable to others.
2.Selecting a Bluetooth Device
Right click on the Bluetooth Manager icon and then tap on “Browse
Device...”.
In the pop-up window there is a list of all detected devices.
Page 55

54
Linpus Lite
Sending and Receiving Files
1.Sending Files
You can send fi les through either of the following methods:
From Bluetooth Manager
1)Right click on the Bluetooth Manager icon and then select “Send File...”
from the pop-up menu.
2)Select the file you want to send in the pop-up window and then tap
Open.
Picture
6-8
Page 56

55
Chapter 6
3) Another menu will then appear asking you to select a device. Tap a
device from the list and then connect.
Picture6-9
4) Once the device you are trying to connect to accepts your fi le the screen
below will appear.
Picture
6-10
Page 57

56
Linpus Lite
From File Manager
From File Manager select the fi le you want to send, right click on it, and
then select “Send To > Bluetooth” from the pop-up menu. Once you have
done this follow through steps 3 and 4 above.
Page 58

57
Chapter 6
2.Receiving Files
In order to receive files Visible and Connectable for other devices must be
selected under Bluetooth Preferences.
When someone is attempting to send you a file the screen below will appear.
Press Ok or cancel. Once it has been received press Delete or Close. The file
will be stored in Home/User/My Internet.
Picture
6-11
Picture
6-12
Page 59

58
Linpus Lite
Appendix A - Rapid System Recovery
You can use the included recovery CD to quickly recover your system
to its factory state. Please make sure you have made backups of files
and data you wish to keep beforehand as recovery process will erase all
your personal data. Please follow the steps below to carry out the system
recovery:
Before starting system recovery, you may opt to back up
personal files using USB Flash Disk or network drives. Please
refer to “1-7 Using Removable Devices” for more details.
Attention: To ensure successful operation, please read closely
the following instructions before attempting system recovery.
Page 60

59
1. Please connect an external optical drive through the USB port on your
system.The Recovery CD is a bootable DVD, please make sure your
optical drive supports the bootable DVD disc.
2. Insert the Recovery CD into the drive and make sure your system is
confi gured to boot up from your optical drive.
3. As shown in Fig. A-1, upon being greeted with the main screen of the
recovery program, you may press F2 to switch the language. You may
also press F1 to find out other options. Press Enter to continue and
follow the instructions shown on the screen.
Fig. A-1: The greeting screen of system recovery program
Page 61

60
Linpus Lite
4. By default, the recovery program will format the whole disk and
restore the system to its factory state. Please press the “->” button on
each screen to complete the recovery process.
Fig. A-2: Optionally select the disk partition to restore the system into
5. When system recovery is complete, you will be prompted so and at this
moment, you may press the “Exit” icon to exit the recovery program
and the system will reboot.
Page 62

61
GPL Copyright Notice
This product includes copyrighted third-party software licensed under
the terms of the GNU General Public License. Please see The GNU
General Public License for the exact terms and conditions of this license.
All included GNU General Public License software packages are
copyright by their respective authors. Refer to the source code for
detailed information.
Linpus Technologies, Inc. has exposed the full source code of the GPL
licensed software, including any scripts to control compilation and
installation of the object code. All future fi rmware updates will also be
accompanied with their respective source code. For more information on
how to obtain our open source code, visit our website (www.linpus.com).
Page 63

Linpus Lite
Trademark Statements
Google, Google Maps, and Google Docs service and its logos are
trademarks of Google Inc..
Yahoo! Service and its logos are trademarks of Yahoo! Inc..
All other services and logos are either trademarks or registered
trademarks of their respective owners. Linpus Technologies, Inc. is not
afliated with any of these companies or their partners.
The trade names used are for hyperlink purposes only. The exclusive
rights to the trade names belong to their owners respectively.
Service and Support
For all service and support issues visit.
http://www.linpus.com
E-mail:HelpDesk@Linpus.com
62
Page 64

百资Linux Lite
(简体中文版)
使 用 手 册
百资科技股份有限公司
Linpus Technologies, Inc.
Page 65

2
Linpus Lite
前言
感谢您使用百资 Linux Lite 操作系统。自 1997 年发行以来,百
资 Linux 以使 Linux 真正走向普通使用者为己任,以应用带动桌
面,始终致力于为最终使用者提供最佳的解决方案。
百资 Linux Lite 是本公司2007年最新推出的Desktop Linux版本,
提供了更简单易用的使用界面、更好的中文支持能力,同时大幅提
高了中文办公软件及 Linux 应用的水平,从而为自由的 Linux 增
添了丰富的色彩。到目前为止,百资 Linux 已发展成为大中华地区
销量相当可观的 Linux 发行版。随着我们不断的努力,将会有更
多、更高质量的发行版奉献给广大使用者。
假如您是初次使用 百资 Linux 操作系统,请务必先仔细阅读本使
用指南,它将会帮助您快速入门,力求在最短的时间内帮您掌握百
资 Linux 中的主要功能。
版权声明
本手册之著作所有权属于百资科技股份有限公司所有(以下简称
「百资科技」)。手册中所提及的商标,均属于其合法注册公司或
组织所有。其中, Linux 是 Linus Torvalds 的注册商标。Linpus
是百资科技的注册商标。
未经百资科技授权,对本手册的任何修改、复制及传递均不能应用
于商业用途,一切因使用本手册所产生的直接或间接损失,百资科
技恕不承担任何责任。
百资科技股份有限公司
台北市南港区三重路园区街3-2号4楼之3
TEL:02-26533368
FAX:02-26558368
E-mail:HelpDesk@Linpus.com
URL:http://www.linpus.com
Page 66

3
关于本使用手册
欢迎使用百资 Linux Lite,本使用手册专门设计用于指导使用者如
何充分使用本系统上的所有功能,以便使用者能在最短时间内迅速
掌握其内容。使用者可通过以下表格快速检索相关信息。
如果您 请参阅
想知道系统基本使用功能
第一章 认识您的系统
第二章 系统设定
想知道如何进行上网
2.1 网络设定
第五章 使用 Internet 服务
想知道如何使用办公室软件 第四章 办公室应用快速入门
想知道如何在编辑及打印
第三章 中文输入
2.2 打印机设定
4.1 OpenOffice.org Writer
想知道如何播放 VCD
1.4 使用可移动装置
6.1 影音播放
还原预装的系统环境 附录A 快速还原系统
图示含义说明
注意︰用来提醒使用者对该部份内容多加留意,并谨记在
心。
说明︰用来标示参考信息及专有名词解释。
Page 67

Linpus Lite
4
目录
第一章 认识您的系统 6
1.1 登入系统 6
1.2 Lite 简易模式导览 7
1.3 使用可移动装置 10
1.4 关闭您的计算机 11
第二章 系统设定 12
2.1 网络设置 12
2.2 打印机设定 15
2.3 蓝牙功能及设置 18
第三章 中文输入 26
3.1 如何使用 26
3.2 新增/移除输入法 30
第四章 办公应用快速入门 31
4.1 OpenOffice.org Writer 32
4.2 OpenOffice.org Calc 35
4.3 OpenOffice.org Impress 39
第五章 使用 Internet 服务 41
5.1 FireFox 网页浏览 41
5.2 电子邮件 43
第六章 进入多媒体世界 47
6.1 游戏娱乐 47
6.2 影音播放 48
Page 68

5
第一章
附录A 快速还原系统 49
GPL Copyright Notice
52
Trademark Statements
53
服务与支持 54
Page 69

Linpus Lite
第一章 认识您的系统
百资 Linux Lite 特别提供了人性化的全新使用界面,简单易用的
菜单及更多贴心的应用。在本章里,我们先来了解一些系统中的基
本操作及注意事项。
1.1 登入系统
当系统启动后,在预设的情况下系统会以"User"账号自动登入Lite
版简易使用界面。
当您启动系统时, Linpus Lite会以“user”账号自动登
入Lite版简易使用界面。在预设的情况下,“user”账号
的密码为空。如果您是 Linux 高级用户,可能需要使用
root用户,默认状态下其密码为“111111”。
百资 Linux Lite 同时提供 Lite简易风格和传统 PC 类
windows 风格 两种不同的桌面环境,您只要按下切换
键,如图1.1所示,就可以在这两种界面之间进行切换。
图1-1 在两种操作环境之间进行切换
6
Page 70

第一章
1.2 Lite 简易模式导览
桌面
在启动 Lite简易界面之后,使用者将会看到如图 1-2 所示的画
面。您可以在此通过鼠标点选桌面上的应用程序快捷方式直接执行
它,或者点选上方的功能群组分页标签,进行不同群组项目的切
换。
图1-2 Lite简易风格工作环境
群组分页标签
在桌面上方提供了「互联网」、「办公」、「学习」、「娱乐」和
「设置」五个不同种类的群组分页标签,每个分页中包含了许多与
此相关的应用软件;默认情况下,Lite简易模式会首先显示「互联
网」分页的内容,使用者可以通过切换群组分页标签选择所需要使
用的应用程序。
7
Page 71

Linpus Lite
8
工具列
Lite简易模式桌面下方有一条长方形的工具列;其中包括了一些
最常用应用程序的快捷方式、系统通知程序以及常见的系统设定程
序,如下图所示。
图1-3 Lite简易操作模式下的工具列
当您开启多个工作项目窗口后,该窗口选项便会在快速启动
栏的右侧出现。它可以让使用者非常方便地在工作窗口桌面
间进行切换动作。
快速启动
Lite简易操作模式的工具列提供了三个快捷方式,从左至右分别
为「显示桌面」、「文件管理器」和「切换到类 Windows传统模
式」。
系统通知区域
系统程序一旦被启动后便会一直在系统中运行;在工具列右边显示
了所有目前正在运行的系统程序。与快速快捷方式相同,点击图标
后即打开应用程序。
1-4 系统通知区域
Page 72

9
第一章
档案管理
Lite简易模式的「文件管理器」选项位于「配置」分页中,请先选
择「设置」分页,并再点选「文件管理器」图示,使用者便可进行
相关文件管理工作。
图1-5文件管理器
Page 73

Linpus Lite
10
1.3 使用可移动装置
当光盘或优盘插入时,系统会自动侦测到该硬件装置,如图1-6所
示,在文件管理器中点选该装置的选项即可通过文件管理器来查看
该装置内的文件,您可以复制、修改、移动及删除装置内的所有文
件及文件夹。
图1-6 自动侦测可移动装置
当您使用完毕后,首先关闭任何正在使用或浏览可移动装置内容的
应用程序,然后在可移动装置图标上按鼠标右键,在弹出式菜单中
点选「卸载卷」,您便可以安全地将可移动装置从计算机中取出。
请勿在使用存储装置或正在执行移除功能时将装置拔出,这
将会引起存储装置内的档案造成损毁。
注意:光盘在已挂载的状态无法直接通过光驱上的弹出按钮
取出光盘,此时您需要请先点击【卸载卷】。
Page 74

11
第一章
1.4 关闭您的计算机
在关闭您的计算机之前,请勿直接关闭计算机的电源,否则会对系
统造成严重损毁,储存的数据很可能因此而被遗失。
点选右下角的「离开」按钮,然后按「关机」或「重启」便可以关
闭或重新启动系统。
图1-7 关闭操作系统
Page 75

12
Linpus Lite
第二章 系统设定
点选「设置」选项,通过这些选项进行各种与系统相关的设定。
图2-1 Lite简易模式下的系统设置群组
2.1 网络设置
在「设置」中点选「网络配置」打开网络连接设置窗口,或在「工
具栏」中点选「网络」图标,出现如图 2-2 所示菜单。选择「连
接管理器」将出现网络连接设置窗口,您可以对有线网络、无线网
络、DSL连接等进行新建、编辑、删除等操作。如果目前的网络处
于关闭状态,您可以在网络连接列表中选取您想要的连接,然后按
「连接」。待网卡被启动后,会在该选项中的「状况」栏显示「活
动」,表示网络卡已正常启动。
Page 76

13
第二章
图2-2 「网络连接设置」窗口
Page 77
14
Linpus Lite
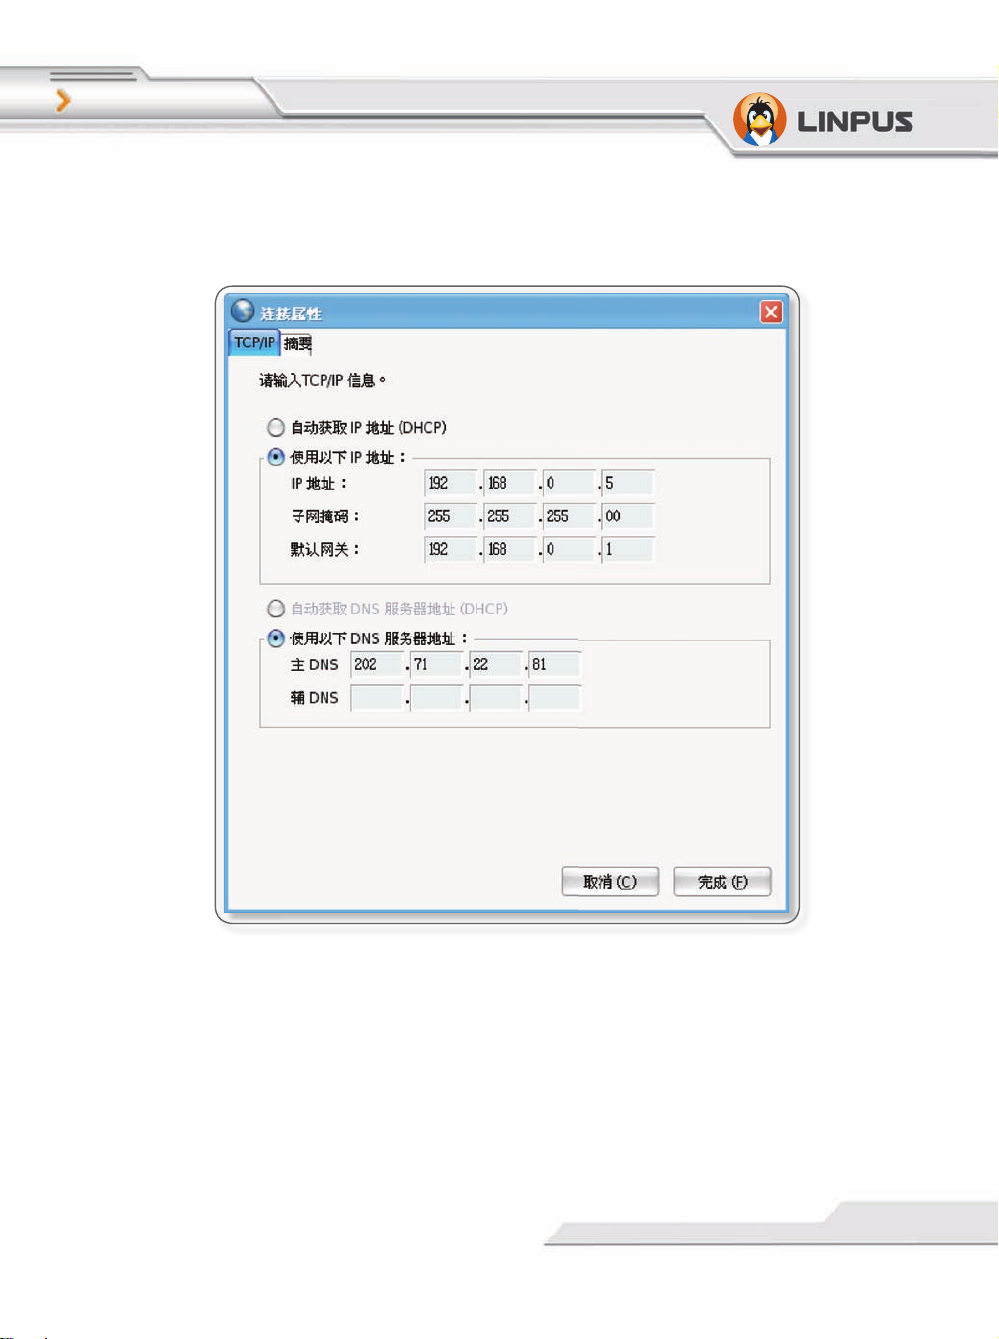
如果您想针对目前的网卡作进一步的设置,您只需点选该装置选
项,再按「编辑」;在在弹出的新窗口中,您可以指定网卡获取 IP
地址的方式。
图2-3 「网络连接」编辑窗口
Page 78

15
第二章
2.2 打印机设定
在「设置」中点选「打印设置」打开打印机设定窗口。
图2-4 打印机设置界面
Page 79

16
Linpus Lite
如果您是第一次设定打印机的话,请点选「新建」图标,通过设定
向导来为您的系统进行打印机设置。
添加打印机
新建打印机向导的会自动扫描网络中可用的打印机,请选择或输入
打印机的网络地址及输入相关信息,完成后按「前进」。
Page 80

17
第二章
图2-5 添加打印机
接着会切换到下一个画面,您将被要求选择打印机的生产厂商和型
号。待完成以上步骤后按「前进」,设置向导会列出刚才针对打印
机所设定的相关信息,您只要按「完成」确认即可。当所有设定完
成后,您可以通过[打印测试页]验证刚才的设定是否正确。如果系
统无法正常打印测试页,则需重新进行设定;若可以正常打印,证
明您的本机打印机已经设定成功了。
声明: 本开源软件默认情况下只包含了部分打印机的驱
动程序,并不保证支持所有打印机,请查询 CUPS 网站
http://www.cups.org 获取更多详细信息。
Page 81

18
Linpus Lite
2.3 蓝牙功能及设置
如果您的机器内建有蓝牙装置,默认状态下蓝牙功能会自动开启,
在屏幕右下方任务栏上会显示两个图标:“蓝牙文件接收器”图标
和“蓝牙管理器”图标,如下图所示:
图2-6
Page 82

19
第二章
蓝牙首选项设置
如果希望内建的蓝牙设备能够被发现和被连接,需进行相应的
设置。右击“蓝牙管理器”图标,在弹出菜单中选择“首选项
(P)”,将弹出蓝牙首选项配置界面(如图),如下图所示:
图2-7
Page 83

20
Linpus Lite
在第一个标签页中有以下主要选项:
*操作模式:如果希望蓝牙设备能够被其他设备发现且连接,请选择
第二项;
*使适配器可见:蓝牙设备的可见时间,根据需要设定,最右端表示
永久可见;
*适配器名称:指本地蓝牙设备的名称,可以根据个人喜好自行设
定。
设定好之后点击“关闭”按钮之后系统将自动保存您的设定。
搜索蓝牙设备
右键点击“蓝牙管理器”图标,在弹出菜单中选择“浏览设备”,
将弹出设备列表对话框,系统将自动列出所有可发现或连接的蓝牙
设备。
Page 84

21
第二章
发送与接收文件
<1>发送文件
您可以通过以下两种方式发送文件:
方式一:从蓝牙管理器菜单中选择“发送文件...”
步骤一:右键点击任务栏上的“蓝牙管理器”图标,在弹出的菜单
中选择“发送文件...”
步骤二:在弹出的对话框中(如下图所示)选择要发送的文件,然
后点击对话框右下角“打开”按钮。
图2-8
Page 85

22
Linpus Lite
步骤三:之后会弹出“选择设备”页面,选中想要发送的对方设备
(如下图所示),然后点击右下角的“连接”按钮,此时
系统会弹出“文件传输“对话框,等待对方的应答。
图2-9
步骤四:如果对方确认接收,“文件传输“对话框即出现发送的进
度(如下图所示),发送完毕后对话框将自动消失。
图2-10
Page 86

23
第二章
方式二:直接发送文件到其他的蓝牙设备
从文件管理器中找到想要发送的文件,右键单击此文件,在弹出菜
单中选择在“发送到(S)”--> “蓝牙”项,接下来同方式一中的
步骤三和步骤四。
Page 87

24
Linpus Lite
<2>接收文件
接收文件之前,请确认蓝牙管理器中已选中“可被其他设备
发现和连接”并且 “蓝牙文件接收器”处于活动状态(即图标可
见),如果弹出文件接收对话框(如下图所示),则表示有其他的
蓝牙设备要向此系统传输文件,点击 “确定”则开始接收文件,在
接收过程中,蓝牙文件接收器会不停的闪烁。系统默认的文件接收
保存路径在 “/home/user/My Internet/” 下(即:Internet 组
下的 “My Internet”文件夹中)。
图2-11
Page 88

第二章
文件接收完毕后,将弹出对话框询问文件处理方式,您可以根据需
要自行选择。(如下图所示)
图2-12
声明: 本开源软件默认情况下只支援通过蓝牙发送与接收
文件,其他蓝牙功能目前暂时无法支援。
提示:该 Linux 操作系统为联想指定机型的专属客制化版
本,因此对于某些特定外接 USB 设备及 PCI-E 扩展设备的
支援,需要您手动额外添加 Linux 驱动程序,更多细节可
以访问 Linux 相关论坛寻求帮助。
25
Page 89

26
Linpus Lite
第三章 中文输入
在百资 Linux Lite 中提供了完整的中文输入法工具,支持智能拼
音及五笔等常用的简体中文输入法。
3.1 如何使用
基本使用方法
当 XFCE 启动后,输入法亦会同时启动,这时候,您会发现在工具
列的「系统通知区域」中出现输入法的图示。
图3-1在 XFCE 环境下的输入法图标
当您启动编辑工具(如OpenOffice.org Writer)或终端机后,再打
开输入法,输入法面板会在桌面上显示,如图 3-2 所示。
图3-2 输入法面板
Page 90

27
第三章
以下是输入法面板内各功能按钮之说明。
功能键 说明
选择输入法。
切换输入键盘。在使用简体中文输入法时,用来切
换中文和英文键盘。
切换全型和半型字符。您可以利用【Shift】+
【Space】组合键来切换全型与半型字符。
切换全型和半型符号。
热键查询。
Page 91

28
Linpus Lite
您可以利用鼠标点选「系统通知区域」中的输入法图标,在选单中
选择常用的输入法,如图 3-3 所示。
图3-3 利用鼠标选择输入法
组合键 说明
【Ctrl】+【Space】 开启/关闭输入法。
【Ctrl】+【Shift】 切换输入法。
【1, 2, ... , 9】 选择候选字符/词汇。
【↑】, 【↓】 选择候选字符/词汇。
【<】, 【>】 切换候选字符/词汇。
【Pg up】, 【Pg down】 切换候选字符/词汇。
【Esc】 取消输入。
【Shift】+【Space】 切换全型/半型字符。
【Shift】+ 符号 以全型方式输入符号。
Page 92

29
第三章
输入文字
假如您启动 OpenOffice.org Writer 后,利用鼠标选择自己惯用的
输入法,然后在 Writer 文件中输入「pu」,您可以按【1, 2, ...
, 9】或【↑】,【↓】选择候选字符/词汇,或按【Pg up】,
【Pg down】切换到其它候选字符/词汇选单来进行选择。
图3-4 选择字符
当您使用「智能」或其它输入法时,您可以利用【<】,
【>】来寻找其它候选字符/词汇。
Page 93

30
Linpus Lite
3.2 新增/移除输入法
您可以利用「泛用对照表/管理对照表」来加入或删除输入法。
图3-5 删除输入法
如图3-5 所示,在「码表管理」设置页面中选择不常用的输入法选
项后,按「删除」,然后按「确定」保存设定值并重新启动输入法
即可生效。
Page 94

31
第四章
第四章 办公应用快速入门
OpenOffice.org 是目前在 Linux 平台下最受广大用户所使用的办
公软件,它具备跨平台的特性,并提供了诸如文字处理 (Writer)、
电子表格 (Calc)、简报 (Impress) 等功能,而且与微软Office 文
件格式具备良好的兼容性。
点选「办公」功能标签就可以打开 OpenOffice 家族中的各种工具
及其它办公软件,如图 4-1 所示。
图4-1 「办公」群组中的应用软件
Page 95

32
Linpus Lite
4.1 OpenOffice.org Writer
新建文件
点选主菜单中的「文件-新建」即可打开一个空白的 Writer 工作
区,如图 4-2 所示。
图4-2 打开一个空白的 Writer 工作区
打开现有文件的方法基本上是相同的,点选主菜单中的「文件-打
开」,并在选单中选择需要打开的档案即可。
保存文件
点选主菜单中的「文件-保存」,然后在「保存」窗口中输入文件
名称及选择档案类型即可。「另存为」的使用方法大致相同。
Page 96

33
第四章
变更文字外观
在 Writer 中,您可以通过各种不同的方法来定义文字的外观,如
字型、大小、颜色等等。最简单直接的方法,就是选取需要变更的
文字后,点击「对象工具列」中附带的快捷方式,如图 4-3 所示。
图4-3 「对象工具列」中用来定义文字外观的快捷方式
您亦可以通过点选鼠标右键,在「快速选单」中选择变更文字的字
型、大小或样式。您还可以点选主菜单中的「格式-字符」选项,
您可以在「字符」设置页中定义文字的字型、大小、颜色和形状
(如:粗体、斜体)。
图4-4 在「字符」设定页中定义文字的外观
Page 97

34
Linpus Lite
插入表格
您可以在 Writer 中插入一些表格;点选主菜单中的「插入-表
格」选项,再在「插入表格」窗口中指定栏和列数目,即可在目前
的位置插入所指定的表格。
在表格的框线上方,按着鼠标左键不放,向左右或上下拖动
来调整表格的宽高。
插入图片
点选主菜单中的「插入-图片-来自文件」选项,然后在「插入图
片」窗口中选择要插入的图片即可。
您还可以调整图片的大小;首先点选图片,接着利用鼠标按
住图片边上的绿色方格向四周拖动来调整图片的大小。您可
以在拖动过程的同时,按【Shift】键保持图片在等比例之
下调大小尺寸。
打印
如果您想把文章打印到纸张上,并假设您的打印机已经正确设置,
点选主菜单中的「文件-打印」来指定执行打印的打印机、打印范
围和打印数量。
输出成 PDF 格式
如果您想把文件输出成 PDF 格式档案,请直接点击「工具列」中的
「输出成为 PDF」快捷方式,然后选择储存路径和文件名再按「保
存」键即可。
Page 98

35
第四章
4.2 OpenOffice.org Calc
储存格
工作表中每一个小方格称为储存格,每一张工作表由多个储存格组
成,每一个储存格都可以用来存放资料。如果要选择整栏或整列
时,只需要直接点选行号(如 C)或列号(如 10)即可。如果希
望选取不连续的栏或列,可利用【Ctrl】+列号 / 栏号组合键来完
成。
编辑工作表
利用鼠标左键点选储存格,这表示该方格已被选取,您可以对它进
行修改。例如您要制作一个前 10 名投票排行榜的话,您可以先
输入「排名」、「姓名」、「语文成绩」、「数学成绩」和「总成
绩」等字段,接着分别在两个储存格上输入「1」和「2」,再选中
这两个数值的储存格,利用鼠标左键点右下角的「黑色正方形」向
下拖动时,会出现一个「充填序列」窗口,请在「排列类型」中选
取「直线」后按「确定」,即可出现 1 至 10 的名次编号,如图
4-5 所示。
图4-5 以「 1,2,3, ... 」快速填满储存格
Page 99

36
Linpus Lite
按着「工具列」中「字型颜色」及「背景颜色」快捷方式,为储存
格或格子里的文字指定颜色。
图4-6 为储存格中的文字选择颜色
例如:需要把所有学生在「语文成绩」栏的得分统一以小数后两位来
表示,请先选取所有学生的「语文成绩」栏,然后点击「工具列」
中「增加小数点位数」快捷方式两次即可。
插入行/列
如果您想在目前的表格中加入一行或一列,只须把光标移到表格最
后一行或列,然后按鼠标右键,在「快速选单」中点选「插入储存
格」,然后在「插入储存格」窗口中选择「插入整列」或「插入整
行」即可。
Page 100

37
第四章
自动求和
如计算学生的总得分,可以利用 Calc 中的「求和」功能来完
成,操作步骤如:首先把光标移到「L4」储存格,然后点击「工具
列」中的「求和」快捷方式,这时候 Calc 会以蓝色边框选取目
前的计算范围(如目前的计算范围为「J4」至「K4」),再按一下
【Enter】键,「F3」储存格将显示刚才计算的结果。当您把光标点
选「F3」储存格,Calc 会在「编辑列」中显示加总的计算公式;如
图 4-7 所示,「=SUM(J4:K4)」表示「J4」与「K4」储存格的求和
结果。
图4-7 求和的计算公式
在公式中除了以「Sum(C1:C3)」格式来指定计算范围外,Calc 支持
在公式中加入「运算符号」及「数字」进行计算。首先,在「编辑
列」中先输入一个「=」符号,再输入公式(如输入「C1+C2+C3」或
「Sum(C1:C3)」),再按【Enter】键,便可获得计算结果。
 Loading...