

Page 1
Wireless-G
PTZ Internet Camera
with Audio
Quick Installation
Model
WVC200
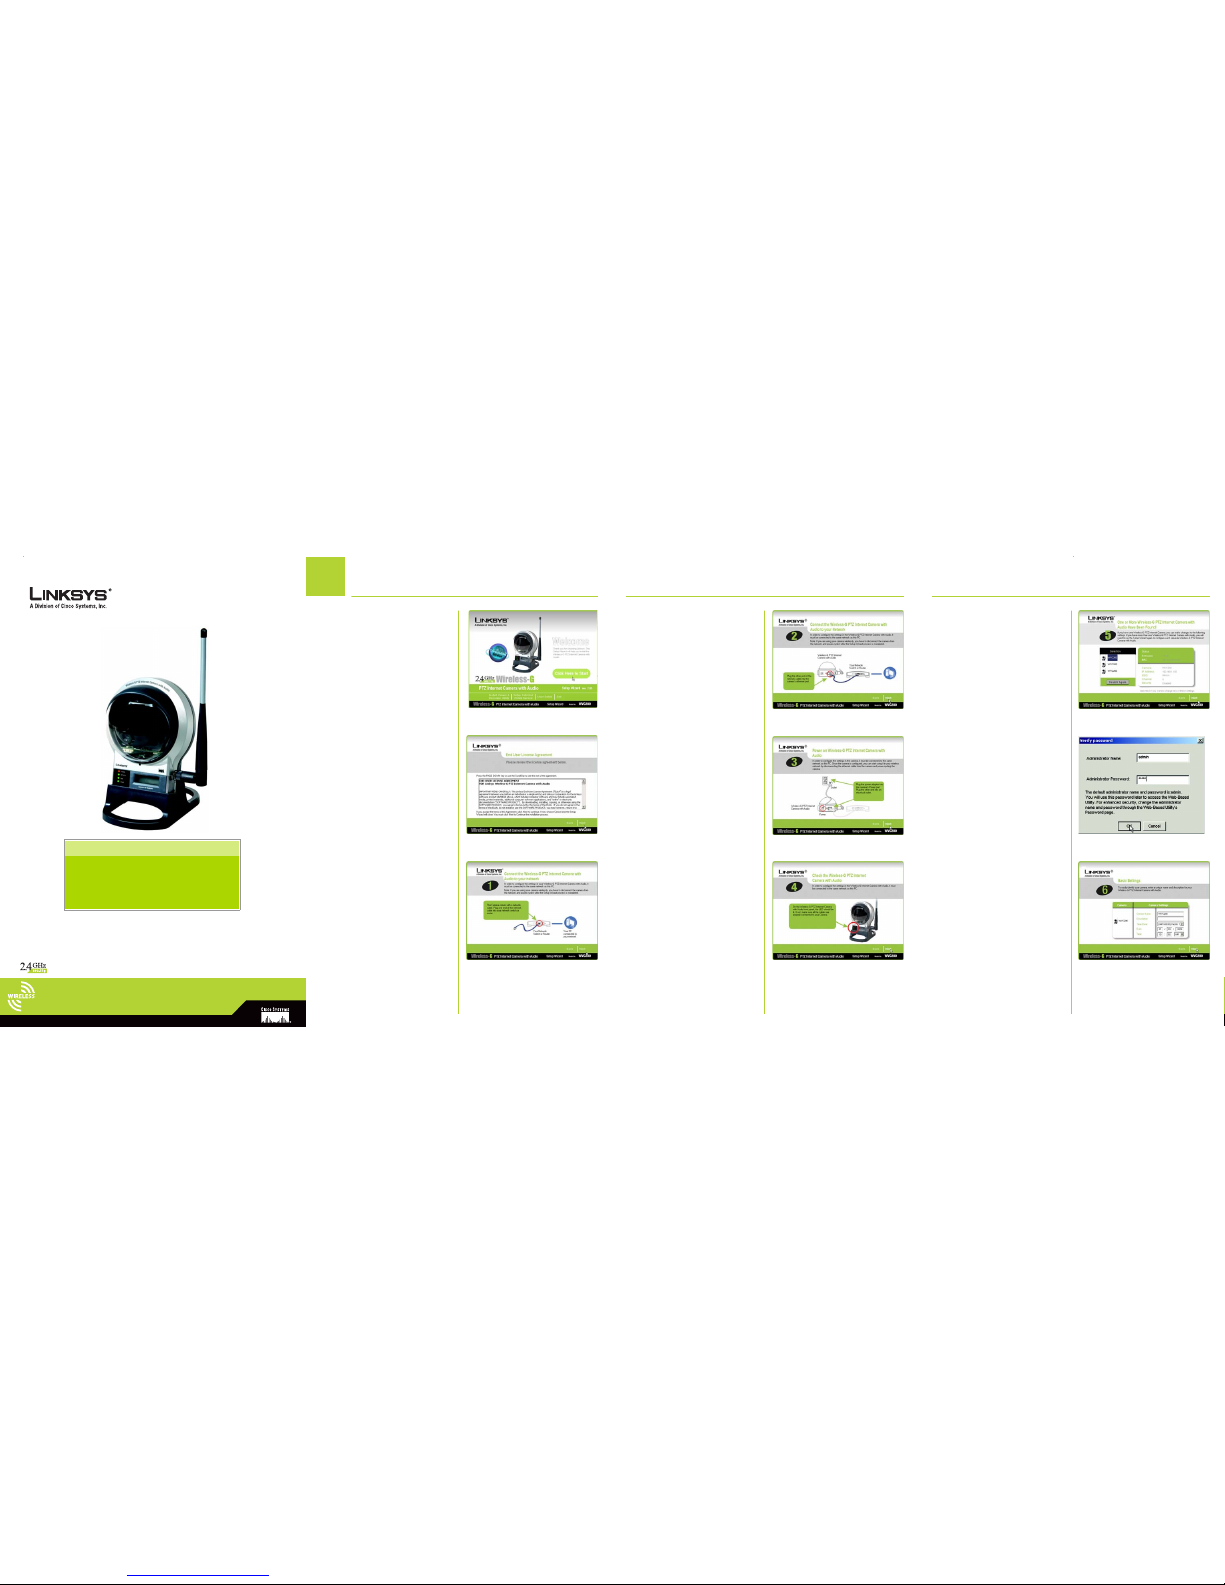
A Insert the Setup CD-ROM into your CD
or DVD drive. You see a screen like
this one. If it doesn’t appear
automatically, click the Start button,
choose Run, type D:\wvc200.exe in
the Open field (where “D” is the drive
letter of your CD or DVD drive), then
click OK.
B Click the Click here to Start button.
C Read and agree to the license
agreement, then click Next.
D Connect the included Ethernet
network cable to your network
router or switch, then click Next.
B
C
D
E Connect the other end of the cable to
the Camera’s ETHERNET port, then
click Next.
F Connect the included power adapter
to the Camera’s POWER port, plug the
other end into a standard electrical
outlet, then click Next.
G Make sure that the Camera’s LEDs
are lit, then click Next.
E
F
G
H In the Selection box, select the
Camera you’re installing, write down
the IP address of the Camera, so you
can access the Web-based utility
later, then click Next. If the Camera
you want is not displayed in the
Selection box, click Search Again.
I For increased network security,
type admin, in lowercase letters,
in the Administrator Name and
Administrator Password fields,
then click OK. (You can change
the administrator name and
administrator password using the
Camera’s Web-based Utility later.)
J On the Basic Settings screen, change
the following settings:
• Camera Name: Enter a unique
name, up to 15 characters, for the
Camera. Unique names are helpful
when you are using multiple
Cameras on the same network.
• Description: Enter a description,
up to 32 characters, with additional
information, such as the location,
for the Camera.
• Time Zone: Select the time
zone that corresponds with
the Camera’s location.
• Date: Enter the current date in the
provided fields.
• Time: Enter the current time in the
provided fields.
When you have finished making
changes, click Next.
H
I
J
1
Package Contents
• Wireless-G PTZ Internet Camera with Audio
• Power Adapter
• Ethernet Network Cable
• Setup CD-ROM with on-screen User Guide
• SoloLink DDNS Free Trial Card
• Registration Card
Set up the Wireless-G PTZ Internet Camera
with Audio
Page 2

K If your network uses static IP
addresses, select Static IP address,
click Next, then go to Step L.
If your network uses a DHCP server
to assign IP addresses to network
devices, keep the default setting,
Automatic Configuration-DHCP,
click Next, then go to step M.
L Enter an IP Address, Subnet Mask,
Default Gateway, Primary DNS, and
Secondary DNS that corresponds
with your network’s settings, then
click Next.
M If you want your camera to
communicate using a wireless access
point or router, select Infrastructure
as the Mode Setting, then click Next.
If you want your camera to
communicate without using a
wireless access point or router,
select Ad-Hoc as the Mode Setting,
then click Next.
K
L
M
N On the Wireless Settings screen,
change the following settings:
• SSID: Enter the SSID name of your
wireless network.
• Channel: If you selected Ad-Hoc
mode in step M, select the channel
that matches your Ad-Hoc network.
When you have finished making
changes, click Next.
O Select the wireless security setting
that matches your wireless network,
then enter the required information
for the type of security you’re using,
then click Next.
If your network doesn’t have wireless
security enabled, select Disabled,
then click Next.
P Review the new settings for your
Camera, then click the Next button.
N
O
P
Q Click OK to save the new settings or
click Cancel to discard your changes.
R You see a Congratulations screen like
this one. Click Install Viewer &
Recorder Utility to install the
software on your PC.
Setup is complete. You can relocate the
Camera after you install the Utility
and/or the SoloLink service.
Q
R
For additional information or troubleshooting
help, refer to the User Guide on the Setup
Wizard CD-ROM. You can also e-mail for
further support.
24 Hour Technical Support
800-326-7114
(toll-free from US or Canada)
E-mail Support
support@linksys.com
Website
http://www.linksys.com or
http://support.linksys.com
RMA (Return Merchandise Authorization)
http://www.linksys.com/support
FTP Site
ftp://ftp.linksys.com
Sales Information
800-546-5797 (800-LINKSYS)
Linksys is a registered trademark or trademark of
Cisco Systems, Inc. and/or its affiliates in the U.S.
and certain other countries. Copyright © 2006
Cisco Systems, Inc. All rights reserved.
WVC200-QI-60330NC BW
 Loading...