

Page 1
1
Model No.
Wireless
Model No.
WPC300N (EU/LA)
Wireless-N
Package Contents
• Wireless-N Notebook Adapter
• Setup Wizard CD-ROM
• User Guide (English only) on CD-ROM
• Quick Installation
2
4
,
GHz
Notebook Adapter
Quick Installation Guide
Page 2
2
1
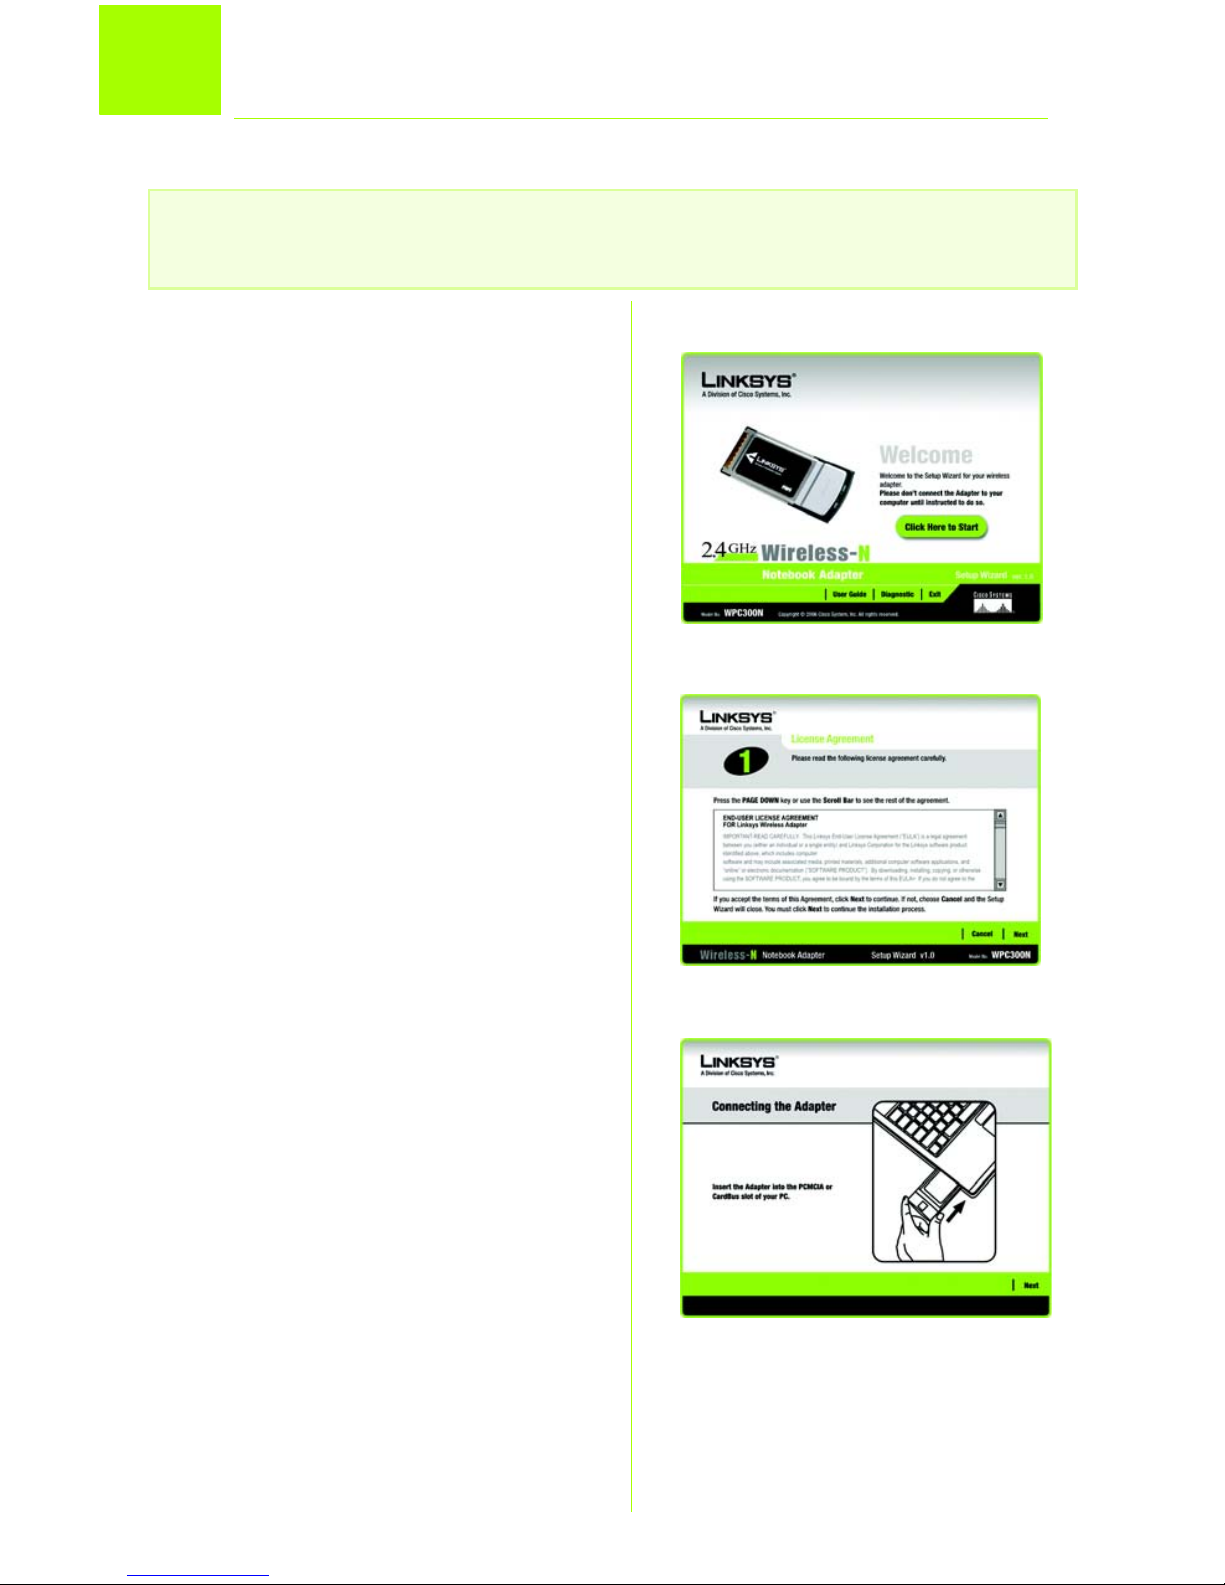
IMPORTANT: Do not insert the Adapter until you are instructed to do so; otherwise,
the setup will not work correctly.
A To begin, insert the Setup
Wizard CD-ROM into your
notebook’s CD-ROM drive.
The Setup Wizard should run
automatically, and the
Welcome screen should
appear.
B Click Click Here to Start.
C After reading the License
Agreement, click Next, and
Windows will begin copying
files onto your notebook.
D The Setup Wizard will now
prompt you to insert the
Adapter into your notebook.
After inserting the Adapter,
click Next.
B
C
D
Begin Installation
Page 3
3
2
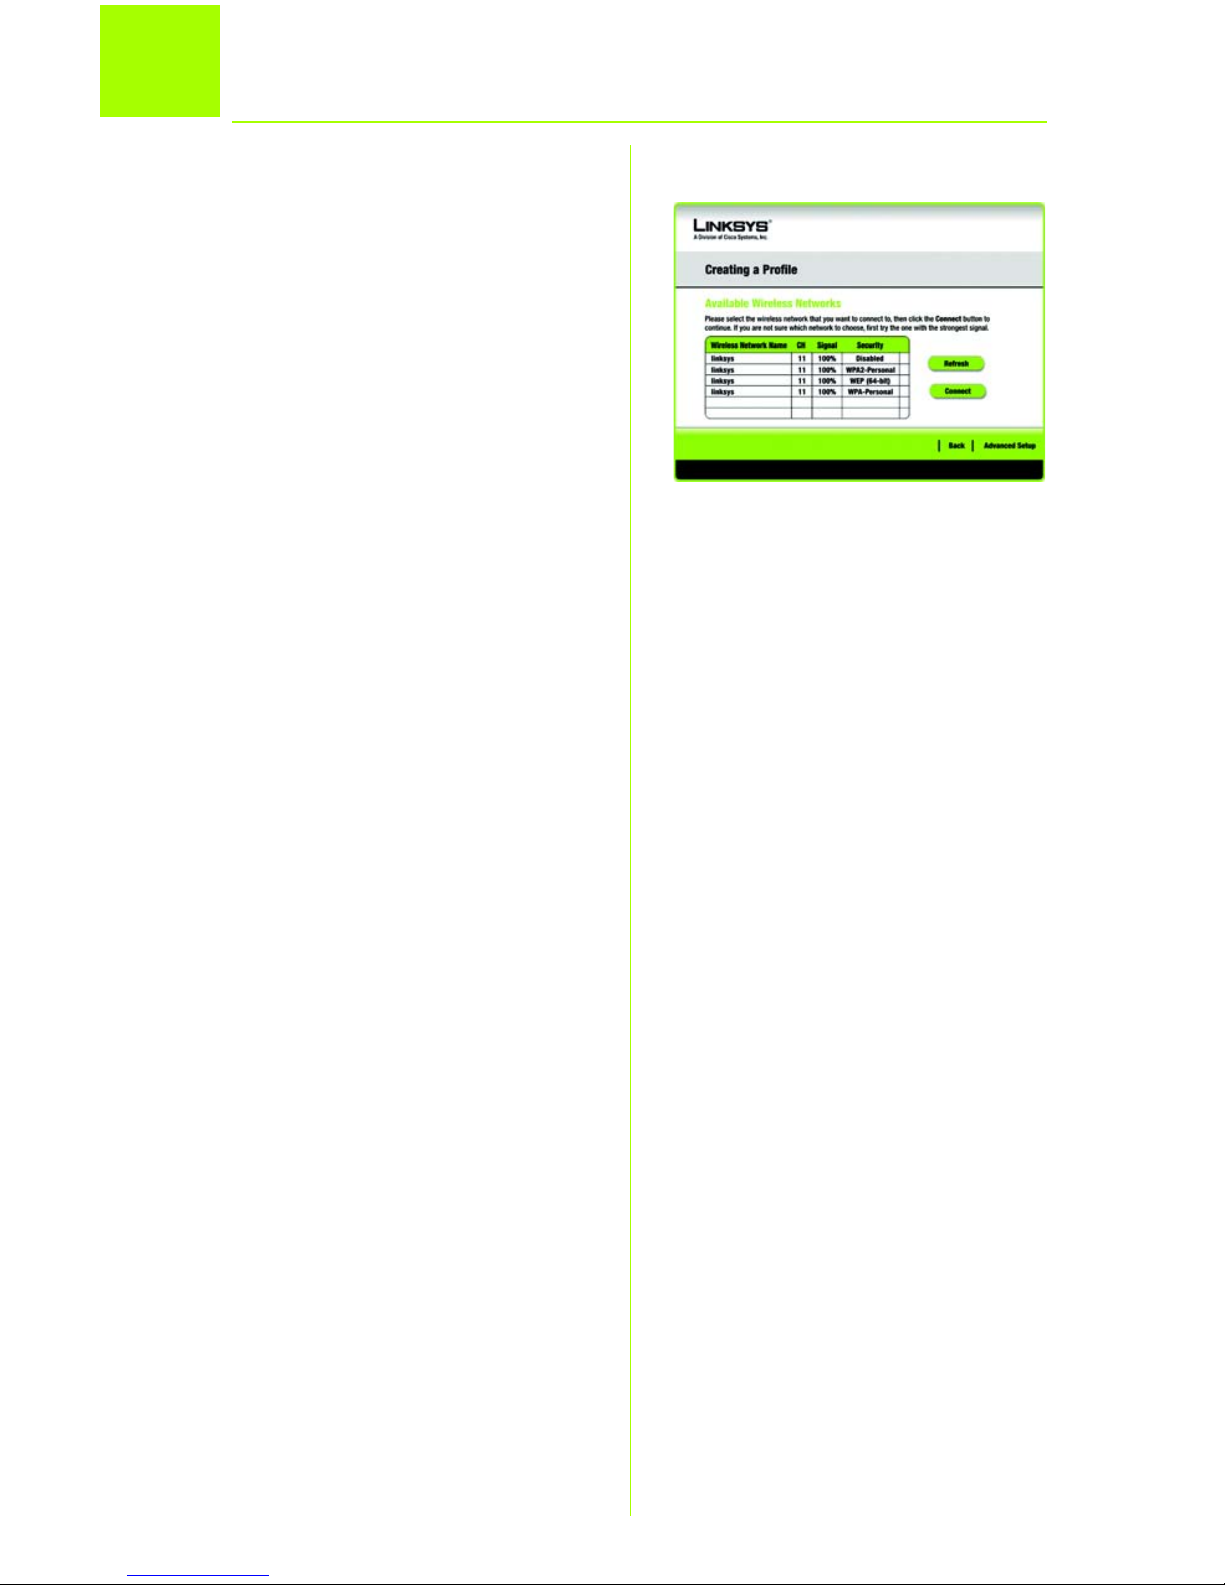
The Available Wireless Networks
screen offers two options for setting
up the Adapter.
NOTE:Later you can use this screen
again to set up configuration
profiles with connection
settings for different
networks.
• Available Wireless Networks.
Most users should use this
option. The networks available
to this Adapter will be listed on
this screen. You can choose
one of these networks and
click Connect to connect to it.
Click Refresh to update the
Available Wireless Network list.
• Advanced Setup. To set up the
Adapter manually, select
Advanced Setup.
Follow the instructions for the option
you are using.
Setting Up the Adapter with an
Available Network
The available networks are listed in
the table by Wireless Network Name
(SSID). Select the wireless network you
wish to connect to and click
Connect. If the network uses wireless
security, you will need to configure
security on the Adapter. If not, you
will be taken directly to the
Congratulations screen.
Set Up the Adapter
Available Wireless Networks
Page 4
4
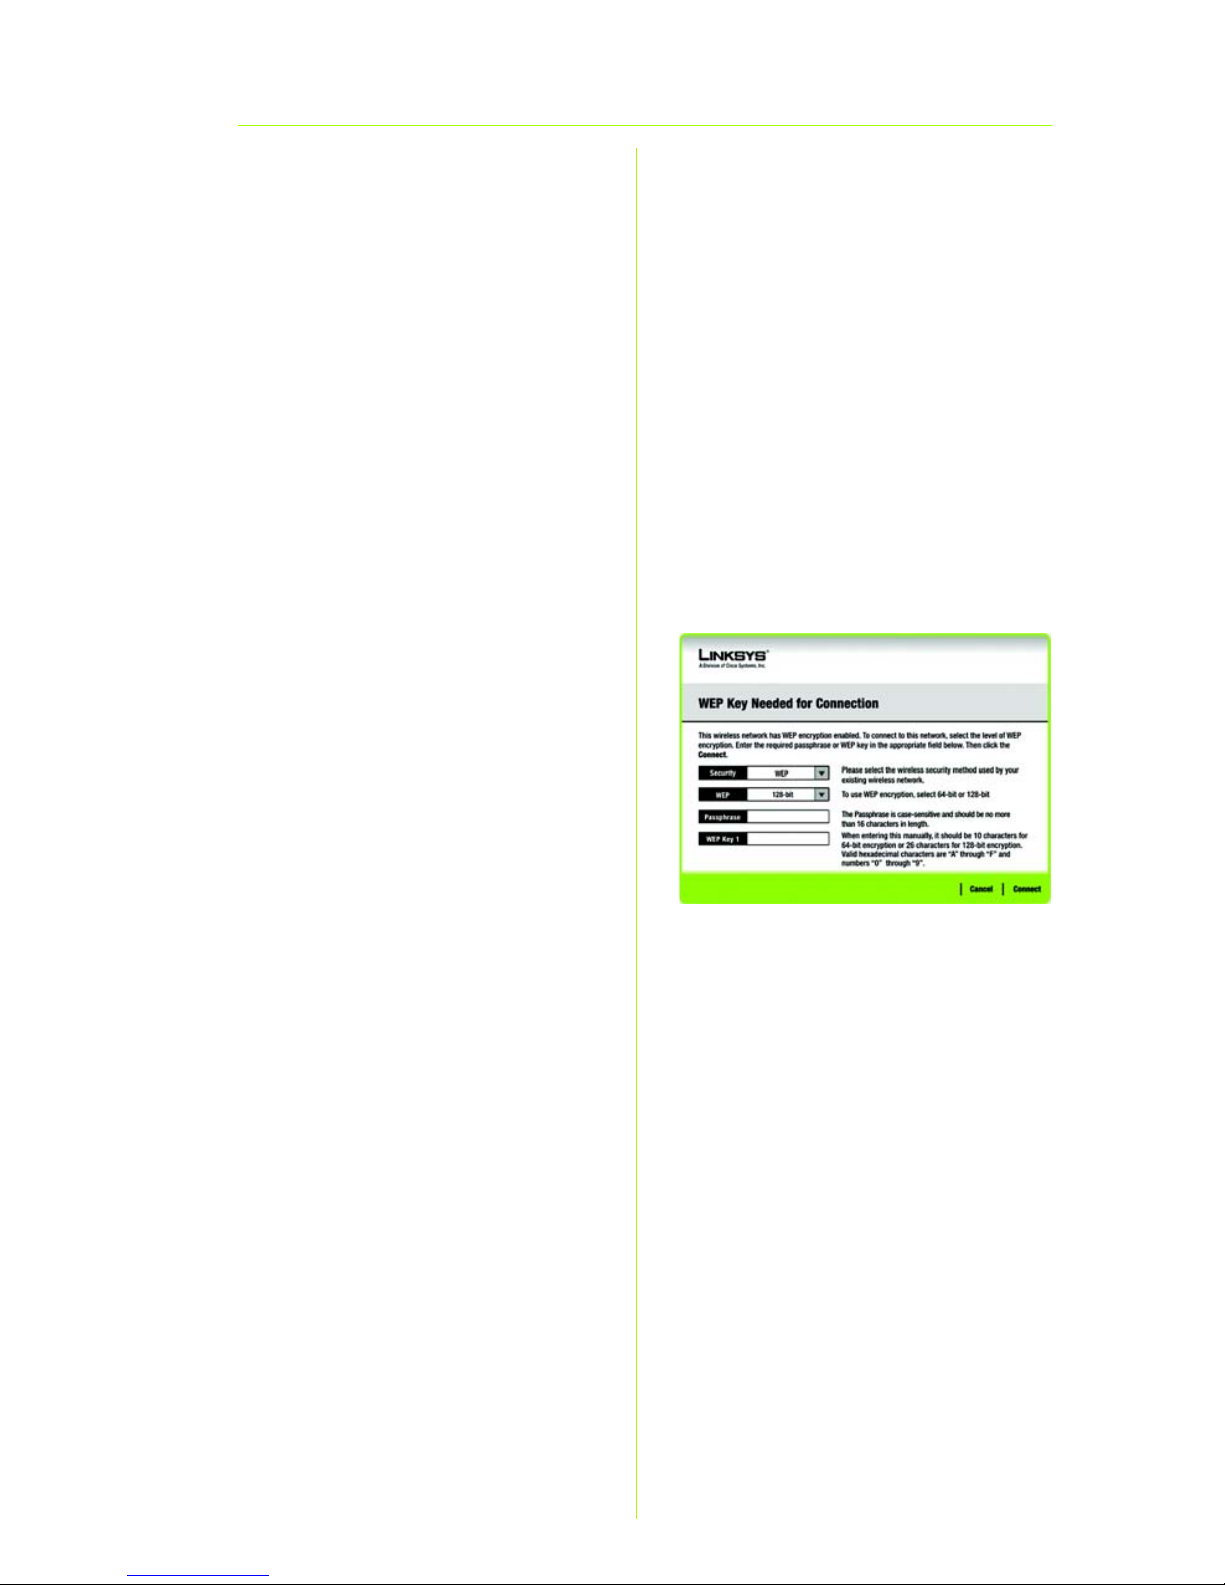
A If wireless security has been
enabled on this network, you
will see a wireless security
screen. If your network uses
WEP (Wired Equivalent Privacy)
encryption, the WEP Key
Needed for Connection
screen will appear. If your
network uses WPA Personal or
WPA2 Personal security, a
screen will appear for one of
those encryption methods.
WEP Key Needed for
Connection
Select the level of encryption
you want to use, 64-bit or
128-bit. Then, enter a
passphrase or WEP key.
Passphrase - Enter a
passphrase, so a WEP key is
automatically generated. The
passphrase is case-sensitive
and should not be longer than
16 alphanumeric characters.
WEP Key 1 - For 64-bit
encryption, enter exactly 10
hexadecimal characters. For
128-bit encryption, enter
exactly 26 hexadecimal
characters. Valid hexadecimal
characters are “0” to “9” and
“A” to “F”.
Then, click Connect.
WEP Key
Page 5

5
WPA Personal for Connection
Select one of the encryption
methods you want to use. Then
enter a Pre-shared Key.
Encryption - Select the type of
algorithm you want to use, TKIP
or AES.
Pre-shared Key - Enter a Preshared Key of 8-63 characters.
Then, click Connect.
WPA2 Personal Needed for
Connection
AES is automatically used as
the encryption method. Enter
a passphrase.
Pre-shared Key - Enter a Preshared Key of 8-63 characters.
Then, click Connect.
B Click Finish to complete the
setup.
Congratulations! Setup is
complete.
Proceed to Step 3 to learn about
the Wireless Network Monitor.
WPA Personal
WPA2 Personal
B
Page 6

6
Setting Up the Adapter with
Advanced Setup
Click Advanced Setup on the
Available Wireless Networks screen
to set up the Adapter manually.
A If your network has a router or
other DHCP server, click Obtain
network settings
automatically (DHCP).
If your network does not have a
DHCP server, click Specify
network settings. You must
specify the IP Address and
Subnet Mask on this screen. If
you are unsure about the
Default Gateway and DNS
addresses, leave those blank.
IP Address - This must be
unique to your network.
Subnet Mask - The Adapter’s
Subnet Mask must match your
wired network’s Subnet Mask.
Default Gateway - Enter the IP
address of your network’s
Gateway here.
DNS 1 and DNS 2 - Enter the
DNS address(es) of your wired
Ethernet network here.
Click Next.
A
Available Wireless Networks
Page 7

7
B Select the wireless mode you
want to use. Then, enter the
wireless network name (SSID) for
your network.
Infrastructure Mode - Use this
mode if the Adapter will
connect to a wireless router or
access point.
Ad-Hoc Mode - Use this mode
if the Adapter will directly
connect to another wireless
device.
Wireless Network Name - Enter
the wireless network name
(SSID) used by all devices in
your wireless network.
Click Next.
C If you chose Infrastructure
Mode, go to Step D. If you
chose Ad-Hoc Mode, the Ad-
Hoc Mode Settings screen will
appear. Select your channel
and network mode settings.
Network Mode - Select the
Network Mode in which your
wireless network will operate. In
Mixed mode, Wireless-N,
Wireless-B and Wireless-G
devices can operate on the
same network. In Wireless-G
Only mode, no Wireless-B
devices can operate in the
network.
B
C
Page 8

8
Standard Channel - Select the
correct channel for your wireless
network. The channel you
choose should match the
channel set on the other
devices in your wireless network.
If you are unsure about which
channel to use, keep the
default setting Auto.
Click Next.
D The Wireless Security screen will
appear.
If your wireless network doesn’t
use wireless security, select
Disabled and then click Next.
Proceed to Step E.
Select the security method
used on your network: WEP, WPA
Personal, WPA2 Personal, or
RADIUS.
For WEP, WPA Personal, and
WPA2 Personal, proceed to the
appropriate instructions for your
security method.
For RADIUS, refer to the User
Guide (English only) on the CDROM for instructions.
WEP
Select the WEP encryption level,
and enter a passphrase or WEP
key.
WEP - Select 64-bit or 128-bit.
Disabled
NOTE: WEP stands for Wired
Equivalent Privacy, and WPA
stands for WiFi Protected
Access. RADIUS stands for
Remote Authentication Dial-In
User Service.
WEP
Page 9

9
Passphrase - Enter a
passphrase, so a WEP key is
automatically generated. The
passphrase is case-sensitive
and should not be longer than
16 alphanumeric characters.
WEP Key - For 64-bit encryption,
enter exactly 10 hexadecimal
characters. For 128-bit
encryption, enter exactly 26
hexadecimal characters. Valid
hexadecimal characters are “0”
to “9” and “A” to “F”.
Advanced Users:
TX Key - Select the appropriate
transmit key number.
Authentication - Select the
appropriate authentication
method.
Click Next.
WPA Personal
Select an encryption method
and then enter a passphrase.
Encryption - Select the type of
algorithm you want to use, TKIP
or AES.
Pre-shared Key - Enter a Preshared Key of 8-63 characters.
Click Next.
WPA Personal
Page 10

10
WPA2 Personal
Enter a Pre-shared Key of 8-63
characters. Click Next.
E Review the new settings. Click
Save to save these settings.
F After the software has been
successfully installed, the
Congratulations screen will
appear. Click Connect to
Network to connect to your
network. Click Return to Profiles
screen to open the Wireless
Network Monitor’s Profiles
screen.
Congratulations! Setup is
complete.
Go to Step 3 to use the Wireless
Network Monitor.
WPA2 Personal
E
F
Page 11

11
After the Adapter has been
configured, the Wireless Network
Monitor icon will appear in your
notebook’s system tray. Double-click
the icon to open the Wireless
Network Monitor.
Use the Wireless Network Monitor to
check the link information, search for
available wireless networks, or create
profiles that hold configuration
settings for different networks.
To work with profiles, click the Profiles
tab. The Profile screen will list the
current profiles and offer five
options:
• New - Click New to create a
profile.
• Edit - To change a profile,
select the profile, and then
click Edit.
• Import and Export - Refer to
the User Guide (English only) on
the CD-ROM for instructions.
• Delete - To delete a profile,
select the profile, and then
click Delete.
To create a new profile, follow these
instructions:
A On the Profiles screen, click
New.
3
Use the Wireless Network Monitor
Monitor Icon
Profiles
Wireless Network
Monitor
Page 12

12
B Enter a name for the new
profile, and click OK.
C The next screen to appear will
be the Available Wireless
Networks screen. This provides
two options for setting up the
Adapter.
Return to Step 2 of this Quick
Installation Guide for
instructions.
WPC300N-EU-LA-QIG-60406NC BW
Linksys is a registered trademark or trademark of
Cisco Systems, Inc. and/or its affiliates in the U.S.
and certain other countries. Copyright © 2006
Cisco Systems, Inc. All rights reserved.
For additional information or troubleshooting
help, refer to the User Guide on the CD-ROM
or the Technical Support Insert. You can also
e-mail for further support.
Website
http://www.linksys.com/international
Product Registration
http://www.linksys.com/registration
C
B
 Loading...