

Page 1

HomeLink™ Series
HomeLink Phoneline
Network Card
Use this guide to install these Linksys Products:
•
HomeLink Phoneline Network Card (HPN100)
• HomeLink Phoneline Network In a Box (HPN100SK)
User Guide
Page 2

COPYRIGHT & TRADEMARKS
Copyright © 2000 Linksys, All rights reserved. HomeLink is a registered trademark of
Linksys. Microsoft, Windows, and the Windows logo are registered trademarks of
Microsoft Corporation. All other trademarks and brand names are the property of their
respective proprietors.
LIMITED WARRANTY
Linksys guarantees that every Linksys HomeLink Phoneline Network Card and Network
in a Box is free from physical defects in material and workmanship under normal use
for five (5) years from the date of purchase. If the product proves defective during this
warranty period, call Linksys Customer Support in order to obtain a Return
Authorization number. Warranty is for repair or replacement only. Linksys does not
issue any refunds. BE SURE TO HAVE YOUR PROOF OF PURCHASE ANDBAR CODE
ON HAND WHEN CALLING. RETURN REQUESTS CANNOT BE PROCESSED WITHOUT PROOF OF PURCHASE AND BAR CODE. When returning a product, mark the
Return Authorization number clearly on the outside of the package and include your
original proof of purchase and bar code.
IN NO EVENT SHALL LINKSYS’ LIABILITY EXCEED THE PRICE PAID FOR THE PRODUCT FROM DIRECT, INDIRECT, SPECIAL, INCIDENTAL OR CONSEQUENTIAL DAMAGES RESULTING FROM THE USE OF THE PRODUCT, ITS ACCOMPANYING SOFTWARE OR ITS DOCUMENTATION. Linksys makes no warranty or representation,
expressed, implied, or statutory, with respect to its products or the contents or use of
this documentation and all accompanying software, and specifically disclaims its quality, performance, merchantability, or fitness for any particular purpose. Linksys reserves
the right to revise or update its products, software, or documentation without obligation
to notify any individual or entity. Please direct all inquiries to:
Linksys P.O. Box 18558, Irvine, CA 92623.
FCC STATEMENT
This equipment has been tested and found to comply with the limits for a Class B digital device, pursuant to Part 15 of the FCC Rules. These limits are designed to provide
reasonable protection against harmful interference in a residential installation. This
equipment generates, uses, and can radiate radio frequency energy and, if not
installed and used according to the instructions, may cause harmful interference to
radio communications. However, there is no guarantee that interference will not occur
in a particular installation. If this equipment does cause harmful interference to radio or
television reception, which is found by turning the equipment off and on, the user is
encouraged to try to correct the interference by one or more of the following measures:
• Reorient or relocate the receiving antenna
• Increase the separation between the equipment or device
• Connect the equipment to an outlet other than the receiver’s
• Consult a dealer or an experienced radio/TV technician for assistance
001
Page 3

Introduction
Your Linksys HomeLink Phoneline Network Card
Congratulations on purchasing your new Linksys HomeLink Phoneline
Network Card(s). This exciting new technology is being offered in compliance with the standards of the Home Phoneline Networking Alliance
(HomePNA). The Linksys HomeLink Phoneline Network Card now offers
instant connectivity to multiple PCs over existing telephone lines in your
home. You can network any computer by connecting it to any standard phone
line. There's no need for a switch, hub, or even any additional cables - the
network runs on standard, home-grade telephone wires just like the ones you
use every day.
The Linksys HomeLink Phoneline Network Card utilizes Advanced Micro
Devices' (AMD®) PCnet™-Home technology. This new technology lets your
phone line carry computer data as well as regular telephone voice service.
You can also use broadband connections like cable modems or Digital
Subscriber Lines (DSL). You can talk on the telephone or download files
from the Internet, and share resources over a network at the same time. Every
standard telephone jack in the home is capable of hosting a PC - you can connect up to 25 computers, transforming your home's telephone wiring into an
easily expandable network. Want to add more PCs? Just put a HomeLink
Card in your computer and plug it into your phone jack. It’s that simple!
Phoneline Network Card & Network in a Box
1
Contents
Introduction 1
Your Linksys HomeLink Phoneline Network Card 1
How Does HomeLink Networking Work? 2
Features 3
Package Contents 4
Sharing Your Resources 5
Installing Your HomeLink Card 6
Installing Your Cabling 8
Installing Your Driver Software 11
Windows 98 Driver Setup 12
Windows 95 Driver Setup 17
Windows NT 4.0 Driver Setup 22
Internet LanBridge 27
Installing Internet LanBridge 28
Using Internet LanBridge 30
Uninstalling Internet LanBridge 31
Troubleshooting 33
Troubleshooting for Windows PCs 33
General Troubleshooting Tips 37
Appendix 39
Changing the Card Settings 39
About Plug-and-Play PCI Technology 41
Windows 95 Version A Driver Installation 43
File and Printer Sharing 45
Starting Over in Windows 95 &98 48
Changing Computer or Workgroup Names 50
Manually Installing Network Components 51
Linux, Open Source, & Beta Operating Systems 53
References 54
Types of Cabling 54
Specifications 57
Customer Support 58
Page 4

Phoneline Network Card & Network in a Box
3
How Does HomeLink Networking Work?
The Linksys HomeLink Phoneline Network Card utilizes a technology known
as Frequency Division Multiplexing (FDM) which divides the data travelling
over the phone lines into separate frequencies - one for voice, one for highbandwidth net access such as DSL, and one for the network data. These frequencies can coexist on the same telephone line without impacting one another, although you will not be able to use your telephone if you are connected
through an analog modem.
HomeLink’s 1Mbps data transfer rate over phone lines more than accommodates home PC applications such as file and printer sharing, gaming, and
Internet and email exchanges. You can share a modem or a high-speed
Internet connection over the entire network using the Internet LanBridge software package. The HomeLink Phoneline Network Card’s data transfer rate is
18 times faster than the fastest analog modems available, which run at
56Kbps. Even high-speed modem, DSL, and ISDN connections will perform
at full speed on a HomeLink network. The HomeLink Phoneline Network
Card gives you the perfect tool to bring the benefits of networking into your
home or office.
NNoottee::
Due to standard telephone cable limitations, HomeLink
HomePNA devices require that your cabling does not exceed a
total length of 500 feet for your entire network.
Linksys HomeLink Series
2
Features
• Build A Network Using Your Existing Telephone Line No Additional Hubs or Cabling Needed
• Internal PCI Network Card with 2 RJ-11 Modular Telephone Ports
• 1Mbps Data Transfer Rate - Perfect for File and Printer Sharing, Email, Web
Surfing, Multi-User Gaming, and More
• Migrate to 10Mbps Ethernet at Any Time with the Optional RJ-45 Port
• Share Your Internet Access and ISP Connection Over a Network With
LanBridge Internet Sharing Software
• Each HomeLink Card Comes Packaged with Its Standard Telephone Cable
• Connect Up To 25 PCs on One Network with Up to 500 Feet of Cabling
• Data Transfer Rate is 18 Times Faster Than 56K Modems
• Works With Windows 95, Windows 98, Windows NT 4.0, and Windows
2000 (Linksys will offer technical support for Windows 2000 after its official release by Microsoft.)
• Frequency Division Multiplexing (FDM) for Uninterrupted Simultaneous
Voice Service, High-Bandwidth xDSL Internet Access and Network Data
Transmissions
• HomePNA, UADSL, IEEE 802.3, CSMA/CD, and FCC Compliant
• Free Technical Support on the Phone and on the Inter net
• Free Software Driver Upgrades
• 5-Year Limited Warranty
Page 5
Sharing Your Resources
The HomeLink Phoneline Network Card brings the advantages of inexpensive
networking to your home or office. Any networked device, including CDROM drives, hard drives, and printers, can be shared by any networked PC on
a HomeLink network.
Sharing Your Internet Connection with Your Network
The Linksys HomeLink Phoneline Network Card comes with an Internet
sharing software (also called proxy server software) package called Internet
LanBridge. The LanBridge Internet sharing software package allows you to
share your Internet connection by setting up a proxy server PC, a computer
that establishes the Internet connection and routes all Internet communications to the other networked PCs. Only one PC on your network will be the
proxy server PC. You should pick the PC that has the modem (analog, DSL or
cable) that you usually use to connect to the Internet already installed to be
the proxy server PC.
NNoottee::
America Online, Compuserve, Prodigy, and similar services are
not supported since you must go through their specific service and software to access the Internet. Consult your ISP provider for more details.
Your HomeLink network will let you talk on the phone and access the
Internet at the same time ONLY if you are using a DSL or cable modem
connection. If you are using an analog modem or other device that
requires you to dial out to your Internet Service Provider (ISP), then,
obviously, your telephone line is already in use, and you can not talk on
the phone. Your internal network data travels on a separate frequency,
so your network communications will not be interrupted no matter what
type of Internet connection you have or whether or not you are using
the telephone.
To share a networked device among your PCs on the network, you must
configure each of your PCs to handle that networked device. You can
also choose not to configure certain PCs to prevent them from using
that device.
Phoneline Network Card & Network in a Box
5
Package Contents
• One HomeLink Phoneline Network Card
(Network in a Box contains 2 HomeLink Cards)
• One Standard Modular Telephone Cable
(Network in a Box contains 2 Telephone Cables)
• Installation CD-ROM with HomeLink drivers and
Internet LanBridge Internet Sharing Software
• User Guide and Registration Card
If any of the above items are missing, contact your Linksys dealer.
Linksys HomeLink Series
4
Page 6

Installing the HomeLink Card
1. Power off your PC and disconnect any peripheral equipment including the power cable.
2. Remove your computer's outside cover.
3. Locate an open PCI expansion slot on the motherboard, and determine
which PCI slot is a Master slot. If you have difficulties locating a PCI
Master slot, consult your PC’s motherboard documentation.
4. Slide the HomeLink Card into your PCI slot. Make sure that all its pins are
touching the slot's contacts. Applying a bit of force may be required to push
the Card completely in. After the card is firmly in place, secure its fastening
tab to your PC's chassis with a mounting screw.
5. Replace your PC's cover and reconnect your PC’s power source. The card
installation is complete, and you are now ready to proceed to the next section
to install your telephone or Ethernet network cabling.
Phoneline Network Card & Network in a Box
7
Installing Your HomeLink Card
Before You Begin
The HomeLink Phoneline Network Card is equipped with two phoneline
ports, called RJ-11 ports, to use in a phoneline network utilizing your existing telephone line. The HomeLink Card also has an optional RJ-45 10Mbps
Ethernet port for use with 10BaseT Ethernet networks.
Using Your HomeLink Card in a Ethernet Network
If you intend to use the HomeLink Card on a 10Mbps Ethernet network, only
use RJ-45 twisted-pair cabling. 10BaseT cabling is available in various
grades. For best results, we recommend using 8-wire, Category 5 UTP
cabling for an Ethernet network. Although Category 3 can be used successfully, Category 5 is much more reliable, and it is compatible with faster
100Mbps networks- a useful feature if you upgrade to Fast Ethernet speeds in
the future.
Both Category 3 and Category 5 twisted-pair
cabling can be purchased from computer retail
stores, or if you prefer, you can crimp your own
cables. See page 54 for details on wiring.
Regardless of what speed your Ethernet network runs, you must always use
Category 5 UTP twisted-pair cabling with a switch or a hub. Each PC plugs
into the switch or hub with its own twisted pair cable. Because all the PCs'
cables converge at the hub's central location, a twisted-pair network is often
referred to as having a star topology.
Linksys HomeLink Series
6
Do not connect PCs with crossover cables or without using a hub. Your
network might work, but the connection will be very unstable. Only use
crossover cables as a last resort when there are no uplink ports available.
NNoottee::
Keep in mind that RJ-11
and RJ-45 capabilities cannot
be used at the same time. If the
one is in use, the other is automatically disabled.
NNoottee::
Most newer PCs (Pentium
166 or higher) usually come
equipped with all PCI bus mastering slots. If your slots are not
labeled, check your motherboard’s
documentation to determine which
slot is a PCI Master slot.
NNoottee::
The RJ-45 cable connecting your PC's
HomeLink Card to your hub must not exceed
100 meters (328 feet) in length.
Page 7

If several of your PCs can only access one phone jack, you can connect those
PCs together using the Daisy Chain method. Just plug the cabling from your
first PC with its HomeLink Card into the phone jack, then use the second RJ11 port on the same Card to connect to your second PC’s Card. One phone
jack can support up to twenty-five PCs on one daisy chain. Again, you can
use a two-way splitter to plug a phone or other device into your jack, or connect the device to the open telephone port on the last card in your daisy
chain. See the illustration below on daisy chaining HomeLink PCs.
Daisy Chaining HomeLink PCs from One Telephone Jack
Phoneline Network Card & Network in a Box
9
Installing Your Cabling
If you are installing telephone cabling for phoneline networking, follow the
instructions in the section below. If you are installing Ethernet cabling to be
used with a hub or a switch, follow the instructions on page 10 .
Installing RJ-11 Telephone
Cabling
1. Plug one end of the telephone wire
into either of the HomeLink Card's RJ11 telephone ports. There are two RJ11 ports and only one silver RJ-45 portthe RJ-11 ports are the smaller, black
ones on the left side of the Card. The
illustration on the right shows telephone cabling with its RJ-11 tip inserted into the black RJ-11 port.
2. Connect the other end of the cable into a telephone jack in your wall,
another PC, or a bridge. You may leave one of the RJ-11 ports empty if you
do not want to connect your PC to anything else.
3.Your hardware is now installed. Proceed with the installation of the software on page 11.
If you only have one phone jack and you want to use your phone, modem or
fax machine, you can purchase a two-way adapter to split your single phone
jack into two jack connections. Plug your phone, modem or fax machine into
one phone jack and your HomeLink Network Card cabling into the other
jack.
NNoottee::
If you are using an analog telephone, you can either connect the
device to a second phone jack (recommended), or you can connect
your telephone directly to the second port on your HomeLink Card.
Remember, using the RJ-45 ports on your HomeLink Card will automat-
tically disable your RJ-11 phoneline networking capabilities. The two
types of connections CANNOT be used at the same time. Choose only
ONE type of connection to use at a time.
Linksys HomeLink Series
8
Standard phoneline cabling with RJ-11 tips
Page 8

Installing the Driver Software
Preparing to Install the HomeLink Software
Setting up the HomeLink Card's software involves installing a network driver onto your computer. The driver will allow the card to communicate with
your Windows software package. Before attempting to install a network driver
for the HomeLink Card, Windows 95, 98, 2000* or NT should already be
installed on your computer. The HomeLink Phoneline Network Card driver
setup program will not work properly under any other operating systems.
Because you must answer several important questions about your PC during
the installation, it is strongly recommended that you read through the installation instructions for your specific operating system before continuing with
this installation.
• Windows 98 instructions are on page 12
• Windows 95 instructions are on page 17
• Windows NT 4.0 instructions are on page 22
** NNoottee::
If you are using Windows 2000, also known as Windows NT
5.0, your Windows 2000 drivers are on the HomeLink CD-ROM. If
the Windows 2000 drivers are not on your CD-ROM, you can download them from the Linksys website. Since Windows 2000 is still in
development, Linksys will provide updated drivers and technical
support for Windows 2000 upon Microsoft’s official release of it.
Every PC must have a CD-ROM drive to be able to install the
HomeLink drivers. You must let the CD-ROM drive to begin
spinning up before starting the driver installation.
Phoneline Network Card & Network in a Box
11
Installing RJ-45 Ethernet
Cabling
1. Plug one end of a Category 5 UTP
Ethernet cable into the HomeLink Card's
RJ-45 port. The RJ-45 port is the silver
port on the far left of the Card. The
photo to the right shows a Category 5
UTP cable inserted into the RJ-45 port on
the Card.
2. Plug the other end of the cable into
your hub, switch, router or bridge. If you plan to use both 10Mbps devices
and 100Mbps devices on the same network, you'll need an autosensing hub
or switch to allow segments of different speeds to communicate. For more
information on 10/100 Autosensing Hubs and Switches, visit the Linksys
website at www.linksys.com or call us at (800) 546-5797 (LINKSYS).
3.Your Ethernet cabling installation is complete. Follow the instructions in
the next section to install your HomeLink driver software now.
Linksys HomeLink Series
10
NNoottee::
The LanBridge software documentation refers
to Windows 95 only, but the Windows 98 and 95
installation are almost identical. Use the instructions
for the proper operating system for best results.
Category 5 UTP Ethernet cabling
with its RJ-45 connector
NNoottee::
Cable modems and DSL connections to the Internet require a 10Mbps
interface. To connect your 100Mbps network to your cable or DSL line, use a
10/100 autosensing device to accommodate both speeds.
Page 9

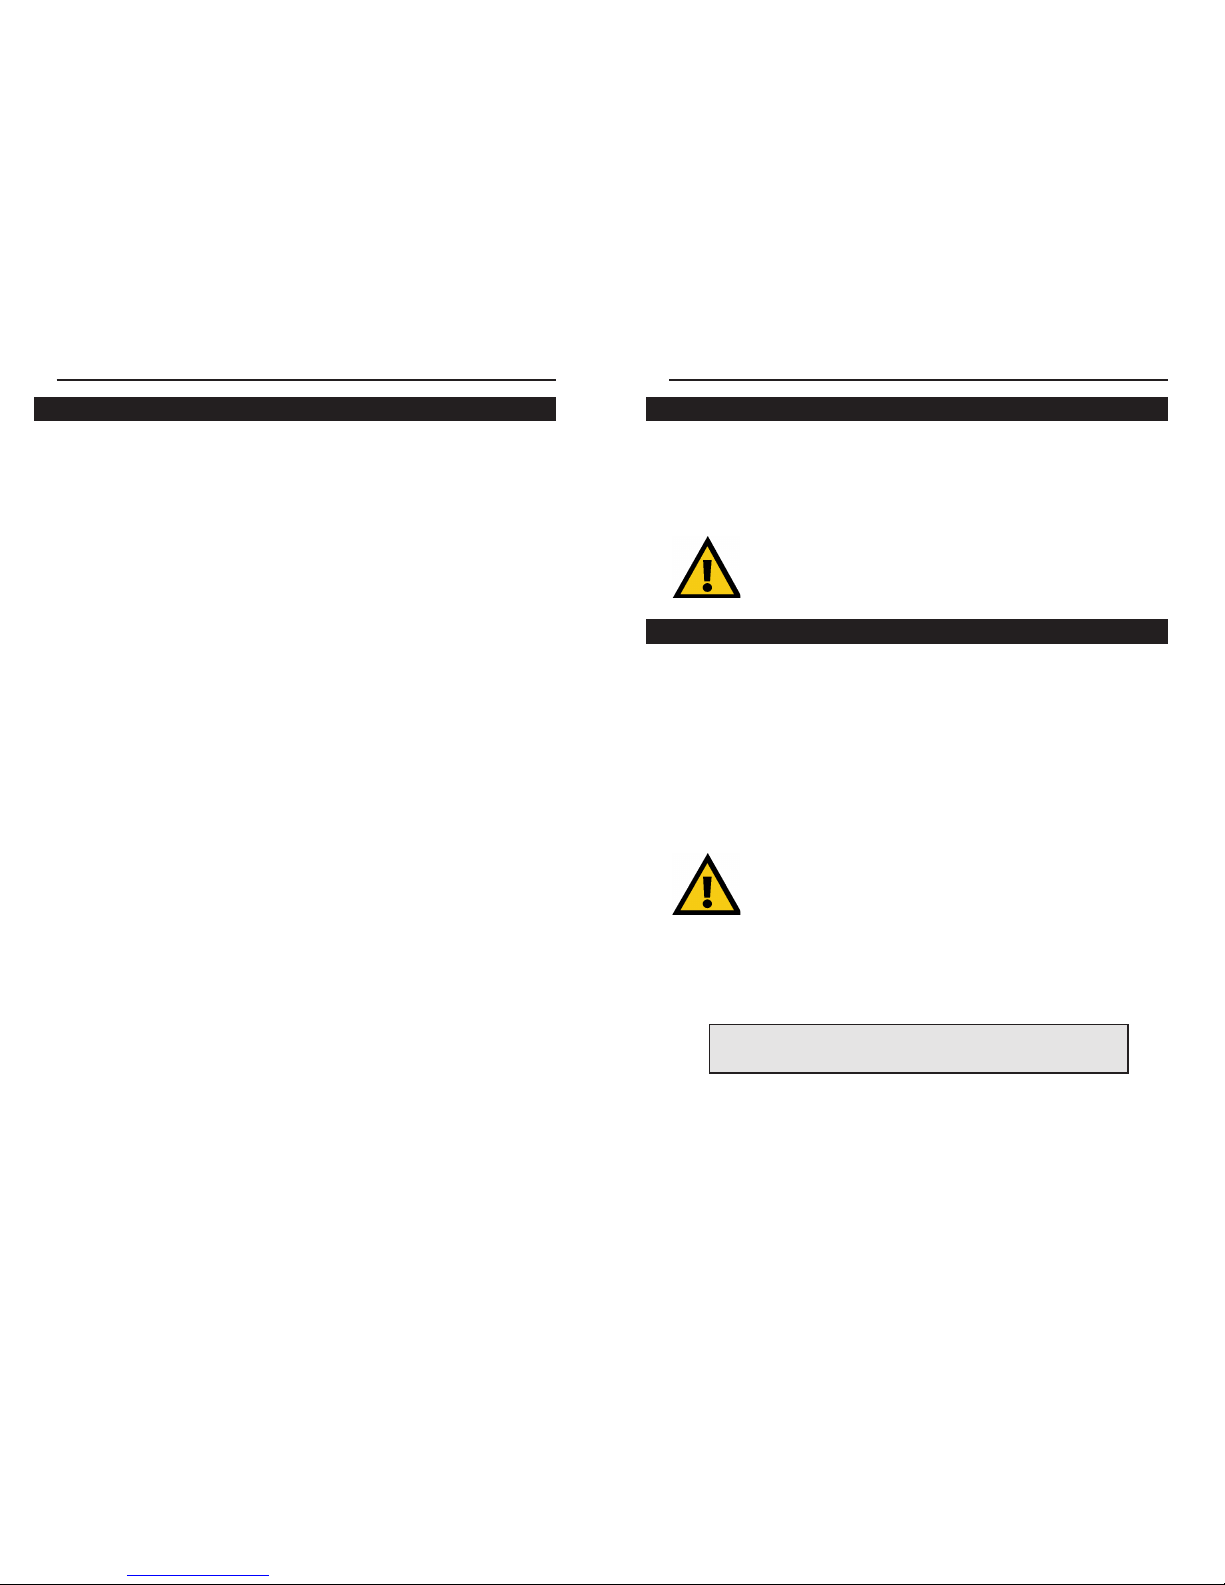
4. Select the first option, Search for the best driver for your device
(Recommended) and click Next.
5. Make sure the HomeLink CD is still in the CD-ROM drive, and click CD-
ROM drive to prompt Windows to search for the drivers there. Click Next.
Phoneline Network Card & Network in a Box
13
Windows 98 Driver Setup
Now that you’ve installed the HomeLink hardware in your PC, follow these
instructions for installing the Windows 98 network driver. The installation
procedure for the network driver will vary slightly, depending on your system
configuration and what version of Windows you are running.
The type of network built with HomeLink consists of two kinds of PCs - the
server PCs and the client PCs. The server PC is the "mother" computer,
while client PCs are the "children". Each of the client PCs must log on to the
Internet through the server PC, which in turn handles all Internet connections
for each client PC. Choose your server PC as the PC with an analog modem,
cable or DSL connection, or other communications device. Your best server
PC is your fastest, most powerful PC, but it doesn't necessarily have to be.
After you choose your server PC, make sure the Internet connection through
your server PC’s modem is configured and full
y functional before beginning
the installation of HomeLink drivers or LanBridge Internet sharing software.
Installing the HomeLink Network Driver
1. Start up your Windows 98 PC. A “New Hardware
Found” window will pop up for a moment.
2. Put the HomeLink Installation CD into your CD-ROM drive.
3. Windows will display a "Add New Hardware Wizard" window. Click Next.
Linksys HomeLink Series
12
You must let your CD-ROM drive spin up before you begin using it,
especially if your CD-ROM drive runs at high speeds.
NNoottee::
Go to page 33
for the Troubleshooting
section if you run into
any problems.
Page 10
8. An “Inser t Disk” window may ask for your Windows 98 installation files.
If so, click OK and insert your Windows 98 installation CD into your CDROM drive. Or, enter the location of those files on your hard drive, (e.g.,
D:\win98, C:\Windows\options\cabs). To do so, enter the hard drive location
of the Windows files in the “Copy files from” field, then click OK.
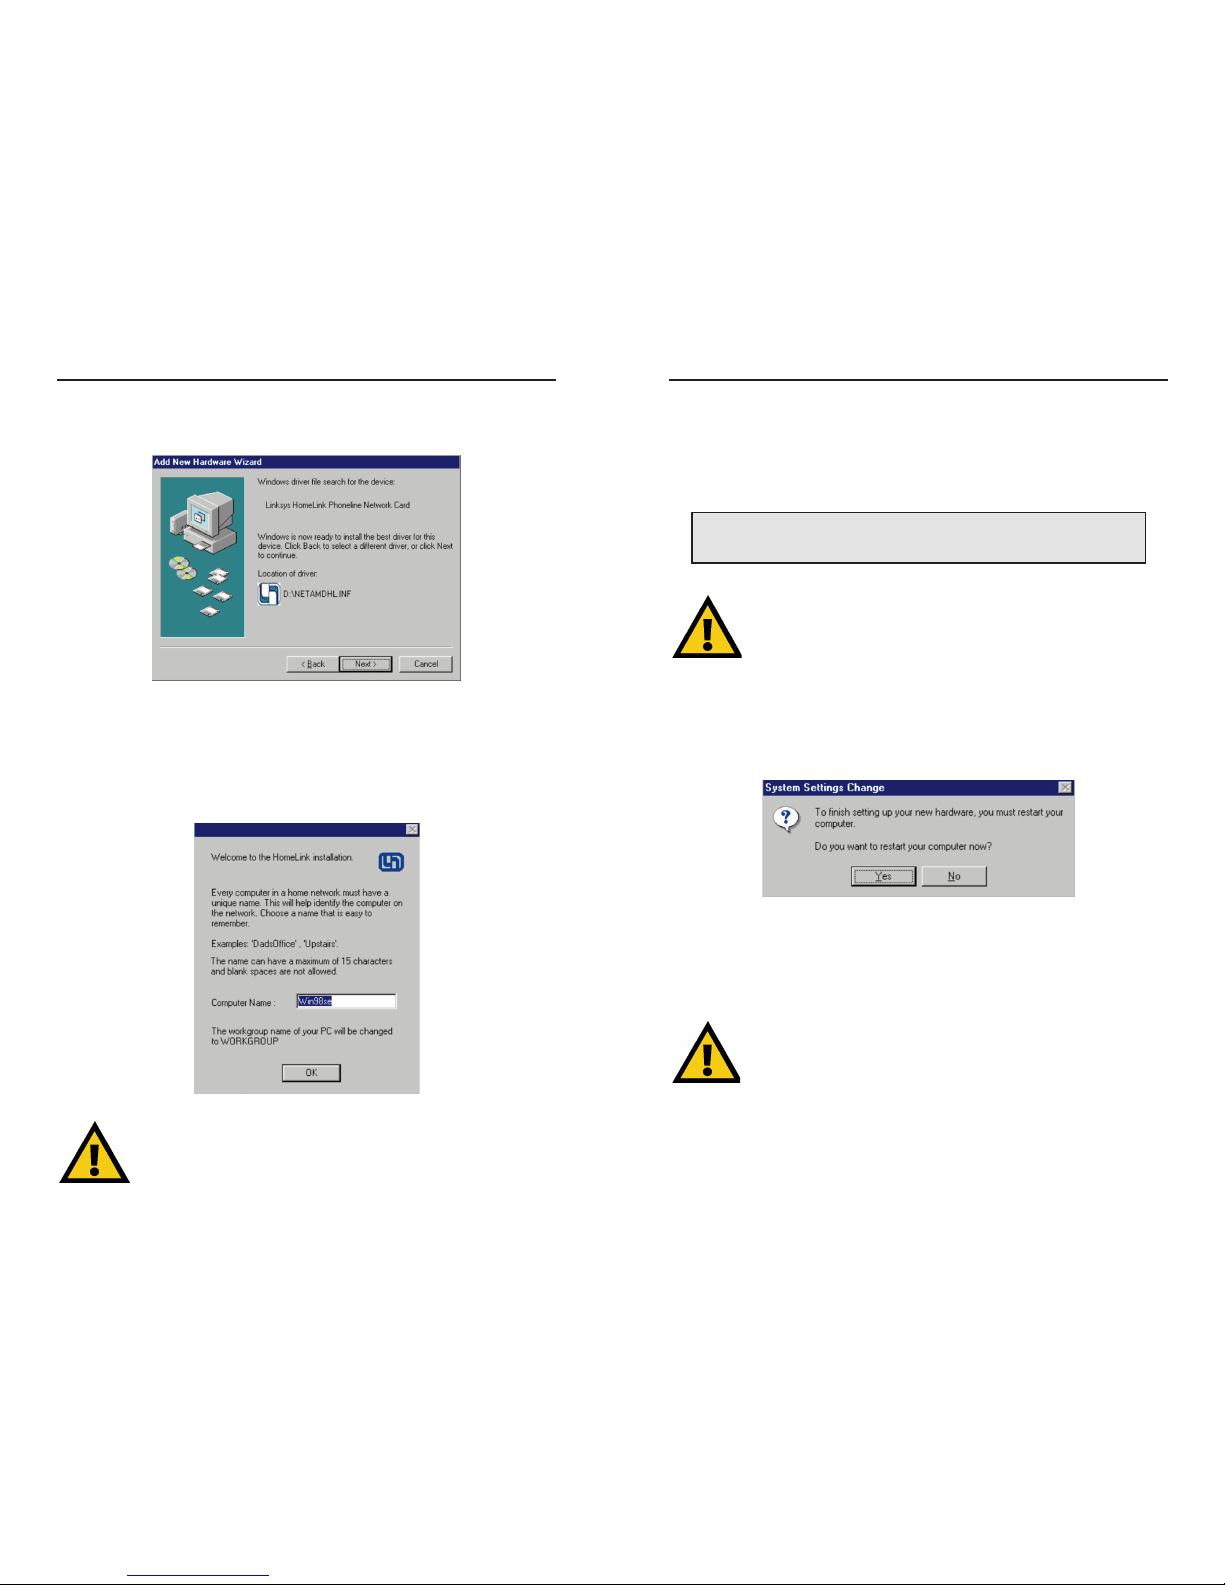
9. Windows will confirm successful installation with a message, “Windows
has finished installing the software that your new hardware device requires.”
Click Finish. When asked if you want to restart your PC, make sure the
HomeLink CD is still in your CD-ROM drive and click Yes.
10. The HomeLink driver installation is now complete. Choose a user name
and password if you have not already done so, and enter them in those fields
to log on to your network. Click OK to finish your log-on and access your
network.
From this point on, to access the network, you must enter the same user
name and password whenever Windows requests it, and click
OOKK..
.
Clicking
CCaanncceell
or hitting
EEssccaappee
will abort your network log-on attempt.
If you do not log on, not all network functions may be available to you.
If you are using of Windows 98 files on a CD, you may have to swap
back and forth between the HomeLink CD and the Windows 98 CD.
Make sure each CD is given a few seconds to spin up before use.
Do NOT hit
CCaanncceell
or
SSkkiipp FFiillee
! Doing so will disrupt the file copy.
NNoottee::
If you see”
VVeerrssiioonn CCoonnfflliicctt””
or a similar message, asking you if you want
to overwrite some existing files, it is highly recommended that you keep them.
You may get this message several times or not at all.
Phoneline Network Card & Network in a Box
15
6. Windows will display, “Windows is now ready to install the best driver for
this device” as it recognizes your HomeLink Card driver. Click Next.
Windows will copy the network files onto your PC, which may take a few
minutes.
7. A “Welcome” screen will ask for your computer’s name. Enter your computer’s name and click OK.
Your workgroup name will be automatically changed to
WWoorrkkggrroouupp
at
this time. Make note of your server’s name for future reference, as you
will need it later. Remember, each of your PC’s names must be unique.
Linksys HomeLink Series
14
Page 11

Windows 95 Driver Setup
Now that you’ve installed the HomeLink hardware in your PC, follow these
instructions to install the Windows 95 network driver. The installation procedure for your network driver will vary slightly depending on your system configuration and what version of Windows you are running.
The type of network built with HomeLink consists of two kinds of PCs - the
server PC and client PCs. Server PCs are the "mother" computers, while
client PCs are the "children." Each client PC must log on to the Internet
through the server PC, which in turn handles all Internet connections for each
client PC. Choose your server PC as the PC with an analog modem, cable or
DSL connection, or other communications device. Your best server PC is your
fastest, most powerful PC, but it doesn't necessarily have to be. Also, attach
networked devices like printers to the server PC for best results.
After you choose your server PC, make sure that the Internet connection
through your server PC’s modem is configured and fully functional before
beginning the installation of the HomeLink or Internet LanBridge software.
Installing the Network Driver
1. Start your PC in Windows 95, and the "Update Device Driver Wizard" window will confirm that it detects a “PCI Ethernet Controller” in your system.
Phoneline Network Card & Network in a Box
17
11. Now that your HomeLink driver installation is done, a window called
“Linksys HomeLink” will automatically begin the Internet LanBridge installation program. Make sure that your file and printer sharing is enabled first
in order to make sure that your LanBridge installation will be successful. For
more on file and printer sharing, see page 45. If you just want to use your
HomeLink network functions now and do NOT want to set up Internet connection sharing on your network, you can exit the Internet LanBridge installation and come back to it at any time.
To set up your Internet connection to be shared on your network, proceed to
page 27 for LanBridge installation instructions. If your HomeLink CD is not
in your CD-ROM drive, a message may prompt you to insert it. If your
LanBridge installation program does NOT automatically run, click My
Computer on your Desktop, CD-ROM drive, and then click on the program
autorun.exe on the CD-ROM. Or, you can also run autorun.exe from your
hard drive.
NNoottee::
The Internet LanBridge documentation has detailed information on LanBridge software set-up and dial-up networking.
The file is called
wwhhaatt__iiss__..hhttmmll
, and you can find it on your
HomeLink CD under the directory named
DD::\\iillbb\\uusseerrgguuiiddeess\\iillbb
.
Linksys HomeLink Series
16
NNoottee::
See page 33 for the Troubleshooting
section if you have any problems.
You must use only
OONNEE
Internet sharing software on
AALLLL
your networked PCs. Internet LanBridge software is not compatible with other
Internet sharing (proxy server) software packages. If you would like to
switch to Internet LanBridge software instead of using WinGate or any
other previously installed Internet sharing software, each PC on your
network must have WinGate removed and Lanbridge installed.
Page 12

4. In the “Copying Files” window, enter the drive letter of your CD-ROM
drive. In most cases, the CD-ROM drive is either D:\ or E:\. Enter the appropriate drive letter and click OK.
Network files will be copied onto your PC, which may take a few minutes.
DDOO NNOOTT
hit
CCaanncceell
or
SSkkiipp FFiillee
!
Doing so will disrupt the file copy.
Phoneline Network Card & Network in a Box
19
2. Insert the HomeLink Installation CD into your PC’s CD-ROM drive and
click Next.
3. Windows will search for the HomeLink Card software driver. When the
window below appears to confirm that the driver is found, click Finish.
NNoottee::
If Windows fails to find the driver, reinsert your
HomeLink driver CD and click
OOtthheerr LLooccaattiioonnss
.
Direct the search to your CD-ROM drive, e.g., D:\..
Remember, you must let your CD-ROM drive start spinning up before
you begin using your HomeLink driver installation CD.
If a “New Hardware Found” window shown below asks for the“Driver
from disk provided by hardware manufacturer,” you are using
Version A of Windows 95. Go to page 43 for Version A driver installation.
Linksys HomeLink Series
18
Page 13

8. After the setup is complete,choose a user name and password if you have
not already done so and enter them in their field and click OK to access the
network.
9. The Inter net LanBridge installation program will r un automatically, but
you can use your network first and come back to the LanBridge installation at
any time in the future if you do not choose to install it now. Before you begin
the LanBridge installation, make sure that your protocols and file and printer
sharing have been enabled before you begin to ensure that it installs successfully.
You can r un the LanBridge program manually by clicking My Computer on
your Desktop. Then click CD-ROM driveto run the program from your
HomeLink CD, or run autorun.exe from your hard drive. See page 27 for
details on the LanBridge installation.
NNoottee::
The Internet LanBridge documentation has detailed information on LanBridge software set-up and dial-up networking.
The file is called
wwhhaatt__iiss__..hhttmmll
, and you can find it on your
HomeLink CD under the directory named
DD::\\iillbb\\uusseerrgguuiiddeess\\iillbb
.
NNoottee::
If you are using HomeLink Cards with WinGate Home software in your other
PCs, and this is the next PC you are adding to your network, you can exit the
Internet LanBridge installation and install the WinGate software on the CD you
obtained prior to the LanBridge CD. If you would like to use Internet LanBridge software instead, all of your PCs must have WinGate removed and LanBridge installed.
Internet LanBridge is not compatible with other proxy software like Wingate.
Phoneline Network Card & Network in a Box
21
6. Windows may ask you to supply your original installation files. If so, click
OK and insert your original Windows 95 installation CD in your CD-ROM
drive. Enter the location of the installation files in the Copy files from window (i.e., D:\Win95). You may have to swap between the HomeLink CD and
the Windows CD a few times. In many cases, the Windows installation files
may be stored on your hard drive in the c:\windows\options\cabs. Click OK.
7. Next, click Yes to restar t your PC.
If you do not restart your PC now, your installation will not be completed.
NNoottee::
Your workgroup name will be automatically changed to
WWoorrkkggrroouupp
at this time. Make note of your server PC’s name for future
reference, as you will need this information later. Remember, each of
your PC’s names must be unique.
NNoottee::
If you get “
VVeerrssiioonn CCoonnfflliicctt""
or a similar message, asking you if you
want to overwrite some of your existing files, it is recommended that you keep
the existing files. You may receive these messages many times, or you may
not receive them at all, depending on your system configuration and software.
Linksys HomeLink Series
20
Page 14

Installing the NT 4.0 Network Driver
1. Log on as the network administrator. From the Windows NT Desktop,
click Start, Settings, Control Panel. Click on the Network icon. If you
already have NT Networking installed, click Adapter, then click Add, and
skip to step 3. Otherwise, a message will ask you, “Windows NT networking
is not installed. Install now?” Click Yes.
2. The Network Setup Wizard will appear. In the “Choices” box, check Wired
to the Network, and click Next.
3. Windows NT will ask you to pick your network adapter from a long list of
network adapters. Since the Linksys HomeLink Card is a newer product, it is
not listed here. Click Have Disk.
4. A message saying “Insert Disk” appears. Make sure the HomeLink CD is
in your CD-ROM drive, type D:\winnt40, and click OK.
Phoneline Network Card & Network in a Box
23
Windows NT 4.0 Driver Setup
Now that you’ve installed the HomeLink hardware in your PC, follow these
instructions for installing the Windows NT 4.0 network driver. The installation procedure for the network driver may vary slightly in your configuration,
depending on what version of NT 4.0 you are using and your current system
configuration.
The type of network built with HomeLink consists of two kinds of PCs - the
server PC and client PCs. Server PCs are the "mother" computers, while the
client PCs are the "children." Each client PC must log on to the Internet
through the server PC, which in turn handles all Internet connections for each
client PC. Choose your server PC as the PC with an analog modem, cable or
DSL connection, or other communications device. Your best server PC is your
fastest, most powerful PC, but it doesn't necessarily have to be. Also, attach
networked devices like printers to the server PC for best results.
Throughout this NT installation, it is presumed that your CD-ROM drive letter is named D. If your CD-ROM drive is named any other letter, use the correct letter instead of D throughout these instructions.
Linksys HomeLink Series
22
NNoottee::
This NT installation does not automatically start the Internet LanBridge
installation onto your PC. Upon completing the NT installation, reboot your PC to
bring up a window that will begin Internet LanBridge installation. If the window
does not appear, simply run the
aauuttoorruunn..eexxee
file on your HomeLink Installation
CD-ROM or from your hard drive..
Windows NT only supports ONE HomeLink phoneline network card.
Multiple HomeLink cards may
NNOOTT
be installed under NT.
Page 15

7. Click the “Protocols” tab under the “Network” window and check for all
protocols you need for the HomeLink Card. Click Add and OK to add protocols.
8. Click the “Services” tab under the “Network” window and check that you
have all necessary services for the HomeLink Card. Click Add and OK to
add items, and click Close when you are finished.
9. Windows NT may tell you that it needs to copy some NT system files onto
your hard drive. If so, remove the Linksys HomeLink CD from your CDROM drive and insert your NT installation CD-ROM. Type D:\i386 in the
field and click Continue.
In the following steps (8, 9, 11, and 13), if you are not sure how to set
up your protocols, services, DHCP, or bindings, please consult your network administrator or your NT 4.0 documentation.
Phoneline Network Card & Network in a Box
25
The “Select OEM Option” window, shown below, will appear.
5. A window will conf ir m that the Linksys HomeLink Phoneline Network
Adapter has been detected. Click OK, and NT will then copy some files to
your PC.
6. The Setup Wizard window reappears with the HomeLink Card now listed
in the “Network” window under the “Adapters” tab, as shown below.
Linksys HomeLink Series
24
Page 16

Internet LanBridge
Internet LanBridge Overview
Acotec’s Internet LanBridge Internet sharing software allows you to share
your dial-up or ISP connection across your entire network using only one
modem and one ISP account.
Do not install LanBridge before making sure that
your HomeLink Card has been successfully
installed. You must also make sure that your file
and printer sharing is fully enabled as well as your
networking capabilities; otherwise, your
LanBridge installation will not be successful.
When you install LanBridge onto a PC, you will be given the choice of configuring it as a server PC or a client PC. There should only be one server PC
on your network. Your fastest, most powerful PC on the network works best
as the server, but the server does not necessarily have to be that PC. To share
your Internet access over your entire network, you must choose the server to
be the PC directly connected to the Internet with a modem. Servers route all
of the Internet connections throughout the network to each of its clients.
NNoottee::
The Internet LanBridge documentation contains detailed information on
software setup and dial-up networking. You can find the file, called
wwhhaatt__iiss__..hhttmmll
,
in the directory named
DD::\\iillbb\\uusseerrgguuiiddeess\\iillbb
, given that your CD-ROM drive is
named the
DD::
drive.
Phoneline Network Card & Network in a Box
27
10. If you use TCP/IP, a “Microsoft Windows NT Setup” window will ask
you if you would like to use DHCP. Select the DHCP option, or enter an IP
address. Click OK.
11. NT will copy files onto your PC, which may take a few minutes. If an
error message says, “Unable to open the file D:\winnt40\pcntn4hl.SYS,” put
the HomeLink CD back in the CD-ROM drive. Wait a moment, and click
Retry.
12. When the “Bindings” window appears, check to see that your bindings are
set up correctly. When you are done, click OK, then OK again.
13. NT will ask you to enter a Workgroup or Domain name. If you are not
sure what your Workgroup or Domain name is, consult your network administrator or your NT documentation. Enter the correct name and click OK.
14. Click Finish. You will be asked to restart your computer. Click Yes.
15.Your PC will reboot. Login to NT when the Login window appears. The
HomeLink driver installation is complete.
Make Sure Your Network is Functioning
Once you have installed your server PC and at least one client PC, go to any
PC on the network and click on the Network Neighborhood icon on the
Windows Desktop. You should see the names of all the PCs on the network. If
any names are missing, see the Troubleshooting section on page 33.
You are now ready to proceed to the next section for the LanBridge Internet
sharing software installation.
Linksys HomeLink Series
26
NNoottee::
If you have a DSL or
cable modem connection, you
can check your installation by
connecting your card directly to
the Internet, then accessing the
Internet through your web
browser.
Page 17

7. When you are asked if you want to reboot your PC, click OK. Y our
Internet LanBridge server PC installation is now complete.
Installing Internet LanBridge on Client PC(s)
1. Insert the LanBridge Installation CD into your CD-ROM drive. When the
pop-up menu appears, click on the Internet LanBridge button.
2.You will be given the option of installing
LanBridge server software, or LanBridge client
software. Since you are currently installing
LanBridge onto a client PC, select Client.
3. Accept the “ User Licensing Agreement” by clicking on the I Accept
check box and click Next.
4. The Installation program will ask you for
permission to create a
new directory for storing
LanBridge installation
files. Click Next.
5.You will be asked to enter the Host Name of your network server PC.
Enter the computer name you gave your server PC during the initial
HomeLink installation. Click Next.
Clicking
II ddoo nnoott aacccceepptt
will in no way prevent future access to
LanBridge. If you do not choose to accept the agreement now, you
can still install LanBridge from this CD whenever you like.
NNoottee::
It is recommended that you use the NetBEUI or IPX/SPX protocol on
your client and server PCs. For security reasons, it is also recommended
that you remove the TCP/IP protocol from all client PCs. See page 51 for
instructions on how to manually install and remove protocols.
Phoneline Network Card & Network in a Box
29
Installing Internet LanBridge on Your Server PC
Your ser ver PC must have Internet access already configured and fully functional before beginning the LanBridge installation.
1. Make sure the HomeLink Installation CD is into your CD-ROM drive.
When the pop-up menu appears, click on the first icon, Internet LanBridge.
If the menu doesn’t automatically pop up, click the My Computer icon on
your Desktop. Then click your CD-ROM Drive icon, and r un the file
autorun.exe.
2. You will be given the option of installing
LanBridge server software or LanBridge client
software. Since you are currently installing
LanBridge onto your server PC, select Server.
3. In the “Internet LanBridge Server Setup Wizard” window, select “I
accept” to accept the End User Licensing Agreement. Click Next.
4. The Installation program will ask your permission to create a new directory
for storing LanBridge installation files. Click Ye s.
5. An ISP account information page will pop up. If you have a permanent
Internet connection (i.e., cable, DSL, Ethernet, etc.), choose “Permanent” and
click Next to continue. If you have a dial-up Internet connection (analog
modem), choose Dial-up. Enter your log-in name in the first box. Complete
the remaining three boxes with the information you use to log into your ISP.
When you complete all four boxes, click Next.
6. When you click Finish on the next screen, the LanBridge Installation pro-
gram will install Internet LanBridge server PC to your server PC’s hard drive.
Clicking
II ddoo nnoott aacccceepptt
will in no way prevent future access to
LanBridge. If you do not choose to accept the agreement now, you
can still install LanBridge from your HomeLink CD whenever you like.
You should install the LanBridge software on your server PC
ffiirrsstt
,
before you install LanBridge on any client PCs.
Linksys HomeLink Series
28
Before installing LanBridge on any client PCs, be sure that you
already have one server PC running on your network. There should
only be one designated server PC on the entire network.
NNoottee::
The Internet LanBridge
documentation is also available
on this menu, in case you run into
any problems with the installation
or during future use.
NNoottee::
If you forgot the Host name of your server PC,
choose
SSttaarrtt
on your server PC, then
SSeettttiinnggss
and
CCoonnttrrooll PPaanneell
. Click on the
NNeettwwoorrkk
icon. When the
Network window pops up, choose the
IIddeennttiiffiiccaattiioonn
tab. The name listed as Computer Name is the
same Host Name you are looking for. Return to your
client PC and enter your server PC’s Computer
Name into the Host Name field now.
NNoottee::
The Internet LanBridge
documentation is also available
on this menu, in case you run into
any problems with the installation
or during future use.
Page 18

Uninstalling Internet LanBridge
To uninstall the Internet LanBridge software, follow these instructions starting with your server PC. These instructions apply to your server PC as well
as your client PCs. Make sure that all of your PCs are disconnected from the
Internet before you begin.
1. Close down Internet LanBridge, your email client, web browser, and any
other applications that require an Internet connection. Click Start, Settings,
and then Control Panel.
2. Double click on Add/Remove Programs.
3. Scroll through the list of applications in the “Add/Remove” window, high-
light Virtual Motion Internet LanBridge, then click Add/Remove.
4. Windows will ask you to confirm the removal of the application. Click Yes.
Windows will remove Internet LanBridge from the list of applications.
5. Click OK and restart your PC. Remove Internet LanBridge from all of
your networked PCs by repeating these instructions on each PC.
Once the
AAdddd//RReemmoovvee
window appears, close the Control Panel window. If you fail to close this window, Internet LanBridge will NOT be
completely removed from your system.
Phoneline Network Card & Network in a Box
31
6. When you click Finish on the next screen, the LanBridge Installation pro-
gram will install Internet LanBridge Client on your client PC’s hard drive.
7. When you are asked if you want to reboot your PC, click OK. The
Internet LanBridge client PC installation is now complete.
Using Internet LanBridge
Internet LanBridge software is automatically configured to work with most
Internet connection hardware such as cable modems, xDSL, ISDN, etc.
In a Internet LanBridge session, the server PC connects to the Internet as
usual. Once the Internet connection is established, any networked client PCs
can automatically access the Internet by launching their web browsers or mail
programs.
The Internet LanBridge server PC must be fully booted before any other networked PCs can log on to the network. It is strongly recommended that you
leave the server PC powered on at all times while you are using your network.
Turn it off only when you end your networking session.
When you log on to the Internet over the phoneline network, it may take a
few minutes before your clients' Internet stream is clean and running smoothly. If you want multiple email accounts for each user on your network, you
must first determine if your Internet Ser vice Provider will allow you to have
multiple mail addresses on one dial-up account. You can either call them,
send them an email from an existing account, or visit the ISP's website for
more information.
After establishing multiple email addresses, you can then configure each
client’s email program to go directly to a specific email box when checking
for Internet messages.
NNoottee::
To keep up to date with new features and updates, check
Acotec’s website for news on LanBridge every now and then at
wwwwww..vviirrttuuaallmmoottiioonn..ccoomm
.
You must use the
SSAAMMEE
proxy software on all of your networked PCs to
avoid system crashes and an unstable Internet connection. If you wish
to use LanBridge on PCs previously installed with other proxy server
software, you must uninstall all other software before beginning
LanBridge installation.
Linksys HomeLink Series
30
Page 19

33
Troubleshooting
Troubleshooting Hints for Windows PCs
Problem 1
Windows doesn't detect new hardware when I plug in my HomeLink Card,
or it detects the card each time I restart my PC.
Solutions
- Check your HomeLink Card to see that it is inserted into the appropriate
PCI slot all the way, and that all the pins are making full contact with the PCI
slot.
- Your PC’s motherboard may not be Plug-and-Play compatible, or it might
have Plug-and-Play options not supported by Windows, or your PC's Plugand-Play settings may not have been enabled. If you need further help, contact your PC's manufacturer.
Problem 2
Windows cannot locate the driver for the HomeLink Card device.
Solutions
- Check to see that the correct CD is inserted into your PC's CD-ROM drive.
- The CD may be defective, files may be missing, or you may be pointing
Windows to the wrong directory or to the wrong drive letter for the CD-ROM
drive.
- Make sure that your CD spins up before attempting to begin using it.
Problem 3
The Windows Logon screen does not appear when I restart my PC.
Solutions
- Click on Start, Shut Down, then Close All Programs and Logon as a
Different User.
- If the problem persists, your PC's manufacturer may have disabled
Windows' networking functionality.
- If you chose “Windows Logon” as your primary network logon and did not
choose a password for that user name, that will also keep your Windows
Logon screen from appearing. Choose Client for Microsoft Networks, or
contact your PC's manufacturer for help.
Phoneline Network Card & Network in a Box
WinGate and Other Internet Sharing Software
There are numerous Internet sharing software (also known as proxy server
software) packages on the market, most of which will not work with each
other. If you have previously installed WinGate or any other Internet sharing
software package on your networked computers, simply exit the LanBridge
installation and continue to use the WinGate CD from your original cards to
install the WinGate software instead.
If you are using an Internet sharing software other than LanBridge, you may
choose to either continue using that software for your entire network or
switch exclusively to the LanBridge software. To use the LanBridge software,
you must first uninstall the other Internet sharing software you are currently
using on each of your computers per the instructions from that software’s
manufacturer, then install LanBridge software on all of your computers.
The copy of Internet LanBridge on your HomeLink installation CD-ROM is
an unlimited users’ license, which means you may use it for as many computers as you like. This software automatically registers itself the first time your
server PC is connected to the Internet.
A Note to Windows NT Users
Internet LanBridge requires that Microsoft’s Remote Access Server (RAS)
software be installed for LanBridge to work properly. Consult your Windows
NT documentation and NT installation CD-ROM to install RAS. Linksys
does not provide technical support for the installation of RAS services.
Linksys HomeLink Series
32
Only change these settings if you know what you are doing.
Page 20

34
Linksys HomeLink Series
Problem 4
In Network Neighborhood, I only see my own PC and no other PCs on the
network.
Solutions
- Make sure your cable to each PC is connected correctly.
- Check your Link/Activity LEDs on your HomeLink Cards (and your hub, if
you are using one) to see if they are lit.
- Switch your cable out with another cable that you know is working to find
out if that cable is bad.
- Verify that the HomeLink Card’s phoneline configuration is set to Auto
Configuration. See “Changing the Card Settings” on page 39 for instructions
on how to do this.
- Connect your PCs using only the phone wire provided with the HomeLink
Card.
- Disconnect your PCs from any phone jacks and remove any telephone,
modem, or other devices connected to the HomeLink Cards.
- If the PCs are far away from each other, position them closer to each other
and connect them directly together. This test will determine whether your
phone wiring or your HomeLink hardware is causing your network to malfunction. (If your PCs do function when you bring them closer to each other,
then...
- Make sure that all your PCs use the same Workg roup name.
Problem 5
I installed the Internet LanBridge client PC software on all my PCs, but I
cannot access the Internet.
Solution
You must install the Inter net LanBridge software program on ONE server PC
first. After you have installed the software’s server component on your server
PC, install the client PC software on the rest of your networked PCs.
Your ser ver PC must be fully booted and connected to the Internet before you
can attempt to access the Internet through a client PC. You may have to
reboot your client PCs to gain access to the Internet through the server PC.
35
Problem 6
I no longer want to share a certain drive or printer, or I want to physically
remove a drive or printer from my network.
Solutions
- Reconfigure your File and Printer Sharing settings manually by clicking on
the My Computer icon. Click on the Printers folder to bring up a window
of available printers. Right-click once on the printer that you want to disable
on the network. Click on Sharing, and then the Sharing tab. Click on Not
Shared. To finish, click on the Apply button, and then click OK.
- Drives are disable in the same way. In Windows Explorer, right-click on the
drive you want to stop sharing. Click on Sharing, then the Sharing tab. Click
on Not Shared. When you're done, click on the Apply button, then OK.
Problem 7: In Network Neighborhood, I can only see the names of PCs
running the same operating system as my PC.
Solution
- Click Start, Find, then Computer, and type the name of any PC not running the same operating system in the window that appears. Click Find Now.
Make sure that each of your PCs are using the same protocols and workgroup
names. To do this, click on Start, Settings, Control Panel, then click on the
Network icon. Click on the Configuration tab and then the Identification
tab for Workgroup settings. If any protocols are missing on any of your PCs,
add those protocol(s) with the Add button in the Network window.
- If all PCs use the same protocol(s) and Workgroup name, and Windows 95
PCs can't see Windows 98 PCs, enable NetBIOS on all of your PCs. The
IPX/SPX-compatible protocol should be installed on all your PCs. Bring up
the properties of the IPX/SPX-compatible protocol. To do this, click on Start,
Settings, Control Panel, then open Network and click on the Configuration
tab. Highlight IPX/SPX-compatible Protocol (only one of them) and click on
Properties. Click on NetBIOS tab. Select “I want to enable NetBIOS over
IPX/SPX” and click OK, then OK again.
When Windows finishes copying the appropriate files, restar t your PC. When
you’ve returned to the Desktop on your PC, open Network Neighborhood to
check for the other PCs on your network.
Phoneline Network Card & Network in a Box
Page 21

36
Linksys HomeLink Series
Problem 8
A PC with an AMD processor can only see itself in Network Neighborhood,
but the workgroup, protocols, cabling and drivers are all working properly.
Solutions
- Some PCs with AMD processors are assigned an IRQ by the BIOS (as it
gets listed on the bootup screens of most PCs) that does not match the IRQ
assigned by Windows. In this case, disable the IRQ holder for “PCI Steering”
in the Windows Device Manager. See your PC's documentation for instructions, or follow the suggestions below. Keep in mind that this procedure will
vary depending on your PC’s configuration.
1. Click on Start, Settings, Control Panel, and open System. Click on the
Device Manager tab. Open System Devices, then double-click PCI Bus.
2. Click the IRQ Steering tab. Remove the check from Use IRQ Holder for
PCI Steering and click OK. Windows will ask you to restart the PC. If
Windows does not ask you to reboot, reboot your PC manually.
3. After the PC reboots, Windows will try to detect the PCI Steering again.
Continue rebooting the PC until Windows stops detecting new hardware and
settings for PCI Steering. This usually takes four reboot attempts.
37
General Troubleshooting Tips
1. If you do not want to install the Internet LanBridge Internet sharing software package, simply click I Do Not Agree when the licensing agreement
appears on the screen during the software installation.
2. Use only the telephone wires in your HomeLink package.
3. If you are connected to the Internet through an ISDN router or cable
modem and your PC already has a network card installed, you must use
Internet LanBridge to share the connection on your HomeLink network. In
some cases, you must manually configure your routing tables if you want to
use the HomeLink Card, instead of the other to share the connection. Linksys
does not provide support on routing table configuration. Contact your phone
or cable company to seek assistance on this matter, if any is provided. It is
easier to use a 10BaseT hub and RJ-45 cabling and use the hub to share the
Internet connection. Some cable modems cannot be shared.
4. To set up an NT-based PC as the LanBridge server PC, LanBridge requires
the Microsoft Remote Access Server software to be installed on that PC.
Check your NT or Microsoft documentation on how to install the RAS service. Linksys does not provide technical support for installing RAS services.
Installing Multiple Network Cards
Linksys does not provide technical support for setting up or troubleshooting
multiple network cards, or enabling or setting up routing in an operating system. See the documentation on your operating system to find out more on
how to set up two network cards in a PC to communicate with each other. The
HomeLink Card can use either its RJ-45 Ethernet connection or RJ-11 phone
wire connection at any given time. Both connections can not be used at the
same time.
NNoottee::
The following information is supplied to you for reference only.
Phoneline Network Card & Network in a Box
Page 22

38
Linksys HomeLink Series
Connecting to an Existing Ethernet Network
If you want to add your HomeLink PC to an already existing Ethernet network, you must use the HomeLink Card’s RJ-45 port to connect your PC to
that Ethernet network. It is not possible to connect the HomeLink Card via
the RJ-11 port directly to an Ethernet network. This can only be done through
the Instant Broadband Bridge (model number HPES03), or an operating system that can route the packets from an Ethernet adapter to the HomeLink
Card. Otherwise, one Ethernet card and one HomeLink Card must coexist in
one PC. The operating system must be able to route packets between network
cards, otherwise the two different segments will not communicate with each
other. Cable modems are often an exception. See the section below for details
about cable modem sharing. For more information on the Broadband Bridge
(HPES03), visit www.linksys.com, or call us at 1-800-546-5797 (LINKSYS).
Using a Cable Modem with the HomeLink Card
If you currently use a network card with a cable modem, it is recommended
that you connect your cable modem to a 10BaseT hub for faster access
speeds. Keep in mind that some cable modems may not be connected to a hub
and require a direct connection to a network card. Contact your cable service
provider if you have any questions regarding this matter.
You can also add the HomeLink Card to a PC with an existing network card.
The Internet LanBridge software packaged with your HomeLink Card is
capable of sharing the Internet connection on the second card. For setup of
two network cards in your PC, see the operating system documentation.
Linksys does not provide any technical support in setting up multiple network
cards in a PC, and is not responsible for setting up or configuring routing or
filtering tables.
Some cable modem providers may prevent the use of Internet sharing software to share Internet access. The best course of action would be to discuss
the matter with your cable service provider, then consult your Windows documentation to find out what is required to install multiple network cards.
Appendix
Changing Card Settings
For most users, the HomeLink default settings will be perfect for either
Phoneline or Ethernet networking. However, you can make any necessary
changes to your system's network settings by clicking on your Taskbar's Start
button, then Settings, then Control Panel, and then the Network icon.
1. To access your HomeLink driver, click on the Configuration tab, highlight
Linksys HomeLink Phoneline Network Card and click on Properties.
2. The Linksys HomeLink Proper ties window will open. Click on Advanced.
Ethernet Configuration
This option allows you to set the duplex mode and speed performance of the
RJ-45 Ethernet port on your HomeLink Card. To change port settings, the
Mode Selection option must be set to 10BaseT Only or 10/100BaseTX Only,
or the mode must be set at Auto Detect with a valid link to the 10BaseT Port.
• 10Mbps Half Duplex sets the 10BaseT port to half duplex mode. This is
the default setting.
• 10Mbps Full Duplex sets the 10BaseT port to full duplex mode.
Phoneline Network Card & Network in a Box
39
NNoottee::
Many hubs have a built-in uplink port that is
crossed internally, which allows you to uplink hubs
together with just a straight through cable instead.
Page 23

41
About Plug-and-Play PCI Technology
Introduction
The HomeLink Network Card is designed to run in 32-bit desktop PCs that
are PCI Version 2.1 compliant or higher. Most bus mastering PCs such as
Pentium 166 and higher meet this standard.
PCI, or Peripheral Component Interconnect, is a technology that allows
special Plug-and-Play expansion cards to be automatically configured by a
computer's BIOS (Basic Input/Output System) upon installation. Refer to
your computer's user guide for more information about its BIOS.
When a PCI card is used in a computer that supports Plug-and-Play, the card
is automatically configured each time the computer is booted. The card's
IRQ, I/O address, and other operating parameters are automatically assigned.
You can only change Plug-and-Play card settings like IRQs through your
computer’s BIOS menu(s). If the resources assigned to your HomeLink Card
seem to conflict with other devices in your PC, use your system's BIOS to
resolve the conflicts.
If you have problems configuring your BIOS or resolving IRQ or other hardware conflicts, consult your computer manual or contact your PC's manufacturer for BIOS setup and configuration directions. For a list of Plug-and-Play
compliant BIOS, see page 42.
Here are some general guidelines to follow when installing a PCI card (like
the HomeLink Card) into your PC. These guidelines are not necessary under
normal installation procedures, but may prove useful in troubleshooting situations.
1. The HomeLink Card must be used in a 32-bit PCI slot that suppor ts PCI
Bus Mastering, and will not work properly in a PCI Bus Slave slot. Most
PCs with a Pentium 166 and faster (or compatible) processor generally have
all PCI slots set to Master. Most newer PCs only have PCI Master slots,
whereas older PCs may have both. Some systems allow you to designate
slots as either Master or Slave slots, and others will already have the slots
labeled on the motherboard. See your PC or motherboard documentation for
more information on Master and Slave slots.
Phoneline Network Card & Network in a Box
Mode Selection
You can set the HomeLink Card to default to either a 10BaseT connection or
a phoneline connection. Since there are three ports, the card is set to auto
detect an active connection. Auto Detect will first search for a connection on
the 10BaseT port, and if one is not found, the card will default to the phoneline connection. The Card can only be configured to use one connection type
at a time.
• 10/100 Ethernet (External) mode will force the card to use a 10/100 connection, if one exists.
• 10BaseT Ethernet (Internal) mode will force the card to use a 10Mbps
connection, if one exists.
• Phoneline mode will force the card to use only the 1Mbps phoneline connection.
Phoneline Configuration
The phoneline port can be set to operate in several modes. The phoneline port
defaults to Auto Config mode, which will automatically set the port to High
Power/High Speed mode.
These port settings will take effect only if the phoneline port is selected as
the default port, or if the card is in Auto Detect mode and the phoneline link
is active.
• Low Power/High Speed mode will allow full speed on the phoneline port
while the card operates at a lower power consumption rate.
• High Power/Low Speed mode will give you a 700Kbps transfer rate over
the phoneline connection, while still allowing the card to operate at full
power.
Linksys HomeLink Series
40
Page 24

Windows 95 Version A Driver Setup
1. Start your Windows 95 PC, which will detect the HomeLink Phoneline
Network Card and display a New Hardware Found window.
2. Make sure the HomeLink CD is in your CD-ROM drive. Select the “Driver
from disk provided by hardware manufacturer” option on the screen, then
click OK. When asked for the files’ location, type D:\win95a and click OK.
3. Windows will copy the appropriate files onto your PC. If Windows asks
you to supply your original Windows 95 installation CD or setup files, enter
the path for those files on your hard drive (e.g., A:\, D:\WIN95,
C:\Windows\options\cabs, etc.) Linksys only provides two files,
NETAMDHL.INF and PCNTN3HL.SYS in d:\Win95a; Microsoft provides
all other files.
43
Phoneline Network Card & Network in a Box
42
2. When using NT, make sure your BIOS settings for your operating system
are not set for a Plug-and-Play operating system. Since NT is not a Plug-andPlay operating system, it will not usually recognize LAN cards if they are set
to be automatically detected and configured. If you need to configure your
PC's BIOS in order to resolve an IRQ or other conflict with the HomeLink
Card, here are a few possibilities:
No Changes Allowed
Your PC’s BIOS may not allow you to change the IRQ value(s) of the PCI
slot(s). In this case, you will ONLY be able to use the IRQ and I/O values
that have been preassigned to each slot. The popular BIOS from Phoenix, for
example, may not allow you to modify BIOS-assigned IRQ settings.
Jumper Changes
You may be able to change the IRQ & I/O values for a given PCI slot by setting jumpers on your PC motherboard. Please refer to your PC's motherboard
user guide for specific instructions.
Menu Changes
Your PC may allow you to change the IRQ
values, and in some cases even I/O values, for a given PCI slot by accessing
the PC's BIOS setup menu. See your PC's user guide for specific details.
Plug-and-Play BIOS list
Generally, all computers with Pentium, Pentium II or Pentium III (or compatible, such as AMD’s ) processors have a Plug-and-Play BIOS. Here’s a list of
BIOS that meet the Plug-and-Play requirements if you’re not sure:
• Phoenix 4.04 or higher
• Award 4.50 PG or higher
• AMI dated after September 94
If your BIOS is not listed above, it does not necessarily mean that your BIOS
is not Plug-and-Play compatible. Consult your PC’s documentation or contact
your PC’s manufacturer to find out about your particular situation.
Linksys HomeLink Series
NNoottee::
Moving the HomeLink Network
Card to a different slot may change
the settings for the Card.
Page 25

4544
File and Printer Sharing
Preparing to Use File and Printer Sharing
These instructions explain how to turn on file and printer sharing in Windows
95 and Windows 98 so that your networked PCs can access each other.
Start Windows 95. When asked to log in, be sure to give your correct user
name and password. To set up file sharing for the first time on a PC, click on
Start, Settings, Control Panel, then click on Network. Under the
Configuration tab, click on the File and Printer Sharing button to make
File and Printer Sharing window will appear.
NNoottee::
Not all printers may be shared on the network, or you may require
special instructions to set them up as shared printers. If you run into a
problem, see your printer’s documentation or contact its manufacturer.
When sharing drives or folders, it is strongly recommended to share
them using a password. If you are using Windows 95B or Windows 98,
you can proceed to “Enabling File Sharing” and “How to Share
Printers”, on page 47.
Phoneline Network Card & Network in a Box
After Windows finishes copying files onto your PC, it may ask you to restart
your PC. Click Yes. When your PC restarts, click Start, Settings, Control
Panel, and click on the Network icon. Click on the Identification tab.
Make sure your workgroup name is “Workg roup” and that your computer
name is complete.
Linksys HomeLink Series
Page 26

4746
Enabling File Sharing on Your Network
Upon completing the preparation instructions, double-click on your My
Computer icon. A window of available disk drives will appear. Using your
right mouse button, click once on the drive or folder that you want to make
available to other users. Click on Sharing. Click on Shar e As. In the “Share
Name” box, enter a name for the drive or folder you are sharing,or keep the
default that Windows assigned, e.g., C Drive, CD-ROM, Leela, etc.
Next, decide what type of access you want to assign to the other users.
• Read-Only access lets other users view the files on your PC.
• Full access lets users create, change, or delete files on your PC.
• Depends on Password lets users have Read-Only and/or Full access,
depending on the password that you decide to give them.
Select the type of file sharing access that you want other users to have. If you
want to assign access password(s), type them into the Password box(es).
When you're done, click on the Apply button, followed by OK. Your drive(s)
or folder(s) can now be accessed by the other users whenever they click on
their Windows icon. If a user tries to access one of your drives or folders
with password protection, the appropriate Read-Only or Full access password
must be given by the user for access to be granted.
Enabling Printer Sharing on Your Network
Double-click on your My Computer icon. Click on the Printers folder. A
window of available printers will appear.
Use your right mouse button to click once on the printer to be shared with
other users. Click on Sharing. Click on Share As. In the “Share Name” box,
enter a name to the printer you're about to share (Jack's HP4, for example). If
you want to set up the printer so only certain users can access it, type a password into the Password field.
When you're done, click on the Apply button, followed by OK. Your
printer(s) are now shared.
Phoneline Network Card & Network in a BoxLinksys HomeLink Series
• If you want others to have access to the files on your PC's hard drive, select
I want to be able to give others access to my files.
• If you want to share your printer with other users on the network, select I
want to be able to allow others to print to my printer.
Click on the OK button. File and Printer Sharing for Microsoft Networks
should now appear in your list of installed components. Click OK. When
asked to restart your PC, choose to do so.
Page 27

4948
8.The “System Properties” window will appear. Click on the Device
Manager tab.
9. Scroll down to the item “Network Adapters” and expand it by clicking on
the plus [+] sign next to it.
10. Remove all devices with the name Linksys in its description. (If at any
point you are asked to restart the PC, click No).
11. Scroll down to the “Other Devices” section. Remove PCI Ethernet
Controller or PCI Ethernet Adapter. (If “Other Devices” is not listed, proceed
to the next step.)
12. When finished, click Close. Do not shut down Windows or restart your
PC at this time.
13.Click Start, Find, then Files or Folders. Search your hard drive for a file
called “netamdhl.inf.” Delete all instances of this file by browsing each subdirectory where the file is located, e.g., c:\windows\inf, c:\windows\inf\other.
14. Shut down Windows and restart your PC.
Phoneline Network Card & Network in a BoxLinksys HomeLink Series
Starting Over in Windows 95 & 98
If you experience installation problems, you may need to reinstall all your
Windows networking components from scratch. The instructions below
explain how to give your PC a clean sweep so you can start the HomeLink
Card’s software installation over. If you need to remove LanBridge Internet
sharing software, see page 31.
1. On your Desktop, click Start, highlight Settings, and click Control Panel.
2. Click on the Network Icon.
3. If the window that says, “The following network components are installed”
has a component called “Dial-Up Adapter,” skip to step 5. If not, go to step 4.
4. Remove any item in the box with “Linksys” in its description. This
includes IPX/SPX…Linksys, NetBEUI…Linksys, and TCP/IP…Linksys. Also
remove Client for Microsoft Networks, Client for Netware Networks, and File
and Printer Sharing for Microsoft Networks.
5. For PCs with Dial-Up Networking and/or an AOL adapter, remove any
instances of the name “Linksys”, all IPX/SPX and NetBEUI protocols, all
Clients, and File and Printer Sharing for Microsoft Networks.
6. When you are done removing all the unnecessary components, click OK.
When asked to restart your PC, click No.
7. Return to the Windows Control Panel. Double-click on the System icon.
In step 5, do
NNOOTT
remove Dial-Up Adapter, AOL Adapter, TCP/IPCompatible Protocol-AOL Adapter or TCP/IP-Compatible ProtocolDial-Up Adapter.
In some cases, removing one of these components may in turn automatically remove other components as well.
NNoottee::
The following screen shots on the next three pages should be
considered guides only. The screen shots may differ on your PC.
Page 28

Phoneline Network Card and Network in a Box
5150
Manually Installing Windows Network Components
Sometimes you may need to manually install missing Windows networking
components. To do so, follow the instructions below:
1. Click on Start, Settings, then Control Panel.
2. Click on the Network icon to bring up the Network window.
3. It is strongly recommended that you install the components below to prop-
erly set up your HomeLink network under the Configuration tab. Of course,
every network is different, so your settings will depend on what settings are
on your PCs. If you have a broadband Internet connection like a cable or DSL
line, your service provider may recommend different settings. Consult your
broadband service provider if you have questions about which protocols are
needed.
Client for Microsoft Networks
Linksys HomeLink Phoneline Network Card
IPX/SPX-compatible protocol
NetBEUI
TCP/IP
If the required components are missing, add them as follows:
Adding Client for Microsoft Networks
If you plan on connecting to an NT file server or peer-to-peer network, click
on the Add button. Highlight Client and click on Add. Select Manufacturer
and choose Microsoft. In the “Network Client” box, highlight Client for
Microsoft Networks and click OK.
Adding IPX/SPX-Compatible Protocol
Click on the Add button. Select Protocol, then click on Add. Under
Manufacturer, highlight Microsoft. Under Network Protocol, highlight
IPX/SPX. Click OK.
NNoottee::
In this example,
TCP/IP is shown only as
an extra protocol.
Changing Computer Names or Workgroup Names
1. To change your PC’s Computer or Workgroup name, click Start, Settings,
then Control Panel.
2. Double click the Network icon.
3. Choose the Identification tab. You can change your PC’s computer name
and Workgroup name here. The computer name must be unique from all your
other PCs. The Workgroup names on all the PCs on your network must be
identical. The “Computer Description” box is simply provided for your information and does not affect your network or PC operation.
4. After entering everything you need to change, click OK. Windows may
copy some files at this time.
5. Restart your PC to complete the process.
Linksys HomeLink Series
Page 29

Phoneline Network Card and Network in a Box
5352
Linux, Open Source and Beta Operating Systems
Linksys does not provide technical support for Linux, FreeBSD, or other
freeware or open source operating systems. Many Linksys products have
proven to perform well under Linux and other freeware operating systems,
but technical support for set-up and troubleshooting Linux is not provided at
this time. For information on finding drivers and setup instructions for Linux
and other freeware OSes, visit the Support and FAQs pages on the Linksys
website at www.linksys.com.
Beta OSes, such as Windows 2000 Beta, do not receive technical support by
Linksys. Linksys will provide technical support for Windows 2000 after
Microsoft officially releases it.
Adding NetBEUI
Click on the Add button. Select Protocol, then click on Add. Under
Manufacturer, highlight Microsoft. Under Network Protocol, highlight
NetBEUI. Click OK.
If you need to install the TCP/IP protocol, consult your system administrator
or your Windows documentation. TCP/IP is added in the same way as the
NetBEUI and the IPX/SPX protocols. DHCP users do not need to configure
any TCP/IPsettings. Linksys does not provide technical support for TCP/IP
configuration or troubleshooting of the TCP/IP protocol.
Linksys HomeLink Series
Page 30

Straight Through Ethernet Cabling
Crossover Ethernet Cabling
Phoneline Network Card and Network in a Box
5554
References
Types of Cabling
Ethernet Cabling
There are different grades, or categories, of twisted-pair cabling. The most
highly recommended type of network cabling is Category 5 UTP Ethernet
cabling, since it is the most widely used and the most reliable. Category 3 is
an acceptable alternative cabling. Straight-through cables are used for connecting computers to a hub. Crossover cables are used for connecting a hub to
another hub, when there are no uplink ports available.
You can buy Category 5 cabling that is precrimped, or you can crimp your
own. Category 5 cables can be purchased or crimped as either straightthrough or crossed over. A Category 5 cable has 8 thin, color-coded wires
inside that run from one end of the cable to the other. All 8 wires are used. In
a straight-through cable, wires 1, 2, 3, and 6 at one end of the cable are also
wires 1, 2, 3, and 6 at the other end. In a crossed cable, the order of the wires
change from one end to the other: wire 1 becomes 3, and 2 becomes 6.
The color code for the 4 wires should be as follows: Wire 1, white with an
orange stripe; Wire 2, orange; Wire 3, white with a green stripe; Wire 6,
green. The other four wires have to be connected as follows: Wire 4, blue;
Wire 5, white with a blue stripe; Wire7, white with a brown stripe, Wire 8,
brown.
To figure out which wire is wire number 1, hold the cable so that the end of
the plastic RJ-45 tip (the part that goes into a wall jack first) is facing away
from you. Flip the spring clip so that the copper side faces up (the spring clip
will now be parallel to the floor).When looking down on the coppers, wire 1
will be on the far left.
Linksys HomeLink Series
Page 31

HomeLink Telephone (RJ-11) Cabling
The telephone cables you use should be standard telephone cables like the
ones you use every day in your home. The RJ-11 cabling has RJ-11 tips and
four colored wires.
Forcing the HomeLink Card to supply modem data from the Internet to multiple computers may result in a failed or unstable network connection.
56
Specifications
Model Numbers HPN100, HPN100SK
Standards HomePNA Version 1.0, IEEE 802.3,
PC98, PC99, and NetPC
Topology Daisy Chain (Phoneline)
Star (Ethernet)
Protocol CSMA/CD
Speed 1Mbps (Phoneline)
10Mbps (Ethernet)
Ports 2 RJ-11 Ports,
1 10BaseT RJ-45 Port
(Mutually Exclusive)
Cabling Type Standard Copper RJ-11 (Phoneline)
Category 5 UTP or Better (Ethernet)
LEDs Link, Activity
Bus Type 32-Bit PCI Version 2.1 Compliant
Environmental Specifications
Dimensions 5.2" x 4.75" x 0.75"
Weight 3 oz.
Power 5 watts maximum
Certifications FCC Class B, CE Mark Commercial
Operating Temperature 0°C to 55°C (32°F to 130°F)
Storage Temperature -40° to 70°C (-40°F to 158°F)
Operating Humidity 10% to 85% Non-Condensing
Storage Humidity 5% to 90% Non-Condensing
Phoneline Network Card & Network in a Box
57
Linksys HomeLink Series
NNoottee::
If you are only sharing Internet access between 2 PCs, you can connect
your modem directly to your HomeLink Card using a standard telephone cable.
However, if you are sharing Internet access among more than two computers, it
is strongly recommended that you obtain a two-way splitter for your phone
jack, or that you find another wall phone jack for your modem connection.
Page 32

Phoneline Network Card & Network in a Box
59
Customer Support
For help with the installation or operation of your HomeLink Phoneline
Network Card or HomeLink Network In a Box, contact Linksys Customer
Support at one of the phone numbers or Internet addresses below.
Customer Support 800-326-7114
949-261-1288
Fax 949-261-8868
Email support@linksys.com
Web http://www.linksys.com
FTP Site ftp://ftp.linksys.com
Linksys HomeLink Series
58
Page 33

© Copyright 2000 Linksys, All Rights Reserved.
Printed in the USA.
http://www.linksys.com
 Loading...