

Page 1
HomeLink™Series
Broadband
Network Bridge
Model No.:HPES03
User Guide
Page 2

COPYRIGHT & TRADEMARKS
Copyright © 2000 Linksys, All Rights Reserved. HomeLink Broadband Network Bridge
is a registered trademark of Linksys. Microsoft, Windows, and the Windows logo are
registered trademarks of Microsoft Corporation. All other trademarks and brand names
are the property of their respective proprietors.
LIMITED WARRANTY
Linksys guarantees that every HomeLink Broadband Network Bridge is free from physical defects in material and workmanship under normal use for one (1) year from the
date of purchase. If the product proves defective during this warranty period, call
Linksys Customer Support in order to obtain a Return Authorization number. BE SURE
TO HAVE YOUR PROOF OF PURCHASE ON HAND WHEN CALLING. RETURN
REQUESTS CANNOT BE PROCESSED WITHOUT PROOF OF PURCHASE. When
returning a product, mark the Return Authorization number clearly on the outside of the
package and include your original proof of purchase.
IN NO EVENT SHALL LINKSYS’ LIABILITY EXCEED THE PRICE PAID FOR THE PRODUCT FROM DIRECT, INDIRECT, SPECIAL, INCIDENTAL, OR CONSEQUENTIAL DAMAGES RESULTING FROM THE USE OF THE PRODUCT, ITS ACCOMPANYING SOFTWARE, OR ITS DOCUMENTATION. Linksys makes no warranty or representation,
expressed, implied, or statutory, with respect to its products or the contents or use of
this documentation and all accompanying software, and specifically disclaims its quality, performance, merchantability, or fitness for any particular purpose. Linksys reserves
the right to revise or update its products, software, or documentation without obligation
to notify any individual or entity. Please direct all inquiries to:
Linksys P.O. Box 18558, Irvine, CA 92623.
FCC STATEMENT
The HomeLink Broadband Network Bridge has been tested and found to comply with
the limits for a Class B digital device, pursuant to Part 15 of the FCC Rules. These limits are designed to provide reasonable protection against harmful interference in a residential installation. This equipment generates, uses, and can radiate radio frequency
energy and, if not installed and used according to the instructions, may cause harmful
interference to radio communications. However, there is no guarantee that interference
will not occur in a particular installation. If this equipment does cause harmful interference to radio or television reception, which is found by turning the equipment off and
on, the user is encouraged to try to correct the interference by one or more of the following measures:
• Reorient or relocate the receiving antenna
• Increase the separation between the equipment or device
• Connect the equipment to an outlet other than the receiver’s
• Consult a dealer or an experienced radio/TV technician for assistance
003
Page 3

Linksys HomeLink™ Series
Table of Contents
Introduction 1
The Linksys HomeLink Broadband Network Bridge 1
Features 1
Package Contents 2
Getting to Know the Broadband Network Bridge 3
Rear Panel Ports 3
Front Panel LEDs 4
Using the Broadband Network Bridge 5
Installation Overview 5
Connecting Your Devices to the Bridge 6
Daisy-chaining to a HomeLink Network 7
Resetting the Broadband Network Bridge 8
Troubleshooting 9
Appendix 10
Twisted Pair Cabling 10
Telephone Cabling 11
Specifications 12
Environmental 12
Customer Support 13
Page 4

Broadband Network Bridge
Introduction
The Linksys HomeLink Broadband Network Bridge
Congratulations on the purchase of a Linksys HomeLink Broadband Network
Bridge, the complete Internet connection solution for your Home Phoneline
network. This unique new device features two HomeLink RJ-11 standard telephone ports (conf igured as one pass-through por t), and two 10BaseT Ethernet
ports with one shared uplink port. Plug in your cable modem or DSL
modem’s 10BaseT connection, then attach the bridge to the nearest telephone
jack using standard phone cables, and any computer on your Home Phoneline
network can access the Internet.*
Do you want to share your cable or DSL modem on your 10BaseT network?
You can add a PC at any time by connecting it to the open Ethernet port—or
you can uplink a 10BaseT or 10/100 hub or switch for instant networking.
The groundbreaking technology inside every HomeLink Broadband Network
Bridge delivers intercommunication between home networks of 10Mbps and
1Mbps speeds. With your HomeLink Broadband Network Bridge, that means
instant Internet sharing across both networks at blazing broadband speeds.
High-speed Internet sharing for your home or small office network has never
been easier.*
Features
• Connects Your 10Mbps Ethernet Connection to Your 1Mbps Home
Phoneline Network for Seamless Integration
• Share a Cable or DSL Modem Without Interrupting Nor mal Telephone
Service*
• Share Internet Access Across Your Entire HomeLink Network—Up to 25
PCs and Even More on an Ethernet Network*
• Stand-alone Unit with Two 10BaseT RJ-45 Ports, one Shared RJ-45 Uplink
Port, and One RJ-11 Modular Telephone Port With Pass-through.
• Fully HomePNA Compliant
• Easy Installation—No Software Required
• Free 24-Hour Technical Support and Limited 1-Year Warranty
**
Contact your Internet Service Provider for details.
1
Page 5
Linksys HomeLink™ Series
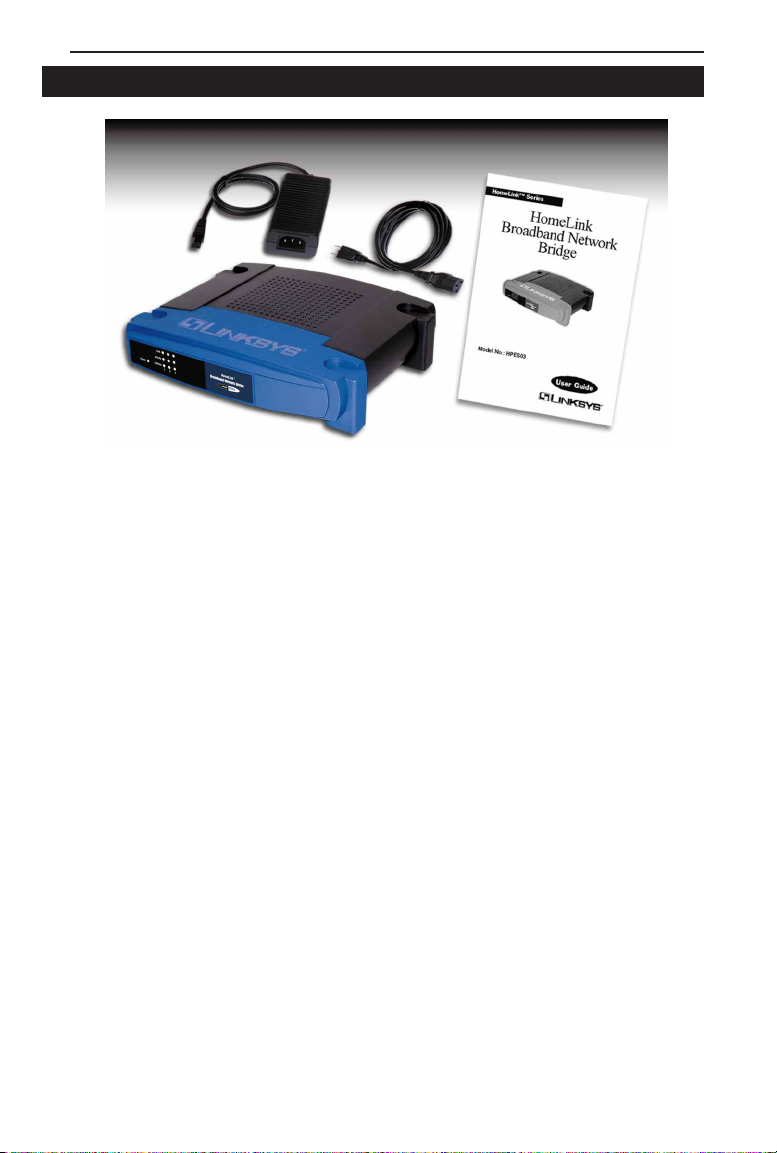
Package Contents
• One HomeLink Broadband Network Bridge (Model No.: HPES03)
• One AC Adapter & Power Cord
• One User Guide and Registration Card
2
Page 6

Broadband Network Bridge
Getting to Know the Broadband
Network Bridge
Rear Panel Ports
Uplink Share your Internet access over your entire phoneline network
by connecting to your DSL or Cable modem through the
Broadband Bridge's uplink port. The uplink port can also connect to Ethernet devices such as hubs, routers, and switches.
If the uplink port is occupied, the port to its direct right (Port
3) will be inoperable. Any connections made through Port 3
will be lost.
10BaseT Connect an Ethernet PC (or any other Ethernet device) to
your HomeLink phoneline network through one of the
10BaseT ports. If you plan on using Port 3, the Uplink port
will become unavailable.
HomeLink Use the HomeLink port to daisy-chain your Broadband
Bridge to your HomeLink network. This por t is configured as
a pass-through port, meaning that the network data travels
into the Bridge through one side of the HomeLink port, then
continues out the other. Connect one HomeLink telephone
cable into one side of Port 1, then continue (with another
cable) to your next HomeLink device through the port's other
side. See page 7 of this User Guide for further information.
Power Connect your power adapter to your Broadband Bridge
through the Power port.
3
Page 7

Linksys HomeLink™ Series
Front Panel LEDs
Power The Power LED is illuminated when the Broadband Bridge is
powered on.
Link A Link LED will illuminate above a specific port number (1, 2
or 3) if the corresponding port is successfully connected to a
network device.
Activity An Activity LED will illuminate above a specific port number if
the corresponding port is cur rently sending or receiving data
over the network.
Collision A Collision LED will illuminate above a specific port number if
the corresponding port is cur rently experiencing network collisions. Small amounts of collisions are normal. If you are experiencing excessive collisions, verify that your cabling is undamaged and properly connected.
4
Page 8

Broadband Network Bridge
Using the Broadband Network
Bridge
NNoottee
: Power
Installation Overview
Because the Broadband Network Bridge is a
stand-alone device that requires no software or
system configuration, setup involves nothing but
plugging everything in and turning everything
on. There are, however, a few limitations to the
amount of physical space your network will be
able to cover without running the risk of data
corruption. These restrictions are due to HomePNA and Ethernet standard
limits on the recommended length of your networking cables. (See below.)
Ethernet Cabling
Although there are different grades of Ethernet network cabling, you should
use Category 5 unshielded twisted-pair (UTP) for each Ethernet connection
you make, and no Ethernet cable should exceed 100 meters (328 feet) in
length. Category 5 cabling can be obtained at most computer stores, or you
can crimp your own. (See page 10 for more details.)
Network Bridge. If both the
computer and bridge are
powered on when the initial
connection is made, the network will act erratically and
you will have to reset the
bridge.
everything off
before connecting a PC to the
Broadband
Phoneline Cabling
Because of the limitations of standard telephone cables, HomeLink
HomePNA devices require that no network of HomeLink cabling exceeds a
total length of 150 meters (500 feet). In other words, if you have more than
500 feet of telephone wires connecting your network, you will likely experience data loss.
Beside that, any standard telephone cable will do.
5
Page 9

Linksys HomeLink™ Series
Connecting Your Devices to the Bridge
The following steps will have your Broadband Network Bridge up and running in minutes.
Basic Installation
1. Ensure that every component of your network (including your
Broadband Network Bridge) is powered off.
2. If you are uplinking to a DSL modem, cable modem, Ethernet hub, or
Ethernet switch, connect it to the bridge through the bridge's uplink port
with a network cable. Keep in mind that using the uplink port deactivates
10BaseT Port 3.
3. Connect your Ethernet-equipped devices to the bridge through the
Bridge's 10BaseT ports. If you are not uplinking the Broadband Bridge to
an Ethernet device, both 10BaseT ports 2 and 3 will be available. If you
are using the bridge's uplink port, only port 2 will be active. Ethernet
devices should be connected to the Bridge with a network cable. Each
cable should be less than 100 meters (328 feet) in length.
4. Daisy-chain the Broadband Bridge into the HomeLink network by
running HomeLinked telephone lines through the Bridge's HomeLink
port. The entire length of telephone cable used in a HomeLink network
should never exceed 150 meters (500 feet). For more detailed infor mation
on daisy chaining, see the next page.
5. Power everything on. Connect the supplied power cord to the Power port
on the rear of the bridge, then plug the power cord into an electrical outlet.
The Broadband Bridge installation is complete.
6
Page 10

Broadband Network Bridge
Daisy-chaining to a HomeLink Network
By daisy-chaining your HomeLinked PC's and peripherals, you can create a
simple network that will act in the same way an Ether net network acts on
your PC's desktop.
While Ethernet networks usually revolve in a star topology around a hub or
switch, phoneline networks link together like a string of Christmas lights. In a
HomeLink network, data passes into on one side of a port, and a new telephone cable continues out from the port’s other side. You can string up to 25
PCs on a single HomeLink network, provided that the entire length of cable
doesn't exceed 150 meters (500 feet).
HomeLink networks are able to send data through existing telephone lines
without interrupting your telephone service, connecting over your existing
telephone jacks. If you have computers on two different floors of your house,
plug one of the downstairs PCs into the phone jack in the wall, and you're
able to network your upstairs computers without running excessive amounts
of extra cable.
7
Page 11

Linksys HomeLink™ Series
Resetting the Broadband Network Bridge
If your network connection begins acting erratically, you may want to reset
the bridge. To reset, shut down all of your network components, disconnect
the bridge's power supply, wait five seconds, and then plug it back in.
8
Page 12

Broadband Network Bridge
Troubleshooting
Specific Problems
1. I can't get a link at one of my ports.
• Ensure that your cabling is not damaged and that it is connected properly.
• Ensure that the network card you are connecting to has been properly
installed.
• Ensure that both the Bridge and the device are powered on.
• If you are linking to a hub or a switch, ensure that the hub or switch is
functioning correctly.
• If you are connecting to a cable modem, try plugging the cable modem
into the bridge's uplink port rather than a 10BaseT port.
• If all else fails, reset the Bridge.
9
Page 13

Linksys HomeLink™ Series
Appendix
Twisted Pair Cabling
There are different grades, or categories,
of twisted-pair cabling. Category 5 is the
most reliable and is highly recommended.
Category 3 is a good second choice.
Straight-through cables are used for connecting computers to a hub. Crossover
cables are used for connecting a hub to
another hub (there is an exception: some
hubs have a built-in uplink port that is
crossed internally, which allows you to
link or connect hubs together with a
straight-through cable instead).
You can buy pre-made Category 5 cabling, or cut and crimp your own.
Category 5 cables can be purchased or crimped as either straight-through or
crossover cables. A Category 5 cable has 8 thin, color-coded wires inside that
run from one end of the cable to the other. All 8 wires are used. In a straightthrough cable, wires 1, 2, 3, and 6 at one end of the cable are also wires 1, 2,
3, and 6 at the other end. In a crossover cable, the
order of the wires change from one end to the
other: wire 1 becomes 3, and 2 becomes 6. See the
diagrams on the next page for more detailed information on straight-through and crossover cabling.
To determine which wire is wire number 1, hold the cable so
that the end of the plastic RJ-45 tip (the part that goes into a
wall jack first) is facing away from you. Face the clip down
so that the copper side faces up (the springy clip will now be
parallel to the floor).When looking down on the copper side,
wire 1 will be on the far left.
10
Page 14

Broadband Network Bridge
Telephone Cabling
The telephone cables you use can be either crossover or straight-through
cables. Standard telephone cables like the ones you use everyday in your
home should do the job.
11
Page 15

Linksys HomeLink™ Series
Specifications
Model Number: HPES03
Standards: IEEE 802.3 10BaseT, HomePNA v.1.1
Protocol: CSMA/CD
Ports: Two 10BaseT RJ-45, One Uplink RJ-45 (Shared),
One Modular Telephone RJ-11 (with Pass-
Through)
Speed: HomePNA - 1Mbps, Ethernet - 10Mbps
Cabling Type: Standard Telephone Cable, 10BaseT - Category 3
or 5 UTP or STP
Topology: Star (10BaseT) or Bus (HomePNA)
LED Status Lights: Link per Port, Activity per Port, Collision per Port,
Power
Environmental
Dimensions (LxWxH): 7.5” x 6” x 2”
Unit Weight: 0.9 lbs.
Power Input: 5V DC, 3A
Certif ications: Class B, CE Mark Commercial
Operating Temperature: 32°F to 131°F (0°C to 55°C)
Storage Temperature: -4°F to 158°F (-20°C to 70°C)
Operating Humidity: 10% to 85% Non-condensing
Storage Humidity: 5% to 90% Non-condensing
12
Page 16

Broadband Network Bridge
Customer Support
For help with the installation or operation of your HomeLink Broadband
Network Bridge, contact Linksys Customer Support at one of the phone numbers, Internet or e-mail addresses below.
Customer Support 800-326-7114
949-261-1288
Fax 949-261-8868
Email support@linksys.com
Web http://www.linksys.com
FTP Site ftp.linksys.com
13
Page 17

http://www.linksys.com
© Copyright 2000 Linksys, All Rights Reserved.
Printed in the USA.
 Loading...