

Page 1

Notebook Security Bracket
Installation Guide English
LINDY No. 25007
LINDY No. 40592
www.lindy.com
Introduction
Thank you for purchasing the LINDY Heavy Duty Notebook
Security Bracket. This robust security bracket effectively secures
your notebook PC to a wooden desk or metal shelf.
Its high visibility design is ideal for use in schools, offices,
libraries, shops and other public display environments.
Packing List
2 x Adjustable arms
Desktop bracket with base plate
Locking section
Heavy duty lock & 2 keys
Key ring
1m foam
4 x Nuts
4 x Bolts
Spanner
Requirements for Installation
Tape measure
An electric drill with an 8mm bit suitable for wood or metal
use (depending on installation)
Installation
Important! This bracket will accommodate
notebooks with the following width dimensions Minimum width: 30cm; Maximum width: 50cm
When installing the bracket, make sure the desk is at 90 degrees
to the wall and not on a sloped surface. For steel shelving or
desks use the small bolts to secure the base plate and use the
larger bolts to secure the arms together. For a wooden shelf or
desk, use the larger bolts to secure the base plate and the
smaller bolts to secure the arms together.
1.
Place the base plate 100mm from the rear of the desk.
Make sure you can get the heavy duty lock into the desktop
bracket and that the notebook does not overhang the desk.
Base plate
100mm
Shelf/Desk
2.
Once the base plate has been positioned, mark two holes
through the bolt apertures. Drill through the desk at the
marked positions using an 8mm drill bit.
Drill through the desk
at these points
100mm
Shelf/Desk
Page 2
3.
From underneath the desk, push two bolts through the base
plate and secure to the internal anchor plate. Place the nuts
on the bolts and tighten using the supplied spanner.
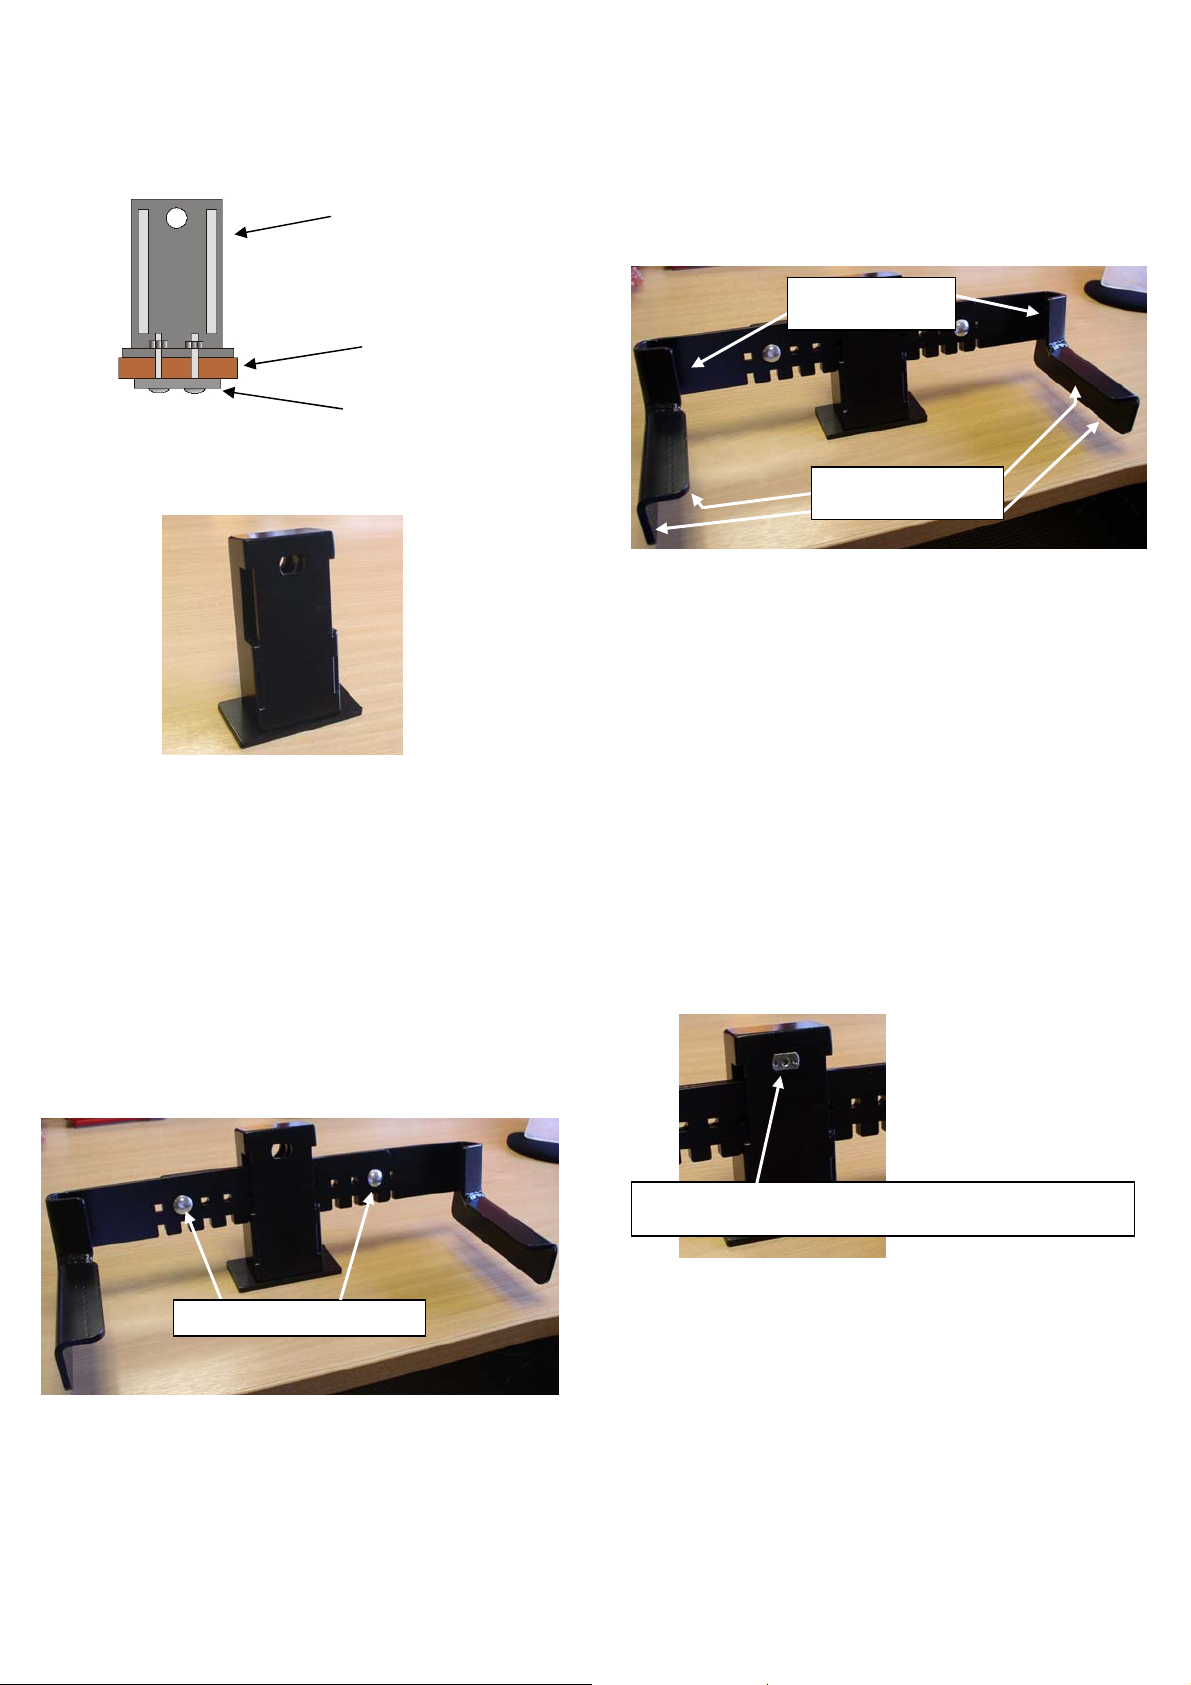
4.
Place the external cover over the internal anchor plate.
Internal
anchor plate
Desk
Base plate
5.
1m of protective foam is included. To protect your notebook
from being damaged or scratched by the metalwork, this
should be added to the arms BEFORE proceeding with final
assembly. Please apply the foam to all areas the notebook
comes into contact with.
Around the inside
of this area
Underneath the top
and along the sides
6.
Insert each arm into either side of the desktop bracket.
Ensure that the arm with the square holes is at the front and
the arm with the round holes is at the rear. Adjust the width
of the arms according to the size of your notebook. Put the
2 spare bolts into the outermost points ensuring they go
through both arms.
Bolts through both arms!
7.
Once you have inserted your laptop into the bracket, put the
locking bolt through the eye hole and lock into place.
Once the notebook is in place you can insert the locking bolt.
(Notebook removed for illustration purposes)
LINDY No. 40592
1st Edition February 2006
www.lindy.com
 Loading...