

Page 1
Tested to Comply with
FCC Standards
For Home and Office Use!
HDMI & IR Cat.6 Extender
User Manual English
Benutzerhandbuch Deutsch
Manuel Utilisateur Français
Manuale Italiano
No. 38144
www.lindy.com
© LINDY Group - FIRST EDITION (May 2016)
Page 2

Page 3

User Manual English
Introduction
Thank you for purchasing the HDMI & IR Cat.6 Extender. This product has been designed to provide
trouble free, reliable operation. It benefits from both a LINDY 2 year warranty and free lifetime technical
support. To ensure correct use, please read this manual carefully and retain it for future reference.
The HDMI & IR Cat.6 Extender is a simple to use plug and play solution which lets you extend an HDMI
AV signal up to 50m* using a single low cost Cat.6 UUTP cable (not included). For added convenience
IR signals (20-60 kHz) can also be extended using the supplied IR Receiver and Emitter cables.
Supporting resolutions up to Full HD 1080p, including 1080p 3D, the Extender is designed for use in AV
and digital signage applications in a variety of settings such as home, education, business, retail and
healthcare.
The Extender features an HDMI loop-through output on the Transmitter with simultaneous viewing so
that a local display can be connected for monitoring or to create an additional viewing zone. To ensure
the maximum compatibility when two displays are connected the EDID data, which determines the
supported video and audio formats, can be used from either a local monitor connected to the Transmitter
or the remote monitor connected to the Receiver.
Power over Cat.6 (PoC) functionality enables the Extender to operate from a single power supply
connected to the Transmitter, allowing the Receiver to be located where there is limited access to mains
power sockets making it ideal for retro fit installations. In addition to PoC functionality the Extenders slim
design and integrated mounting brackets make it easier to install in limited spaces behind modern flat
screen displays.
*Please Note: The quoted lengths and resolutions are possible with a direct connection between
Transmitter and Receiver using good quality Cat.6 solid core cable. Using a different cable type, or
introducing wall plates, couplers or patch panels will result in a reduction of possible distances.
Package Contents
HDMI & IR Cat.6 Extender with local HDMI Output
5V DC 1A Multi-Country Power Supply
IR Emitter Cable
IR Receiver Cable
LINDY Manual
Specification
Extends HDMI (including HDCP) & IR signals via Cat5e/Cat6 UTP Cable
Connection is via cat.5e/6/7 cable, up to 50m (CAT6 solid core recommended)
Local HDMI Output allows local & remote displays to be used simultaneously
Supports resolutions up to Full HD 1080p 60Hz (4:4:4 @ 8bpc / 4:2:2 @ 12bpc ) at 50m
Supports Full HD 1080p24 3D according to HDMI 1.4
Audio Formats: LPCM, DTS Digital, DTS HD, Dolby Digital & Dolby True HD
PoC (Power over CAT6) feature allows requires only a 5V 1A PSU to be attached
Supports 20 – 60kHz IR Frequencies
Maximum HDMI Cable length, 3m in/out
EDID can be selected from either the remote or local display
Transmitter ports: HDMI Type A In, 1x CATX Out, 3.5mm IR Out & DC Socket
Receiver ports: HDMI Type A Out, 1x CATX In & 3.5mm IR In
Power consumption: 5W Max
ESD Protection: Human Body model: +/- 8kV (air-gap discharge) +/- 4kV (contact discharge)
Temperature: Operating 0oC to 40oC (32oF to 104oF) / Storage -20oC to 60oC (-4oF to 140oF)
Relative Humidity: 20 to 90% RH (Non-condensing)
Page 4
User Manual English
Overview
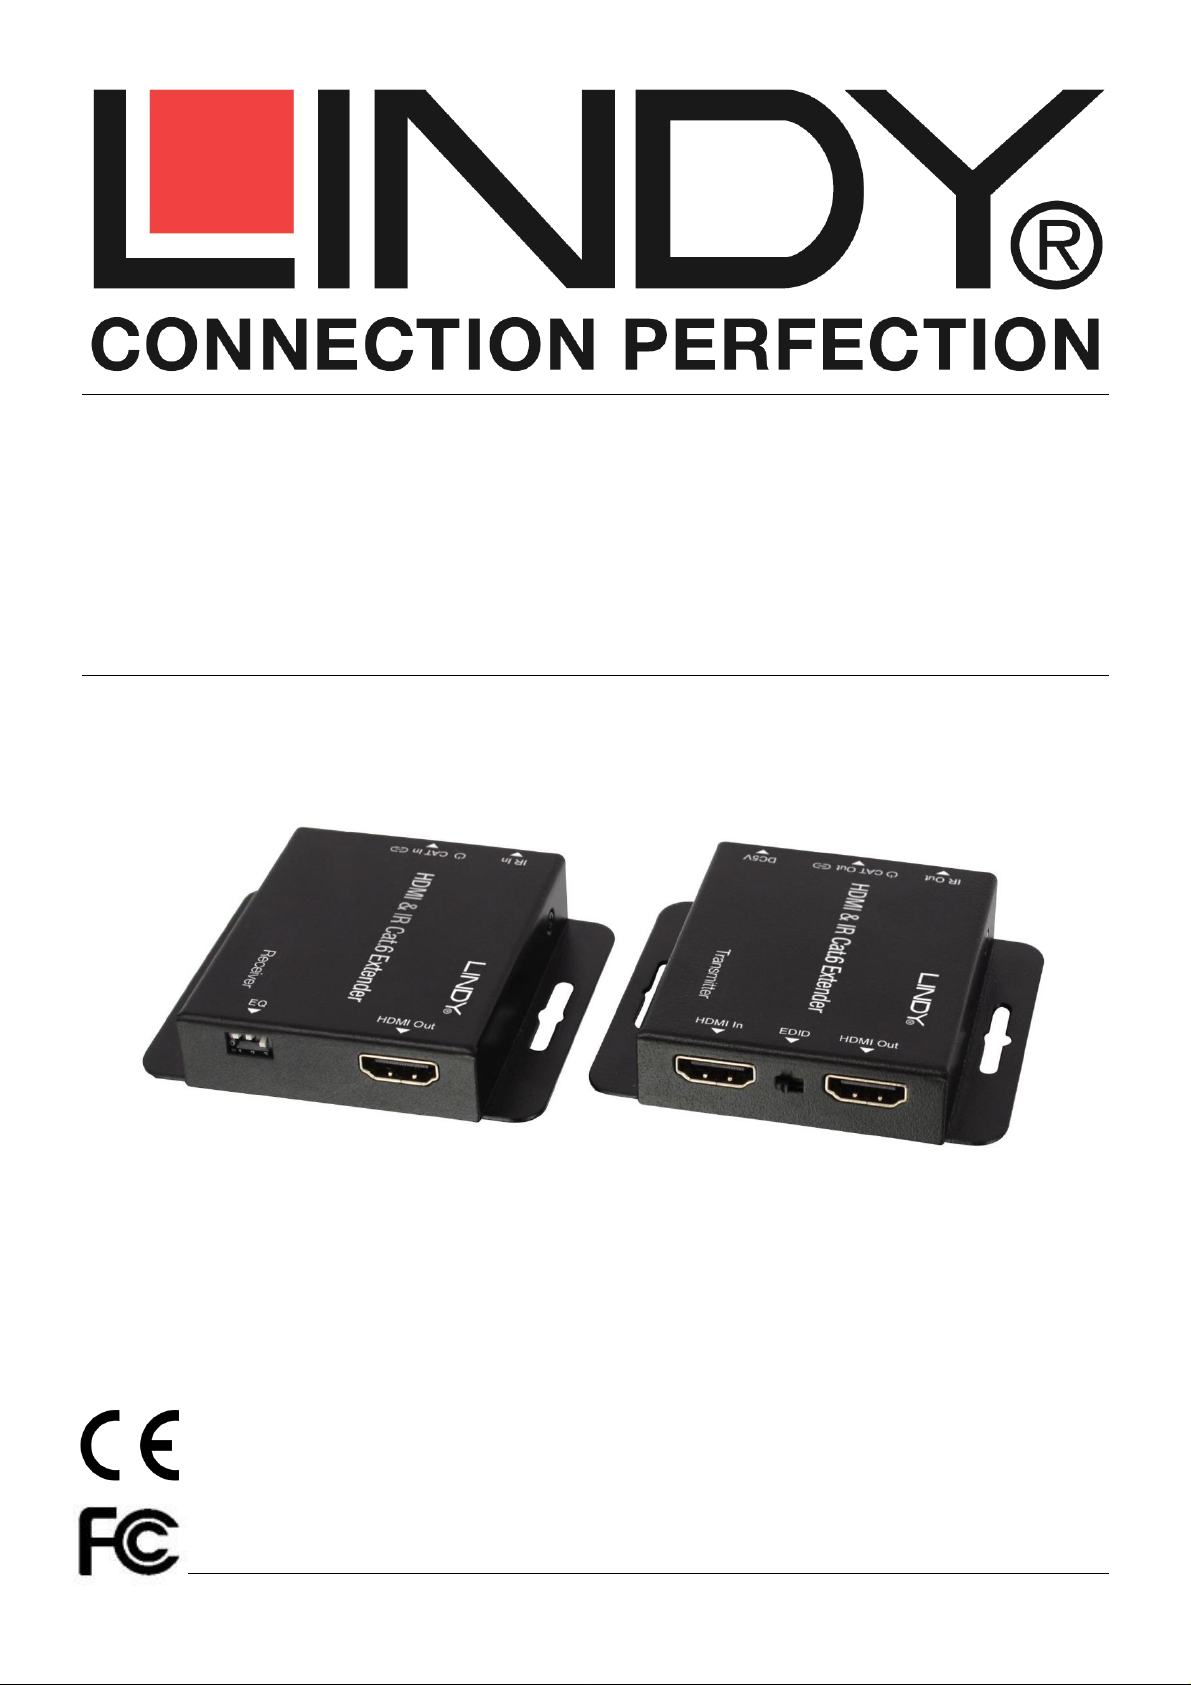
Transmitter Unit
1. HDMI In – Connect to an HDMI source device, such as Media Player or Blu-ray player.
2. EDID Switch – Locate the switch to the right to copy the EDID information from the display connected
to the HDMI Out port of the Transmitter or to the left to copy the EDID information from the display
connected to the Receiver.
3. HDMI Out – Connect to an HDMI display to for local monitoring or to create an additional viewing
zone.
4. IR Out – Connect the supplied IR Emitter cable and place the other end of the cable in line of sight of
the IR port of the device to be controlled.
5. Power LED – Illuminates when the Transmitter unit is receiving power.
6. CAT – Connect a Cat.5e/6 cable of up to 50m to this port and the corresponding port on the Receiver.
7. LINK LED – Illuminates when the Transmitter is receiving a signal from the HDMI source.
8. DC5V – Connect the supplied 5V power supply to power the Transmitter and Receiver units.
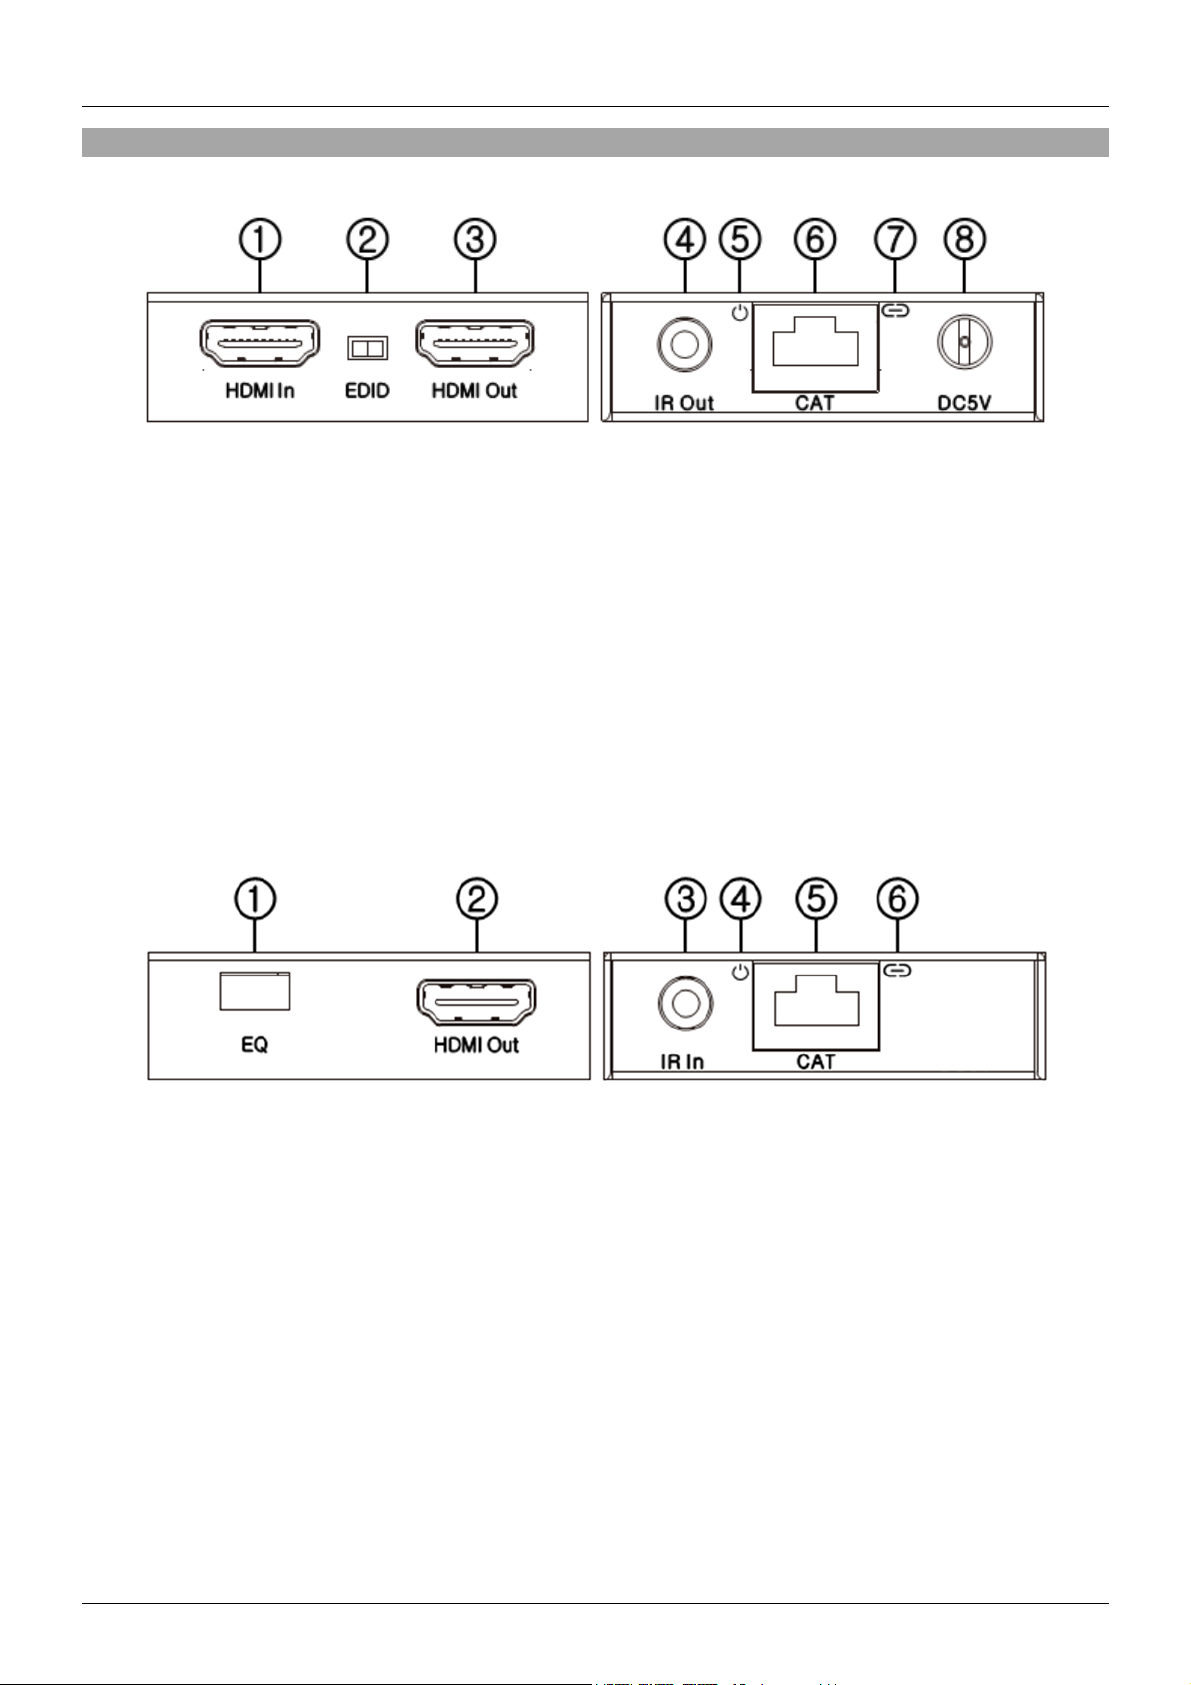
Receiver Unit
1. EQ – Set the EQ dip switches to the corresponding setting for the length of Cat.5e/6 cable you are
using. Please refer to the Installation section for further information.
2. HDMI Out – Connect to an HDMI display or projector.
3. IR IN – Connect the supplied IR Receiver cable and place the other end of the cable in a location
where it is in line of sight of the IR remote control to be used.
4. Power LED – Illuminates when the Receiver unit is receiving power from the Transmitter via the PoC
feature.
5. CAT – Connect a Cat.5e/6 cable of up to 50m to this port and the corresponding port on the
Transmitter.
6. Lock LED – Illuminates when a stable HDMI signal is being received from the Transmitter.
Page 5
User Manual English
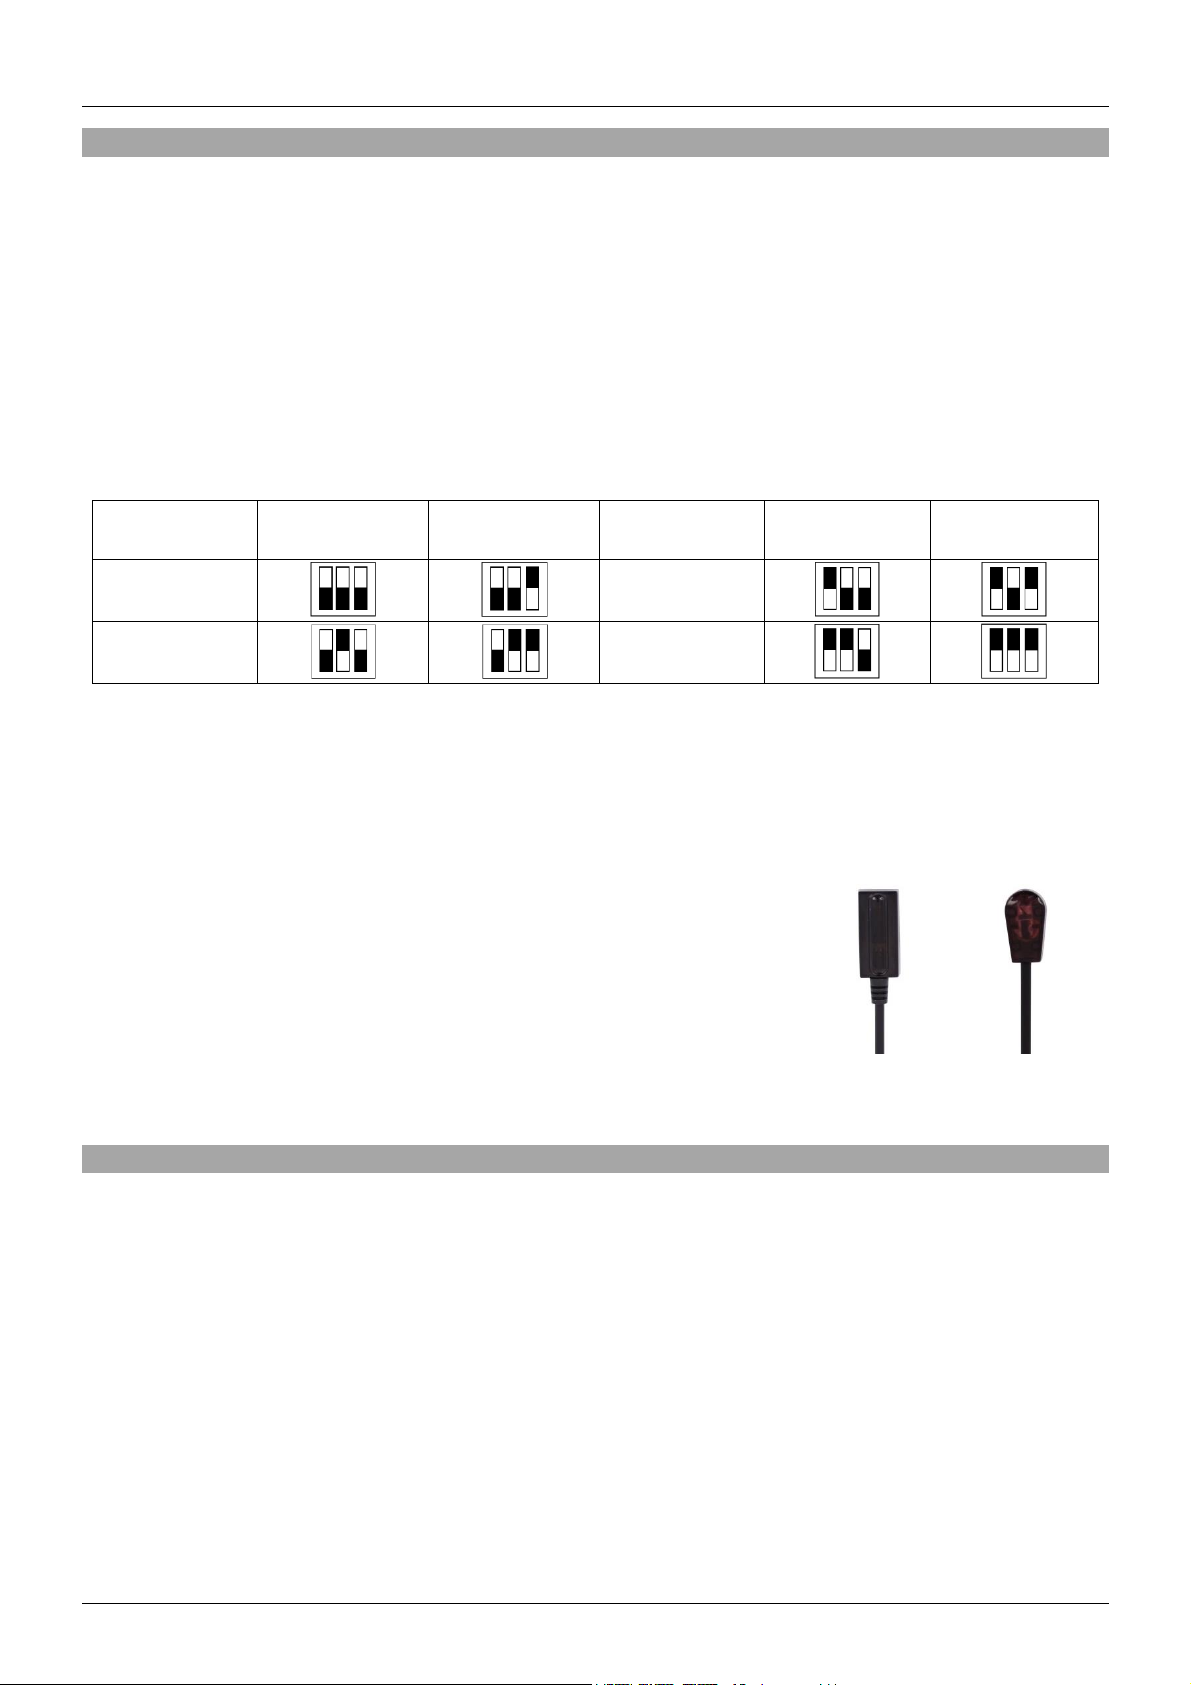
Cable
Length
Primary
Setting
Secondary
Setting
Cable
Length
Primary
Setting
Secondary
Setting
Under 15m
(49.5ft)
30 – 40m
(99 – 132ft)
15 – 30m
(49.5 – 99ft)
40 – 50m
(132 – 164ft)
IR Receiver
IR Emitter
Installation
Important! If you want to lay cables inside a cable duct or through a wall, please test your Cat.5e/6
cables in a test installation at the highest desired resolution/colour space/colour depth combination with
the extender BEFORE you install them in your wall or cable duct!
The following steps are for an installation using HDMI equipment, if you are using DVI equipment, please
substitute the HDMI cables for DVI to HDMI cables where required.
1. Connect your HDMI source to the Transmitter unit using a HDMI cable (maximum length 3m).
2. Connect one end of the CAT5e/6 cable (max. length 50m) to the CAT port on the Transmitter and the
other end to the CAT port of the Receiver. Use solid core installation cable of at least Cat.5e UTP.
3. Set the EQ on the Receiver to the setting which matches the Cat.5e/6 cable length (see table below),
either the Primary or Secondary may be used depending on picture and cable quality.
4. Use another HDMI cable (maximum length 3m) to connect your HDMI display device to the HDMI
output port on the Receiver unit.
5. An additional HDMI display can be connected to the HDMI Out port of the Transmitter if required.
6. Set the EDID Switch according to your requirement, to the right uses the EDID from the display
connected to the Transmitter, to the left uses the EDID from the display connected to the Receiver.
7. For additional Infrared remote signal functionality, connect the
included IR Extension Cables to the Transmitter and Receiver
units, using the IR Emitter with the IR Out port and the IR
Receiver with the IR In port.
8. Place the IR Emitter in front of the IR Port of the equipment you
want to control, and ensure you place the IR Receiver in a
location where it may easily receive the signal of your IR remote.
9. Power on your HDMI Source and Display to complete the installation.
10. Finally plug the DC power supply into the Transmitter unit, the Power LED will illuminate on both
units.
Troubleshooting
There is no display on the screen.
Check that the DC plug and jack used by external power supply is firmly connected and that the
Power LED on both the Transmitter and Receiver are illuminated.
Check that the CAT5e/6 cable is seated correctly and that the Lock LED on is illuminated.
Power off all the devices, then power on in this order: first, the Transmitter unit, followed by the
display(s) and finally the source.
For some HDMI devices it may be helpful to unplug and replug their HDMI connection to re-initiate
the HDMI handshake and recognition.
Check that the EQ setting matches the Cat.5e/6 cable length being used. If the primary EQ setting
does not work, please try the secondary setting for the length of Cat.5e/6 cable being used.
Reduce the length of CAT5e/6 or HDMI cable used, or use a higher quality cable.
Page 6

Benutzerhandbuch Deutsch
Einführung
Wir freuen uns, dass Ihre Wahl auf ein LINDY-Produkt gefallen ist und danken Ihnen für Ihr Vertrauen.
Sie können sich jederzeit auf unsere Produkte und einen guten Service verlassen. Dieser HDMI & IR
Cat.6 Extender unterliegt einer 2-Jahres LINDY Herstellergarantie und kostenlosem lebenslangen
technischem Support. Bitte lesen Sie diese Anleitung sorgfältig und bewahren Sie sie auf.
Dieser Extender ist eine einfach zu bedienende Plug & Play-Lösung und kann ein HDMI AV Signal bis
zu 50m weit über ein einziges günstiges Cat.6 Kabel übertragen. Zusätzlich können IR-Signale (20-60
kHz) über die mitgelieferten IR-Empfänger und -Sender zur Fernbedienung der Signalquelle zurück
übertragen werden. Unterstützt werden Auflösungen bis Full HD 1080p, einschließlich 1080p 3D.
Der Extender unterstützt zusätzlich die gleichzeitige HDMI-Ausgabe am Transmitter, so dass eine lokale
Anzeige zur Überwachung angeschlossen werden kann. Es kann eingestellt werden, ob die EDID-Daten
des lokalen oder des remote Monitor verwendet werden. Die Power-over-Cat.6 (PoC) Funktionalität
ermöglicht die Stromversorgung des Receivers über das Cat.-Kabel, so dass am Receiver kein Netzteil
angeschlossen werden muss. Ferner ermöglichen integrierte Halterungen den Einsatz bei begrenztem
Platzbedarf hinter modernen Flachbildschirmen.
Beachten Sie bitte: Die angegebenen Längen und Auflösungen sind realisierbar bei einer direkten
Verbindung zwischen Sender und Empfänger mit hochwertigen Cat.6 Kabeln mit festen Adern
(Installationskabel). Bei Verwendung von Kabeln mit niedrigerer Qualität oder von zusätzlichen
Steckverbindungen in der Strecke verringern sich die möglichen Distanzen bzw. Auflösungen.
Lieferumfang
HDMI & IR Cat.6 Extender mit lokalem HDMI Ausgang
5V DC 1A Multi-Country Steckernetzteil mit Adaptern für Euro, UK, USA, AUS/CN
IR Emitter Kabel
IR Receiver Kabel
LINDY Handbuch
Eigenschaften
Überträgt HDMI (inklusive HDCP) & IR Signale via Cat.5e/Cat.6 Kabel
Cat.5e/6/7 Kabellänge bis 50m (Empfehlung: Cat.6 Installationskabel mit starren Adern)
Lokaler HDMI Ausgang zum optionalen gleichzeitigen Anschluss eines Kontrollmonitors
Unterstützt Auflösungen bis Full HD 1080p 60Hz (4:4:4 @ 8bpc / 4:2:2 @ 12bpc ) bei 50m
Unterstützt Full HD 1080p24 3D gemäß HDMI 1.4
Audio-Formate: LPCM, DTS Digital, DTS HD, Dolby Digital & Dolby True HD
PoC (Power over Cat.6) Feature erfordert nur ein Netzteil 5V 1A (am Transmitter)
Unterstützt 20 – 60kHz IR Frequenzen
Maximale HDMI Kabellänge am Eingang und am Ausgang: 3m
Monitor EDID Daten vom lokalen oder am Receiver angeschlossenen Monitor auswählbar
Einstellbarer Kabel-Equilizer für das verwendete Cat.5e/6 Kabel und seine Länge
Transmitter Anschlüsse: HDMI Typ A In, 1x CATX Out, 3.5mm IR Out, DC Netzteilanschluss
Receiver Anschlüsse: HDMI Typ A Out, 1x CATX In, 3.5mm IR In
Leistungsaufnahme: 5W max.
Temperaturbereiche: 0
o
C - 40oC (Betrieb), -20oC - 60oC (Lagerung)
Relative Feuchtigkeit: 20 - 90% RH (Nichtkondensierend, Verwendung in geschlossenen Räumen)
Page 7

Benutzerhandbuch Deutsch
Übersicht
Transmitter
1. HDMI In – Anschluss für HDMI Signalquelle (Media Player, Blu-ray Player, …).
2. EDID Umschalter – Schieben Sie den Schalter nach rechts um die EDID des lokalen Monitors zu
verwenden, oder nach links für die des am Receiver angeschlossenen Monitors.
3. HDMI Out – Schließen Sie hier den lokalen Kontrollmonitor oder weitere HDMI Geräte an.
4. IR Out – Anschluss für das IR Emitterkabel – platzieren Sie die IR Sendediode so dass Ihre HDMI
Quelle das IR Signal aufnehmen kann!
5. Power LED – Leuchtet wenn der Transmitter korrekt mit Strom versorgt wird.
6. CAT – Anschluss für das Cat.5e/6 Kabel zum Receiver.
7. LINK LED – Leuchtet wenn der Transmitter ein Signal von der HDMI Quelle erhält.
8. DC5V – Anschluss für das beiliegende Netzteil.
Receiver
1. EQ – Stellen Sie die DIP Switches passend zum Cat.X Verbindungskabel ein – Nähere
Informationen sieh Abschnitt Installation.
2. HDMI Out – Anschluss für das HDMI Display oder Zielgerät(e).
3. IR IN – Anschluss für das mitgelieferte IR Receiver-Kabel – platzieren Sie den IR Empfänger so
dass er das Signal der Fernbedienung gut aufnehmen kann.
4. Power LED – Leuchtet wenn der Receiver über das Cat.X Kabel korrekt mit Strom versorgt wird.
5. CAT – Anschluss für das Cat.5e/6 Kabel zum Transmitter.
6. Lock LED – Leuchtet wenn ein stabiles Signal vom Transmitter empfangen wird.
Page 8

Benutzerhandbuch Deutsch
Kabellänge
Primäre
Einstellung
Sekundäre
Einstellung
Kabellänge
Primäre
Einstellung
Sekundäre
Einstellung
Unter 15m
30 – 40m
15 – 30m
40 – 50m
IR Receiver
IR Emitter
Installation
WICHTIG! Falls Sie das Cat.5e/6 Verbindungskabel durch einen Kabelkanal oder durch Wände verlegen
wolle, testen Sie VORHER ob das Kabel die benötigten Auflösungen und Farbtiefen in Kombination mit
dem Extender unterstützt!
Die folgenden Schritte gelten für HDMI Geräte. Bei Verwendung von DVI Geräten verwenden Sie
einfach entsprechende DVI-HDMI Anschlusskabel statt der HDMI Versionen.
1. Schließen Sie die HDMI Quelle mit einem maximal 3m langen HDMI Kabel an.
2. Schließen Sie das bis zu 50m lange Cat.5e/6 Kabel an Transmitter und Receiver an. Verwenden Sie
idealerweise hochwertiges Cat.6 UTP Installationskabel
3. Stellen Sie die EQ DIP Switches am Receiver entsprechend der abgebildeten Tabelle ein –
verwenden Sie entweder die Primäre oder Sekundäre Einstellung, je nach bestem Ergebnis
4. Schließen Sie das HDMI Zielgerät mit einem maximal 3m langen HDMI Kabel an.
5. Ein lokaler HDMI Monitor kann bei Bedarf am Transmitter angeschlossen werden.
6. Stellen Sie den EDID Switch entsprechend Ihrem Wunsch ein. Stellung rechts für Verwendung der
EDID Daten des lokalen Monitors, links für die des Remote Monitors.
7. Um zusätzlich IR Fernbedienungssignal vom Receiver zurück
zum Transmitter zu übertragen schließen Sie das IR
Receiverkabel am IR Input des Receivers an, und das IR
Emitterkabel am Transmitter.
8. Platzieren Sie den IR Receiver so dass er das Signal der
Fernbedienung aufnehmen kann und den IR Emitter so dass er
das Signal an das HDMI Quellgerät abgeben kann.
9. Schließen Sie das Netzteil am Transmitter an.
10. Schalten Sie alle Geräte ein um die Installation abzuschließen. Die LEDs sollten kurz darauf
leuchten.
Fehlersuche
Es wird kein oder ein schlechtes Bild angezeigt.
Die POWER LED an beiden Geräten sollten leuchten - überprüfen Sie ggf. Netzteil und Cat-Kabel.
Schalten Sie alle Geräte aus und in folgender Reihenfolge wieder eine: Transmitter gefolgt von den
Bildschirmen und abschließend die HDMI Signalquelle.
Bei einigen HDMI Geräten kann es erforderlich sein das HDMI Kabel für 10 Sekunden abzuziehen
und wieder anzuschließen um den HDMI-Handshake zu erneuern.
Ein lokal angeschlossener Monitor muss ein Bild anzeigen.
Wenn das Cat.5e/6 Kabel korrekt angeschlossen und in Ordnung ist sollte die Lock LED leuchten.
Prüfen Sie die EQ Einstellungen (siehe oben) und versuchen Sie es mit anderen Einstellungen wenn
es trotzdem nicht funktioniert.
Verwenden Sie ggf. Ein höherwertiges Cat.5e/6 Kabel und kürzere HDMI Anschlusskabel.
Page 9

Manuel Utilisateur Français
Introduction
Nous sommes heureux que votre choix se soit porté sur un produit LINDY et vous remercions de votre
confiance. Vous pouvez compter à tout moment sur la qualité de nos produits et de notre service. Cet
extender HDMI & IR Cat.6 est soumis à une durée de garantie LINDY de 2 ans et d’une assistance
technique gratuite à vie. Merci de lire attentivement ces instructions et de les conserver pour future
référence.
L’extender HDMI & IR Cat.6 est une solution plug&play simple qui vous permet d’étendre un signal AV
HDMI jusqu’à 50m* en utilisant un simple câble Cat.6 U/UTP (non fourni). Pour plus de commodité les
signaux IR (20-60 kHz) sont aussi pris en charge via les câbles (émetteur et récepteur) IR fournis.
Prenant en charge les résolutions jusqu’à Full HD 1080p, 1080p 3D inclus, l’extender est conçu pour
une utilisation dans les applications AV et digital signage, home cinéma, salles de cours, milieux
professionnels et secteur médical.
L’extender dispose d’une sortie HDMI bypass sur l’émetteur, pour un affichage simultané afin de pouvoir
connecter un écran local pour le monitoring ou pour créer une zone d’affichage local. Pour assurer un
maximum de compatibilité lorsque deux écrans sont connectés, les données EDID qui déterminent les
formats audio et vidéo pris en charge, peuvent être utilisées pour un affichage local connecté à
l’émetteur ou un moniteur distant connecté au récepteur. La fonctionnalité Power over Cat.6 (PoC)
permet à l’extender de fonctionner à partir d’une seule alimentation connectée à l’émetteur, permettant
au récepteur d’être situé à un endroit où il est difficile d’ajouter une source d’alimentation. En plus de la
fonction PoC, l’extender a une faible épaisseur et possède des pattes de fixation pour une installation
simplifiée derrière des écrans plats.
* Note: les longueurs de câbles et résolutions citées ci-dessous sont possibles avec une connexion
directe en émetteur et récepteur, en utilisant un câble monobrin Cat.6 de bonne qualité. L’utilisation d’un
autre type de câble, ou en introduisant des connexions intermédiaires réduira les distances possibles.
Contenu de l’emballage
Extender HDMI & IR Cat.6 avec sortie HDMI locale
Alimentation multi-pays 5V DC 1A
Câble émetteur IR
Câble capteur IR
Manuel LINDY
Spécifications
Etend les signaux HDMI (HDCP inclus) & IR via câble Cat5e/Cat6 UTP
Connexion via câble cat.5e/6/7, jusqu’à 50m (CAT6 monobrin recommandé)
Sortie HDMI locale permettant l’utilisation simultanée d’un écran local & distant
Prise en charge des résolutions jusqu’à Full HD 1080p 60Hz (4:4:4 @ 8bpc / 4:2:2 @ 12bpc) à 50m
Prise en charge Full HD 1080p24 3D d’après HDMI 1.4
Formats audio: LPCM, DTS Digital, DTS HD, Dolby Digital & Dolby True HD
Fonctionnalité PoC (Power over CAT6) permettant l’utilisation d’une alimentation 5V 1A unique
Prise en charge des fréquences IR 20 – 60kHz
Longueur maximale de câble HDMI, 3m en entrée et 3 mètres en sortie
L’EDID peut être sélectionnée à partir de l’écran local ou distant
Ports sur l’émetteur: HDMI Type A In, 1x CATX Out, 3,5mm IR Out & prise d’alimentation DC
Ports sur le récepteur: HDMI Type A Out, 1x CATX In & 3,5mm IR In
Puissance: 5W Max
Protection ESD: modèle du corps humain: +/- 8kV (décharge dans l’air) +/- 4kV (par contact)
Température de fonctionnement: 0oC - 40oC (32oF - 104oF) / de stockage: -20oC - 60oC (-4oF - 140oF)
Humidité relative: 20 - 90% RH (non condensée)
Page 10

Manuel Utilisateur Français
Vue d’ensemble
Unité de transmission “Transmitter”
1. HDMI In – A connecter à une source HDMI, comme un Media Player ou un lecteur Blu-ray.
2. EDID Switch – basculer l’interrupteur à droite pour copier l’EDID de l’affichage connecté au port HDMI
Out de l’émetteur (Transmitter) ou à gauche pour l’EDID de l’affichage connecté au récepteur
(Receiver).
3. HDMI Out – A connecter à un affichage HDMI pour le monitoring local ou pour créer une zone
d’affichage additionnelle.
4. IR Out – Connectez ici le câble émetteur IR fourni et placez l’autre extrémité en direction du capteur
IR de l’appareil à contrôler.
5. Power LED – s’allume lorsque l’émetteur est alimenté.
6. CAT – Connectez ici un câble Cat.5e/6 de jusqu’à 50m et le port correspondant sur le récepteur.
7. LINK LED – s’allume lorsque l’émetteur reçoit un signal de la source HDMI.
8. DC5V – Connectez ici l’alimentation 5V fournie, pour alimenter l’émetteur et le récepteur.
Unité de réception “Receiver”
1. EQ – placez les dip switch EQ pour correspondre aux paramètres de longueur de câble Cat.5e/6 que
vous utilisez. Veuillez-vous référer à la section installation pour plus de détails.
2. HDMI Out – A connecter à un affichage ou vidéo projecteur HDMI.
3. IR IN – Connectez ici le câble capteur IR fourni et placez l’autre extrémité en direction de la
télécommande IR utilisée.
4. Power LED – s’allume lorsque le récepteur reçoit l’alimentation provenant de l’émetteur via la
fonctionnalité PoC.
5. CAT – Connectez ici un câble Cat.5e/6 de jusqu’à 50m à et au port correspondant sur l’émetteur.
6. Lock LED – s’allume lorsqu’un signal HDMI stable est reçu de l’émetteur.
Page 11

Manuel Utilisateur Français
longueur
du câble
Paramètres
Primaires
Paramètres
Secondaires
longueur
du câble
Paramètres
Primaires
Paramètres
Secondaires
sous 15m
(49.5ft)
30 – 40m
(99 – 132ft)
15 – 30m
(49.5 – 99ft)
40 – 50m
(132 – 164ft)
Capteur IR
Emetteur IR
Installation
Important! Si vous posez le câble dans une gaine ou dans les cloisons, veuillez tester le câble Cat.5e/6
dans une configuration de test et avec les combinaisons de résolution et d’espace colorimétrique
maximal AVANT de l’installer de façon définitive !
Les étapes suivantes concernent un équipement HDMI, si vous utilisez un équipement DVI, merci de
substituer les câbles HDMI par des câbles DVI vers HDMI.
1. Connectez la source HDMI à l’émetteur à l’aide d’un câble HDMI (longueur maximale 3m).
2. Connectez une extrémité du câble CAT5e/6 (longueur max. 50m) au port CAT de l’émetteur et l’autre
extrémité au port CAT du récepteur. Utilisez du câble d’installation monobrin d’au moins Cat.5e UTP.
3. Placez l’EQ sur le récepteur en fonction de la longueur de câble Cat.5e/6 (voir tableau ci-dessous),
les réglages Primaires ou Secondaires peuvent être utilisés, en fonction de la qualité de l’image ou
du câble.
4. Utilisez un autre câble HDMI (maximum 3 mètres) pour connecter votre écran HDMI au port de sortie
HDMI du récepteur.
5. Un affichage HDMI additionnel peut être connecté au port HDMI Out de l’émetteur si nécessaire.
6. Placez le switch EDID en fonction de vos besoins, à droite pour utiliser l’EDID de l’affichage
connecté à l’émetteur, à gauche pour l’EDID connecté au récepteur.
7. Pour les fonctionnalités infra-rouge, connectez les câbles IR
fournis à l’émetteur et au récepteur, avec l’émetteur IR au port IR
Out et le capteur IR au port IR In.
8. Placez l’émetteur IR en face du capteur IR de l’équipement à
contrôler, assurez-vous de placez le capteur IR à un endroit où il
pourra recevoir les signaux de votre télécommande IR.
9. Mettez votre source et affichage HDMI sous tension pour terminer.
10. Branchez finalement l’alimentation à l’émetteur, les LED Power s’allument sur les deux unités.
Dépannage
Aucun affichage à l’écran.
Assurez-vous que les connecteurs d’alimentation soient bien branchés et que les LED Power soient
allumées sur l’émetteur (Transmitter) et le récepteur (Receiver).
Vérifiez que le câble CAT5e/6 est bien branché et que le LED Lock est allumée.
Mettez tous les appareils hors tension, alimentez-les dans l’ordre suivant: l’émetteur en premier,
suivi par le(s) affichage(s) et finalement la source.
Pour certains appareils HDMI il peut être nécessaire de déconnecter/reconnecter leurs connexions
HDMI afin de refaire le handshake HDMI (appairage).
Vérifiez que les paramètres EQ correspondent à la longueur du câble Cat.5e/6 utilisé. Si les réglages
EQ primaires ne fonctionnent pas, veuillez essayer avec les réglages secondaires pour la longueur
de câble Cat.5e/6 utilisée.
Réduisez la longueur des câbles CAT5e/6 ou HDMI utilisés, ou utilisez des câbles de meilleur
qualité.
Page 12

Manuale Italiano
Introduzione
Vi ringraziamo per aver acquistato l'Extender HDMI & IR Cat.6. Questo prodotto è stato progettato per
garantirvi la massima affidabilità e semplicità di utilizzo ed è coperto da 2 anni di garanzia LINDY oltre
che da un servizio di supporto tecnico a vita. Per assicurarvi di farne un uso corretto vi invitiamo a
leggere attentamente questo manuale e a conservarlo per future consultazioni.
Questo Extender HDMI & IR Cat.6 rappresenta una semplice soluzione plug and play per estendere un
segnale AV HDMI fino a 50m* tramite un singolo cavo di rete Cat.6 UUTP (no incluso). Inoltre porta
anche segnali IR (20-60 kHz) utilizzando l’emettitore e ricevitore IR. Supporta risoluzioni fino a Full HD
1080p incluso 1080p 3D. L’Extender è la soluzione ideale per applicazioni AV e digital signage in
molteplici installazioni professionali, casalinghe, uffici, retail, ecc.
Il trasmettitore ha un’uscita HDMI passante per collegare un monitor locale aggiuntivo. Per ottenere la
massima compatibilità quando sono connessi due monitor, i dati EDID, che determinano i formati video e
audio supportati, possono essere utilizzati o sul monitor locale connesso al trasmettitore o sul monitor
remoto connesso al ricevitore.
La funzione Power over Cat.6 (PoC) consente di utilizzare un solo alimentatore connesso al
trasmettitore, il ricevitore viene alimentato direttamente dal cavo di rete agevolandone notevolmente
l’installazione. Oltre alla funzione PoC, il design compatto e le staffe di montaggio integrate consentono
di installare le unità anche in spazi limitati ad esempio dietro a schermi piatti.
*Nota Bene: è possibile raggiungere distanze e risoluzioni indicate connettendo trasmettitore e ricevitore
con un cavo di rete diretto Cat.6 solid core di buona qualità. Utilizzando un cavo di rete differente o
introducendo placche a muro, prolunghe o patch panel è possibile avere una riduzione della distanza
massima supportata.
Contento della Confezione
Extender HDMI & IR Cat.6 con uscita HDMI locale
Alimentatore 5V DC 1A Multi-Country
Emettitore IR
Ricevitore IR
Manuale
Specifiche
Estende segnali HDMI (HDCP incluso) & IR tramite un cavo Cat5e/Cat6 UTP
Connessione via cavo cat.5e/6/7 fino a 50m (cavo consigliato: CAT6 solid core)
Uscita HDMI locale per poter visualizzare il segnale sia in locale che in remoto
Supporta risoluzioni fino a Full HD 1080p 60Hz (4:4:4 @ 8bpc / 4:2:2 @ 12bpc ) a 50m
Supporto Full HD 1080p24 3D secondo le specifiche HDMI 1.4
Formati Audio: LPCM, DTS Digital, DTS HD, Dolby Digital & Dolby True HD
PoC (Power over CAT6), necessita di un solo alimentatore 5V 1A
Supporta frequenze IR da 20 a 60kHz
Lunghezza massima cavi HDMI: 3m in/out
EDID può essere selezionato dal monitor locale o remoto
Equalizzatore regolabile in base alla lunghezza del cavo CAT5e/6 utilizzato
Porte sul trasmettitore: HDMI Tipo A In, 1x CATX Out, 3.5mm IR Out & alimentazione
Porte sul ricevitore: HDMI Tipo A Out, 1x CATX In & 3.5mm IR In
Consumo: 5W Max
Protezione ESD: Human Body model: +/- 8kV (air-gap discharge) +/- 4kV (contact discharge)
Temperatura operativa: 0oC / 40oC, Temperatura di stoccaggio: -20oC / 60oC
Umidità: 20 a 90% RH (senza condensa)
Page 13

Manuale Italiano
Overview
Trasmettitore
1. HDMI In – Connettete la sorgente HDMI, come un Media Player o lettore Blu-ray.
2. Selettore EDID – Posizionate il selettore a destra per copiare i dati EDID del monitor connesso alla
porta HDMI Out del trasmettitore o a sinistra per copiare i dati EDID del monitor connesso al
ricevitore.
3. HDMI Out – Collegate un monitor HDMI locale.
4. IR Out – Collegate l’emettitore IR e posizionate l’altro capo del cavo davanti alla porta IR del
dispositivo che si intende controllare.
5. Power LED – Si illumina quando il trasmettitore viene alimentato.
6. CAT – Collegate un cavo Cat.5e/6 lungo fino a 50m.
7. LINK LED – Si illumina quando il trasmettitore sta ricevendo un segnale dalla sorgente HDMI.
8. DC5V – Collegate l’alimentatore da 5V incluso per alimentare trasmettitore e ricevitore.
Ricevitore
1. EQ – Regolate i dip switch in base all’impostazione corrispondente considerando la lunghezza del
cavo Cat.5e/6. Per ulteriori informazioni consultate il paragrafo Installazione.
2. HDMI Out – Collegate un mionitor HDMI.
3. IR IN – Collegate il ricevitore IR e posizionate l’altro capo del cavo in modo tale che sia visibile e
quindi potervi indirizzare il telecomando.
4. Power LED – Si illumina quando il ricevitore riceve alimentazione dal trasmettitore via PoC.
5. CAT – Collegate un cavo Cat.5e/6 lungo fino a 50m.
6. Lock LED – Si illumina quando riceve un segnale HDMI stabile dal trasmettitore.
Page 14

Manuale Italiano
Lungh
cavo
Impostazione
Primaria
Impostazione
Secondaria
Lungh
cavo
Impostazione
Primaria
Impostazione
Secondaria
Sotto i 15m
(49.5ft)
30 – 40m
(99 – 132ft)
15 – 30m
(49.5 – 99ft)
40 – 50m
(132 – 164ft)
Ricevitore IR
Emettitore IR
Installazione
Importante! Se volete stendere i cavi in canaline, testate prima i vostri cavi Cat.5e/6 alle risoluzioni più
alte considerando anche profondità di colore con l’extender PRIMA di installarli nelle canaline!
Seguite i passaggi seguenti per un’installazione con apparecchiature HDMI, se utilizzate dispositivi DVI
sostituite i cavi HDMI con cavi DVI / HDMI dove richiesto.
1. Collegate la sorgente HDMI al trasmettitore tramite un cavo HDMI (lunghezza massima 3m).
2. Collegate un cavo CAT5e/6 (lungo al massimo 50m) alla porta CAT del trasmettitore e del ricevitore.
Consigliamo di utilizzare un cavo solid core Cat.5e UTP.
3. Regolate l’EQ sul ricevitore in base alla lunghezza del cavo Cat.5e/6 utilizzato (vedi tabella qui
sotto), oltre alle impostazioni primaria o secondaria:
4. Utilizzate un altro cavo HDMI (lungo al massimo 3m) per collegare il monitor HDMI all’uscita HDMI
sul ricevitore.
5. Potete collegare un monitor HDMI addizionale all’uscita HDMI sul trasmettitore.
6. Impostate il selettore EDID a destra se volete utilizzare i dati EDID del monitor connesso al
trasmettitore, a sinistra se volete utilizzare i dati EDID del monitor connesso al ricevitore.
7. Collegate i cavi IR per gestire anche i segnali del telecomando;
collegate l’emettitore IR all’uscita IR e il ricevitore IR all’ingresso
IR.
8. Posizionate l’Emettitore IR davanti alla porta IR del dispositivo
che intendete controllare, e il ricevitore IR in modo tale che possa
essere visibile dal telecomando.
9. Accendete la sorgente e il monitor HDMI per completare l’installazione.
10. In fine alimentate il trasmettitore, il LED Power si illuminerà su entrambe le unità.
Risoluzione dei problemi
Mancanza del segnale video.
Controllate che l’alimentatore sia connesso correttamente e che i LED power siano accessi su
entrambe le unità.
Controllate che il cavo CAT5e/6 sia inserito correttamente e che il LED Lock sia illuminato.
Spegnete tutti i dispositivi, quindi riaccendeteli in questo ordine: trasmettitore, monitor e sorgente.
Con alcuni dispositivi HDMI può essere necessario scollegare e ricollegare il cavo HDMI per
ripristinare il riconoscimento delle periferiche.
Controllate che l’equalizzatore sia stato regolato correttamente in base alla lunghezza del cavo
Cat.5e/6 utilizzato. Se con l’impostazione primaria non dovesse funzionare, provate con
l’impostazione secondaria, sempre considerando la lunghezza del cavo Cat.5e/6 utilizzato.
Riducete la lunghezza dei cavi CAT5e/6 o HDMI utilizzati, oppure utilizzate dei cavi di qualità
superiore.
Page 15

CE/FCC Statement
CE Certification
This equipment complies with the requirements relating to Electromagnetic Compatibility Standards
EN55022/EN55024 and the further standards cited therein. It must be used with shielded cables only.
It has been manufactured under the scope of RoHS compliance.
CE Konformitätserklärung
Dieses Produkt entspricht den einschlägigen EMV Richtlinien der EU für IT-Equipment und darf nur
zusammen mit abgeschirmten Kabeln verwendet werden.
Diese Geräte wurden unter Berücksichtigung der RoHS Vorgaben hergestellt.
Die formelle Konformitätserklärung können wir Ihnen auf Anforderung zur Verfügung stellen
FCC Certification
This equipment has been tested and found to comply with the limits for a Class B digital device, pursuant
to part 15 of the FCC Rules. These limits are designed to provide reasonable protection against harmful
interference in a residential installation.
You are cautioned that changes or modification not expressly approved by the party responsible for
compliance could void your authority to operate the equipment.
This device complies with part 15 of the FCC Rules.
Operation is subject to the following two conditions:
1. This device may not cause harmful interference, and
2. This device must accept any interference received, including interference that may cause undesired
operation.
LINDY Herstellergarantie – Hinweis für Kunden in Deutschland
LINDY gewährt für dieses Produkt über die gesetzliche Regelung in Deutschland hinaus eine zweijährige
Herstellergarantie ab Kaufdatum. Die detaillierten Bedingungen dieser Garantie finden Sie auf der LINDY Website
aufgelistet bei den AGBs.
Hersteller / Manufacturer (EU):.
LINDY-Elektronik GmbH LINDY Electronics Ltd
Markircher Str. 20 Sadler Forster Way
68229 Mannheim Stockton-on-Tees, TS17 9JY
GERMANY United Kingdom
Email: info@lindy.com , T: +49 (0)621 470050 postmaster@lindy.co.uk , T: +44 (0)1642 754000
Page 16

Recycling Information
Tested to Comply with
FCC Standards
For Home and Office Use!
WEEE (Waste of Electrical and Electronic Equipment),
Recycling of Electronic Products
Europe, United Kingdom
In 2006 the European Union introduced regulations (WEEE) for the collection and recycling of all waste electrical
and electronic equipment. It is no longer allowable to simply throw away electrical and electronic equipment.
Instead, these products must enter the recycling process.
Each individual EU member state has implemented the WEEE regulations into national law in slightly different
ways. Please follow your national law when you want to dispose of any electrical or electronic products. More
details can be obtained from your national WEEE recycling agency.
Germany / Deutschland
Die Europäische Union hat mit der WEEE Direktive Regelungen für die Verschrottung und das Recycling von
Elektro- und Elektronikprodukten geschaffen. Diese wurden im Elektro- und Elektronikgerätegesetz – ElektroG in
deutsches Recht umgesetzt. Dieses Gesetz verbietet das Entsorgen von entsprechenden, auch alten, Elektro- und
Elektronikgeräten über die Hausmülltonne! Diese Geräte müssen den lokalen Sammelsystemen bzw. örtlichen
Sammelstellen zugeführt werden! Dort werden sie kostenlos entgegen genommen. Die Kosten für den weiteren
Recyclingprozess übernimmt die Gesamtheit der Gerätehersteller.
France
En 2006, l'union Européenne a introduit la nouvelle réglementation (DEEE) pour le recyclage de tout équipement
électrique et électronique.
Chaque Etat membre de l’ Union Européenne a mis en application la nouvelle réglementation DEEE de manières
légèrement différentes. Veuillez suivre le décret d’application correspondant à l’élimination des déchets électriques
ou électroniques de votre pays.
Italy
Nel 2006 l’unione europea ha introdotto regolamentazioni (WEEE) per la raccolta e il riciclo di apparecchi elettrici
ed elettronici. Non è più consentito semplicemente gettare queste apparecchiature, devono essere riciclate. Ogni
stato membro dell’ EU ha tramutato le direttive WEEE in leggi statali in varie misure. Fare riferimento alle leggi del
proprio Stato quando si dispone di un apparecchio elettrico o elettronico.
Per ulteriori dettagli fare riferimento alla direttiva WEEE sul riciclaggio del proprio Stato.
LINDY No 38144
1st Edition, May 2016
www.lindy.com
 Loading...