

Page 1
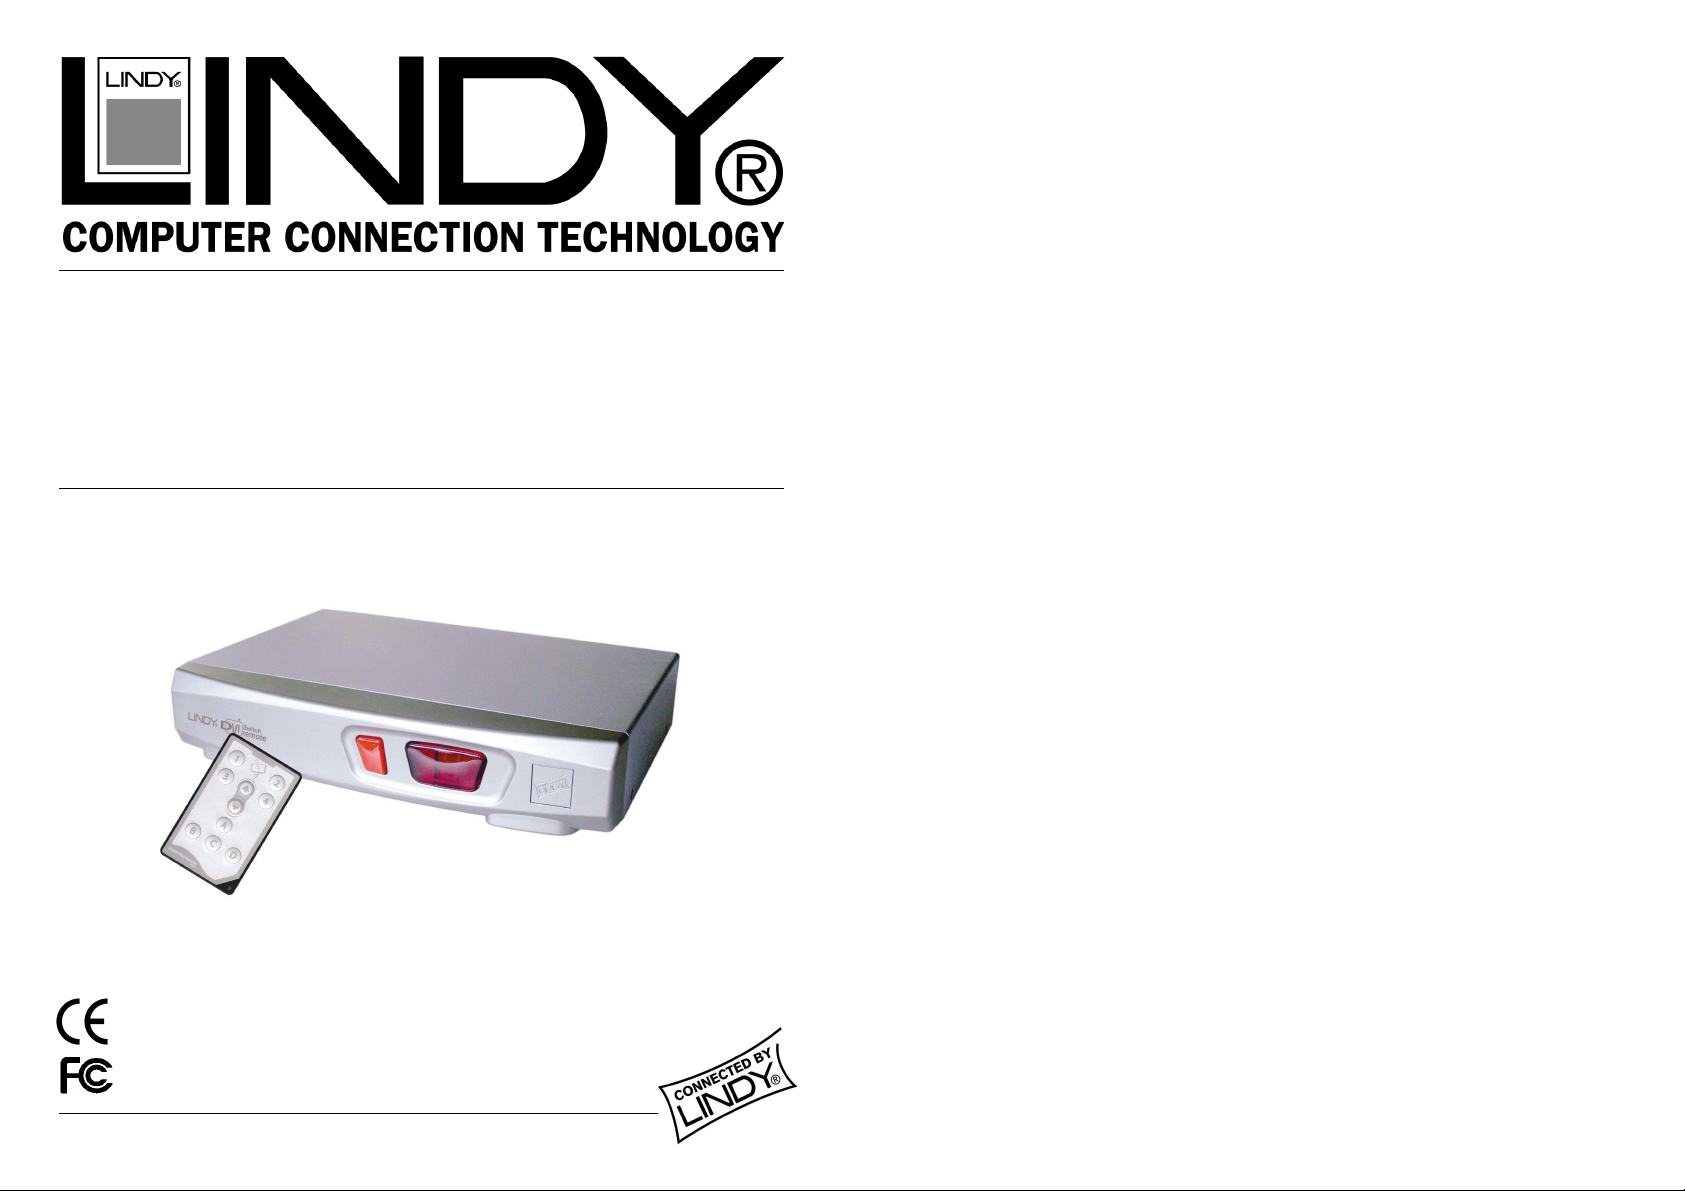
DVI Switch Remote
Installation Manual English
Benutzerhandbuch Deutsch
Manuel Utilisateur Français
Manuale d’uso Italiano
Installation Manual.....Page 2
Benutzerhandbuch.....Page 7
Manuel Utilisateur.......Page 12
Manuale d’uso.............Page 17
LINDY No. 32591 (4 Port)
LINDY No. 32590 (2 Port)
www.lindy.com
© LINDY ELECTRONICS LIMITED & LINDY-ELEKTRONIK GMBH - FIRST EDITION (January 2006)
Page 2
Installation Manual
Display
D
VD Player
PC
Set Top Box
Channel Select
Power Supply
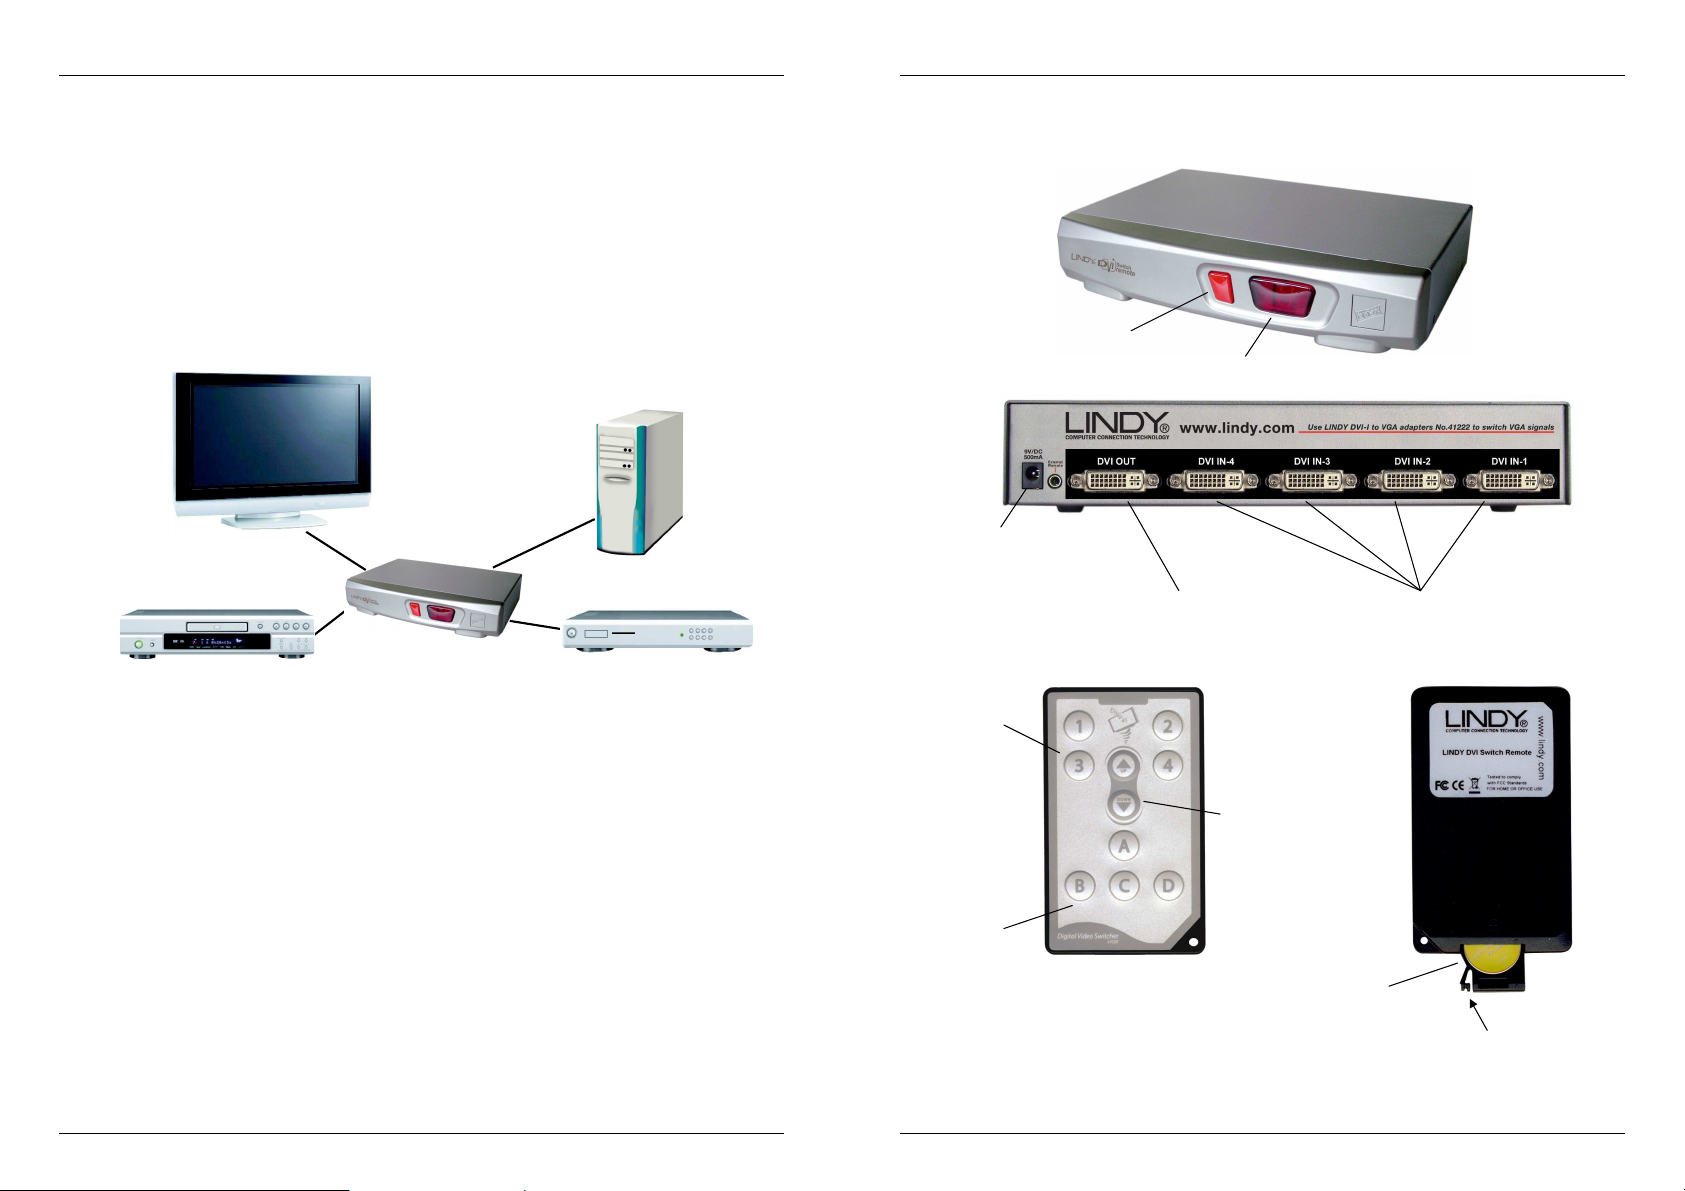
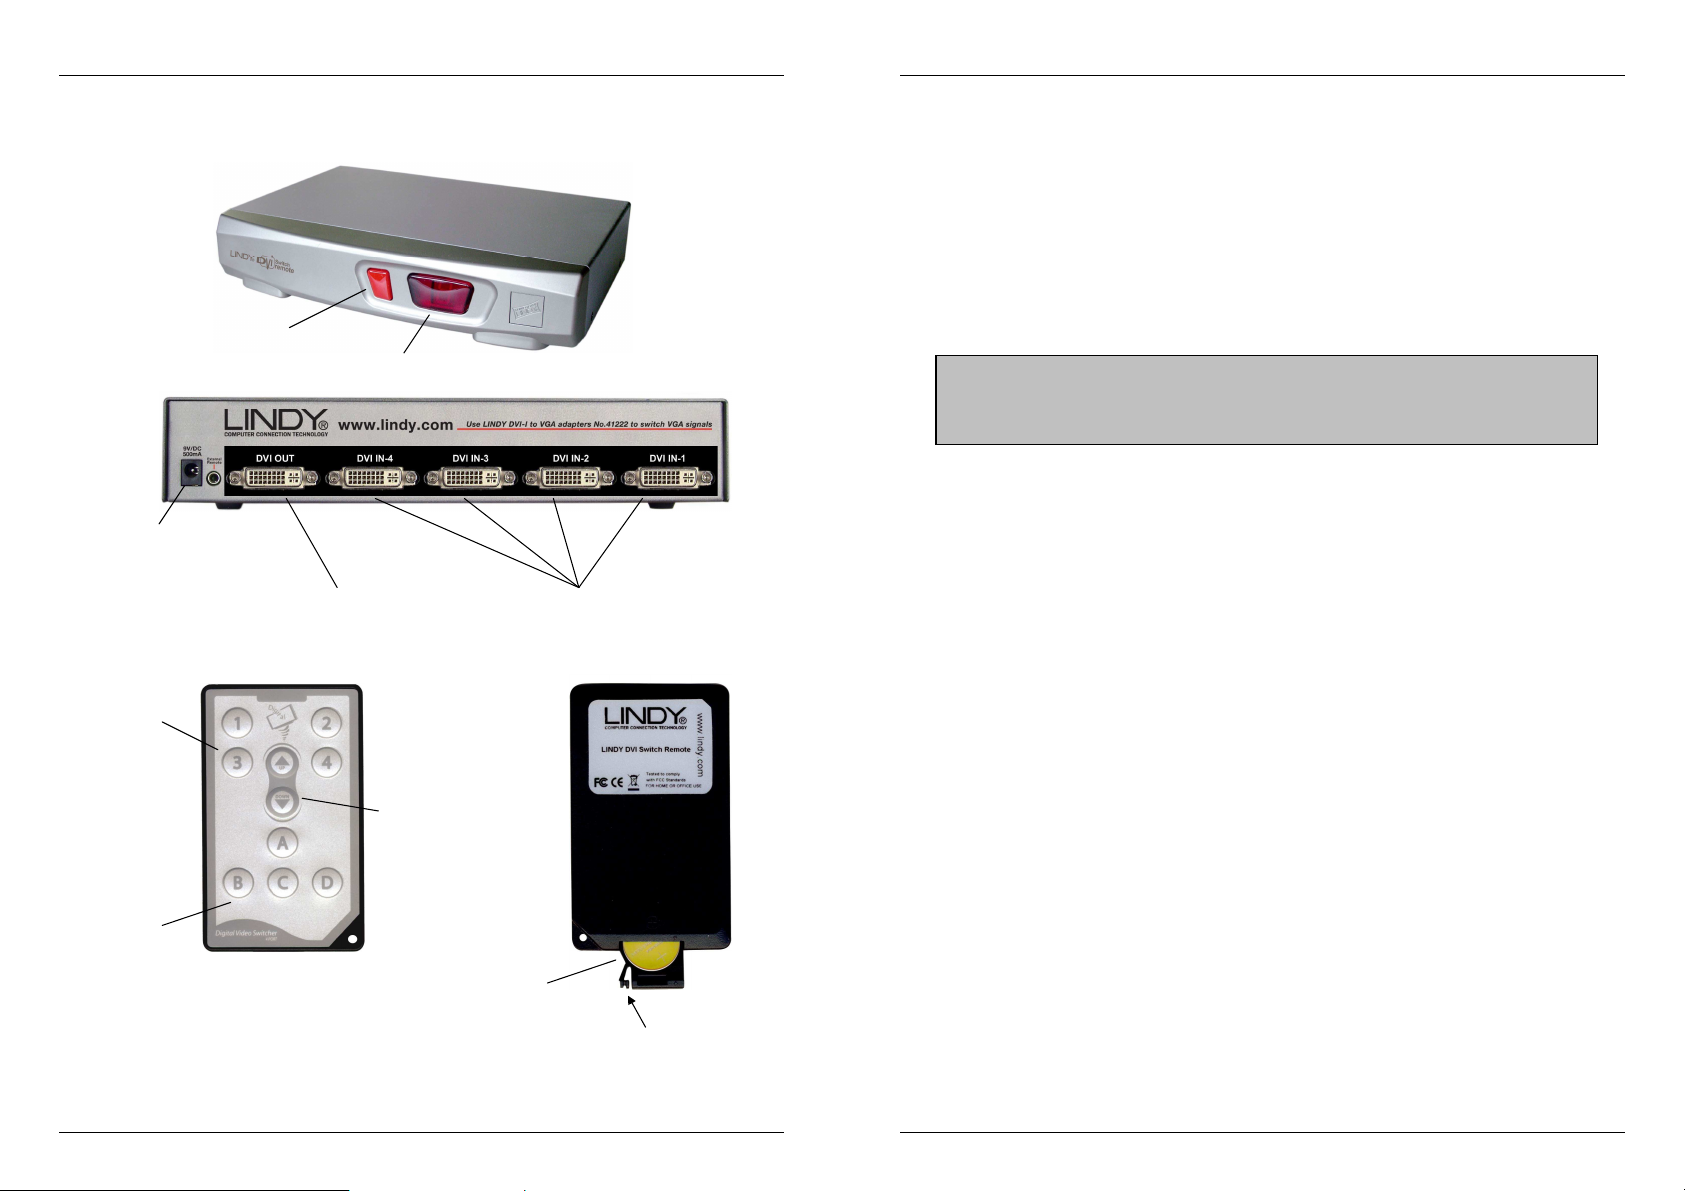
DVI Output port
DVI Input ports
Channel
Channel Select
IR Code
Battery
Squeeze to release
English
Introduction
Thank you for purchasing the LINDY DVI Switch Remote. This high performance switch allows
you to connect multiple DVI/HDMI devices to a single DVI/HDMI equipped TV, projector or TFT
monitor.
Designed for Home Theatre/Cinema installations, the DVI Switch Remote supports HDCP
signals and HDTV resolutions of up to 1080p. VGA analogue sources are also supported, when
used with the correct adapters. Please note, however, that there is no signal conversion from
analogue to digital or vice versa – this means the monitor has to support and auto-switch
between active analogue and digital input by itself. Switching between devices is achieved
using the push button on the switch or the supplied infra-red remote control. The remote control
is designed to allow reconfiguration of the IR codes to resolve IR conflicts with other devices.
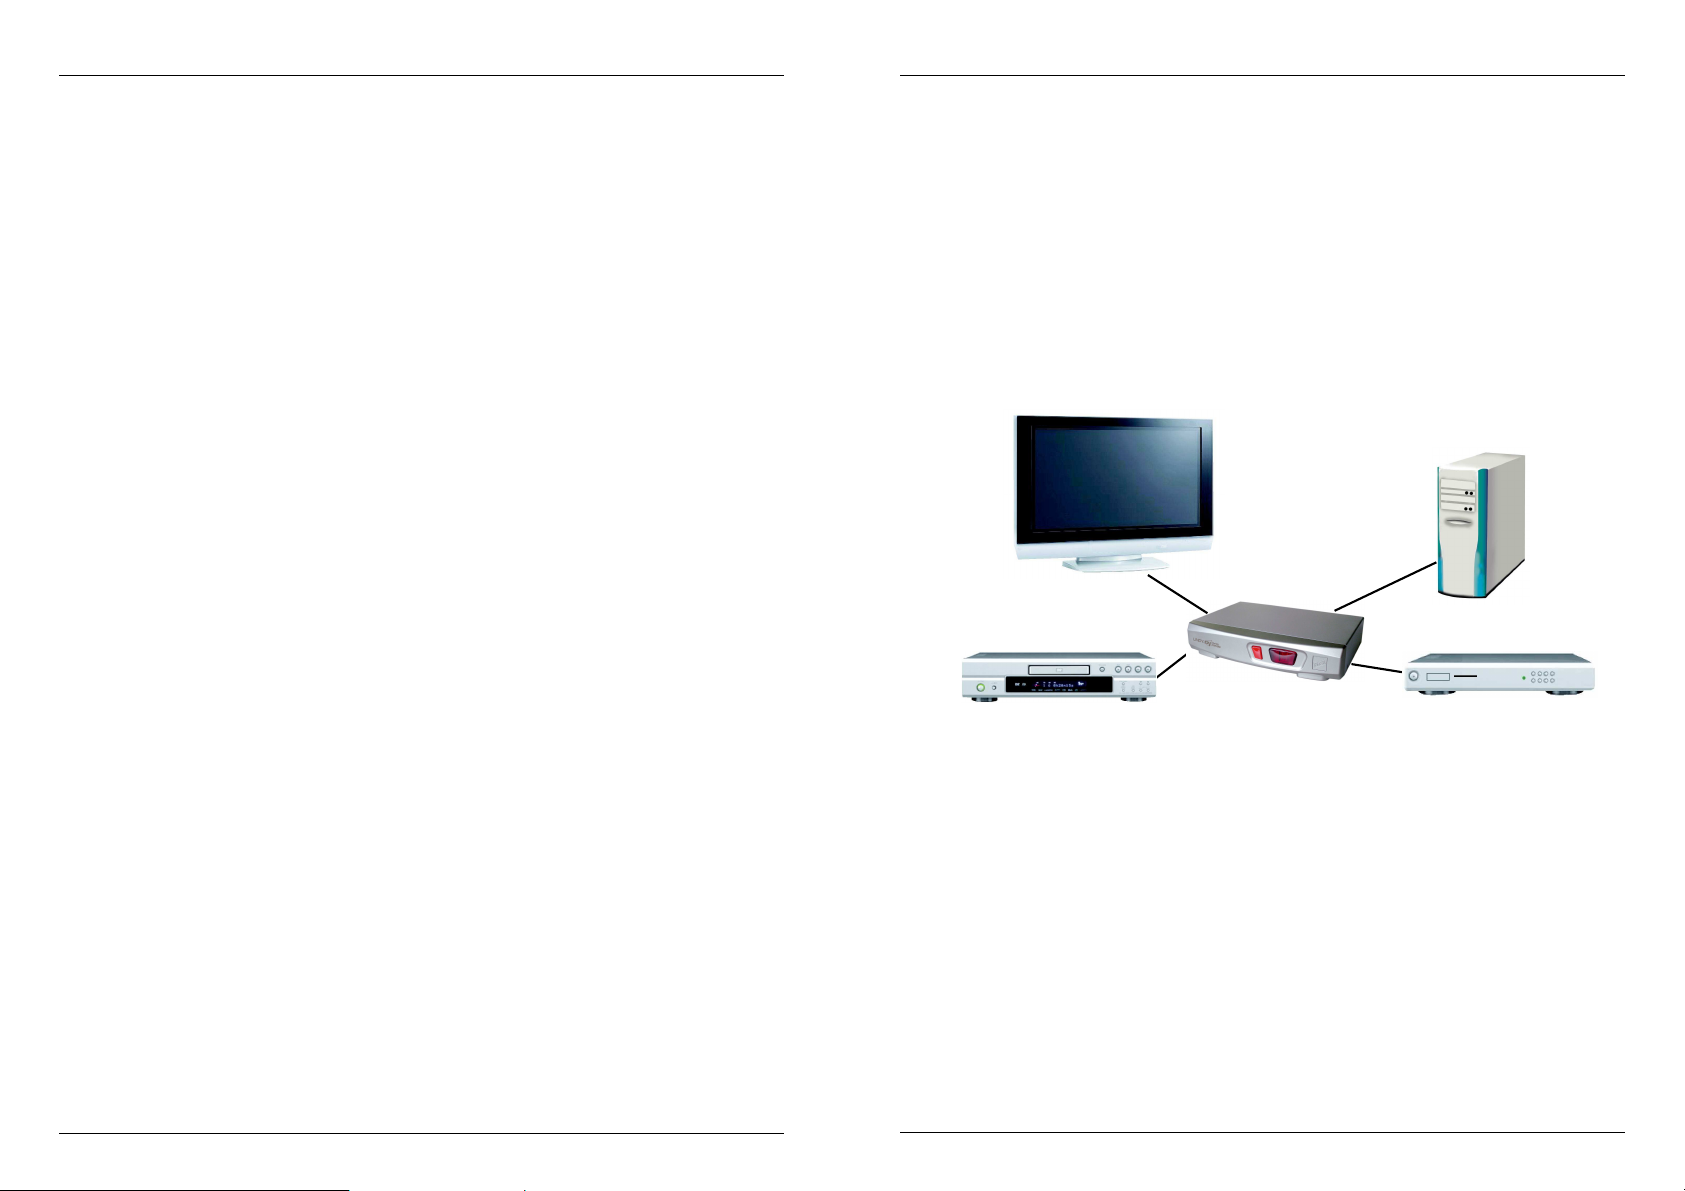
Typical DVI Switch Remote application (4 port model)
Package Contents
LINDY 2 or 4 Port DVI Switch Remote
Infra-red remote control with battery (CR2025)
9V DC, 500mA power supply
This manual
Features
Input Ports: 2/4 x DVI-I Female
Output Ports: 1x DVI-I Female
Device Selection: push button or infra-red remote control
4 selectable IR codes to avoid conflicts with other devices
LED channel display indicates channel selection and IR code
HDCP support
Supports HDTV resolutions of up to 1080p (1920 x 1080)
When used with computers, supports DVI-D Single Link resolutions of up to 1920 x 1200
@60Hz (TFT) and VGA resolutions of up to 2048 x 1536
Installation Manual
Product Information (4 port model shown)
Connection
Buttons
Select Buttons
Push Button
LED Indicator
(For connecting to a
display/projector)
Up/Down
Buttons
(For connecting source
devices e.g. DVD player etc.)
Compartment
English
- 2 -
- 3 -
Page 3

Installation Manual
English
Installation
Note: Please make sure all devices are turned off before beginning the installation
1. Using a DVI cable (not included), connect your display or projector to the DVI OUT port on
the DVI Switch Remote.
2. Connect each of your source devices (e.g. DVD player, PC, Set-Top Box) to the DVI IN
ports.
3. Plug the mains adapter into the power supply socket and then into the mains, to power on
the DVI Switch Remote.
4. Power on all the connected devices.
Note: If your devices are equipped with an HDMI connector you can use DVI to
HDMI cables or adapters. Please be aware, however, that the DVI interface
supports display signals only. Therefore, you will need to make separate audio
connections from your source to your display/amplifier etc.
Operation
You can select the input source in two ways: from the push button on the front of the switch or
via the infra-red remote control.
Front Panel Push Button Selection:
The front panel push button is used to select the current channel. Pressing the button during
normal operation will cause the next channel to be selected.
Remote Control Selection:
Use the channel select buttons to directly select the required channels. The Channel Up/Down
buttons allow you to move up and down the different channels.
Note: It is normal for there to be a short delay when switching between devices as the screen
refreshes.
IR Code Selection:
When the unit is first powered on, the currently selected IR code will be displayed by the LED
indicator (A, b, C, d). The default is A.
If the remote control conflicts with another device you can reconfigure it to use one of four
different IR codes. Press and hold an IR code button (A, B, C or D) until the appropriate letter
(A, b, C, d) is displayed by the LED indicator on the switch.
If the DVI Switch does not respond to the IR remote control, for instance after the battery has
been replaced, simply press and hold any of the IR code buttons until it is registered and
displayed by the LED indicator.
- 4 -
Installation Manual
English
Connecting mixed VGA and DVI equipped devices
Please note: To connect analogue VGA devices, your display must feature either a 15 Way
VGA or a DVI-I (Analogue and digital) input.
When connecting VGA analogue devices, you must use a combination if DVI-I cables and VGA
adapters to make the connection from both the device and the display to the DVI Switch
Remote. This is because DVI-D cables do not support analogue signals.
Example:
1. To connect a PC equipped with a VGA output to the DVI IN port on the DVI Switch Remote,
you can use either:
A 2m VGA TO DVI Adapter Cable (LINDY No. 41206, UK only)
or...
A DVI Analogue to VGA Adapter Cable (LINDY No. 41222) and a
2. To connect the DVI Switch Remote to a display, to enable analogue VGA support, you will
3. Connect the DVI-I cable from the DVI Switch Remote’s DVI OUT port to the DVI-Female
4. Plug the DVI-I/splitter cable into the VGA and/or DVI inputs on your display.
15 Way Male to Male S-VGA Cable
need:
A DVI-I Cable
Or a DVI-I to DVI-D + VGA Splitter Cable (LINDY No. 41219) if connecting to a
display with a separate VGA input.
socket on the splitter cable.
Note: When connecting mixed VGA and DVI equipped devices to the DVI Switch
Remote, we recommend you use a display that supports auto switching between
digital and analogue inputs. If your display does not support this function, you will
have to manually select the required input each time you switch between DVI and
VGA devices.
- 5 -
Page 4
Installation Manual
Display
D
VD Player
PC
Set Top Box
English
Troubleshooting
The DVI Switch Remote does not respond to any commands from the remote control.
If present, remove the plastic tab labelled ‘Remove this tab’ that ships with the remote
control.
Make sure you are in line of sight of the DVI Switch Remote. Make sure that there are no
obstructions which may be blocking the infra-red signal from the remote control.
Try switching channels using the push button on the switch. If this does not work, unplug
and plug all the connections as described in the Installation section earlier in this manual.
Press and hold one of the IR code buttons until the code is displayed on the switch’s front
panel LED.
Try unplugging and plugging all connections as described in the Installation section of this
manual.
Ensure the battery is correctly installed in the remote control. Try a new battery (Type
CR2025)
There is no picture on the display.
Check all connected devices are correctly switched on.
Make sure all cables and connectors are correctly installed.
If a computer is connected, hit a key or move the mouse to wake it from power saving mode.
If connecting mixed DVI/HDMI and VGA devices and your display does not support auto-
switching between analogue and digital inputs, you may have to manually select the correct
line-in input on your display.
A connected DVD Player is set to Pause but restarts playback when the DVI Switch
Remote port is switched
This problem is caused by an incompatibility between the firmware of certain DVD Players
and DVI switch chipsets. Try installing the latest firmware update for your DVD player.
- 6 -
Benutzerhandbuch Deutsch
EINFÜHRUNG
Wir gratulieren Ihnen zum Kauf des LINDY DVI Switch Remote. Wir sind sicher, dass Sie eine
gute Wahl getroffen haben. Sie können diesen Switch an einen Fernseher, Plasma-TV,
Projektor oder Monitor anschließen und zwischen mehreren Signalquellen (DVI/HDMI/VGA
Geräten) hin und her schalten.
Der DVI Switch Remote wurde für den Home Theater- sowie für den Computerbereich
entwickelt. Er unterstützt digitale HDTV Signale einschließlich der HDCP Verschlüsselung bis
zu den aktuell höchsten Auflösungen von 1080p sowie Computer-DVI-Signale bis 1920x1200
bis 60Hz. Analoge VGA Signale werden ebenfalls unterstützt und umgeschaltet, es findet
jedoch keine Signalwandlung analog (VGA) nach digital DVI (DVI-D) statt! Wenn Sie gemischt
analog und digitale Signalquellen verwenden muss Ihr Monitor die Darstellung beider
Signalarten beherrschen!
Das Umschalten erfolgt entweder über die mitgelieferte Fernbedienung oder über die Tasten an
der Front des Switches.
Typischer Anwendungsfall
Lieferumfang
LINDY 2 oder 4 Port DVI Switch Remote
Infrarot Fernbedienung mit Batterie (CR2025)
Netzteil 9V DC, 500mA
Dies Handbuch
Eigenschaften
Eingänge: 2 bzw. 4x DVI-I Buchse
Ausgang: 1x DVI-I Buchse
Kanalumschaltung: Fronttaste oder Fernbedienung
4 umschaltbare IR Codes zur Verhinderung von Konflikten mit anderen Fernbedienungen
LED Kanalanzeige zeigt den gewählten Kanal sowie den Code der Fernbedienung
HDCP Unterstützung
Unterstützt HDTV Auflösungen bis 1080p (1920 x 1080 progressiv)
Unterstützt im Computerbetrieb DVI-D Single Link Auflösungen bis 1920 x 1200 @60Hz
(TFT) und VGA Auflösungen bis 2048 x 1536
- 7 -
Page 5

Benutzerhandbuch Deutsch
Netzteil
-
DVI
Ausgang
DVI
Eingänge
Wahltasten
Kanalwahltasten
Einstellta
sten für
Batterie
-
Zum Öffnen drücken
HINWEIS
:
Produktinformation (Abbildung zeigt das 4 Port Modell 32591)
anschluss
IR Codes
Kanalwahltaste
LED Anzeige
(für TV / Monitor /
Projektor / …)
Kanal
Auf und Ab
(für Signalquellen, PC, DVD
Player, HDTV Receiver, etc.)
fach
Benutzerhandbuch Deutsch
Installation
HINWEIS: Bitte schalten Sie alle Geräte vor der Installation aus!
1. Schließen Sie Ihren Monitor unter Verwendung eines passenden Kabels (nicht enthalten) an
den DVI OUT Anschluss des Switches an.
2. Schließen Sie alle Signalquellen (z.B. DVD-Player, Computer, HDTV-Receiver, …) an die
DVI IN Anschlüsse an.
3. Verbinden Sie das Steckernetzteil mit dem DVI Switch Remote und einer Steckdose.
4. Schalten Sie alle Geräte ein.
Geräte mit HDMI Anschluss können unter Verwendung von HDMI-DVI-D
Adaptern oder entsprechenden Adapterkabeln angeschlossen werden. Beachten Sie
bitte, dass in diesem Falle die Audiosignale via HDMI nicht mit übertragen werden.
Daher müssen Sie für die Audioverbindungen eine separate Kabelverbindung
herstellen.
Betrieb
Sie können die Eingangsquelle entweder über die Fernbedienung oder über die Taste an der
Front des DVI Switch Remote auswählen.
Auswahl über die Taste am DVI Switch Remote:
Durch Druck auf diese Taste werden die Kanäle der Reihe nach durchgeschaltet.
Auswahl über Fernbedienung:
Mit der Fernbedienung können Sie Eingänge/Kanäle direkt auswählen oder der Reihe nach
durchschalten.
HINWEIS: Eine kurze Schaltverzögerung ist besonders bei digitalen Signalen
IR Code Auswahl:
Nach dem ersten Einschalten sind Fernbedienung und Empfänger im DVI Switch Remote auf
Code A eingestellt. Er wird im Displayfenster des DVI Switch Remote angezeigt (A, b, C, d).
Falls Konflikte mit anderen Fernbedienungen auftreten kann der Kanalcode umgestellt werden.
Zur Umstellung halten Sie einen der Knöpfe der Fernbedienung für (A, B, C oder D) gedrückt
bis im Display des Switch (A, b, C, d) angezeigt wird.
Falls der DVI Switch Remote auf die Signale der Fernbedienung nicht reagiert, z.B. nach
Batteriewechsel, drücken und Halten Sie einen der Kanalwahlknöpfe wie soeben beschrieben.
unvermeidbar. Der Monitor muss sich auf das neue Signal einstellen.
- 8 -
- 9 -
Page 6

Benutzerhandbuch Deutsch
Anschluss gemischter Signalquellen analog & digital
HINWEIS: Wenn Sie analoge VGA Signalquellen anschließen wollen, muss auch ihr Monitor
den VGA Anschluss unterstützen! Z.B. via VGA HD-15 Buchse oder via DVI-I Buchse am
Monitor.
Wenn Sie analoge VGA Signale verwenden wollen müssen Sie entweder DVI-I Kabel oder
passende Adapter oder Adapterkabel DVI-I auf VGA verwenden! DVI-D Kabel unterstützen
keine analogen Signale!
Besipiele:
1. Um einen PC mit VGA Ausgang (HD-15 Buchse) an den DVI IN Port des DVI Switch
Remote anzuschließen benötigen Sie VGA-DVI-I Adapter und ein DVI-I bzw. VGA Kabel.
2. Um das Display an den DVI-I Ausgang des DVI Switch Remote anzuschließen brauchen Sie
je nach Eingangsbuchsen am Display verschiedene Kabel:
i) Monitor mit DVI-I Buchse : Verwenden Sie ein DVI-I Kabel
ii) Monitor mit getrennten VGA und DVI-D Buchsen: Sie benötigen das Splitterkabel
(LINDY Art.Nr. 41219) und ein DVI-I Kabel. Schließen Sie das Splitterkabel an die
VGA und DVI-D Eingänge Ihres Monitors an und verbinden Sie den DVI Switch
Remote dann mit dem DVI-I Kabel mit dem Splitterkabel.
HINWEIS: Wenn Sie gemischt analoge und digitale Signale einspeisen sollte Ihr
Monitor die automatische Umschaltung zwischen aktivem analogen und digitalen
Signal beherrschen. Wenn er dies nicht beherrscht müssen Sie den Monitor jeweils
von Hand zwischen digitalem und analogem Eingang umschalten.
Benutzerhandbuch Deutsch
Fehlersuche
Der DVI Switch Remote reagiert nicht auf Kommandos der Fernbedienung.
Entfernen Sie von der Fernbedienung den Plastikstreifen mit der Aufschrift ‘Remove this
tab’ , falls noch vorhanden.
Die Infrarot-Fernbedienung funktioniert nur bei freier Sichtverbindung.
Versuchen Sie die Kanäle durch Drücken der Taste an der Front des DVI Switch Remote zu
wechseln. Falls das auch nicht funktioniert, ziehen Sie alle Kabel und das Netzteil vom DVI
Switch ab und schließen Sie danach alle Geräte wieder neu an (Siehe Kapitel Installation).
Drücken Sie eine der Knöpfe (A, B, C, D) der Fernbedienung bis im Display des DVI Switch
Remote (A, b, C oder d) angezeigt wird.
Falls dies nicht funktioniert ersetzen Sie die Batterie in der Fernbedienung (Type CR2025).
Der Monitor zeigt kein Bild.
Prüfen Sie ob die angeschlossenen Geräte korrekt eingeschaltet sind.
Prüfen Sie alle Kabelanschlüsse.
Falls das Problem bei einem Computer auftritt, stellen Sie sicher, dass der Computer nicht
im Power Save Modus ist, wecken Sie ihn gegebenenfalls auf.
Beim gemischten DVI/HDMI und VGA Anschluss beachten Sie unbedingt die obigen
Ausführungen! Wenn Ihr Monitor das automatische Umschalten nicht beherrscht bleibt Ihnen
keine andere Wahl als den Monitor von Hand zwischen analog und digital umzuschalten.
(Oder Sie verwenden einen anderen Monitor, der dies beherrscht.)
Wenn am DVI Switch Remote Kanäle umgeschaltet werden wechselt ein
angeschlossener HDMI DVD Player aus dem PAUSE- in den Playback-Modus
Dies ist eine bekannte Inkompatibilität zwischen vereinzelten DVD Playern (nicht alle
Modelle einer Serie!) und DVI Umschalter Chipsets. Versuchen Sie für Ihren DVD Player
ein Firmware Update vom Hersteller zu erhalten und spielen Sie dies ein.
- 10 -
- 11 -
Page 7

Manuel Utilisateur Français
Affich.
Lecteur DVD
PC
Amplificateur
Sélection du
Connexion
Port de sortie DVI
Port d’entrée DVI (source DVI
Bouton de
Sélection
Bouton de
Comp.
Appuyez pour relâcher
Introduction
Merci d’avoir acheté le LINDY DVI Switch Remote. Ce commutateur haute performance vous
permet de connecter plusieurs périphériques DVI/HDMI vers un seul récepteur DVI/HDMI
comme un téléviseur, un projecteur ou un moniteur LCD.
Conçu pour les installations Home Cinema, le commutateur DVI Switch Remote supporte les
signaux HDCP et des résolutions HDTV jusqu’à 1080p. Les sources analogiques VGA sont
également supportées, lors de l’utilisation avec les adaptateurs adéquats. Veuillez remarquer
qu’il n’y a pas de conversion de signal analogique vers numérique et vice versa – cela signifie
que le moniteur doit supporter la commutation automatique entre un signal analogique et
numérique. La commutation entre les périphériques est assurée en appuyant sur un bouton sur
le commutateur ou par la télécommande infrarouge fournie. La télécommande est conçue pour
ne pas entrer en conflit avec les autres périphériques infrarouges éventuellement connectés.
Application typique du commutateur DVI Switch Remote (modèle 4 ports)
Contenu de l’emballage
LINDY DVI Switch Remote 2 ou 4 ports
Télécommande infrarouge avec pile (CR2025)
Alimentation 9V DC, 500mA
Le manuel
Caractéristiques
Ports d’entrée: 2/4 x DVI-I Femelle
Ports de sortie: 1x DVI-I Femelle
Sélection du périphérique: bouton poussoir ou télécommande infrarouge
4 codes infrarouges sélectionnables pour éviter les conflits avec d’autres périphériques
Affichage du canal sélectionné par LED
Support HDCP
Supporte les résolutions HDTV jusqu’à 1080p (1920 x 1080)
Lors de l’utilisation avec un ordinateur, les résolutions DVI-D Single Link supportées sont de
1920 x 1200 @60Hz (TFT) et VGA jusqu’à 2048 x 1536 maximum
- 12 -
Manuel Utilisateur Français
Information produit (modèle 4 ports affiché)
sélection code IR
Alimentation
des ports
port
Indicateur LED
(connexion projecteur
ou téléviseur)
sélection de
ports
- 13 -
comme lecteur DVD, etc…)
pile
Page 8

Manuel Utilisateur Français
Remarque:
Installation
Remarque: Assurez-vous d’éteindre tous les périphériques avant de commencer l’installation.
1. En utilisant un câble DVI (non inclus), connectez votre affichage ou projecteur au port DVI
OUT du DVI Switch Remote.
2. Connectez chacun de vos périphériques source (ex. lecteur DVD, PC) au port DVI IN.
3. Connectez l’adaptateur d’alimentation et branchez-le sur le DVI Switch Remote.
4. Allumez tous les périphériques connectés.
Si vos périphériques sont équipés d’un connecteur HDMI, vous pouvez
utiliser des câbles ou adaptateurs DVI vers HDMI. Attention de vérifier que le
connecteur DVI laisse passer uniquement un signal vidéo et pas audio.
Utilisation
Vous pouvez sélectionner la source DVI de deux manières: à partir du bouton poussoir en
façade, ou par la télécommande infrarouge fournie.
Bouton de sélection en façade:
Le bouton poussoir en façade est utilisé pour sélectionner un port. Si vous appuyez dessus, le
prochain port va être sélectionné.
Contrôle par télécommande:
Utilisez le bouton de sélection du port pour sélectionner directement les ports. Le bouton
haut/bas vous permet de passer en revue les différents ports.
Remarque: Il est normal qu’il y ait un léger délai de rafraîchissement d’affichage entre les
commutations.
Sélection du code IR:
Lorsque le commutateur est alimenté pour la première fois, le code sélectionné par défaut sera
affiché par l’indicateur LED (A, b, C, d). La valeur par défaut est A.
Si la télécommande est en conflit avec un autre périphérique, vous pouvez utiliser un code IR
différent. Pressez et restez appuyé sur le bouton code IR (A, B, C ou D) jusqu’à ce que la lettre
appropriée (A, b, C, d) est affichée par l’indicateur LED sur le commutateur.
Si le commutateur DVI ne répond pas à la télécommande IR, par exemple après que la pile ait
été remplacée, appuyez simplement et gardez la touche enfoncée jusqu’à l’affichage du code
IR sur l’afficheur LED.
- 14 -
Manuel Utilisateur Français
Connexion de périphériques VGA et DVI
Remarque: pour connecter des périphériques VGA analogiques, votre affichage doit disposer
d’une entrée HD-15 ou DVI-I (analogique et numérique).
Lorsque vous connectez des périphériques VGA analogiques, vous devez utiliser une
combinaison d’un câble DVI-I avec adaptateurs VGA pour établir la connexion vers le
périphérique et l’affichage DVI sur le DVI Switch Remote. Cela vient du fait que les câbles DVID ne supportent pas les signaux analogiques.
Exemple:
1. Pour connecter un PC équipé d’une sortie VGA vers l’entrée DVI IN du DVI Switch Remote,
vous pouvez utiliser soit:
Un câble adaptateur 2m VGA vers DVI (LINDY No. 41206, UK seulement)
ou...
Un câble DVI Analogique vers VGA (LINDY No. 41222) et un
2. Pour connecter le DVI Switch Remote sur un affichage et pour activer le support VGA , vous
3. Connectez le câble DVI-I depuis le port DVI OUT du DVI Switch Remote vers la connexion
4. Connectez le câble splitter DVI-I à l’entrée VGA et/ou DVI.
câble SVGA 15 broches Mâle/Mâle
aurez besoin :
Un câble DVI-I
Ou un câble Splitter DVI-I vers DVI-D + VGA (LINDY No. 41219) si vous le
connectez sur un affichage avec entrée VGA séparée.
DVI-Femelle du câble splitter.
Remarque: Lors de la connexion d’équipements mixtes VGA et DVI sur le DVI
Switch Remote, nous vous recommandons d’utiliser un affichage supportant la
commutation automatique entre les périphériques numériques et analogiques.
Si votre affichage ne supporte pas cette fonction, vous devrez à chaque fois
sélectionner manuellement l’entrée à utiliser entre les périphériques DVI et VGA.
- 15 -
Page 9

Manuel Utilisateur Français
Monitor
Lettore
DVD
PC
Ricevitore
Problèmes Rencontrés
Le DVI Switch Remote ne répond à aucune commande du contrôle distant.
Si présent, retirez la partie plastique de protection sur la télécommande.
Assurez-vous d’être à portée du DVI Switch Remote. Vérifiez qu’il n’y ait pas d’objets
empêchant le signal infrarouge de passer.
Essayez de commuter les ports en utilisant le bouton en façade du commutateur.
Si cela ne fonctionne pas, déconnectez et reconnectez toutes les connexions comme décrit
dans la section Installation au début du manuel.
Restez appuyé sur le bouton de réglages des codes IR jusqu’à ce que le code soit affiché
sur la LED en façade.
Essayez de déconnecter et reconnectez tous les ports comme indiqué dans la section
Installation de ce manuel.
Assurez vous que la pile est installée correctement dans la télécommande.
Essayez une nouvelle pile si cette dernière ne fonctionnait pas (Type CR2025)
Il n’y a pas d’affichage.
Vérifiez si tous les périphériques sont allumés correctement.
Assurez-vous d’avoir connecté correctement les câbles et connecteurs.
Si un ordinateur est connecté, appuyez sur une touche du clavier ou bougez la souris pour
sortir du mode économie d’énergie.
Si vous connectez des périphériques mixtes DVI/HDMI et VGA et que votre affichage ne
supporte pas la commutation automatique du mode d’affichage, vous devrez sélectionner
manuellement le type de source.
Un lecteur DVD connecté est sur Pause, mais la lecture continue lors d’une commutation
avec le DVI Switch Remote
Ce problème est causé par une incompatibilité entre le BIOS et certains lecteurs DVD et
chipsets DVI. Essayez d’installer le dernier BIOS pour votre lecteur DVD.
Manuale d’uso Italiano
Introduzione
Grazie per aver scelto il LINDY DVI Switch Remoto. Questo switch consente connessioni
multiple di apparati DVI/HDMI a un unico televisore, proiettore o monitor TFT HDMI/DVI.
Progettato per installazioni Home Theatre/Cinema , questo Switch DVI supporta segnali HDCP
e HDTV fino a 1080p. Sono supportati anche segnali VGA, se si utilizza l’adattatore corretto . In
ogni caso, non è possible convertire un segnale digitale in un segnale analogico e vice versa –
ciò significa che il monitor deve poter supportare e commutare in automatico un segnale
analogico attivo e un segnale digitale. La commutazione tra i dispositivi avviene schiacciando il
pulsante sullo switch o tramite il telecomando a infrarossi incluso nella fornitura. Il telecomando
è progettato per consentire la riconfigurazione del codice IR per evitare conflitti con altri
dispositivi.
Applicazione tipica dello Switch DVI Remoto (4 porte)
Contenuto
Switch DVI Remoto 2 o 4 porte
Telecomando a infrarossi con batteria (CR2025)
Alimentatore 9V DC, 500mA
Questo manuale
Caratteristiche
Porte in input: 2/4 x DVI-I Femmina
Porte in output: 1x DVI-I Femmina
Selezione dispositivi: tasto sullo switch o telecomando
4 codici IR per evitare conflitti
LED: selezione canale e codice IR
Supporto HDCP
Supporta risoluzioni HDTV fino a 1080p (1920 x 1080)
Se si utilizza con computer, supporta risoluzioni DVI-D Single Link fino a 1920 x 1200
@60Hz (TFT) e risoluzioni VGA fino a 2048 x 1536
- 16 -
- 17 -
Page 10
Manuale d’uso Italiano
Tasto per
Porta
Porta DVI out
Porte DVI In
Tasti canali
Tasti di selezi
one
Tasti selezione
Vano per
Schiacciare per aprire
N.B.:
Informazioni sul prodotto (modello a 4 porte)
alimentazione
canali
del codice IR
commutare
LED di stato
(per connessione a un
display/monitor)
Avanti/indietro
(per connessioni a
dispositivi come lettori DVD
batteria
Manuale d’uso Italiano
Installazione
Assicurarsi che tutti i dispositivi siano spenti prima di iniziare l’installazione.
1. Utilizzare un cavo DVI (non incluso) per collegare un monitor o proiettore alla porta DVI OUT
sullo Switch DVI Remoto.
2. Collegare i dispositivi (lettore DVD, PC, ricevitore satellitare) alle porte DVI IN.
3. Collegare l’alimentatore allo Switch DVI Remoto.
4. Accendere tutti i dispositivi collegati.
se i dispositivi da collegare hanno il connettore HDMI, potete usare un cavo o
un adattatore DVI a HDMI. Accertarsi in ogni caso che l’interfaccia DVI supporti solo
segnali video. In questo caso, è necessario effettuare un collegamento dedicato per
il segnale audio dal dispositivo al monitor, amplificatore etc.
Utilizzo
Potete selezionare i dispositivi collegati in due modi: schiacciando il tasto sullo switch o tramite
il telecomando a infrarossi.
Commutazione tramite tasto sullo switch:
Il tasto rosso sullo switch serve per selezionare il canale da usare.
Commutazione tramite telecomando:
Utilizzare i tasti numerici per selezionare direttamente i canali desiderati. I tasti Avanti/indietro
consentono di passare al canale successivo o precedente.
N.B.: è normale che ci sia un leggero ritardo nella commutazione tra dispositivi
Selezione del codice IR:
Quando viene acceso per la prima volta lo Switch, il codice selezionato viene visualizzato dagli
indicatori LED (A, b, C, d). Di default viene visualizzato A.
Se si crea conflitto tra il telecomando e un dispositivo collegato è possible riconfigurarlo
utilizzando un altro codice IR. Schiacciare il tasto e attendere che venga visualizzata la lettera
scelta (A, b, C, d) sul LED dello switch.
Se lo Switch non risponde al telecomando, per esempio anche dopo aver sostituito la batteria,
tenere premuto il tasto e attendere che il codice IR venga registrato e visualizzato dall’indicatore
LED.
- 18 -
- 19 -
Page 11

Manuale d’uso Italiano
N.B.:
e uno
VGA.
Collegare dispositivi VGA e DVI
N.B.: per collegare dispositivi VGA analogici, il monitor deve avere un ingresso VGA 15 poli o
un ingresso DVI-I (Analogico e digitale) .
Se si collegano dispositivi con conettore VGA, è necessario un cavo DVI-I e un adattatore VGA
per consentire la connessione dal dispositivo e dal monitor allo Switch DVI Remoto. I cavi DVID non supportano segnali analogici.
Esempio:
1. Per collegare un PC con una porta VGA all’ingresso DVI IN sullo Switch DVI Remoto,
occorre:
Un adattatore da DVI Analogico a VGA (LINDY No. 41222) e un
2. Per collegare lo Switch DVI Remoto a un monitor, per abilitare il supporto VGA,
3. Collegare il cavo DVI-I dalla porta DVI OUT dello Switch DVI Remoto al connettore DVI-I
4. Inserire il cavo divisore DVI-I nelle porte VGA e/o DVI del monitor.
Cavo S-VGA 15 pin Maschio/Maschio
occorre:
Un cavo DVI-I
O un cavo divisore da DVI-I a DVI-D + VGA (LINDY No. 41219), se collegato a un
monitor con un ingresso VGA aggiuntivo.
femmina del cavo divisore.
Se si collegano dispositivi sia VGA che DVI allo Switch DVI Remoto, Vi
consigliamo di usare un monitor che abbia la funzione auto switching tra segnali
digitali e analogici. Se il Vostro monitor non supportasse questa funzione, dovrete
selezionare manualmente il segnale ogni volta che si commuta tra un dispositivo DVI
Manuale d’uso Italiano
Risoluzione dei problemi
Lo Switch DVI Remoto non risponde ai comandi del telecomando.
Rimuovere la linguetta in plastica con scritto ‘Remove this tab’ , se non fosse stata ancora
rimossa.
Assicurarsi che non ci siano ostacoli che possano bloccare il segnale a infrarossi tra il
telecomando e lo Switch DVI Remoto.
Provare a commutare schiacciando il tasto sullo switch. Se non dovesse funzionare,
scollegare e ricollegare tutte le connessioni già effettuate come descritto nel paragrafo
Installazione manuali questo manuale.
Tenere premuto il tasto del codice IR fino a quando viene visualizzato sul display dello
switch.
Provare a scollegare e ricollegare tutte le connessioni come descritto nel paragrafo
Installazione di questo manuale.
Assicurarsi che le batterie del telecomando siano installate correttamente. Cambiare le
batterie (CR2025)
Non viene visualizzato niente sul display.
Controllare che tutti i dispositivi collegati siano accesi.
Assicurarsi che tutti i cavi e connettori siano installati correttamente.
Se è collegato un computer, schiacciare un tasto della tastiera o muovere il mouse per
disattivare lo standby.
Se sono collegati dispositivi DVI/HDMI e VGA e il monitor non supporta la funzione auto-
switching tra un segnale analogico e uno digitale, occorre selezionare manualmente il tipo di
segnale in entrata sul display.
Un lettore DVD collegato è in pausa ma si riavvia quando viene selezionata la porta dello
Switch DVI Remoto
Questo problema è causato da un’incompatibilità tra il firmware del lettore DVD e il chipset dello
Switch DVI. Provare ad installare il firmware più recente per aggiornare il Vostro lettore DVD.
- 20 -
- 21 -
Page 12

Radio Frequency Energy, Certifications
Shielded cables must be used with this equipment to maintain compliance with radio frequency
energy emission regulations and ensure a suitably high level of immunity to electromagnetic
disturbances.
FCC Warning
This equipment has been tested and found to comply with the limits for a Class B digital device,
pursuant to part 15 of the FCC Rules. These limits are designed to provide reasonable
protection against harmful interference in a residential installation.
This equipment generates, uses, and can radiate radio frequency energy and, if not installed
and used in accordance with the instructions, may cause harmful interference to radio
communications. However, there is no guarantee that interference will not occur in a particular
installation. If this equipment does cause harmful interference to radio or television reception,
which can be determined by turning the equipment off and on, the user is encouraged to try to
correct the interference by one or more of the following measures:
Reorient or relocate the receiving antenna
Increase the separation between the equipment and receiver
Connect the equipment into an outlet on a circuit different from that to which the receiver is
connected
Consult the dealer or an experienced technician for help
You are cautioned that changes or modification not expressly approved by the party responsible
for compliance could void your authority to operate the equipment.
This device complies with part 15 of the FCC Rules.
Operation is subject to the following two conditions:
1. This device may not cause harmful interference, and
2. This device must accept any interference received, including interference that may cause
undesired operation.
LINDY No’s 32590 & 32591
1st Edition January 2006
www.lindy.com
 Loading...