

Page 1
USB 2.0 External HDD Housing
FireWire External HDD Housing
Installation Guide English
Installationsanleitung Deutsch
Manu el Ut ilisateu r Français
Manuale d’uso Italiano
LINDY Model No. 42912 USB 2.0/1. 1 & Fi r eWIr e
LINDY Model No. 20697 Versi on USB 2.0/ 1. 1 ALI Chi p
LINDY Model No. 20688 Versi on USB 2.0/ 1. 1 ISD Chip
LINDY Model No. 20689 Versi on FireWire (1394)
www.LINDY.com
© LINDY ELECTRONICS LIMITED & LINDY-ELEKTRO NIK GMBH - 3rd EDITION ( JUL 2003)
Introduction ENGLISH
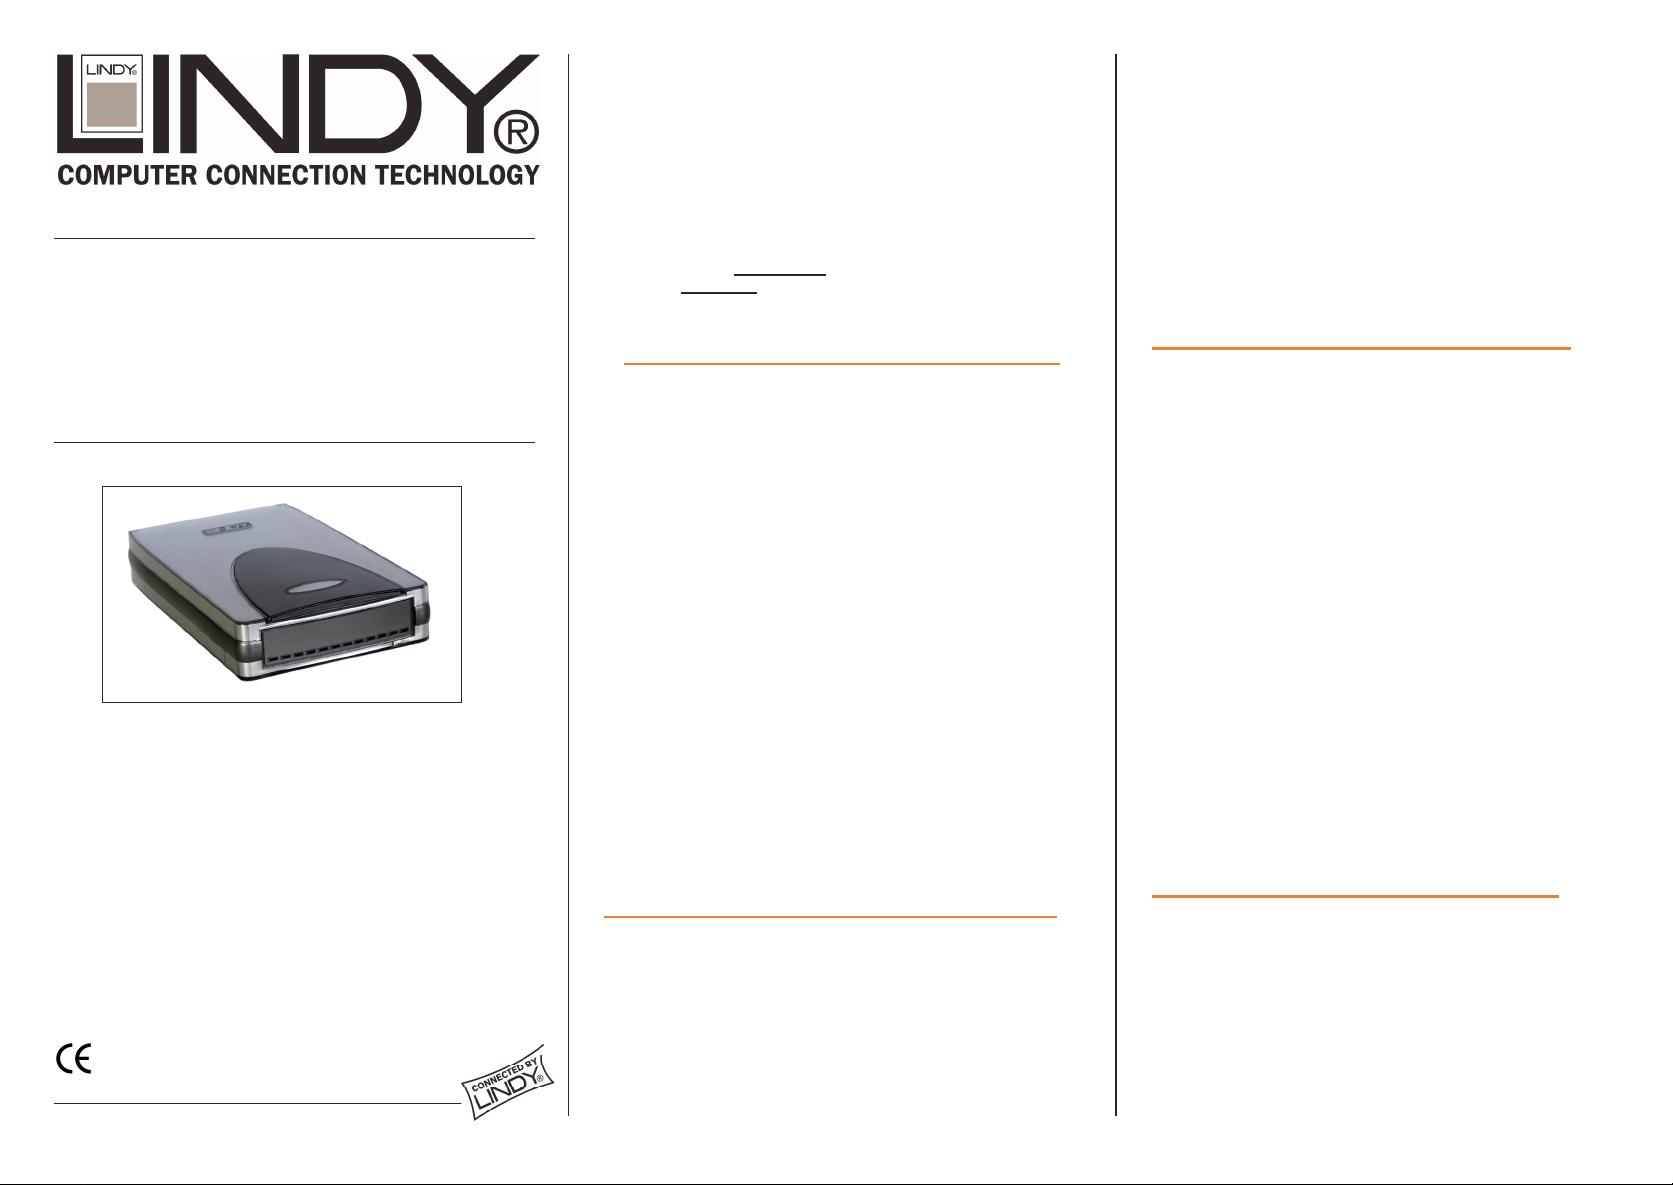
The LINDY Externa l HDD (Hard Di sk Drive) Box is designed to
support inexpe nsiv e 3.5” HDD's with an IDE/ATA interface. The
drive box makes it easy to share HDD’s and acce ss large amounts
of data quickly and easily between several computers in different
locatio n s wi th out the n eed for network access. Both the USB 2.0
and FireWire Interfaces support high speed data transfer rates that
are approx imately the same sp eed as modern HDD’s themselves.
USB 2.0 version is compatible with USB 1.1 with reduced spee d.
Please refer to the user manual
installation of drivers
Caution: During an active data transfer the connection to the
for each operating system.
computer must not be unplugged!
for general operatio n and the
Introduction FRANCAIS
Le boîtier externe HDD LINDY (Disque Dur) est conçu pour
supporter des disques durs 3.5” HDD’s IDE/ATA. Le boît ier permet
de partager facilement vo s disques durs, ave c un dé bit performant
et une grande mobilité sa ns connexion réseau néce ssaire. Le
modèle USB 2.0 est compatible USB 1.1.
Pour l’installation des pilotes et l’utilisation av ec les différents
systèmes d’exploitation, veuillez suivre les instructions dans le
MANUEL UTILISATEUR.
Il est vivement recommandé de ne pas déconnecter le
périphérique USB lorsqu’il effectue un transfert !
Cela peut causer une perte de données!
Failure t o comply may cau se t he loss of d at a!
Contents
• LINDY External 3.5” HDD Box
• 2 met al HDD mounting rails complete with 8 fixing screws
• 2 plastic fixing strips to connect top and bottom case cov er
• This manual and a User Manua l
• Driver for USB 2.0 (not for FireWire Box)
• USB 2.0 or/and FireWire cable
• Switching power supply and mains cable
Bitte beachten DEUTSCH
Das externe LINDY Festplattengehäuse ist für die Verwendung mit
günstigen 3,5” Festplatten mit IDE/ATA Schnittstelle entwickelt
worden. Mit ihm kann bequem und einfach auf große
Datenmengen mit höchster Performance von verschiedenen
Rechnern und an unterschiedlichen Orten ohne
Netzwerkv erbindung zugegriffen werden. Sow ohl USB 2.0 als
auch FireWire unterstützen Datentra nsferraten, die nahezu
identisch sind mit der Performance moderner Festplatten selbst.
Beachten Sie das beiliegende USER MANUAL zur Installation der
eventuell notwendigen Treiber für die unterschiedlichen
Betriebssysteme sowie für den Betrieb der Festplattengehäuse.
Beachten Sie bitte, dass während eines aktiven
Datentransfers die Verbindung zum Rechner nicht getrennt
werden da rf!
Bei Nichtbeachtung droht Datenverlust!
Lieferumfang
• LINDY External 3.5” HDD Box
• 2 Metalle inbauschienen für die Festplatte und 8 Schrauben
• 2 Kunststoffschienen zur Verbindung der Gehäusehä lften
• Diese Installationsanleitung und ein USER MANUAL
• Treiber CD für USB 2.0 (Nicht bei FireWire Box)
• USB 2.0- oder/und FireWire-Kabel
• ECO-Netzteil (100-240V) und Netzkabel
Contenu
• Boîtier externe 3.5” LINDY
• 2 rail s de montage métal HDD et un sachet de 8 vis
• 2 rails de fixation pour la fermeture du boîtier
• Le manuel utilisateur
• Pilote USB 2.0 (pas pour boîtier FireWire)
• Câble USB 2.0 ou/et FireWire
• Alimentation secteur et câbles
Introduzione ITALIANO
Il LINDY External HDD (Hard Disk Drive) Box è progettato per
ospitare dischi fissi da 3. 5” econ omici con in ter faccia IDE/ATA.
Permette di condividere facilmente grandi quantità di dati con le
migliori performance permesse da ogni computer senza la
necessità di complessi collegamenti in rete. Sia l’interfaccia USB
2.0 che la FireWire supporta altissimi transfer rates che eguagliano
le prestazioni dei dischi fissi stessi. La versione con interfaccia
USB 2.0 è compatibile con l’interfaccia USB 1.1 permettendo
ovviamente transfer rates molto inferiori.
Per installare i drivers e per l’utilizzo seguite le istruzioni dello
USER MANUAL per i diversi sistemi operativi supportati.
ATTENZIONE: durante il trasferimento dei dati la connessione
con il PC non va modificata.
Ciò potrebbe causare la perdita di dati!
Contenuto della confezione
• LINDY External 3.5” HDD Box
• 2 rotaie di met allo per i l montaggi o degli HDD e 8 vit i.
• 2 rotaie di fissaggio per agganciare il guscio superiore della
copertura del case a quello inferiore.
• Questo manuale e uno User Manual
• Driver per USB 2.0 (non nella versione FireWire)
• Cavo USB 2.0 o/e FireWire.
• Cavo di alime ntazione
Page 2
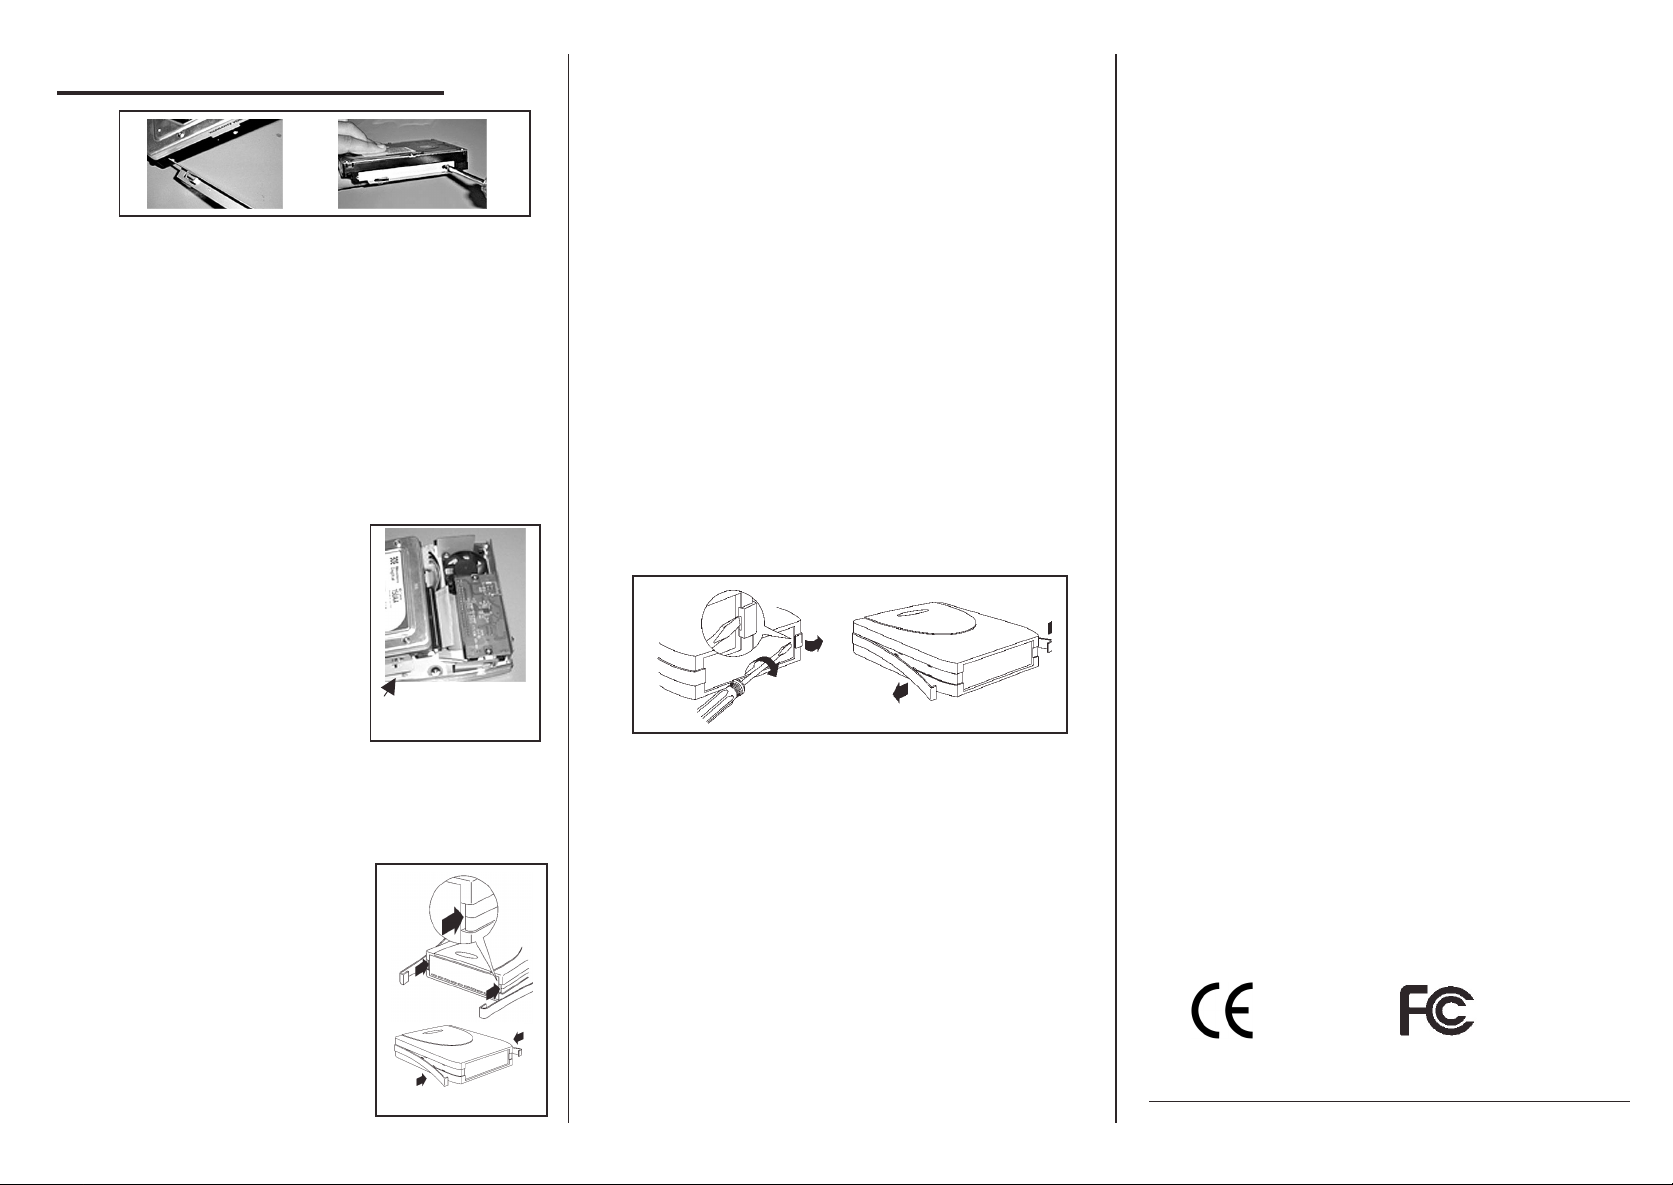
INSTALLATION GUIDE
2.
1.
Mount the drive carefully to the 2 metal HDD mounting rails
as shown above using the screws supplied.
Montieren Sie vorsichtig mit 2 beiliegenden Schrauben die
beiden Metallschienen an der Festplatte wie abgebildet.
Montez le disque dur sur les deux rails de montage.
Fissate con delicatezza il d riv e a lle d u e rotaie co n le viti incluse
come mostrato in figura.
Connect the IDE and Power Cable to your HDD.
Hook the mounting rai ls of the drive carefully on to
the base and secure it in the front usi ng 2 scr ews supplied.
Schliessen Sie die IDE- und Stromversorgungskabel Ihres Laufwerkes an.
Schieben Sie die Montageschienen
des Laufwerkes vorsichtig in die
Haken der Bodenplatte und schrauben
Sie sie mit 2 Schrauben vorne fest.
Connectez l e câble IDE et
l’alimentation à votre disque dur.
Accrochez ensuite les rails du
Hook on the HDD
mounting rails here
lecteur sur la base du boîtier puis
fixez le en façade à l’aide des 2 vis fournies.
Connettete il cavo IDE e l’alimentazione al vostro HDD
Fissate poi il drive al l a part e i nfer i ore del case bl occando i l
tutto inserendo nella parte frontale le viti incluse.
3.
Fit the top cover to the base taking
care not to trap the internal cables.
Attach the two plastic strips starting
at the front and working t owards the
back by pressing the clips into the
holes. Finally st i ck on the bottom
labels.
Setzen Sie die Gehäusehälften wieder zusammen und haken
Sie die Gehäuseschienen an der Frontblende ein. Drücken Sie
die Gehäuseschienen von vorne nach hinten vorsichtig in die
vorgesehenen Aussparungen bis Sie an der Rückseite
einrasten.
Befestigen Sie abschließend die Produktaufkleber an der
Unterseite des Gehäuses.
Refermez le boîtier avec ses deux parties en veillant à ne
pas coincer d e câbles. Rel iez-l e ensuite avec les d eu x
languettes pla s tiques et exercez une p ression sur ces
derniers pour fermer le boîtier.
Riposizionate il guscio superiore facendo attenzione ai
cavi e reinserite le due rotaie di fissaggio. Bloccatele
facendo scattare le clips nelle loro sedi. Per concludere
attaccate l’adesivo sul fondo del box.
OPENING THE HDD BOX / ÖFFNEN DES
GEHÄUSES / OUVRIR LE BOîTIER /
COME APRIRE IL BOX
Carefully prise the two fixing rails from t he back of the
housing using a screwdriver. Stri p t he rails off carefully
from back to front. Separate the top cover from the base.
Heben Sie die seitlichen Gehäuseschienen ZUERST an der
Rückseite des Gehäuses mit einem Schraubenzieher
vorsichtig an. Heben Sie die Verschlussschienen vorsichtig
von hinten nach vorne ab. Öffnen Sie dann die beiden
Gehäusehälften.
Retirez les sécurités des rails à l’aide d’un tournevis plat.
Vous pouvez ensuite retirer les rails latéraux en tirant vers
l'arrière.
Sfilare le rotaie facendo delicatamente pressione sulla parte
posteriore del Box con un cacciavit e. Sganci at e il gus ci o
superiore dalla base.
Radio Frequency Energy, Certifications
Shielded cables must be used with thi s equi pment to
maint ain compliance with radio frequency ener gy
emission regulations and to ensure a suitably high
level of immunity to electrom agnetic distur banc es.
European E M C Directive CE statemen t
This equipment complies with the requirement for CE
menti oned in the European Di r ec tive and Standards
EN55022 and EN55024.
FCC Compliance Statement ( United States)
This equipment has been tested and found to comply
with part 15 of FCC rules.
Operation is subject to the foll owing two conditions:
(1) This device m ay not cause harmf ul
interference.
(2) This device m ust ac c ept any interference
received. Including int er ference that may
cause undesired operation.
Canadian Department of Communications RFI
statement
This equipment does not exceed the class B limits for
radio noise emissions from digital apparatus set out in
the radio i nterferenc e r egulations of the Canadian
Department of Communications.
Le présent appareil numérique n’émet pas de bruits
radioélectriques dépassant les limites appl icables
aux appareils numériques de l a c lasse A prescrites
dans le règlement sur le brouillage radi oélectriques
publié par le ministère des Communications du
Canada
© LINDY ELECTR O NICS LIMITED & LINDY-ELEKTRONIK GMBH - TH IRD EDITION (JUL 2003)
 Loading...