

Page 1
© LINDY ELECTRONICS LIMITED & LINDY
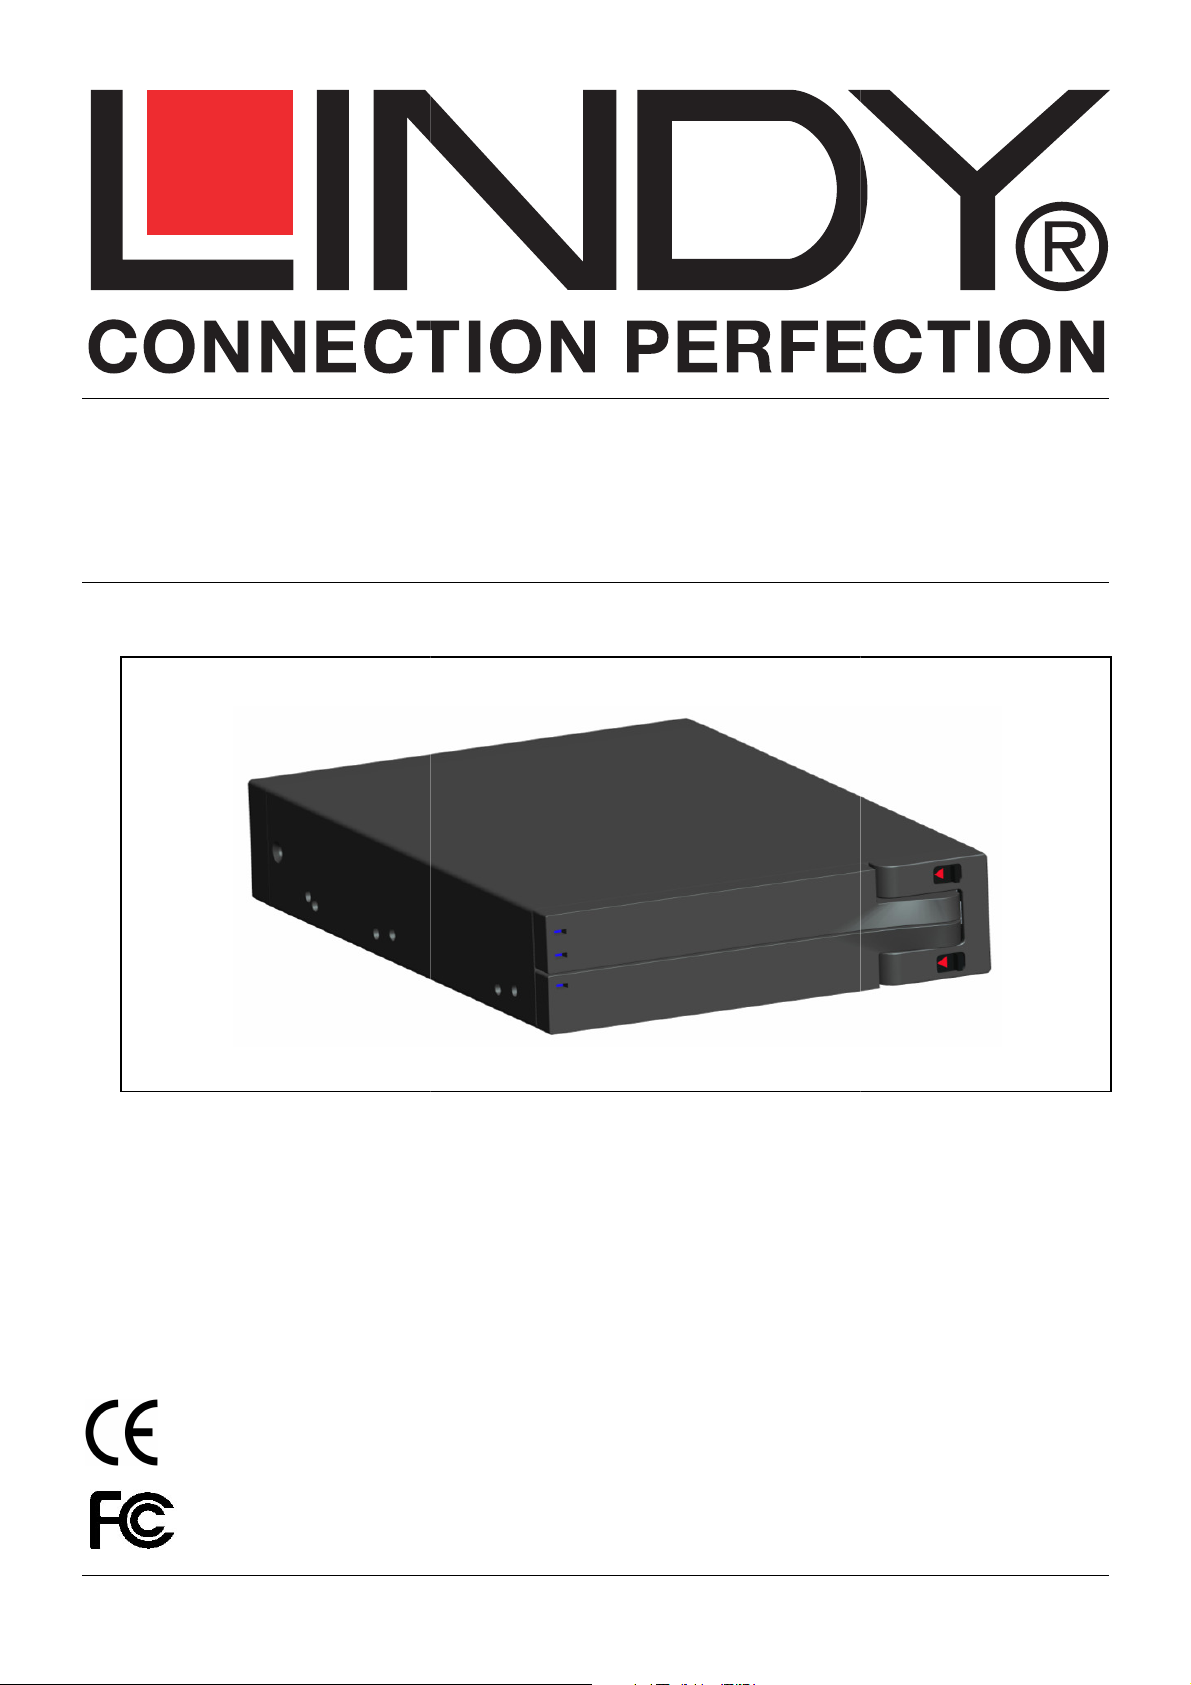
Dual 2.5“ SATA Mobile RAID
www.LINDY.com
User Manual
English
LINDY No. 20288
For Home and Office Use
Tested to Comply with
FCC Standards
-ELEKTRONIK GMBH -
FIRST EDITION (Aug 2010)
Page 2

English Manual
Overview
Installation
Unlock upper and lower covers
Note: Do not force the door to pen
while it is locked,
damaged the lock.
DC Jack
English 2
Device
HDD ACTIVE LED
POWER LED
HDD ACTIVE LED
LOCK HOLE
HDD GATE
USB Host
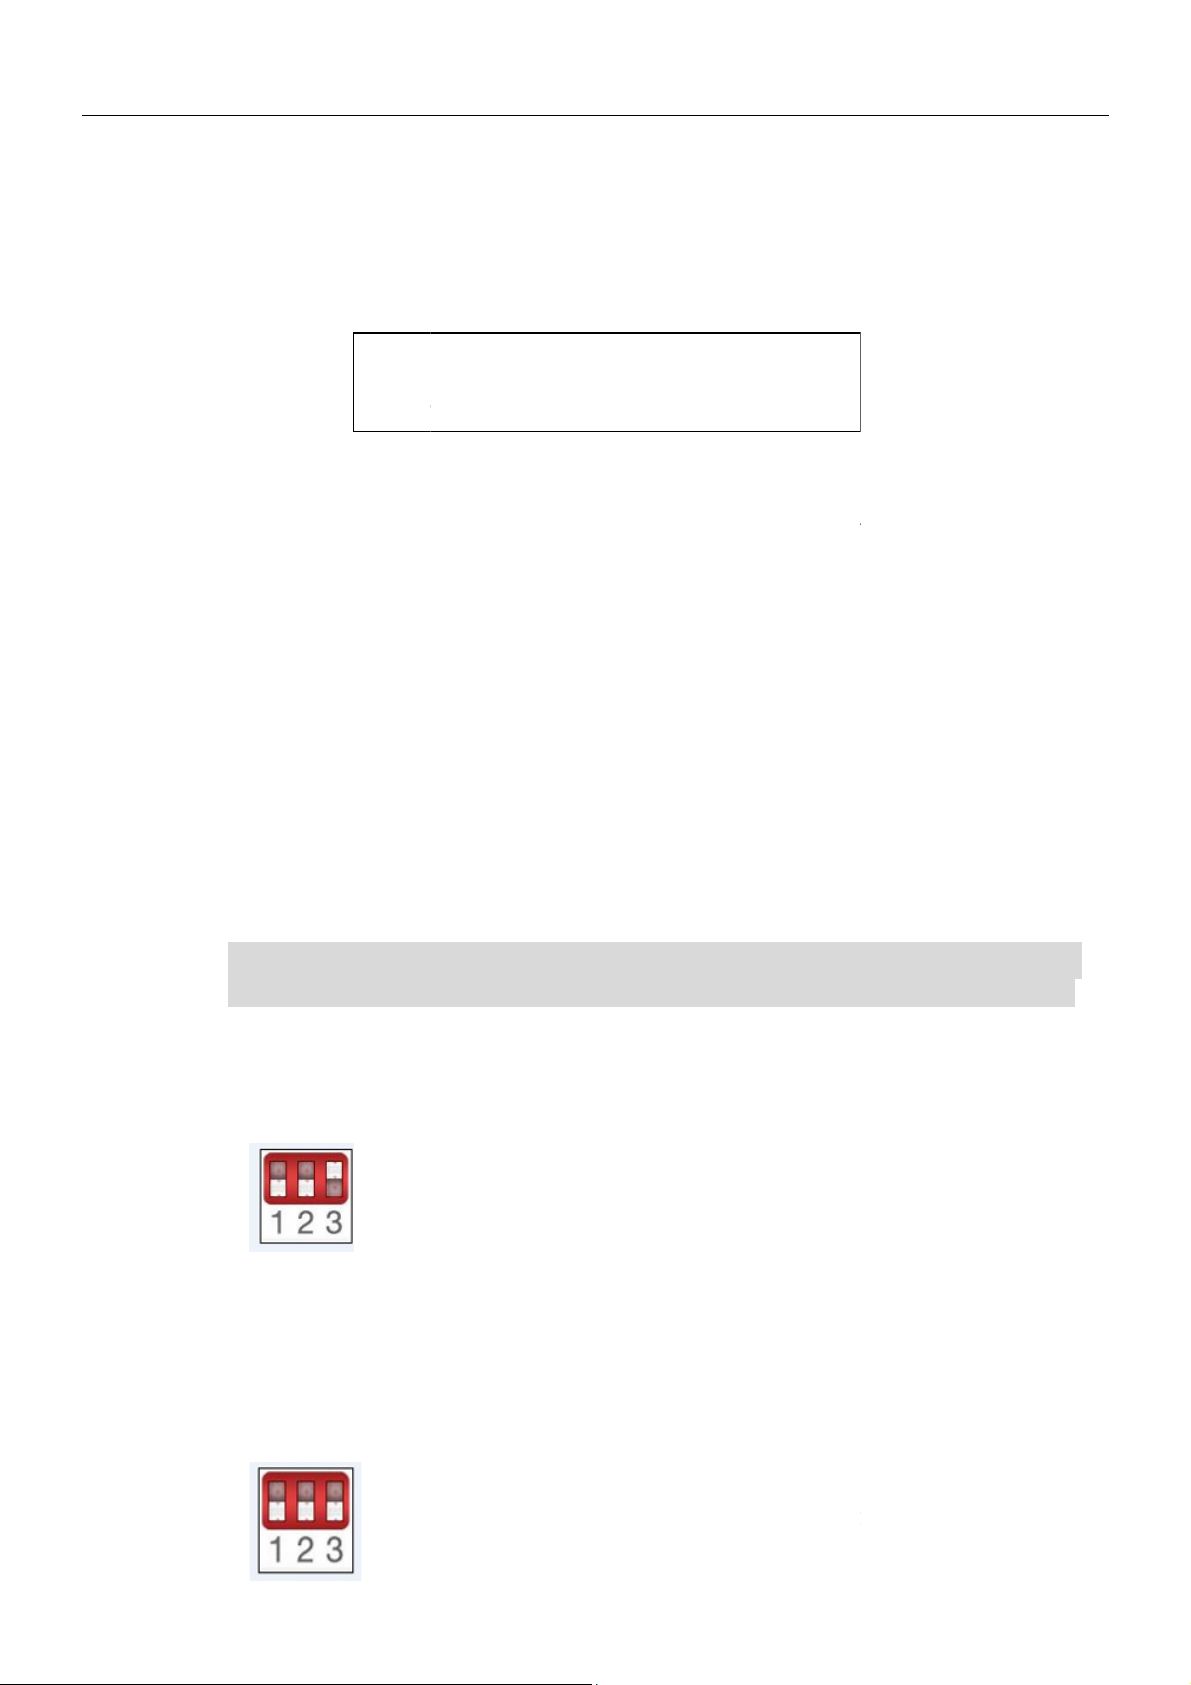
Hardware
1.
Mode
Select
switch
Mode
change
switch
, then open the door.
otherwise, you will
eSAT
::::
Page 3
English Manual
lace one or two hard driver(s) in the slot. Make sure the SATA connector
is lined up with the connector inside the
Carefully push the hard driver into the
is seated securely, then close the door and lock it.
Users are advised to disable the device from the computer before unplugging the
cable or turning off the device.
If the hard drive does not support ACCESS signal, then the
will not flash when the hard drive is in use.
If the system cannot d
Do not open the door or turn off the power of the
is busy, this may cause damage to you hard drive.
It must be in the lock position when in use. This prevents
Do not force the door to open while it is locked, otherwise, you will damage the
RAID Information
Changing the RAID mode destroys data stored on the
If you have saved data on
RAID):
Note: It must be in the lock position when in
use. This prevents unexpected removal
while working.
, So that the drive
etect the device, please go to device management and
Mobile Rack
the drives, back up data before following these steps.
The two physical disks read as two independent hard drives
single housing, so that two logical volumes mount on the
desktop. Therefore, the computer will show two separate
SATA connector, the computer must
support port multiplier for this function to work.
The failure of one disk will not affect the other disk.
Therefore, the data on the working drive will be intact and
The two physical drives are combined
yet larger logical volume mounts on the desktop, offeri
maximum possible capacity (the available capacities of each
If one physical disk fails, the data on both disks
will become inaccessible. If you are concerned about
2. P
3.
SATA connector
Note:
1.
2.
3.
enable it.
4.
5.
while working.
6.
lock.
Mobile Rack.
Mobile Rack
HDD ACTIVE LED
while the hard drive
unexpected removal
English 3
’s
Caution:
1. JBOD (Non-
in a
2.
::::
drives.
Note: When using the e-
functioning.
BIG (Concatenation):
so that one single
disk are combined).
Note:
Mobile Rack,
ning
Page 4
English Manual
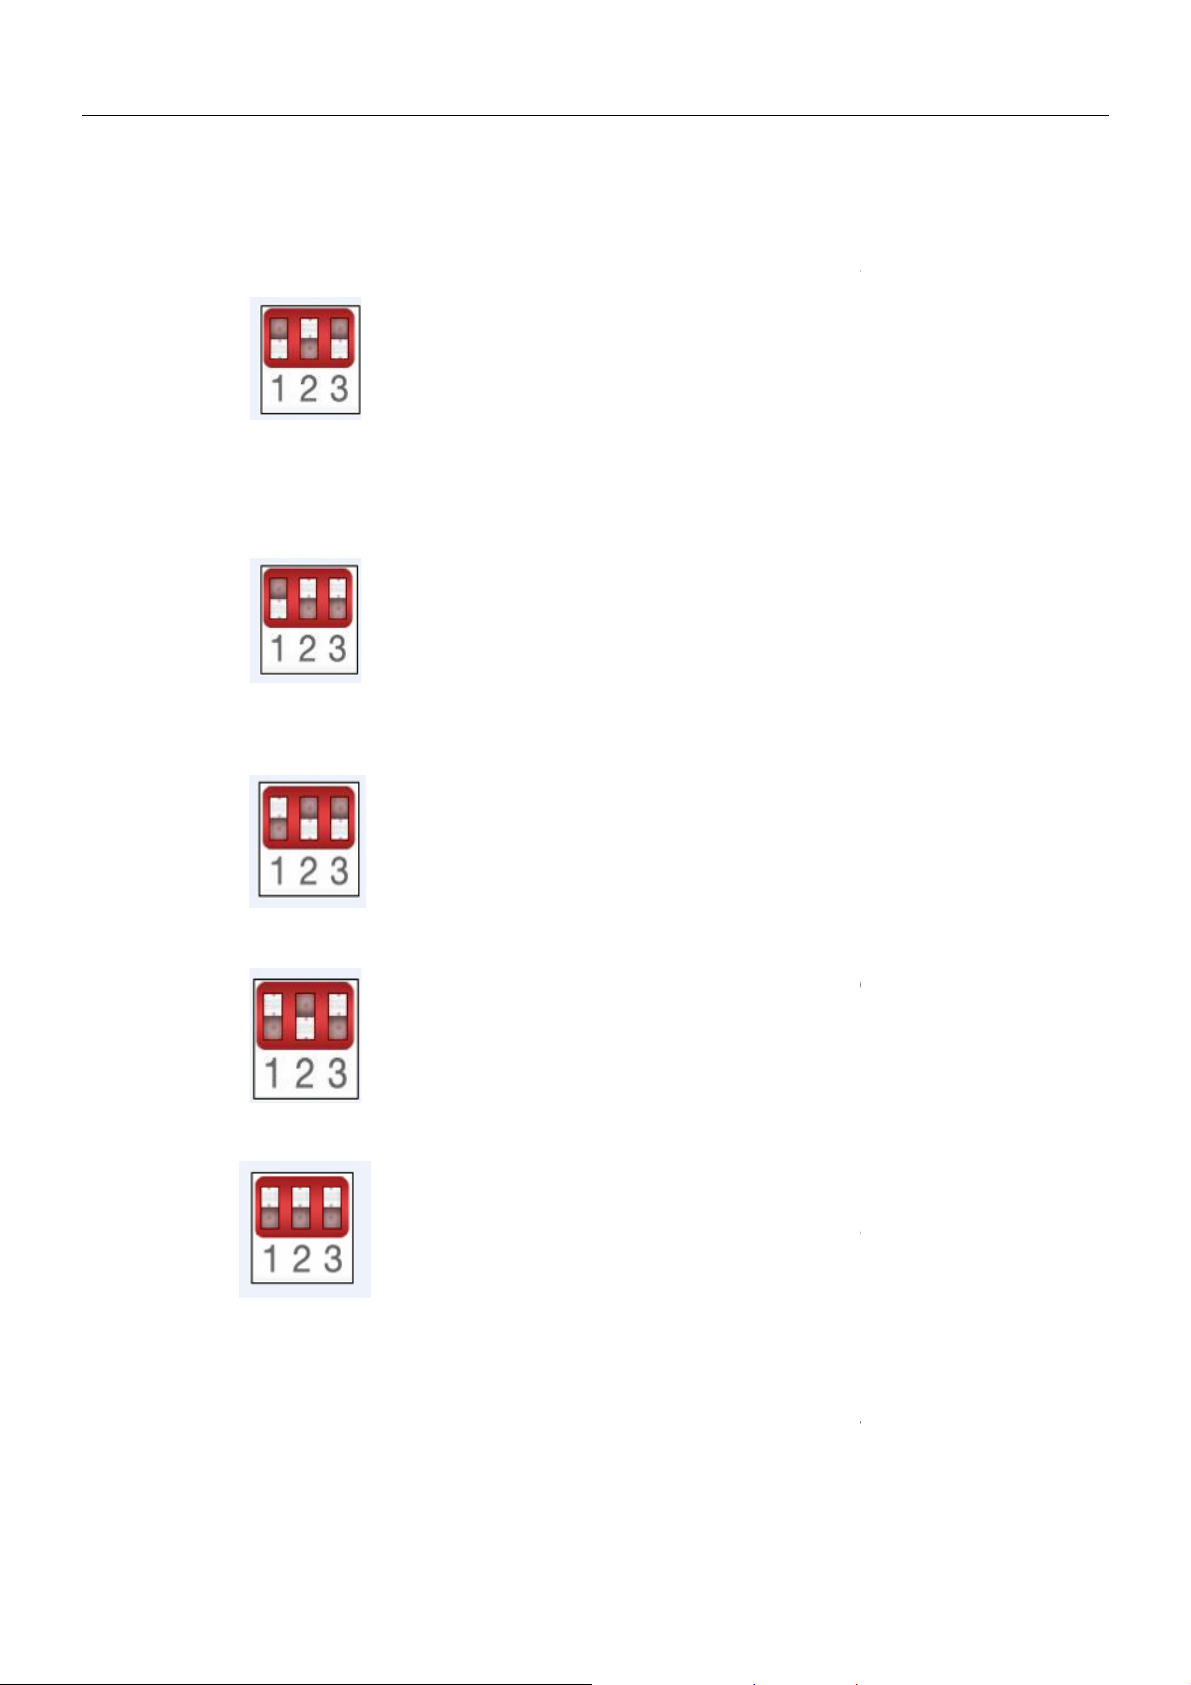
Fast (RAID 0 Mode):
Safe (RAID 1 Mode):
RAID 1 (SAFE 33%) + (BIG 67%), 33% of memory space on both
RAID 1 (SAFE 50%) + (BIG 50%), 50% of the memory in both disks
Use
data security, we highly recommend using Safe configuration
together so that one
larger logical volume mounts on the desktop, offering the
e in Big mode (the available
capacities of each disk are combined) y
than the Big mode (the speed of each disk runs faster to a
If one drive fails, the data on both disks will become
The two physical drives are “mirrored” (RAID 1) so that one
single logical volume mounts on the desktop. All of the data
drive will be recoverable from the other drive (the
available capacity of one drive cannot exceed the available
If one physical disk fails, the data can be immediately
recovered from the second disk. No data will be lost
hard drives will be operating under RAID 1 mode, and the
rest of the hard drive memory on both disks will be assorted
will be RAID 1, and the rest of the hard drive memory on
to configure
Only under GUI ONLY mode, SteelVine Manage can
change the hard drive memory mode, on other modes,
SteelVine Manager can monitor the hard drive statue, not
according to the above seven mode , need to turn
which you want to
Hard drive management
which you want to
3.
4.
5. Safe33:
(RAID 1 mode).
The two physical drives are stripped
maximum possible capacity lik
certain level).
Note:
inaccessible.
on one
capacity of the other drive).
Note:
drive fails.
et with greater speed
English 4
if one
6. Safe50:
7. GUI ONLY:
into BIG.
both disks will be assorted into BIG.
SteelVine Manager Software
change that.
Note:Changing the Mobile Rack
policy
the Mode Select to a new position
change,then press Mode change
latest storage policy take effect.
After effected, you need to click“My
Computer”
,
“Management””
the HDD Mode.
hard drive storage
button to reset,so the
” then
Page 5

English Manual
continue to repartition and reformat the Mobile Rack hard
drive.
English 5
RAID notification
1. It is better to use the same hard drive brand and memory capacity to use the RAID
functions.
2. When using eSATA connector to set JBOD function, if the host cannot support port
multiplier function, the computer may not be able to detect 2 hard drives
simultaneously. (You may need to purchase the optional port multiplier eSATA
controller card to get the enclosure working properly)
SteelVineManager Software Installation
1. For Windows XP /SP2/Server 2003
Insert the software driver CD into the CD-ROM drive.
Vista to install files on the disk
:\HDD Enclosures\Sil5744\Windows\57xxSteelVine_V5.1.24B:
Double-click “SETUP.exe”
2. The following window will be seen
Page 6

English Manual
3.Click “Next”, select “I Agree”
English 6
4. Select “Just me”, Click “Next”
5. After showing the following Window,Click “Close” to exit.
Page 7

English Manual
to restart your system.
Once completed you will see a new icon in the Task Bar
English 7
6. Click “Yes”
7.
Page 8

English Manual
Starting the SteelVine Manager
>
Once started, the SteelVine Manager Application icon can be found
located at the bottom right hand corner of the screen. Double click the notification tray icon
to open the SteelVine Manager GUI status window. The SteelVine Manager icon remains
active in the notification tray even if you close th
clicking on the icon and selecting “
The SteelVine Manager starts with the Status Window visible so you can monitor the
SteelVine Storage Reference Designs connected to the host computer. Up t
SteelVine Storage Reference Designs can be managed through a single session. When
the SteelVine Storage Reference Design is set to GUI mode, you can access the Basic
Configuration Wizard from the Status window. From there, you can optionally use the
Advanced Configuration Wizard to create multi
Select menu options and follow the instructions in the remainder of this guide to configure
SteelVine Storage Reference Designs. When prompted, enter the administrative password
SteelVineManager
in the Notification Tray
e SteelVine Manager window. It can be
volume configurations.
English 8
Click Start > Program Files
closed by right-
Silicon Image > 57XX SteelVine >
Exit”.
o four
-
.
(default password is admin).
Page 9

English Manual
Toolbar Buttons on the Status Window
function
To access the Basic Configuration Wizard, click on the
top of the SteelVine Manager
To protect against unintended changes, the SteelVine Manager prompts for a
password the first time you access the Wizard. Enter the administrator password. The
admin
The Basic Configuration Wizard dialog will appear
Configure Box
Mode
English 9
RAID
1.
2.
default password is
3.
set
icon along the
Status Window.
.
4.
.(For BIG
)
Page 10

English Manual
English 10
5. In “Storage Policy” , select your configuring MODE
:JBOD,SAFE(RAID1),BIG,SAFE33,SAFE50,FAST(RAID0),click“Ap
ply”take on the following Window,set OK。
Page 11

English Manual
6. Open”My Computer””Computer management””Disk management”. Delete the disk
partition of the Mobile Rack.
7. To repartition and reformat the Mobile Rack,then BIG Mode setting OK, that is
under work.
NOTE
`
::::
The manner of setting
JBOD
, ( ) , , , ( )
SAFE RAID1 SAFE33 SAFE50 FAST RAID0 is the same as the
above.
English 11
Page 12

Radio Frequency Energy, Certifications
This equipment has been tested and found to comply with the limits for a Class B Digital device, pursuant to part 15
are designed to provide reasonable protection against harmful interference in a
residential installation. This equipment generates, uses, and can radiate radio frequency energy and, if not
installed and used in accordance with the instructions, may cause
However, there is no guarantee that interference will not occur in a particular installation. If this equipment does
cause harmful interference to radio or television reception, which can be determined by tur
and on, the user is encouraged to try to correct the interference by one or more of the following measures:
Reorient or relocate the receiving antenna
Increase the separation between the equipment and receiver
nto an outlet on a circuit different from that to which the receiver is connected
Consult the dealer or an experienced technician for help
You are cautioned that changes or modifications not expressly approved by the party responsible for compliance
void your authority to operate the equipment.
This device complies with part 15 of the FCC Rules. Operation is subject to the following two conditions:
This device may not cause harmful interference, and
This device must accept any interference received, i
CE Statement, EMC Compatibilty
This device complies with EN Standards EN55022 and EN55024 according to the relevant EC EMC Directive. It
must be used with shielded cables only to maintain EMC
Dieses Produkt entspricht den einschlägigen EMV Richtlinien der EU und darf nur zusammen mit abgeschirmten
LINDY gewährt für dieses Produkt über die gesetzliche Regelung hinaus eine zweijährige Herstellergarantie ab
Kaufdatum. Die detaillierten Bedingungen dieser Garantie finden Sie auf der LINDY Website aufgelistet bei den
nd Electronic Equipment),
Recycling of Electronic Products
In 2006 the European Union introduced regulations (WEEE) for the collection and recycling of all waste electrical
and electronic equipment. The wheelie bin symbol shown indicates that this
household waste. Instead the product must be recycled in a manner that is environmentally friendly. For more
information on how to dispose of this product, please contact your local recycling centre or your household wa
disposal service. Each individual EU member state has implemented the WEEE regulations into national law in
slightly different ways. Please follow your national law when you want to dispose of any electrical or electronic
obtained from your national WEEE recycling agency.
Die Europäische Union hat mit der WEEE Direktive umfassende Regelungen für die Verschrottung und das
und Elektronikprodukten geschaffen. Diese wurden von der B
ElektroG in deutsches Recht umgesetzt. Dieses Gesetz verbietet vom 24.März 2006
und Elektronikgeräten über die Hausmülltonne! Diese Geräte müssen den lokalen
men bzw. örtlichen Sammelstellen zugeführt werden! Dort werden sie kostenlos entgegen
genommen. Die Kosten für den weiteren Recyclingprozess übernimmt die Gesamtheit der Gerätehersteller.
harmful interference to radio communications.
ncluding interference that may cause undesired operation
product must not be disposed of with
undesregierung im Elektro
1
FCC Warning
of the FCC Rules. These limits
Connect the equipment i
ning the equipment off
could
1.
2.
Kabeln verwendet werden.
LINDY Herstellergarantie
AGBs.
WEEE (Waste of Electrical a
compatibility.
products.
More details can be
Germany / Deutschland
Recycling von Elektround Elektronikgerätegesetz –
an das Entsorgen von ElektroSammelsyste
LINDY No 20288
st
Edition, August 2010
www.lindy.com
ste
-
 Loading...