

Page 1
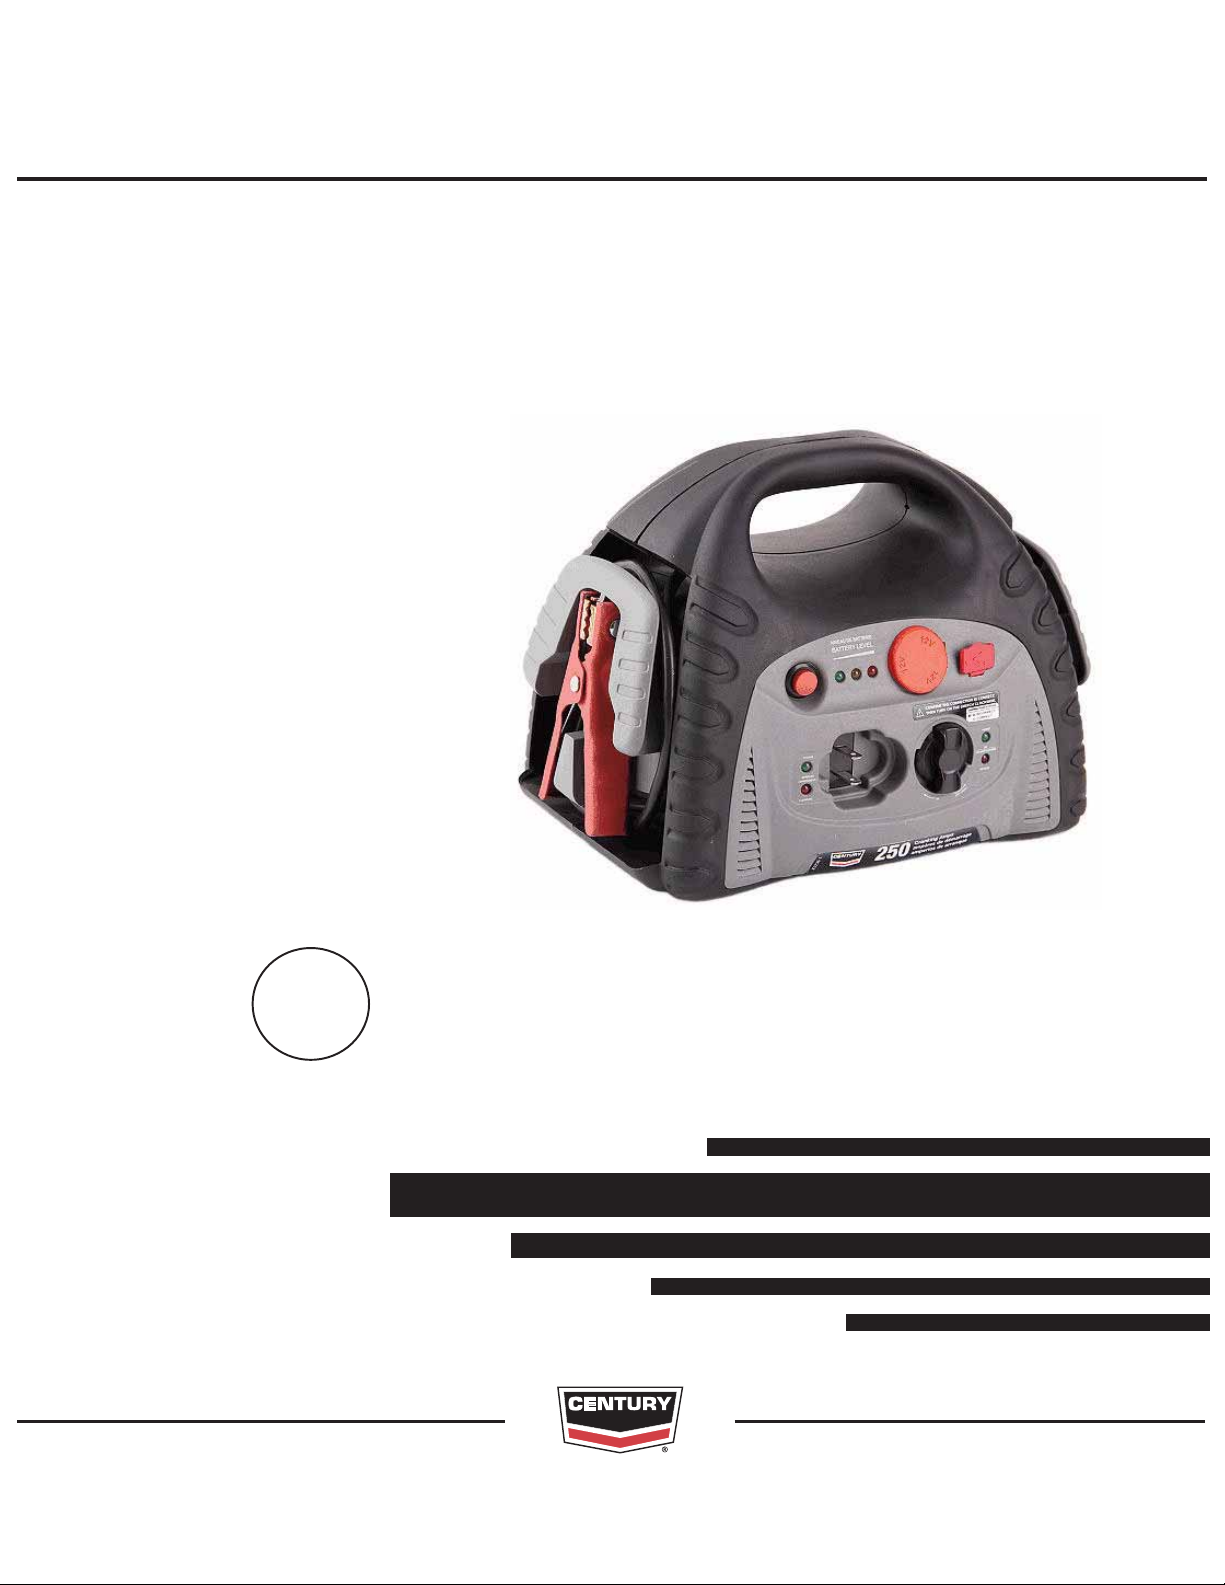
JUMP STARTER
RETURN TO MAIN MENU
IM10139
September, 2013
For use with machines having Code Numbers:
Safety Depends on You
Century charging and jump starting equipment is designed and
built with safety in mind.
However, your overall safety can
be increased by proper installation ... and thoughtful operation
on your part. DO NOT INSTALL,
OPERATE OR REPAIR THIS
EQUIPMENT WITHOUT READING THIS MANUAL AND THE
SAFETY PRECAUTIONS CONTAINED THROUGHOUT. And,
most importantly, think before
you act and be careful.
11912
BC
OPERATORʼS MANUAL
Century Equipment
2345 Murphy Blvd. Gainesville, GA 30504
Page 2

i
SAFETY
i
Congratulations on the purchase of your new battery charger. We wish to acknowledge Underwriters Laboratories
(U/L) for contributing the following important safety precautions. Please read and retain these instructions for the continued safe use of your new charger.
This manual contains important safety information. DO
NOT OPERATE this equipment UNTIL YOU HAVE READ
this safety summary!
IMPORTANT SAFETY INSTRUCTIONS. SAVE
THESE INSTRUCTIONS
SAFETY INFORMATION
The following safety information is provided as guidelines to
help you operate your new battery charger under the safest
possible conditions. Any equipment that uses electrical
power can be potentially dangerous to use when safety or
safe handling instructions are not known or not followed.
The following safety information is provided to give the user
the information necessary for safe use and operation.
A procedure step preceded by WARNING is an indication
that the next
ous to a person if proper safety precautions are not heeded.
A procedure preceded by a CAUTION is an indication that
the next
equipment being used.
A NOTE may be used before or after a procedure step to
highlight or explain something in that step.
step contains a procedure that might be injuri-
step contains a procedure that might damage the
11. ALWAYS plug in and unplug the ac power cord by
grasping the power cord plug, NOT THE POWER CORD,
to reduce risk of damaging power cord.
12. ALWAYS remove personal metal items such as rings,
bracelets, and watches when working with a lead-acid
battery. A lead-acid battery can produce a short circuit
current high enough to weld a ring or any jewelry to
metal causing a severe burn.
13. ALWAYS unplug the battery charger from the ac outlet
before attempting any cleaning or maintenance. Turning
the chargers control(s) OFF, alone, will not remove all
electricity from the charger.
14. An extension cord should not be used unless absolutely
necessary. Use of an improper extension cord could
result in a fire or electric shock. If an extension cord
must be used, make sure that:
a. the pins on the plug of the extension cord are the
same number, size, and shape as those of the plug
on the charger,
b. the extension cord is properly wired and in good
electrical condition, and
c. the wire size is large enough for the length of cord as
specified in the following chart.
Length in feet: 25 50 100 150
cord AWG size: 16 12 10 8
SHOCK HAZARDS
1. This battery charger is intended for indoor use only. Do
not expose the charger to rain or snow.
2. NEVER attempt to charge a marine (boat) battery while
the boat is on or near the water. A boat must be on a
trailer and located indoors before attempting to charge its
battery(s). The boat manufacturers battery charging
instructions must be followed exactly.
3. NEVER set the charger, output cable or clamps, or ac
power cord plug in water or on wet surfaces.
4. NEVER use this charger on a pier or dock. Charger
could fall in water, creating an electric shock hazard.
5. NEVER attempt to plug in or operate the battery charger
with defective or damaged wires, power cord, or power
cord plug. Have any of these parts that are defective or
damaged replaced by qualified personnel IMMEDIATELY.
6. NEVER attempt to plug in the charger or operate its
controls with wet hands or while standing in water.
7. NEVER alter the ac power cord or power cord plug provided with the battery charger.
8. NEVER use an attachment not recommended or sold by
the battery charger manufacturer for use with this specific
model battery charger
9. NEVER operate this battery charger if it has received a
sharp blow, been dropped, or similarly damaged, until
after being inspected and/or repaired by qualified service
personnel.
10. NEVER disassemble this battery charger. Take the battery charger to qualified service personnel when service
or repair is needed.
EXPLOSIVE GAS HAZARDS
1. Working in the vicinity of a lead-acid battery is dangerous. Batteries generate explosive gasses during normal
operations and, at an even higher level, during charging.
If anything is allowed to ignite these gasses, the battery
may explode, sending pieces of the battery and extremely caustic battery acid out in all directions and with
extreme force. Since just the slightest spark is sufficient
to ignite these gasses, it is of UTMOST IMPORTANCE
that you read this manual and follow the instructions
exactly, before using your battery charger each time.
2. NEVER operate this battery charger near any fuel tanks
or gas cylinders. This charger can produce sparks that
could ignite gasses and cause an explosion.
3. NEVER attempt to permanently mount this battery
charger on a marine or recreational vehicle.
4. NEVER attempt to connect this chargers output cables
directly to the battery(s) in the bilge or engine compartment of a boat. Follow the boat manufacturers battery
charging instructions exactly.
Page 3
ii
SAFETY
ii
BATTERY EXPLOSION HAZARDS
1. To reduce the risk of battery explosion, read, understand,
and follow these instructions, those published by the battery manufacturer, and those of the manufacturer of any
equipment you intend to use near the battery. Review
cautionary markings on these products and on the
engine. If unable to determine the battery manufacturers
requirements for charging, always charge the battery with
the cell caps in place. In addition, make certain that anyone else that uses this equipment, or is a bystander in
the vicinity of a charging battery, understands and follows
these safety instructions as well.
2. NEVER smoke or allow a spark or flame in the vicinity of
the battery or engine.
3. NEVER operate the battery charger in a closed-in area
or restrict ventilation in any way.
4. NEVER charge a frozen battery as battery explosion can
result.
5. NEVER connect BOTH battery charger clamps DIRECTLY to the two posts of the same battery. See OPERATION INSTRUCTIONS for connection procedures.
6. NEVER charge batteries other than a LEAD-ACID type.
Especially, DO NOT use for charging dry-cell batteries
that are commonly used with toys and home appliances.
These batteries may burst and cause injury to persons or
damage property.
7. NEVER allow the dc output clamps to touch each other.
8. ALWAYS be extra cautious to reduce the risk of dropping a metal object, such as a tool, onto or near the battery. Doing so could produce a spark or short circuit the
battery or other electrical part that could cause an explosion.
9. ALWAYS make sure the area around a battery is well
ventilated while it is being charged. Gas can be forcefully blown away by using a piece of cardboard or other
non-metallic material as a fan.
10. ALWAYS make sure that the ac power cord is
unplugged from the ac outlet or extension cord BEFORE
connecting or disconnecting the battery charger clamps,
to prevent arcing or burning.
11. ALWAYS locate the battery charger as far away from the
battery as the dc output cables will permit.
12. ALWAYS twist or rock charger clamps back and forth
several times on the battery post and the other point of
connection at the time of initial connection. This helps
keep the clamps from slipping off their points of connection which helps reduce the risk of sparking. DO NOT
rock the clamp connected to the battery post AFTER the
second connection (at a point away from the battery) is
made or sparking may occur at the battery post.
13. ALWAYS check the cable and wire connections at the
battery(s) for tightness - BEFORE STARTING TO
CHARGE. A loose connection can cause sparks or
excessive heating which could cause a battery explosion.
14. ALWAYS make sure the battery compartment is open
and well ventilated before charging.
FIRE HAZARDS
1. NEVER use an attachment not recommended or sold by
the battery charger manufacturer for use with your specific model charger.
2. NEVER disassemble the battery charger; take it to qualified service personnel when service or repair is needed.
3. ALWAYS make sure that the ac power cord is
unplugged from the ac outlet or extension cord, BEFORE
connecting or disconnecting the battery charger clamps,
to prevent arcing or burning.
BATTERY ACID HAZARDS
1. ALWAYS have someone within range of your voice and
close enough to quickly come to your aid when working
near a lead-acid battery.
2. ALWAYS have plenty of fresh water and soap nearby in
case battery acid contacts eyes, skin, or clothing.
3. ALWAYS wear complete eye and clothing protection and
avoid touching eyes while working with a battery.
4. ALWAYS act QUICKLY if contact with battery acid is
made. If acid contacts skin or clothing, wash IMMEDIATELY with soap and water. If acid enters the eye,
IMMEDIATELY flood the eye with running cold water for
at least 10 minutes. Get medical attention IMMEDIATELY.
MOVING PARTS HAZARDS
1. NEVER connect the battery charger clamps to a vehicle
when the engine is running.
2. ALWAYS stay clear of fan blades, fan belts, pulleys and
other moving engine parts when working near an engine.
Moving engine parts can cause severe personal injury
including dismemberment.
3. ALWAYS make sure that the battery charger cables and
clamps are positioned so they will not come in contact
with any moving engine parts.
BURN HAZARDS
1. NEVER lean on or rest against the engine or cooling
system parts when the vehicle is running.
2. ALWAYS stay clear of the cooling system, engine, and
engine manifold. These engine components get very hot
and retain heat for a long time. Touching any of these
components can cause severe burns.
Page 4

TABLE OF CONTENTS
Page
Specifications .................................................................................................................Section A
Technical Specifications.......................................................................................................A-1
Operation.........................................................................................................................Section B
Description ...........................................................................................................................B-1
Controls and Indicators ........................................................................................................B-1
Operating Instructions ..........................................................................................................B-2
Maintenance ....................................................................................................Section D
Charging the Power Supply...................................................................................D-1
Battery Removal and Disposal ..............................................................................D-1
vivi
FCC Statement:
This device complies with part 15 of the FCC rules.
Operation is subject to the following two conditions:
(1) This device may not cause harmful interference, and
(2) this device must accept any interference received,
including interference that may cause undesired operation.
Page 5

A-1
SPECIFICATIONS
A-1
TECHNICAL SPECIFICATIONS - Jump Starter / Portable Power Station Manual for
K3236-1, (Code 11912)
1. Output Voltage: 12 Vdc
2. Battery: 12V Sealed Lead Acid (AGM).
3. Charging Circuit Automatic - Can leave plugged in when not in use.
4. On-Off Switch Switch activates output cable for safe hook-up.
5. Charge Indicator LEDs Indicate charging progress.
6. Reverse Hook Up LED If the clamps are hooked up backwards, the Red light will come on.
7. Reverse Hook Up Beeper Beeps if the clamps are hooked up backwards.
8. Correct Hook Up LED GREEN OK light indicates proper hook up.
9. Clamp Holsters Allow neat storage of the clamps / cables.
10. 12Vdc Charging Cord Permits alternate charging method for the Jump Starter or vehicle battery.
11. 5 and 12Vdc receptacles for powering or charging camping or personal devices such as cell phones, tablets,
camping lights, etc.
JUMP STARTER
Page 6

B-1
OPERATION
DESCRIPTION
This unit has a sealed lead acid battery and should be
kept fully charged at all times for maximum battery
life. Recharge when first received, immediately after
each use, and every three months if not used. Failure
to do this may cause the battery life to be greatly
reduced.
CONTROLS AND INDICATORS
(See Figure B.1)
FIGURE B.1
12Vdc socket for powering 12Vdc devices
B-1
Battery Level LEDs indicate state of charge
Storage Holsters for
neat clamp storage
USB Port for charging
5Vdc personal devices
such as cell phones,
cameras and tablets
Storage Holsters for
neat clamp storage
Red charging and
green charged LEDs
to monitor the
charging process
Automatic Internal Charger
charges internal battery
On-Off switch with red (reverse)
and green (correct) hook-up LEDs
for safe hook-up to battery / chassis
250 cranking amps help start
stubborn 12V motors
JUMP STARTER
Page 7

B-2
OPERATION
B-2
OPERATING INSTRUCTIONS:
USING AS A JUMP STARTER
A. Shield eyes and turn the vehicleʼs key to the OFF
position.
B. Make sure the ON/OFF switch of your Jump
Starter is in the OFF (counter-clockwise) position.
C. Connect the RED clamp to the positive (+) post of
the vehicleʼs battery.
D. Connect the BLACK clamp to a non moving metal
(chassis) part of the engine far away from the battery. Do not connect to carburetor or fuel lines.
Make sure the unit and cables are not in the path
of moving belts or fans. (NEVER connect to the
negative (-) post of the battery on a negative
ground vehicle).
E. If the red REVERSE light comes on and the unit
beeps, verify that the connections are correct. If
they are not, disconnect both clamps and reconnect starting at step C. If the green OK light
comes on, proceed to step F. If the connections
are correct and either the red REVERSE light
comes on, or the green OK light does not come
on, the vehicleʼs battery could be bad, DO NOT
proceed to step F, test and/or replace the battery.
F. If the green (OK) light is on turn the ON/OFF
switch of your Jump Starter to the ON (clockwise)
position.
Using as a Battery Charger
If a vehicleʼs battery is discharged, you may plug one
end of the 12V charging cord into the 12V socket on
the front of the Jump Starter, then plug the other end
into the vehicleʼs auxiliary power port plug. (note that
some vehicles require that the key be turned to the
accessory position for the auxiliary port to be activated).
Using as a Power Supply
• Power a 12 Vdc device using the cigarette style
receptacle on the front of the unit.
• Charge or power 5Vdc devices using the USB port
such as cell phones, cameras and tablets.
Note: Press the red BATTERY LEVEL/USB button
and the yellow or green light should come on
to power the USB port. If the green light does
not come on, you should charge the Jump
Starterʼs internal battery as soon as possible
to maximize battery life.
• Be sure to recharge the Jump Starter after every
use.
Battery Level Lights
To check the battery charge level when not charging,
push the red BATTERY LEVEL/USB button to the
left of the BATTERY LEVEL lights. If the green light
comes on, the unit is fully charged. If the green light
does not come on, you should begin charging as
soon as possible or the battery life may be reduced.
G. Stay away from the batteries while starting the
engine. Turn the vehicleʼs key to the START position for a maximum of 3 seconds.
H. If the vehicle does not start, wait at least 3 minutes
before trying again.
J. Once the vehicle has started, ALWAYS turn the
ON/OFF switch of your Jump Starter to the OFF
(counter-clockwise) position.
K. ALWAYS disconnect the clamp connected to a
non moving metal engine part (chassis) first
(BLACK on a negative ground vehicle), then disconnect the clamp hooked to the battery terminal
(RED on a negative ground vehicle) and put them
in their storage holsters securely.
L. Be sure to recharge the Jump Starter after every
jumpstart.
JUMP STARTER
Note: Be sure to press the red BATTERY
LEVEL/USB button again (the lights should go
off) or the battery will slowly discharge.
Page 8

D-1
MAINTENANCE
D-1
CHARGING THE POWER SUPPLY
1. Using a 120V AC Wall Outlet (preferred method)
Plug the female end of the cord onto the male plug
on the front of the power supply, then plug the
male end into the AC wall power (if you do not
have the cord that came with this unit, a standard
extension cord will work).
S29558-2
AC Extension Cord
The red CHARGING light will come on indicating
the unit is being charged. When the green
CHARGED light comes on, the battery is charged.
This can take a day or longer depending on the
batteryʼs state of charge.
WARNING
1. Never unplug the extension cord by pulling on
the cord. Do not use the extension cord if the
cord or plug is damaged.
2. Repairs should be performed by qualified service personnel.
3. Do not allow the clamps to short circuit to
themselves or to any metal or conductive material when stored (such as in the trunk of a vehicle).
-----------------------------------------------------------------------
CAUTION
1. Recharge the unit if not used for 90 days.
2. Do not store the unit in temperatures that may
exceed 50° C.
------------------------------------------------------------------------
WARRANTY
For questions regarding warranty or use,
call 1-866-236-0044.
2. Using the 12VDc Charging Cord (alternate
method)
S29558-1
Charging Cord
You can charge the Jump Starter using the 12Vdc
charging cord. Plug one end of the cord into the 12V
socket on the front of the Jump Starter, then plug the
other end into the vehicleʼs auxiliary power port while
the vehicle is running. Note that you do not want to
charge for more than 15 minutes as the current available from a vehicle can damage the Jump Starterʼs
battery if left in for more than 15 minutes
BATTERY REMOVAL AND DISPOSAL
This unit contains a sealed lead acid
battery. It must be disposed of
properly as dictated by Law. When
the unit / battery is in need of
replacement or disposal, remove it
according to the instructions below
and take it to your local recycling
center. Federal, state or local governments may have additional regulations to be followed in your area.
To remove the battery, lay the unit on itʼs front and
remove the screws holding the case together, lift the
back panel out of the way and remove the bolts connecting the cables to the battery. Be careful not to
short across the positive (+) and negative (–) terminals with the tools being used or by laying the battery
on a metal table.
JUMP STARTER
Page 9

NOTES
JUMP STARTER
Page 10

NOTES
JUMP STARTER
Page 11

NOTES
JUMP STARTER
Page 12

Century Equipment
2345 Murphy Blvd. Gainesville, GA 30504
 Loading...