

Page 1
Quick Reference Guide
2017 CONTINENTAL
This Quick Reference Guide is not
intended to replace your vehicle Owner’s
Manual which contains more detailed
information concerning the features of
your vehicle, as well as important safety
warnings designed to help reduce the
risk of injury to you and your passengers.
Please read your entire Owner’s Manual
carefully as you begin learning about
your new vehicle and refer to the
appropriate chapters when questions
arise. All information contained in this
Quick Reference Guide was accurate at
the time of duplication. We reserve the
right to change features, operation and/
or functionality of any vehicle specication
at any time. Your Lincoln dealer is the best
source for the most current information. For
detailed operating and safety information,
please consult your Owner’s Manual.
Lincoln Continental
June 2016
First Printing
Quick Reference Guide
Litho in U.S.A.
HD9J 19G217 AA
WARNING
Driving while distracted can result in loss of vehicle control, crash and
injury. We strongly recommend that you use extreme caution when
using any device that may take your focus o the road. Your primary
responsibility is the safe operation of your vehicle. We recommend
against the use of any hand-held device while driving and encourage
the use of voice-operated systems when possible. Make sure you are
aware of all applicable local laws that may aect the use of electronic
devices while driving.
United States
Lincoln Client Relationship Center
1-800-521-4140
(TDD for the hearing impaired 1-800-232-5952)
owner.lincoln.com
Canada
Lincoln Client Relationship Centre
1-800-387-9333
(TDD for the hearing impaired 1-888-658-6805)
lincolncanada.com
Page 2
3
2017 CONTINENTAL
2
Table of Contents
Instrument Panel .............................................4 – 5
SYNC 3 ..............................................................6 – 9
Lincoln Experiences ............................................. 10
Convenience ..................................................11 – 13
Function .........................................................14 – 17
Essential Features ........................................ 18 – 19
Comfort ........................................................ 20 – 22
Commonly Used Voice Commands ....................23
owner.lincoln.com lincolncanada.com
LEARN MORE ABOUT
YOUR NEW VEHICLE
Scan the country-appropriate QR code with your
smartphone (make sure you have a scanner app
installed) and you can access even more information
about your vehicle.
MyLincoln Mobile
The Lincoln Pledge
1
The Lincoln Pledge is the collective promise of everyone at the Lincoln Motor
Company—from our trusted service advisors to expert technicians to the voice
on the other end of the line should you call—that we’ll be there for you and your
Lincoln wherever, whenever, if ever you need us. Here are some of the ways
the Lincoln Pledge comes to life and makes the journey of owning a Lincoln a
rewarding one.
Lincoln Warranties
Be assured that everything between the bumpers of your Lincoln is covered for
four years/50,000 miles2 as well as a six-year/70,000-mile Powertrain Warranty
for life.
2
Roadside Assistance
If ever you need help on the road, the Lincoln Motor Company will be there for
you with 24-hour/seven-days-a-week assistance nationwide.
2
Complimentary Car Wash
As an added touch, after each service visit we’re happy to provide your Lincoln
back to you washed and ready for the road ahead.3
Complimentary Loaner
Should your Lincoln require warranty service, we’ll be there for you with a
loaner vehicle.3
Service Parts Warranty
We’ll stand behind our service and you with a two-year, unlimited-mile
warranty on both parts and labor.2
Dedicated Support
Lincoln Client Relationship Center
and Roadside Assistance
1-800-521-4140
TDD for the Hearing Impaired
1-800-232-5952
owner.lincoln.com
How-to and informational videos.
Warranty and maintenance information.
Make your payment or schedule service online.
Shop for accessories.
Join us in Conversation
1 Canadian Roadside coverage and benefits may differ from the United States
coverage. Canadian clients should refer to the Lincoln Roadside Assistance
section of the Warranty Guide, call 1-800-387-9333 or visit the website at
LincolnCanada.com for more details.
2 See dealer for complete details. Lincoln reserves the right to change
program details at any time without obligations.
3 Availability depends on dealership participation.
Our caring agents are empowered
to handle your call and concerns
from beginning to end.
Page 3
*if equipped *if equipped
5
2017 CONTINENTAL
4
Voice Controls
Press to access voice recognition.
Use the toggle control and the OK button to
select and confirm options for SYNC 3.
Press the button to return to the
previous screen.
Cruise Control
If you do not have adaptive cruise control, use
the following to use the cruise control buttons on
your steering wheel
To set the speed:
A. Press and release ON.
B. Accelerate to the desired speed.
C. Press SET+ and take your foot off the
accelerator.
To set a higher or lower speed, press and
hold SET+ or SET– until you reach the
desired speed.
Press and release either button to change
a set speed in approximately 1 mph (2 km/h)
increments.
To cancel a set speed, tap the brake pedal.
The set speed saves for easy recall.
To return to a previously set speed,
press RES.
To switch off, press OFF or switch the
ignition off.
Information Display Controls
Press the button to accept or make a call.
Press the button to reject or end a call.
You can also use the steering wheel buttons to
control the Head Up Display and SYNC 3 screens
including the audio, settings, navigation and the
information display options.
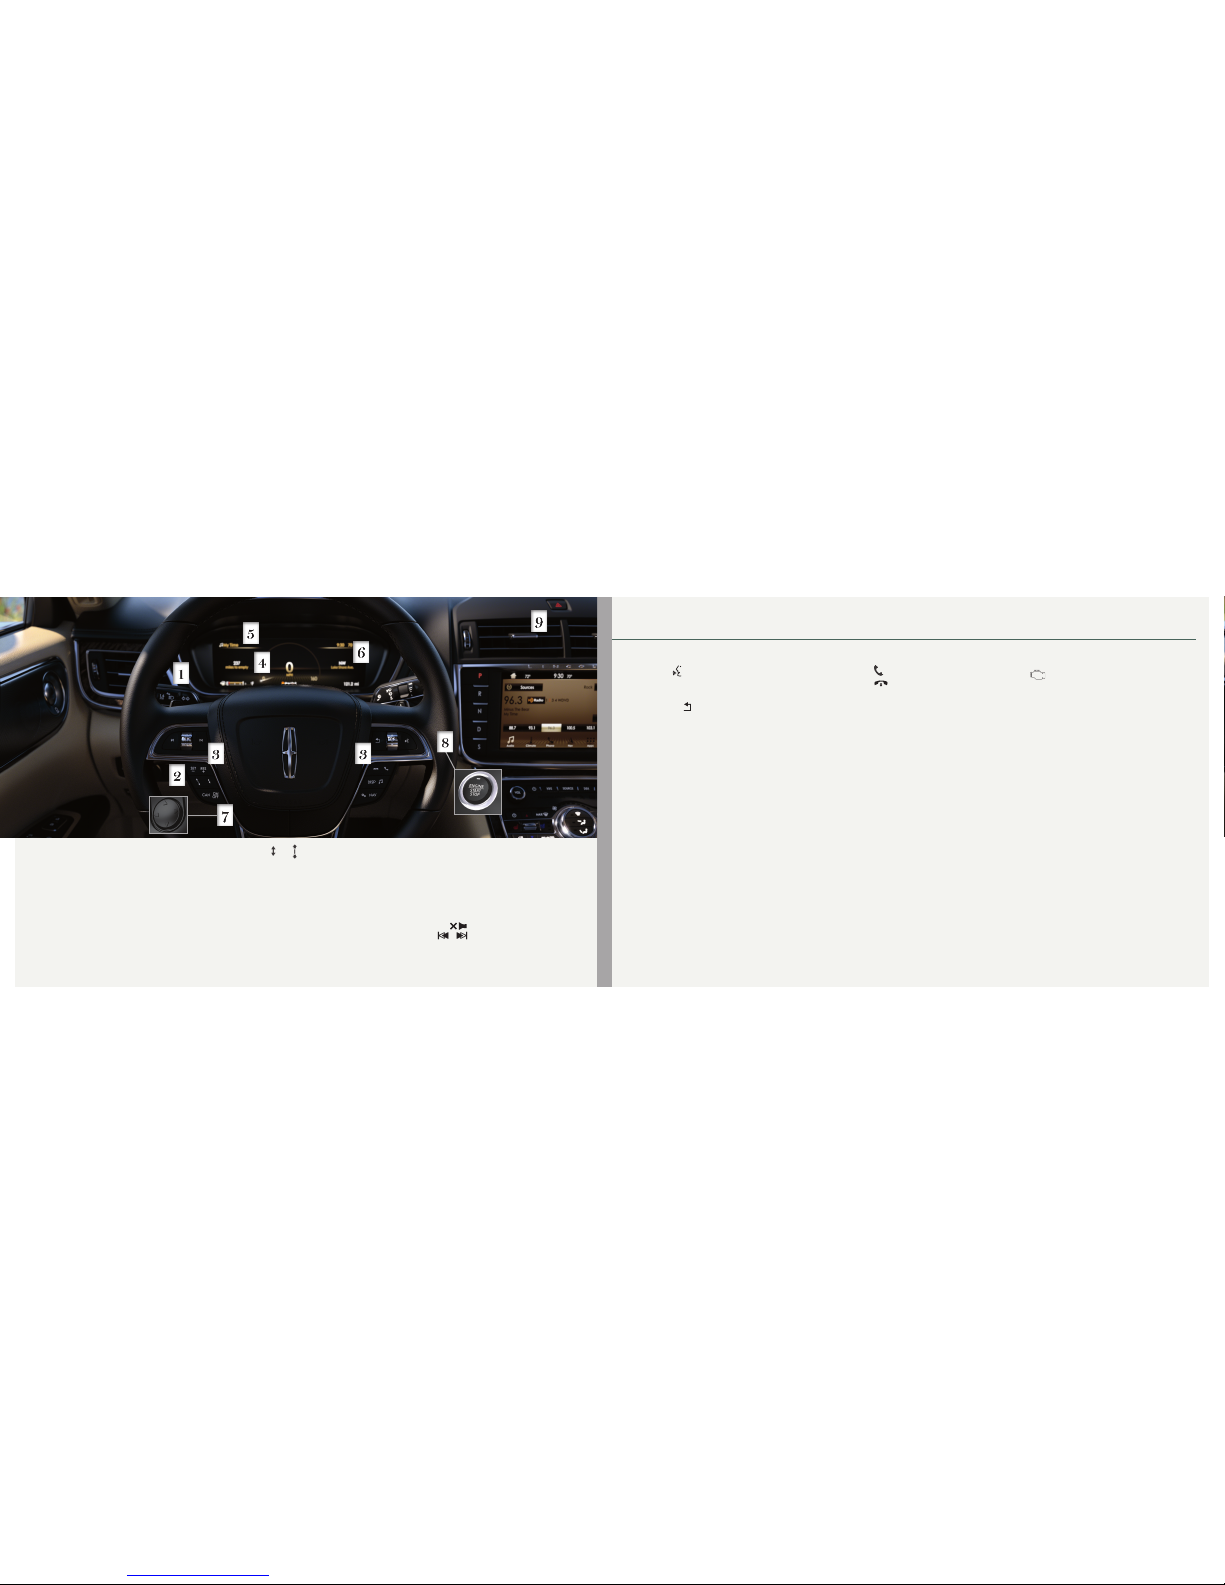
4 Vehicle Information Display
Provides information about various systems on
your vehicle. Use the right-hand toggle control
on the steering wheel to choose and confirm
settings and messages. Refer to the Information
Displays chapter in your Owner’s Manual for
more information.
5 Audio Status Bar
Displays the media or phone information above
the gages for easy viewing. When a media source
is active, a music note and the song or program
title appears. When you are on an active call the
phone icon displays. During an active call, you
see the caller’s ID and the duration of the call.
You can also see if you have muted the call,
switched it to privacy mode or if it is a
conference call.
6 Service Engine Soon Light
Lights briefly when you switch on the
ignition. If it remains on or blinks after you start
the engine, the On-Board Diagnostics (OBD-II)
system has detected a problem.
Drive in a moderate fashion (avoid heavy
acceleration and deceleration) and contact your
authorized dealer as soon as possible.
7 Power Tilt/Telescoping Steering Column
The 4-way rocker control allows you to adjust the
steering wheel to your desired position.
8 Push Button Start
Allows you to start your vehicle by pressing the
START STOP button while fully pressing down on
the brake pedal. If you leave your vehicle idling
for an extended period of time, it automatically
shuts down. Before the engine shuts down,
a message appears in the information display,
allowing the driver to override the
shutdown feature.
Note: Your intelligent access key must be inside
the vehicle for the ignition to start. The keyless
warning alert sounds the horn twice when you
exit the vehicle with the key and the vehicle is
still on.
9 Hazard Warning Flashers
Instrument Panel
1 Adaptive Headlamps
The headlamp beams move in the same direction
as the steering wheel. This provides more visibility
when driving around curves.
2 Adaptive Cruise Control*
In addition to cruise control, your vehicle may also
include adaptive cruise control. The system adjusts
your speed to maintain a proper distance between
you and the vehicle in front of you in the same lane.
You can select from one of four gap settings by
pressing the and controls on the
steering wheel.
The system can also bring your vehicle to a
complete stop and may resume going forward in
stop-and-go trac.
Note: Driving aids do not replace the need to
watch where the vehicle is moving and brake
where necessary. Refer to the Cruise Control
chapter of your Owner’s Manual for safety
information, more details and limitations.
3 Steering Wheel Controls
There are four banks of steering wheel controls,
controlling the audio, voice, cruise and
information displays.
Audio Controls
Press VOL + or – to increase/decrease
volume levels.
Press the to mute the active audio.
Press to access the next or previous
radio station preset, CD track or preset satellite
radio channel*.
Page 4
7
2017 CONTINENTAL
6
SYNC® 3
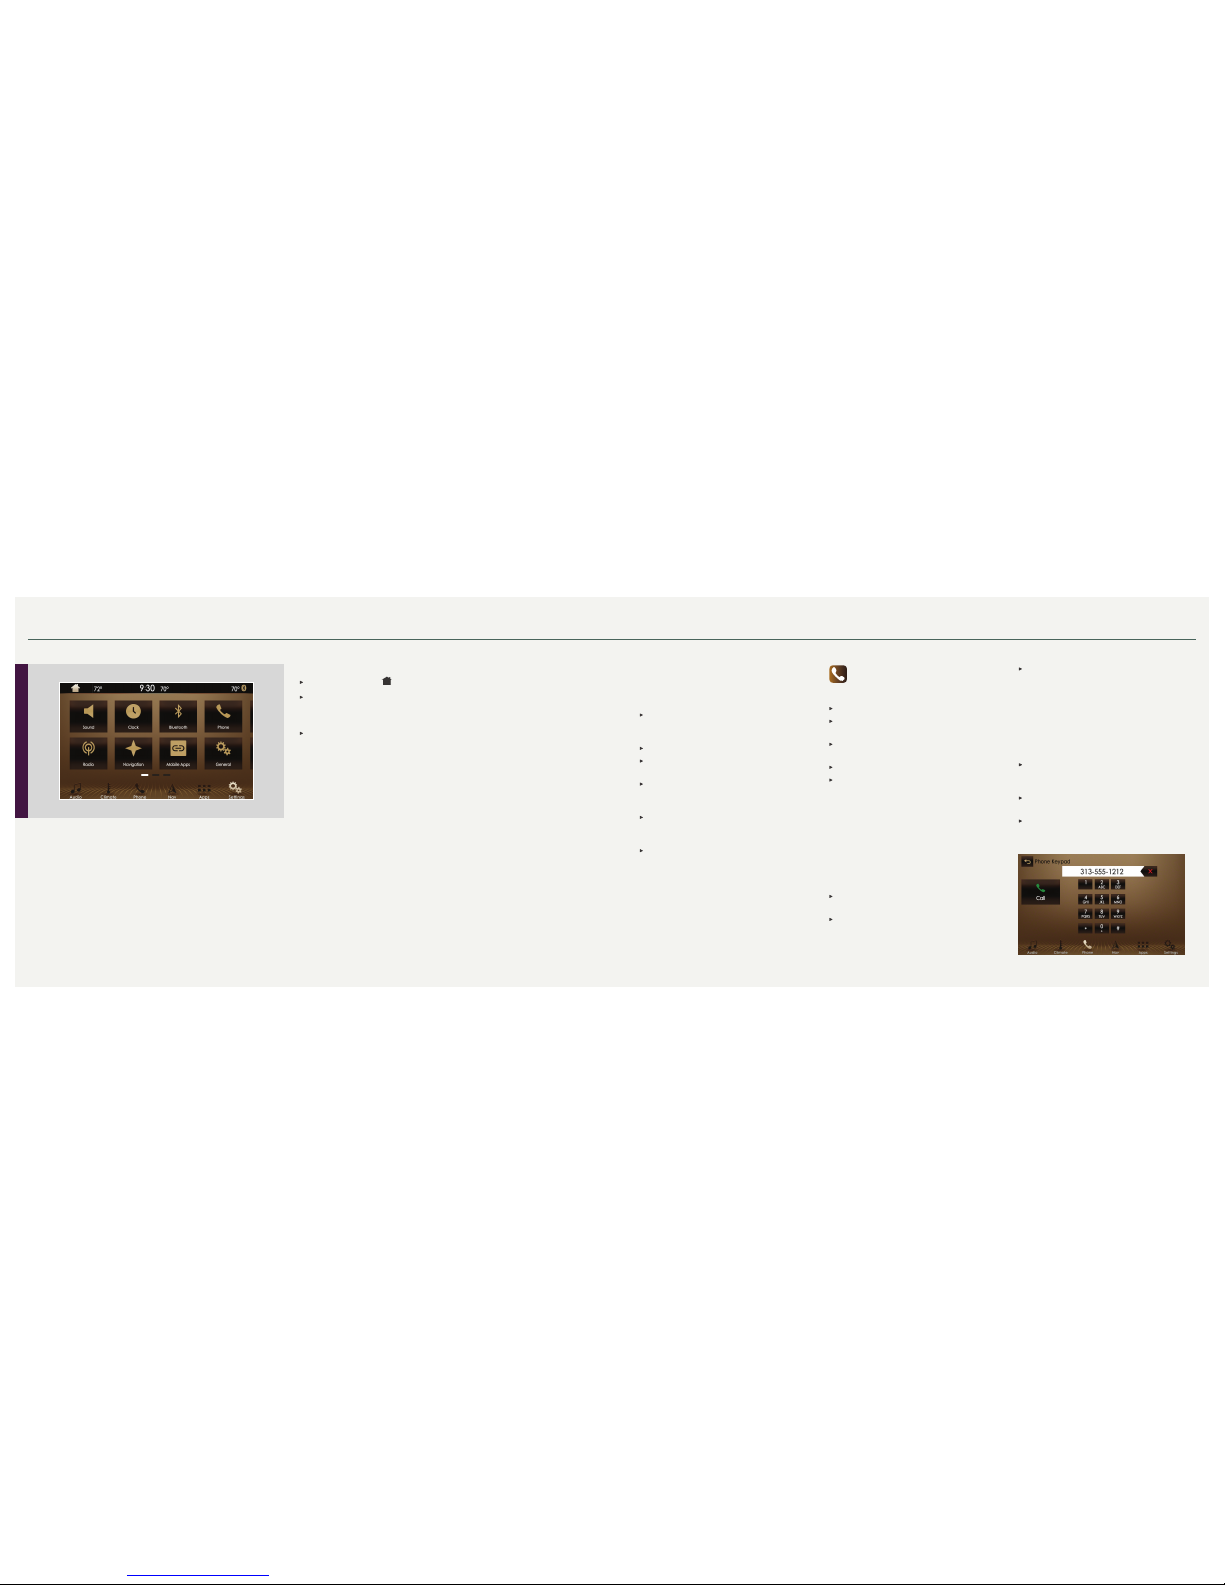
Using SYNC 3
SYNC is a hands-free, voice recognition system used for entertainment,
information and communication.
Use the touchscreen to explore and interact with your vehicle. The
touchscreen works the same way traditional controls, knobs and buttons
do. The system provides easy interaction with your audio, climate, phone,
navigation, mobile apps and settings.
Press Settings on the feature bar in your touchscreen to personalize the
many features and settings of your vehicle all in one place.
General Tips
Press the home icon at any time to return to the home screen.
For additional support, refer to the SYNC 3 chapter in your Owner’s Manual, visit
the website or call the toll-free number. See the inside back cover of this guide for
more details.
The touchscreen is sensitive, so make sure you press the desired
icon accurately.
Why Do You Need a SYNC Owner Account?
A SYNC owner account allows you to receive the latest software updates, and when
you have questions, free client support. Some services may not be available in
your area.
Create Your Account
Create your account by visiting the website. Call the toll-free number for
more information.
In the United States:
owner.lincoln.com
1-800-521-4140
In Canada:
syncmyride.ca
1-800-387-9333
Pairing Your Phone with SYNC 3
Pair your cell phone to SYNC 3 before use. Make
sure that your vehicle is in park (P) and you switch on
your ignition.
Make sure you switch Bluetooth on and
that your device is discoverable. See
your device’s manual, if necessary.
Touch Add Phone on the touchscreen.
Select SYNC on your device. A six-
digit PIN appears on your device.
If your device prompts you to enter
a PIN, enter the PIN displayed on the
touchscreen. Skip the next step.
When prompted on your cell phone’s display,
confirm that the PIN provided by SYNC matches
the PIN displayed on your cell phone.
The display indicates when the
pairing is successful.
Note: SYNC 3 prompts you to choose your settings
for certain features. Your cell phone may also
prompt you to give SYNC 3 permission to access
information. For more information on your cell
phone’s capability, see your cell phone’s manual
and visit the website.
Phone
After pairing your phone, you can
access more phone-dependent features:
Recent call lists.
Contacts: Sort alphabetically and choose a
specific letter to begin viewing your entries.
Phone settings: Pair another phone, and set ring
tones and alerts.
Text messages.
Do not disturb: Send all calls to your voicemail,
and all ring tones and alerts set to silent mode.
Note: Use the voice commands to make calls. Say
“Call James at home” or “Dial 555-1212”. You
can use the touchscreen to place calls. Refer to
the SYNC 3 chapter in your Owner’s Manual for
complete details.
Making a Phone Call
Use SYNC 3 to make a phone call to anyone in your
phone book through the touchscreen:
Press Contacts and then select
the name of the contact you want to call.
To call using a number from your recent calls,
press Recent Call List and then select an entry
you want to call.
To call a number that is not stored in your
Contacts list, use the Keypad feature to manually
dial the number. Press Call to initiate the call.
Note: Typing the X button deletes the last typed digit.
Receiving Calls
Whenever you have an incoming call, an audible
tone sounds. Caller information also appears in the
display, if the information is available.
Press Accept on the touchscreen or the phone
button on the steering wheel to answer an
incoming call.
Do nothing to ignore an incoming call, and
SYNC 3 logs it as a missed call.
Reject any incoming call by pressing Reject
on the touchscreen.
Page 5
*if equipped *if equipped
9
2017 CONTINENTAL
8
SYNC® 3
Ending the Call
Press and hold the phone button on your
steering wheel.
Do Not Disturb Mode
Touch the Do Not Disturb button to send all calls
directly to your voicemail. All ringtones and alerts
are silent.
Ending the Call
Press and hold the phone button.
Text Messaging
Note: Downloading and sending text messages
using Bluetooth are cell phone-dependent features.
Certain features in text messaging are speeddependent and not available when your vehicle
is traveling at speeds over 3 mph (5 km/h).
When a new message arrives, an audible tone
sounds and the screen displays a pop-up with the
caller name and ID, if supported by your cell phone.
You Can Select:
Hear It to have SYNC 3 read the message to you.
View to see the message on the touchscreen.
Call to call your contact.
Close to exit the screen.
You can reply to text messages with a preset
message. See the SYNC 3 chapter in your Owner’s
Manual for details.
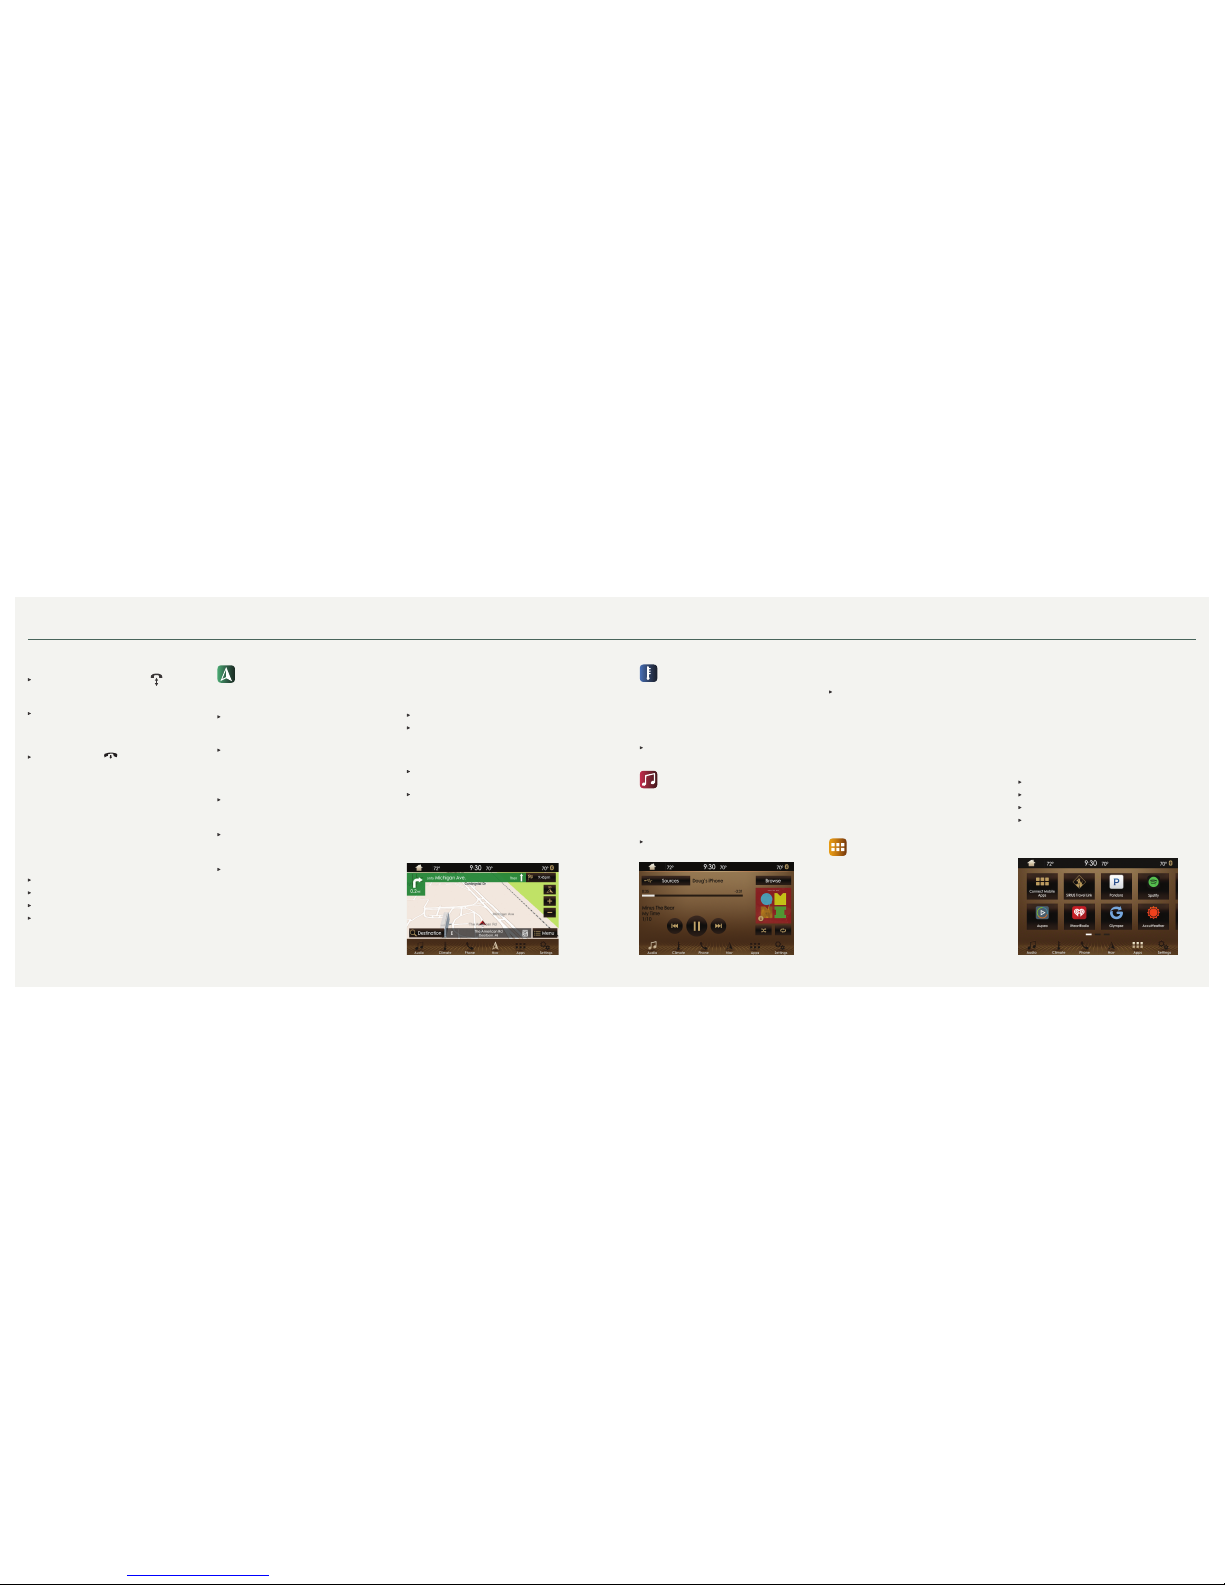
Navigation*
Press the Navigation* icon to set your
destination. Select one of two ways to find
your destination:
Destination mode lets you key in a specific
address or use a variety of search methods to
locate where you want to go.
Map mode shows advanced viewing of 2D city
maps, 3D landmarks and 3D city models
(when available).
Set a Destination
Press Destination on your touchscreen and then
press Search. Enter a street address, intersection,
city or a point of interest (POI).
After you choose your destination, press Start.
The system uses a variety of screens and visible
prompts to guide you to your destination.
During your route, you can press the maneuver
arrow icon on the map if you want the system to
repeat the previous route guidance instructions.
The navigation map shows your estimated time of
arrival, remaining travel time or the distance to
your destination.
Navigation Menu
When you are on your route, you can change your
touchscreen view. Touch Menu and then select
Screen View to select from these options:
Full Map.
Highway Exit displays on the right side of the
touchscreen. View POI icons (restaurants, ATMs,
etc.) as they pertain to each exit. You can select a
POI as a waypoint, if you wish.
Turn List shows all of the available turns on
your current route.
Traffic List displays SiriusXM Traffic and
Travel Link* information.
Climate
Touch the Climate icon on the touchscreen
to access climate control features, including the
temperature, airflow direction, fan speed and other
climate features for you and your front passenger.
Say “Climate set temperature to 72 degrees” and
SYNC 3 makes the adjustment.
You can also use the ▲ or ▼ buttons to change
the temperature setting.
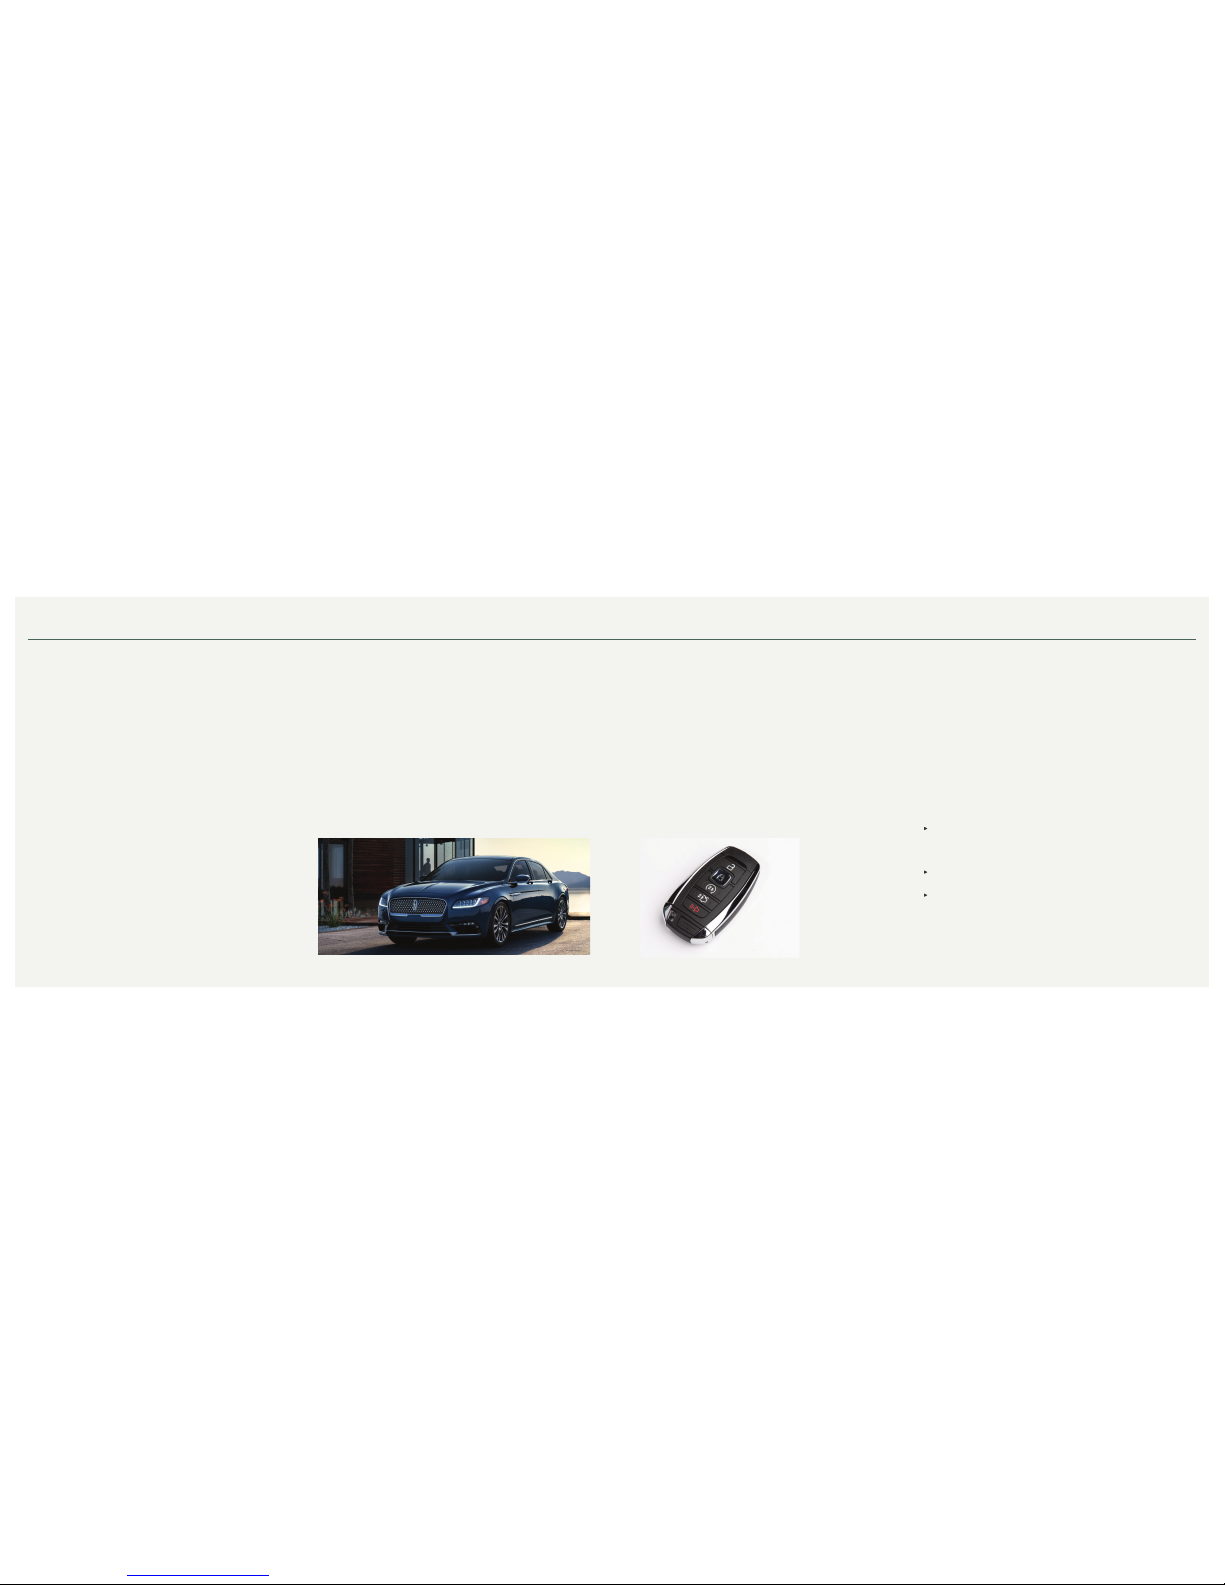
Audio
SYNC 3 gives you a mix of media. Press the
Audio icon on the touchscreen and select Sources.
Choose from AM, FM, SiriusXM*, CD, USB, Bluetooth
Stereo or Apps.
Set Your Radio Presets
Tune to the station and then press and hold one
of the memory preset buttons.
The audio mutes briefly while the system saves the
station and then the audio returns.
Two preset banks are available for AM and three
banks for FM. To access additional presets, tap
the preset button. The indicator on the preset
button shows which bank of presets you are
currently viewing.
Using SYNC 3 to Access Digital Media
Play all of your favorite music from phones, flash
drives and other devices.
Plug your device into a USB port, select Sources
and then choose USB. Wait for the system to finish
indexing your music to begin listening.
You can even create random playlists by using the
Shuffle function.
Apps
Voice Control Your Smartphone Apps
The system supports the use of certain types of
apps such as Pandora® or iHeartRadio® (U.S.),
Spotify® or Glympse® through a USB or
Bluetooth-enabled device. Each app gives you
different on-screen options depending on the
app’s content. To find new apps, use the voice
command “Find new apps”.
For more information, refer to the SYNC 3 chapter in
your Owner’s Manual for details. For support,
visit the website or call the toll-free number. See
the inside back cover of this guide for details.
Smartphone Connectivity
SYNC 3 allows you to use Apple CarPlay and
Android Auto to access your phone over a
USB connection.
When you use Apple CarPlay or Android Auto,
you can:
Make calls.
Send and receive messages.
Listen to music.
Use your phone’s voice assistant.
For more information, refer to the SYNC 3 chapter in
your Owner’s Manual for details.
Page 6
*if equipped *if equipped
11
2017 CONTINENTAL
10
Easy Exit
Moves the driver seat rearward up to 2 in (5 cm). Additionally, the power tilt and
telescoping steering wheel moves to the full up position when the transmission
is in park (P) and you switch o the keyless start ignition. The driver seat and
steering column return to their previous positions when you push the keyless
start ignition button.
Note: You must have your intelligent access key with you for these features
to work.
MyLincoln MobileTM*
This smartphone-compatible app combines vehicle service, client support and
driver convenience features. Using the app, you can start, lock, unlock and
locate your vehicle remotely.
For more details, visit support.lincoln.com/mylincolnmobile.
Lincoln Experiences
As you approach or leave your vehicle, areas of your vehicle automatically adjust,
including the following personalization features.
Welcome Lighting
As you approach your vehicle, select exterior lighting illuminates. You can switch
this feature on and o in your information display. See the Information Displays
chapter in your Owner’s Manual.
Auto-folding Exterior Mirrors*
Exterior mirrors automatically fold toward the glass when you place the
transmission into park (P), switch o the ignition, exit and lock the driver door.
Auto-folding mirrors unfold and return to their original position automatically after
you unlock your vehicle and then open and close the driver door.
You can fold the mirrors on demand by pressing the power-folding mirror control
on the door. The control illuminates and the mirrors fold in toward the glass. Press
the control again to unfold the mirrors. The control light turns o.
Interior Lighting
Interior lighting and ambient lighting including the push button start, adjust as you
enter your vehicle. When you start your vehicle, the information display and the
touchscreen illuminate.
Easy Entry
Automatically recalls your seat and power tilt and telescoping steering wheel
positions when you push the keyless start ignition button.
Convenience
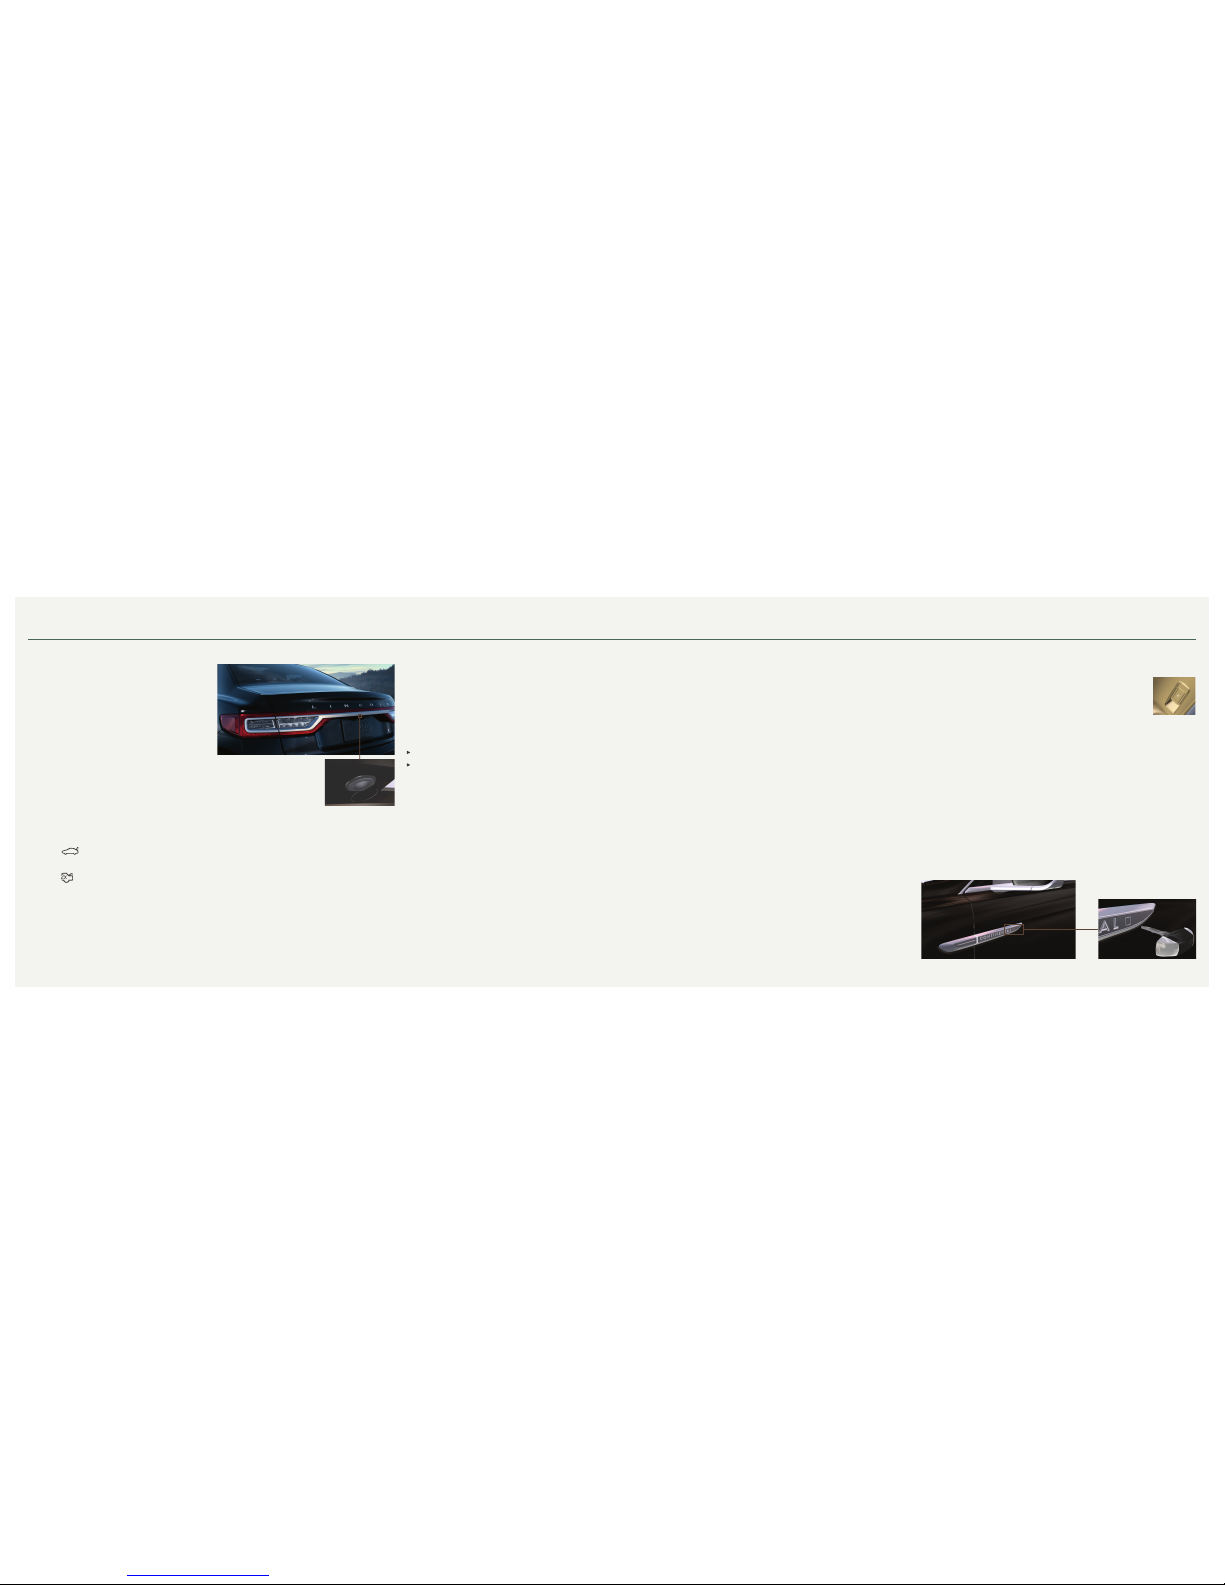
Intelligent Access
Note: Your intelligent access key must be within 3 feet (1 meter) of the vehicle for
intelligent access to function properly.
To unlock and open the driver door,
gently depress the switch inside the exterior door handle to open the door.
To lock all of the doors, touch and briefly hold the lock sensor area on the front
doors.
To open the power decklid, press the button above the license plate on the
center of the decklid.
Note: The key also contains a mechanical key blade that you can use to unlock
the driver door, if necessary.
See Unlocking the Driver Door with the Keyblade on page 13.
Power Windows: Global Opening and Closing
You can use the intelligent access key to operate the windows with the
ignition o.
After you unlock your vehicle, press and hold the key unlock button
to open the windows. Release the button when movement starts.
Press the key lock or unlock button to stop movement.
To close, press and hold the key lock button. Release the button when movement
starts. Press the lock or unlock button to stop movement.
Autowipers*
To switch this feature on, move the wiper controls to intermittent wipe. The
autowiper system turns the wipers on only when moisture is present on the
windshield. The wiper speed depends on how much moisture the system detects
and the sensitivity setting.
A low sensitivity means the wipers turn on when the system detects a large
amount of moisture on the windshield. A high sensitivity means the wipers turn
on when the rain sensor detects a small amount of moisture on
the windshield.
To switch this feature off, use your wiper controls. To change this feature to
intermittent wipe every time you use your wipers, use the information display.
To switch intermittent wipe back to autowipers, use the information display.
Note: Make sure that you switch off this feature before entering a car wash.
Page 7
*if equipped *if equipped
13
2017 CONTINENTAL
12
Convenience
Head Up Display
When your vehicle rapidly approaches another
vehicle, a red warning light flashes and a tone
sounds. The brake support system assists you in
reducing any collision speed by pre-charging the
brakes. If the risk of collision continues to increase
after the audio-visual warning, the brake support
prepares the brake system for rapid braking.
The system does not automatically activate the
brakes, but if you press the brake pedal, even
lightly, the brakes apply full stopping power.
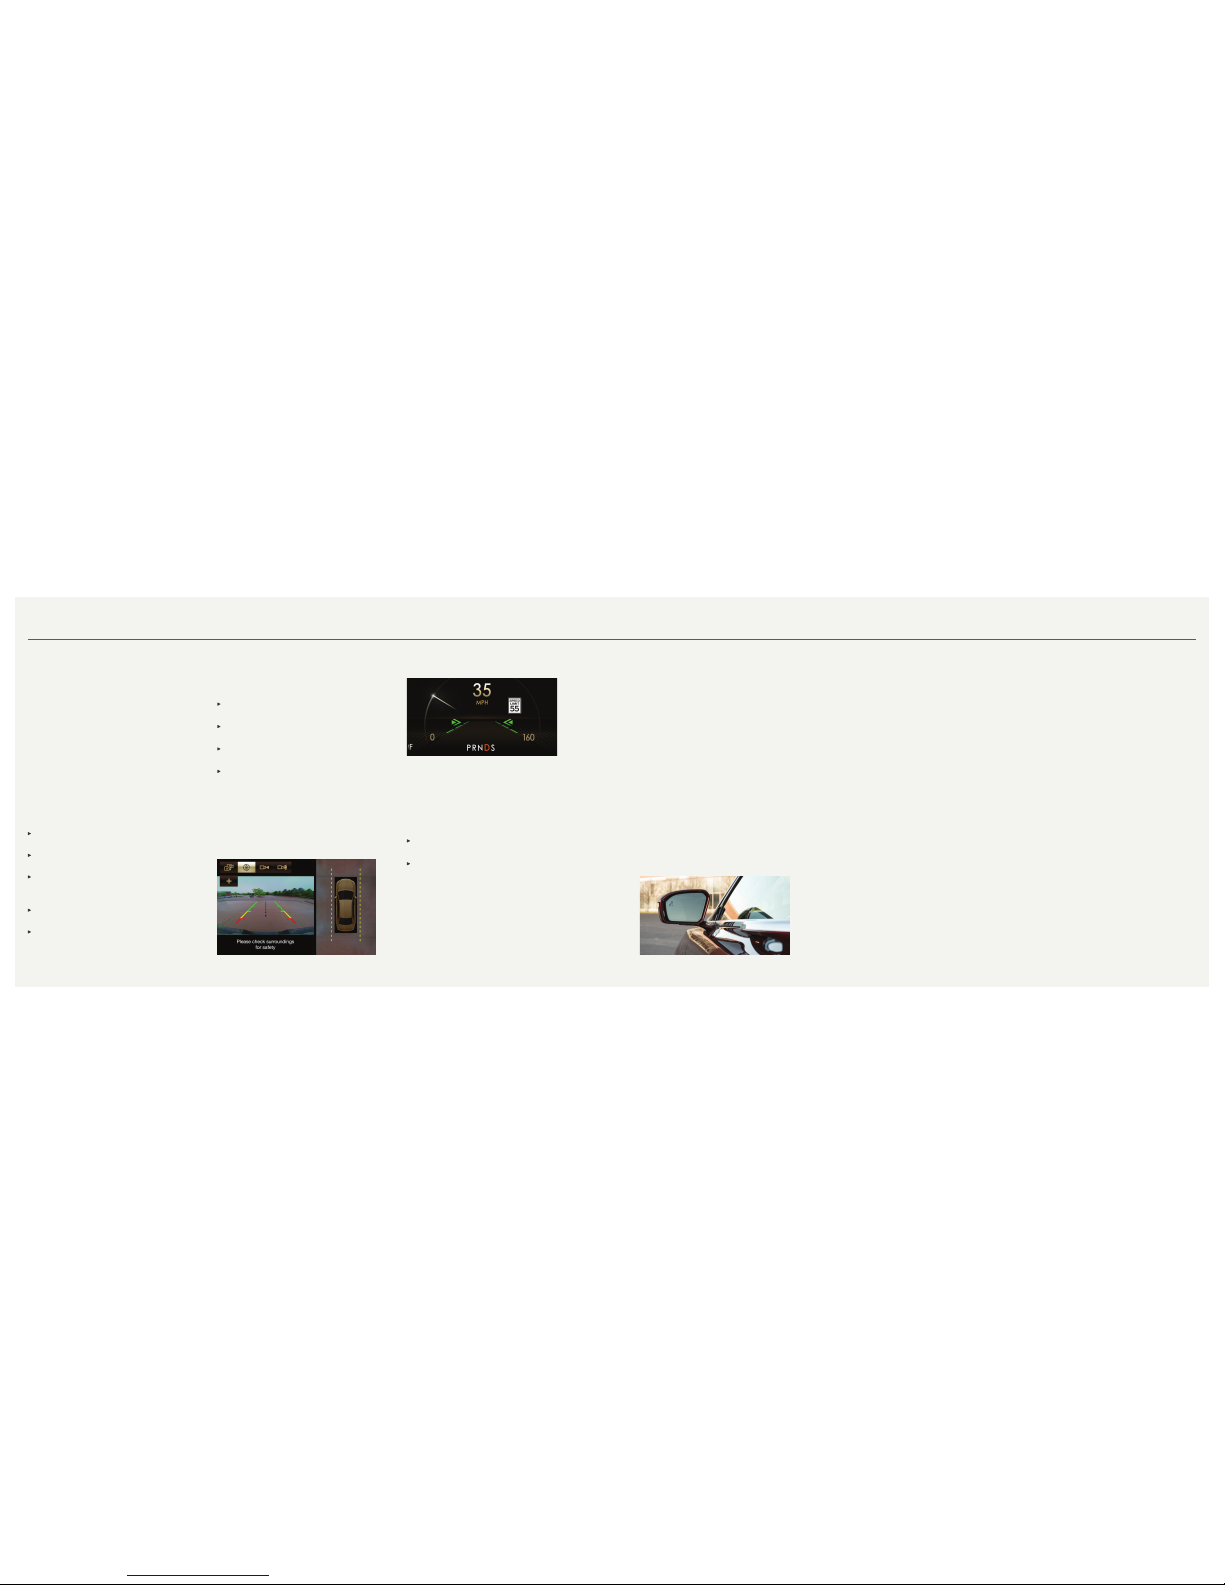
Power Decklid*
Opening and Closing the Power Decklid
The power decklid only operates when
the transmission is in park (P).
From Inside Your Vehicle
Press the button on the instrument panel.
With the Remote Control
Press the button twice within three seconds.
From Outside Your Vehicle
Press the exterior release button. Your vehicle must
be unlocked or have an intelligent access transmitter
within 3 ft (1 m) of the luggage compartment.
Note: Allow the power system
to open the decklid. Manually
pushing or pulling the decklid
may activate the system’s
obstacle detection feature and
stop the power operation or reverse its direction.
Hands-free Decklid Operation*
Make sure you have your intelligent access key
within 3 feet (1 meter) of the decklid .
1. Move your foot under and away from the rear
bumper detection area in a single kick motion.
Do not move your foot sideways or the sensors
may not detect the motion.
2. The decklid opens or closes.
Obstacle Detection*
Opening, the system stops when it detects
an obstacle and a tone sounds
Closing, the system stops when it detects
an obstacle, then a tone sounds and
the system reverses to open.
The Decklid Does Not Power Open or Close When
It detects an object in its opening or closing path.
The ignition is on and the transmission is
not in park (P).
Note: Entering the vehicle while the decklid is
closing could cause the vehicle to bounce and
activate obstacle detection.
Advanced Electronic Door System
Your vehicle has an intelligent, electronically-controlled door system that is in
constant communication with the overall vehicle systems.
When you lock your vehicle using the lock switch on each door interior trim
panel or by using the keyless entry keypad or the lock sensor on each door
exterior trim panel, all exterior door handle switches turn o. This helps to
secure your vehicle and prevent unauthorized entry. The exterior door handle
switches also turn o when your vehicle reaches a speed greater than 12 mph
(20 km/h). A tone may sound indicating the exterior door handle switches are
turned o and your vehicle is secure.
If the airbags deploy or the fuel pump shuto switch activates, all interior and
exterior unlock switches turn o for six seconds. This helps to secure the doors
in the event of a crash. After six seconds, all switches reset and you can open
the doors using the interior and exterior unlock switches. See the Locking and
Unlocking chapter of your Owner’s Manual for information about locking your
vehicle with no power.
Opening and Closing the Door
To open, gently depress the switch inside the exterior door handle to
open the door. To close, gently shut the door until it fully latches. The system
automatically closes the door, making sure that it is fully secure. While your
vehicle is in motion, the door release buttons will only function if pressed three
times in two seconds.
Door Lock Indicator
An LED on each front door window trim illuminates when you lock the doors.
It remains on for up to 10 minutes after you switch the ignition o.
Door Lock Switch Inhibitor
When you electronically lock your vehicle, the door lock switches
and the interior luggage compartment release switch do not
operate after 20 seconds. You must unlock your vehicle with the
remote control or keyless entry keypad, or switch the ignition on to
restore function to these switches.
You can switch this feature on or o in the information display. See the Locking and
Unlocking section of your Owner’s Manual for information.
Emergency Door Release
If you are inside your vehicle and unable to use the Electronic Door System, you
can open the driver’s door using the manual door release switch in the map pocket.
Unlocking the Driver Door with the Keyblade
If your vehicle has no power and the backup power system is disabled, you can
manually unlock the driver door using a key in the position shown.
1. Remove the key blade from the transmitter.
2. Insert the key blade into the lock cylinder behind the continental badge on the
driver door.
3. Turn the key clockwise to unlock the driver door.
All other doors will remain locked.
Page 8
*if equipped *if equipped
15
2017 CONTINENTAL
14
Function
BLIS® (Blind Spot Information System) and
Cross Trac Alert*
BLIS uses radar sensors to help you determine
if a vehicle may be in your blind spot zone. The
cross trac alert feature warns you of vehicles
approaching from the sides when the transmission
is in reverse (R). BLIS and cross trac alert display
a yellow indicator light in your exterior mirrors and
the cross trac alert also sounds tones and displays
messages to warn you from which direction vehicles
are approaching. Refer to the Driving Aids chapter
in your Owner’s Manual for more information.
Note: Visibility aids do not replace the need
to watch where the vehicle is moving. Refer
to the Owner’s Manual for safety information,
more details and system limitations.
Lincoln Drive Control
This feature intelligently integrates chassis and
powertrain systems for personalized ride comfort,
steering, handling, powertrain response and sound.
Choose between two default settings or customize
your own.
Factory default settings include Normal Handling and
Normal Performance while you are in drive (D). Select
sport (S) to engage Sport Handling and Sport
Performance settings.
Customize your Handling and Performance settings
through the information display by navigating
through the menu to Settings > Vehicle >
Drive Control to congure:
Handling
Comfort: Provides lower steering efforts and a
more fluid suspension.
Normal: Delivers an engaging drive experience
with confident handling.
Sport: Increases handling and control with a
sporty feel.
Performance
Normal: Provides smooth power delivery and a
refined sound.
Sport: Increases engine and transmission
responsiveness, while adding a more powerful
engine tone.
360 Degree Camera*
The 360 degree camera system consists of front,
side and rear cameras.
Allows you to see what is directly in front of or
behind your vehicle.
Provides cross trac view in front of and behind
your vehicle.
Allows you to see a top-down view of the area
outside your vehicle, including the blind spots.
Provides visibility around your vehicle to you in
parking maneuvers such as:
• Centering in a parking space.
• Obstacles near vehicle.
• Parallel parking.
The front camera enable button is near the display
screen and turns on the front camera when your
vehicle is not in reverse.
Lane Keeping System*
This system offers drivers two features to help them
stay within their lanes, lane-keeping alert and lanekeeping aid.
A forward-facing camera in the rearview mirror reads
lane markings. If the vehicle drifts out of its lane
without the driver using a direction indicator, the
system can provide one or both of the following:
Alert: Sends vibration pulses to the
steering wheel.
Aid: Provides steering torque to help direct the
driver to steer the vehicle back into its lane.
To switch this system on or off, use the control on the
end of the direction indicator.
Push Button Shift Transmission
Your vehicle includes an electronic transmission. The
shift controls are on the center stack next to
the touchscreen.
Putting Your Vehicle in Gear
A. Fully press down the brake pedal.
B. Press and release one of the PRNDS controls to
select your gear.
C. The selected gearshift control illuminates and the
information display shows the selected gear.
D. Release the brake pedal and your transmission
remains in the selected gear.
Note: When entering an automatic car wash, always
put your vehicle into Stay in Neutral mode. To put
your vehicle in Stay in Neutral mode, make sure your
vehicle is stationary first and then:
A. Press the neutral (N) control on the shifter assembly
once. The information display screen reads “Press
N Again to Enter Stay in Neutral mode”.
B. Press neutral (N) on the shifter assembly again. The
message “Stay in Neutral mode engaged” appears
in the information display and the neutral (N) control
flashes continuously to confirm your selection.
To exit Stay in Neutral mode, press another gear.
Front Parking Aid
When your vehicle approaches an object, a warning
tone sounds. When your vehicle moves closer to an
object, the warning tone repeat rate increases. The
warning tone sounds continuously when an object is
12 in (30 cm) or less from the front bumper. Coverage
area of up to 28 in (70 cm) from the front bumper. The
coverage area decreases at the outer corners.
Auto Hold
Auto Hold can assist you while stopping at traffic lights
or while in traffic jams by holding the brakes when you
stop the vehicle. Press the Auto Hold button to switch
the system on. The Auto Hold button lights. When
the system is on and actively holding the vehicle,
AUTO HOLD displays in the instrument cluster.
When you press the accelerator pedal, Auto Hold
automatically releases the brakes. In some situations,
Auto Hold may apply the electric parking brake and
illuminate the brake warning lamp in the instrument
cluster.
Auto Hold turns off when you power down your
vehicle, or you can switch the feature off manually by
pressing the Auto Hold button. Switch Auto Hold o if
you are towing a trailer or having the vehicle towed.
Page 9
*if equipped *if equipped
17
2017 CONTINENTAL
16
17
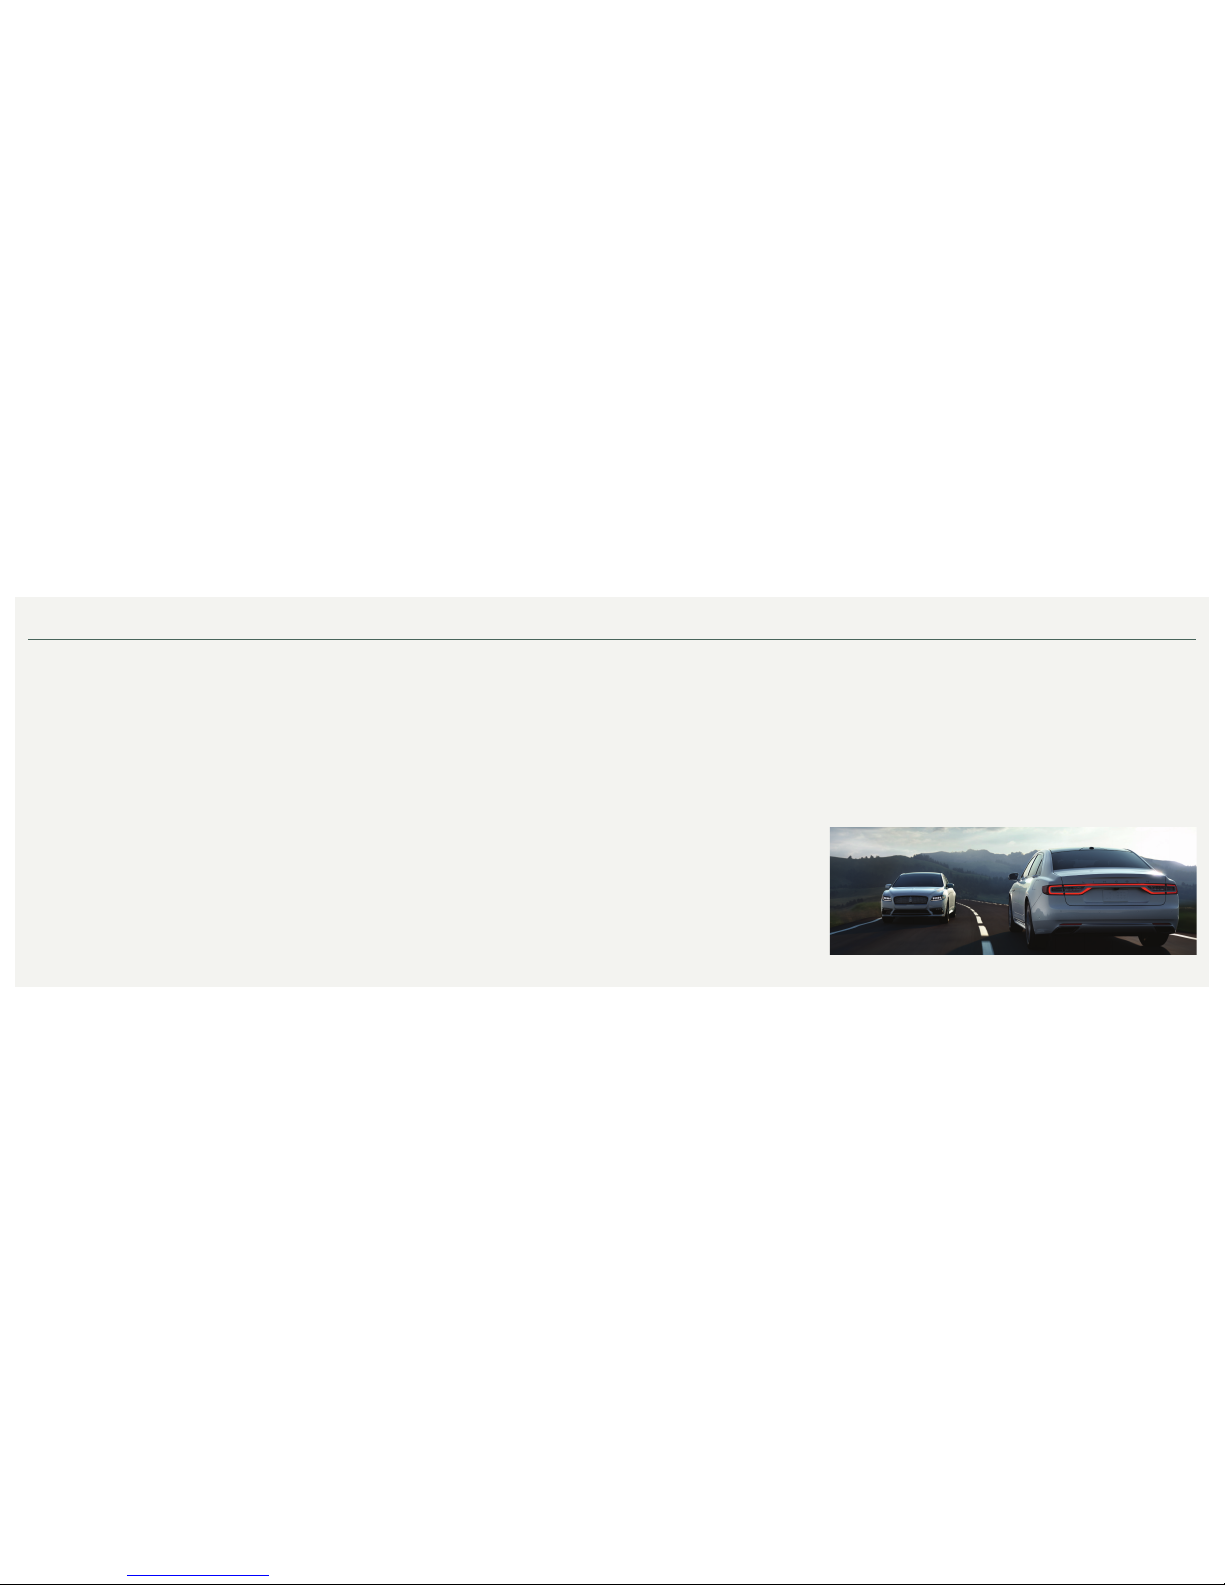
Pre-Collision Assist with
Pedestrian Detection*
This system warns you of certain collision risks.
The system’s sensor detects your vehicle’s rapid
approach to a stationary vehicle, another vehicle
traveling in the same direction as yours, or a
pedestrian within your driving path. When the system
activates, a red warning light flashes and a tone
sounds. The brake support system assists you in
reducing any collision speed by pre-charging the
brakes. If the risk of collision continues to increase
after the audio-visual warning, the brake support
prepares the brake system for rapid braking. The
system does not automatically apply the brakes, but
if the brake pedal is pressed even lightly, the system
may apply full force.
See the Driving Aids chapter in your Owner’s
Manual for safety information, more details
and limitations.
Brake Assist
Brake assist detects when you brake rapidly by
measuring the rate at which you press the brake
pedal. It provides maximum braking eciency
as long as you press the pedal, and can reduce
stopping distances in critical situations.
Active Park Assist*
The system detects an available parallel or
perpendicular parking space and automatically
steers your vehicle into the space (hands-free) while
you control the accelerator, gearshift and brakes.
The system visually and audibly guides you to park
your vehicle.
If you are uncomfortable with the proximity to any
vehicle or object, you may choose to override the
system. The system automatically steers your vehicle
out of a parallel parking space (hands-free) while you
control the accelerator, gearshift and brakes. The
system visually and audibly guides you to
enter trac.
See the Parking Aids chapter in your Owner’s
Manual for safety information, more details
and limitations.
Driver Alert
The system automatically monitors your driving
behavior using various inputs including the front
camera sensor. If the system detects that your driving
alertness is reduced below a certain threshold, the
system will alert you using a tone and a message in
the information display.
The warning system is in two stages. At rst the
system issues a temporary warning that you need to
take a rest. This message will only appear for a short
time. If the system detects further reduction in driving
alertness, another warning may be issued which will
remain in the information display for a longer time.
Press OK on the steering wheel control to clear
the warning.
You may switch the system on or o through the
information display.
Function (continued)
Using All Wheel Drive*
All-Wheel Drive (AWD) uses all four wheels to power
the vehicle. This increases traction, enabling you
to drive over terrain and road conditions that a
conventional two-wheel drive vehicle cannot. The
AWD system is active all the time and requires no
input from the operator.
Dynamic Torque Vectoring*
This feature uses all four wheels to power the vehicle
and independently controls the torque to each
rear wheel. This increases traction and handling
performance. The system is active all the time and
requires no input from the operator.
Using a Compact Spare Tire*
When you install the compact spare tire and operate
the vehicle, the system automatically disables to
protect itself and displays this message on the
instrument cluster. This also occurs if the system
is overheating or if there is an issue with another
vehicle system preventing AWD operation.
Adaptive Steering
The adaptive steering system continually changes
the steering ratio with changes to vehicle speed,
optimizing the steering response in all conditions.
Child Safety Locks
When these locks are set, the rear doors cannot be
opened from the inside. The childproof lock switch is
on the driver door.
Press the control to lock or unlock the rear doors. It
illuminates when you lock the rear doors. When you
switch the locks o or on, a message appears in the
information display showing system status.
The child lock setting remains on when you switch
the ignition o.
Rear Inatable Seatbelt*
The rear inatable seatbelts are in the shoulder
portion of the seatbelts of the second-row outboard
seating positions
The rear inatable seatbelts function like standard
restraints in everyday usage. During a crash of
sucient force, the inatable belt inates from inside
the webbing. This holds the occupant in place more
eectively, reduces pressure on the chest and
controls head and neck motion.
Page 10
*if equipped *if equipped
19
2017 CONTINENTAL
18
SecuriCodeTM Keyless Entry Keypad
Lock or unlock the doors without using a key. You can operate the keypad with
the factory-set, 5-digit entry code. This code is on the owner’s wallet card in the
glove box.
In addition to the factory-set code, you can also create up to five of your own
5-digit personal entry codes. To lock all of the doors and decklid, press and
hold 7•8 and 9•0 at the same time with the driver door closed. For complete
information, refer to the Locks chapter of your Owner’s Manual.
SelectShift® Automatic Transmission
The transmission gives you the ability to manually change gears, if you like. To
use SelectShift, press drive (D). Use the paddle shifters, located on the steering
wheel, to manually select gears. Pull (+) to upshift, pull (–) to downshift. The
system stays in manual control until you make another shift button selection.
MyKey
TM
MyKey allows you to program driving restrictions in order to promote good
driving habits such as speed restrictions and limited volume levels. For complete
information, refer to the MyKey chapter in your Owner’s Manual.
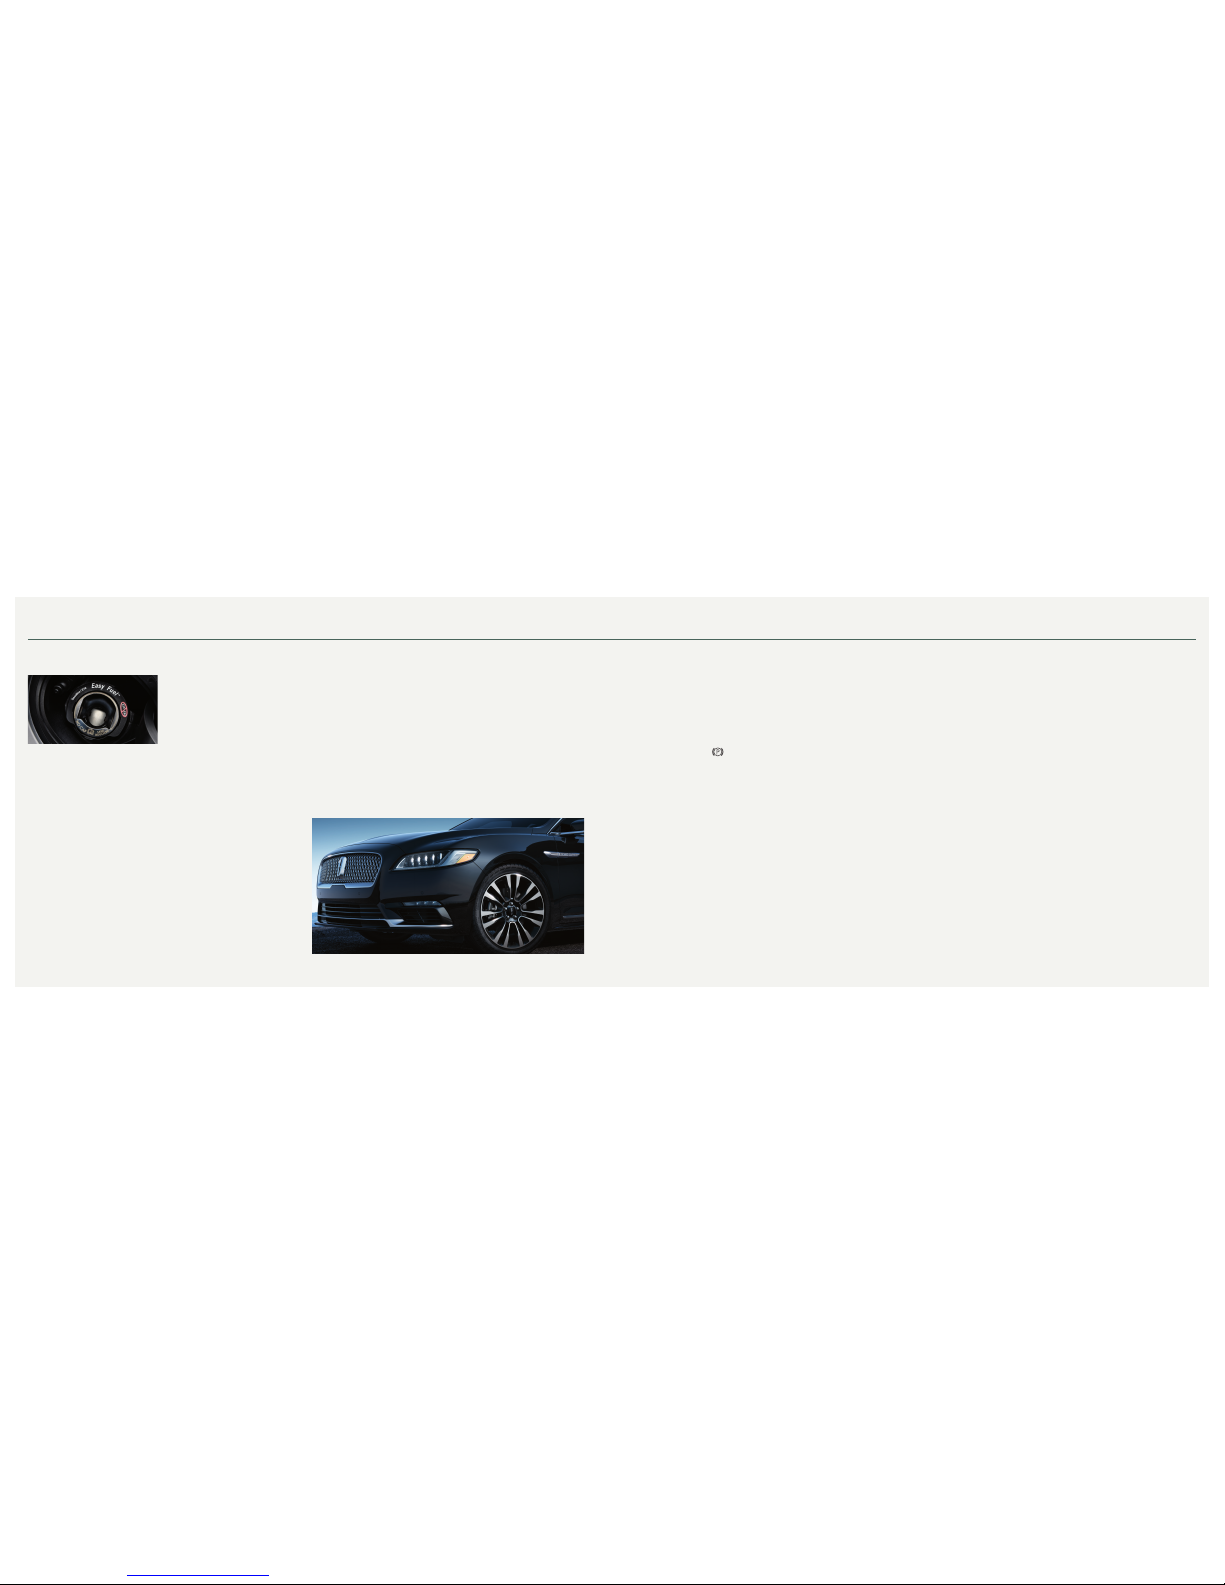
Location of Spare Tire and Tools
Your spare tire and tools are beneath the carpeted load oor in the rear of
your vehicle. The spare tire is for emergency use only and should be replaced
as soon as possible. For complete details on changing your tire, refer to the
Changing a Road Wheel section in the Wheels and Tires chapter of your
Owner’s Manual.
Electric Parking Brake
The operating switch replaces the conventional handbrake, and is in the
instrument panel. To use it, pull the switch. The brake system warning lamp
flashes for 2 seconds, then stays lit to confirm that you applied the electric
parking brake. You can release the electric parking brake manually by switching
the ignition on, pressing the brake pedal and then pressing the electric parking
brake switch down. The brake system warning lamp turns off. Refer to the
Brakes chapter of your Owner’s Manual for more details.
Essential Features
Refueling
When Fueling Your Vehicle
1. Put your vehicle in park (P) and
switch the ignition o.
2. Open the fuel ller door. Slowly,
fully insert the fuel ller nozzle into
the fuel system. Leave the nozzle
inserted fully until you are done
pumping your fuel.
3. Wait at least 10 seconds before
removing the fuel pump nozzle to
allow any residual fuel to drain into
the fuel tank.
Note: When using a portable fuel
container, do not use aftermarket
funnels as they do not work with
the capless fuel system and may
cause damage. Instead, use the plastic
funnel included with your vehicle.
The fuel funnel is in the rear of the
vehicle, in the spare wheel storage
tray. Properly clean the funnel after
each use or dispose of it properly.
Automatic Engine Shutdown
Your vehicle has a feature that
automatically shuts down the engine
if it has been idling for an extended
period of time. The ignition also turns
o in order to save battery power. You
can override this feature temporarily
by pressing the brake or accelerator
pedal, or by pressing OK or the RESET
button on your information display.
Refer to the Information Displays
chapter of your Owner’s Manual for
more details.
Towing Your Vehicle
Towing your vehicle behind an RV or
any other vehicle may be limited. Refer
to Towing the Vehicle on Four Wheels
section in the Towing chapter of your
Owner’s Manual for more information.
Fuel Tank Capacity/Fuel Info
Your vehicle has a 18.0 gallon (68.1L) fuel tank. We recommend regular unleaded
gasoline with a minimum pump (R+M)/2 octane rating of 87. To provide improved
performance, we recommend premium fuel for severe duty usage such as trailer
towing. Do not use ethanol (E85), diesel, fuel-methanol, leaded fuel or any other
fuel because it could damage or impair the emission control system.
Tire Pressure Monitoring System
Your vehicle has a tire pressure monitoring system that lights a low tire
pressure warning light in your instrument cluster when one or more of your
tires are signicantly under-inated. If this happens, stop and check your tires
as soon as possible. Inate them to the proper pressure. Refer to the Wheels and
Tires chapter of your Owner’s Manual for more information.
Page 11
*if equipped
21
20
2017 CONTINENTAL
Comfort
Automatic Climate Control Settings
The remote start feature allows you to pre-condition
your vehicle’s interior. When you set the climate
control system to AUTO, it automatically adjusts the
cabin temperature during a remote start if the remote
start climate control settings are set to AUTO in the
information display.
In hot weather, the air conditioning automatically
turns on. In cold weather, the heat automatically turns
on. See the Climate Control chapter of your Owner’s
Manual for more details.
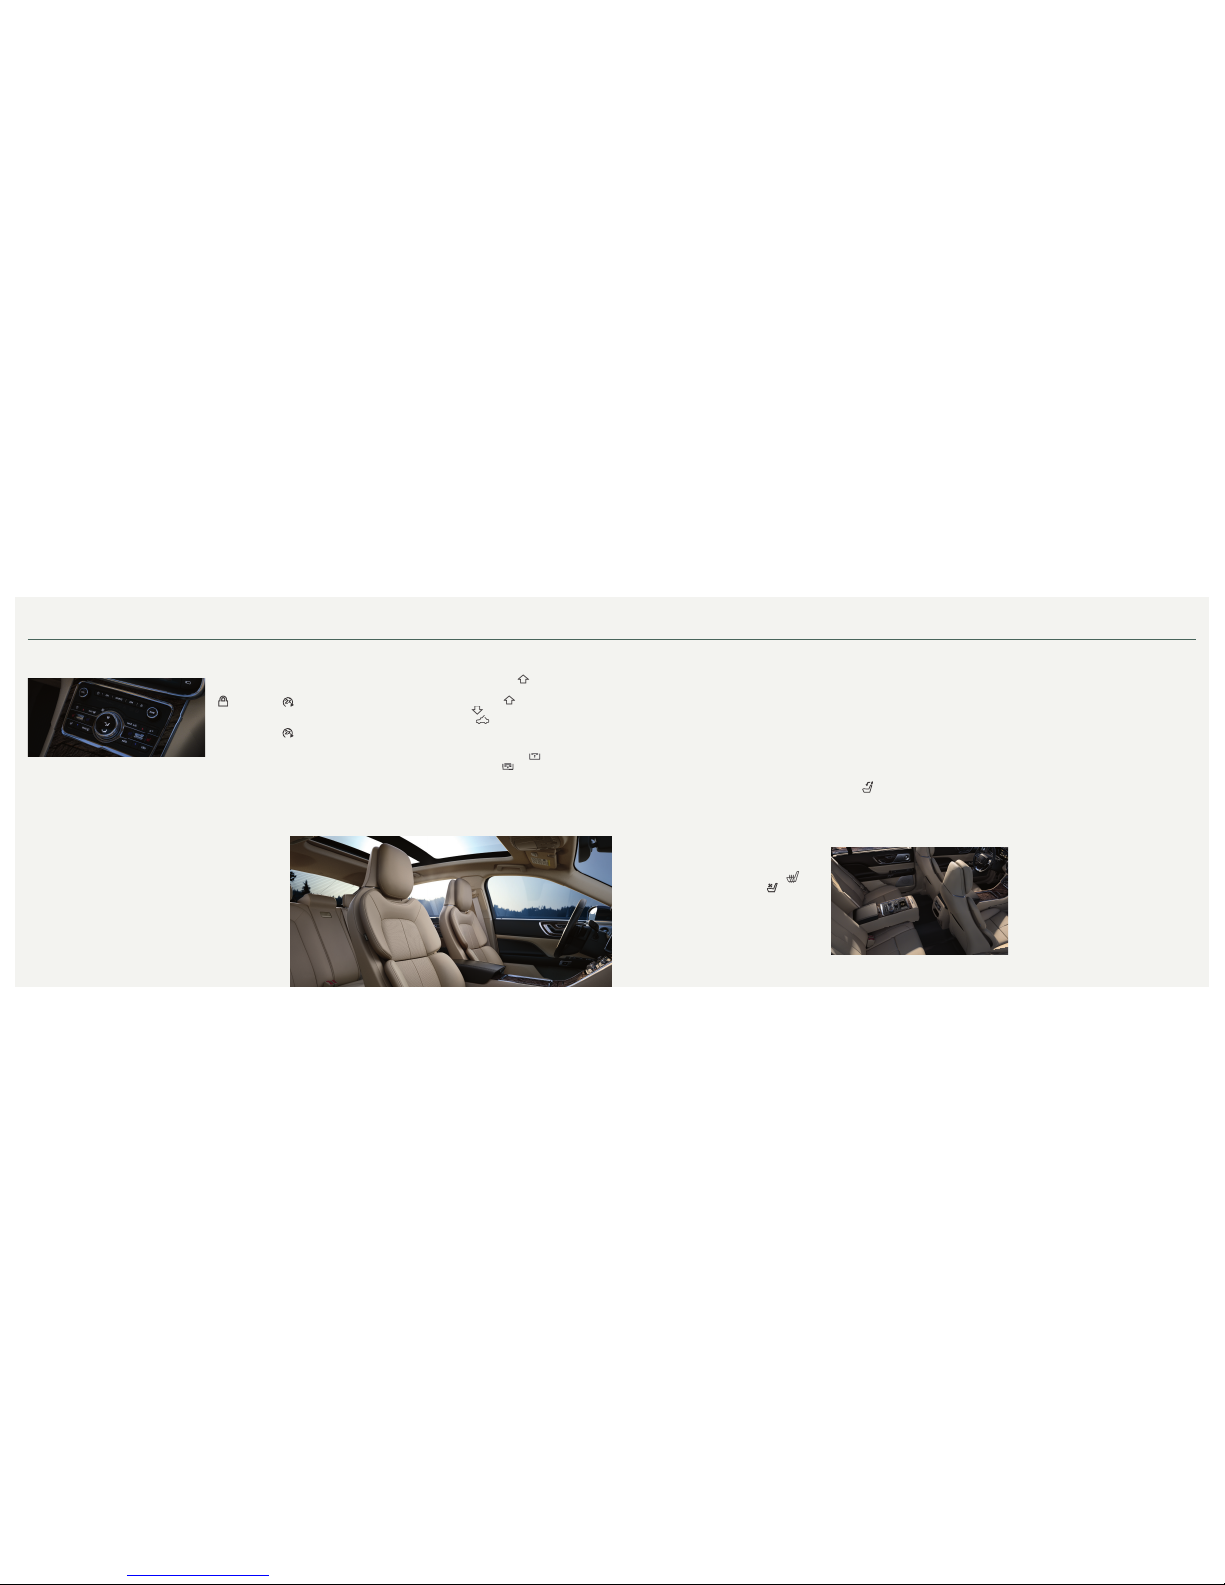
Climate Controlled* Front Seats
To use, press the heated or the cooled seat symbol
on the touchscreen to cycle through the various
settings and o. Warmer or cooler settings are
indicated by more lights. The climate controlled seats
function only when the engine is running.
Remote Start
Remote start allows you to start the engine from
outside your vehicle using your key. To start, press
and then press twice within three seconds.
When inside, shift into drive (D) and go. To switch the
engine off from outside the vehicle after using your
remote start, press once.
An LED on the key provides status feedback of
remote start or stop commands:
Solid green: The remote start or extension
was successful.
Solid red: The remote stop was successful and
the engine is off.
Moonroof*
To open the moonroof, press the open button.
It stops short of the fully opened position. To open
the moonroof fully, press the open button again.
To close, press the close button. To vent the
moonroof, press the vent button.
The sunscreen automatically opens with the
moonroof, but if the moonroof is closed, you can
open the sunscreen by pressing the open
button. To close it, press the close button.
Sunshades*
A control for the power rear sunshade is on the
overhead console and rear seat armrest*. Press and
release the control to open and close the sunshade.
To stop motion and return the shade to its previous
position, press the control a second time. The shade
automatically retracts when you shift the transmission
into reverse (R).
Manual sunshades can be found on the rear
side windows.
Rear Passenger Climate Controls*
The rear climate controls allow rear passengers to
adjust the temperature, fan speed and air distribution
for the rear seating area. You can select the fan
speed control lock to restrict the control of the rear
settings to the touchscreen.
Rear Climate Controlled Seats*
The rear seat climate controls are on the rear of the
center console. For heated seats, press the
button. For ventilated seats, press the ventilated
seat button. Press the desired button to cycle
through the various heat settings and o. Warmer
settings are indicated by more indicator lights.
Note: You must switch the engine on to use
this feature.
Rear Passenger Audio Controls*
The rear audio controls on the center armrest allow
rear passengers to change the media source and
adjust the volume. You can also seek, fast forward,
or reverse when in CD or USB mode. There are also
two USB ports in the arm rest compartment.
Refer to the Audio System chapter of your Owner’s
Manual for more information.
Power Rear Head Restraints*
If you need more visibility out of the rear window,
press the button on the overhead console to fold
the rear outboard head restraints down.
Automatic High Beam Control*
The system automatically turns on the high beams
if it is dark enough and no other trac is present.
When it detects the headlights of an approaching
vehicle, the rear lamps of the preceding vehicle or
street lighting, the system turns o the high beams
before they distract other drivers. The low beams
remain on. You can turn this system on and o
by using the information display to the autolamps
position. See the Information Displays chapter of
your Owner’s Manual for more information.
Headlamp Exit Delay
After you switch the ignition o, you can switch the
headlamps on by pulling the direction indicator
lever toward you. You will hear a short tone. The
headlamps will switch o automatically after three
minutes with any door open or 30 seconds after
the last door has been closed. You can cancel this
feature by pulling the direction indicator toward you
again or switching the ignition on
Rear Power Recline*
Use the control on the passenger side rear door to
recline the outboard rear seatbacks.
*if equipped
Page 12
*if equipped
23
22
2017 CONTINENTAL
Basic Commands
Main menu
Go back
Cancel
List of commands
Next page
Previous page
Help
Climate
Climate set temperature to
<# of degrees>
Climate help
Phone
Phone list of commands
Pair phone
Call <name> on cell/
at home/at work
Dial <phone number>
Listen to text messages
(phone-dependent feature)
Phone help
Apps
List mobile apps
Find new apps
Audio
AM <530-1710>
FM <87.9-107.9>
Bluetooth audio
CD
USB
Sirius <0-233>
<Sirius channel name>
Help
Navigation*
Navigation list of commands
Destination
<home/previous destination>
Find
<POI/an address/ intersection>
Show route
Where am I?
SiriusXM Trac and Travel Link*
list of commands
• Show <trac/weather map/
5 day forecast/fuel prices>
• Help
Some services may not be available in your area. For additional support, refer to your the SYNC 3 chapter of your Owner’s Manual,
visit the website or call the toll-free number.
For U.S. clients: Visit owner.lincoln.com or call 1-800-521-4140 (select Option 1 or 2 for language, then press 3).
For Canadian clients: Visit SyncMyRide.ca or call 1-800-387-9333 (select Option 1 or 2 for language, then press 3).
Commonly Used Voice Commands
Press the voice button on your steering wheel and then say:
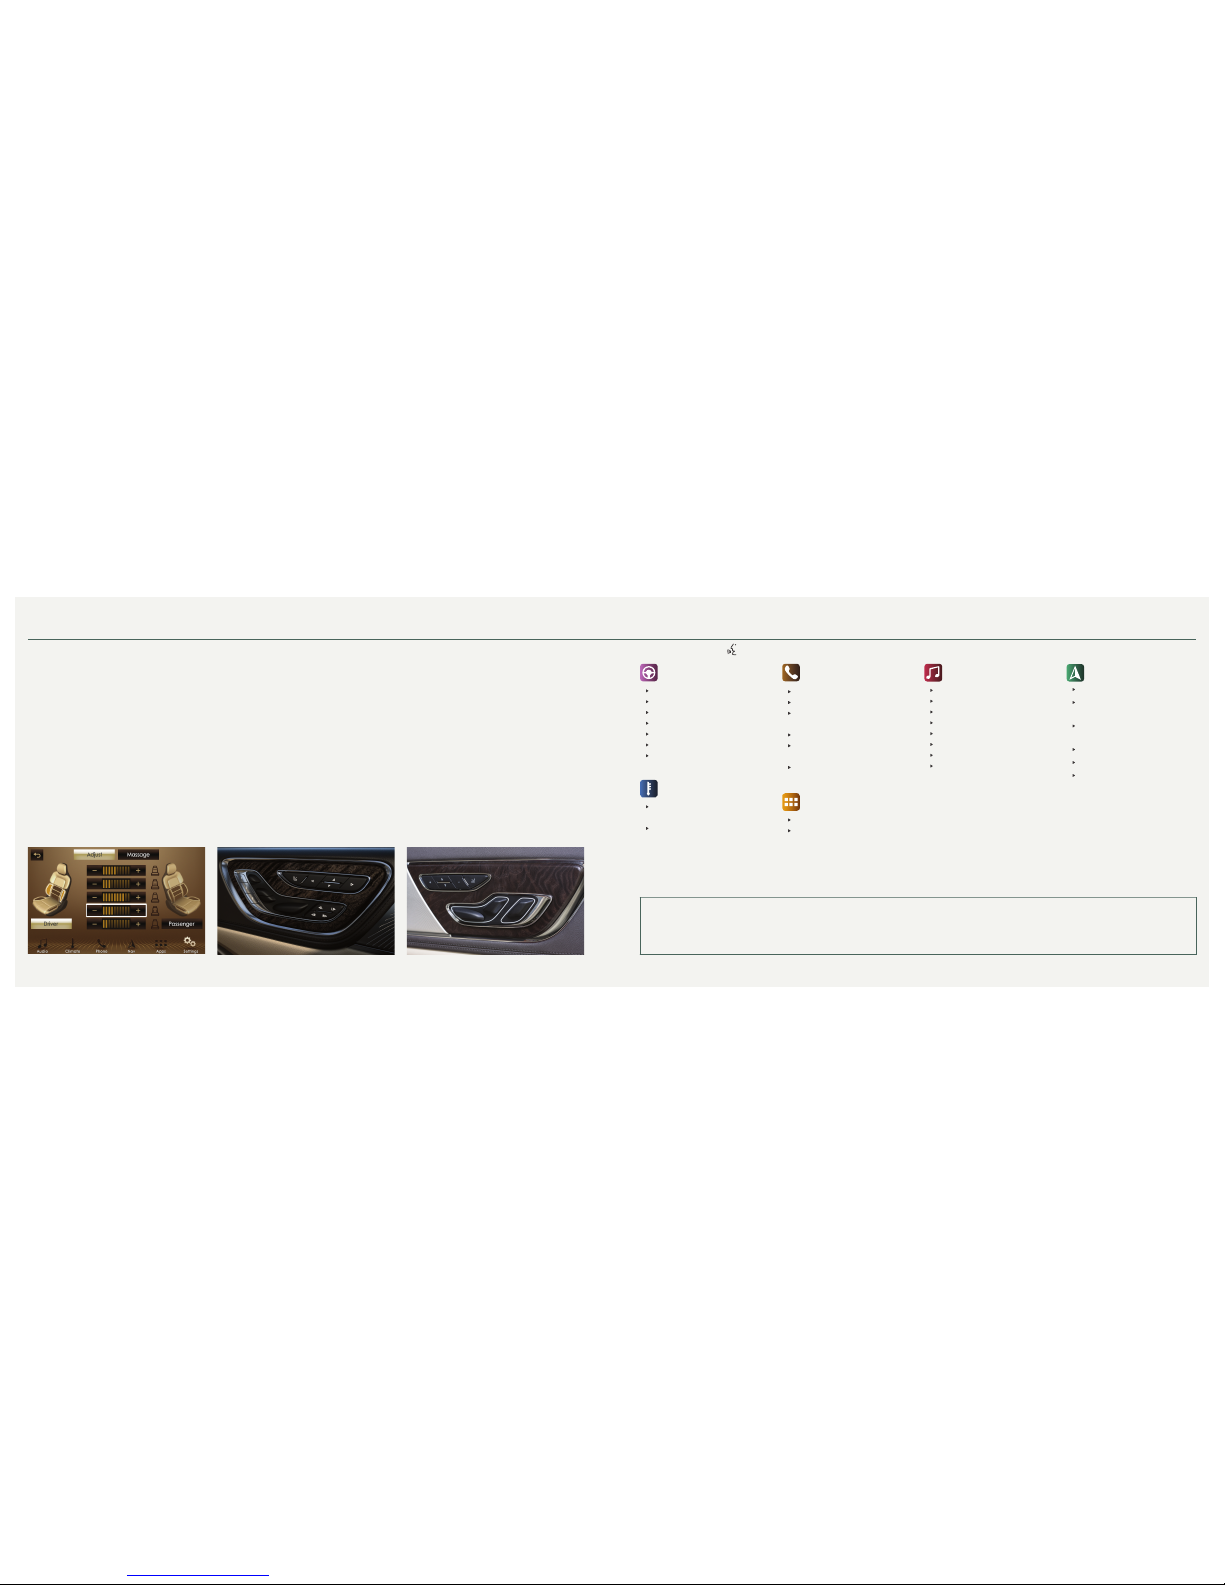
Multi-Contour Front Seats*
Your can adjust your seat in a variety of ways to
help find the best fit for you. The seat controls are on
the door.
Using these controls, you can adjust the seat height,
recline, lumbar support, the length of the seat
cushion, the upper seatback* and the head restraint.*
See the Power Seats chapter in your Owner’s
Manual for more information.
Mutli-Contour Front Seats with Active Motion*
Using the buttons or the SYNC 3 menu, you can
switch on the massage system. You can control the
intensity and the massage features.
Rear Multi-Contour Seats with Active Motion*
You can use the controls on the rear doors to activate
the seatback and cushion massage function.
See the Rear Seats section of your Owner’s Manual
for more information.
Power Head Restraint*
You can use the four-way controls on the door
panel to adjust the height and angle of the front
head restraints.
Rear Window Bueting
When just one of the windows is open, you may hear
a pulsing noise.
Lower the opposite window until the noise subsides.
Auto-Dimming Mirror
The mirror dims automatically to reduce glare when
the system detects bright lights from behind your
vehicle. It automatically returns to normal reection
when you select reverse (R) to make sure you have a
clear view when backing up.
Driver’s Exterior Mirror
The driver’s exterior mirror automatically dims when
the interior auto-dimming mirror turns on.
Chaueur Switch*
Use the control on the rear passenger door to move
the front passenger seat.
Comfort (continued)
 Loading...