

Page 1

User Instructions
Electric Convection Oven
ECO8 and ECO9
IS331 ECN3191
Page 2
Dear Customer
Thank you for purchasing this Lincat product.
With correct use and careful maintenance as described in these instructions,
your Lincat product will give years of trouble free use.
We produce over 450 different items of catering equipment and our range is
constantly being extended and improved. Find out more about Lincat
products from your local distributor or direct from us.
CONTENTS
CONTENTS ..................................................................................................... 2
SAFETY INFORMATION.................................................................................3
DELIVERY CHECKLIST ..................................................................................4
TECHNICAL SPECIFICATION ........................................................................4
ACCESSORIES ...............................................................................................4
INSTALLATION ...............................................................................................5
OPERATING INSTRUCTIONS ........................................................................ 7
CLEANING.......................................................................................................9
MAINTENANCE...............................................................................................9
SPARE PARTS.............................................................................................. 10
SERVICE INFORMATION .............................................................................11
GUARANTEE.................................................................................................11
IS331 ECN3191
2
Page 3
SAFETY INFORMATION
To prevent injury to yourself or your staff, and to avoid
damaging the product, please read and follow the safety
precautions below before setting up and using the unit:
• Remove all plastic coatings and clean the unit before use.
• Ensure that the electrical supply cable is not damaged. If it is,
it must be replaced by Lincat Ltd or by qualified personnel.
• Always disconnect the unit from the electricity supply before
servicing.
• The unit must be earthed.
• Do not try to modify this unit.
• Never clean the unit with a water jet.
• Inform staff that the surfaces and base will become hot.
• Do not lean over the oven door when opening.
• Keep these instructions in a safe place for future reference.
IS331 ECN3191
3
Page 4

DELIVERY CHECKLIST
If an item is missing please contact your dealer.
ECO8
• Electric convection oven (with
electrical supply cable and 13
amp plug)
• 3 x wire shelves
• Plastic water connection hose
• User instructions
• Guarantee card
ECO9
Electric convection oven
4 x wire shelves
Plastic water connection hose
User instructions
Guarantee card
TECHNICAL SPECIFICATION
Model ECO8 ECO9
Model ECO8 ECO9
Width mm 790 765
Depth mm 700 810
Height mm 570 650
Power Rating kW 3.0 7.5
Net weight net kg 68 75
ACCESSORIES
Floor stand ECO8/FS
ECO9/FS
Low level floor stand ECO8/LFS,
ECO9/LFS
Stacking kit ECO8/SK
ECO9/SK
Floor stands with 12 runners for storage
of 1/1GN containers and cooling of baked
products
Low level floor stands with 4 runners for
GN containers
Stacking kits required for safe stacking of
one unit on top of another
Important: For stability, a matching
low level floor stand ECO8/LFS or
ECO9/LFS must also be used
IS331 ECN3191
4
Page 5

INSTALLATION
• Install the unit on a heat-resistant work surface.
• This appliance should have at least 100mm clearance at the back , as
it has a rear facing flue to enable two appliances to be stacked using
our optional stacking kit. Where it is to be positioned in close proximity
to walls, partitions, kitchen furniture, decorative finishes, etc., it Is
recommended that they be made of non-combustible material, or if not,
be clad with a suitable non-combustible heat insulating material, and
that the closest attention be paid to fire prevention regulations.
• Make sure that the surface is firm and level.
• Inform all users that the surfaces and base will become hot
• For safety regulations the plug or means of disconnection must always
be accessible
Connecting to the electricity supply
ECO8
The unit must be earthed
Check that the voltage of your electricity supply corresponds to the voltage
shown on the serial plate
The product is supplied with a 13 amp plug. If replacing the plug, connect the
terminals as follows:
− Green and yellow wire
− Blue wire
− Brown wire
Earth E
Neutral N
Live L
ECO9
The unit must be earthed
Check that the voltage of your electricity supply corresponds to the voltage
shown on the serial plate
This unit must be connected to the supply by a qualified electrician in
accordance with Health and Safety at Work Acts and other relevant
regulations, standards and codes of practice
A means of disconnecting from the supply must be provided with at least 3mm
contact separation in all poles
IS331 ECN3191
5
Page 6
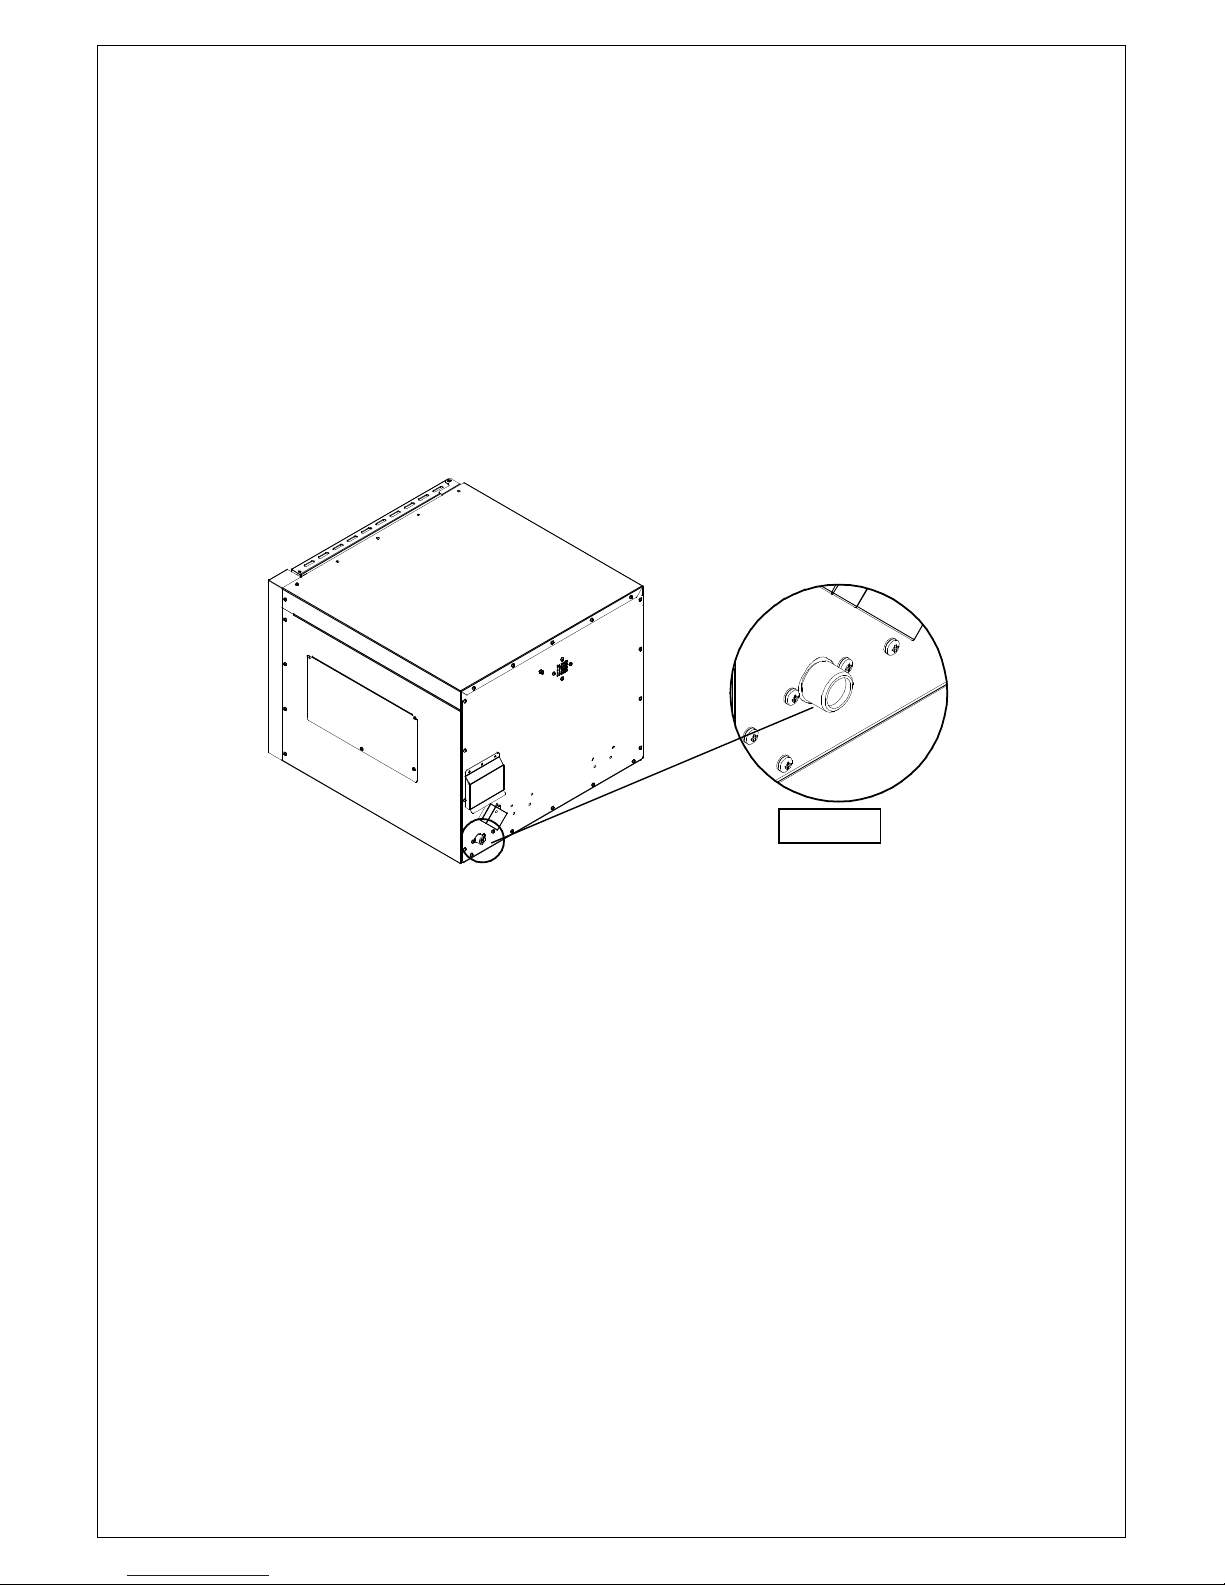
Connecting to the water supply
VALVE A
The water supply pressure must be from 0.2-10 bar
Screw one end of the white plastic feed hose to valve (A) on the back of the
oven and the other end to your water supply tap.
Figure 1: Water Supply Valve
IS331 ECN3191
6
Page 7
OPERATION
Figure 2: ECO8 / ECO9 Oven Controls
1 ON / OFF switch
3
6
1
5
2 Power supply indicator
3 Oven temperature indicator
2
4 Temperature control knob
5 Cook and hold switch
6 Cook and hold indicator
4
7 Cook and hold timer
8 60-minute timer
9 Interior light switch
10 Water injection switch
7
8
9
IS331 ECN3191
10
7
Page 8

Cooking
1 Connect the unit to the electricity supply. The green indicator (2) lights up
when there is power to the unit.
2 Make sure the oven door is shut.
3 Turn the mains switch (1) on: the switch lights up.
4 Turn the control knob (4) to the required temperature.
5 The amber indicator (3) will go out when the oven has reached the
required temperature.
Cook and hold function
1 Switch the cook and hold switch (5) to ON. The cook and hold indicator (6)
lights up.
2 Set the cook and hold timer (7) to the required cooking time. After the time
set has elapsed the oven cools gradually to approximately 80ºC.
3 The temperature is maintained at approximately 80ºC until the oven is
turned off.
Interior lights
Press the light switch (9) to turn the lights on and off
Water injection
The water injection switch (10) sprays water into the oven cavity to create
steam.
60-minute timer
Turn the knob (8) to the required time. A bell sounds when the time has
elapsed.
IS331 ECN3191
8
Page 9

CLEANING
Important: Take care not to damage the thermostat bulbs inside the
oven when cleaning.
• Clean the unit regularly to maintain efficient performance and hygiene.
• Disconnect the unit from the electricity supply and allow to cool before
starting to clean
• Use a mild detergent in hot water and a soft cloth.
• Do not allow excess water to run into the unit.
• Do not use abrasive creams or scourers.
• Burnt-on food may be removed using Carb’n’off or similar cleaner
MAINTENANCE
The parts listed below can be replaced by the user. No other regular
maintenance is required.
For replacement of parts in the Spare Parts List please contact your dealer.
Door inner
glass
Light bulb 1 Carefully remove the glass cover using a flat-bladed
Shelf racks 1 Swivel shelf locking tabs to allow the shelf to rise upwards.
1 Slide the glass up and out of the lower clamps
2 Slide down to remove it from the top clamps
3 Slide the new glass first into the lower clamps
4 Clip the glass into the top clamps
screwdriver
2 Unscrew the bulb
3 Screw in new bulb and replace cover
2 Lift the shelf rack upwards to free from lower retaining pins
3 Slide the rack forwards to remove from oven
4 To refit, slide rack into oven and fit onto upper retaining
pins
5 Fit over the lower retaining pins
6 Lock in place by swivelling locking tabs up.
IS331 ECN3191
9
Page 10

SPARE PARTS
Description Part No ECO8 ECO9
Hinge bush BU81 2 2
Adjustable foot FE10 4 4
60-minute timer knob KN247 1 1
180-minute timer knob KN248 1 1
Thermostat knob KN249 1 1
Slimline light assembly LA14 2 2
Green indicator NE42 1 1
Amber indicator NE43 2 2
Inlet connection hose PI12 1 1
1/1 GN wire shelf SH106 3 4
Solenoid valve & hose assembly SO1 1 1
Rocker switch SW23 1 1
Plunger micro switch SW32 1 1
Change over switch SW34 1 1
Momentary switch SW35 1 1
Switch black/green SW66 1 1
Thermostat, 330º C TH12 2 2
180 minute timer TI34 1 1
60 minute timer TI37 1 1
Door handle ball end KN246 1 1
Element 3KW ECO8 EL236 2
Hot air fan, ECO8 FA106 2
Inner glass GL205 1
Power cable, plug & lead PL202 1
Door seal SE76 1
Contactor CO112 2
Side element, ECO9 EL141 2
Base element, ECO9 EL190 1
Fan blade FA102 2
Hot air fan, ECO9 FA12 2
Inner door glass GL503 1
Cooling fan S/R0079 1
Door seal SE05 1
Terminal block small TE10 1
Terminal block, 3 phase TE45 1
Safety thermostat, 365º C TH63 1
IS331 ECN3191
10
Page 11

SERVICE INFORMATION
For help with the installation, maintenance and use of your Lincat equipment,
please contact our service department:
UK: 01522 875520
All service work, other than routine cleaning should be carried out by one of
our authorised service agents. We cannot accept responsibility for work
carried out by other persons.
To ensure your service enquiry is handled as efficiently as possible, please
tell us:
• Brief details of the problem
• Product code
• Type number
• Serial number
Lincat reserve the right to carry out any work under warranty during normal
working hours, ie Monday to Friday, 08:30 a.m. – 17:00 p.m.
From serial plate
GUARANTEE
This unit carries a comprehensive UK twelve-month warranty. The guarantee
is in addition to, and does not diminish your statutory or legal rights.
The guarantee does not cover:
• Accidental damage, misuse or use not in accordance with the
instructions in these instructions
• Consumable items
• Damage due to incorrect installation, modification or unauthorised
service work
• The manufacturer disclaims any liability for incidental, or consequential
damages
IS331 ECN3191
11
Page 12

This page intentionally left blank
IS331 ECN3191
12
Page 13

This page intentionally left blank
IS331 ECN3191
13
 Loading...