

39 Larkspur st./ Suite B support@lilitab.com
San Rafael CA 94901 t: 888.705.0190 www.lilitab.com
lilitab K Pro Head Unit
for iPad
Assembly Instructions
v1.0
lilitab K Pro Head Unit for iPad Assembly Instructions v1.0
2
TABLE OF CONTENTS
Packing List............................................2
Assembly Instructions ...................................3
Using the MayKEY....................................... 4
Using the iPad Air Power Button Trigger ....................5
Cleaning Instructions....................................5
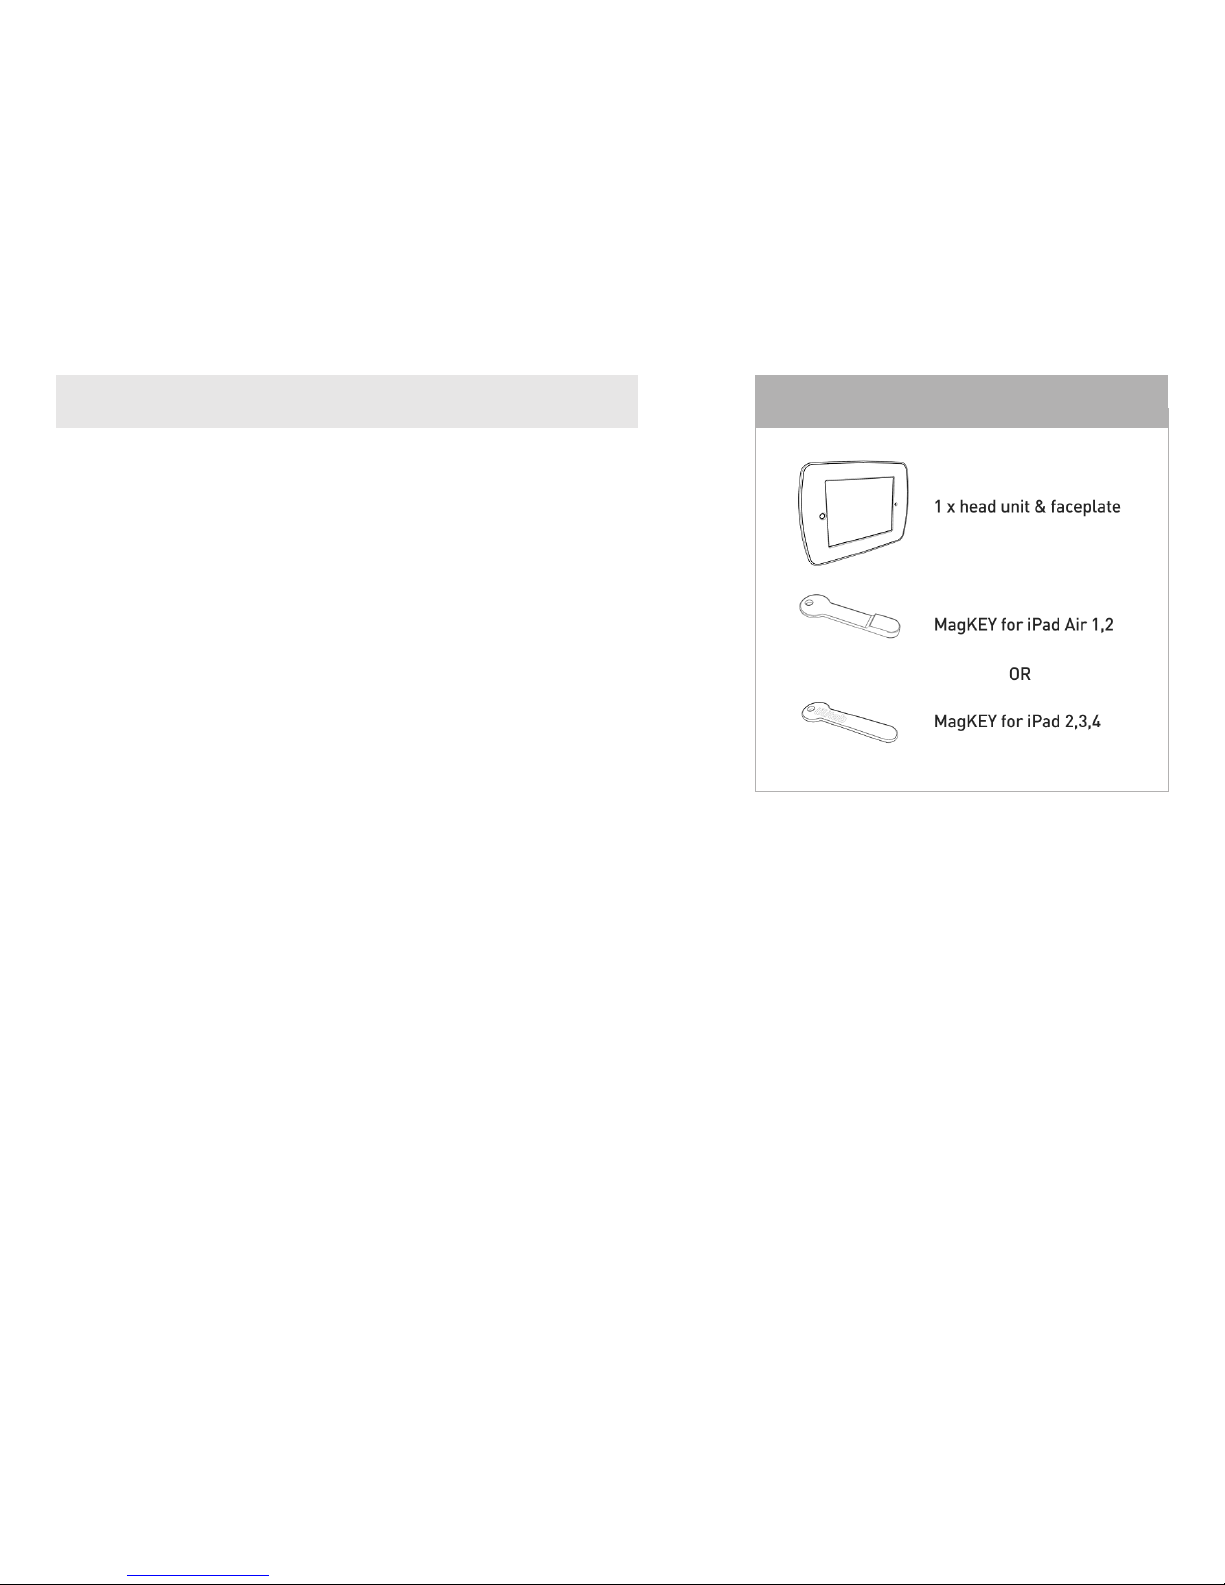
PACKING LIST
GOT QUESTIONS? WE’RE HERE TO HELP!
EMAIL support@lilitab.com PHONE 888.705.0190

lilitab K Pro Head Unit for iPad Assembly Instructions v1.0
3
ASSEMBLY INSTRUCTIONS
2. Place the head unit onto a clean surface
with the inside of the enclosure facing up
(with the cable on the right side). Rotate the
green “rotational keepers” on the left side
of the enclosure such that the #2 is closest
to the outside edge.
3. Plug the cable that came with your kiosk
into your tablet.
For iPad (2017), Pro 9.7”, Air 1 & 2: Rotate
the keepers on the left side such that the
number “2” is closest to the center of the
tablet as shown in the photo to the left.
For iPad 2, 3 & 4: Rotate the keepers on the
both sides such that the number “1” is
closest to the center of the tablet.
1. Open the lilitab head unit by placing it
facedown on a clean surface and squeezing
the finger latches together as shown.
Carefully lift up and the faceplate will
come off, allowing access to the inside
of the head unit.
4. Position the faceplate over the tablet.
Be sure to align the openings. Gently press
down around the edges—it should snap
into place.
Refer to your lilitab Mount owner’s manual
for instructions on attaching the head unit.

lilitab K Pro Head Unit for iPad Assembly Instructions v1.0
4
USING MAGKEY WITH IPAD (2017), AIR 1 & 2
1. You can use the included MagKEY with an
iPad Air & Air 2. The MagKEY allows you to
sleep the iPad without having any access
to it. This ensures you (and your staff) can
turn your kiosk on and off at the end of
the day without removing the iPad. You’ll
always know when the iPad is sleeping
because the MagKEY attaches to the face
of the of unit (as shown).
2. To put your iPad to sleep, snap your
MagKEY, with the orange side facing up,
to the front on your lilitab.
3. To wake your iPad, remove the MagKEY
and it will resume right where it left off
before it went to sleep.
USING MAGKEY WITH IPAD 2, 3, & 4
1. You can use the included MagKEY with an
iPad 2, 3 or 4 in your lilitab. The MagKEY allows
you to sleep the iPad without having any
access to it. This ensures you (and your
staff!) can turn your kiosk on and off at the
end of the day without removing the iPad
from the kiosk. You’ll always know when
the iPad is sleeping because once inserted
the MagKEY pokes out the top of unit like a
little flag.
2. To put your iPad to sleep, insert your
MagKEY with the orange side facing front
and the black side facing back.
3. To wake your iPad, remove the MagKEY
and it will resume right where it left off
before it went to sleep.
ATTENTION: The MagKEY functionality requires that the iPad Cover Lock/Unlock preference is turned on. You can find this in Settings > Display & Brightness > iPad Cover Lock/Unlock.
Replacement MagKEYs can be ordered directly from the website: www.lilitab.com.

lilitab K Pro Head Unit for iPad Assembly Instructions v1.0
5
1. Spray the Brillianize onto one of
the cloths provided.
WARNING: Other cloth/material may
scratch the surface of your lilitab
Cleaning kit available on our
website in the accessories section.
2. DO NOT spray directly onto your lilitab!
3. Rub gently in a circular motion to remove
fingerprints and dirt.
WARNING: Applying excess pressure can
scratch the surface of your lilitab.
NOTE: Here’s a tablet installed in the
correct orientation with the Power Button
Trigger next to the tablet’s power button.
2. Once installed you can actuate the Power
Button Trigger via a paper clip inserted into
the small opening on the rear below the
camera opening.
1. You can actuate the power button located on
the edge of your tablet using the black Power
Button Trigger shown to the left.
CLEANING INSTRUCTIONSUSING THE IPAD POWER BUTTON TRIGGER
 Loading...