

lilitab Counter Pro Assembly Instructions Manual

lilitab Counter Pro
Packing List and Assembly Instructions
v.2.0
39 Larkspur Street | Suite B t: 888.705.0190
San Rafael, CA 94901 e: support@lilitab.com www.lilitab.com

lilitab Counter Pro Packing List and Assembly Instructions v1.0
2
TABLE OF CONTENTS
LILITAB counTer Pro PACKAGING AND ASSEMBLY INSTRUCTIONS
lilitab Counter Pro Assembly Preparation ................... 3
lilitab Counter Pro Features ..............................4
lilitab Counter Pro Mount Options..........................5
lilitab Counter Pro Mounting Pattern ....................... 6
lilitab Counter Pro Assembly Instructions ...................7
Using the iPad Power Button Trigger and Magkey ........... 10
lilitab Cleaning Instructions..............................11
lilitab Counter Pro Packing List and Assembly Instructions v1.0
3
ASSEMBLY PREPARATION
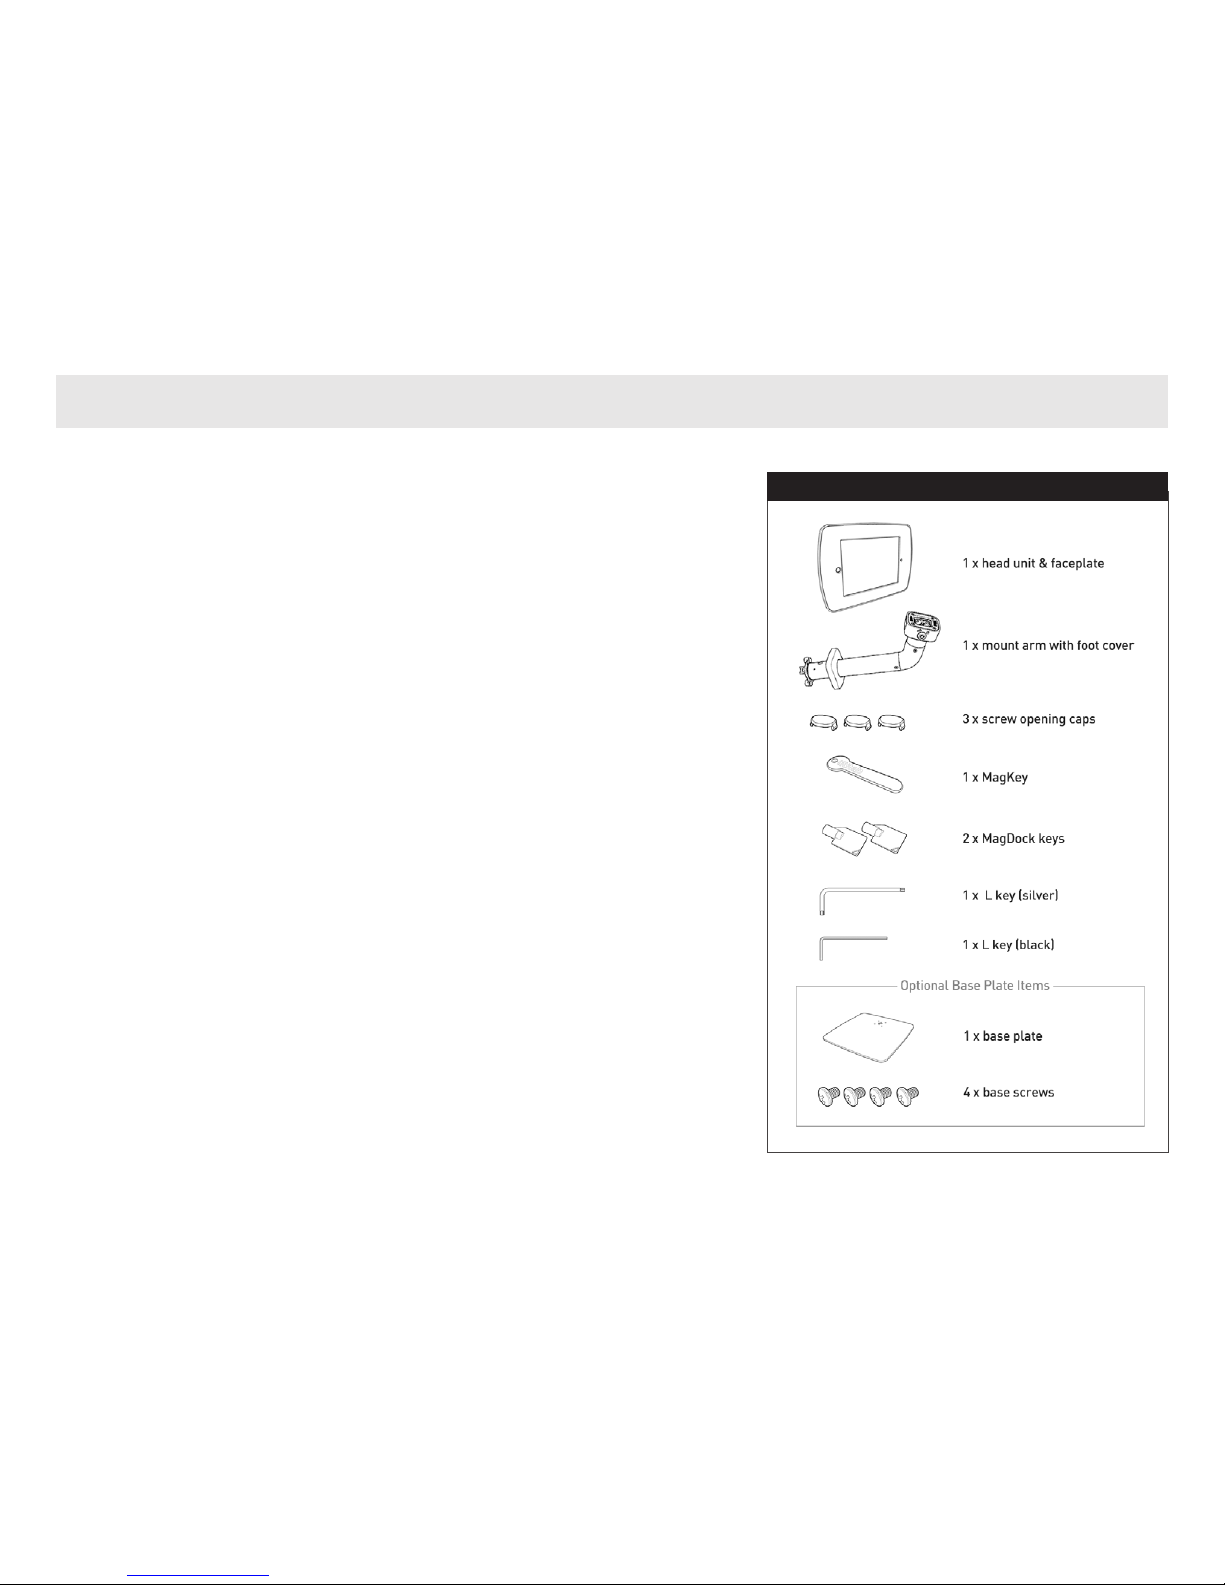
PACKING LIST
TO ASSEMBLE YOUR LILITAB YOU WILL NEED:
4 Phillips screwdriver
TO MOUNT YOUR LILITAB TO A SURFACE YOU WILL NEED:
4 Powered drill/driver, preferably with impact action
4 4 x bolts or wood screws (m5, no.10, no.11, 3/16” or
13/64 diameter)
lilitab Counter Pro Packing List and Assembly Instructions v1.0
4
FEATURES
MAGKEY SLOT
Accepts a MagKey for securely
sleeping an iPad.
MAGDOCK
With the turn of a key, the operator
can dock/undock the lilitab head unit.
When the head unit is docked it
automatically begins charging and it
can be docked in any orientation.
WIRELESS TRANSPARENCY
The lilitab head unit causes no
radio interference.
ROTATE FEATURE
The lilitab Counter can be
configured to allow 90,° 180°
or no rotation. By default it
is set to 180. °
To disable rotation (and/ or adjust
rotation tension) tighten the screw in
the upper rear opening of the vertical
tube to the desired level.
To switch from 180° to 90° remove
the lower screw visible through the
lower rear facing opening in the tube
using the short black L Key provided
and insert it into the threaded opening
visible through the lower front opening.
90°
180°
MULTI-POSITION NECK JOINT
Permits tilt up/down. It has two
operator configurable modes:
Fixed. The head unit can
be set to any fixed angle
between completely
vertical and +/-22.5.°
Tilt. Can be configured to
allow the user to tilt the
head unit.
 Loading...