

Page 1
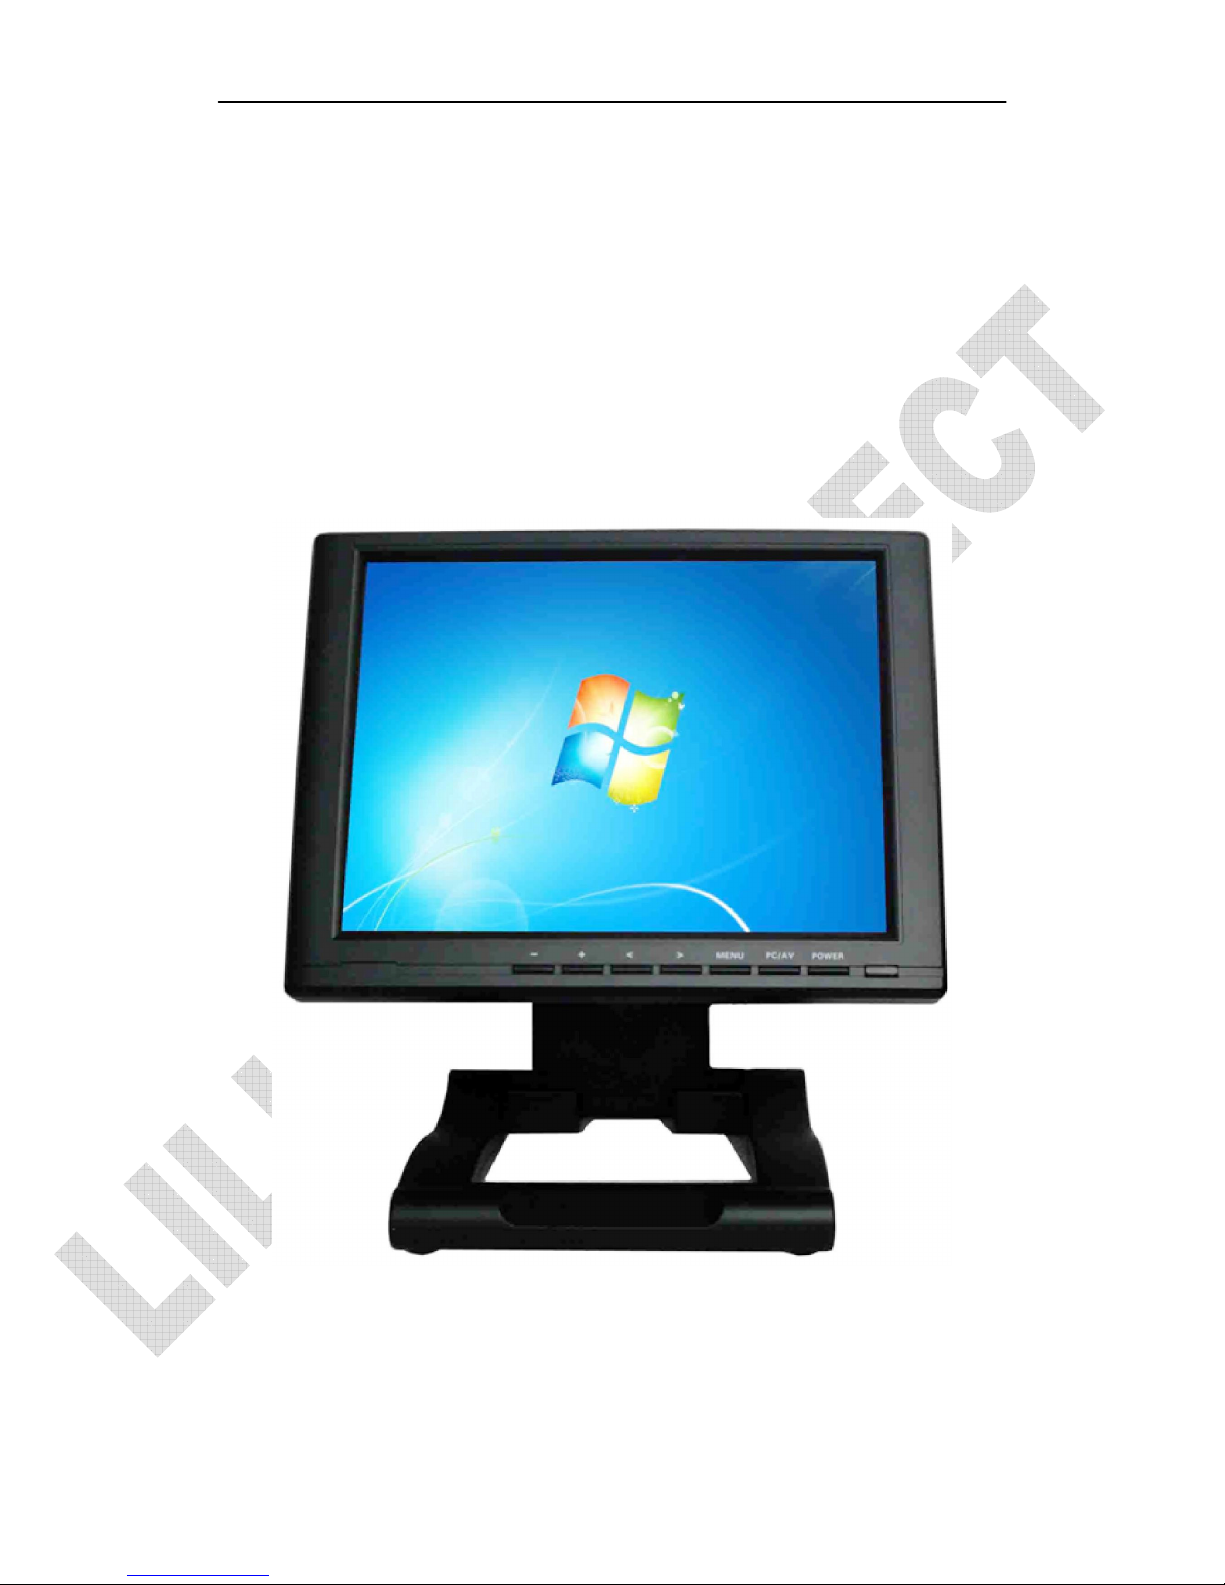
TFT LCD
COLOR
MO
NI
T
OR
Page 2

DEAR
CUSTOMERS
Thank you for purchasing the liquid crystal display monitor. This product employs
new integrate circuits and high quality TFT LCD modules. It is putting out with its
low power consumption, emits no radiation, and other advantage characteristics. This
product is shaped with modern style and is easy to be carried with. The color TFT
LCD is the most suitable display for VGA,VCD, DVD and GPS system for motorcars
and ships .It also can be used in the office ,in flat ,at home also in other suitable
position. You will certainly benefit from this monitor in lots of ways, to name some of
them: convenience, safety, space-saving.
We hope that you will have the enjoyment of your new mini color TFT LCD.
To ensure the best use of the unit, please read this handbook carefully
beforehand.
CAUTION
1. Please use the adapter attached in the accessory.
2. Do not expose this product to direct sunlight, heat or humid conditions.
3. Keep away from strong light while using this product so as to obtain the
clearest and the most colorful picture.
4. Please avoid heavy impact or drop onto the ground.
5. Do not use chemical solutions to clean this unit. Please simply wipe with a
clean soft cloth to keep the brightness of the surface.
6. If the product does not operate normally when the instructions are followed.
Adjust only those controls that are covered by the instructions. Improper
adjustment of other controls may result in damage and will often require
extensive work of a qualified technician.
Page 3

CONTENTS
1. PRODUCT DESCRIPTION --------------------
2. REMOTE CONTROL----------------------------
3. MENU OPERATION ----------------------------
IN AV MODE--------------------------------------
IN PC MODE--------------------------------------
IN DVI&HDMI&YPbPr MODE--------------
4. MATCHED CABLES-------------------------
5. ACCESSORIES ------------------------------------
6. PARAMETER --------------------------------------
7. TROUBLESHOOTING ---------------------------
8. REMARK----------------------------------------
Page 4
1. PRODUCT
DESCRIPTION
Pic
ture
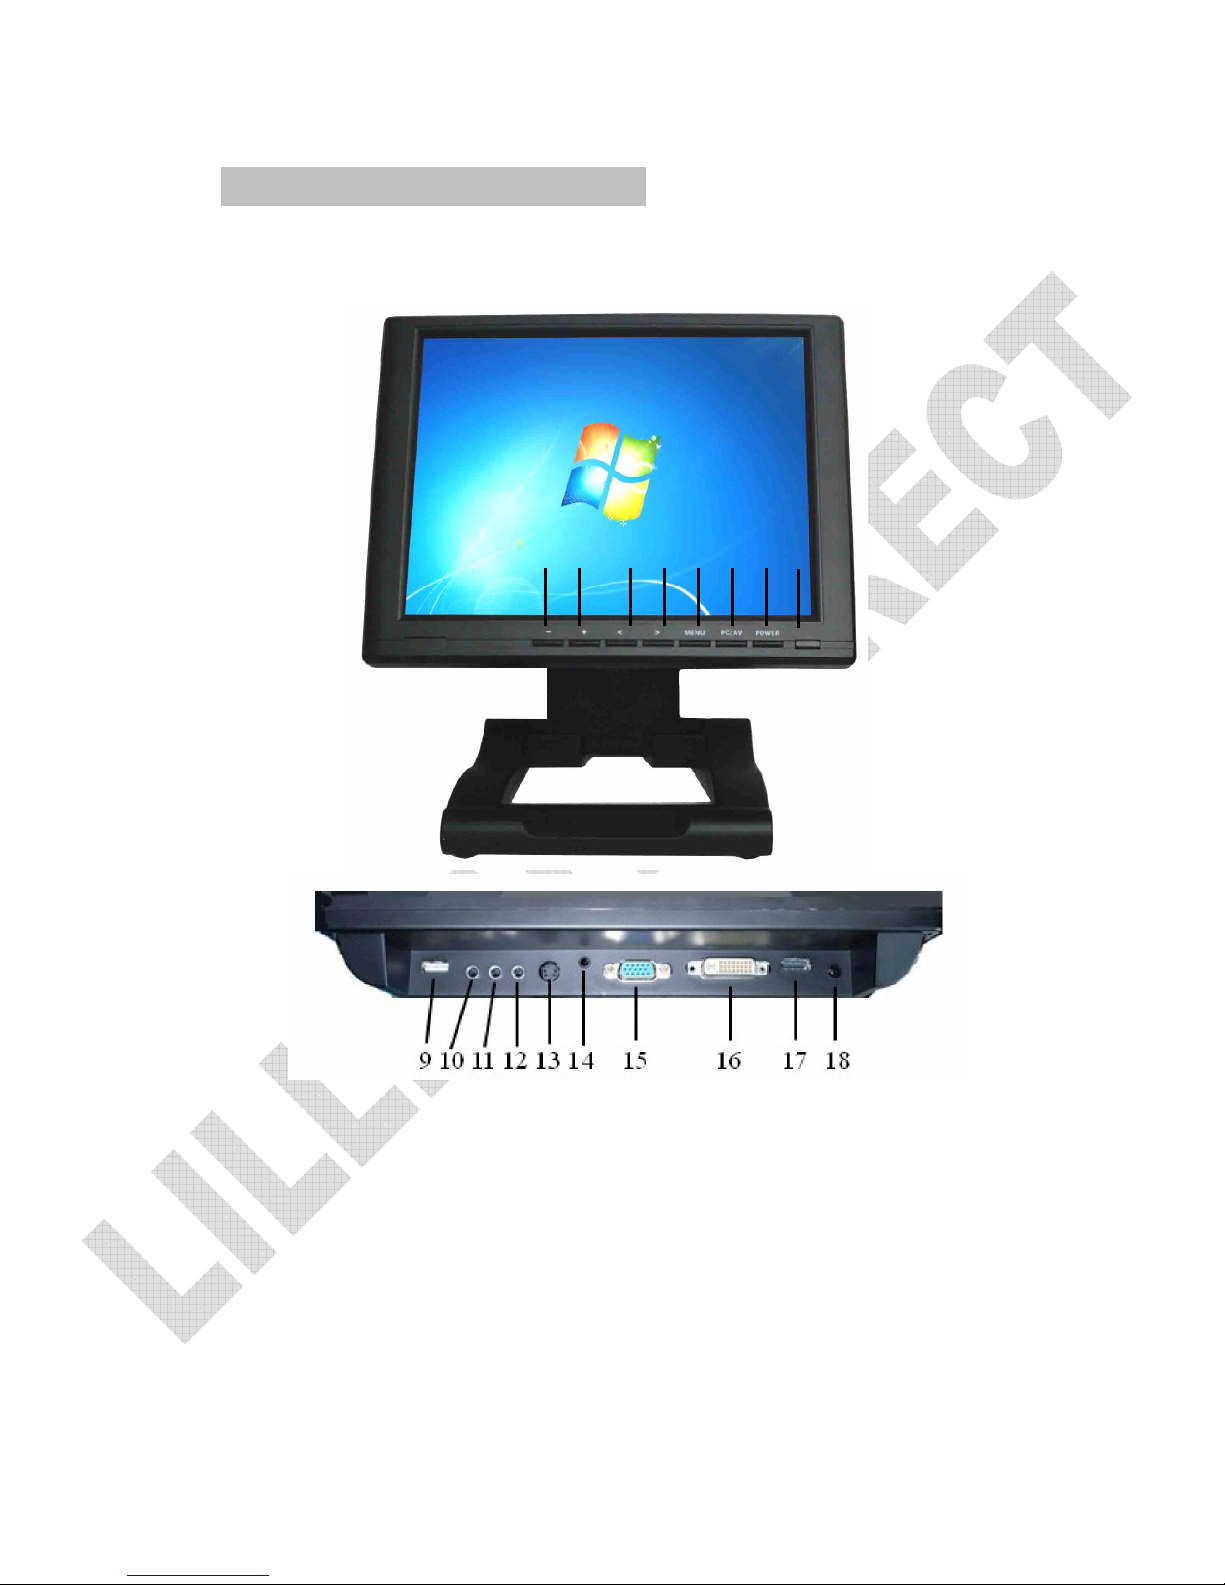
1 2 3 4 5 6 7 8
1. - : Volume down or to adjust the value of setting function
2. +: Volume up or to adjust the value of setting function
3. <: Selection key, to select item on the OSD or push the key in PC mode
directly to adjust phase automatically
4. >: To select function on OSD or to adjust the brightness directly. There
are six levels of brightness, push this button directly to change among
them.
5. MENU: To activate OSD menu
Page 5

(long press to zoom in/out pictures
automatically
when re
ceiving
HDMI (High-Definition
Multimedia Interface)
signal
s)
6. PC/AV: PC, AV,DVI,HDMI,YPbPr,S-video switch
7. POWER: Power on/off
8. Infrared signal receiver/ battery indicator light(red while standby)
9. USB touch connector (optional
)
10. Audio L/R output /
Earphone jack
11. Audio L/R input
12. Video 1/2 input
13. S-video
input
14. YPbPr input
15. VGA input
16. DVI input
17. HDMI input
18. DC power input
2. REMOTE CONTROL
Page 6
Picture 2
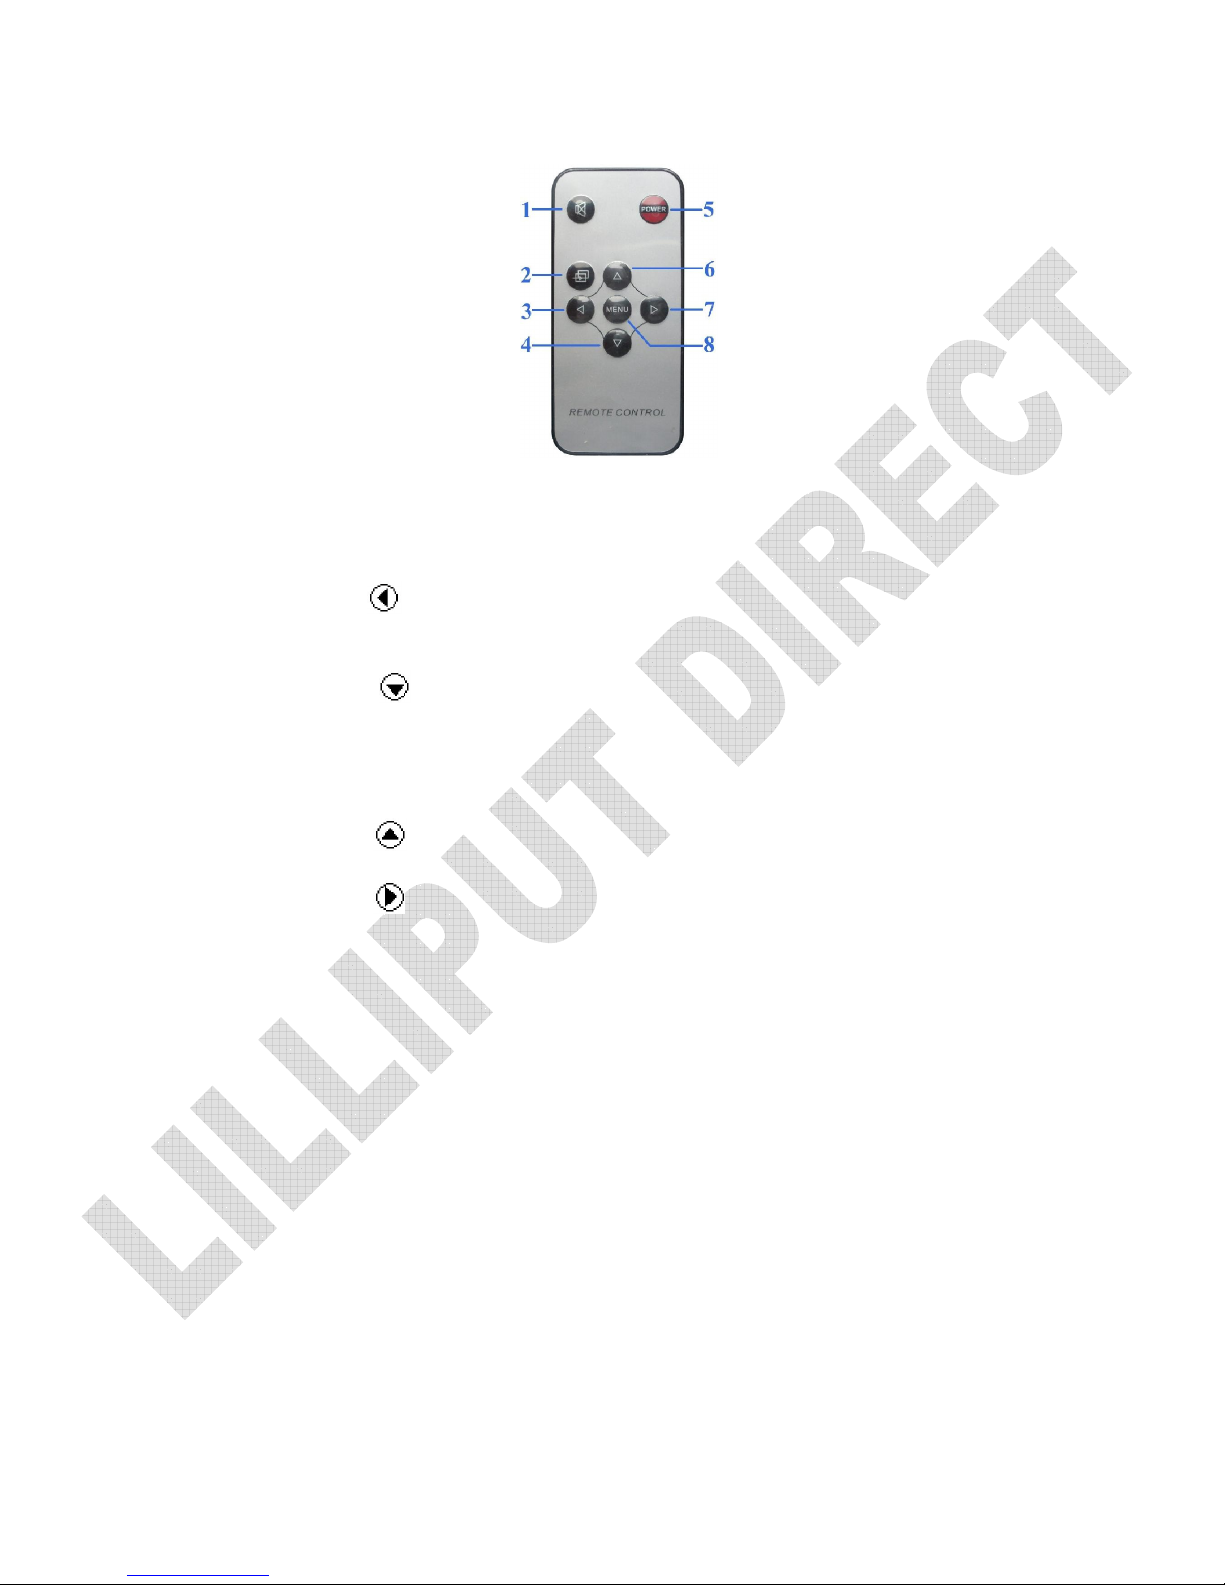
1. MUTE
2. Display switch among Video 1, Video 2, PC,DVI,HDMI,YPbPr and
S-video circularly
3. : Left move,Volume down or to adjust the value of setting
function
4. : Down move, to select function on OSD
(long press to zoom in/out pictures
automatically
when receiving
HDMI (High-Definition
Multimedia Interface)
signal
s)
5. Power
6.
:
UP move, To select function on OSD
7. : Right move, Volume up or to adjust the value of setting
function
8. MENU: To activate OSD menu
Page 7
3. M
ENU
OPERATIO
N
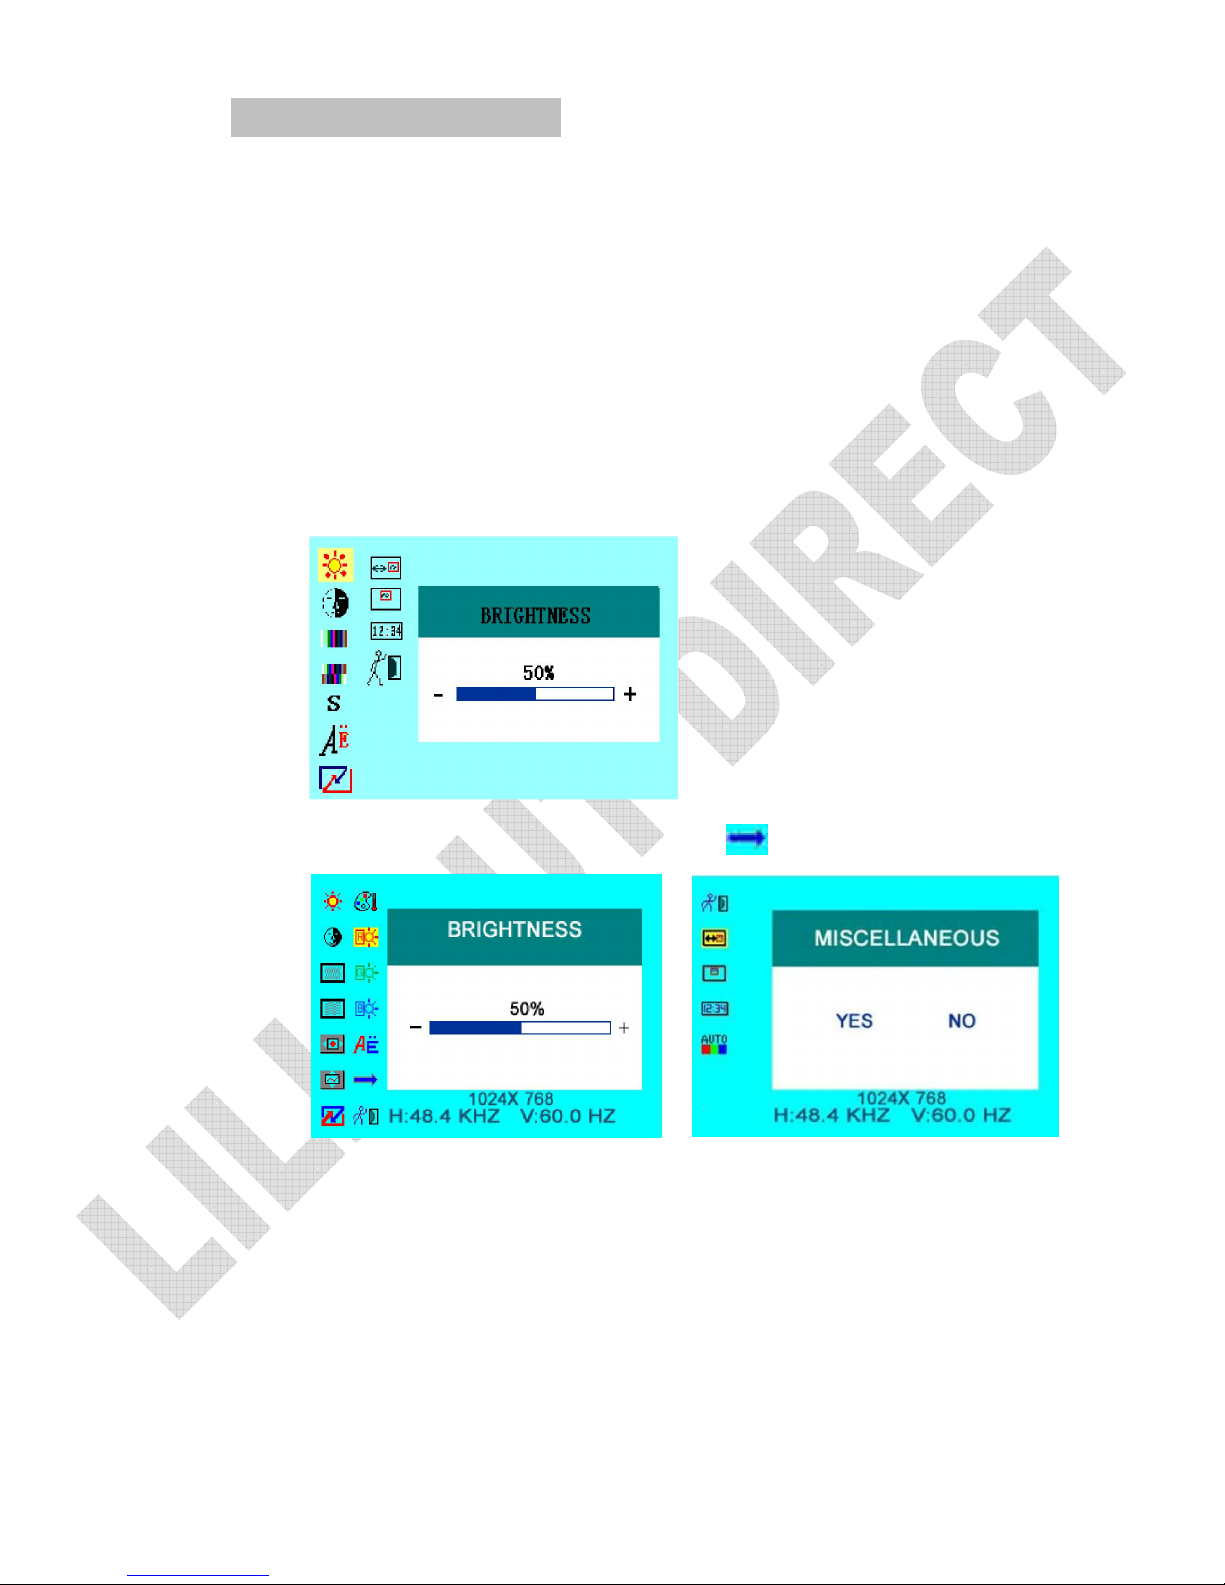
Before setting the menu functions, please make sure the device is connected correctly.
When power on, press MENU on the device or on the remote control. The menu
of function setting will display on the screen.
Press >/< buttons on the device or ▼/▲ buttons on the remote control to select
items on the left of the display. Then press + / – buttons on the device or
►/◄
buttons on the remote controller to change the values.
The following pictures are the setting displays of different modes.
1. IN AV MODE & S-vi
deo
:
2. IN PC MODE:
via item to a new page.
Page 8
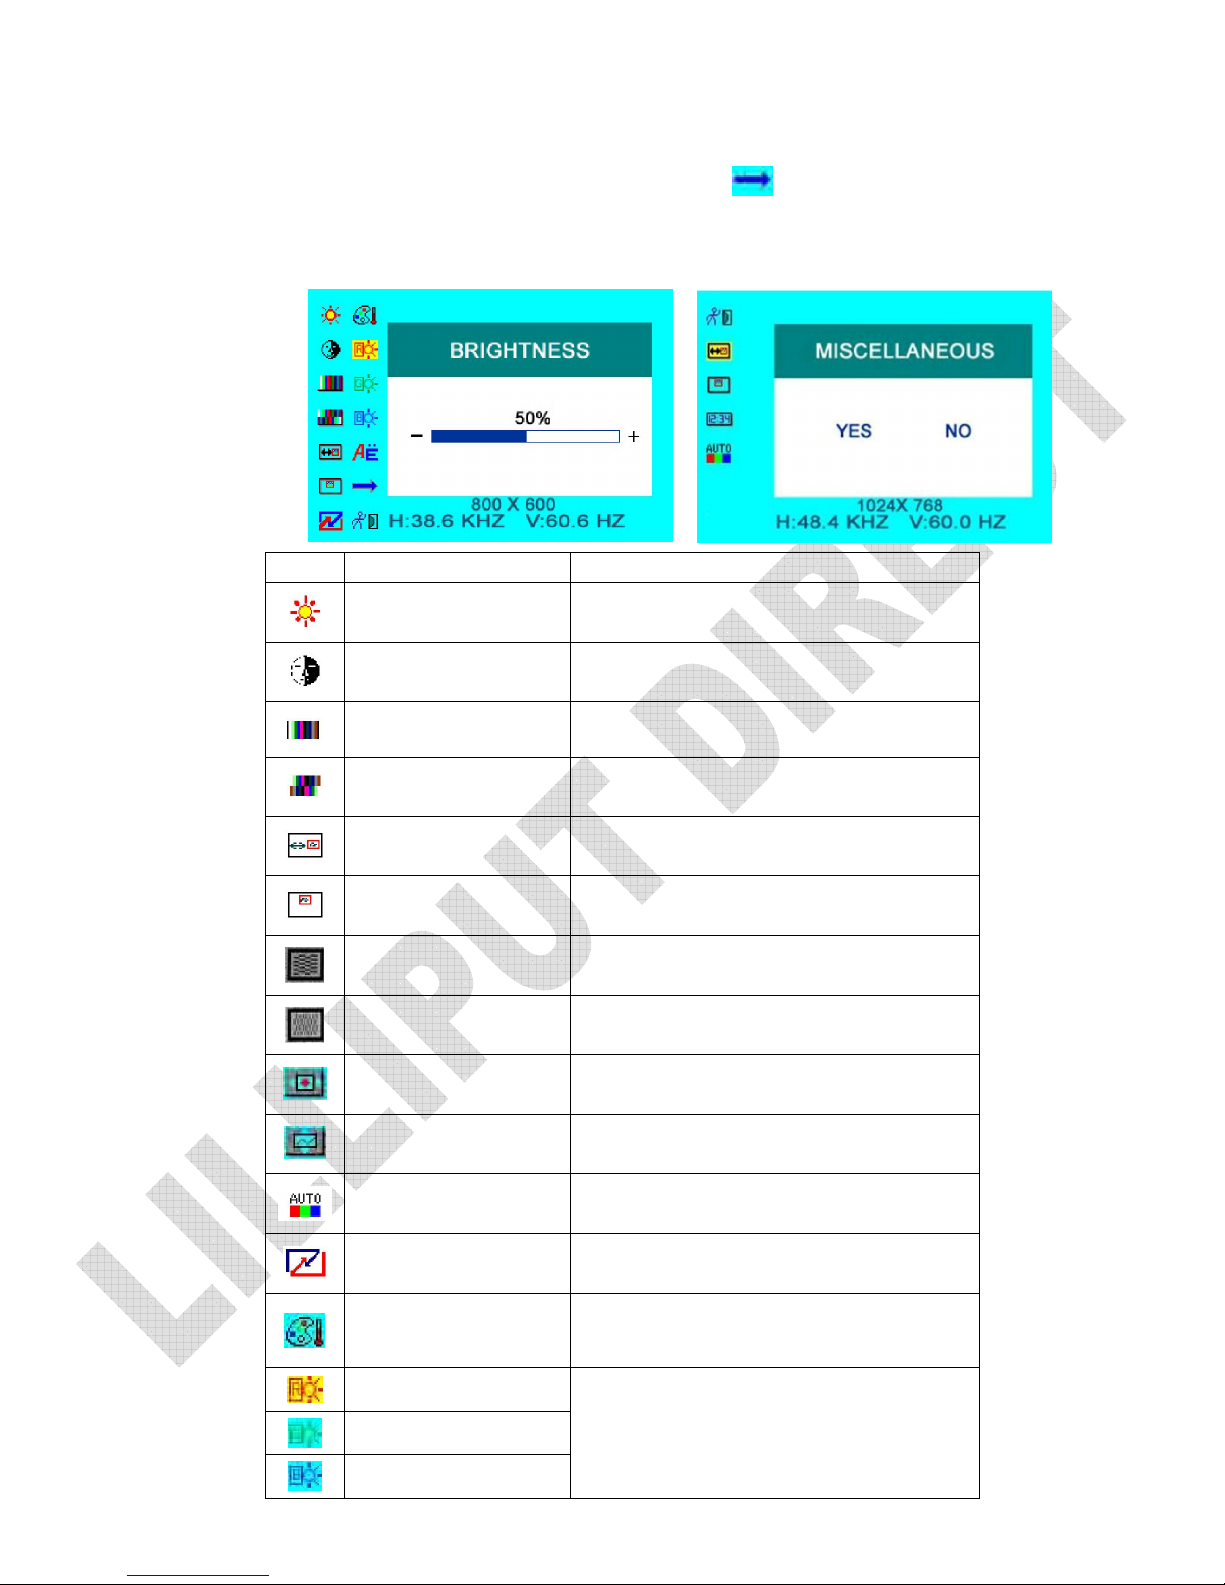
3. IN DVI & HDMI & YPbPr
MODE:
(Note: DVI & HDMI optional) via item to a new page.
4. Icon description
:
Icon
Nam
e
Funct
ion
Brightness
Adjust the level of brightness
Contrast
Adjust the level of contrast
Saturation
Adjust the level of saturation
Tint
Adjust the tint of image
OSD H-Position
Adjust the on-screen-display horizontally
OSD V-Position
Adjust the on-screen-display vertically
PHASE
to adjust the beginning point and terminal
point of image
FREQUENCY
to adjust the frequency range of image
OSD H-POSITION
to adjust the picture position in horizontal
direction
OSD H-POSITION
to adjust the picture position in vertical
direction
OSD AUTO COLOR
If select “YES” it will adjust automatic
color system to the best
Reset
Select “Yes” to reset the adjustment as
manufacture parameters.
Color temperature
Choose the color temperature. Options:
User, 6500ºK, 7500 ºK, or 9300 ºK.
Red
Green
Blue
Note: Only can available under “User”
mode to meet the color value you need.
Page 9
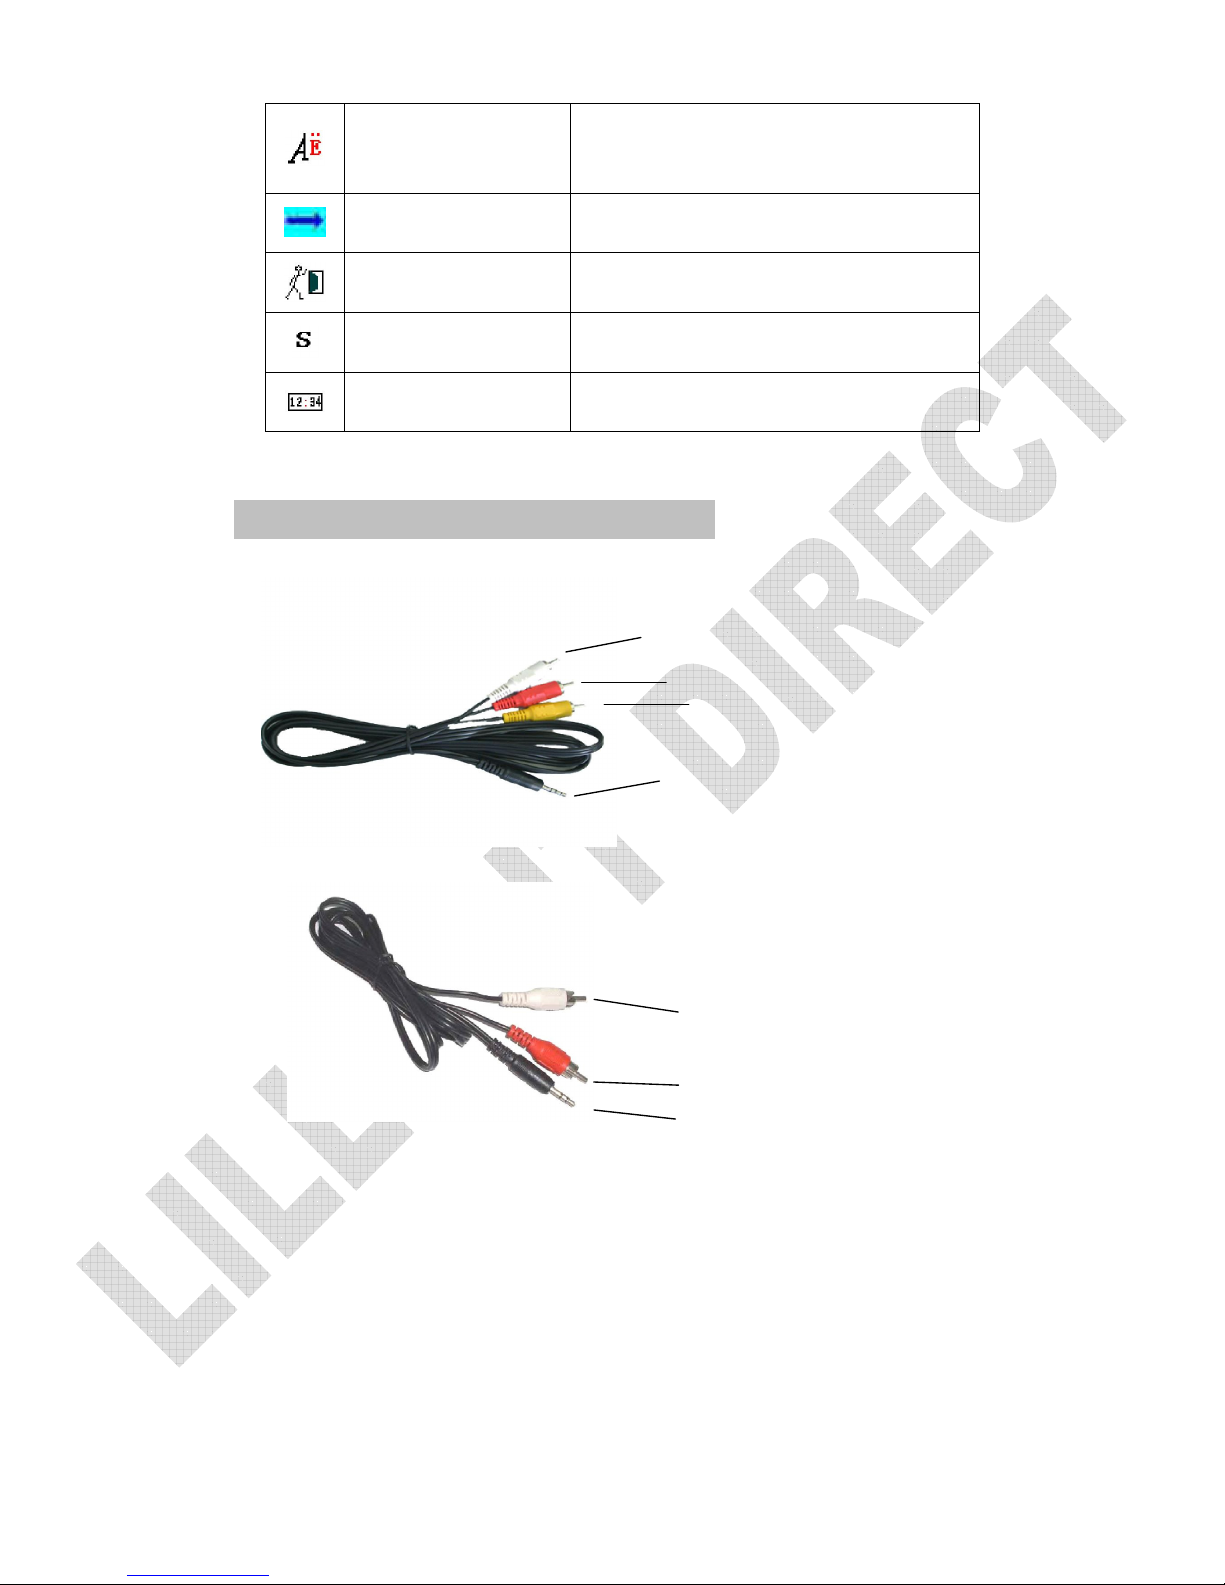
Language
Choose language between English and
Chinese Japanese(optional
)
Miscellaneous
Enter to next page (See picture below) for
miscellaneous selections
Exit OSD
Select “Exit” to quit the on-screen-display
menu.
Sharpness
Adjust the sharpness of picture
OSD Duration
Adjust the display duration of OSD from
5-100 seconds.
4. SPECIAL MATCHED
CAB
LES
YPbPr
signal connect cable
Pb signal connect cable (white)
Pr signal connect cable (red)
Y signal connect cable (yellow)
YPbPr signal input (black)
VIDEO 1&VIDEO 2 signal description
VIDEO 1 (white)
VIDEO 2 (red)
VIDEO1/2 signal input
(black)
Page 10
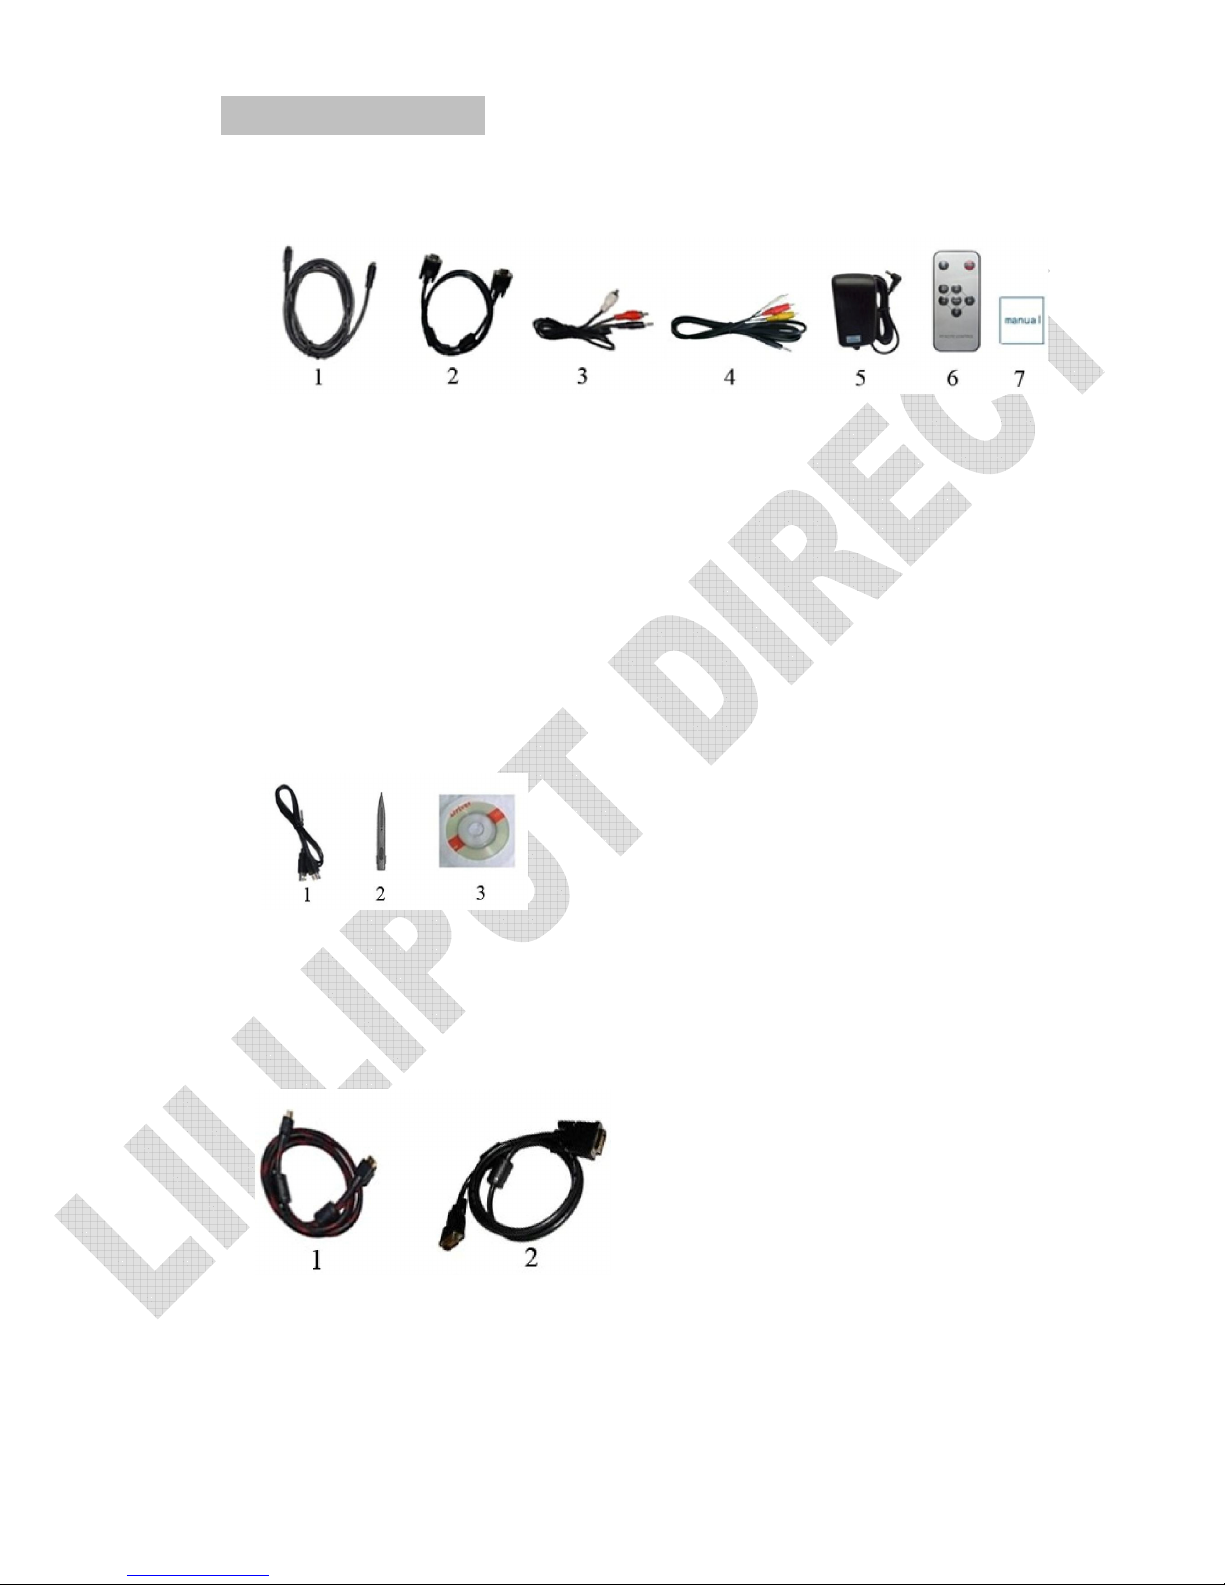
5. ACCESSORI
ES
Standard
acc
esso
ries
:
1. S-video signal cable 1 piece
2. VGA15-pin cable 1piece
3. VIDEO&AUDIO input/output cable 3 piece
4. YPbPr signal cable 1 piece
5 12V/1.2A DC adapter 1piece
6. Remote control 1piece
7. Manual 1copy
With touch scr
een acce
ssories:
1. USB connection cable 1 piece
2. Touch pen 1 piece
3. Drive disk 1piece
Optional
acc
esso
ries:
1. HDMI signal cable 1 piece
2. DVI line 24+1/DVI-D
1 piece
Page 11
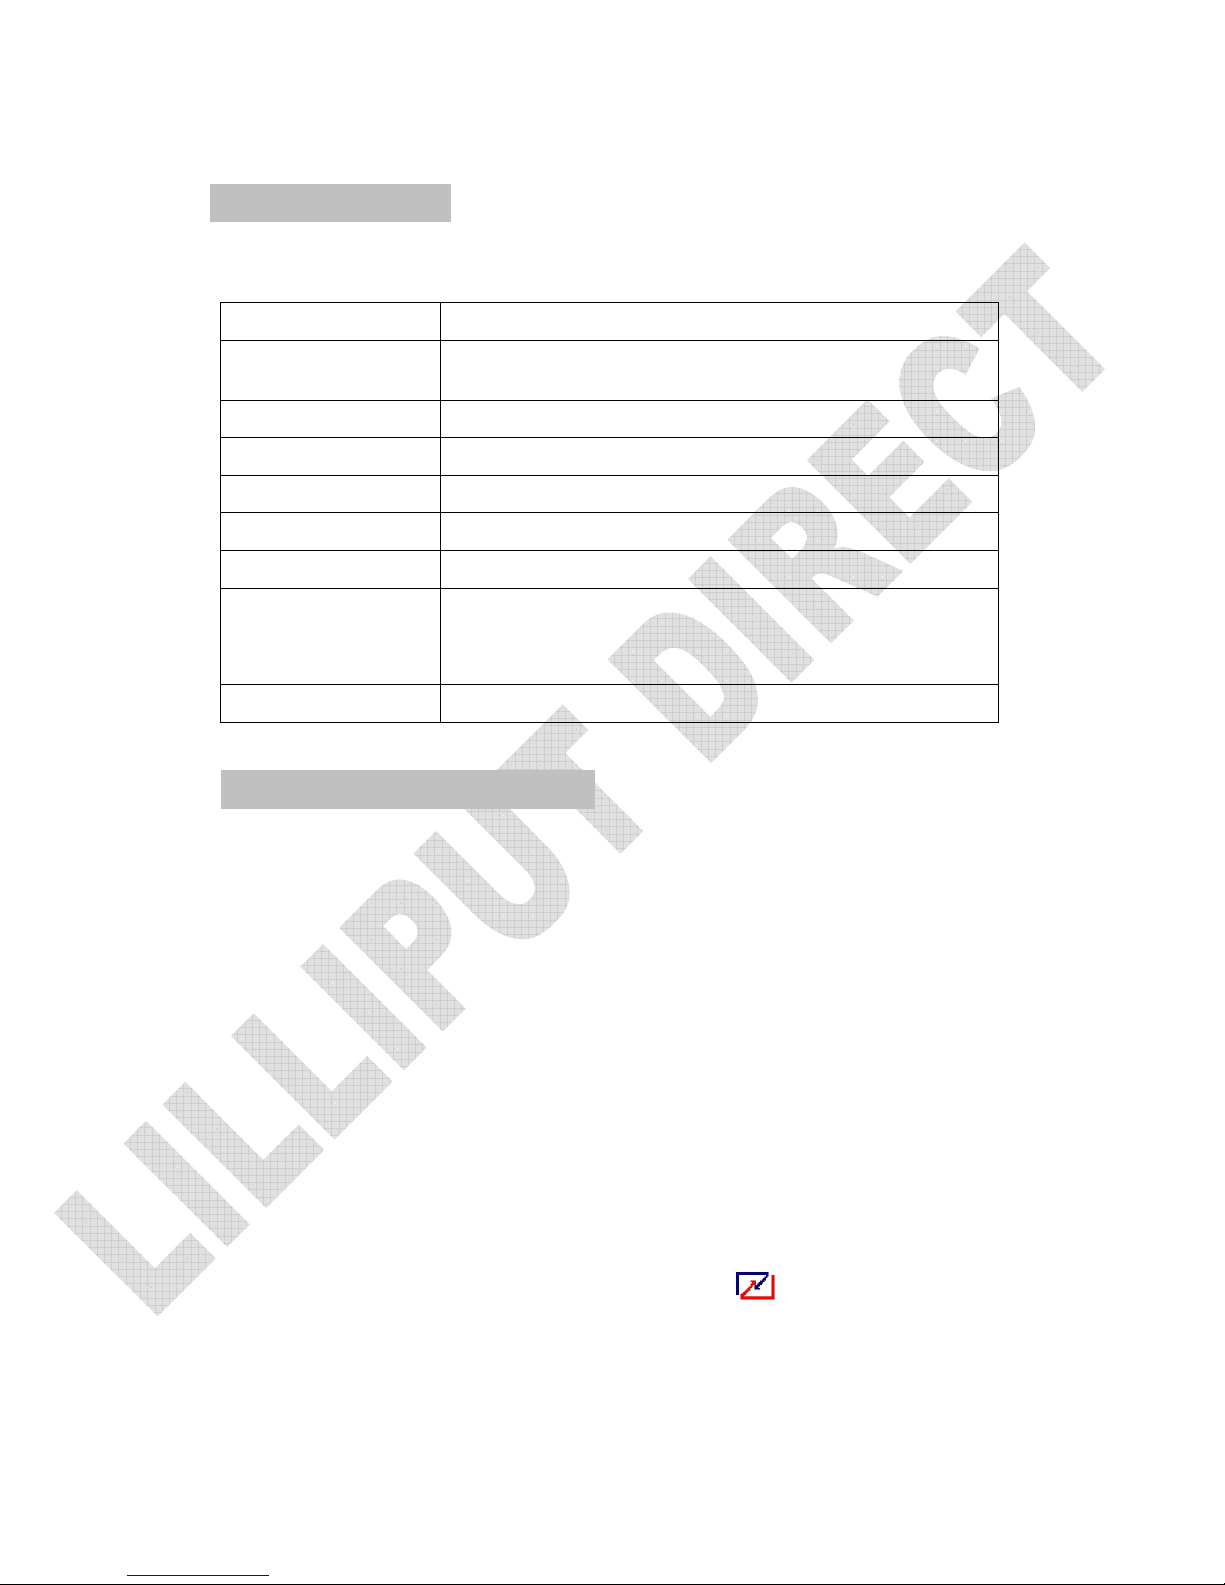
6. P
ARAMETER
Panel TFT LCD 10.4’’
Physical Resolution
800×600(up to 1920×1080
)
Viewing Angle 130°/ 110°(H/V)
Input Voltage DC 12V
Input Signal AV 1, AV 1,YPbPr,S-video PC(VGA),HDMI,DVI
Power Consumption
≤
8W
Contrast 400:1
Size(LWD):
226mm×200mm×39mm
260mm×200mm×70mm(with bracket
)
Weight 902g / 1474g(with bracket)
7. TROUBLE S
HO
OTI
NG
Only black-and-white image
Make the level of color saturation and brightness is proper.
Power on but no picture
Make sure the AV &VGA &HDMI & DVI & YPbPr & S-video cable is tightly
connected from the video out connector AV &VGA
&HDMI&DVI&YPbPr&S-video signal output connector. Make sure you are
using the standard power adapter coming with the monitor.
Wrong or abnormal colors
If any color is missing, check the cables to make sure it is securely connected.
Broken or loose pins in the cable connector can cause a bad connection.
Remote control doesn't work
Check the battery to make sure the battery is installed properly and make sure it is
not a low battery. The signal is interfered by some obstructions.
Please try to reset if any abnormal matters happened .
Page 12

8. REMARK:
If
there
are still any problems, you can connect with the
related deals
*If interruptive image occurs, it maybe that the VGA signal frequency isn’t
matched with normal standard
*It is a normal condition that some bright lines appear on the screen when you
turn the unit.
Note: due to constant
effort
to improve products and
produc
t
features,
specifications may change without
not
ice.
Page 13

 Loading...